
Still scrolling through paver patio photos on Pinterest without a clear plan? It’s easy to get lost in a sea of perfect backyards, saving pin after pin until they all start to blur together. Let’s change that. We’ve done the deep dive for you, filtering through hundreds of real-home projects to find what truly stands out. These aren’t just generic pictures; they are curated designs that blend style with real-world function, with costs ranging from a simple $800 DIY weekend project to a $25,000+ custom installation.
Inside, you’ll find 30 distinct paver patio ideas, from cozy fire pit nooks and lush garden paths to sprawling multi-level entertaining spaces. We’re covering every style, including modern, rustic, and natural designs. For 2026, the biggest trend is creating a true “outdoor room”—an extension of your home’s living space. It’s less about just laying down some stones and more about intentional design that reflects your life. And stay until the end — we break down the most common mistakes that can ruin these looks.
📌 Save this to Pinterest for later — you’ll want to revisit these ideas.
1. Create a Split-Level Oasis with a Fire Pit and Dining Zone
The genius here is in the zoning. By creating distinct levels, the design cleanly separates the active dining area from the relaxed fire pit lounge. This clever trick creates different outdoor “rooms,” making a very large space feel more intimate and organized. The use of a consistent light-colored paver throughout ties the two zones together visually, while the elevation change adds major architectural interest and improves the functionality of a sloped yard. It’s a masterclass in making a single space serve multiple purposes without feeling chaotic.
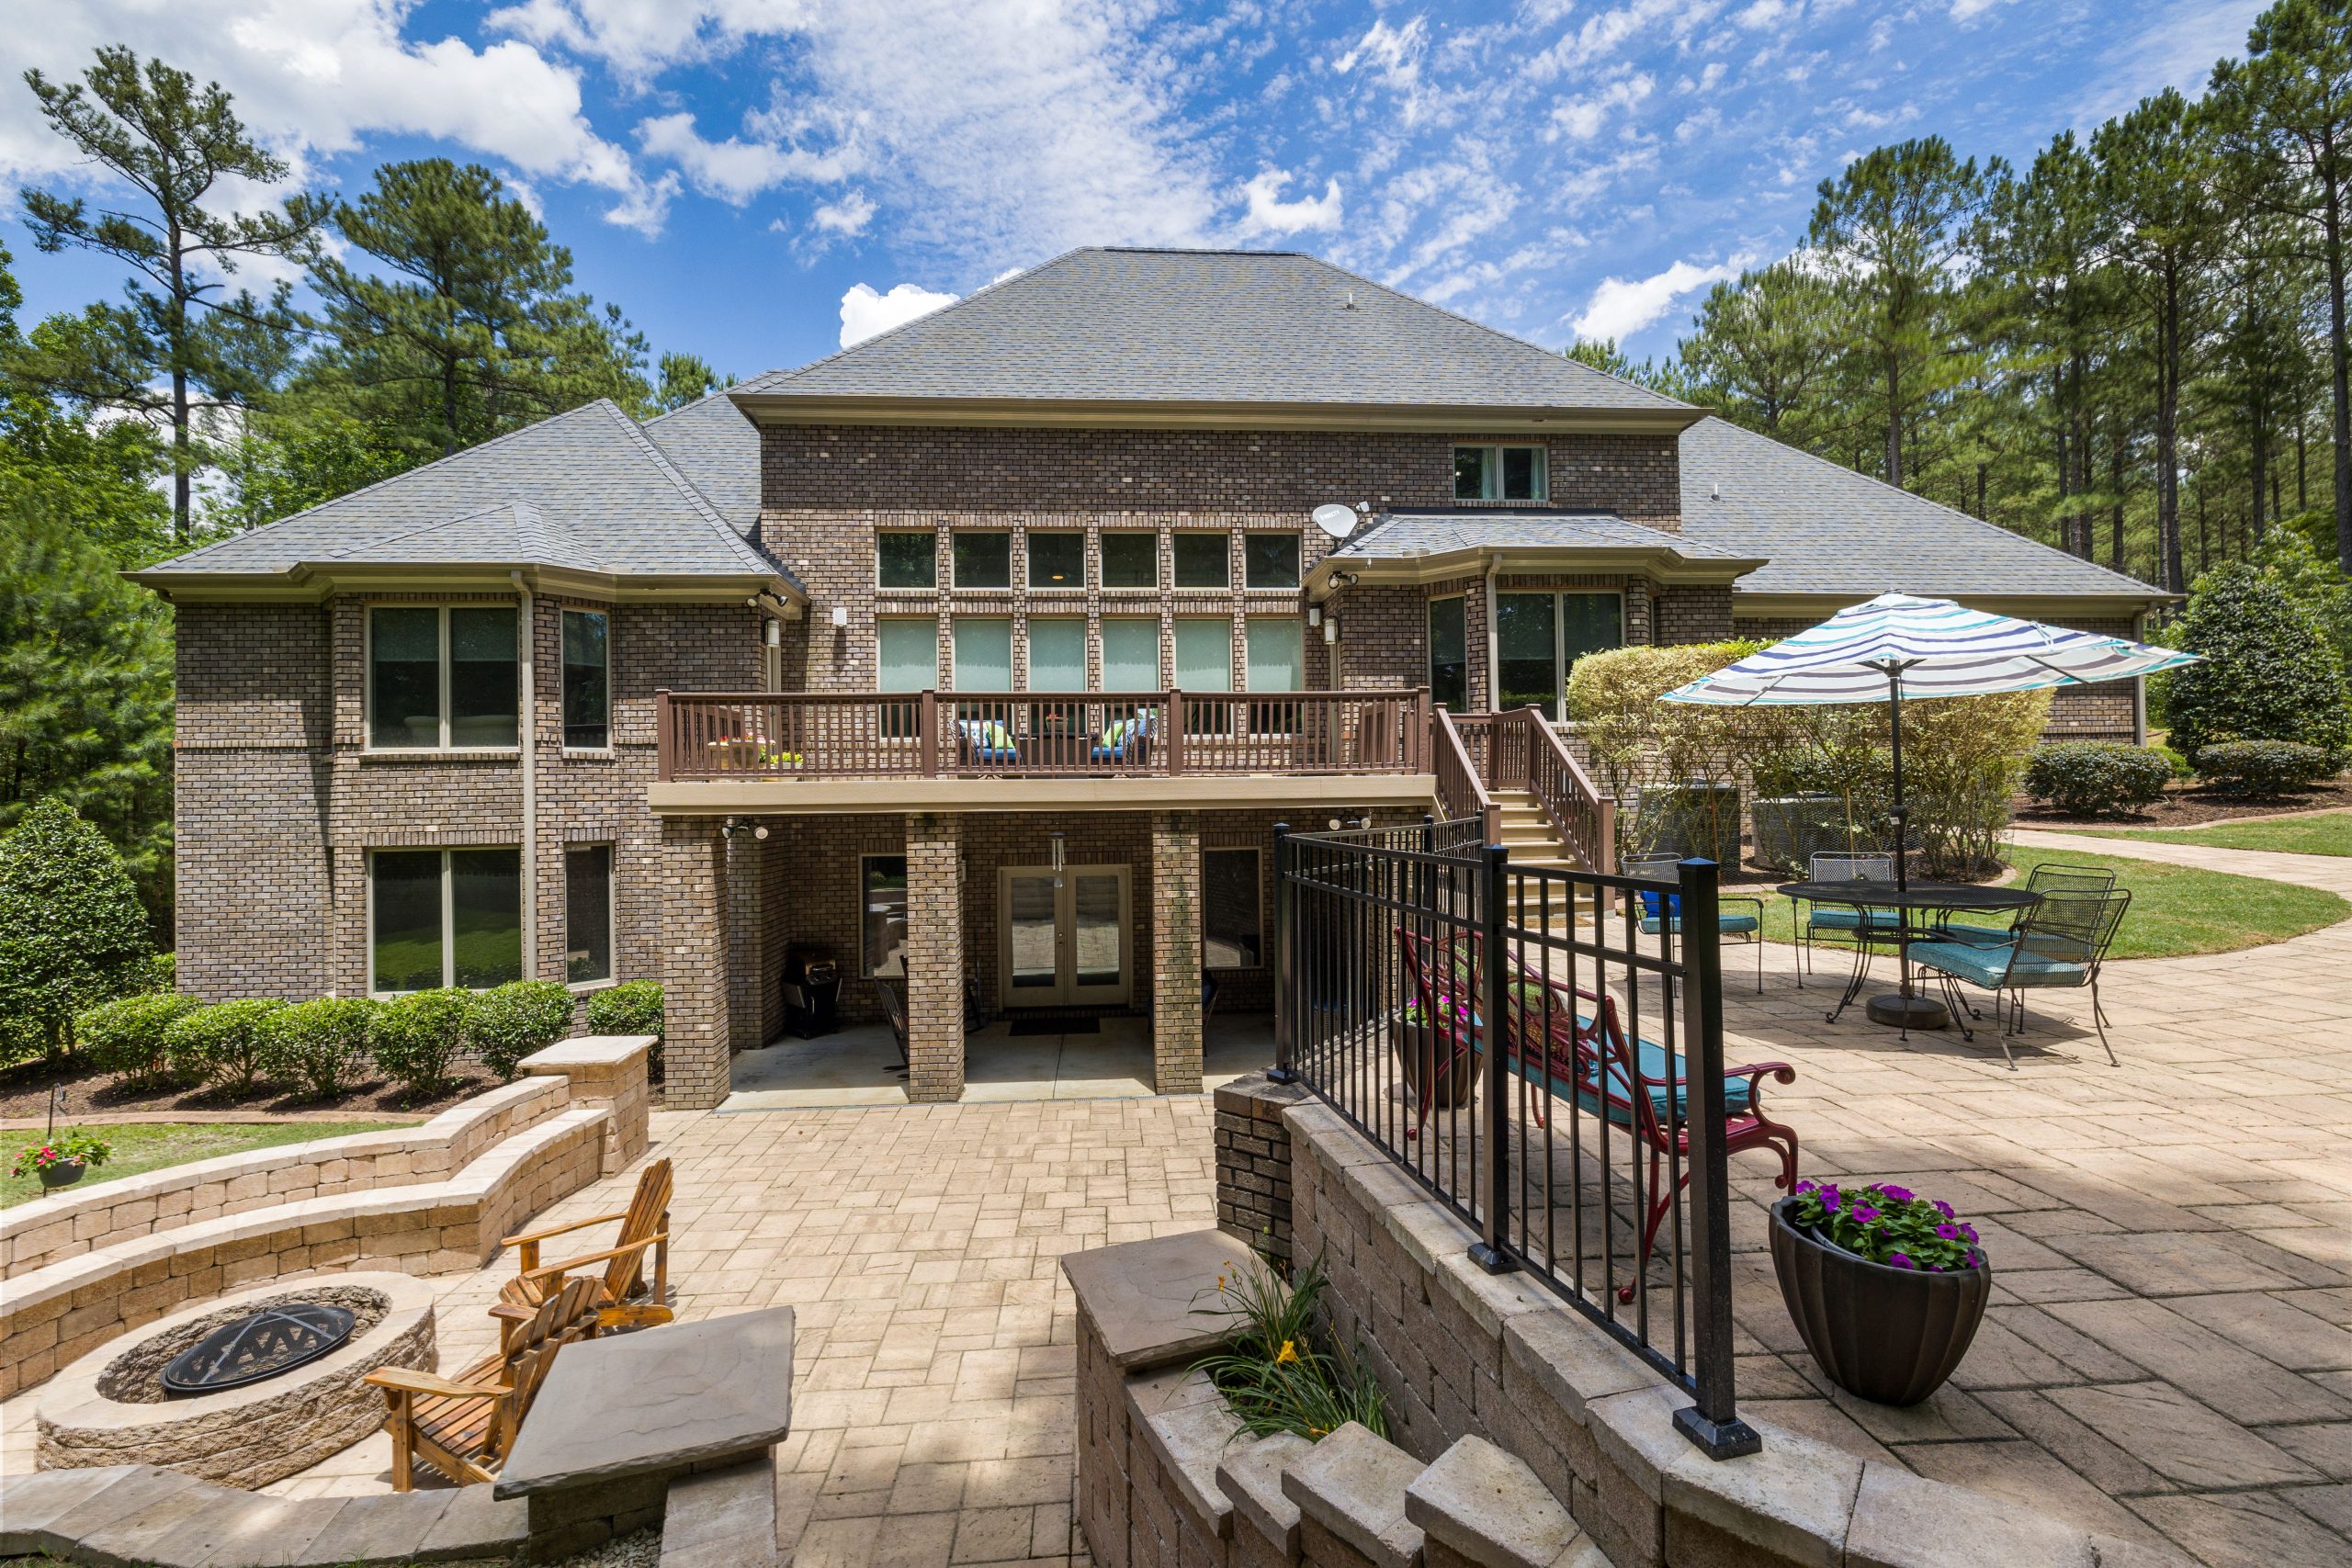
A multi-level design like this is purpose-built for yards with a natural slope, turning a landscape challenge into a stunning feature. You’ll need a generous footprint of at least 400-500 square feet to pull this off without it feeling cramped. For the upper dining area, aim for at least 12’x12’ to comfortably fit a six-person table and chairs. The lower fire pit lounge works beautifully in a 15’x15’ area to allow for seating and safe clearance. This is a large-scale project, a dramatic contrast to the more contained courtyard fire pit idea.
2. Go for Clean Lines with a Neutral Paver Grid
When using large rectangular pavers (like 12″x24″) in a simple running bond pattern, the secret to a high-end look is the jointing sand. Don’t just use any cheap sand from the hardware store. You must opt for a high-quality polymeric sand. When activated with a light mist of water, it hardens to a firm, durable consistency. This locks the pavers in place, prevents pesky weeds from growing in the cracks, and resists being washed out by rain. For pavers this large, use a 1/8″ to 3/16″ joint for that crisp, modern aesthetic.
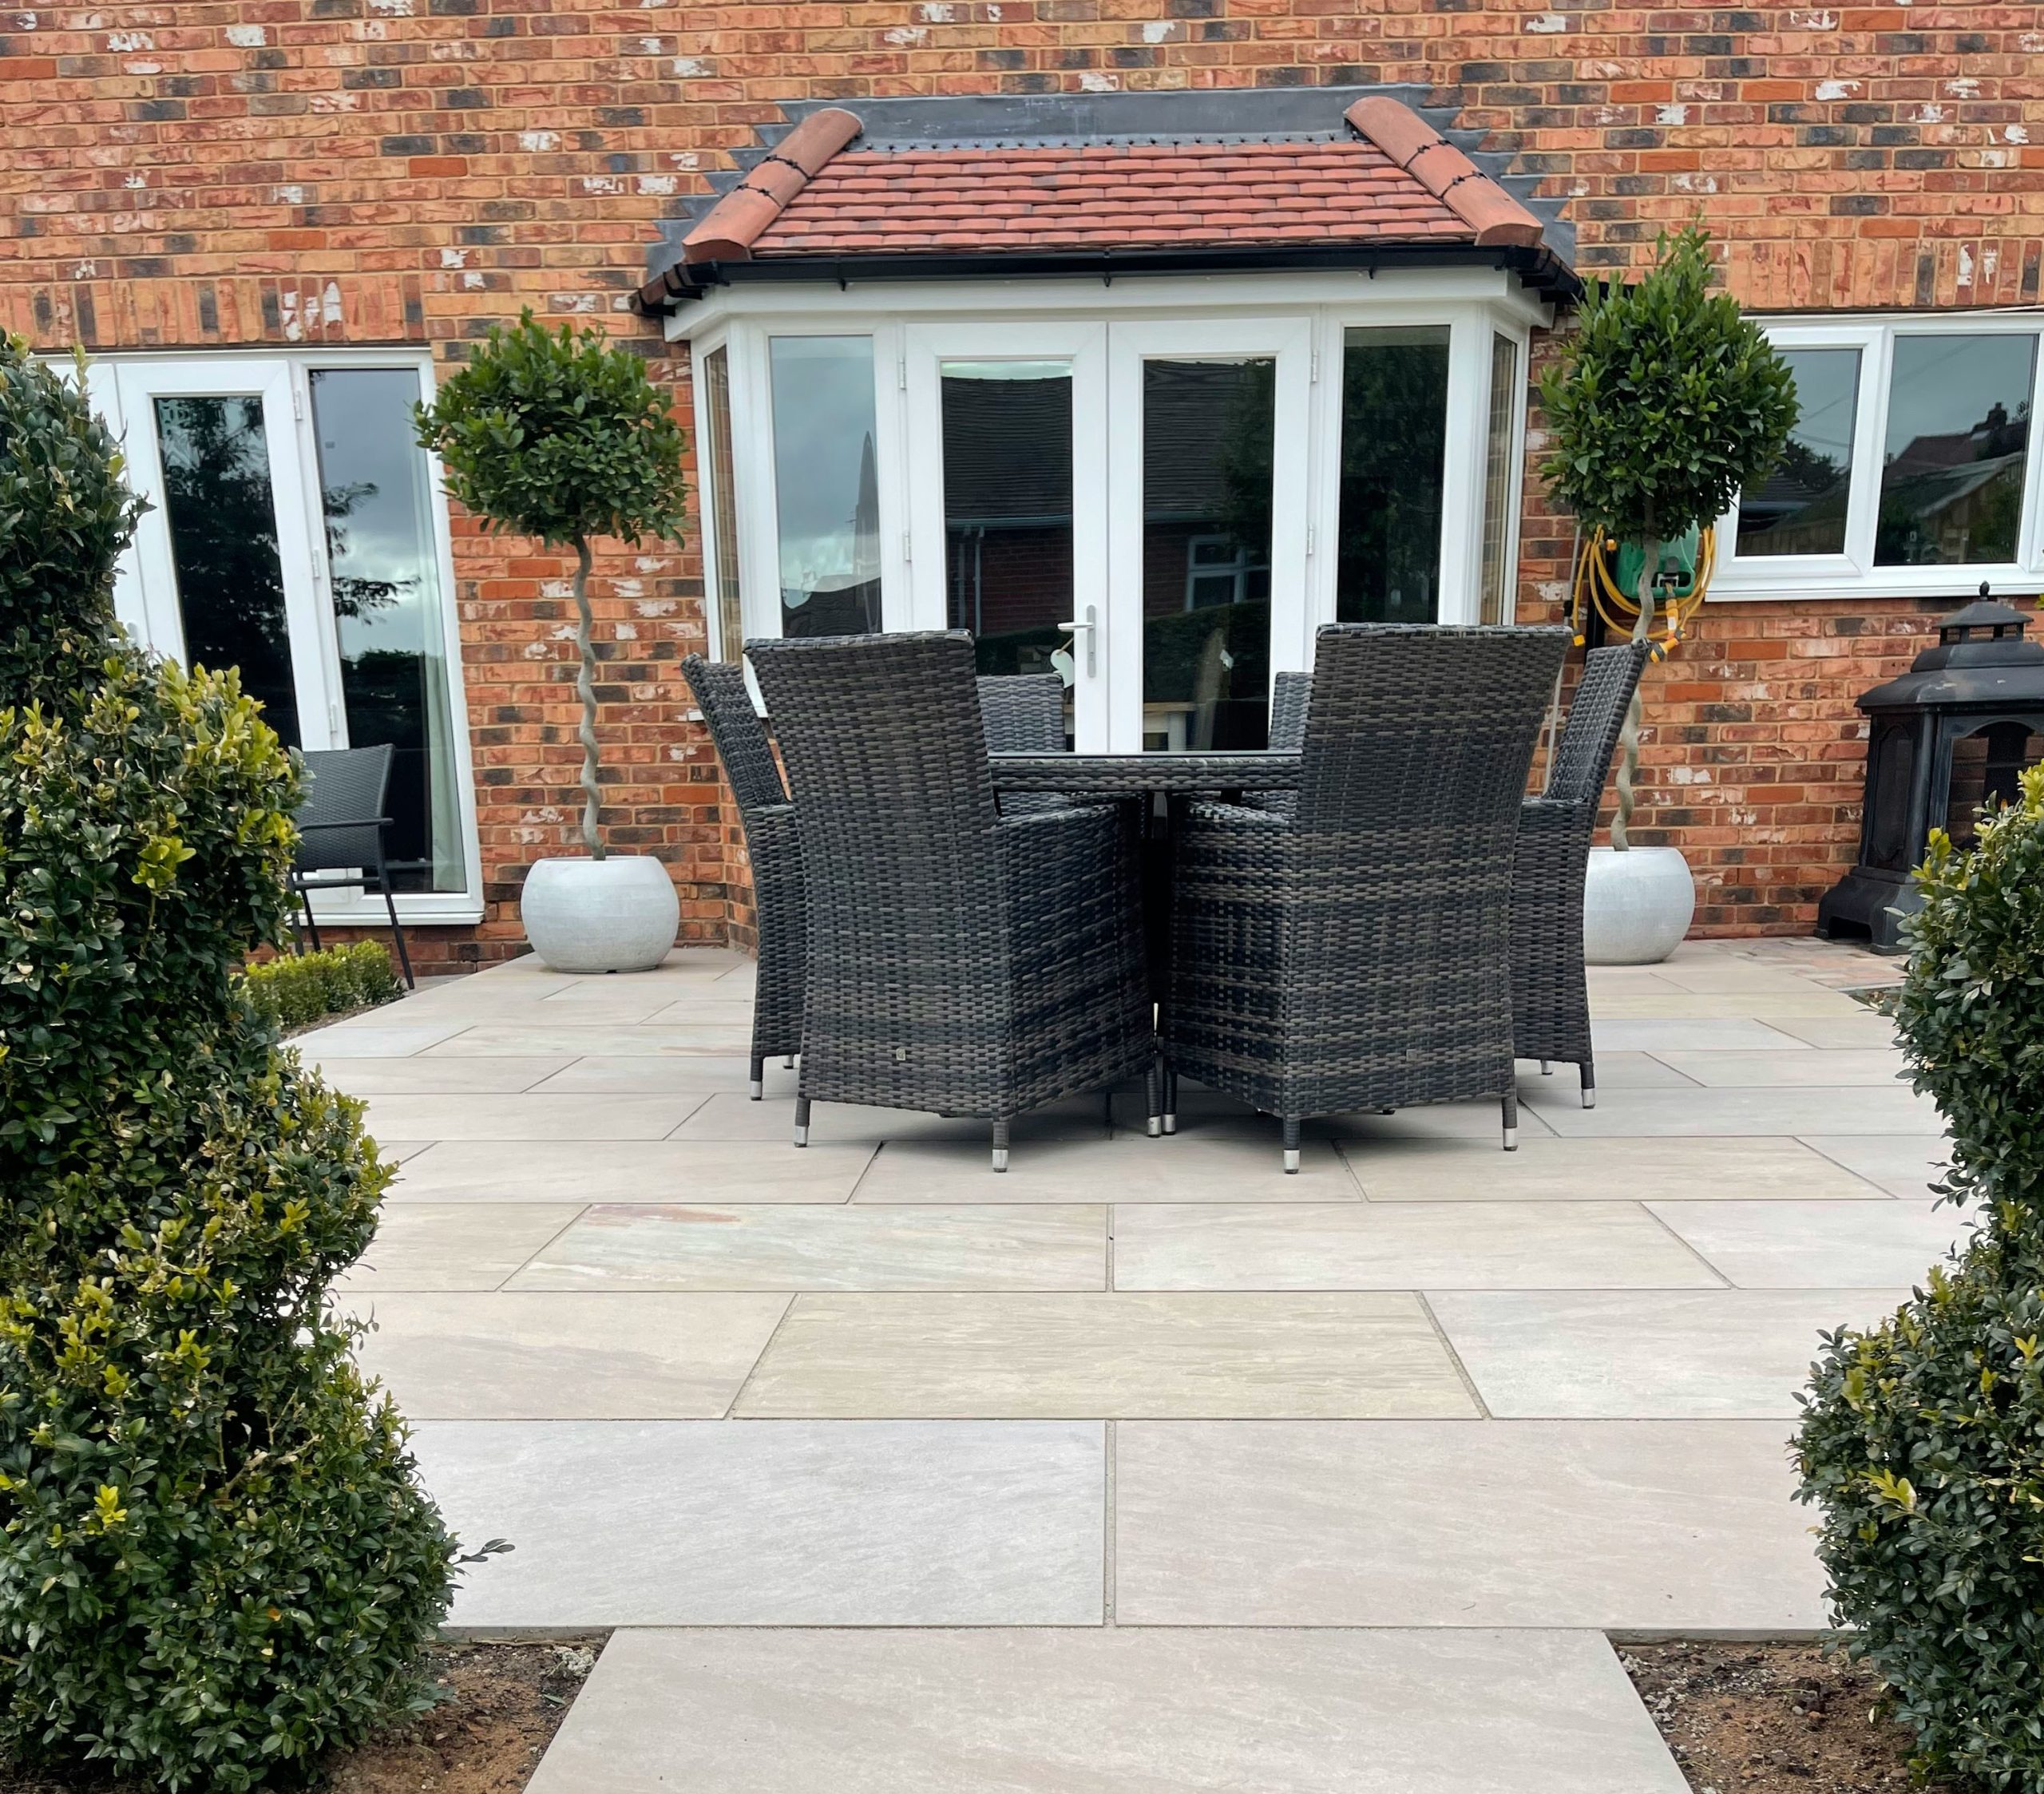
Let’s be honest: a large, light-colored paver patio looks incredible, but it can create a ton of glare and heat in direct sun. Those beautiful beige and grey tones will reflect sunlight right into your eyes, so a large cantilever umbrella or a future pergola isn’t just a style choice—it’s a necessity for comfort on hot days. Also, be mindful of trees that drop berries, colorful leaves, or flowers, as they can stain light-colored pavers if not swept away regularly. A leaf blower will be your best friend.
3. Embrace an Organic Look with Flagstone and Gravel
You don’t need a five-figure budget to get this natural, rustic vibe. The key is in the materials. Instead of sourcing expensive, oversized flagstone slabs, look for smaller, irregular bluestone or fieldstone pieces from a local landscape supplier, which are often sold by the pound at a much lower cost. For the infill, skip the pricier decorative pebbles and opt for basic pea gravel ($5-7 per bag). Build your fire pit using a simple metal fire ring (around $50-100 online) and surround it with coordinating stacked wall blocks from a big-box store like Lowe’s or Home Depot for under $400.
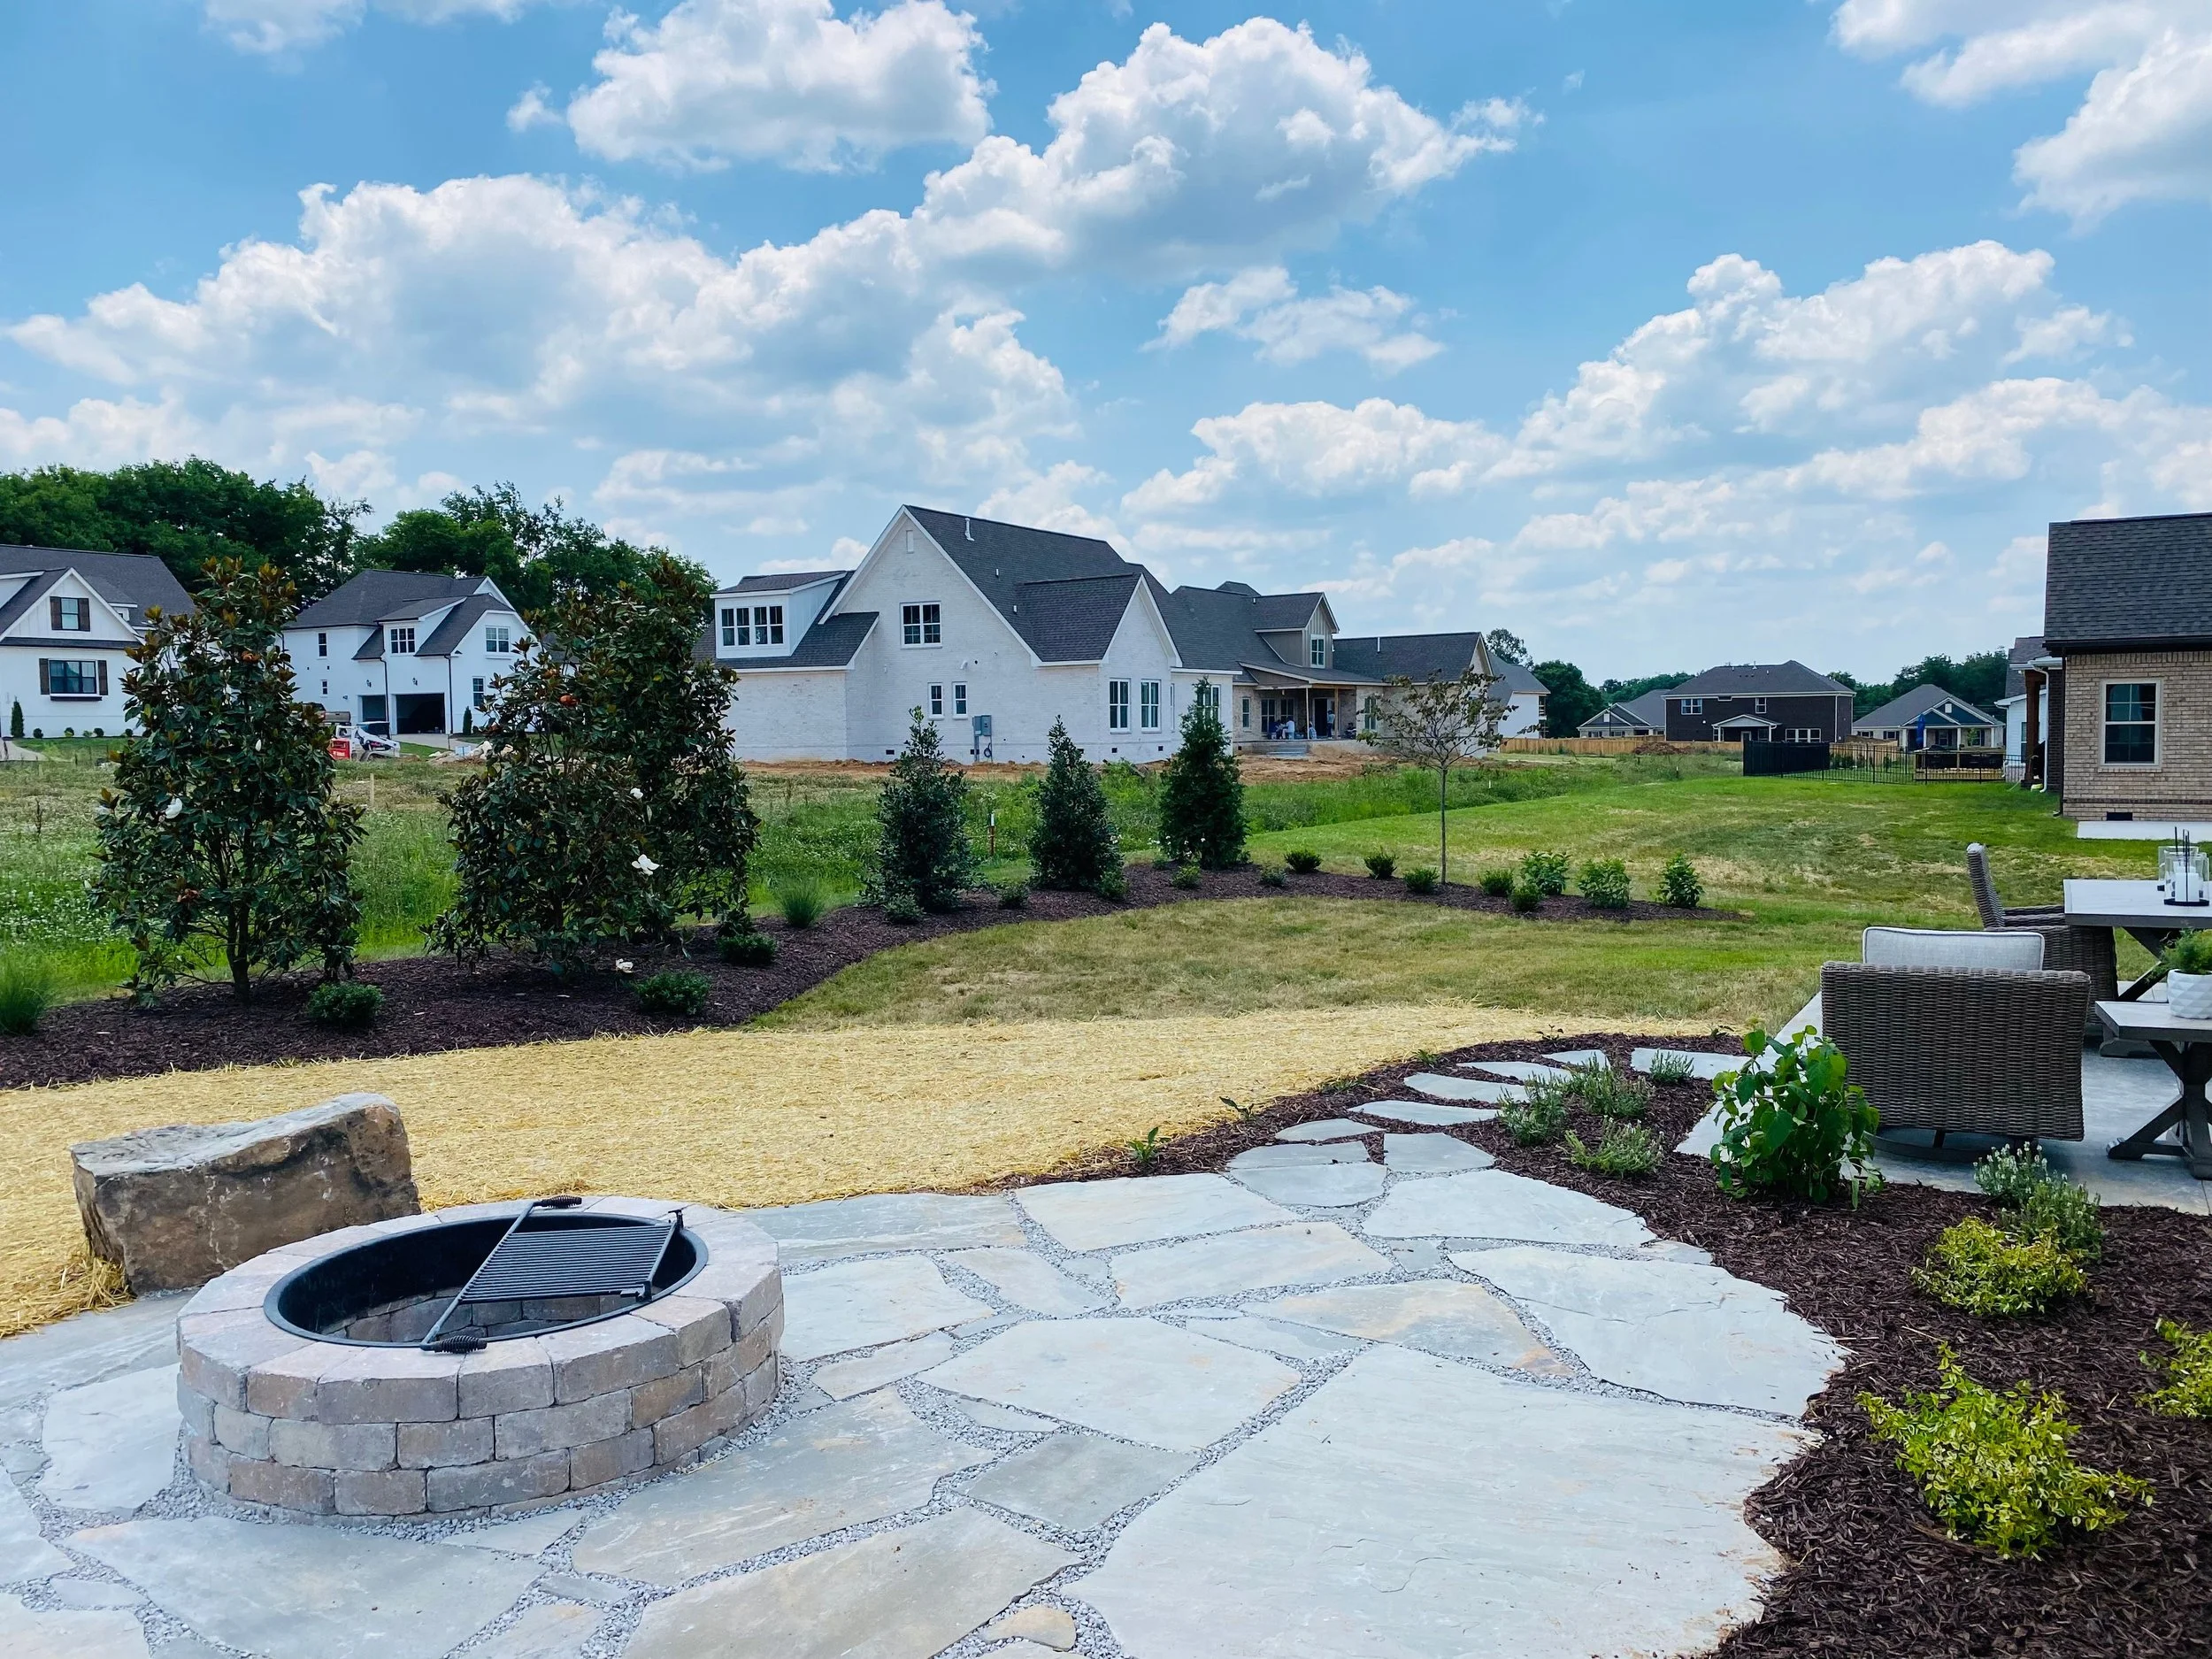
The single element that makes this patio feel so free-form and natural is the gravel infill between the stones. By leaving generous, irregular gaps between the flagstones and filling them with gravel, the entire surface breathes. It avoids the rigid, formal look of a mortared patio and instead feels like it grew right out of the landscape. This technique is also more forgiving for DIY installation, as you don’t have to cut and fit each stone perfectly. It’s a design choice that is both beautiful and practical.
4. Frame Your View with a Tiled Veranda
This look is a beautiful balance of architectural structure and natural softness. Think of it as: 50% bold architecture (the strong arches and dark floor tile), 30% rustic texture (the exposed wood beams on the ceiling), and 20% natural connection (the open views to the green landscape). You could swap the geometric tile for a terracotta Saltillo tile for a more Mediterranean feel, or change the dark wood beams to white-painted ones for a lighter, more coastal vibe, all while keeping the core formula intact.
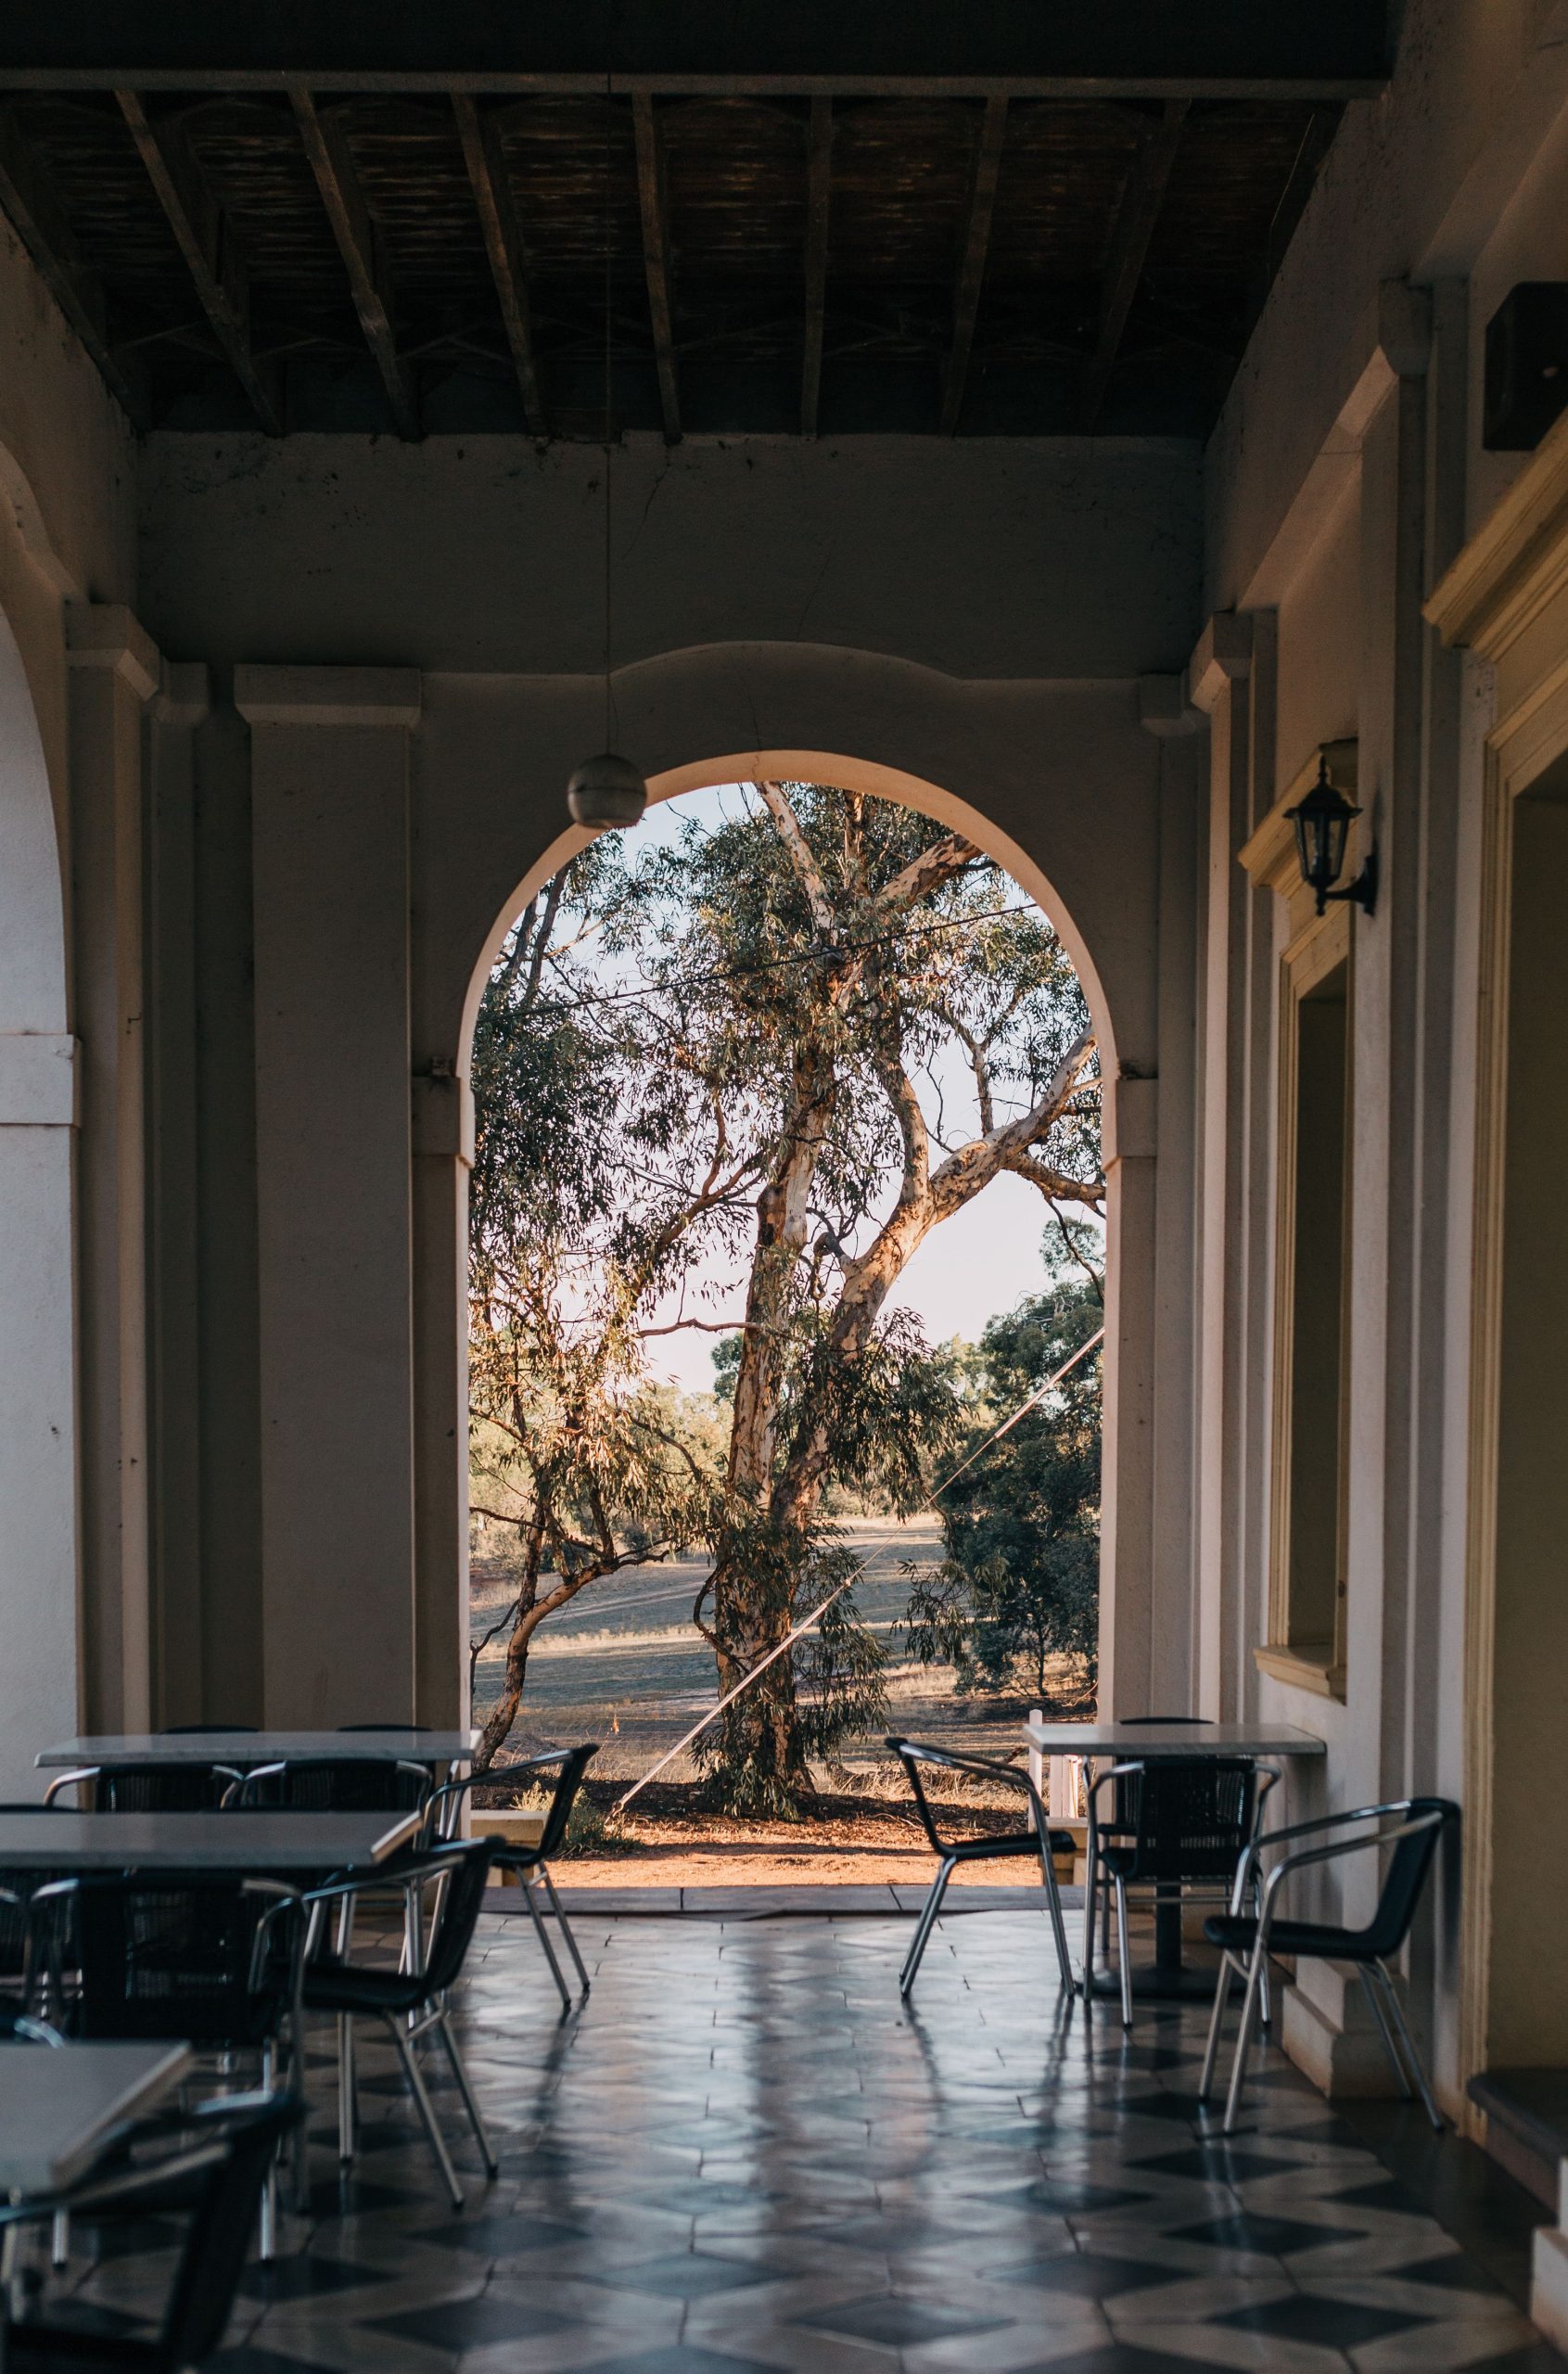
A covered space like this is a dream, but it’s not maintenance-free. That gorgeous geometric tile floor, while durable, will show every bit of dust, pollen, and stray leaf that blows in. Because it’s a dark color, you’ll likely need to sweep or blow it off a few times a week to keep it looking sharp. The wooden ceiling beams will also need to be inspected every few years for signs of weathering, pests, or water damage, and may require re-staining or sealing every 5-7 years depending on your climate.
5. Design a Structured Garden Path with Pavers and Gravel
Before you commit to this beautifully structured look, run through this simple checklist. It can save you major headaches later.
- Measure for Materials: Calculate the exact square footage for both the pavers and the gravel beds. Remember to add a 10% overage for cuts and mistakes.
- Check Your Sunlight: Does this area get full sun or partial shade? The answer will dictate your plant choices. The lavender shown here needs at least 6 hours of direct sun daily to thrive.
- Test Your Soil Drainage: Before laying any base material, dig a small hole and check how quickly water drains. Poor drainage will lead to puddles and shifting pavers. You may need to add a deeper gravel base.
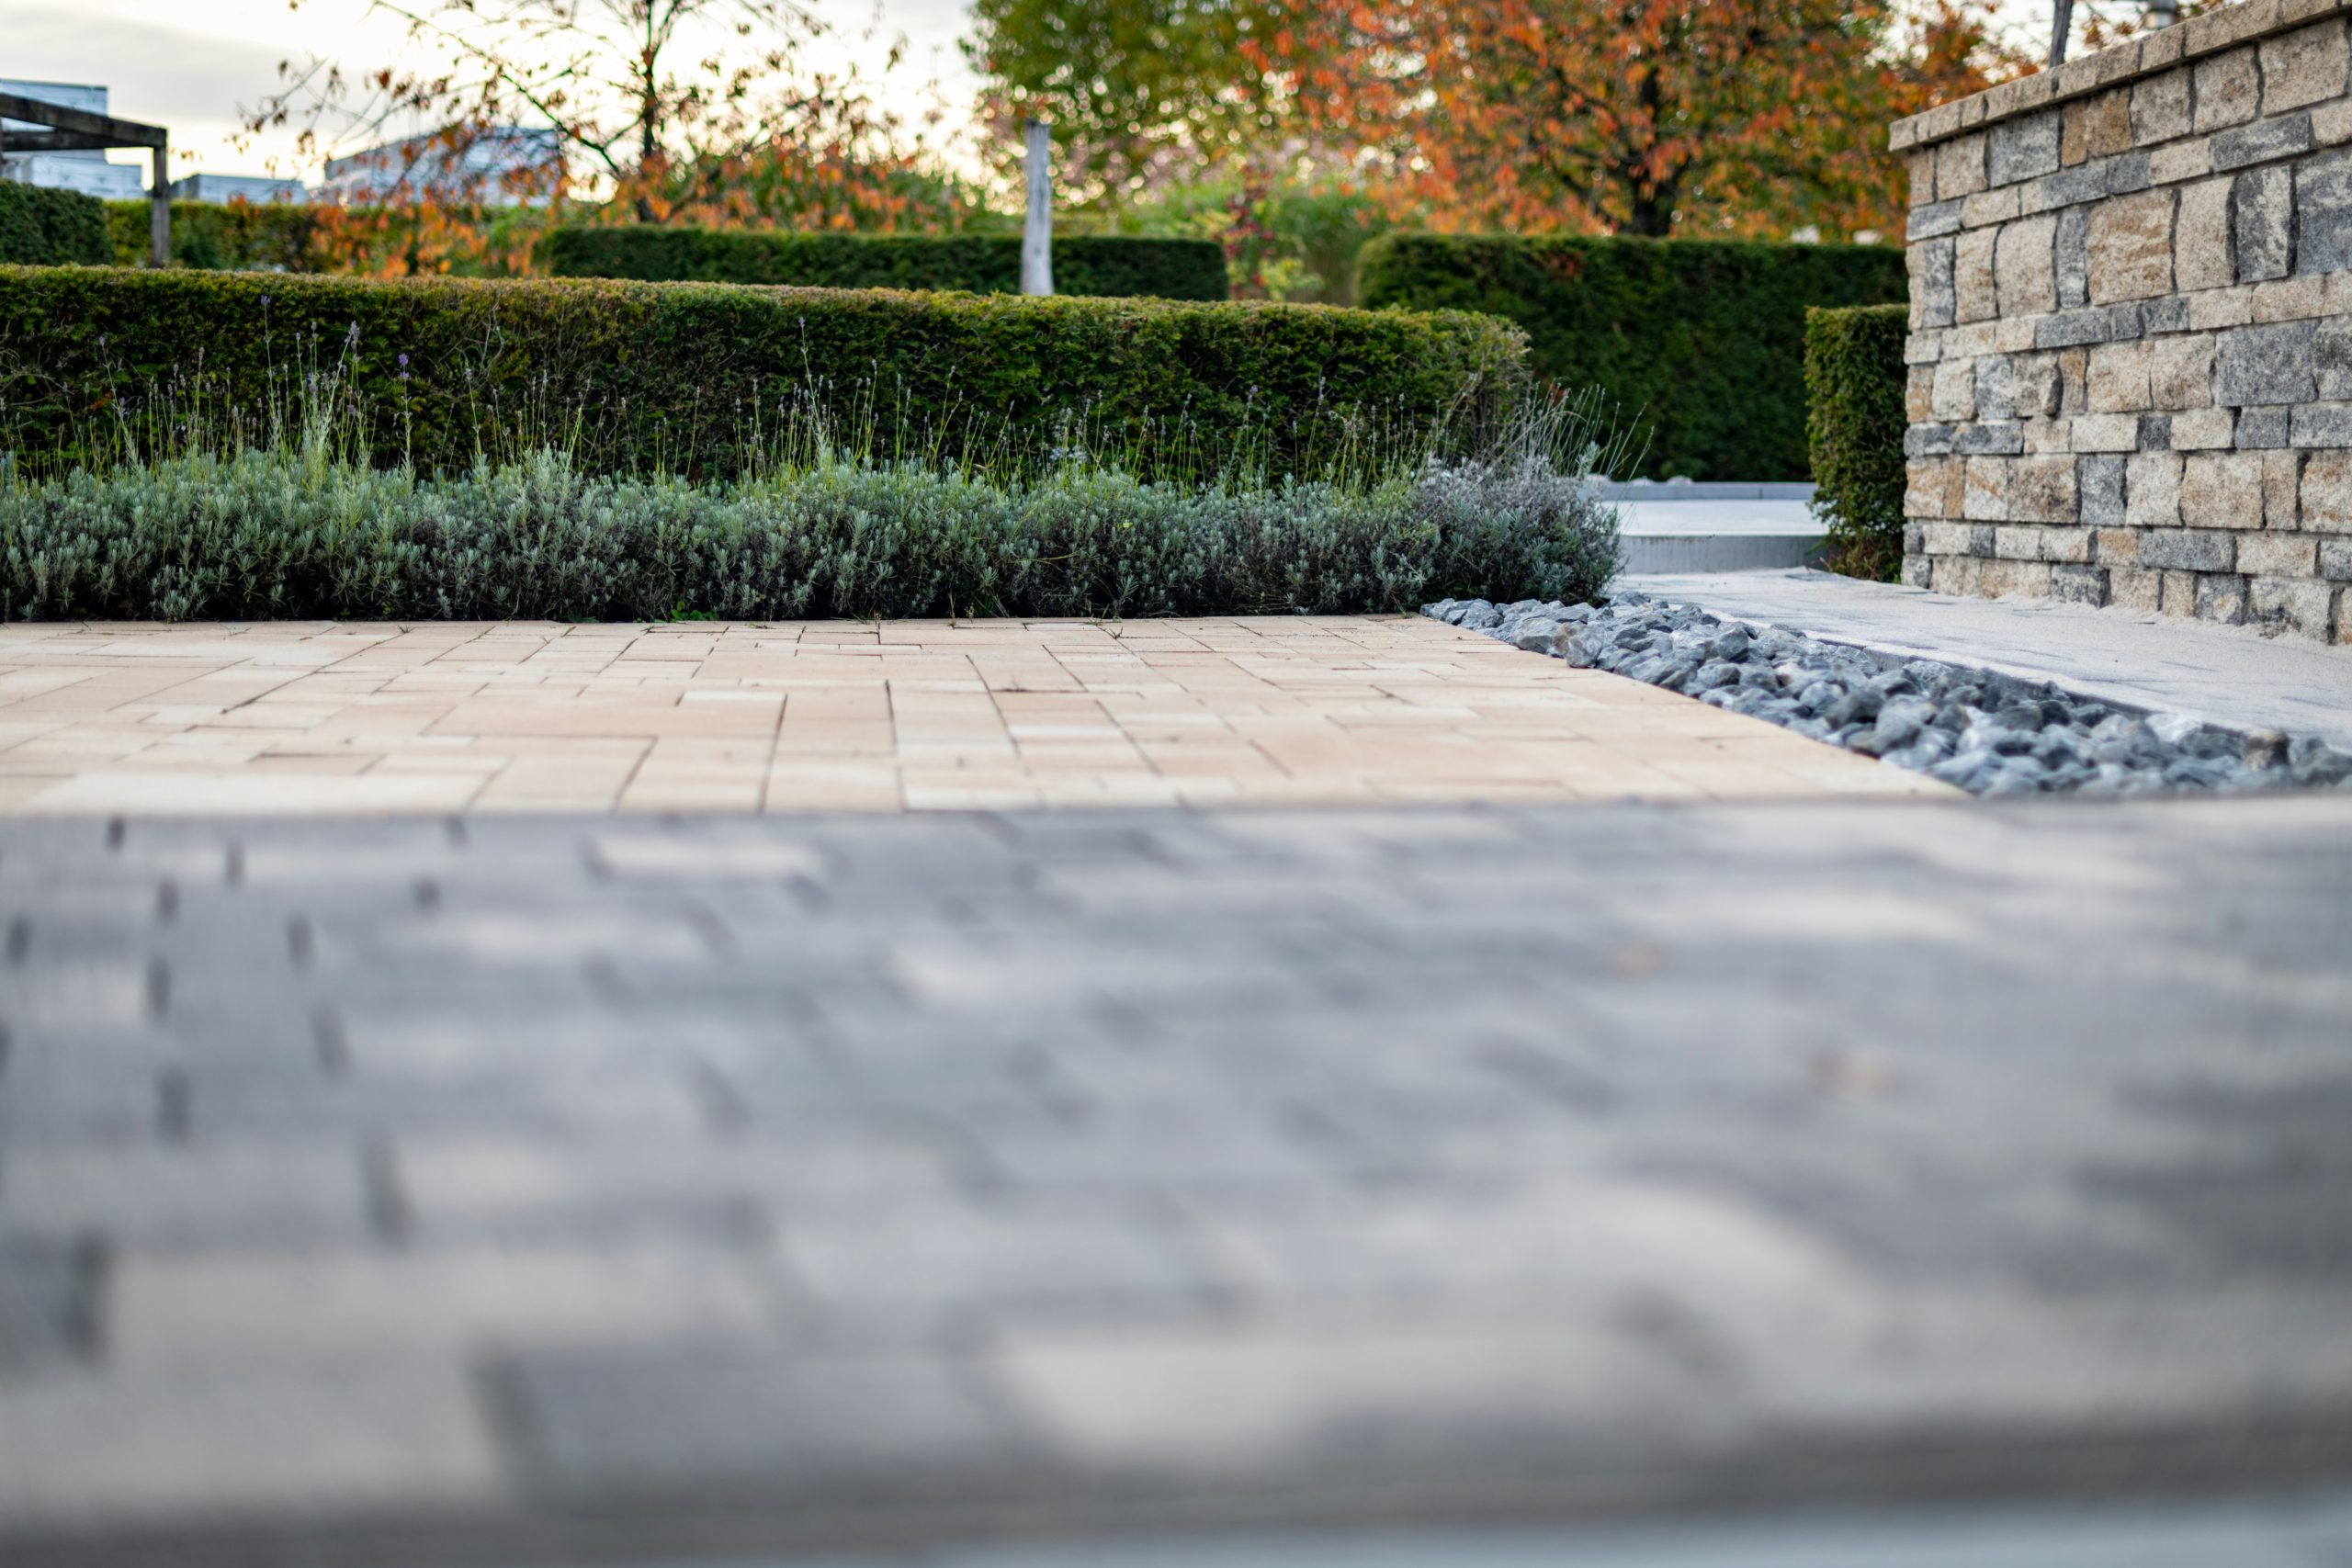
This design works because it’s a study in controlled contrast. The clean, smooth lines of the beige rectangular pavers are placed directly against the soft, varied texture of the small grey rocks. This juxtaposition of textures is incredibly pleasing to the eye. Furthermore, the design uses repetition effectively—the paver grid provides rhythm, while the linear gravel bed and the lush green hedge create strong parallel lines that guide the eye through the space. It feels both natural and intentionally designed, which is a hard balance to strike. Compare with the pathway in Idea #7 for a more organic feel.
6. Add Texture with Hexagonal Exposed Aggregate Pavers
The texture is everything here. While the hexagonal shape is interesting, it’s the exposed aggregate finish that truly defines this look. The tiny, variegated pebbles embedded in the surface create a visual and tactile experience that you just can’t get with smooth concrete or brick. This finish is what gives the patio its natural, earthy, and incredibly durable feel. If you were to swap these for smooth hex pavers, you’d lose all the rugged character that makes this design so unique and appealing.
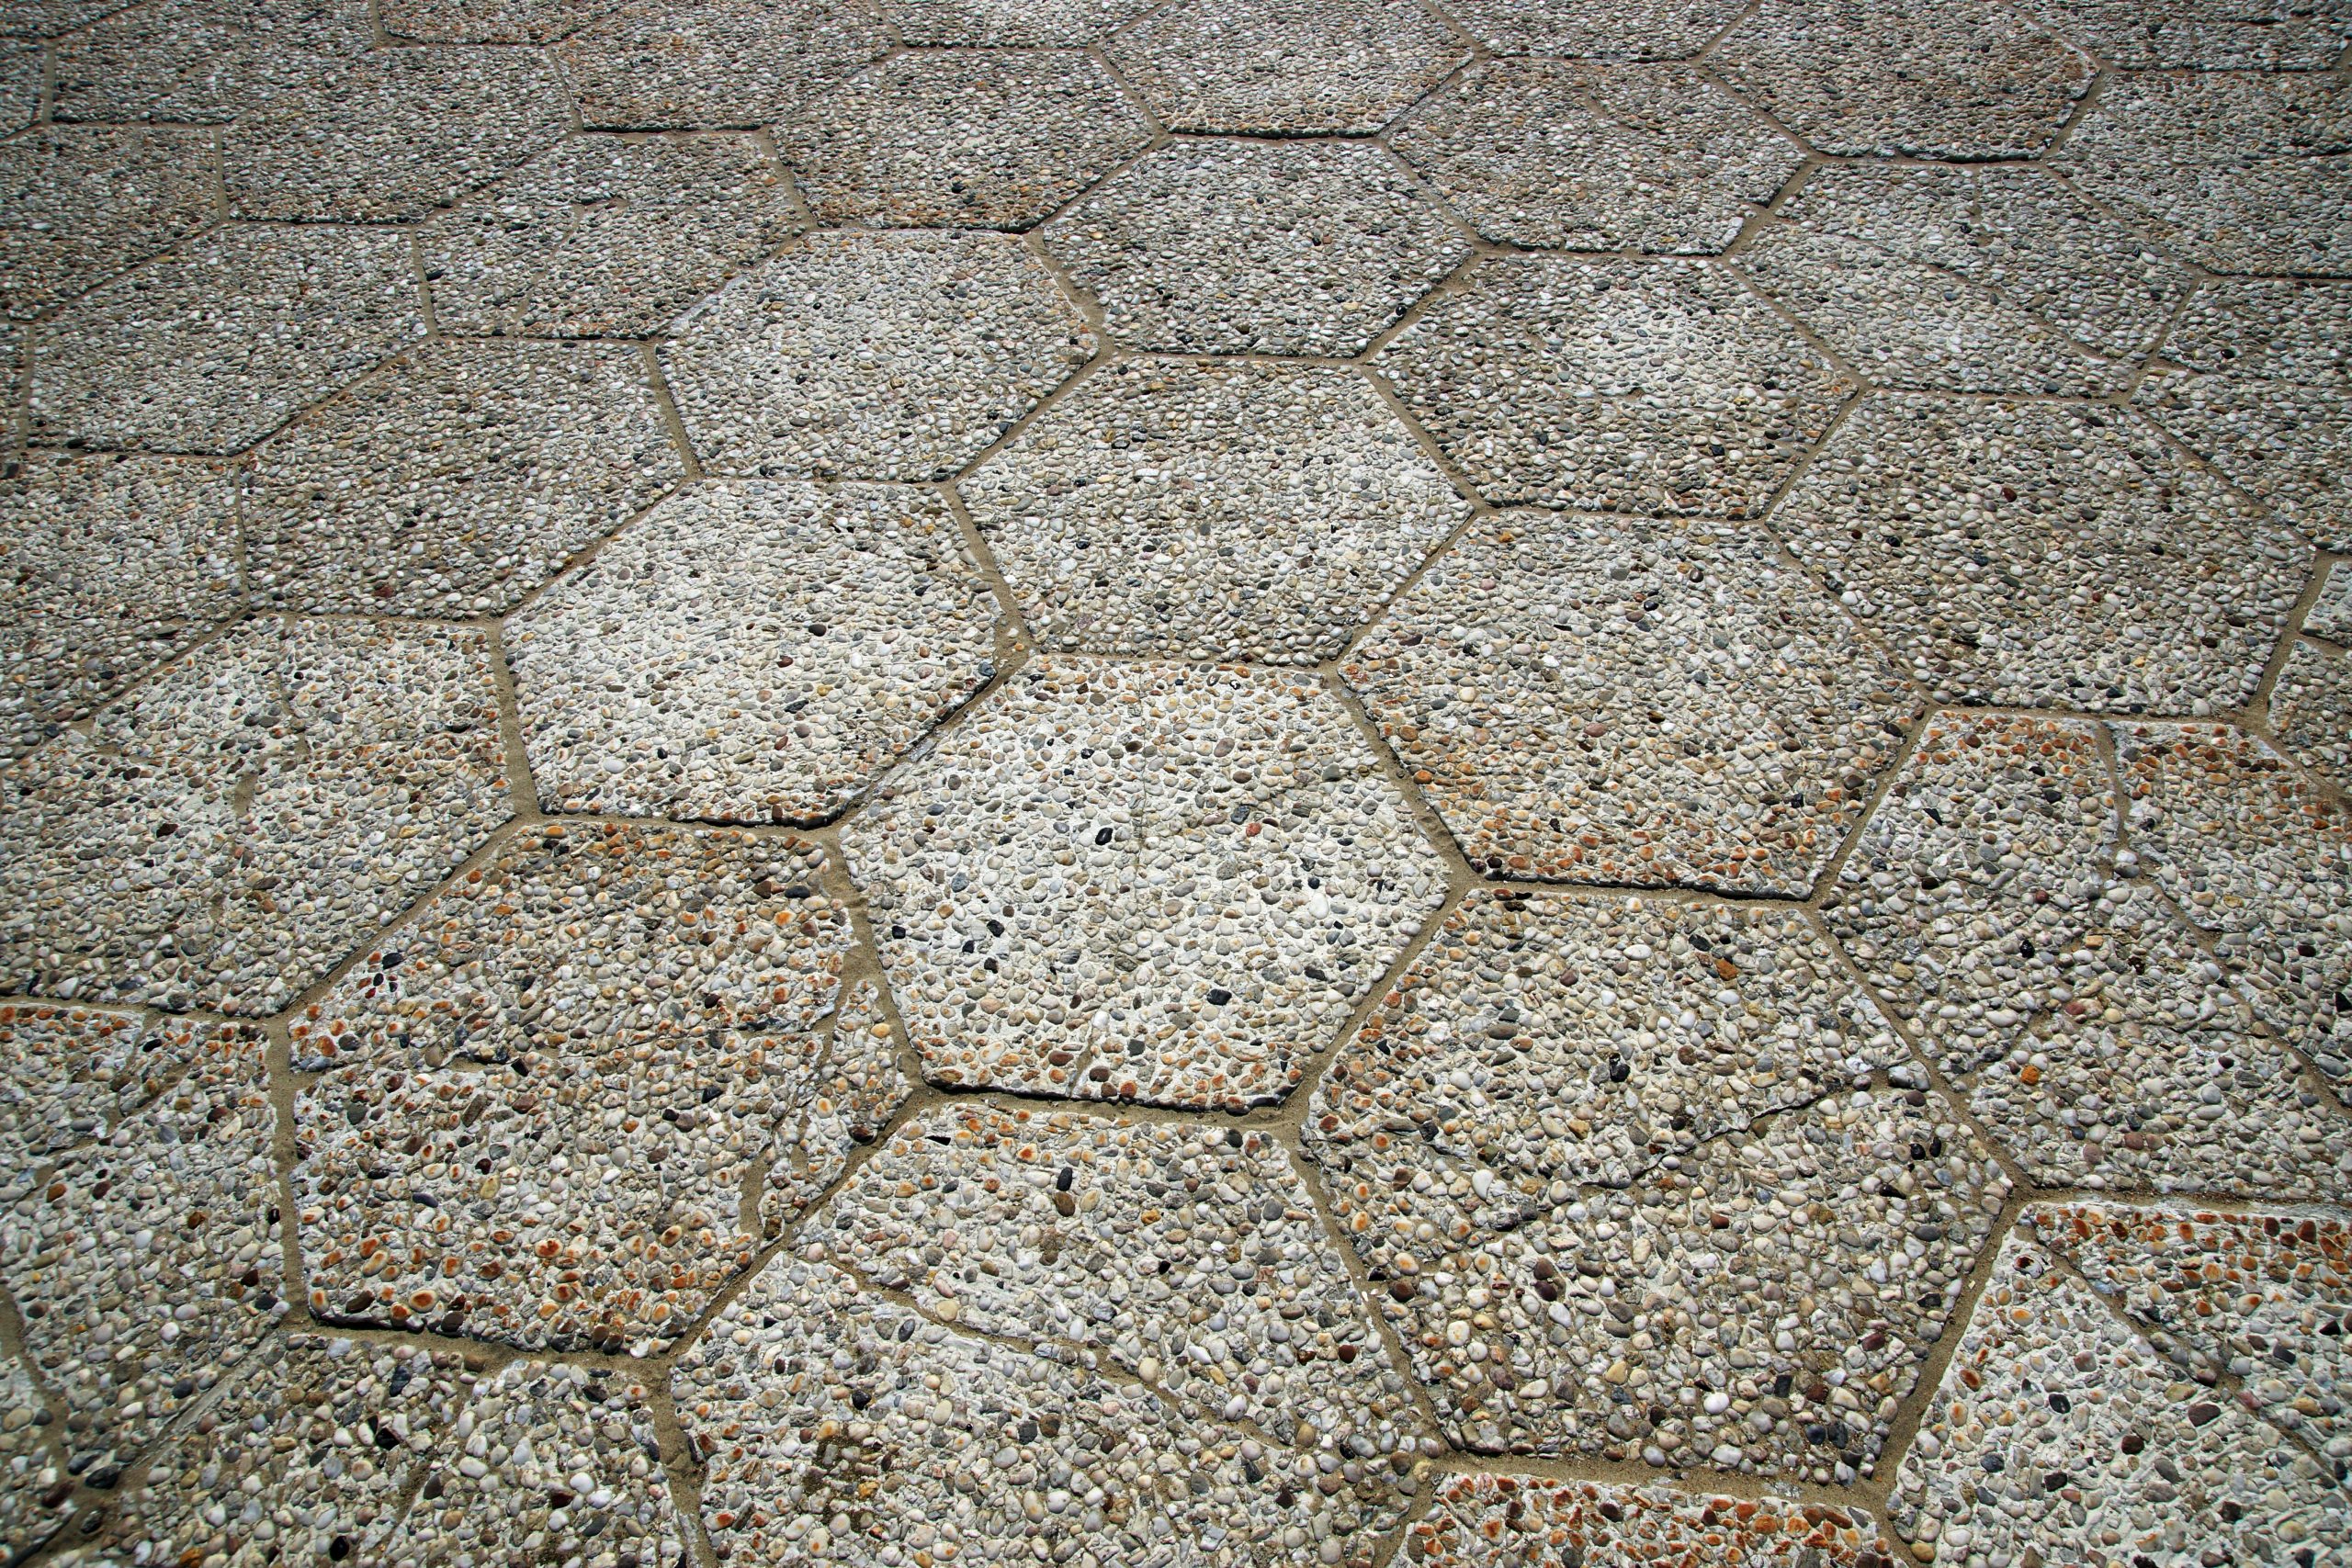
When you’re going for a textured-paver look, the grout or sand you choose for the joints is crucial. With a busy surface like this exposed aggregate, using a dark-colored polymeric sand is a pro move. The darker grout line doesn’t compete for attention with the multi-toned pebbles in the pavers. Instead, it creates a subtle, defining border around each hexagon, emphasizing the geometric pattern without adding more visual noise. A light-colored sand, by contrast, would look busy and fight with the pavers themselves.
7. Mix Materials with Stepping Stones and Stacked Stone Planters
The magic of this lush, modern look lies in its material recipe. It’s roughly 40% soft, organic elements (the abundant green and flowering plants), 30% hard-edged modernism (the clean, rectangular stepping stones), and 30% rustic texture (the stacked stone walls and light brown gravel). This balance is key. If you lean too heavily on the modern pavers, it can feel sterile. Too much rustic stone, and it can look dated. The plants are the glue that holds the two styles together in perfect harmony.
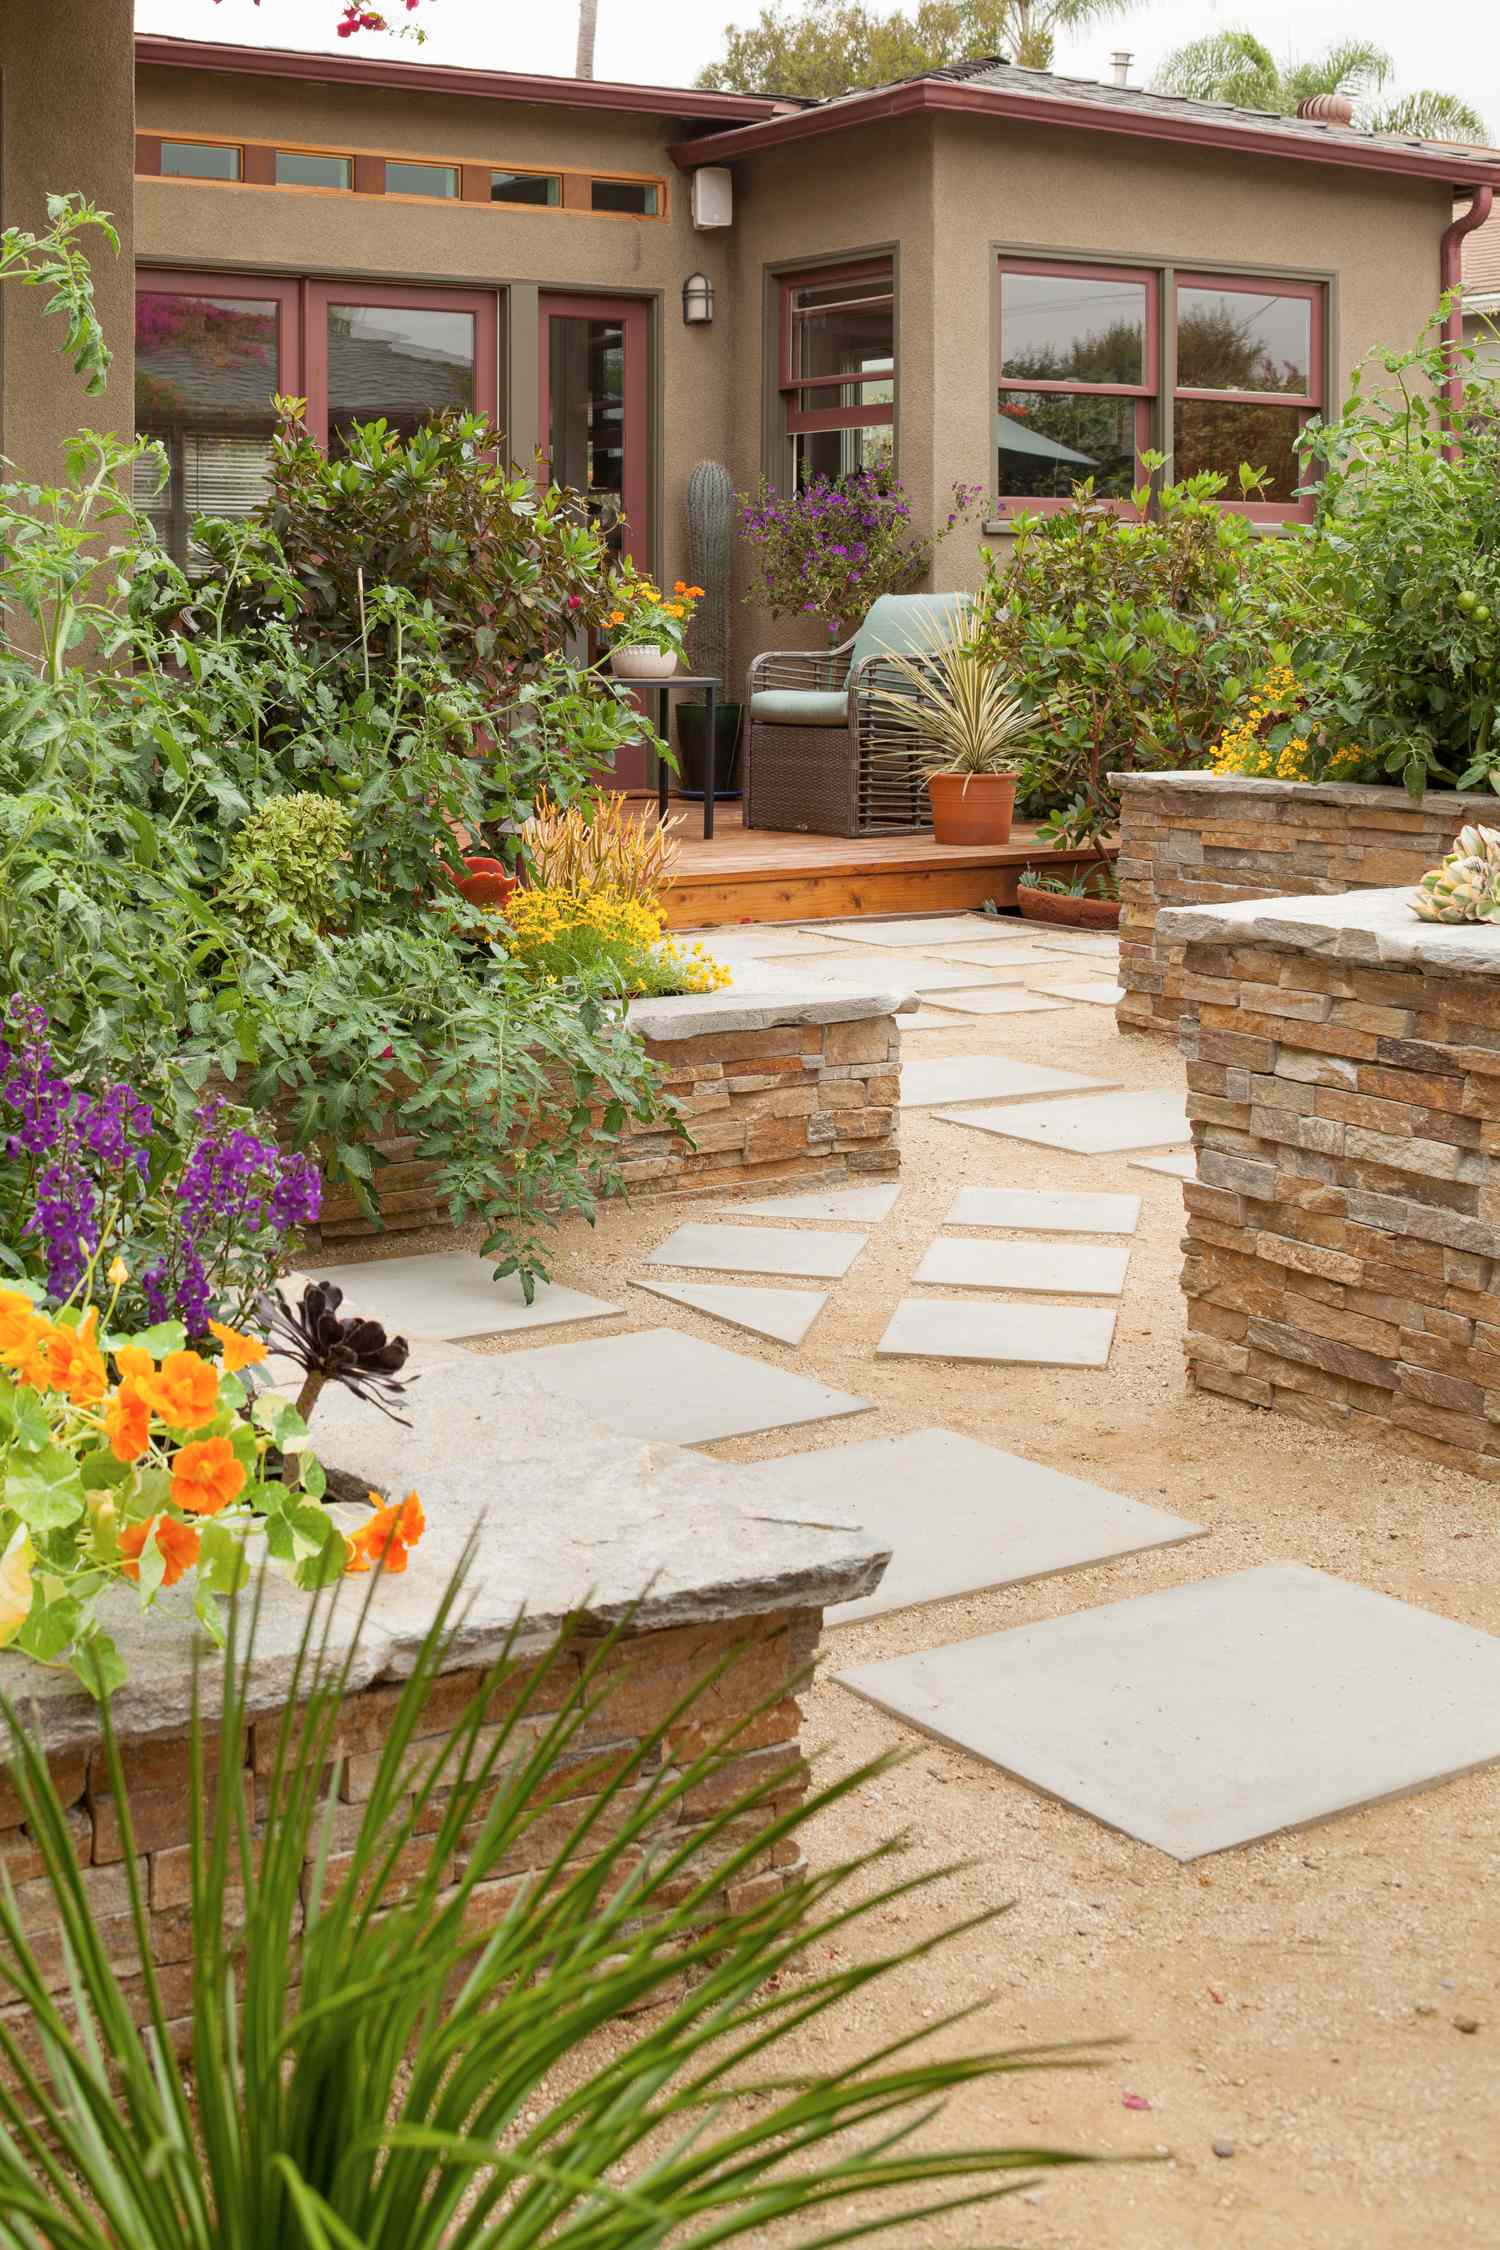
This style of “deconstructed” patio is a huge trend right now, and for good reason. Homeowners are moving away from massive, unbroken seas of pavers and towards more natural, permeable designs. Using stepping stones with gravel or groundcover in between allows rainwater to drain naturally into the ground, which is more environmentally friendly. It also breaks up a large space, creating a softer, more garden-like feel that integrates the patio into the landscape rather than paving over it.
8. Build a Split-Level Patio with an Integrated Conversation Pit
Installing low-voltage lighting into a seating wall is a high-impact DIY project that makes any patio feel custom-built. Here’s a quick guide:
- Plan Ahead: As you build your stone wall, decide on light placement. Aim for one hardscape light under the capstone every 6-8 feet.
- Create a Channel: Use a chisel to notch out a small channel on the top of the blocks where the wire will run, hidden under the capstone.
- Run the Wires: Lay your low-voltage landscape wire in the channel, connecting each light fixture according to its instructions.
- Set the Capstone: Apply a bead of landscape block adhesive, carefully place the capstone over the wires, and press firmly. Make sure not to pinch the cable.
- Connect to Power: Run the main wire to your low-voltage transformer. This weekend project costs about $200-$400 for a quality kit.
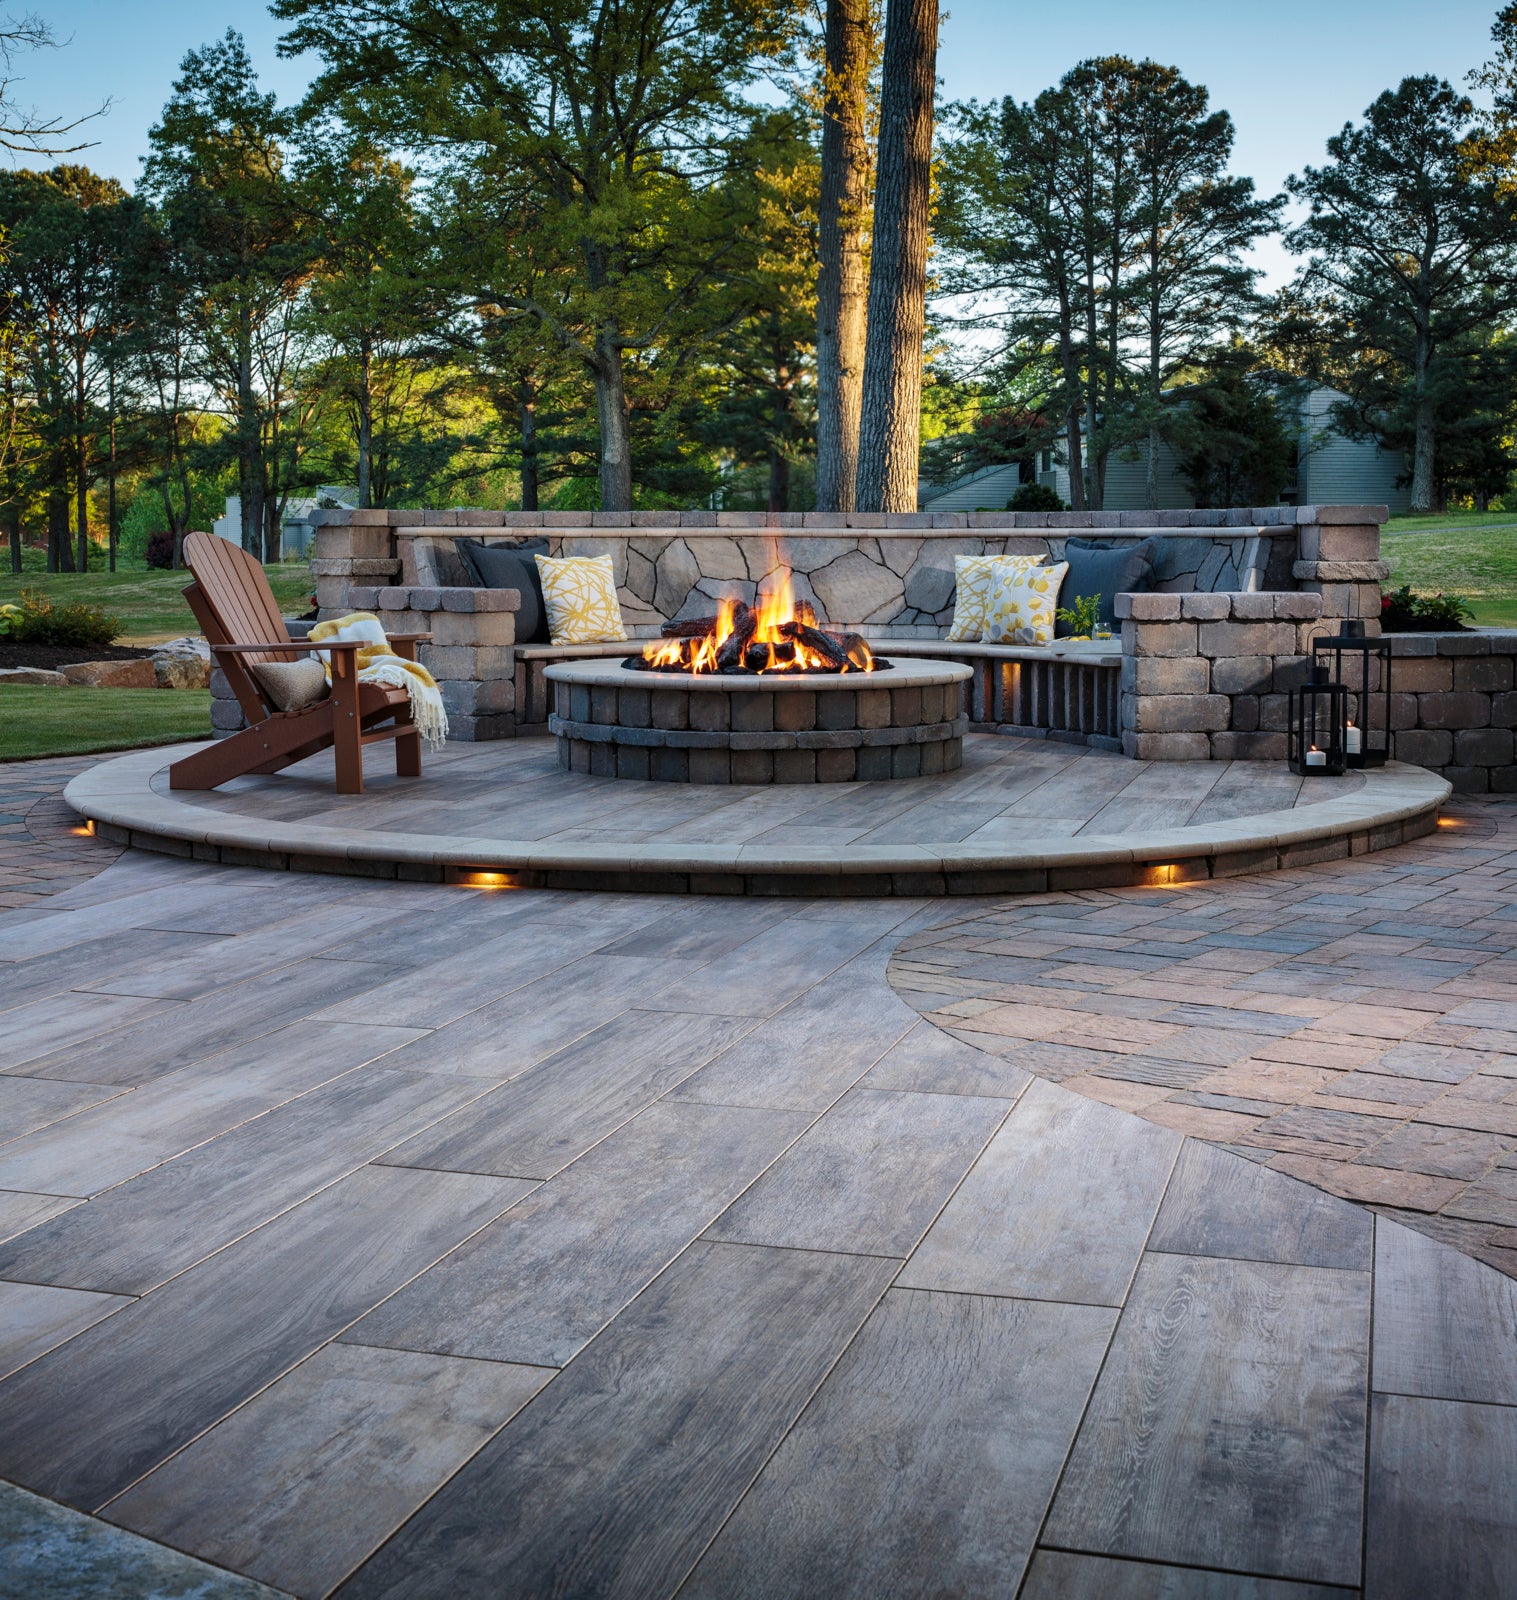
The single element that makes this design feel so luxurious and inviting is the built-in seating. By integrating the seating into the structure of the multi-level patio, the design feels permanent, intentional, and incredibly cozy. It creates a destination that literally pulls you in, defining the conversation pit as its own distinct “room.” Without it, you’d just have a few chairs on a patio; with it, you have an architectural feature that provides function and style. The look is more polished and space-efficient than what you see in the otherwise similar Modern Paver Patio.
9. Install a Circular Paver Patio with a Lighted Retaining Wall
Recreating this cozy, self-contained fire pit nook requires a few key investments. Here’s a rough estimate for doing it yourself, assuming a 15-foot diameter patio.
- Pavers & Base Material: $900 – $1,800
- Stone Blocks (Wall & Pillars): $1,200 – $2,500
- Fire Pit Kit: $400 – $800
- Low-Voltage Lighting Kit: $200 – $500
- Labor (if hiring out): $4,000 – $7,000
- TOTAL (DIY): $2,700 – $5,600
Budget alternative: Get a similar feel for about 50% less by using a standard paver-and-gravel base, skipping the tall pillars, and opting for a simple metal fire pit bowl instead of a block kit.
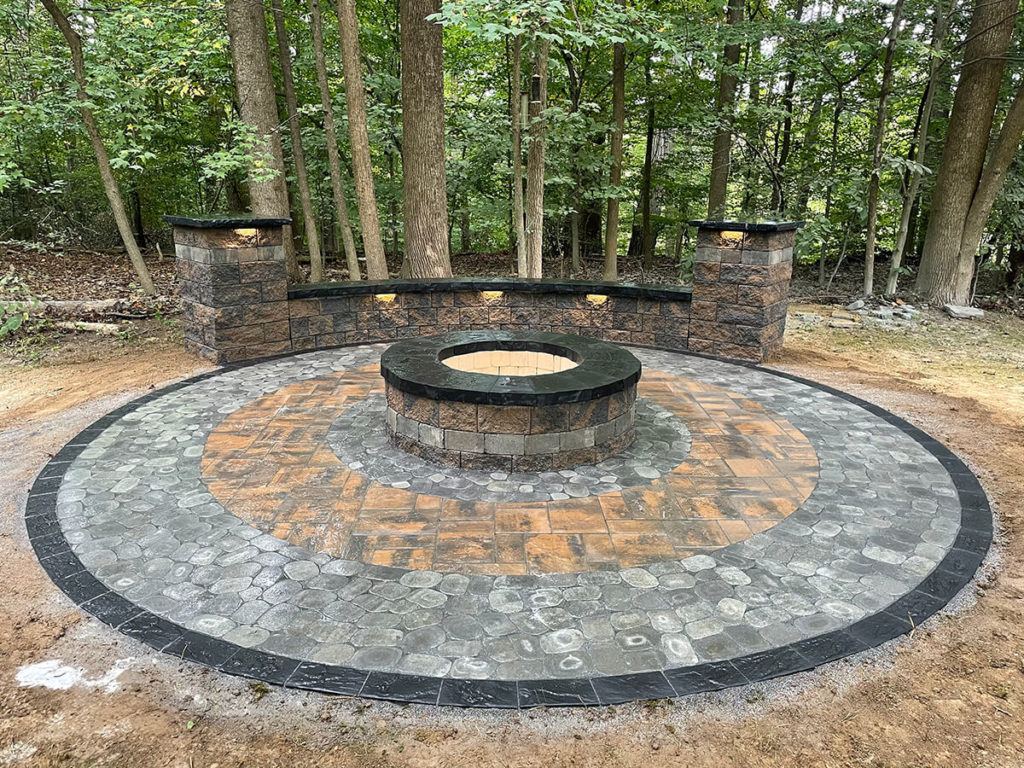
A circular design surrounded by a wall looks amazing, but it can feel a bit like a fishbowl if you don’t get the scale right. For a 15-foot diameter patio like this, the retaining wall should be kept low—no more than 18-24 inches high. Any higher, and it will start to feel claustrophobic and block views of the surrounding yard. Also, remember that integrated lighting requires running low-voltage electrical cable, which means planning a trench from your power source to the patio before you start building.
10. Combine Petal-Shaped Pavers with Rough Granite Curbing
This design is a masterclass in texture and form. The smooth, refined shape of the dark, petal-like pavers provides a strong geometric pattern. This is then contained and contrasted by the rough, organic, and irregular nature of the granite block curbing. It’s a classic design principle: pairing something man-made and precise with something natural and untamed. The light aggregate filler acts as a neutral middle ground, transitioning between the dark pavers and the tan-and-grey granite without competing with either.
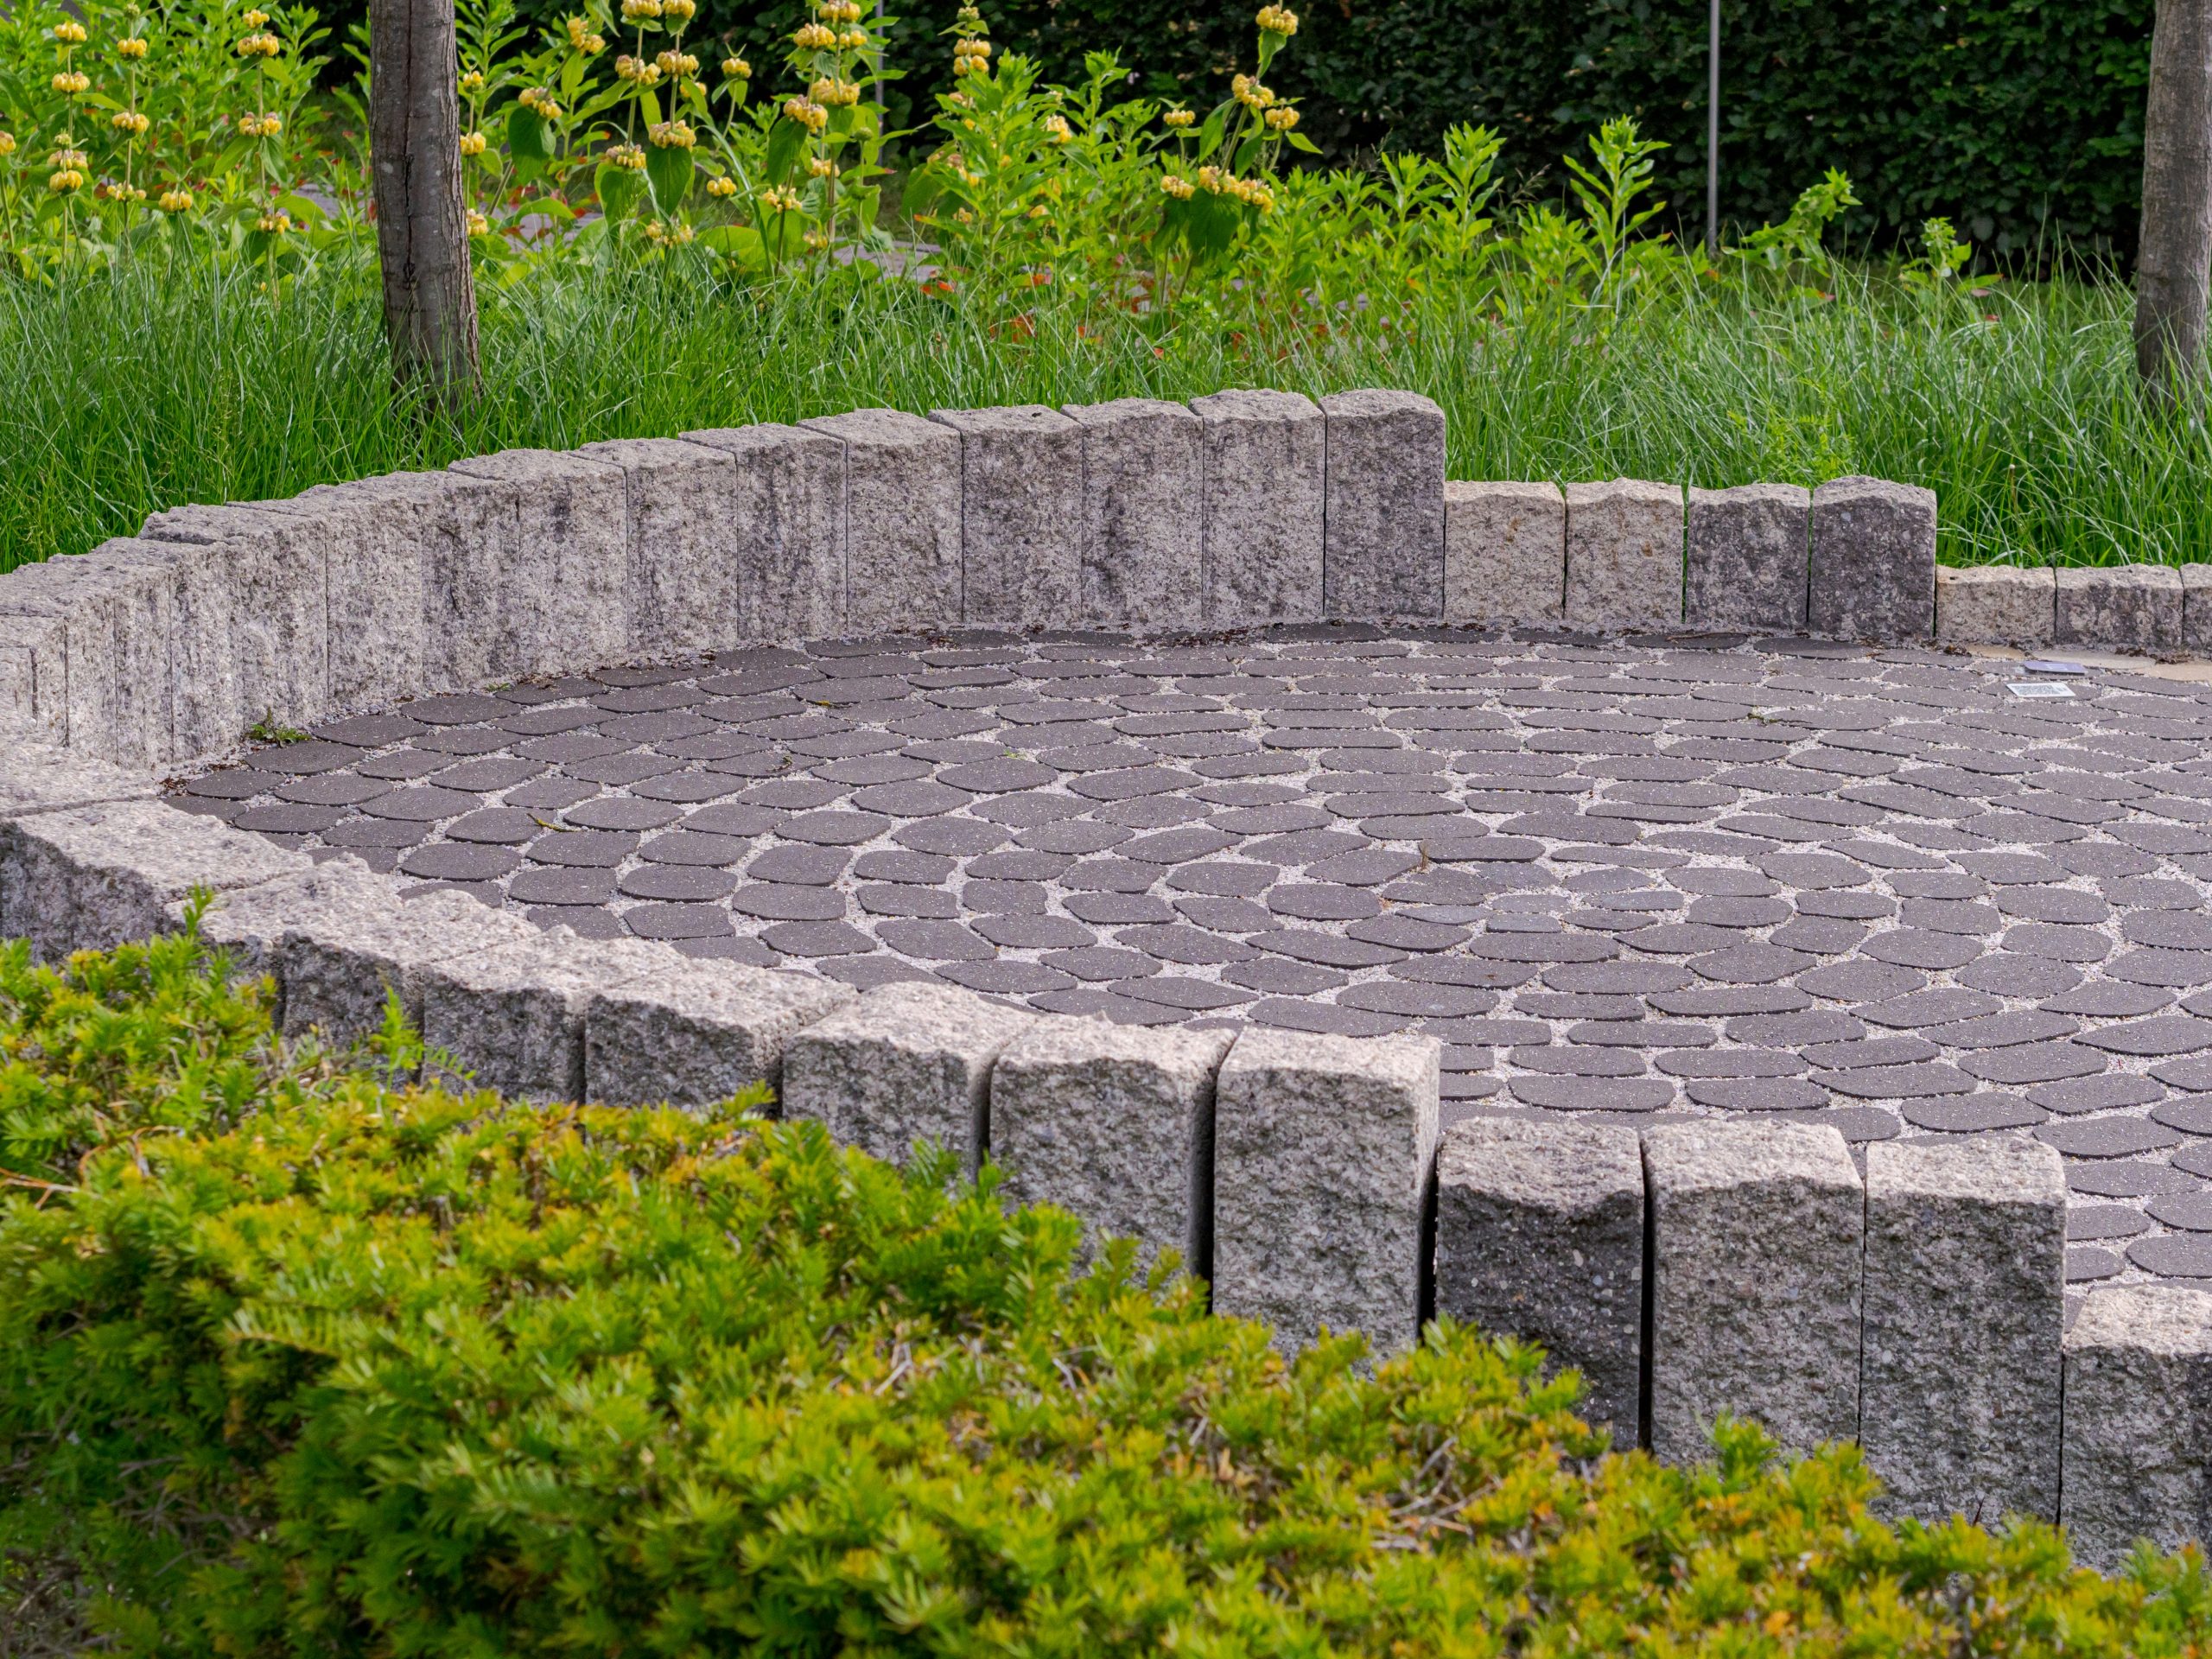
While the granite curbing is practically indestructible, the light-colored aggregate filler between the pavers is the high-maintenance element here. Over time, it will collect dirt, seeds from surrounding plants, and can become discolored. To keep it looking fresh, you’ll need to gently blow it out with a leaf blower a few times a season. Every few years, you may need to top it off with a fresh bag of aggregate to fill in any low spots where it has settled or washed away. It’s a small price to pay for such a unique look.
11. Create a Sunken Patio with Curved Concrete Steps
A sunken patio, or “patio well,” is a fantastic solution for a flat yard where you want to create architectural interest without building upwards. This design works best with a diameter of at least 12-15 feet to avoid feeling cramped. Any smaller and it will feel more like a hole than a room. The steps leading down should be wide and generous—at least 4 feet—to feel welcoming. This idea is specifically for creating depth in a level space; if your yard already has a slope, a multi-level design like Idea #1 is a better fit.
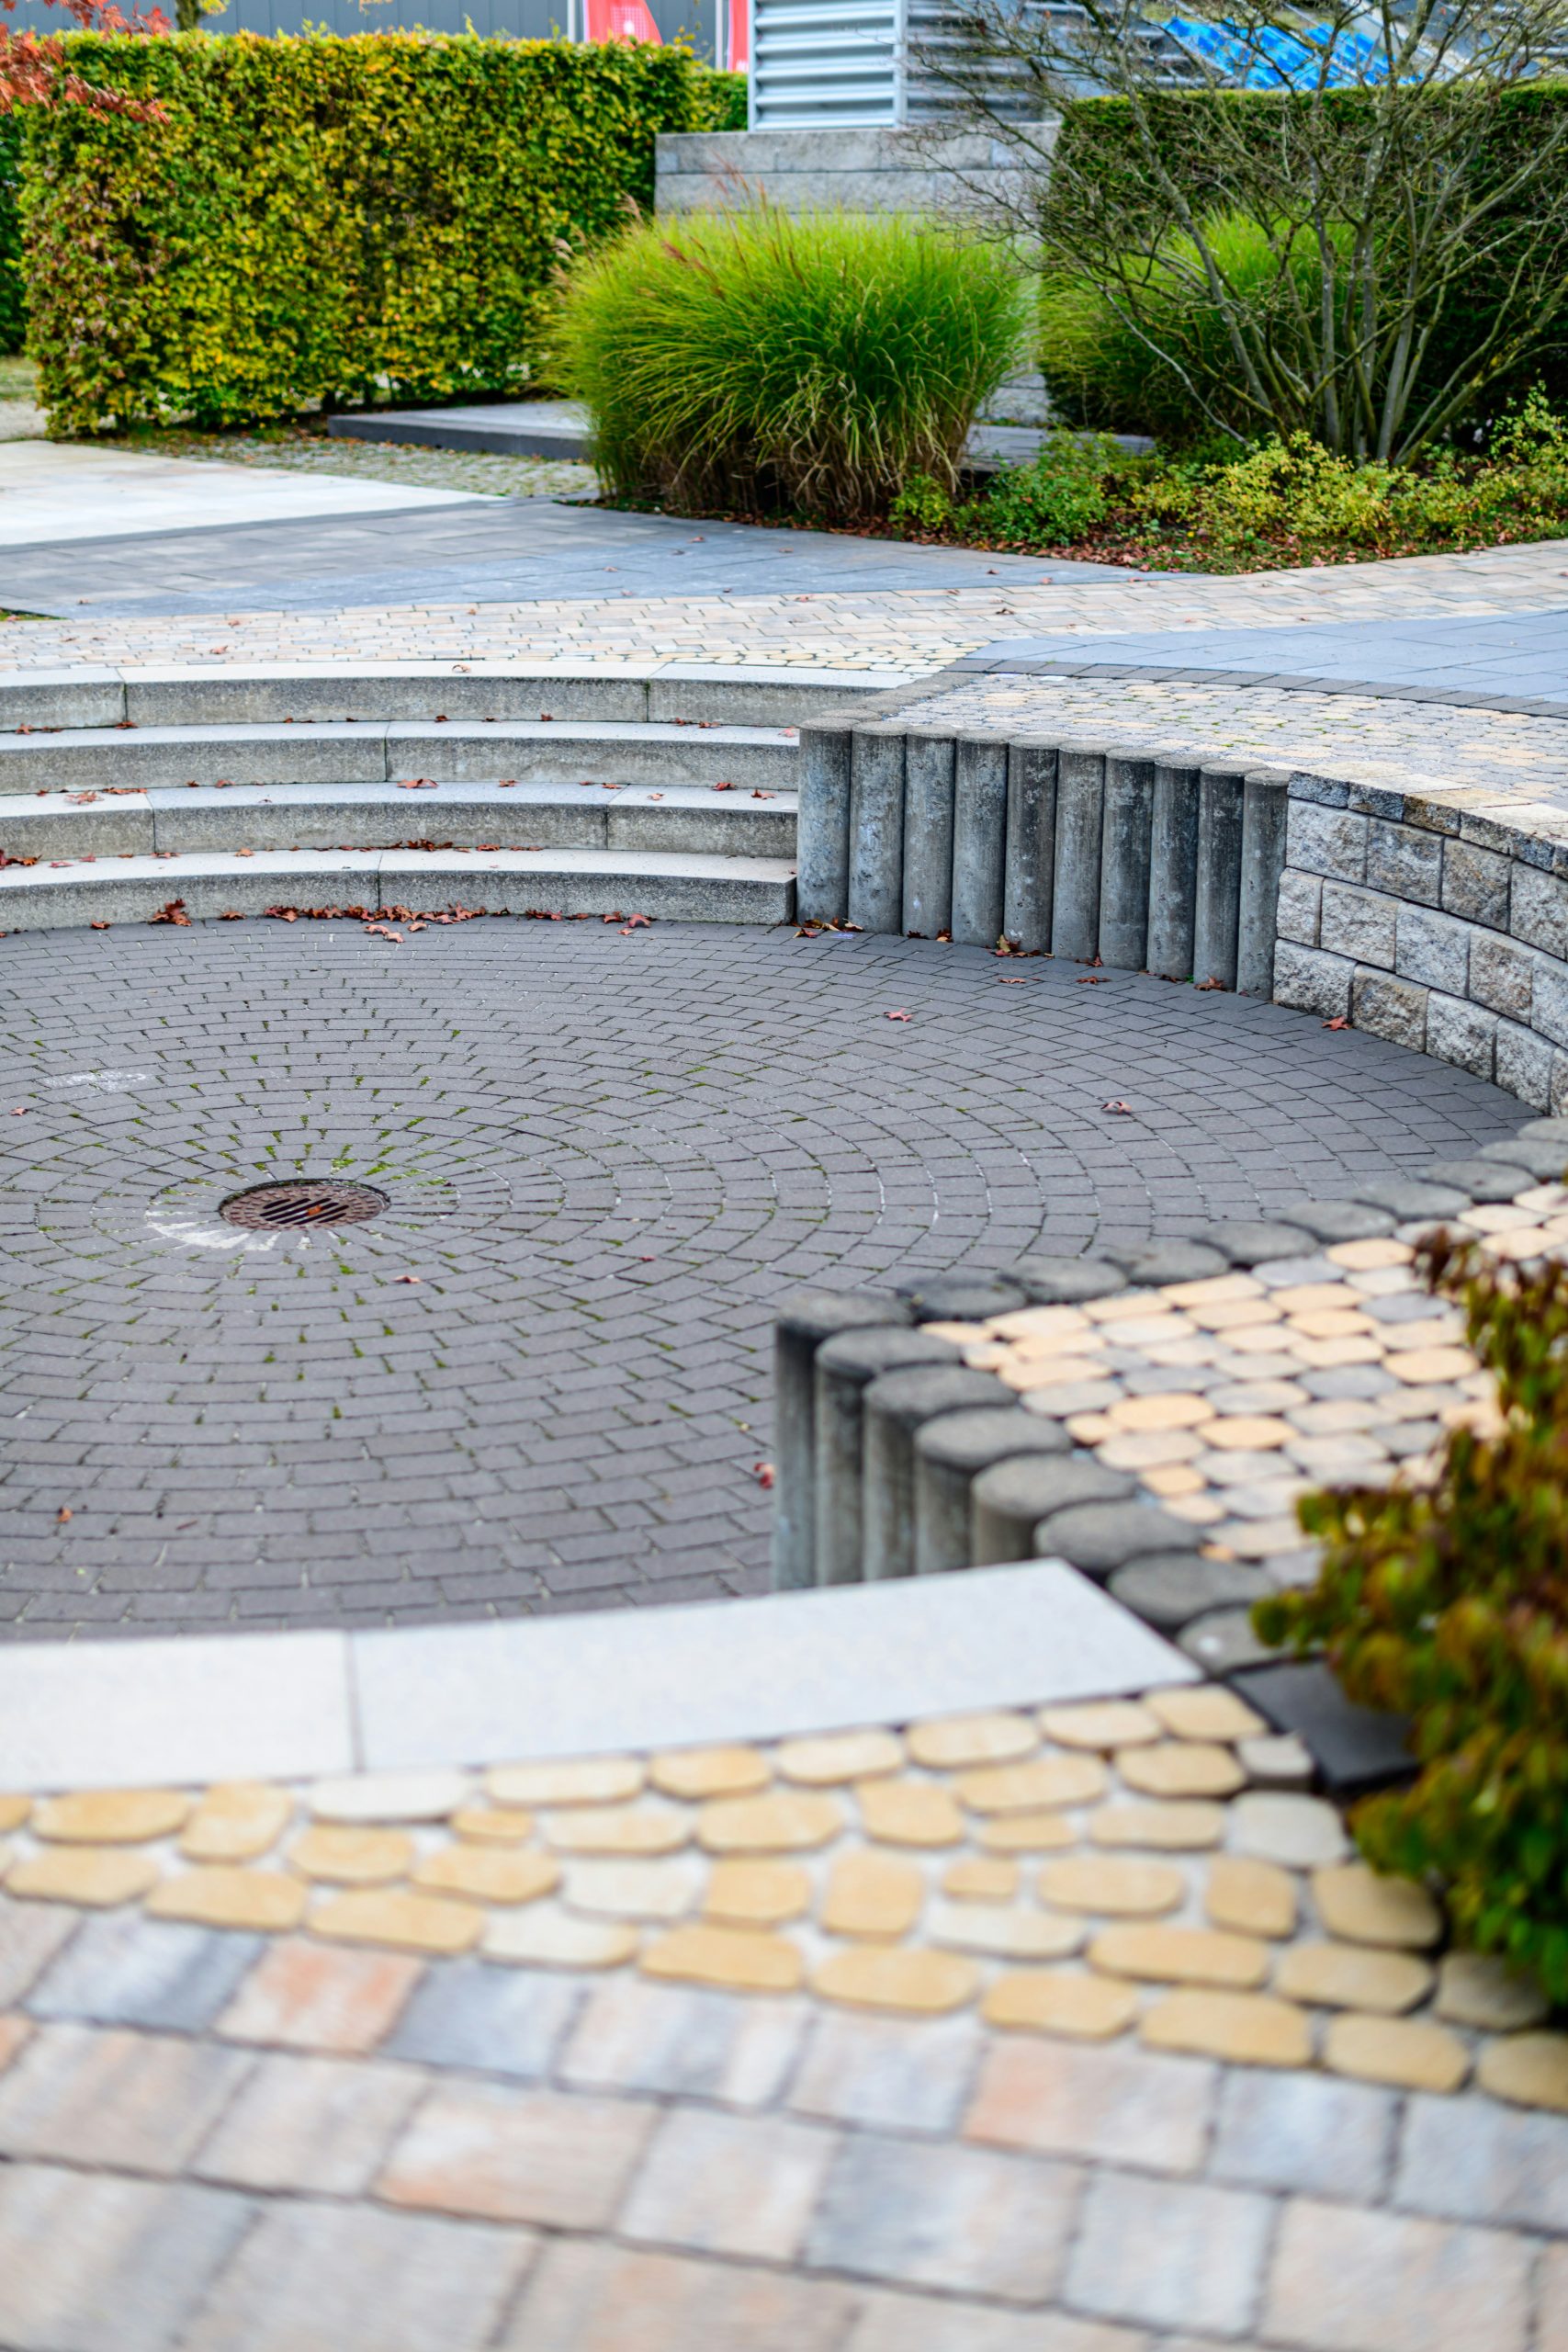
The most critical element in a sunken patio is drainage. By definition, you are creating a low point where water will naturally collect. A central drain, as seen in this design, is not optional—it is absolutely essential. This drain must be connected to a pipe that carries water away from the patio to a lower point in the yard or into a French drain system. Without proper drainage, your beautiful sunken patio will become a shallow pond every time it rains, leading to shifting pavers, mildew, and endless frustration.
12. Anchor a Circular Patio with a Stone Fire Pit and Red Chairs
Love this classic fire pit scene but not the price tag of a full paver installation? You can get this look for a fraction of the cost. Start with a simple 12-foot diameter circle of tamped gravel or decomposed granite as your base—this will cost you less than $200. Then, hunt for a set of Adirondack chairs on Facebook Marketplace or at the end-of-season sales; you can often find them for $50-75 each. A simple, affordable metal fire bowl ($100 at Target or Walmart) can stand in for the pricier stone-clad version, giving you the same cozy vibe for under $500 total.
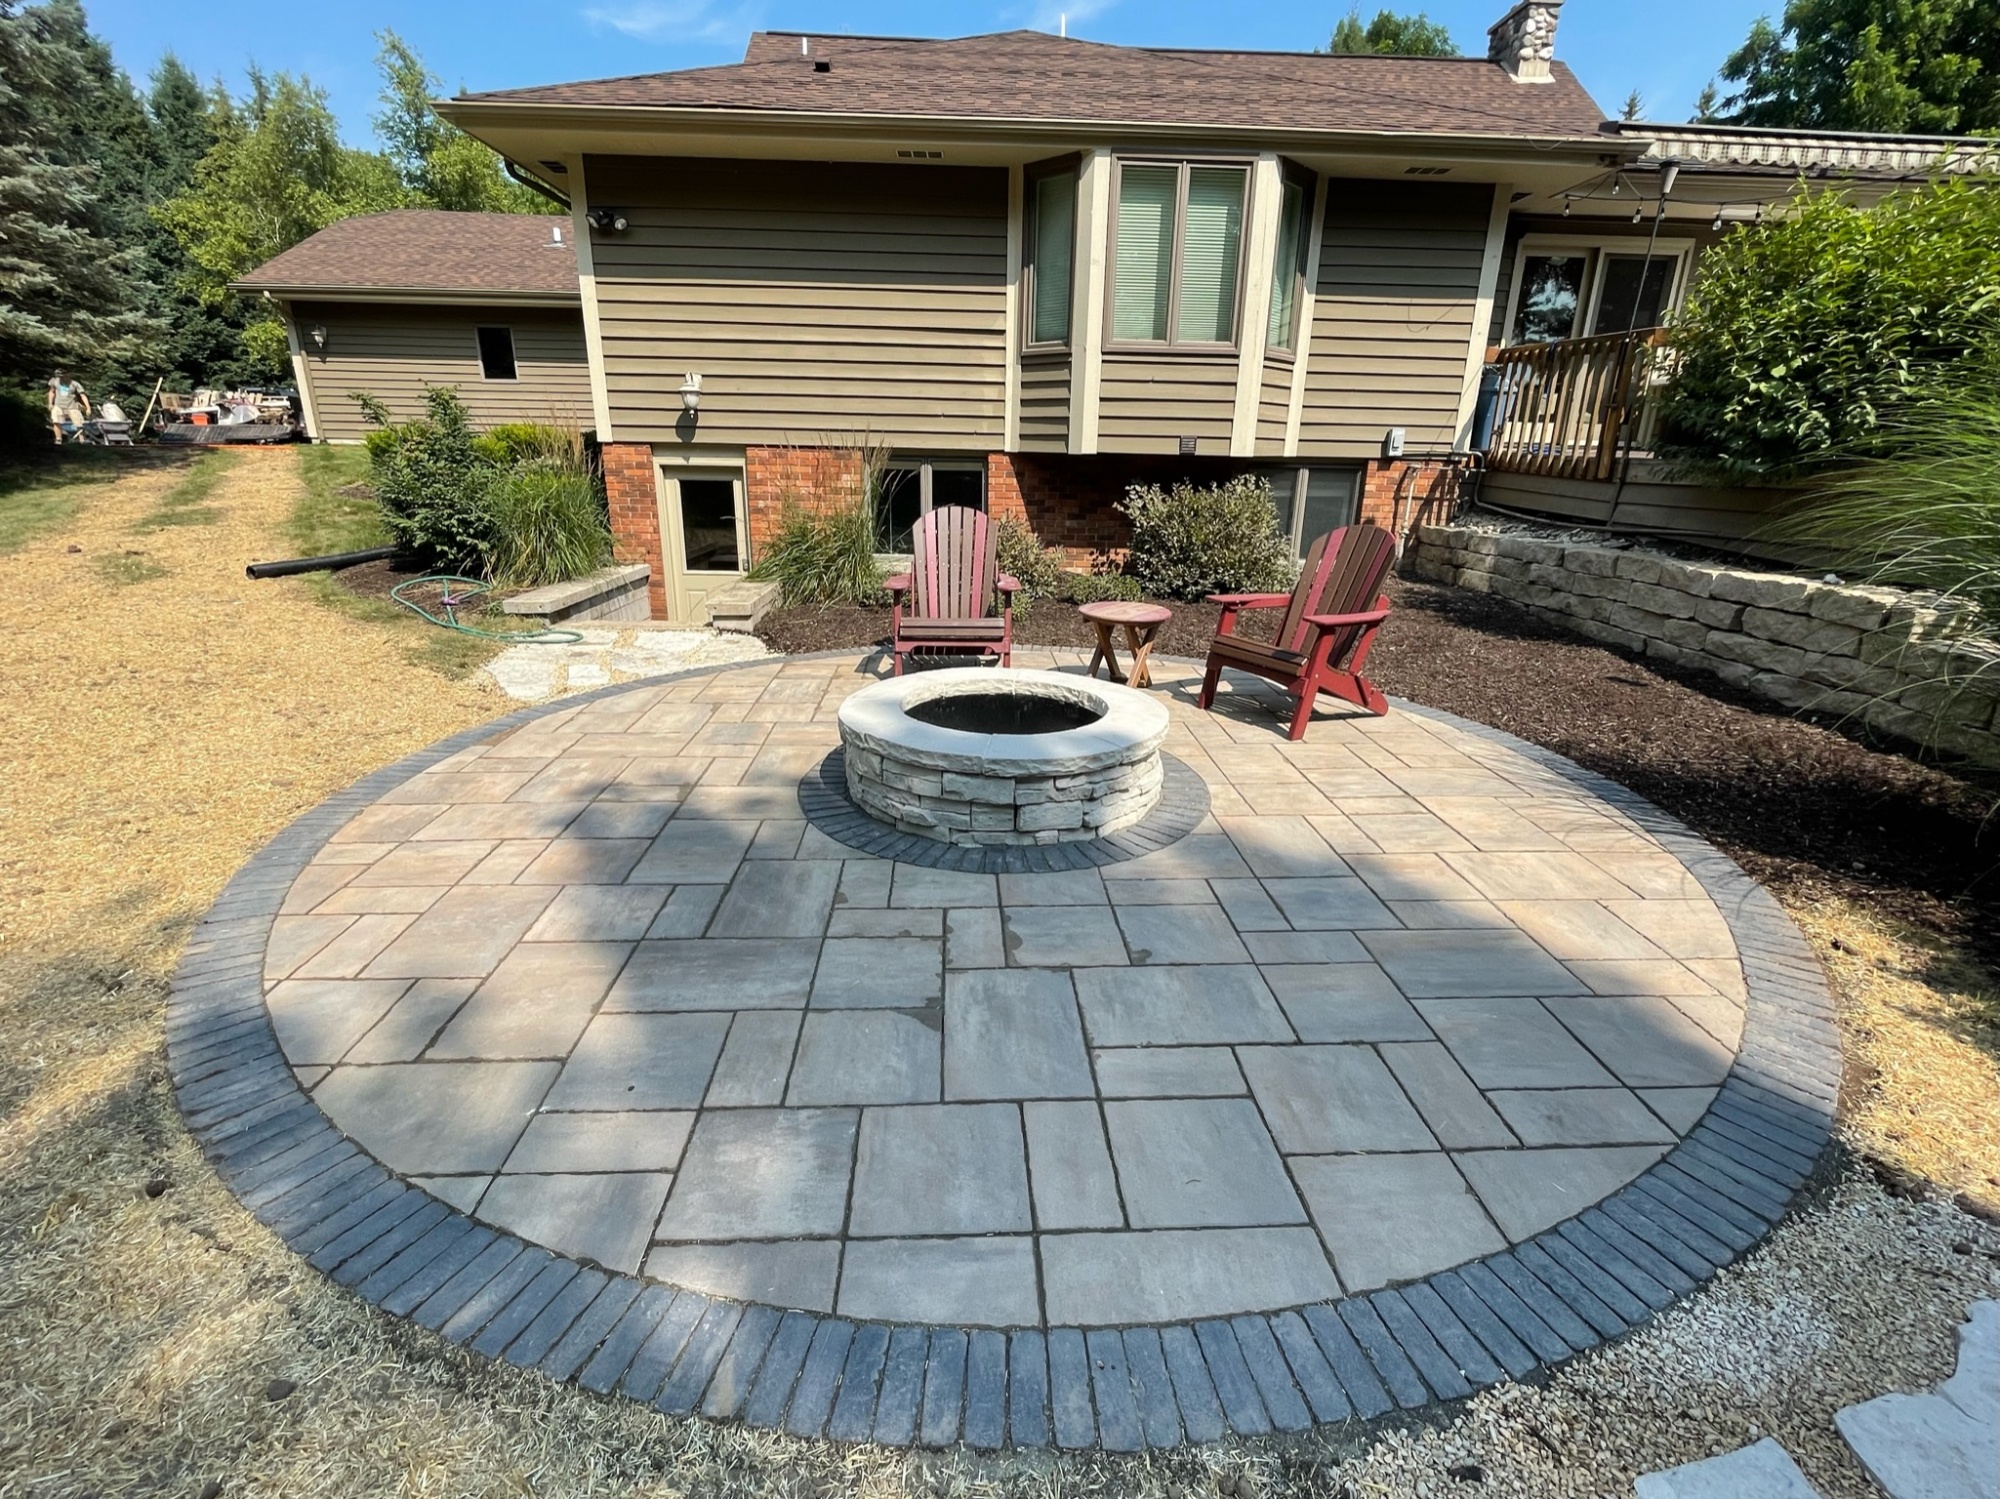
Those weathered red Adirondack chairs are the heart of this design, but painted wood furniture requires upkeep. In an exposed outdoor setting, you’ll need to re-paint or re-seal them every 2-3 years to protect the wood from moisture and sun damage. If you don’t, the paint will start to peel and the wood can begin to rot. If that level of maintenance sounds like a drag, consider composite Adirondack chairs. They offer the same classic look and vibrant color but are made from recycled plastic, requiring only an occasional cleaning with soap and water. Compare with the blue chairs in Idea #16.
13. Lay a Multicolor Herringbone Paver Patio
The herringbone pattern is timeless for a reason: it creates a sense of movement and sophistication. What makes this particular application so successful is the use of multi-toned pavers. By mixing red-brown and gray-brown bricks, the pattern feels dynamic and textured rather than flat and monotonous. This color variation adds a layer of visual interest that complements the geometric complexity of the pattern itself. The vibrant red-leafed bush at the edge provides a final, perfect color echo, tying the whole scene together.
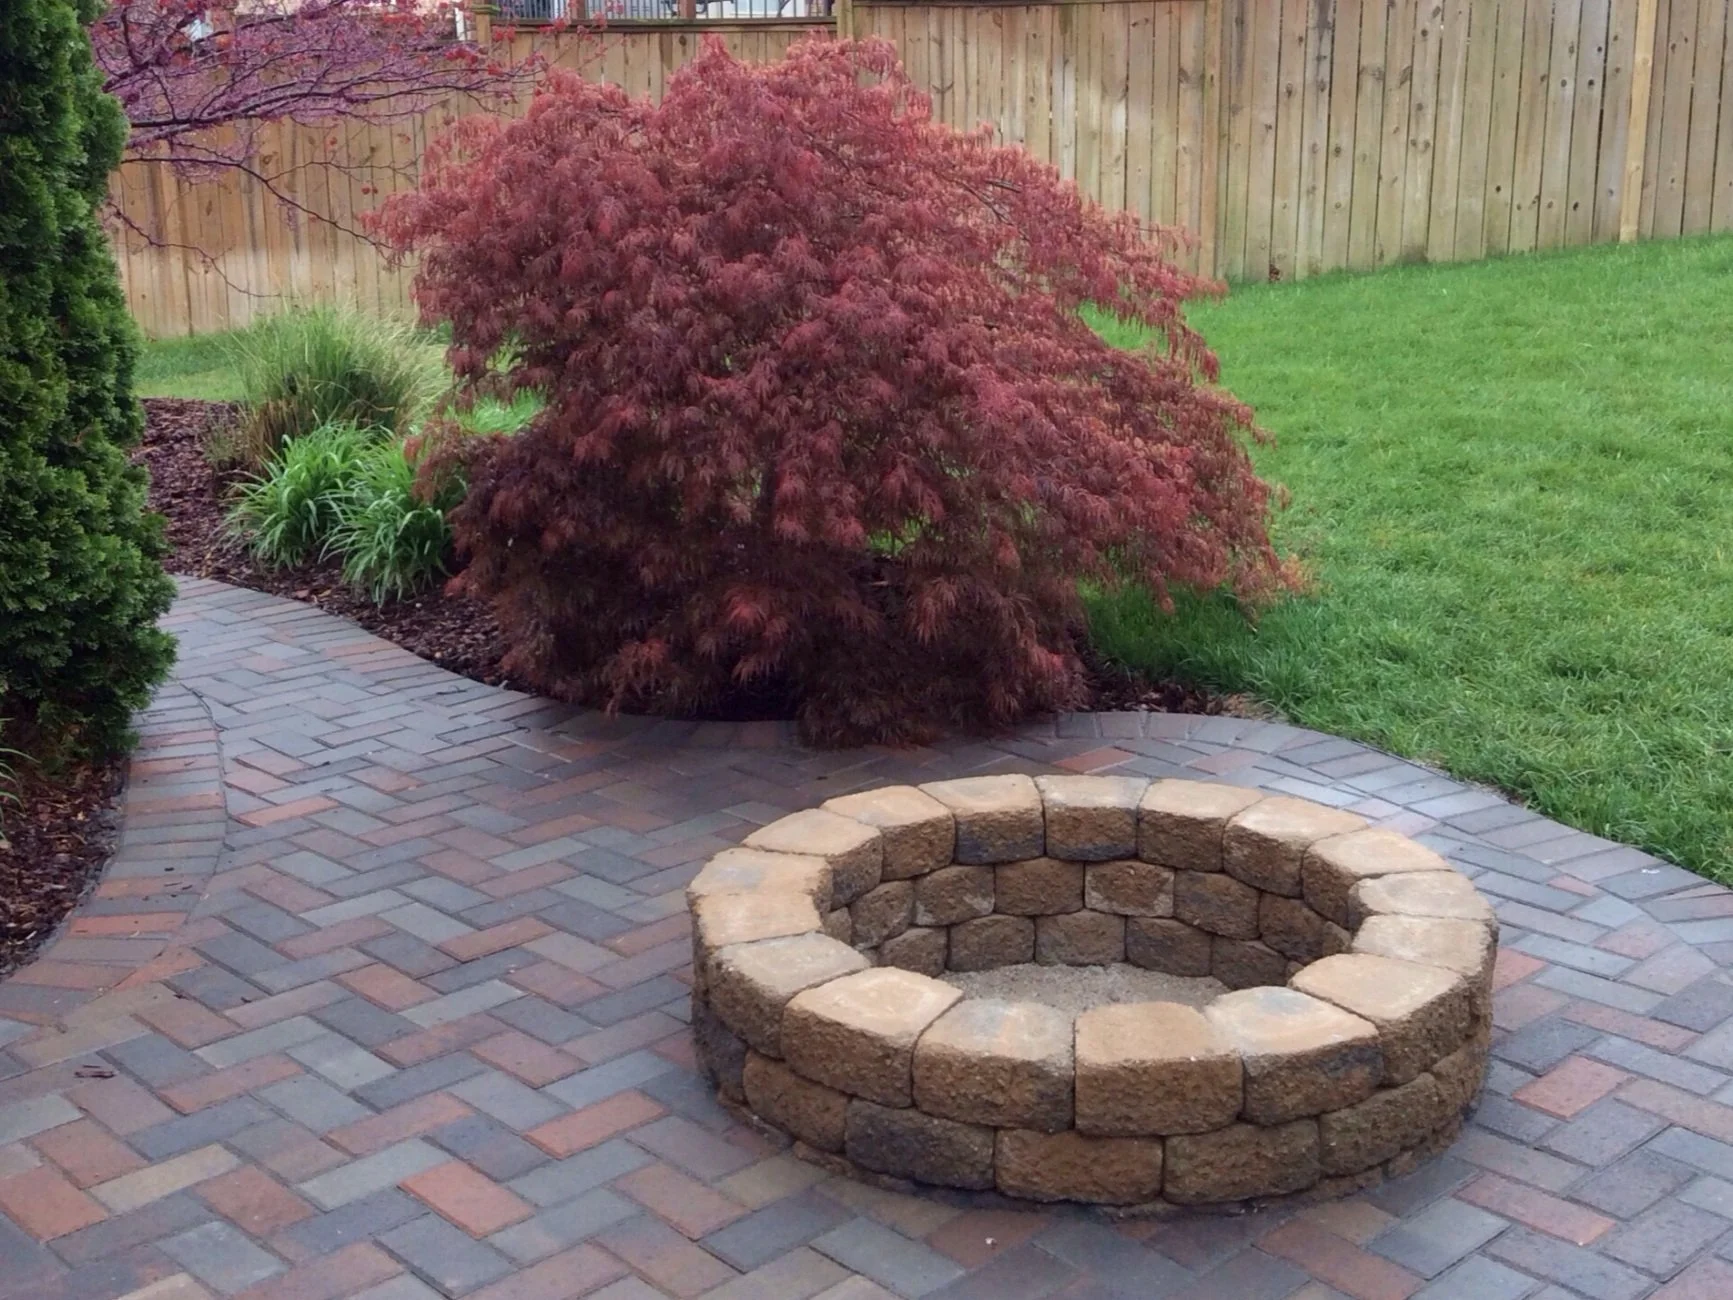
When laying a herringbone pattern, your base preparation is more critical than ever. This pattern uses many small pavers with lots of joints, making it more susceptible to shifting and settling if the base isn’t perfectly level and compacted. You’ll need at least a 4- to 6-inch deep base of compacted gravel, topped with a 1-inch layer of sand. Be sure to rent a plate compactor for this—your feet or a hand tamper won’t cut it. A solid, stable base is the only way to ensure your beautiful pattern stays put for years to come.
14. Carve Out a Nook with a Built-in Stone Bench and Flagstone Floor
The single element that transforms this patio from a simple surface to a cozy destination is the built-in stone bench. It anchors the entire space, providing a sense of permanence and enclosure that you can’t get with standalone furniture. The curve of the bench creates a natural gathering spot, physically drawing people in towards the fire pit. If you removed the bench, you’d just have a fire pit on some flagstones. With it, you have an outdoor room with integrated architecture and a much cozier feel. It’s a similar concept to the seating in Idea #16, but with a more rustic, organic execution.
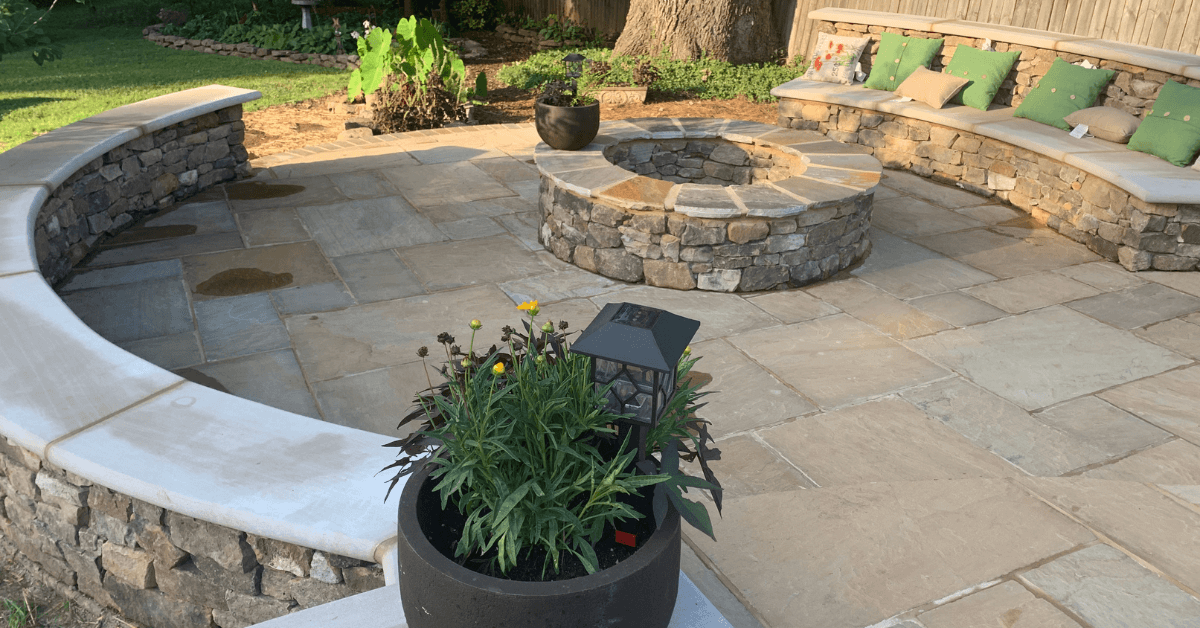
There’s a major shift in outdoor design towards creating spaces that feel as permanent and thoughtfully designed as our interiors. Built-in features like this stone bench are a huge part of that trend. People are tired of flimsy patio sets that get blown around in the wind. They want substance and structure. This kind of integrated seating, combined with natural materials like flagstone, speaks to a desire for authenticity and longevity in our home environments—we’re not just decorating our backyards, we’re building them.
15. Mix and Match Furniture on a Bluestone Paver Patio
This effortless, collected look comes from a smart mix of materials and styles. Let’s break down the formula: 50% classic, durable surfaces (the bluestone pavers and brick border), 30% comfy, modern texture (the tan wicker sofa and chairs), and 20% sleek accent pieces (the dark gray Adirondack-style rockers). The key is that while the styles are different, the color palette is tight and controlled—sticking to grays, tans, and reddish-browns. This allows you to mix a wicker sofa with a modern rocker without it looking chaotic.
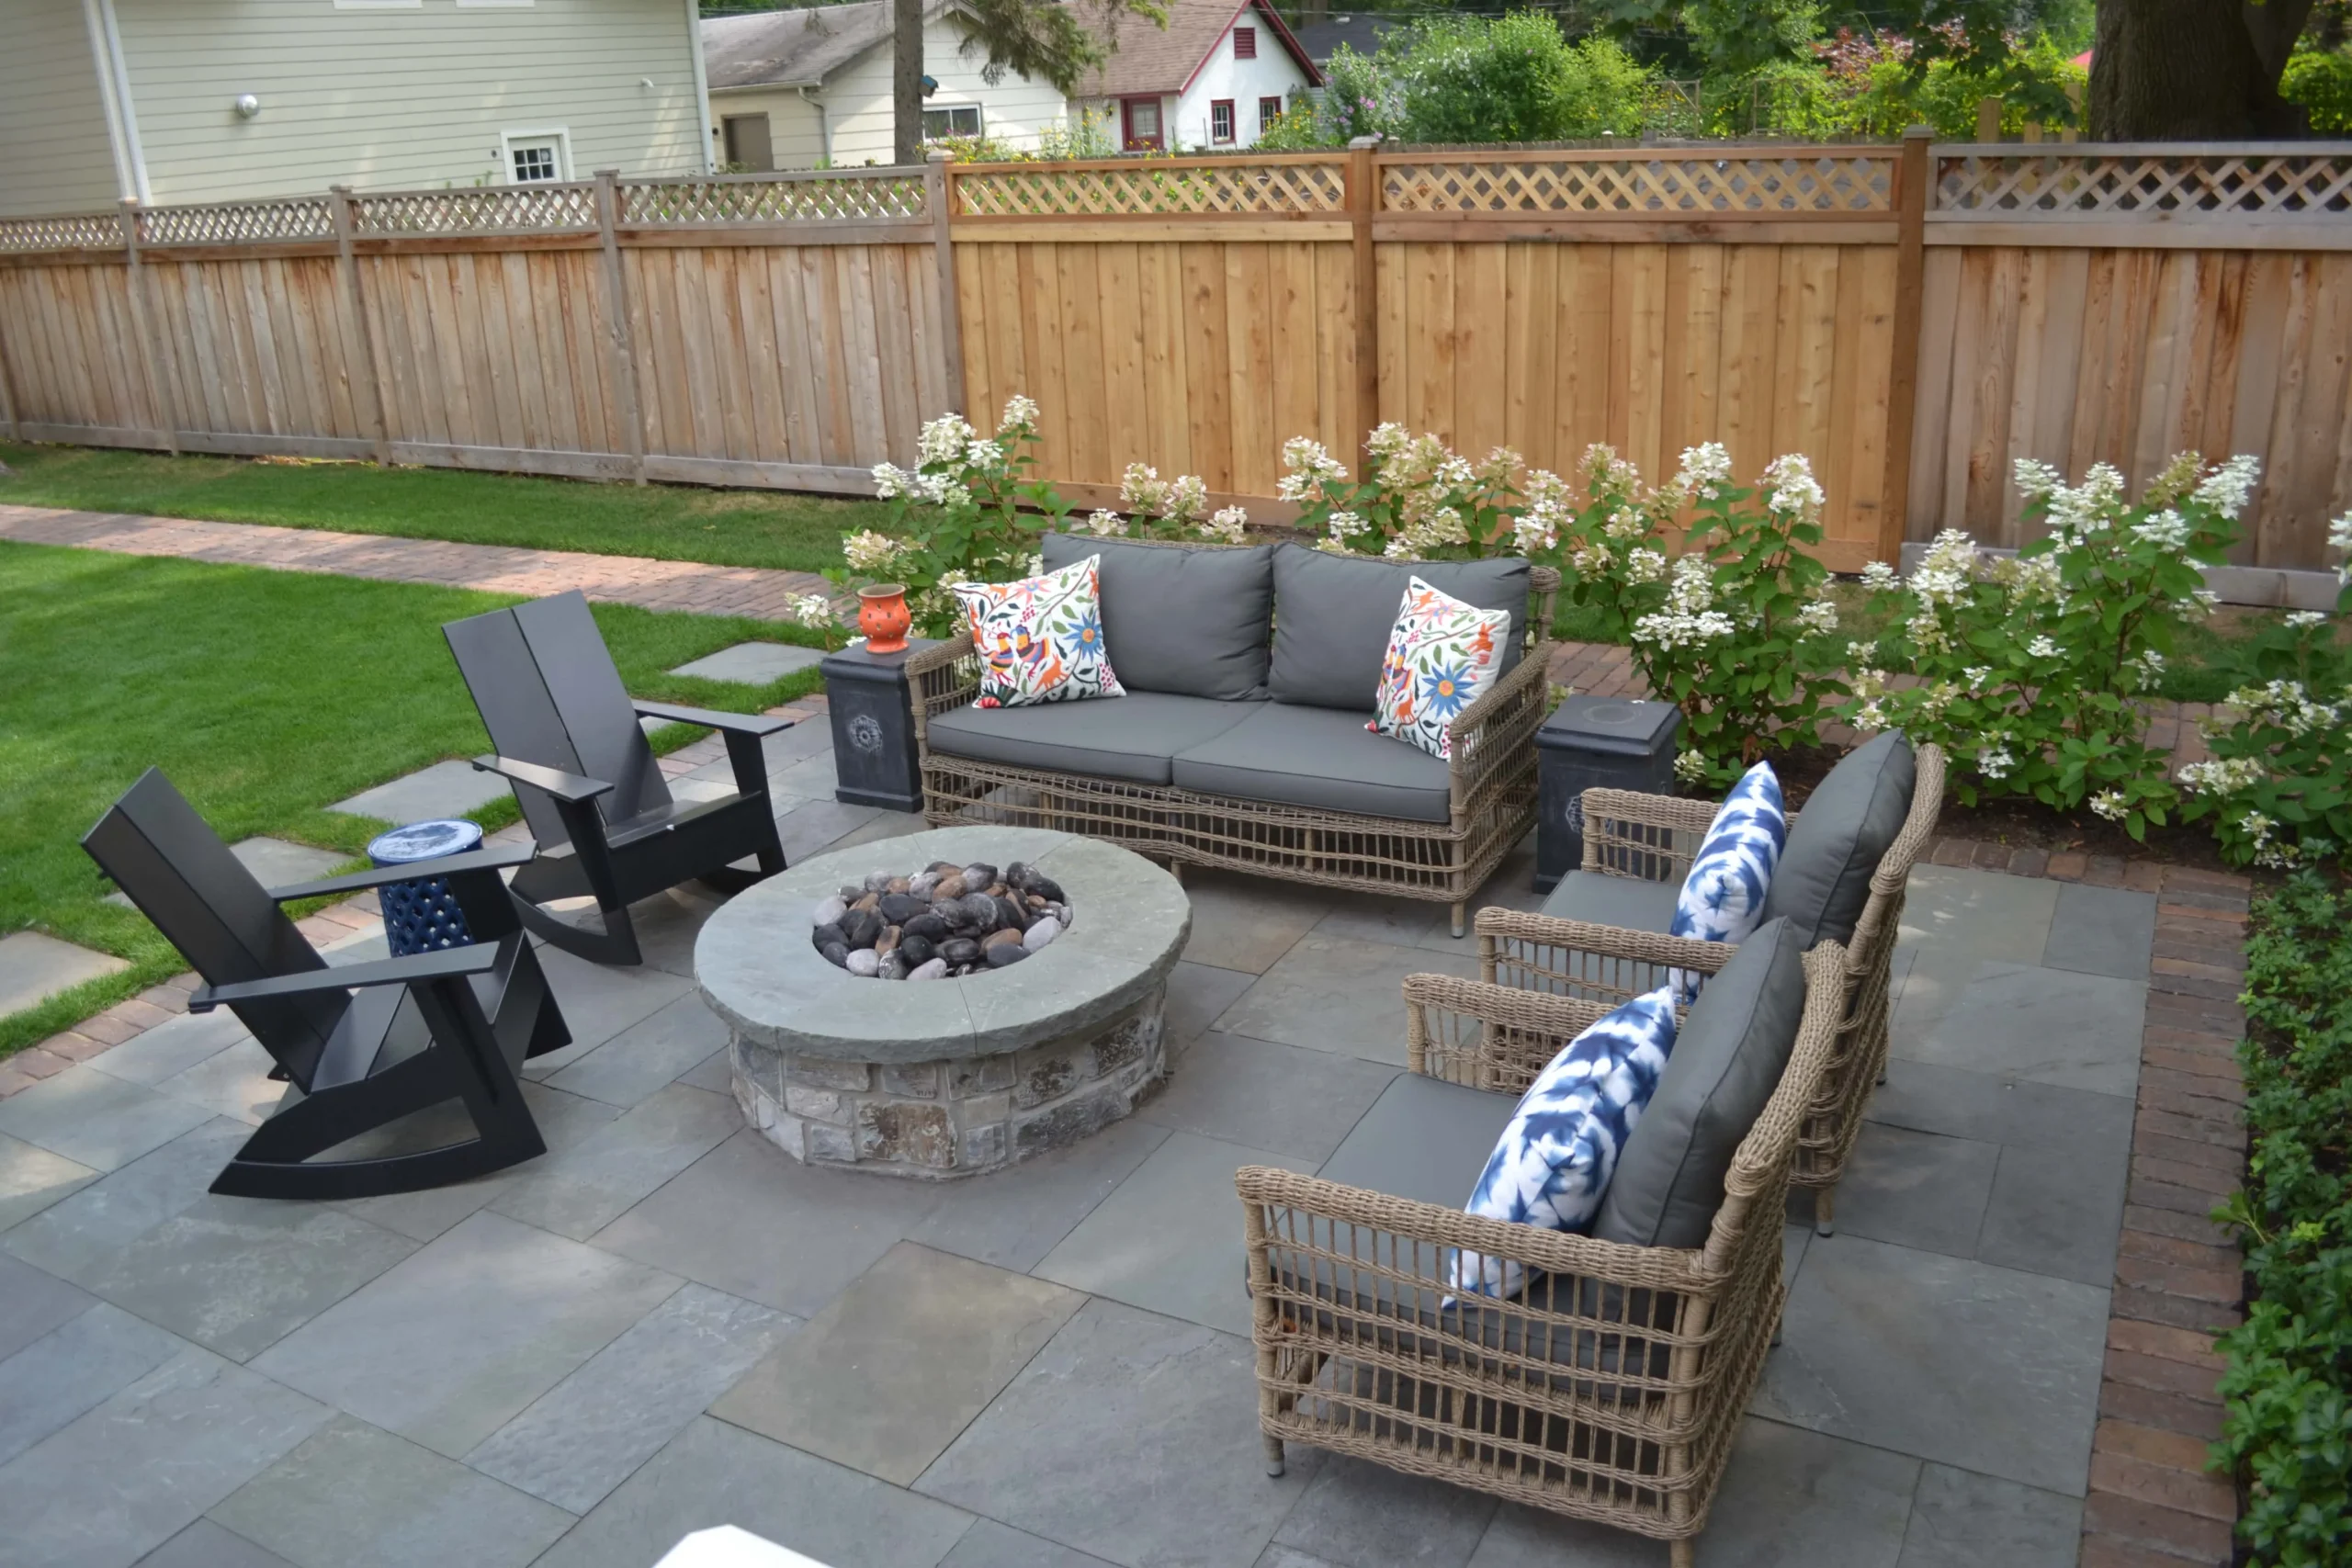
Bluestone is a stunning and classic patio material, but it has two characteristics you need to be aware of. First, it gets extremely hot in direct sunlight. On a sunny summer day, the surface can be too hot to walk on barefoot, which is a consideration if you have kids or pets. Second, its natural cleft surface, while beautiful, is not perfectly smooth. This means that tables and chairs can have a slight wobble. Using an outdoor rug under your dining or seating area can help create a more stable, level surface.
16. Circle Up with Blue Adirondack Chairs Around a Fire Pit
This design is all about the power of color and shape. The concentric rings of the paver patio draw your eye inward, directly to the central fire pit. Then, the bold, dark blue of the Adirondack chairs creates a stunning pop of cool color against the warm, earthy tones of the pavers and the flickering orange fire. This complementary color scheme (blue and orange) is naturally pleasing to the eye and makes the entire scene feel vibrant and intentional. The circular arrangement of the chairs reinforces the geometry of the patio and creates a welcoming, communal atmosphere.
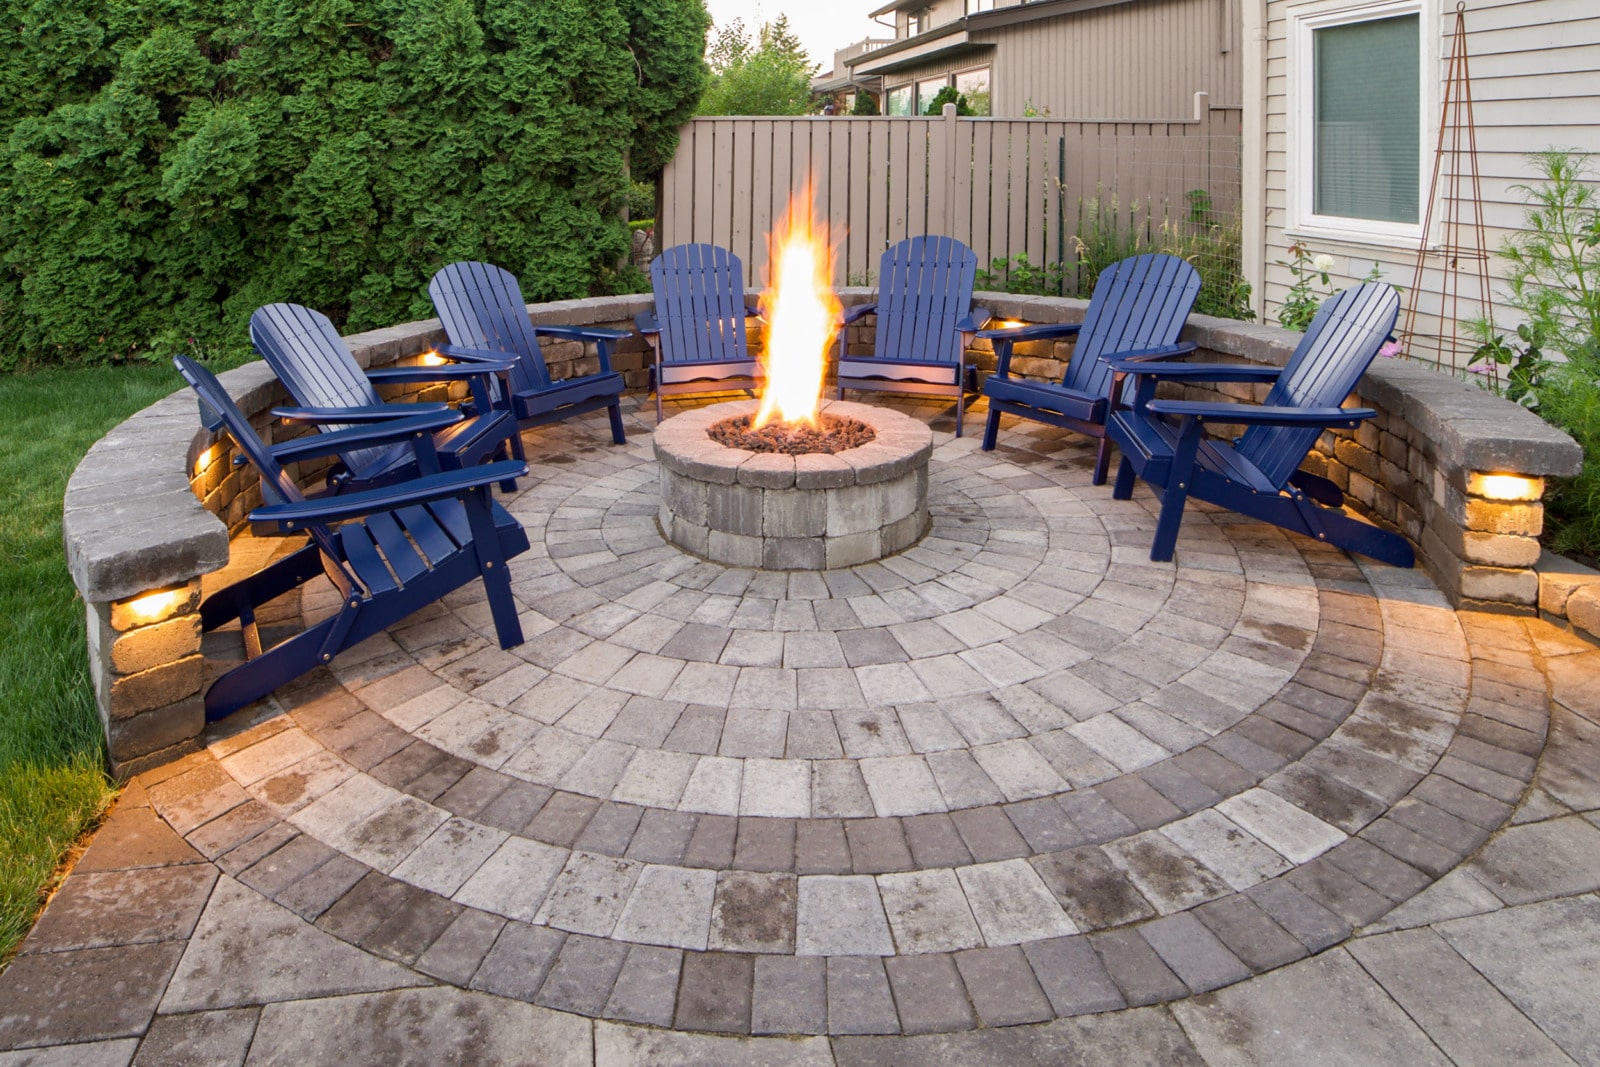
Those six blue Adirondack chairs are the undeniable heart of this entire scene. They provide a powerful dose of personality and color that elevates the patio from just a well-laid circle of stones to a stylish and inviting destination. Without that specific, saturated color, the mood would be much more subdued. The choice of blue is what gives the space its character, proving that sometimes a simple furniture choice can be the most impactful design decision you make.
17. Get Cozy with Integrated Wall Lighting and a Stone Fire Pit
To make a fire pit area feel truly luxurious, layer your lighting sources. This design smartly combines three types of light for the perfect ambiance. First, you have the primary, active light from the fire itself. Second, you have the soft, ambient glow from the integrated wall lighting, which provides a beautiful wash of light and enhances safety. Third, you have the intimate, flickering light from the decorative lanterns. This layering technique creates depth, warmth, and a dynamic atmosphere that a single light source could never achieve.
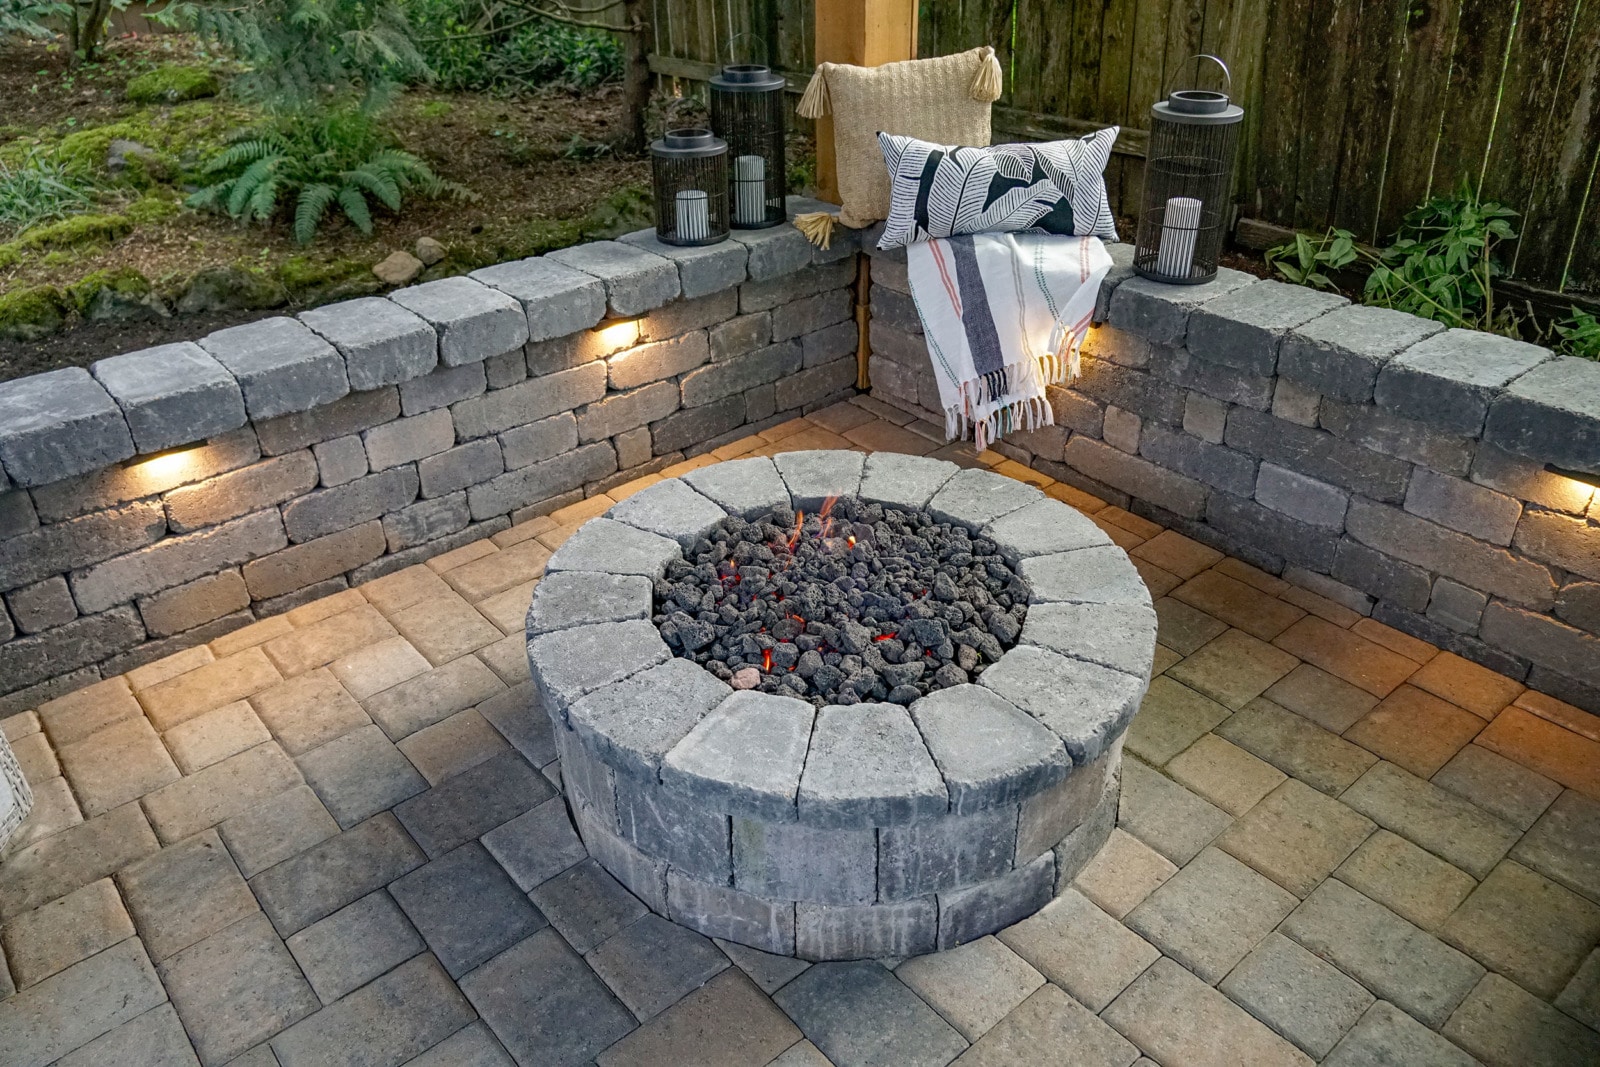
You can get this high-end, cozy vibe on a much smaller budget. Start with a basic metal fire bowl from Home Depot ($100-$150). Instead of building a full stone retaining wall, create a similar sense of enclosure by arranging a few large, statement planters ($50 each at stores like At Home or T.J. Maxx). Place solar-powered LED puck lights ($30 for a set) in the planters to uplight some foliage. Add a few affordable outdoor pillows from Target, and you’ve captured the same layered, inviting mood for less than $400.
18. Marry Classic Arches with Bold Striped Furniture
This elegant patio achieves its timeless appeal through a carefully balanced equation: 40% classic architecture (the white stucco arches), 30% rustic texture (the natural wood ceiling and flagstone floor), and 30% graphic punch (the black and white striped cushions and black metal furniture). The black and white elements are key; they act as a modern counterpoint to the more traditional architecture, keeping the whole look fresh and current rather than stuffy or dated. It’s a perfect fusion of old-world charm and modern energy.
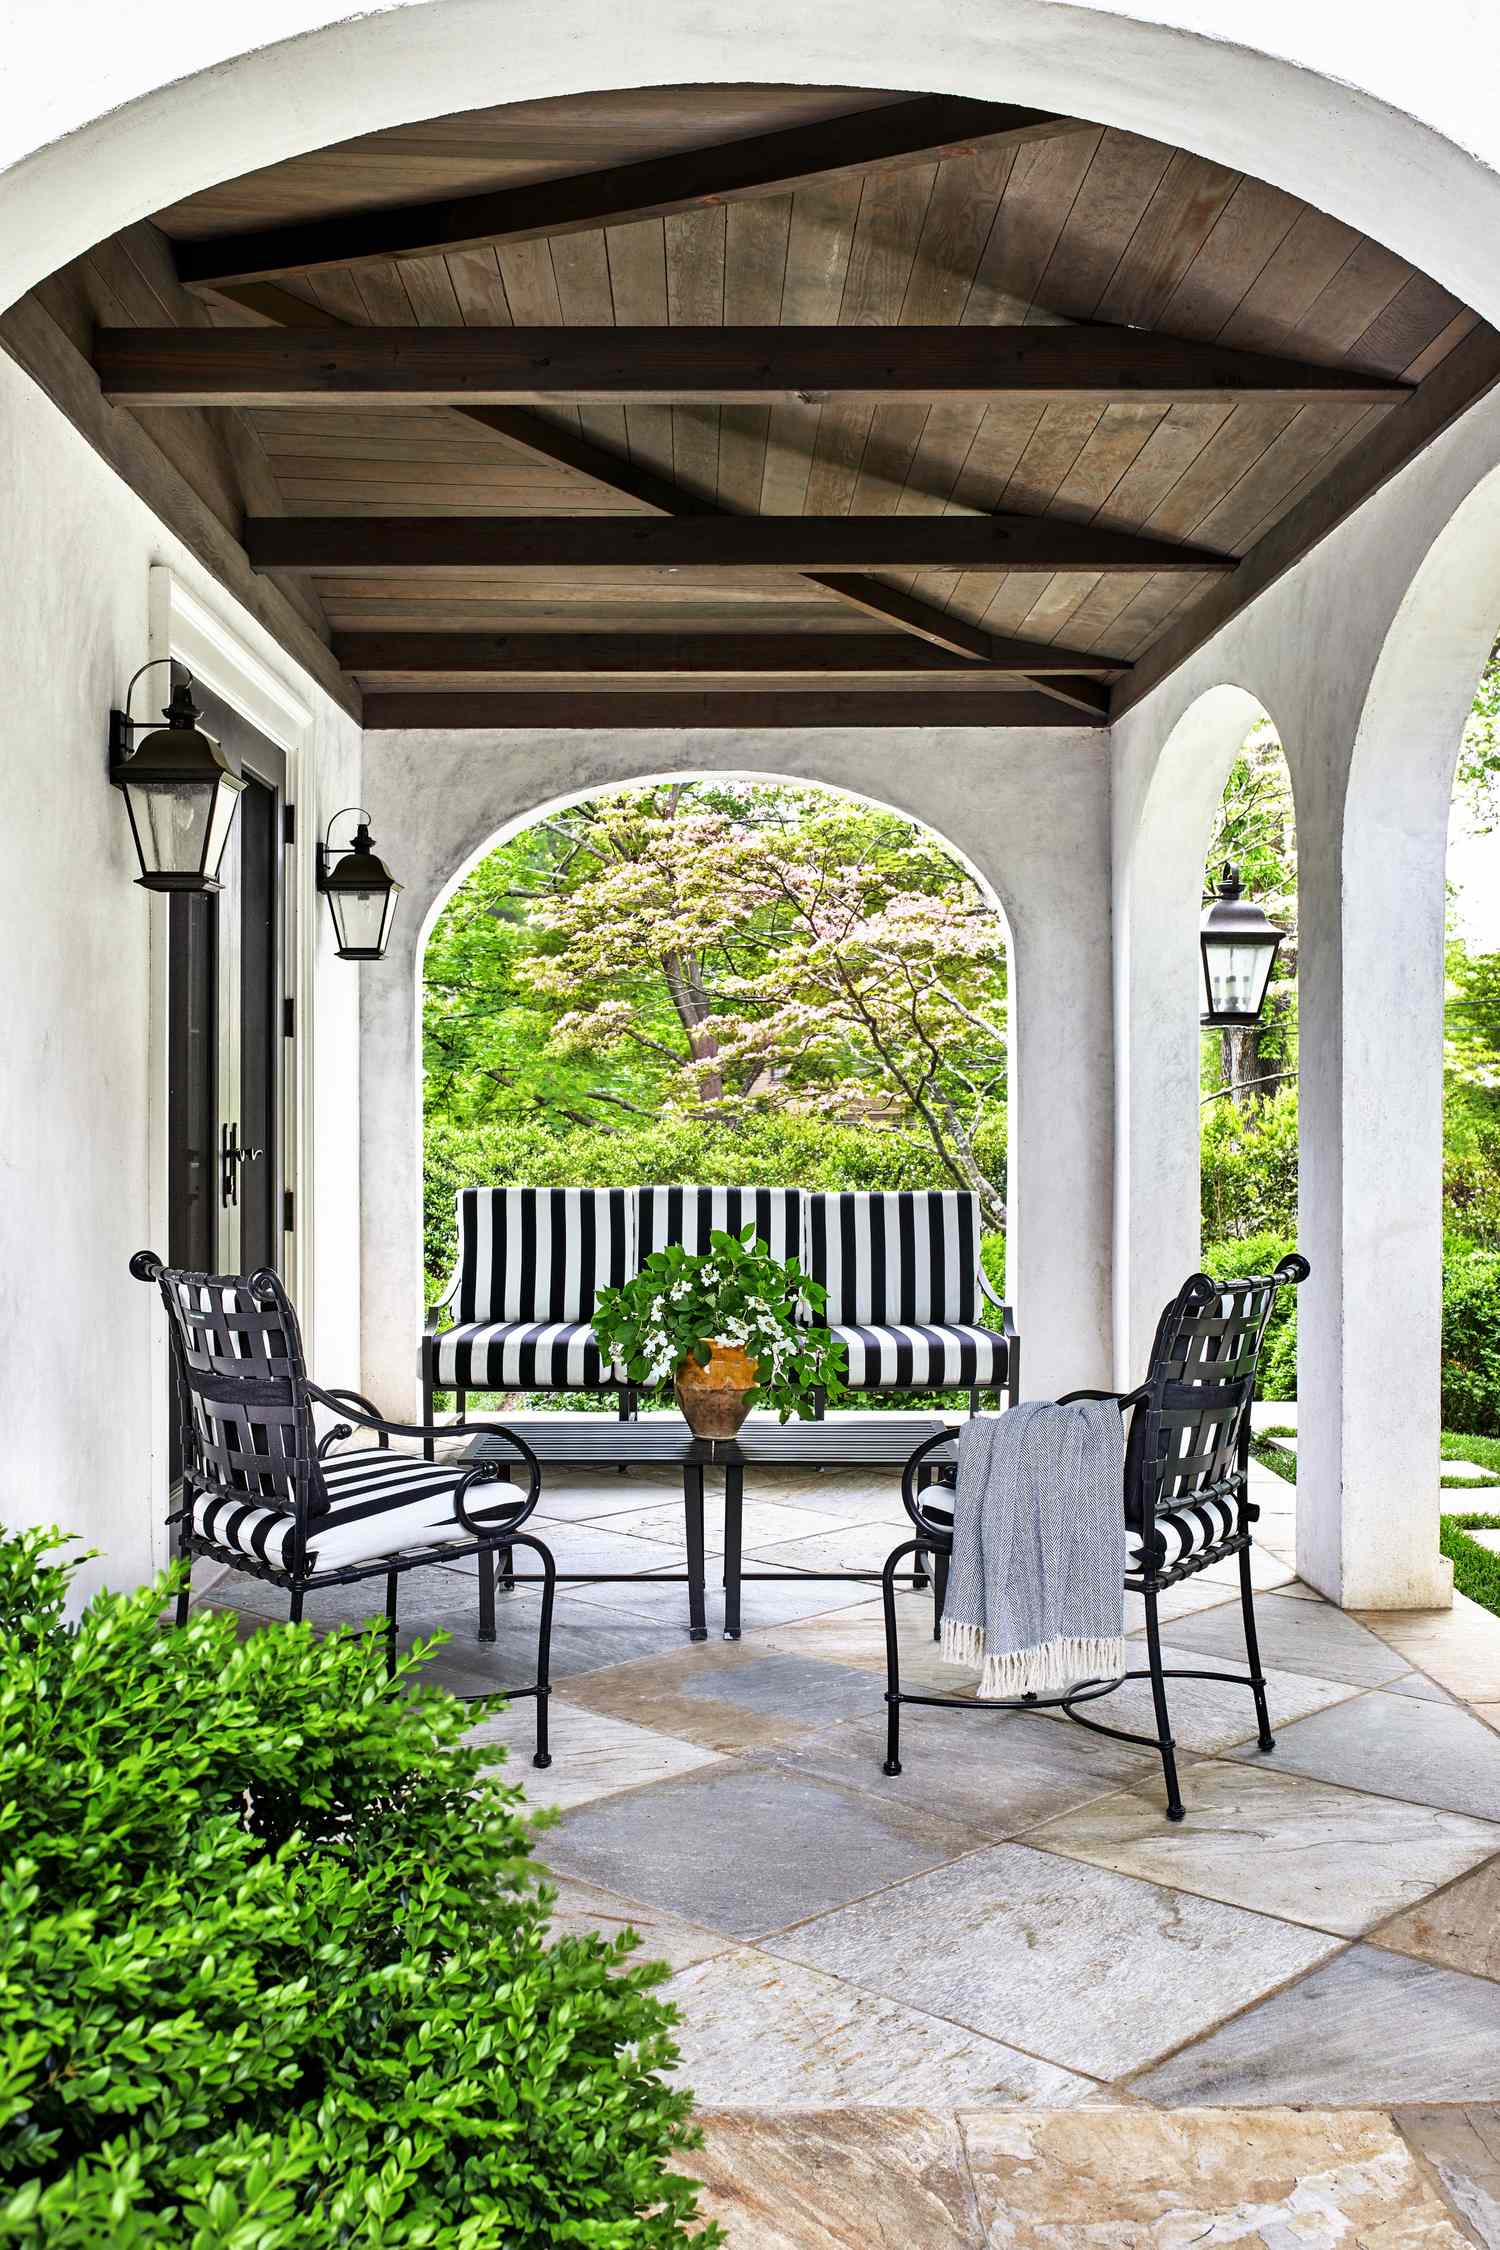
The design works because it masterfully plays with contrast. You see it in the colors (the crisp white stucco against the dark wood beams and black metal), the textures (the smooth stucco versus the rough flagstone), and the patterns (the organic shapes of the surrounding garden against the rigid geometry of the bold striped cushions). This constant interplay of opposites creates a dynamic tension that is visually exciting and incredibly sophisticated. It feels curated and designer-driven, yet comfortable and inviting.
19. Define a Modern Corner with Pavers, Gravel, and Turf
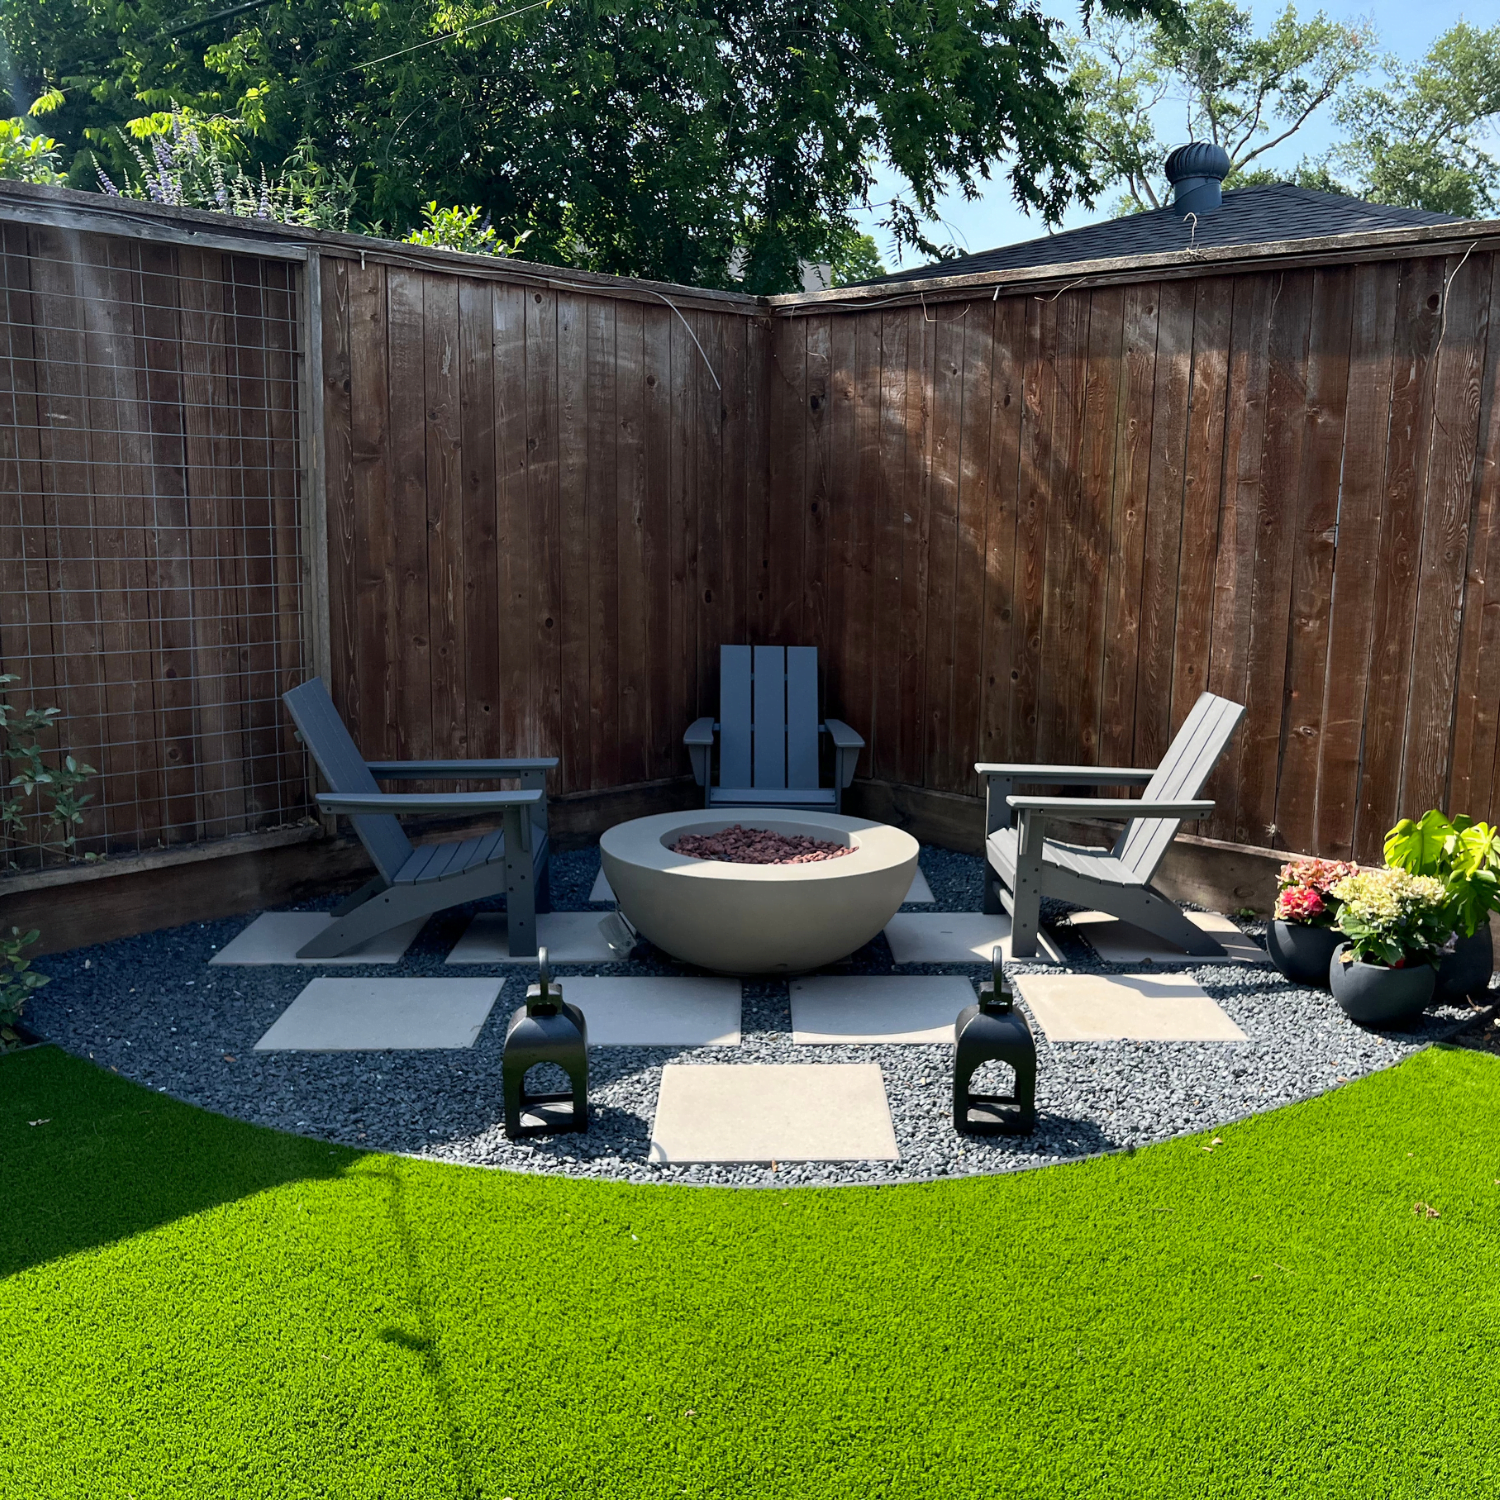
The single most important element making this modern design work is the dark grey gravel. It’s the unifying thread that ties everything together. It provides a clean, neutral ground plane that allows the other elements—the light-colored pavers, the grey chairs, the concrete fire pit—to pop. It also offers a textural contrast to the smooth pavers and the artificial turf. If you were to replace the gravel with more pavers or more turf, you would lose the sophisticated, layered effect. The gravel is the magic ingredient.
20. Create an Aged Look with Octagonal and Square Pavers
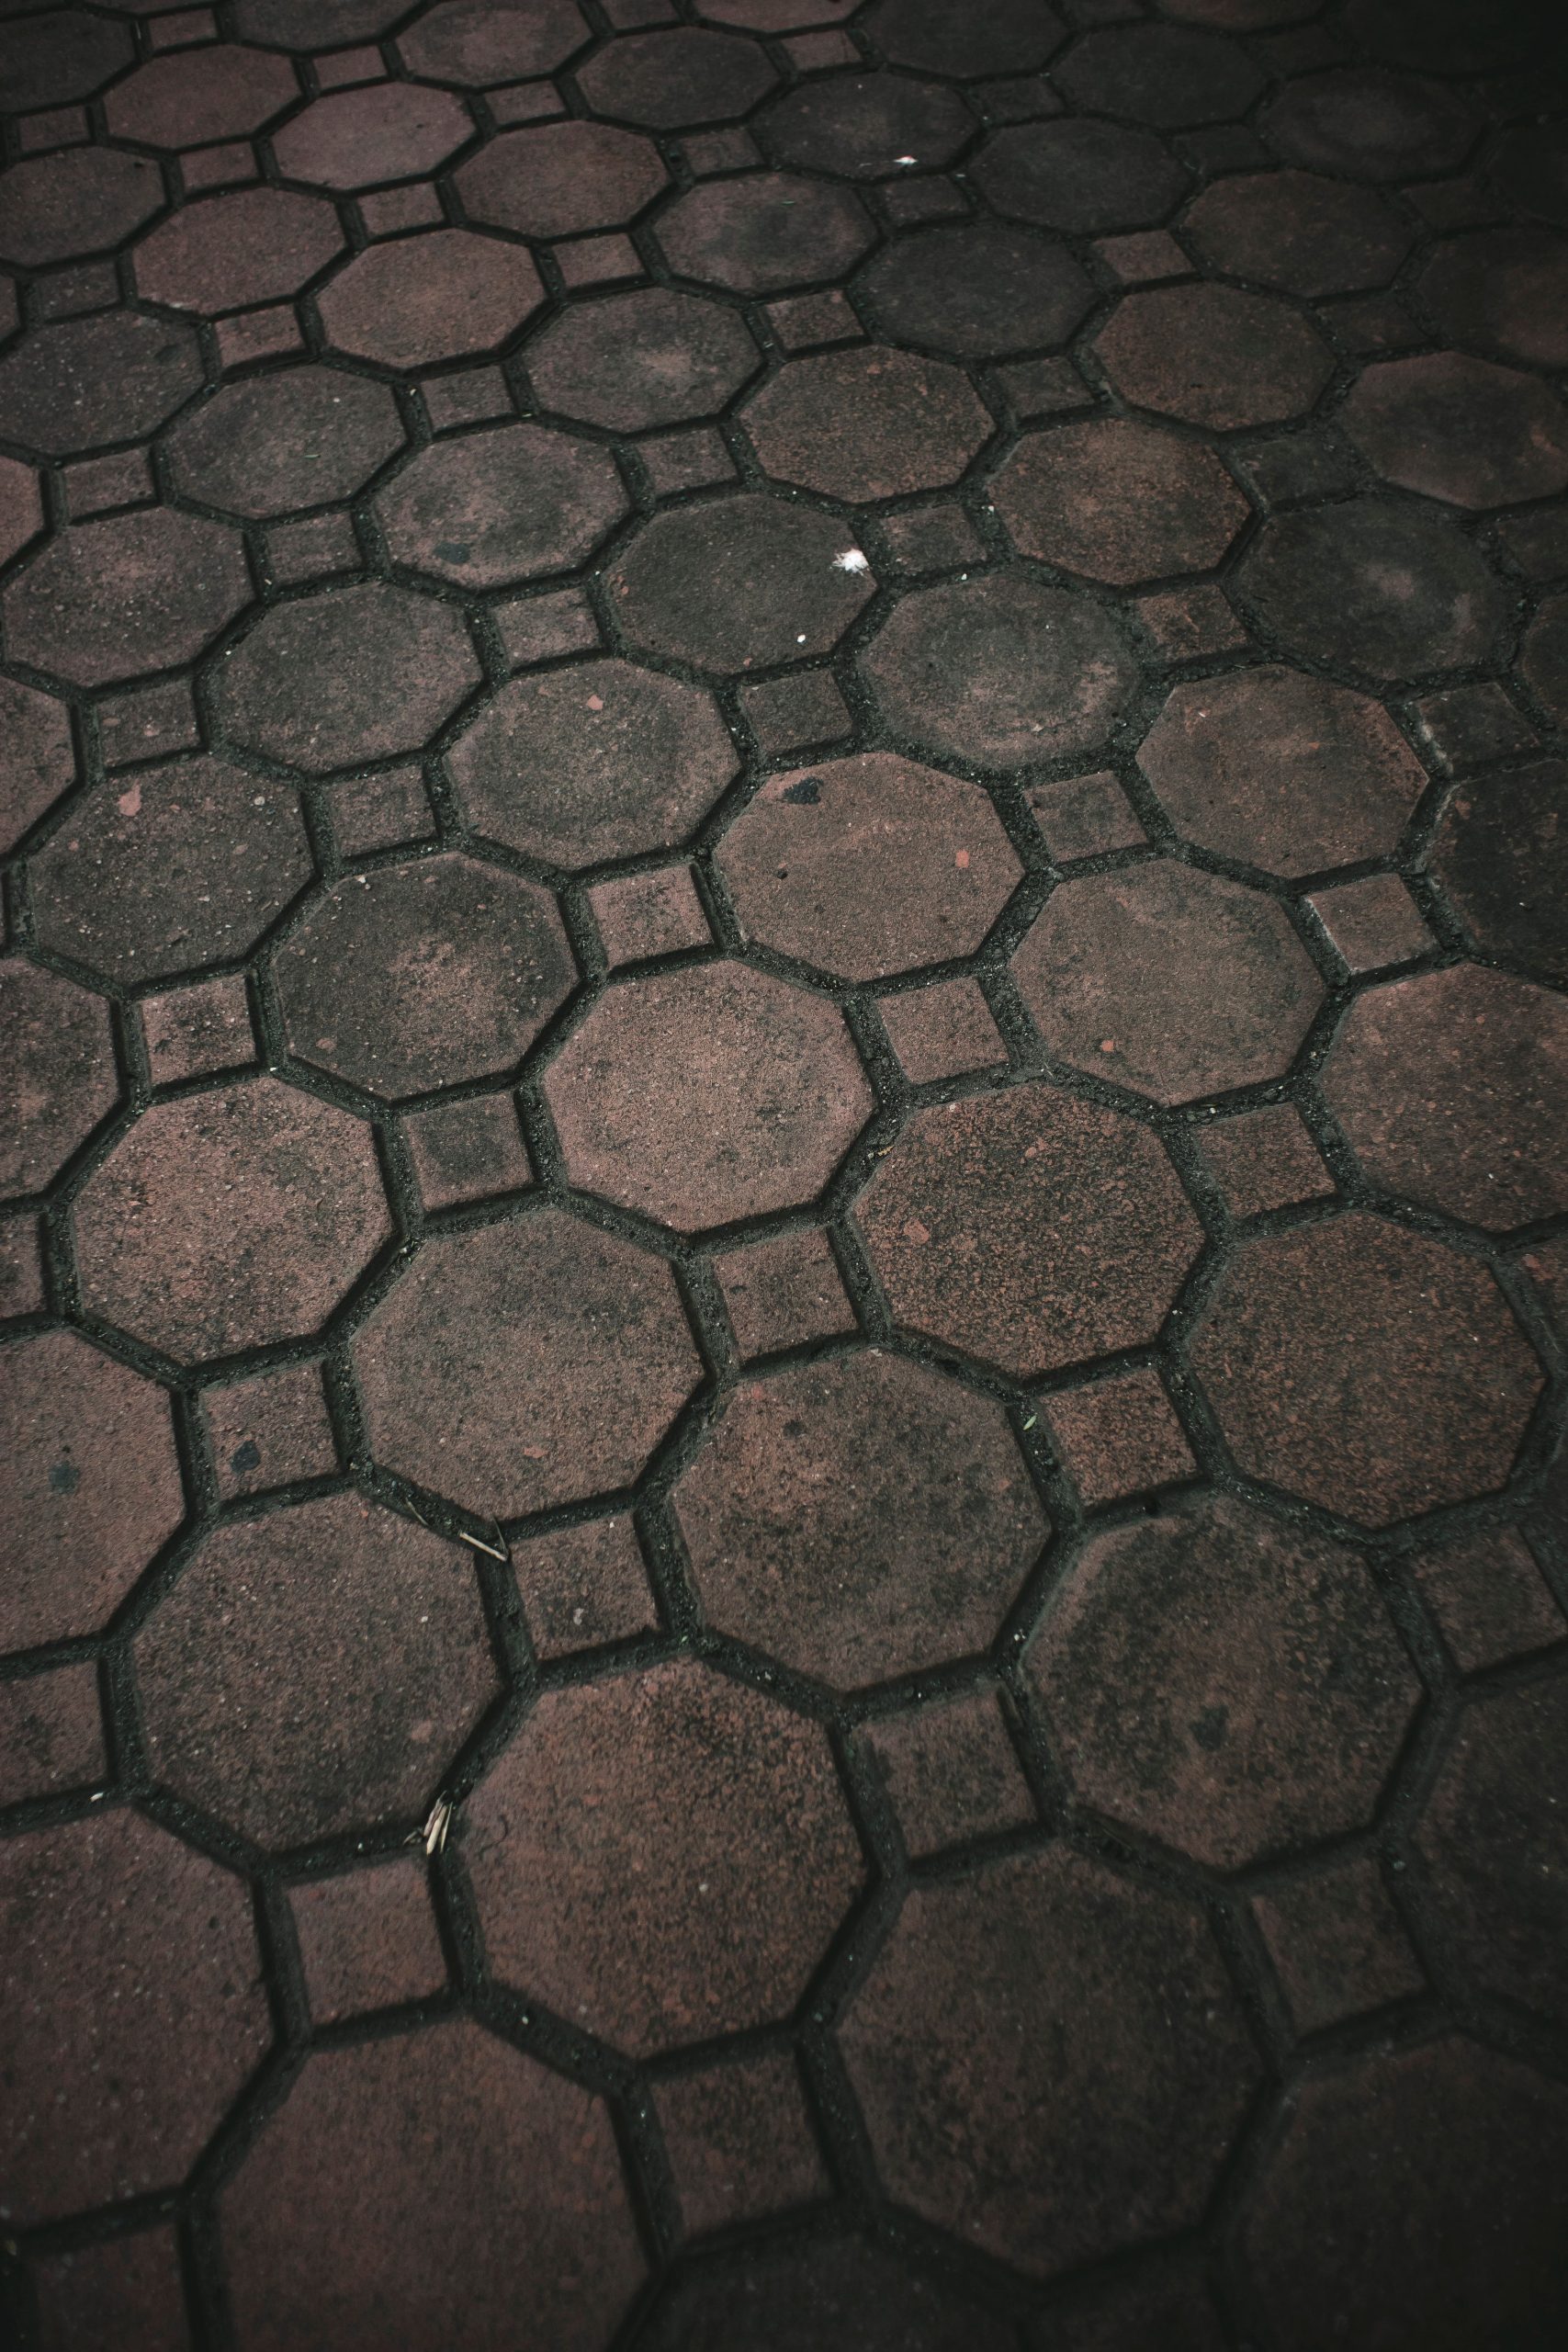
To achieve an authentic, aged look with a tessellated pattern like this, the key is to embrace imperfection during installation. When you fill the joints with sand or grout, don’t wipe them perfectly clean. Allowing a little bit of the jointing material to smudge over the paver edges softens the lines and mimics the natural settling and wear that occurs over decades. This technique, sometimes called a
21. Mix Paver Styles to Define Paths and Planting Beds
This design is visually successful because it uses different paver types to create clear visual cues and delineate function. The dark, interlocking pavers form the main, high-traffic walkway, their color and pattern signaling “this is the primary path.” The lighter, larger square pavers signal a secondary area or landing spot, while the brick wall and cobblestone-style pavers define borders. This practical use of pattern and color to guide movement and organize space is a subtle but powerful design technique. The white gnome adds a touch of whimsy that keeps it from feeling too rigid.
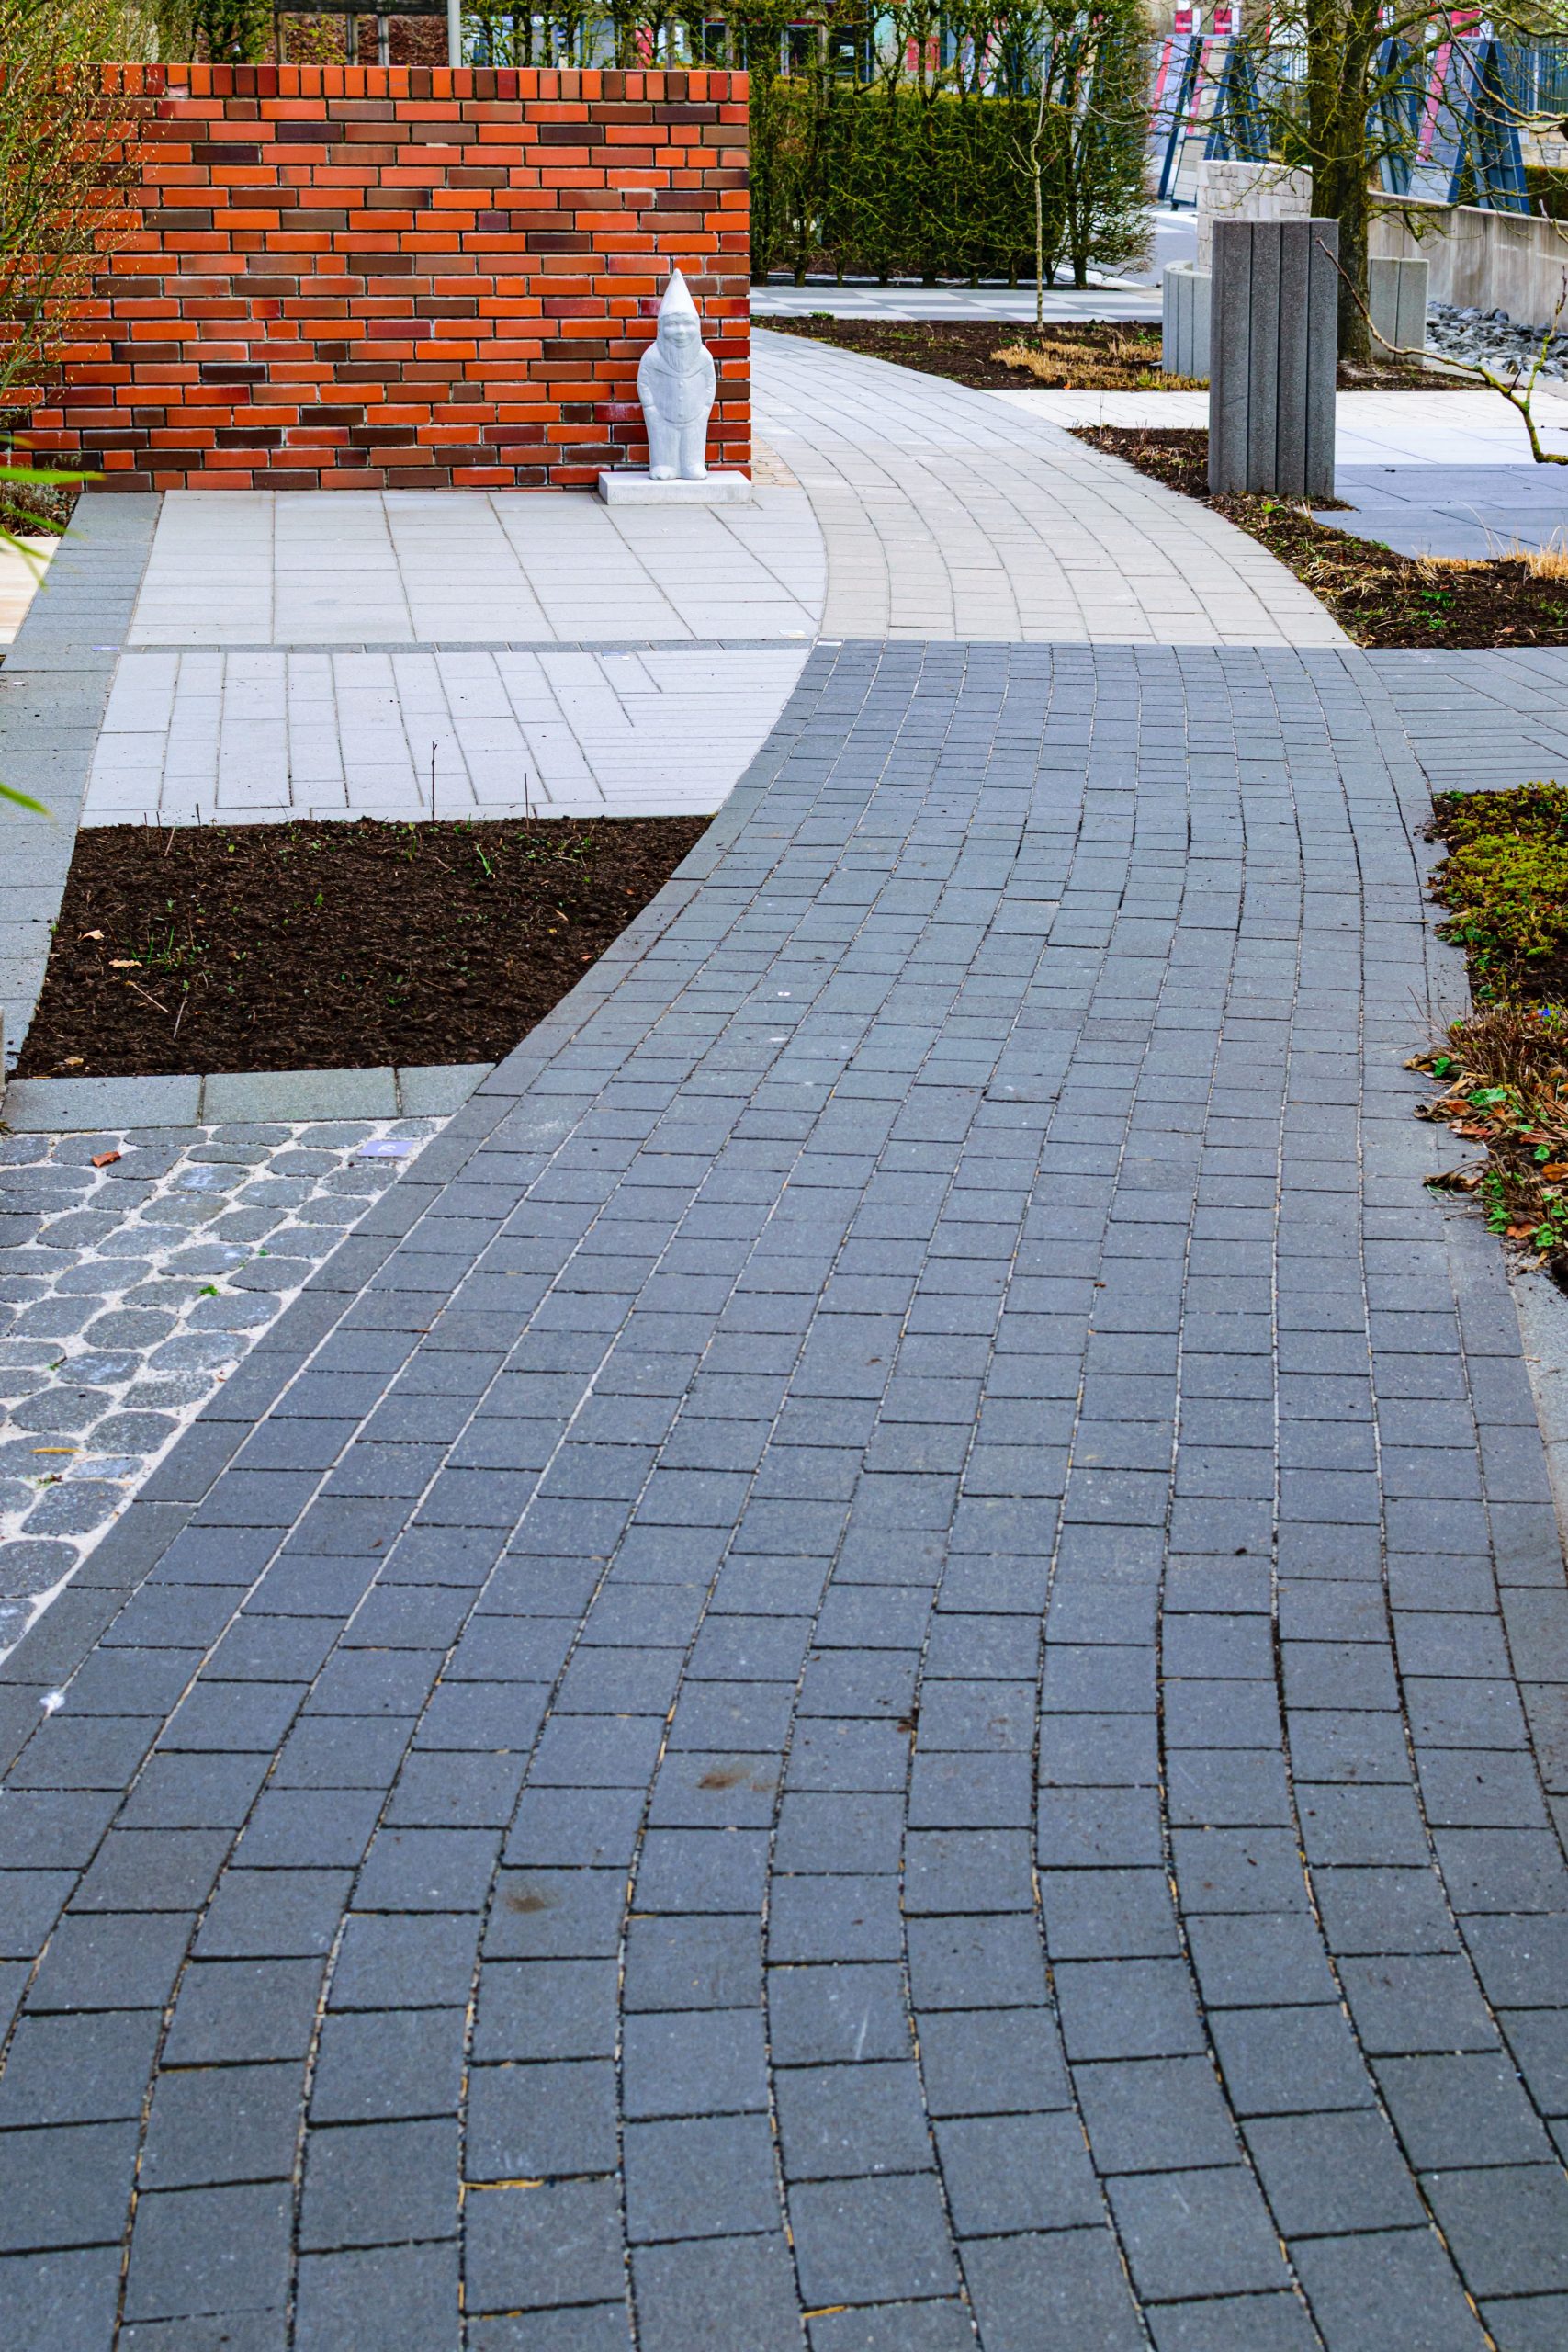
The idea of using multiple paver styles can get expensive if you’re buying small quantities of each. To get this look for less, check the clearance section at your local landscape supply yard or big-box store. You can often find odd lots or end-of-season pavers for a fraction of the original price. Since you’re intentionally mixing patterns and colors, it doesn’t matter if they don’t match perfectly. This is a great way to build a unique, custom-looking patio on a strict budget, turning clearance items into a cohesive design feature.
22. Combine a Fire Pit with a Curved Retaining Wall for Seating
This inviting design follows a simple but effective formula: 50% functional hardscape (the light-colored pavers and stone wall), 30% defined focal point (the circular fire pit and dark border), and 20% lush, natural softness (the surrounding garden beds). The curved shape of the wall seating is key; it softens the hard materials and creates a more communal, conversational space compared to a linear or L-shaped bench. The contrast between the light main pavers and the dark circular border adds a layer of custom detail, making the fire pit area feel special. For a similar but more formal look, see Idea #12.
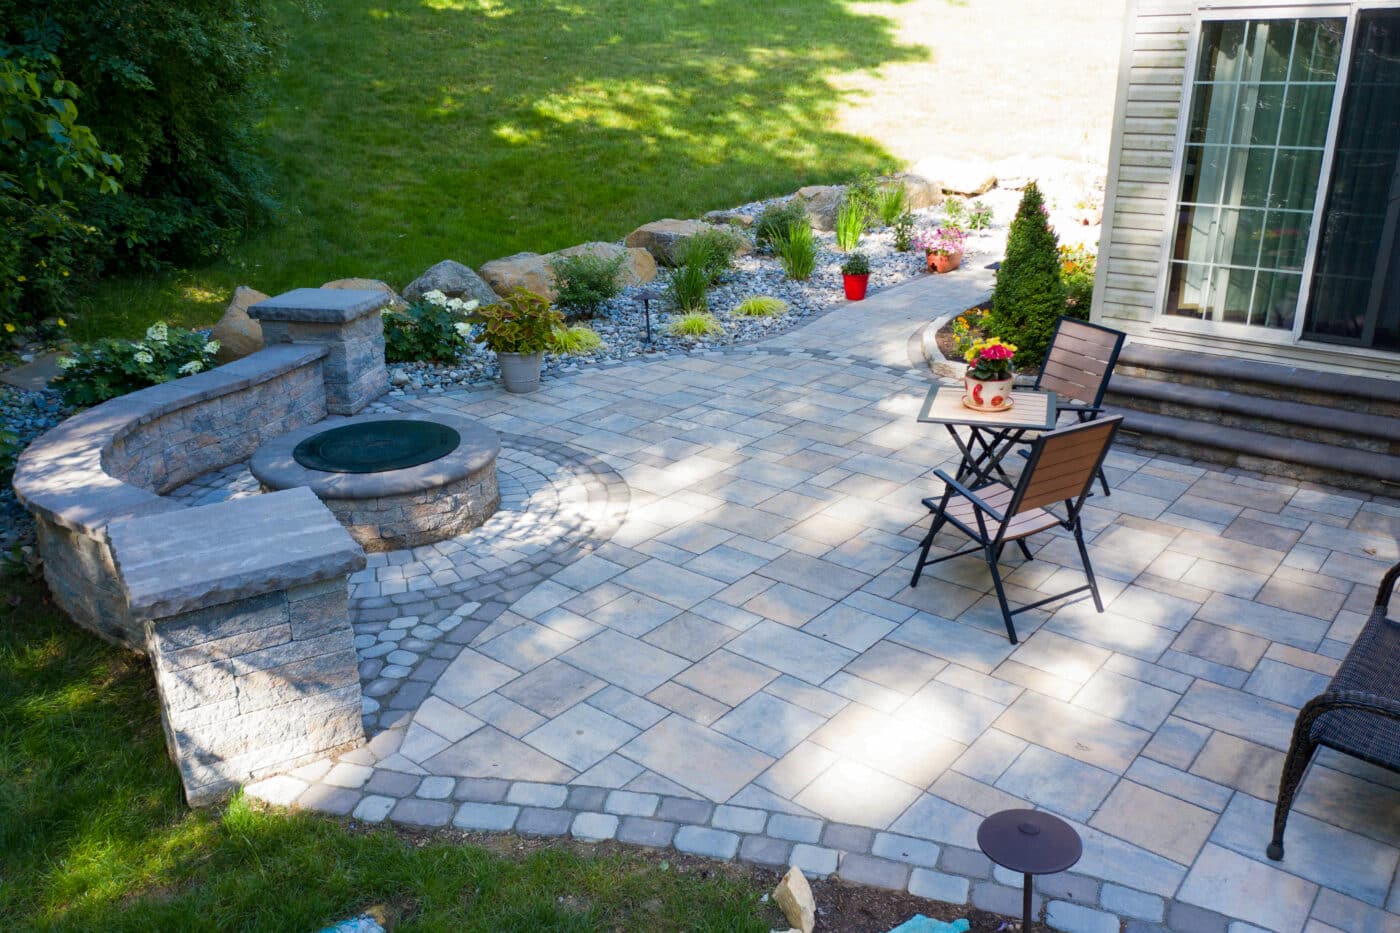
A combined fire pit and seating wall works wonderfully in small to medium-sized yards where you want to maximize space. The ideal diameter for the circular paver area is between 12 and 16 feet. This provides enough room for the fire pit itself, plus 3-4 feet of clearance for safe and comfortable seating on the wall. The retaining wall itself should be about 18 inches high (standard seating height) and at least 12 inches deep to provide a stable and comfortable perch. Anything smaller will feel undersized and unsteady.
23. Integrate an L-Shaped Bench with a Square Fire Pit
This patio feels so inviting because of its smart use of geometry and warm tones. The strong right angle of the L-shaped bench perfectly frames the square fire pit, creating a clean, organized, and intimate conversation zone. This geometric harmony is then softened by the warm, flickering light from the fire and the integrated lighting under the bench. This combination of a structured layout with warm, ambient light is what gives the space its cozy, room-like feeling. The choice of rich, dark red cushions adds another layer of warmth and a welcome pop of color.
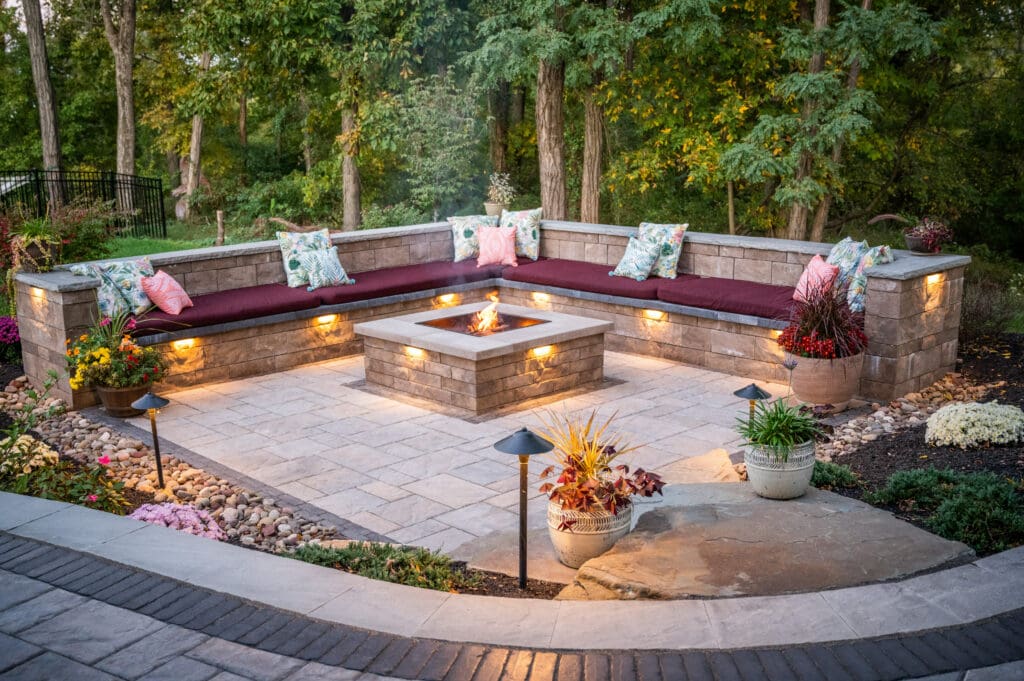
When you’re designing a built-in bench, don’t forget about comfort. An 18-inch seat height is standard, but the secret to a comfortable bench is a slight backward tilt on the seat—about 1/4 inch per foot of depth. This subtle angle makes people feel more secure when they lean back. For the seat depth, aim for at least 20 inches if you plan to use thick back cushions, or 16-18 inches if it will be a backless bench. These small ergonomic details make a huge difference in how much the seating actually gets used.
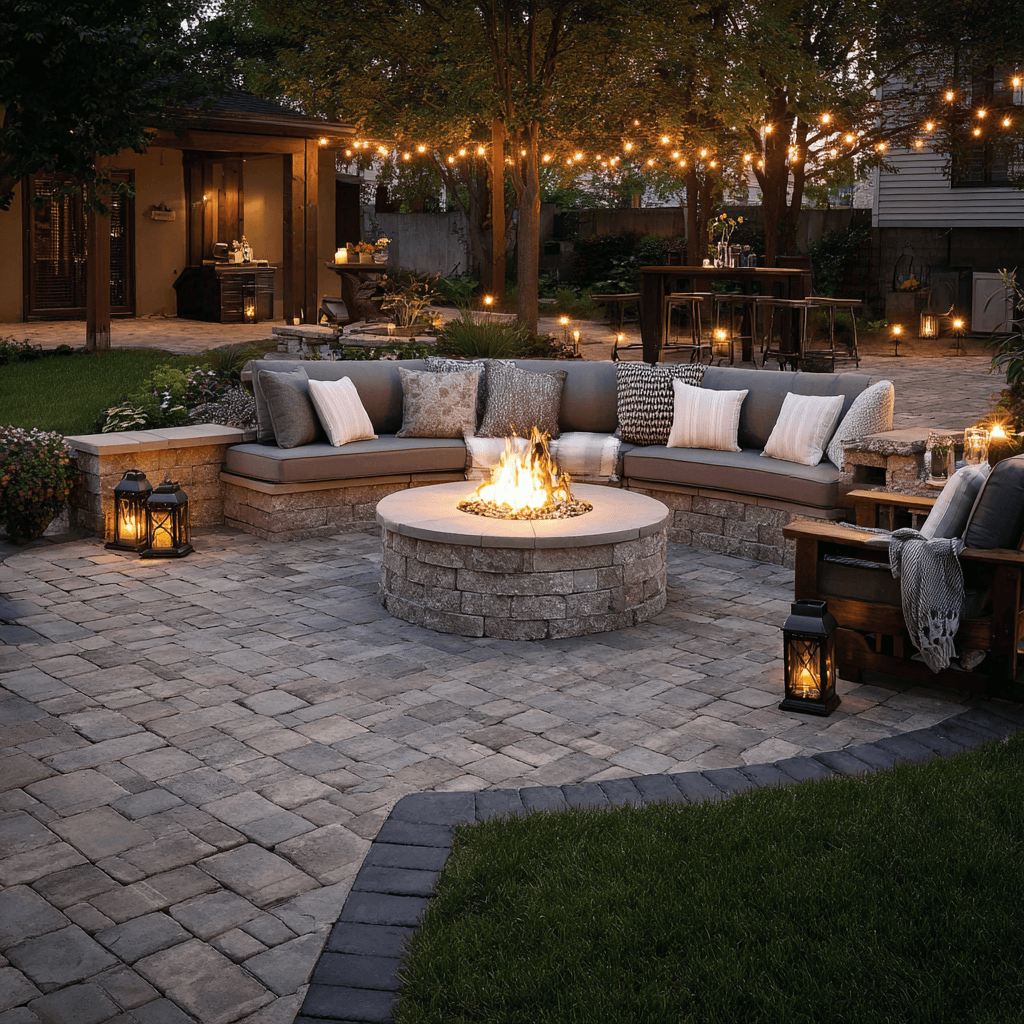
24. Illuminate a Fire Pit Lounge with Overhead String Lights
The single element that elevates this patio from a nice seating area to a magical evening destination is the string lights. They are the undeniable heart of the ambiance. The fire pit and the built-in sofa create a fantastic foundation, but it’s the warm, festive glow from above that makes the space feel like a true outdoor living room. The lights define the vertical space, creating a
25. Integrate a Deck and Fire Pit with Modern Paver Tiles
This design is a stunning example of mixed-material modernism. It works because it designates clear zones through texture and color while maintaining a cohesive feel. The dark wood deck insert creates a warm, organic focal point for the fire pit and seating, distinguishing it from the surrounding walkways. The large, light gray paver tiles provide a cool, clean border and extend the living space. The integrated lighting under the bench is the final touch, unifying the wood and stone elements and making the entire composition glow. It’s a more complex and integrated version of the split-level concept seen in Idea #8.
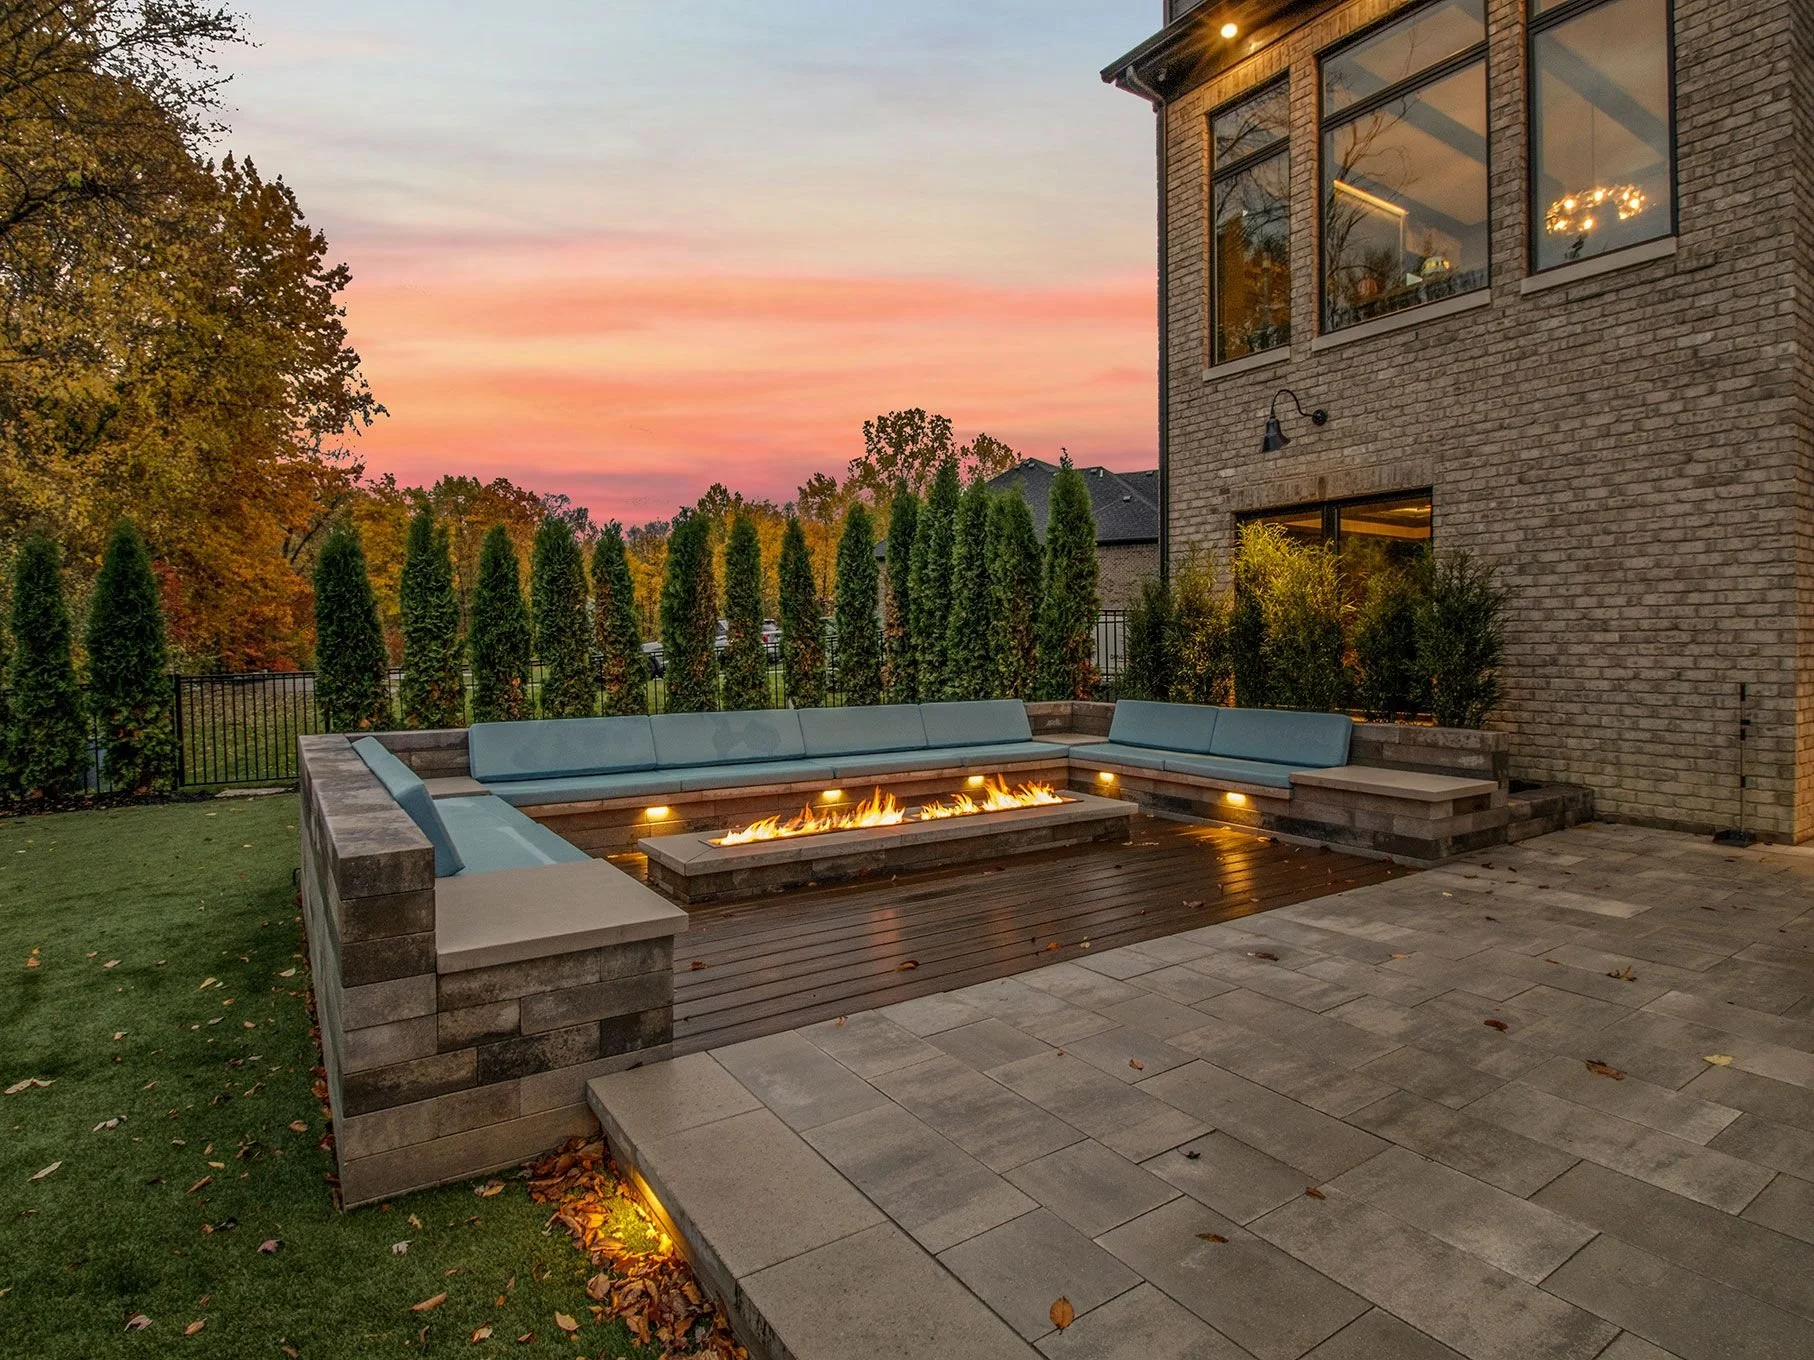
A patio that mixes wood decking with stone pavers looks sharp, but it also means you have two different maintenance routines. The pavers will need occasional sweeping and joint sand touch-ups. The wood decking, especially the dark color, will require more work. To keep that rich tone, it will need to be cleaned and re-stained or sealed every 1-2 years. Be prepared for leaves and debris to collect in the seams between the deck and the pavers, requiring regular cleaning with a leaf blower or vacuum to keep the lines crisp.
26. Create Zones with a Multi-Level Paver Patio
When designing a multi-level patio, use borders to your advantage. Notice how the dark grey paver border is used here to outline every edge, step, and planter bed. This isn’t just decoration; it’s a powerful design tool. The border provides visual structure, clearly defines the different zones (dining, fire pit, planting), and emphasizes the changes in elevation. This makes the overall design look incredibly polished, intentional, and custom. Without the border, the transitions would feel much less defined and the whole project would have less impact.
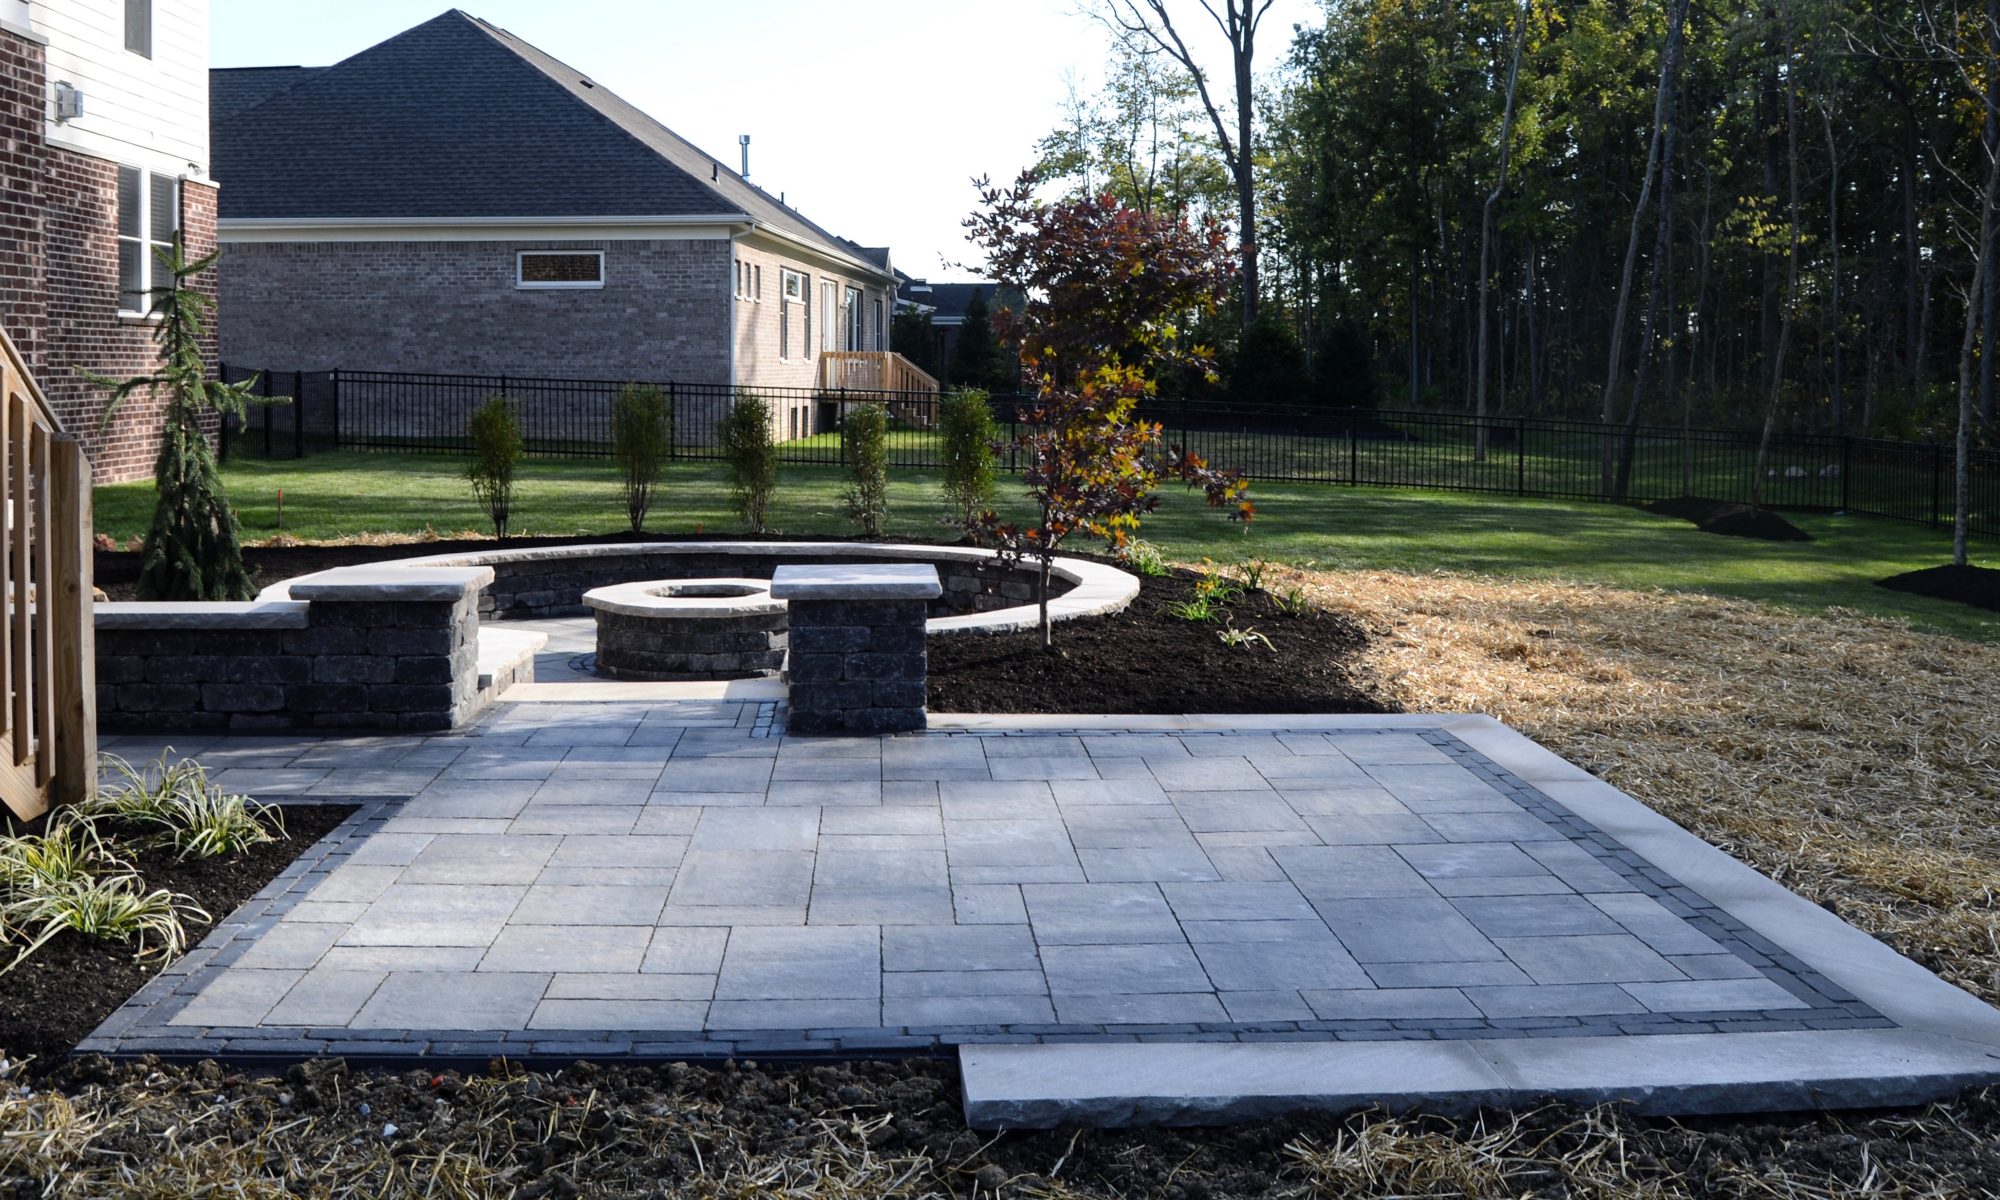
This type of expansive, multi-zone patio is best suited for medium to large suburban backyards, requiring a minimum of 600 square feet to not feel cluttered. The fire pit circle needs about a 12-foot diameter to be functional. The main patio area should be at least 20×20 feet to allow for distinct zones without tripping over furniture. A key consideration is the transition to the lawn; building in planter beds like this creates a much softer, more attractive edge than having the pavers just end abruptly at the grass.
27. Create a Cozy Nook with a Stone Fire Pit and Wicker Chairs
This cozy scene is a perfect example of a balanced style recipe. Let’s call it 50% rustic texture, 40% classic comfort, and 10% graphic pop. The rustic texture comes from the stacked stone fire pit and the multi-toned pavers. The classic comfort is all about those deep-seated wicker chairs. And the crucial 10% graphic pop comes from the geometric pattern on the throw pillows. You could change the pillow pattern or color to completely change the accent, but the core formula of stone + wicker remains a timeless winner.
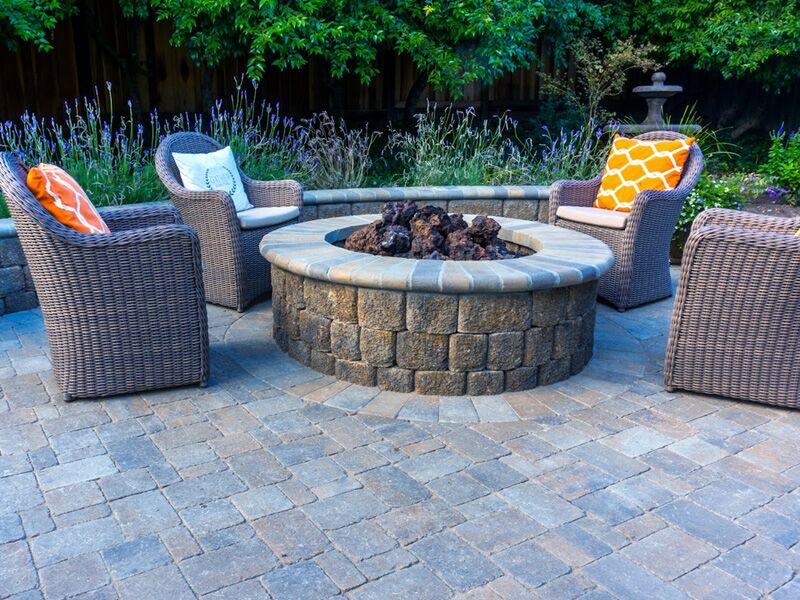
The success of this design lies in its repetition of shapes and its complementary color palette. The circular shape of the fire pit is echoed in the circular border of the pavers, creating a sense of harmony. The dark brown of the wicker chairs is a perfect complement to the grayish-brown tones in the pavers, ensuring the furniture feels connected to the base. Finally, the pop of orange in the pillows is a classic complementary color to the greens and blues in the surrounding foliage, making the whole scene feel vibrant and alive.
28. Build a Shaded Retreat with a Dark Wood Pergola
A pergola structure is a major upgrade that creates a true outdoor room. Here is a sample budget for a premium setup like this, assuming a 16×20 foot area.
- Dark Wood Pergola Kit: $3,000 – $8,000
- Paver Patio (Professionally Installed): $8,000 – $12,000
- Stacked Stone Walls & Fire Pit: $4,000 – $7,000
- Outdoor Kitchen Island/BBQ: $3,000 – $10,000+
- Wicker Seating Set: $1,500 – $4,000
- TOTAL: $19,500 – $41,000+
Budget alternative: Get a similar feeling with a metal-frame pergola or large cantilever umbrella ($500-$1,500) over a simple paver area. Compare with the simpler covered patio in Idea #4.
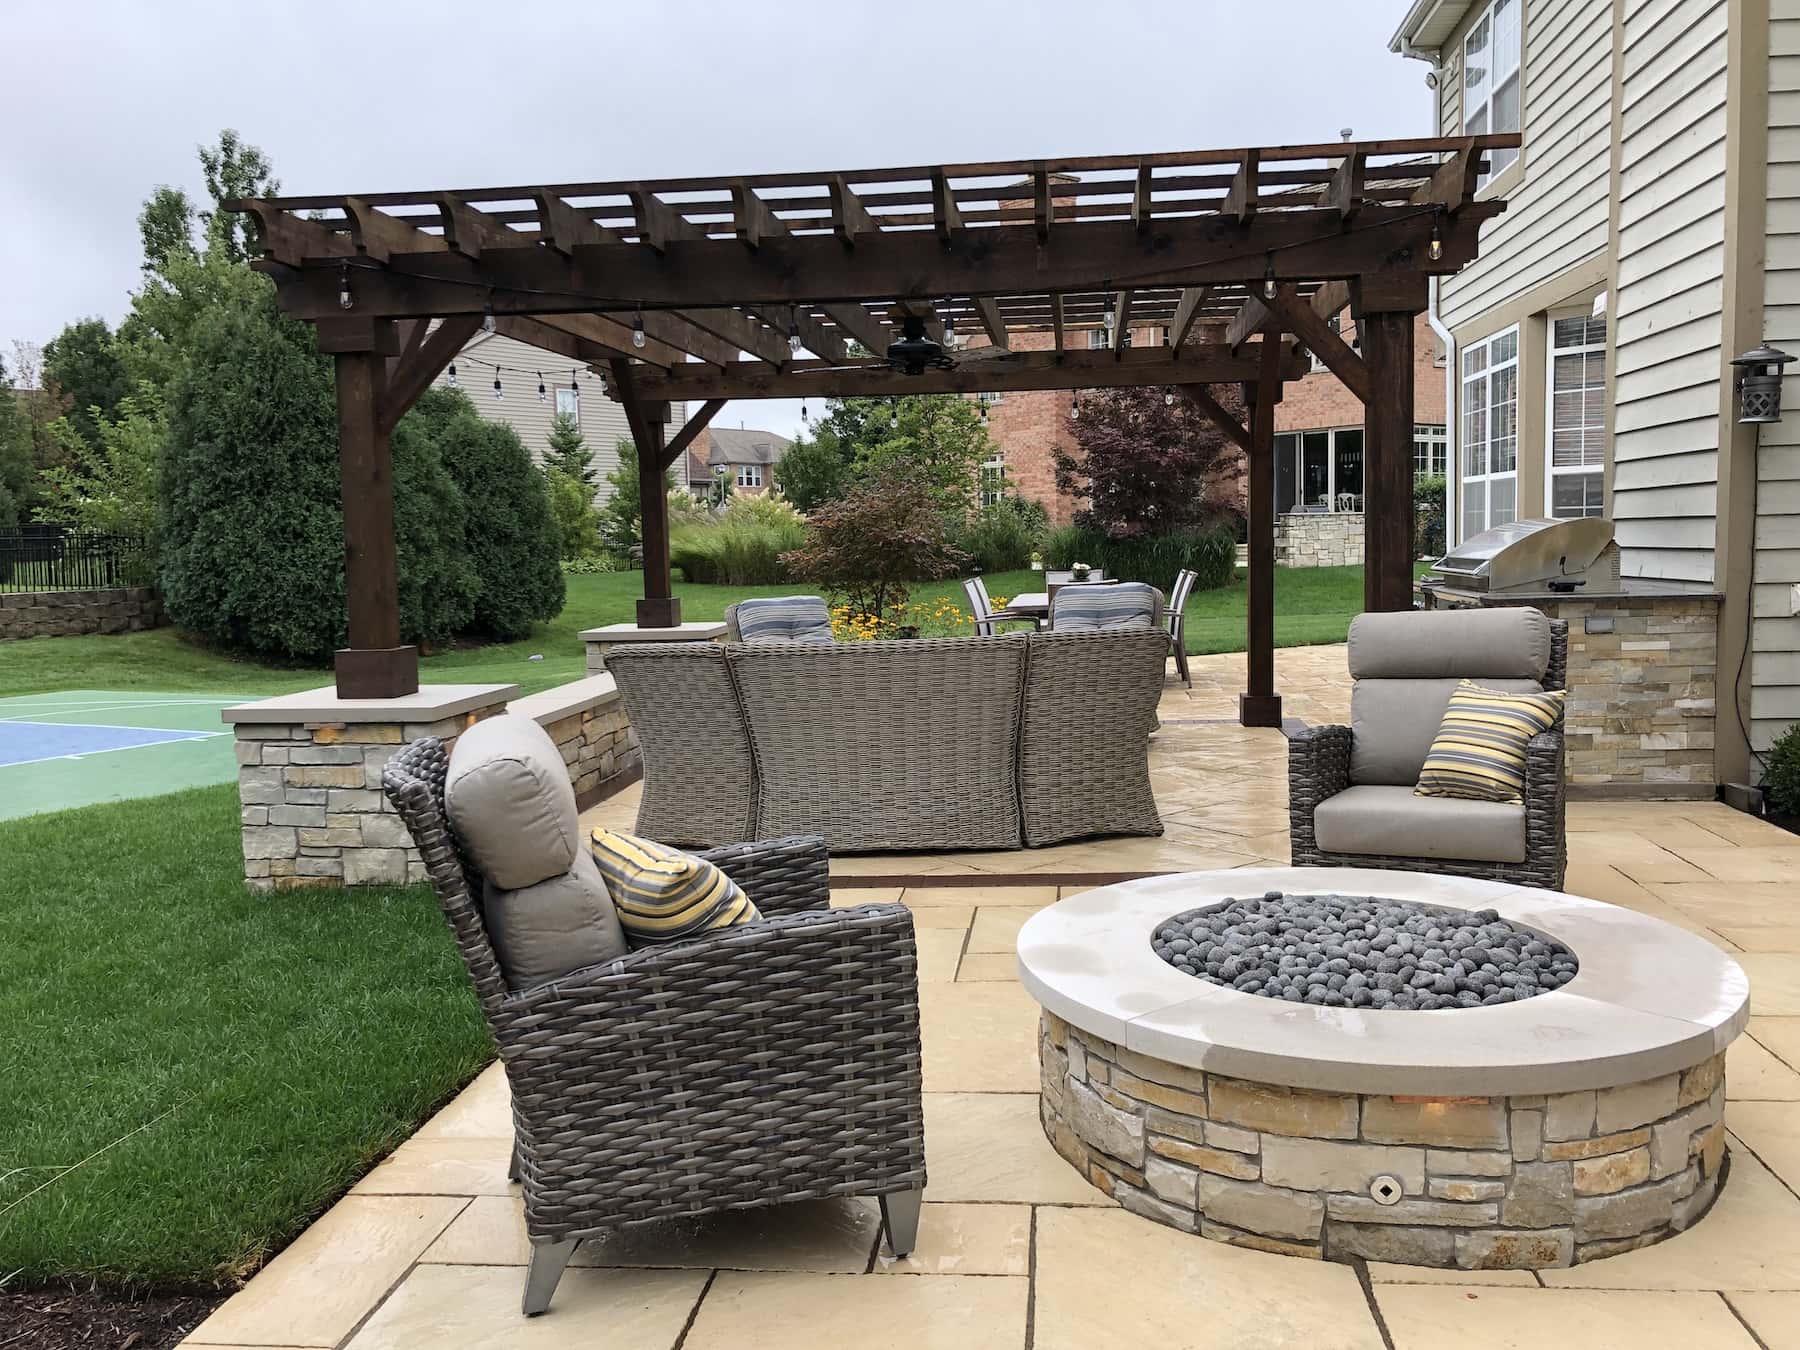
A dark wood pergola is absolutely stunning, but it’s also a magnet for heat. That deep brown color will absorb sunlight and radiate warmth downwards, which can make it feel less shady than you’d expect on a very hot, still day. To combat this, consider adding a retractable fabric canopy underneath the slats or planting a deciduous vine (like wisteria or trumpet vine) that will provide dense shade in the summer but let sunlight through in the winter. Also, check your local building codes; a structure this large often requires a permit.
29. Get a Rustic, Eclectic Vibe with Checkerboard Pavers
This space feels so effortlessly cool because it’s a masterclass in mixing styles. The checkerboard floor is classic and graphic. The rustic timber beams are pure farmhouse. The woven chairs have a touch of bohemian flair, while the clean lines of the table feel almost modern. It shouldn’t all work together, but it does. The key is the simple, neutral color palette. By sticking to creams, grays, and natural wood tones, the different styles can coexist without clashing, creating a look that is layered, personal, and completely unique.
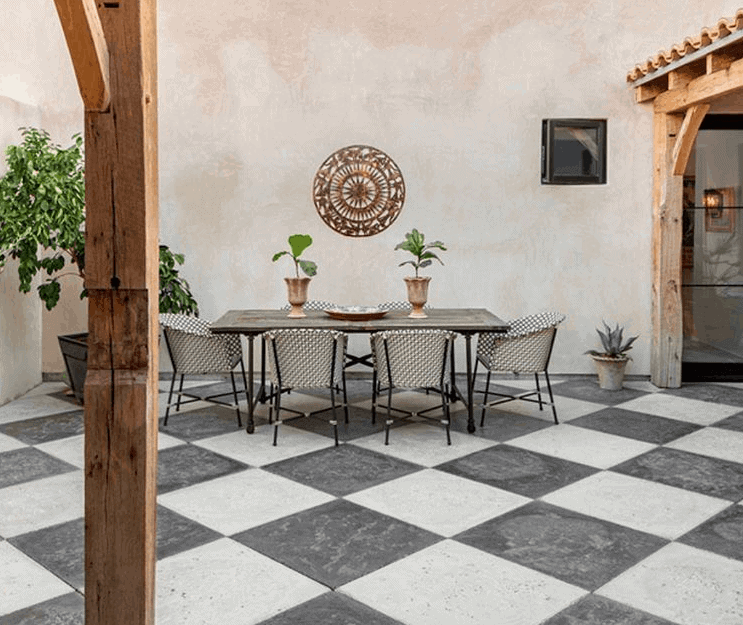
The checkerboard paver floor is, without a doubt, the element that makes this entire patio. It’s the bold, graphic foundation upon which everything else is built. It provides an immediate sense of style and personality that a plain paver floor could never achieve. This strong pattern is what allows the rustic beams and eclectic furniture to work; it gives them a structured, intentional base to play off of. Take away the checkerboard, and you lose the entire room’s focal point and defining character.
30. Lead the Way with a Curved Brick Paver Path
When creating a curved brick path, the installation pattern is key to a smooth, professional-looking result. For gentle curves like this one, a “running bond” or “stretcher bond” pattern where the bricks are laid lengthwise along the path’s edge is the best choice. This allows you to make slight adjustments with each brick to follow the curve naturally. Avoid rigid patterns like herringbone or basketweave for curved paths, as they will result in awkward, triangular gaps that are difficult to cut and look amateurish.
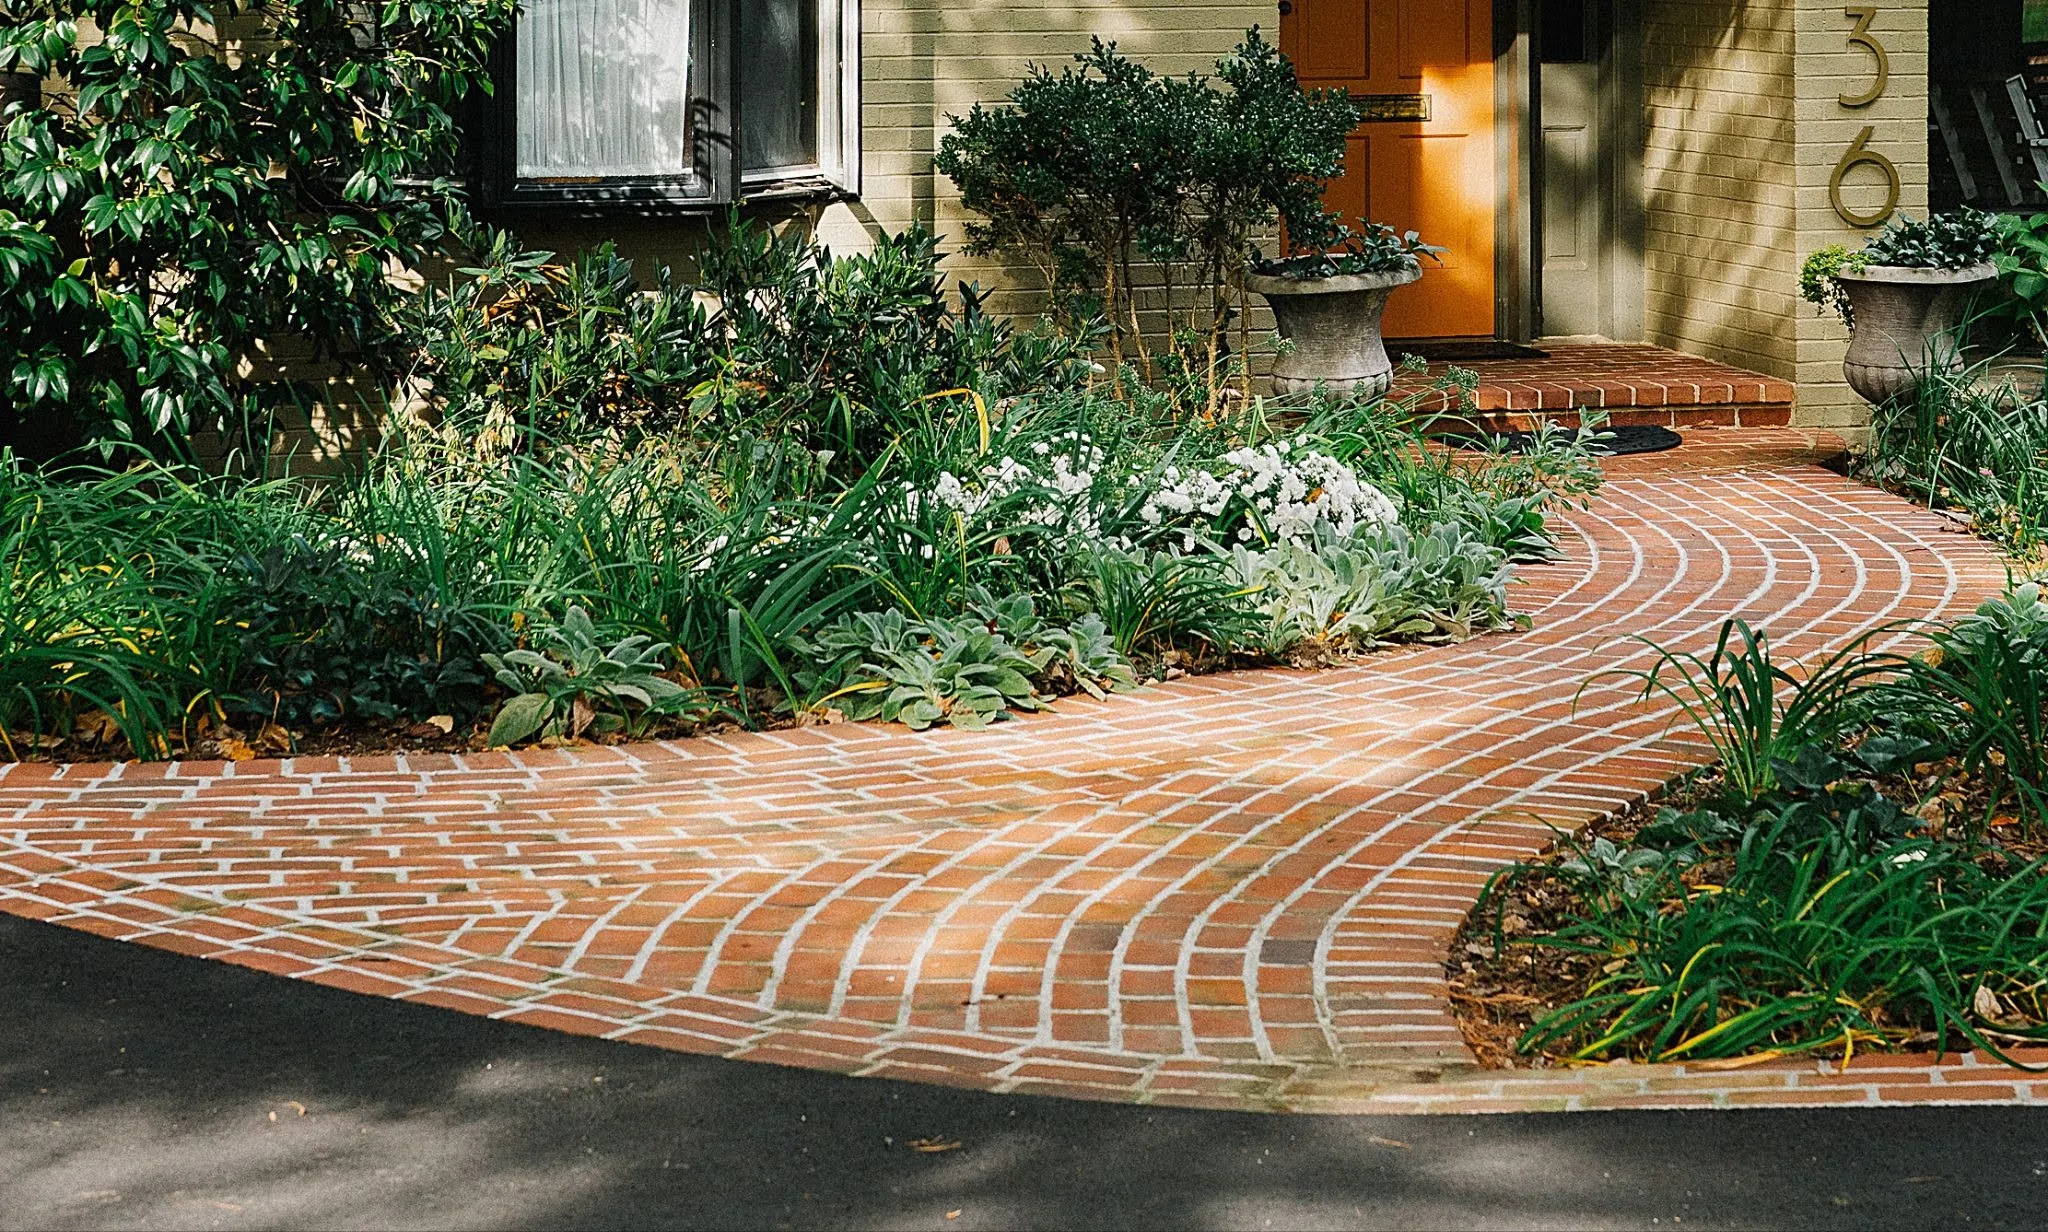
This entryway is so welcoming because it uses a classic design principle: the curved pathway. A gentle, sweeping curve is inherently more graceful and intriguing than a straight, rigid line. It slows the journey to the front door, forcing you to take in the lush plantings along the way. The vibrant orange door acts as a powerful focal point, drawing your eye forward and rewarding you at the end of the path. The combination of the curving line and the strong color destination makes for an incredibly effective and inviting design.
Your Perfect Patio Awaits
Whew, that was a lot of inspiration! But remember, the best patio isn’t just one you see on a screen—it’s one that fits your home, your budget, and the way you want to live outdoors. Whether you’re starting small with a simple gravel nook or planning a full-scale backyard renovation, the right design is out there. Take these ideas, make them your own, and start building the outdoor space you’ve been dreaming of.
Ready for more? Head over to Pinterest to explore even more paver patio designs and start creating your personal inspiration board!