
You know that feeling when you finally find the outdoor BBQ area that looks exactly right for your space? We’ve chased that feeling for you. After filtering through hundreds of options across Wayfair, Home Depot, and even custom build sites, we narrowed it down to the 28 ideas that actually deliver. We’ve curated incredible outdoor BBQ setups, from sleek modern grill stations and rustic stone kitchens to cozy Mediterranean-inspired patios. For 2026, the trend is all about creating fully functional ‘second kitchens’ outdoors, not just a lonely grill on the patio. It’s a shift towards seamless indoor-outdoor living that we’re seeing all over Pinterest. And stay until the end — we break down the most common mistakes that can ruin these looks. 📌 Save this to Pinterest for later — you’ll want to revisit these ideas.
1. A Classic Black Gas Grill on a Clean Concrete Patio
Sometimes, the simplest solution is the best one. This setup works because of its straightforward honesty. The modern black grill provides a strong, dark anchor against the light grey concrete and the vibrant, textured green of the lawn and hedges. There are no competing elements, just a functional cooking tool in a pleasant, natural setting. It’s an accessible and clean look that puts the focus squarely on the act of grilling itself, which is what it’s all about.
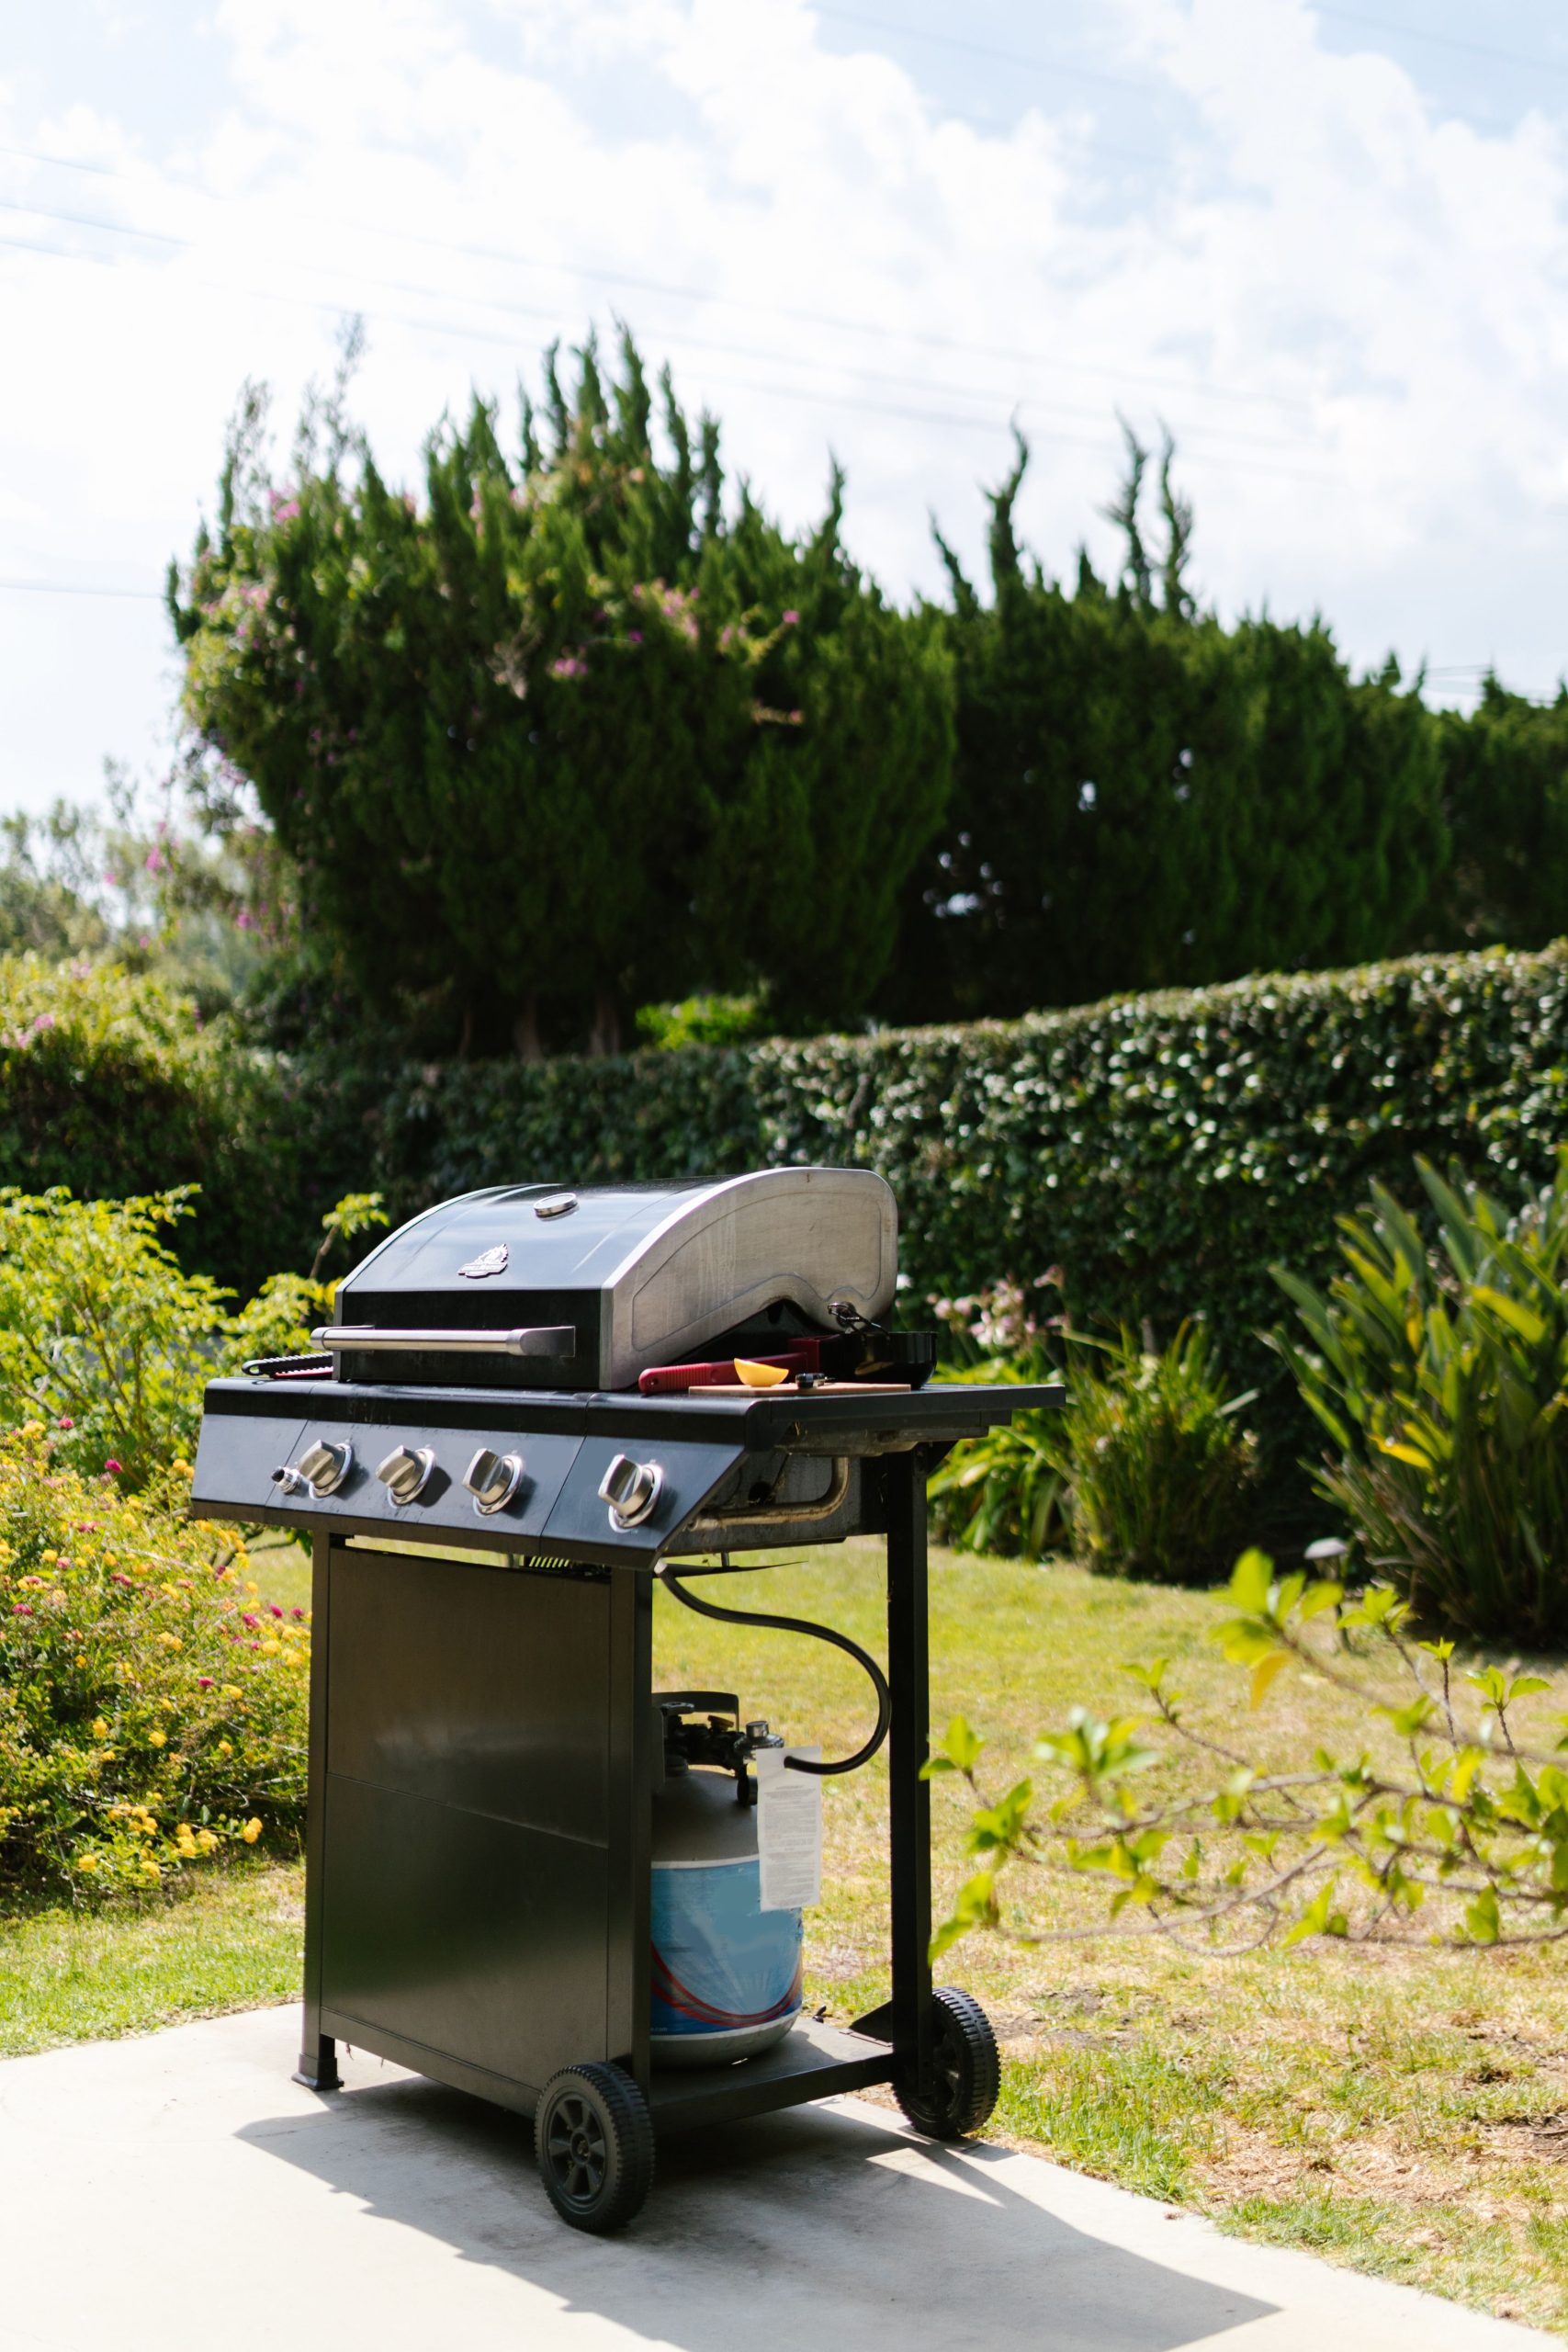
This entire look *is* the budget alternative! You don’t need a massive built-in kitchen to enjoy your backyard. A quality gas grill like this can be found at any big-box home improvement store for $250-$600. The concrete patio is a durable, low-cost option. If you don’t have one, you can create a similar functional area with large format pavers from Lowe’s or Home Depot for just a few hundred dollars in materials. The key is to keep it simple and celebrate the function.
2. An All-In-One Outdoor Living Room Under a Pergola
When hanging string lights from your pergola, aim for a height of about 8 to 10 feet off the patio floor. This keeps them high enough to be out of the way for even your tallest guests, but low enough to cast a warm, intimate glow over the seating and dining areas. Use a larger bulb (like a G40 or G50) for a classic bistro look and ensure you buy outdoor-rated, shatterproof versions. For an extra touch, run the strands on a dimmer switch to control the mood throughout the evening.
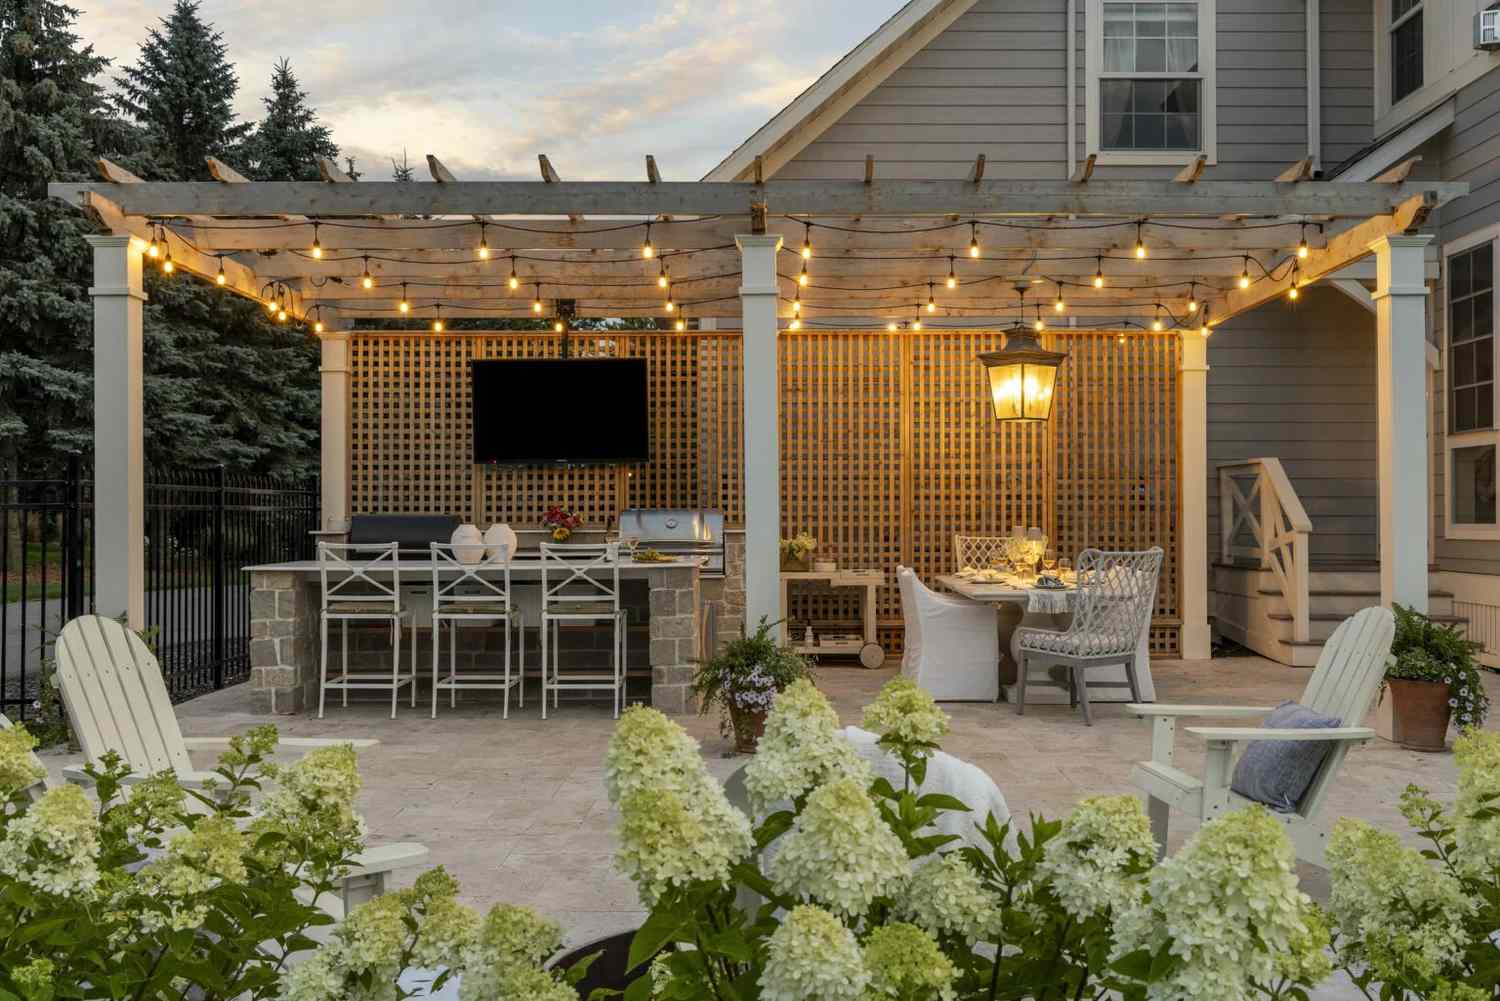
A multi-zone setup like this one requires a generous footprint. To comfortably fit a cooking station, bar seating, and a separate dining area, you should have a minimum patio space of 20 feet by 15 feet. This ensures you have adequate clearance around the grill and enough room to pull out chairs without bumping into a wall or the pergola posts. Anything smaller and you’ll want to combine functions, like having the dining table double as your main seating area.
3. Warm Modernism: A Covered Patio with Dark Wood and White Accents
This look achieves its sophisticated balance by following a simple formula: 60% crisp white + 30% warm, dark wood + 10% neutral stone and textiles. The white structure (columns, island base) provides a bright, clean canvas, while the dark wood ceiling and accents bring in organic warmth and drama. The light gray stone countertop and brick fireplace act as textural bridges between the two extremes. You could swap the dark wood for black for a more graphic look, or use a lighter oak for a Scandinavian feel, all while keeping the same successful ratio.
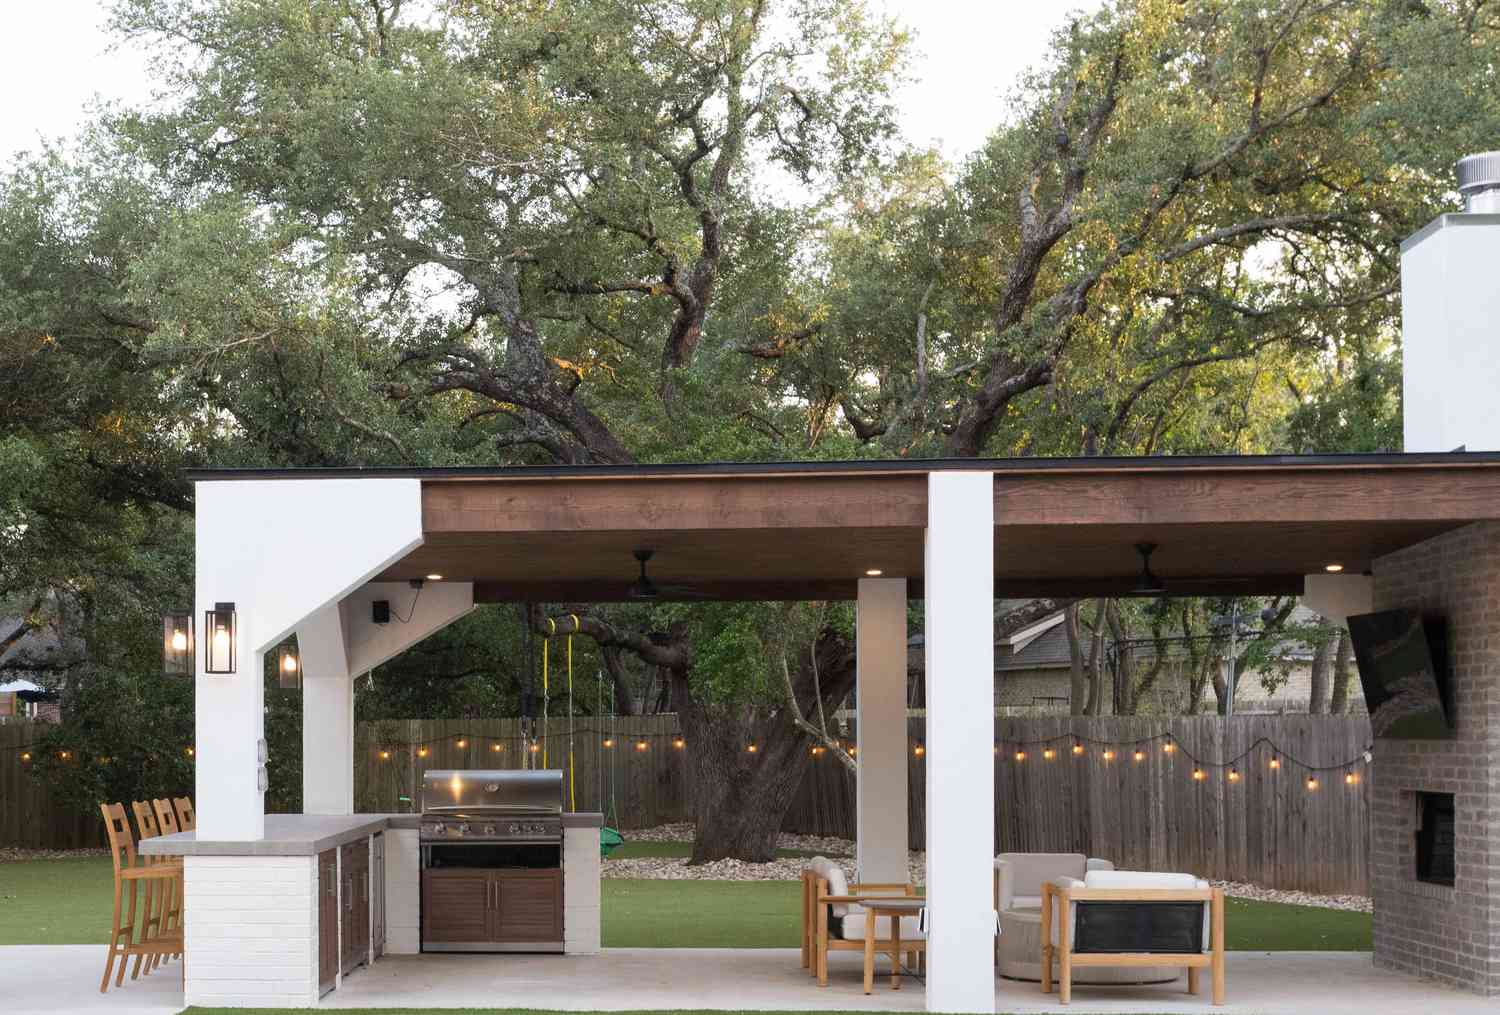
A beautiful white outdoor kitchen looks incredible, but it demands commitment. The white-painted shiplap on the island base and the pristine columns will show every splash of marinade and every dirty fingerprint. Plan on a thorough wipe-down after every few uses and a deeper clean with a mild detergent solution 2-3 times per season to keep it from looking dingy. The area near the grill is especially prone to grease stains, so being proactive is key to keeping it looking fresh.
4. The Pitmaster’s Corner: A Serious Charcoal Smoker on a Wooden Deck
that defines this space is, without a doubt, the large offset charcoal smoker. Remove it, and you just have a simple wooden deck. With it, you have a dedicated zone for the art of barbecue. It signals a commitment to a specific type of cooking—low and slow. The integrated thermometers, the separate firebox, and the utilitarian design all communicate function and hobbyist passion over simple aesthetics, and that’s what gives this corner its authentic character.
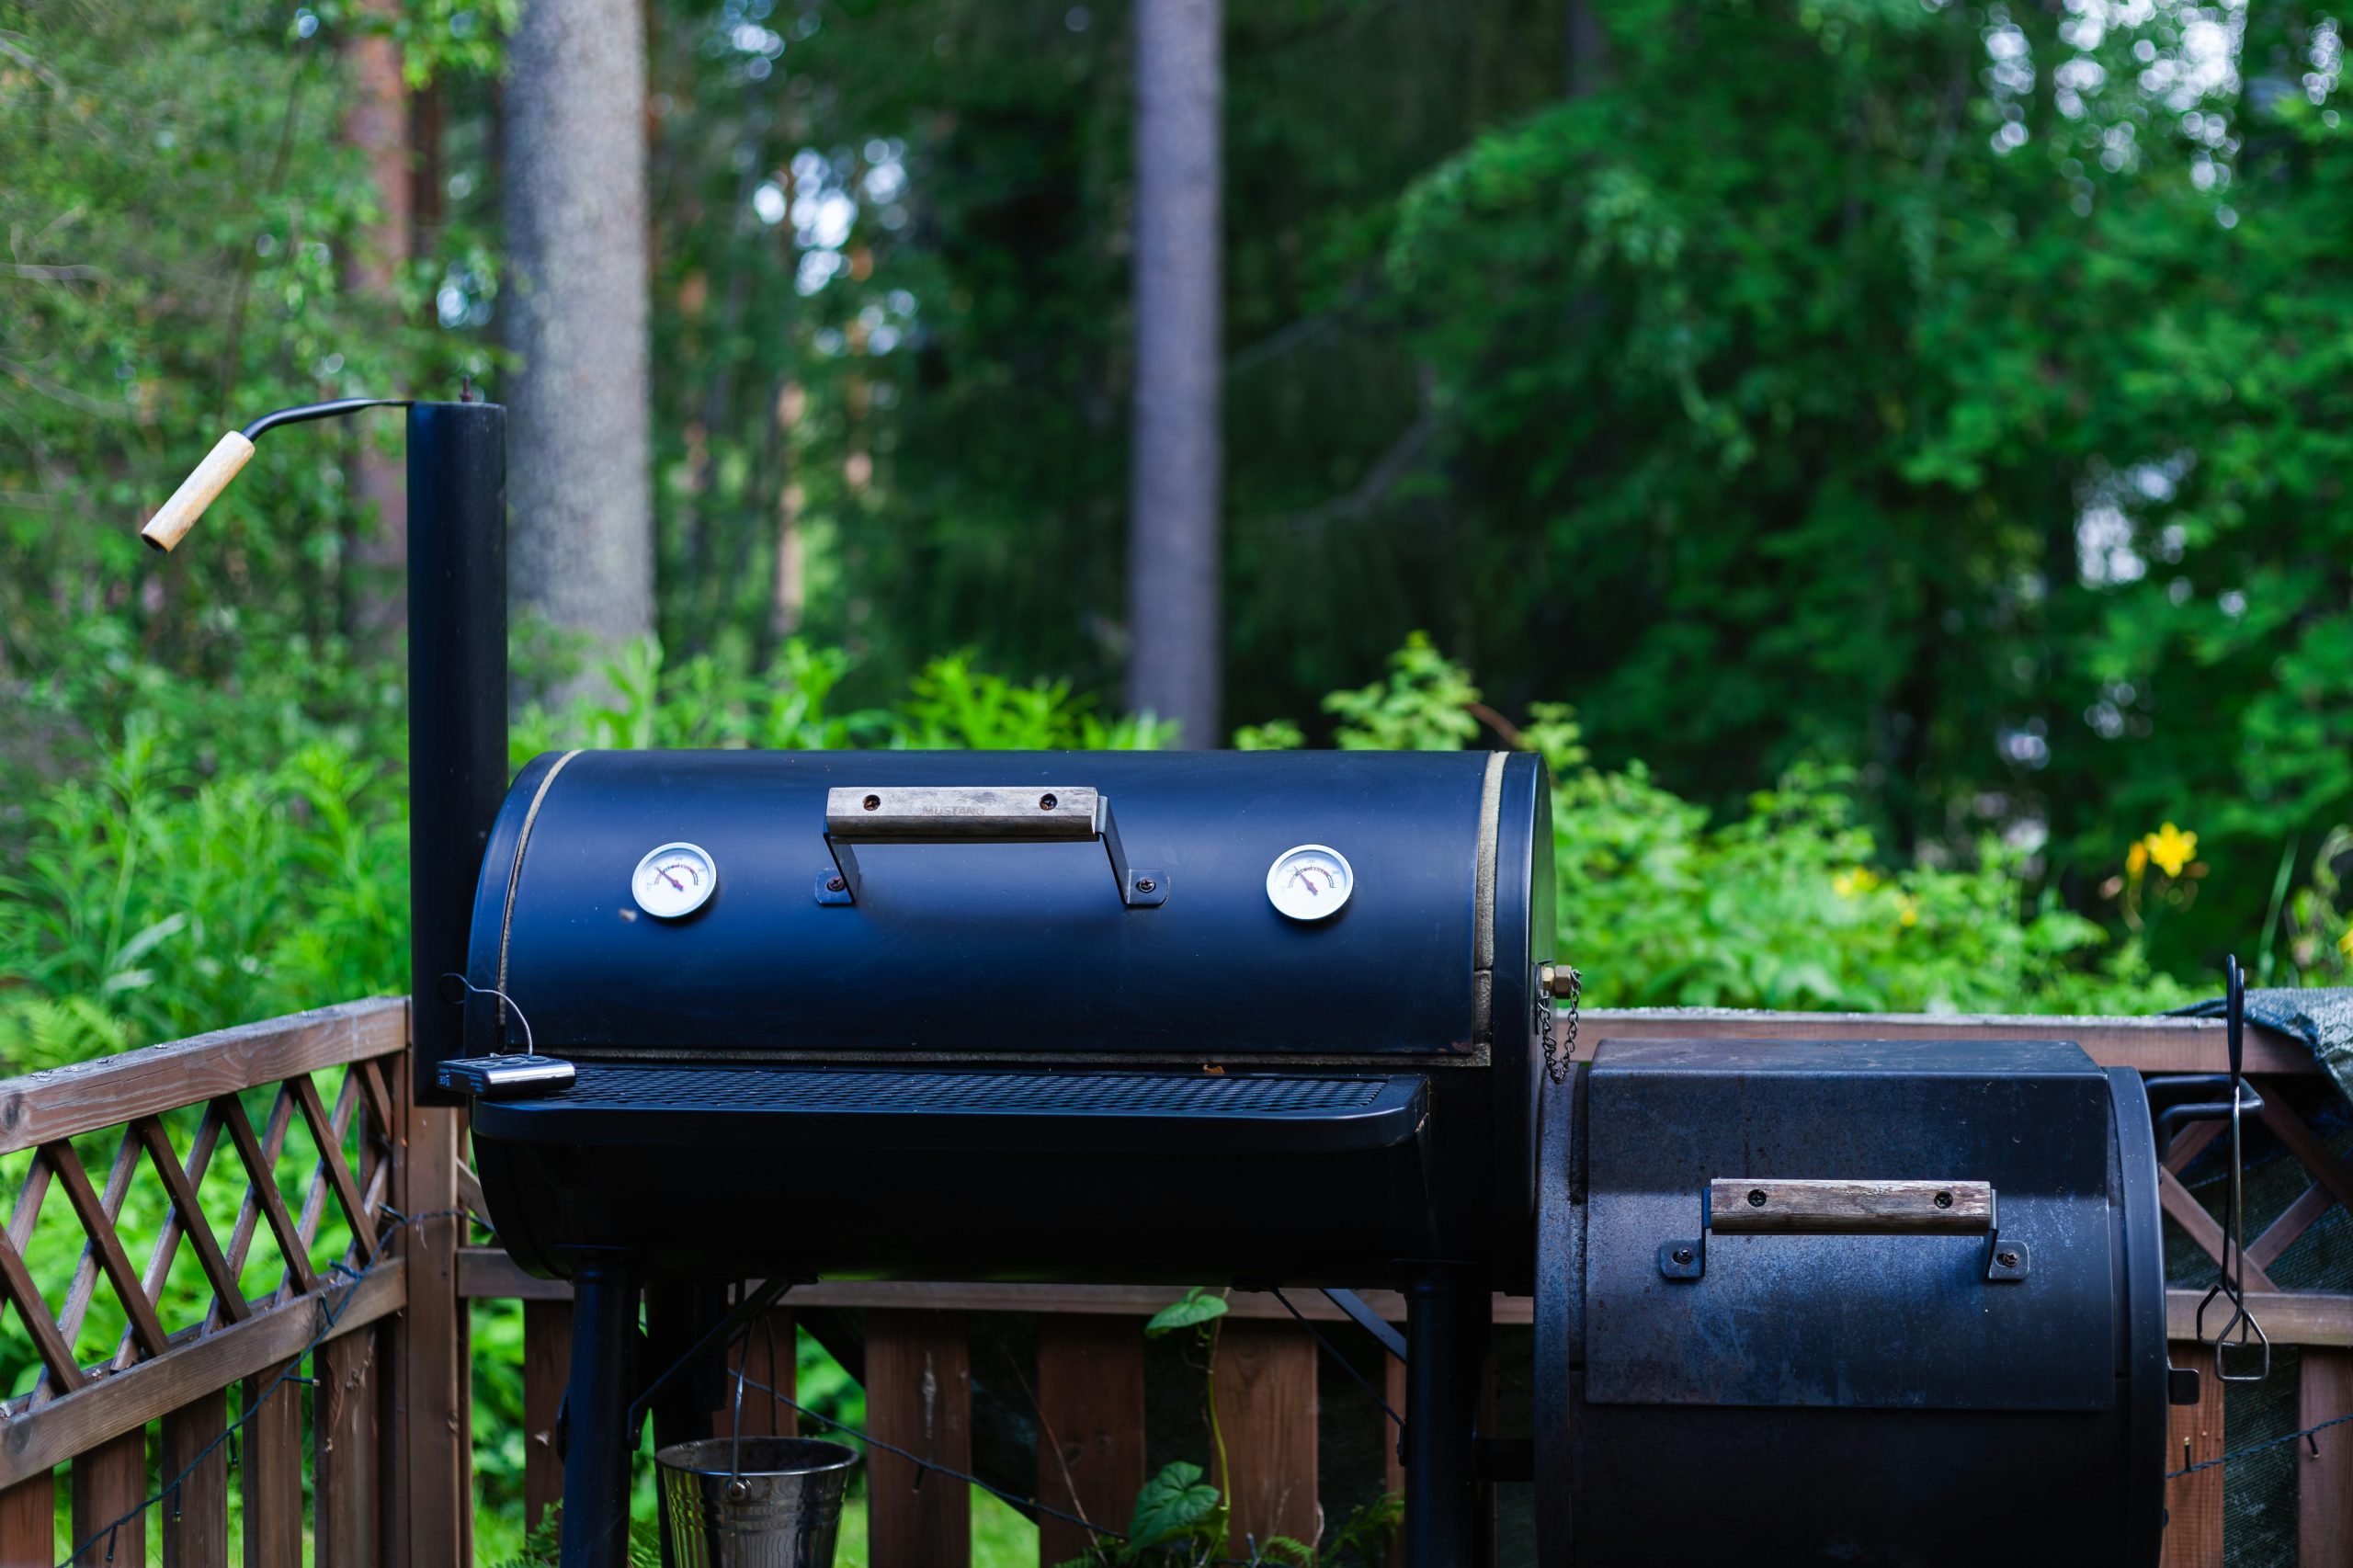
Let’s be honest: cooking on a smoker like this is a hobby, not a quick weeknight dinner solution. Unlike a gas grill that’s ready in 10 minutes, a charcoal smoker requires time to light, bring up to temperature, and maintain over several hours. There’s a definite learning curve to managing the fire and airflow to hold a steady temperature. It’s an incredibly rewarding process that produces amazing food, but it’s a weekend project, not a fast-food machine.
5. Casual Lakeside Grilling with Mix-and-Match Seating
The charm of this deck lies in its relaxed, unpretentious attitude. The design wisely lets the lakeside view be the star of the show. Instead of a perfectly matched, expensive patio set, the mix of different metal-framed chairs in various colors feels collected and casual, like friends have gathered over time. A simple, functional charcoal grill and a basic glass-top table are all that’s needed. It works because it doesn’t try too hard; it’s a space designed for living, not for a magazine shoot.
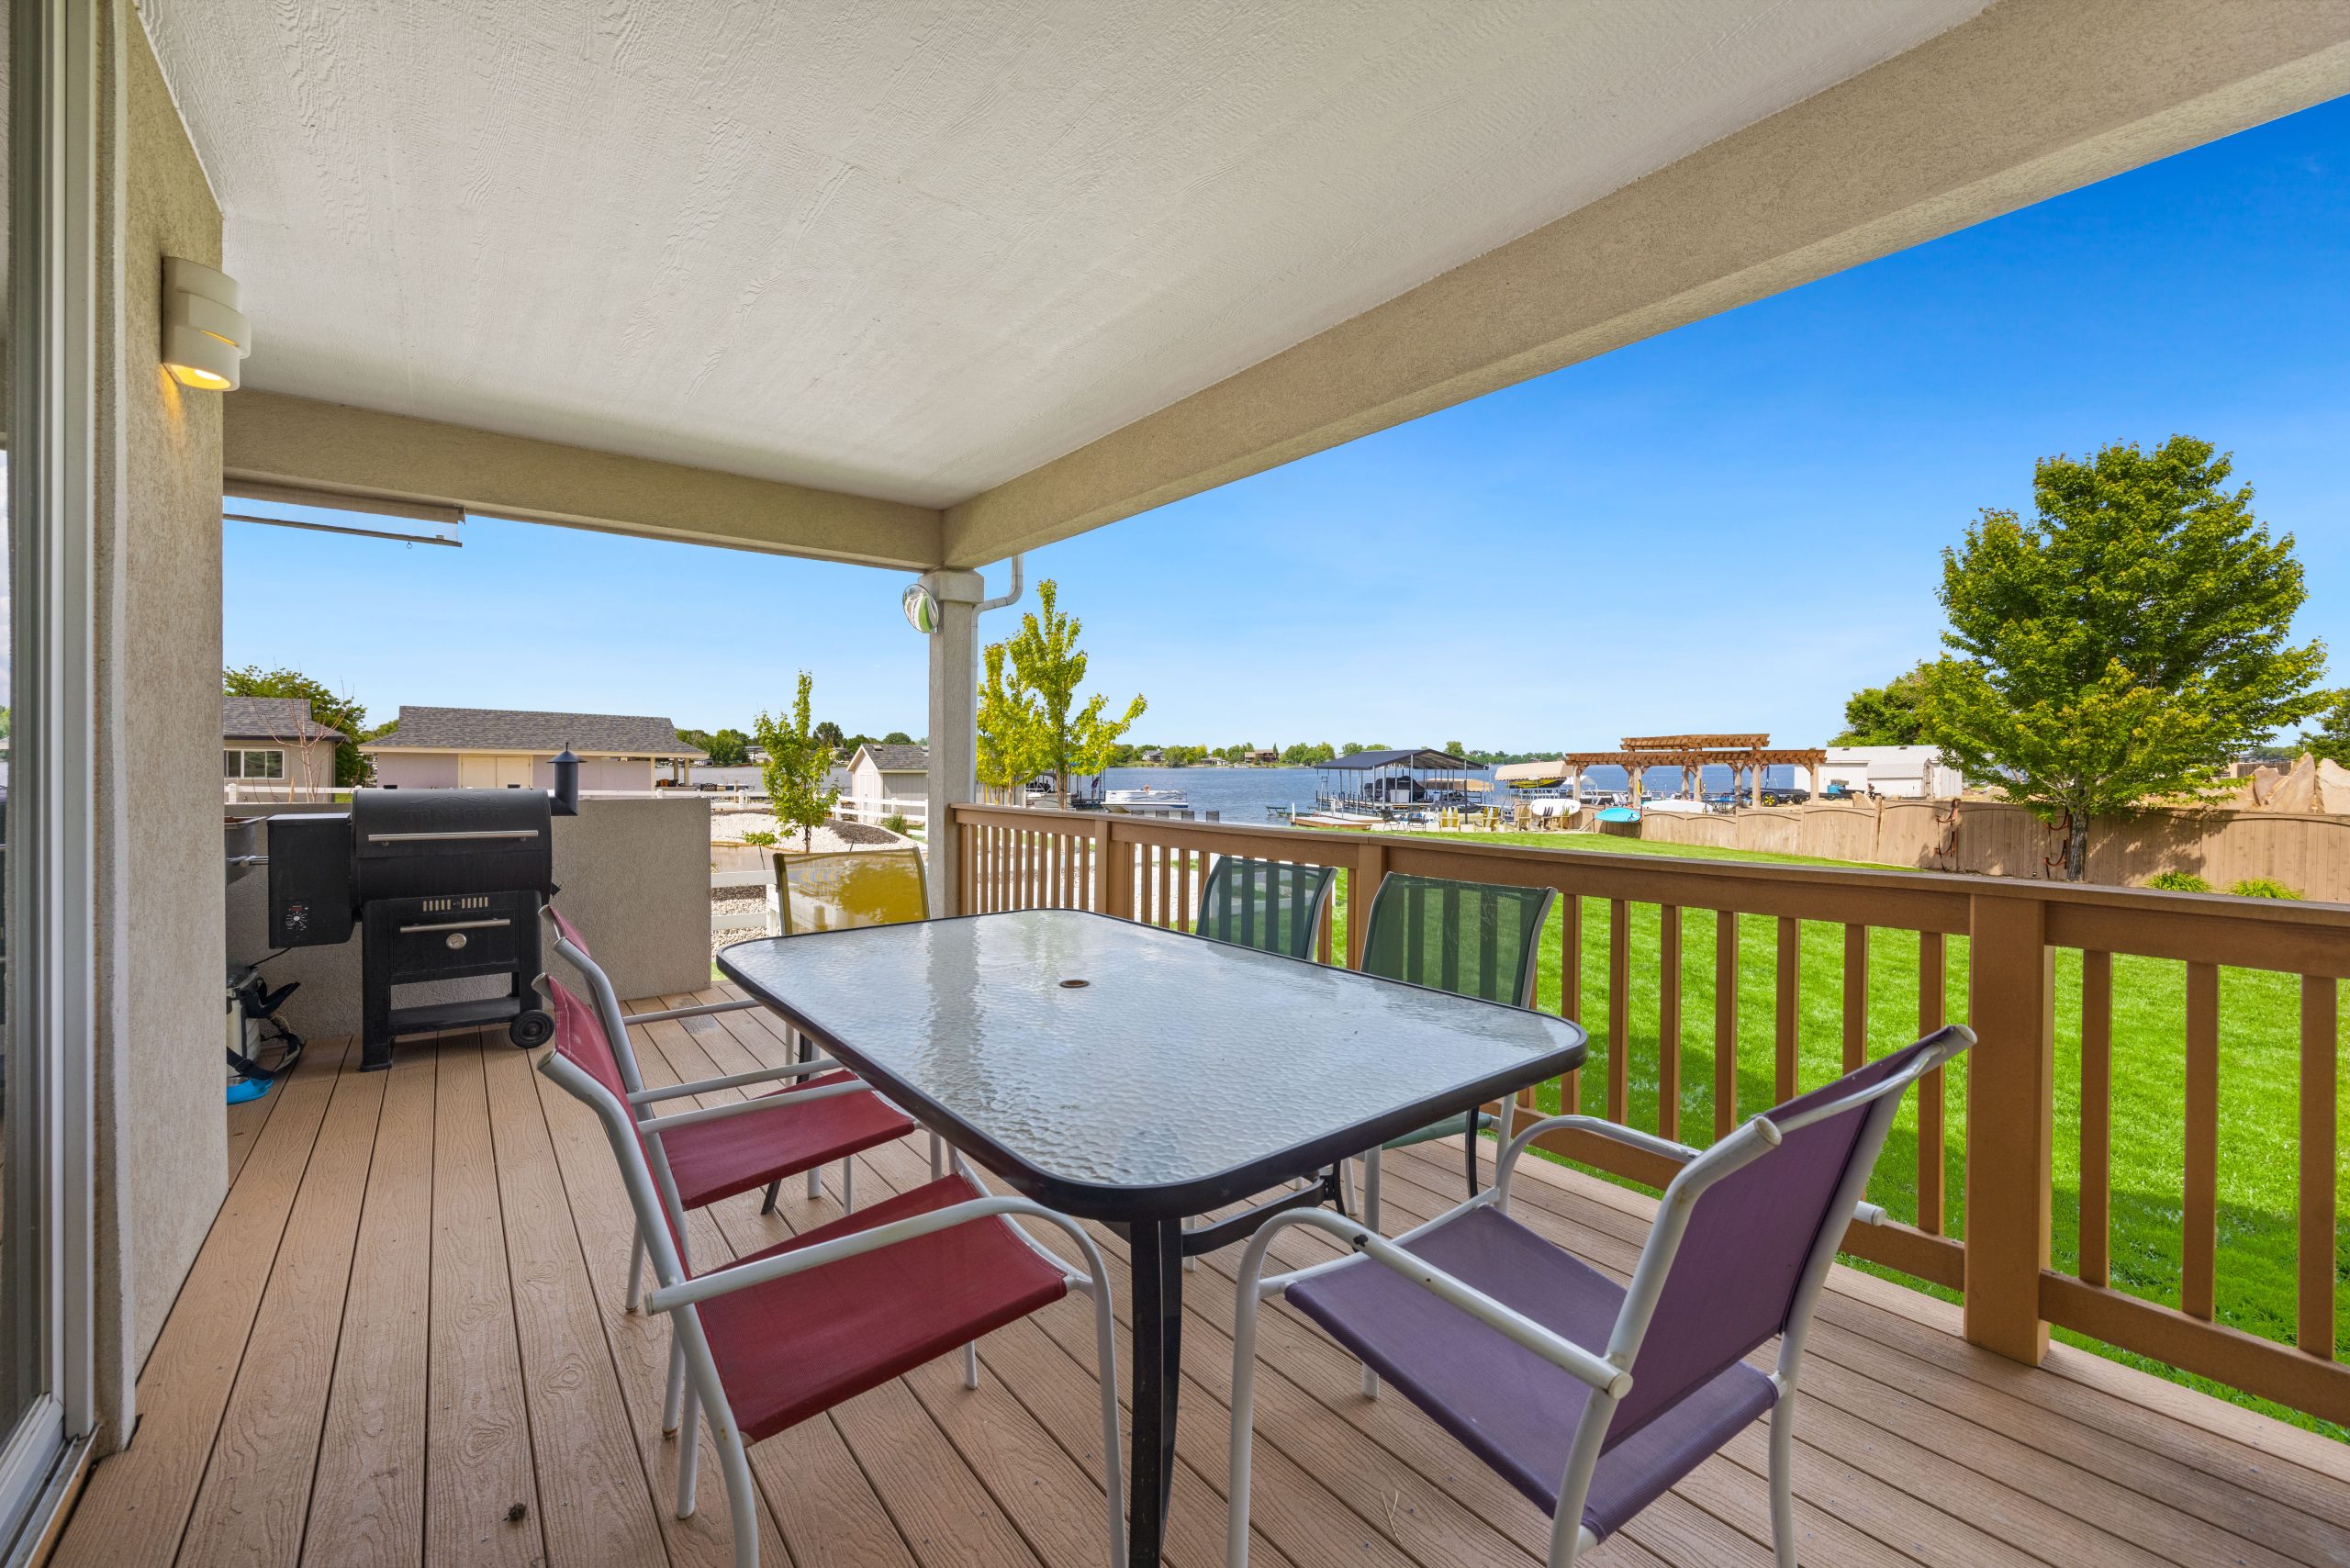
You can achieve this easygoing vibe for next to nothing. This setup is proof that you don’t need to spend thousands. Here’s how to get the look for less:
- Seating: Scour Facebook Marketplace or local thrift stores for mismatched metal-framed patio chairs. A can of spray paint can unify them or make them all different, like here. Budget: $10-20 per chair.
- Table: Glass-top tables are often given away for free or sold cheaply online. They are durable and easy to clean. Budget: $0-$50.
- Grill: A classic Weber kettle charcoal grill offers fantastic performance and costs around $150.
6. A Pop of Color: An Outdoor Kitchen with Light Green Cabinetry
Bringing interior color trends outside is one of the biggest shifts we’re seeing for 2026. For years, outdoor kitchens were limited to stainless steel, stone, and wood. Now, homeowners are craving more personality. This beautiful light green cabinetry is a perfect example, echoing the sage and olive green tones that have dominated interior design. It feels fresh, modern, and harmonious with the surrounding greenery, proving that your outdoor space can be just as stylish as your indoor one.
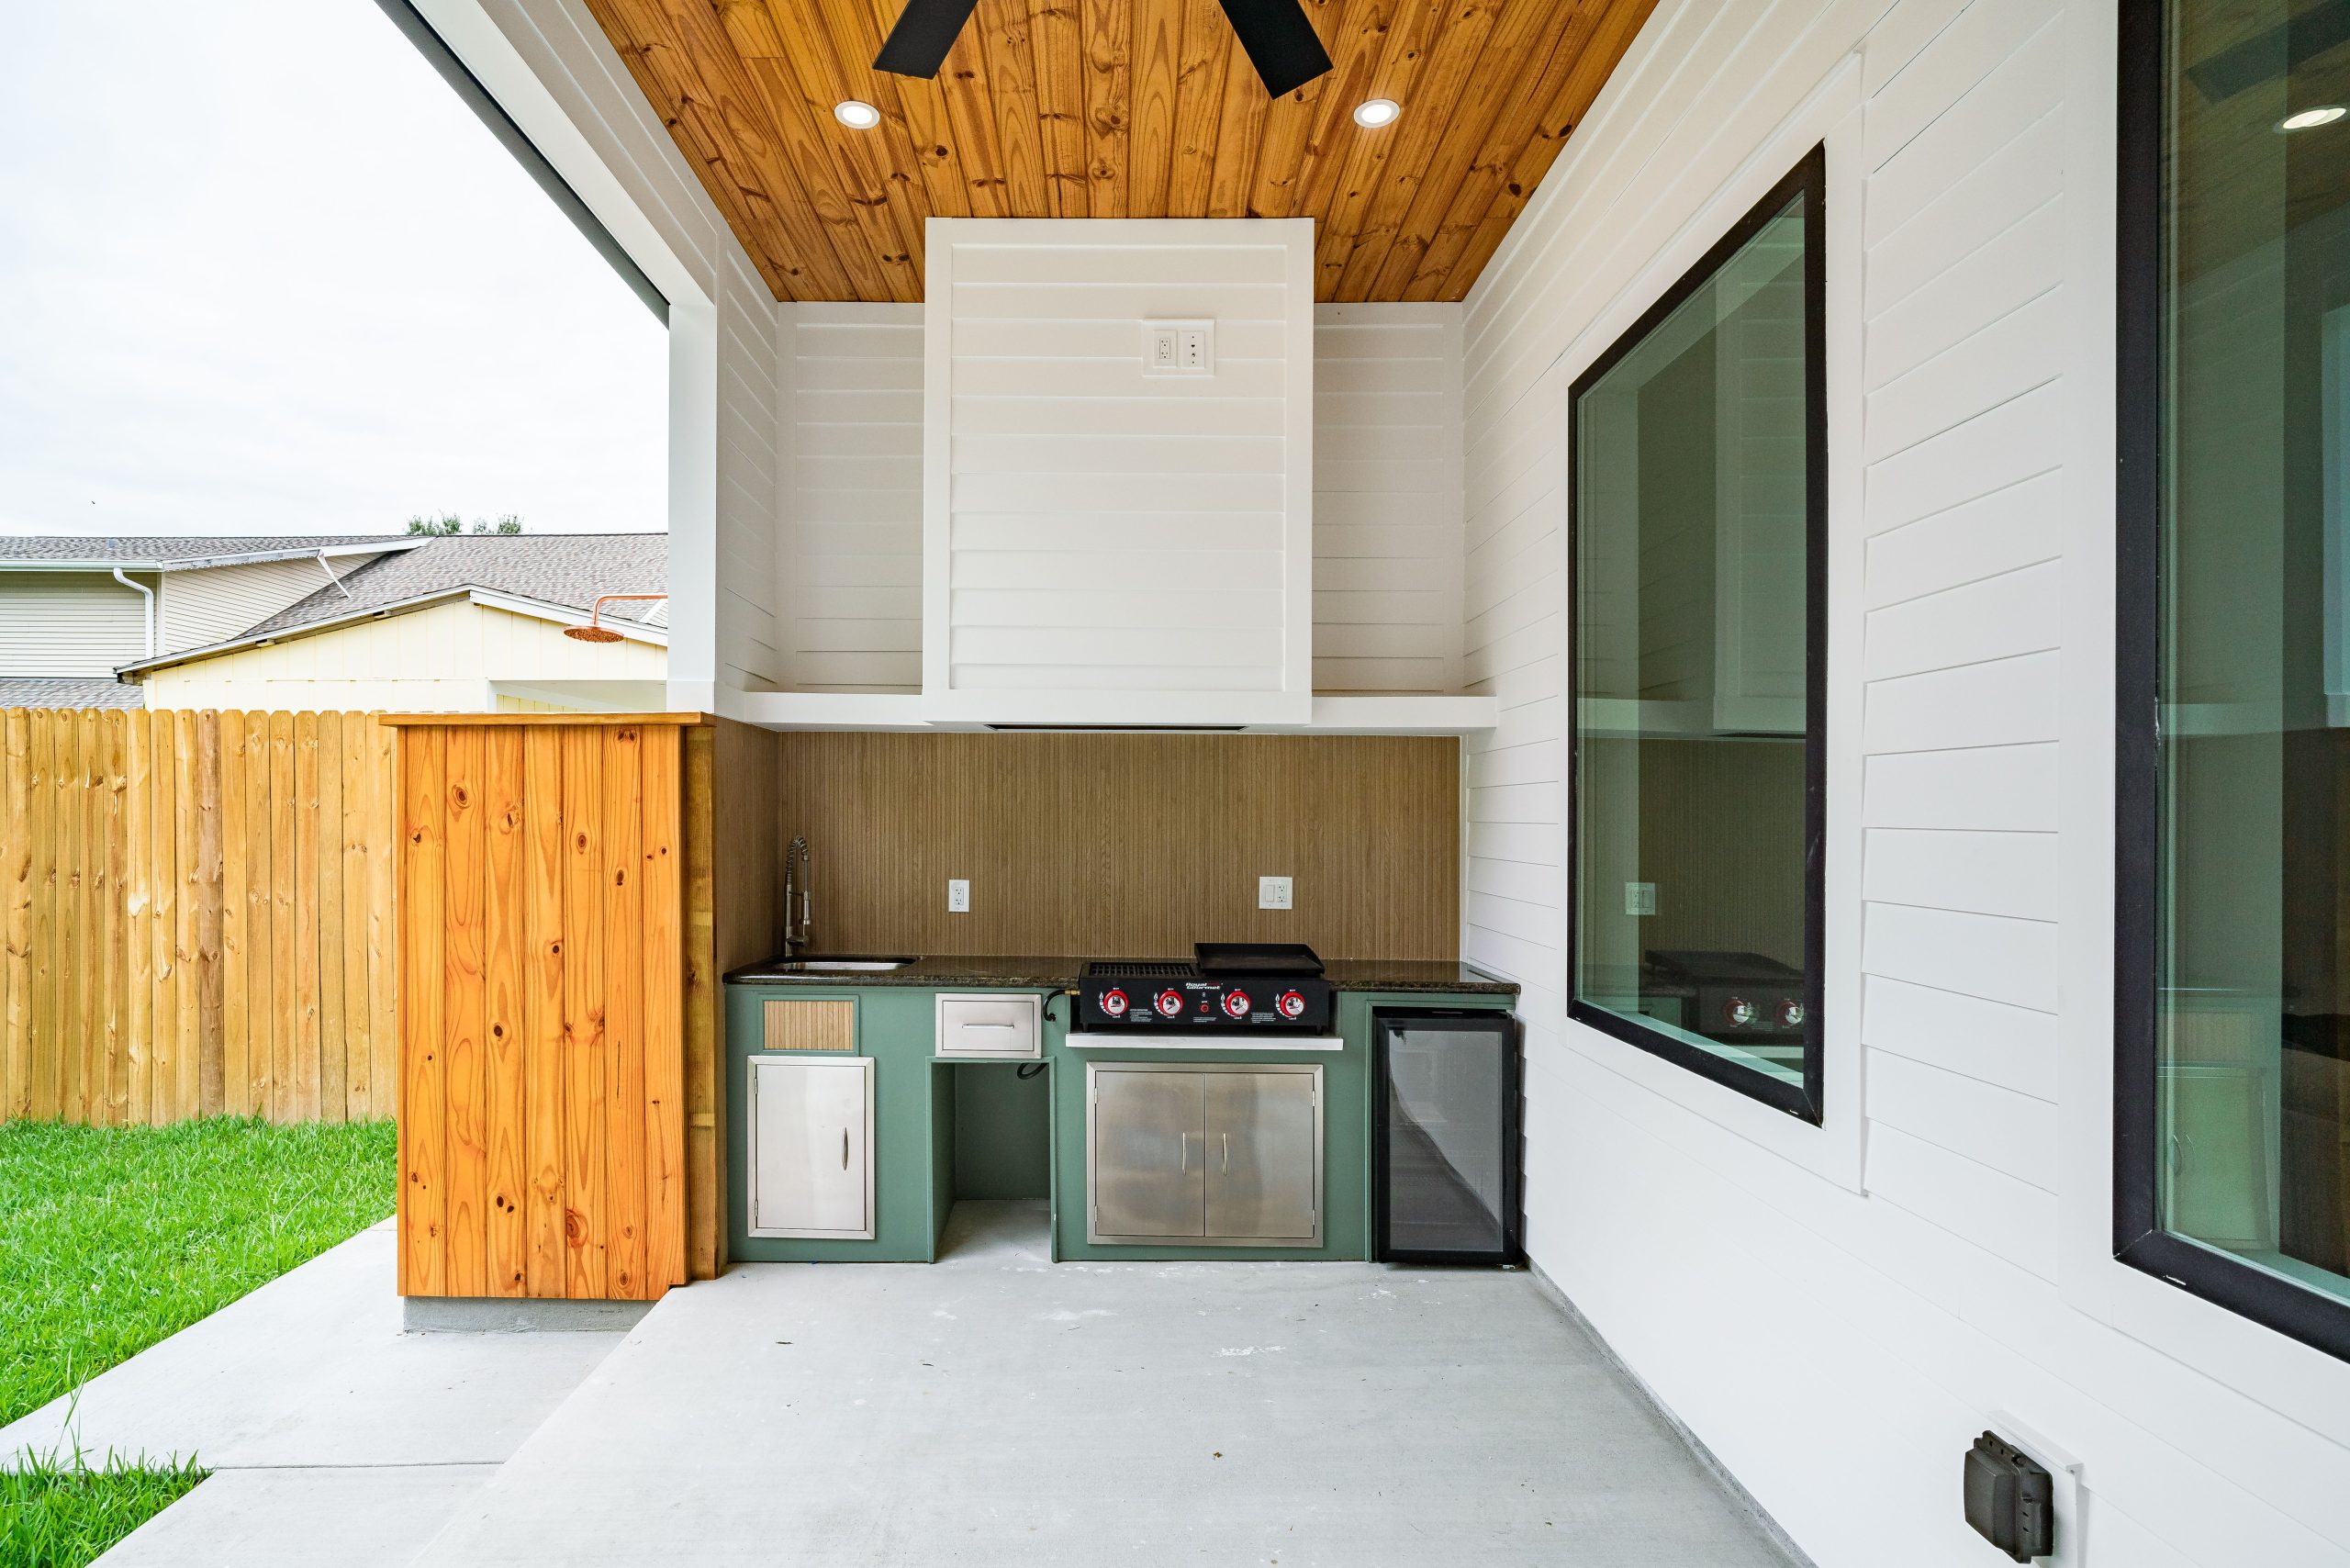
Before you commit to a built-in outdoor kitchen with a sink and fridge, be sure to verify a few key things. This isn’t just about placing cabinets.
- Can you easily run a water supply line and a drain line to your desired location? This often involves a plumber and can add significant cost.
- Is there a GFCI-protected electrical outlet nearby to power a refrigerator or task lighting?
- Have you measured your chosen grill, sink, and fridge? Get the exact appliance dimensions *before* you order the cabinetry to ensure a perfect fit.
7. Mediterranean Vibes with Terracotta Tiles and a Brick BBQ
Recreating this warm, Mediterranean outdoor kitchen has a moderate price tag, mostly dependent on labor for the masonry and tile work.
- Main Structure: Brick, mortar, and labor for the built-in BBQ: $1,500 – $3,000
- Countertop/Finishes: Granite-look counter and decorative tiles: $800 – $2,000
- Flooring: Terracotta floor tiles for a 10×12 area: $600 – $1,200
- Appliances: Grill insert: $500 – $1,500
- Covering: Slatted wood ceiling materials: $700 – $1,800
- TOTAL: $4,100 – $9,500
- Budget Alternative: Use a standalone grill next to a DIY counter built from concrete blocks and a tiled top. This can bring the cost down to under $2,000.
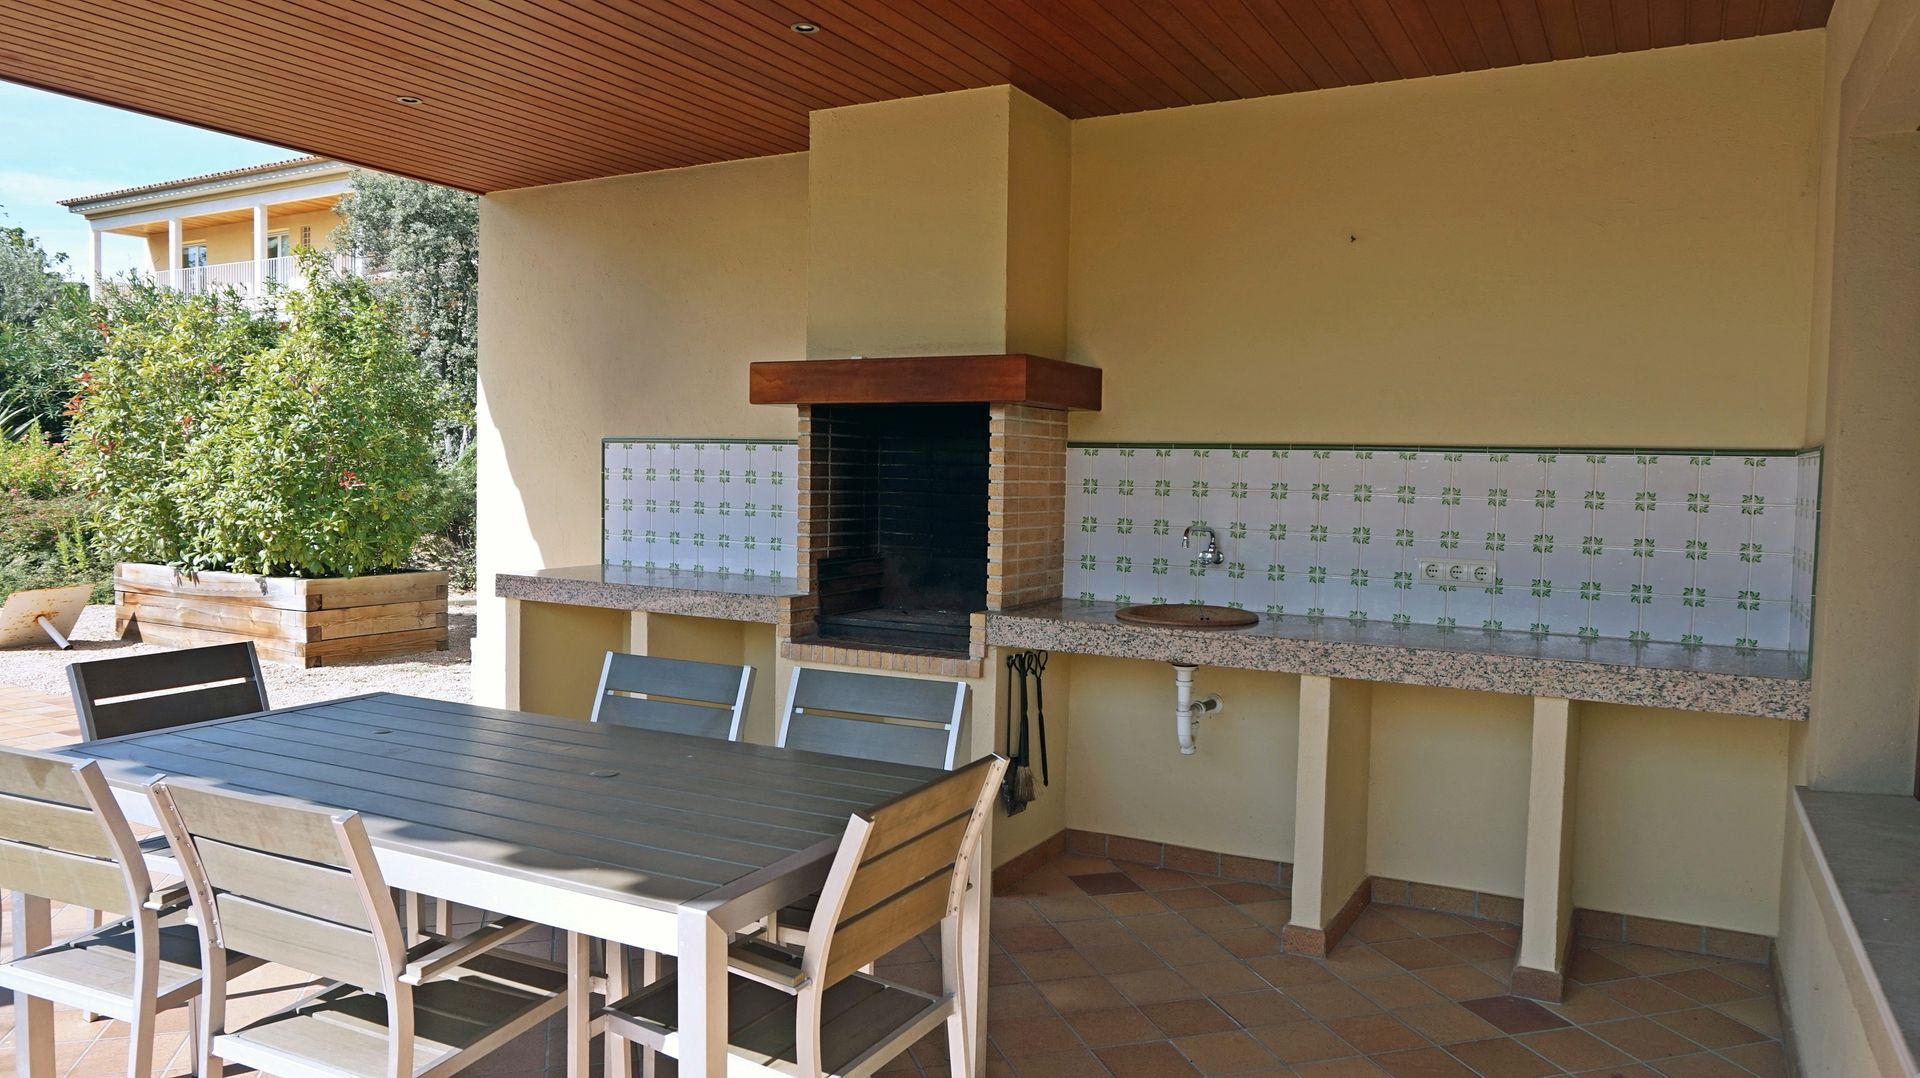
When using materials like terracotta and decorative ceramic tiles outdoors, the grout you choose is critical. Don’t just use standard interior grout. You need a polymer-modified, cement-based grout that is specifically rated for exterior use and resistant to temperature changes and moisture. For extra protection against stains from spills and mildew growth, make sure to seal the grout lines with a high-quality penetrating sealer at least once a year. This small step will dramatically extend the life and look of your tilework. For a more rustic take on a brick build, see Idea #26.
8. A Simple, Budget-Friendly Roof for Your Grill Station
You can build a simple lean-to roof to cover your grill in a weekend. This provides rain and sun protection without the cost of a full pergola. Time: 1 Day. Cost: $300-$600.
- Set Posts: Secure two 4×4 pressure-treated posts in concrete footings about a foot away from your wall.
- Attach Ledger Board: Bolt a 2×6 ledger board horizontally to your house’s wall framing. Ensure it’s level and flashed properly.
- Install Rafters: Run 2×6 rafters from the ledger board to a header beam across your two posts, creating a gentle slope away from the house.
- Add Roofing: Cover the rafters with corrugated polycarbonate or metal roofing panels, which are lightweight and easy to install.
Hold on before you start building that roof. Any permanent overhead structure, even a small one, may require a permit from your local building department. Codes vary wildly by location, and they exist for your safety—to ensure structures can handle wind and snow loads and are properly secured. Building without a permit can result in fines and having to tear your work down. A quick call to your town or city’s planning office to ask about requirements for a small ‘patio cover’ or ‘pergola’ is a crucial first step.
9. Streamlined and Serene: A Beige Outdoor Kitchen with a White Pergola
A long, linear kitchen setup like this one is an incredibly efficient use of space, especially for rectangular patios or long, narrow side yards. By keeping all the cabinetry and appliances along one wall, you maintain an open feel and an easy traffic flow. This design works best on a patio that is at least 15 feet long but can be as narrow as 8-10 feet wide, as it leaves plenty of room for a dining table or lounge area opposite the kitchen run without feeling cramped.
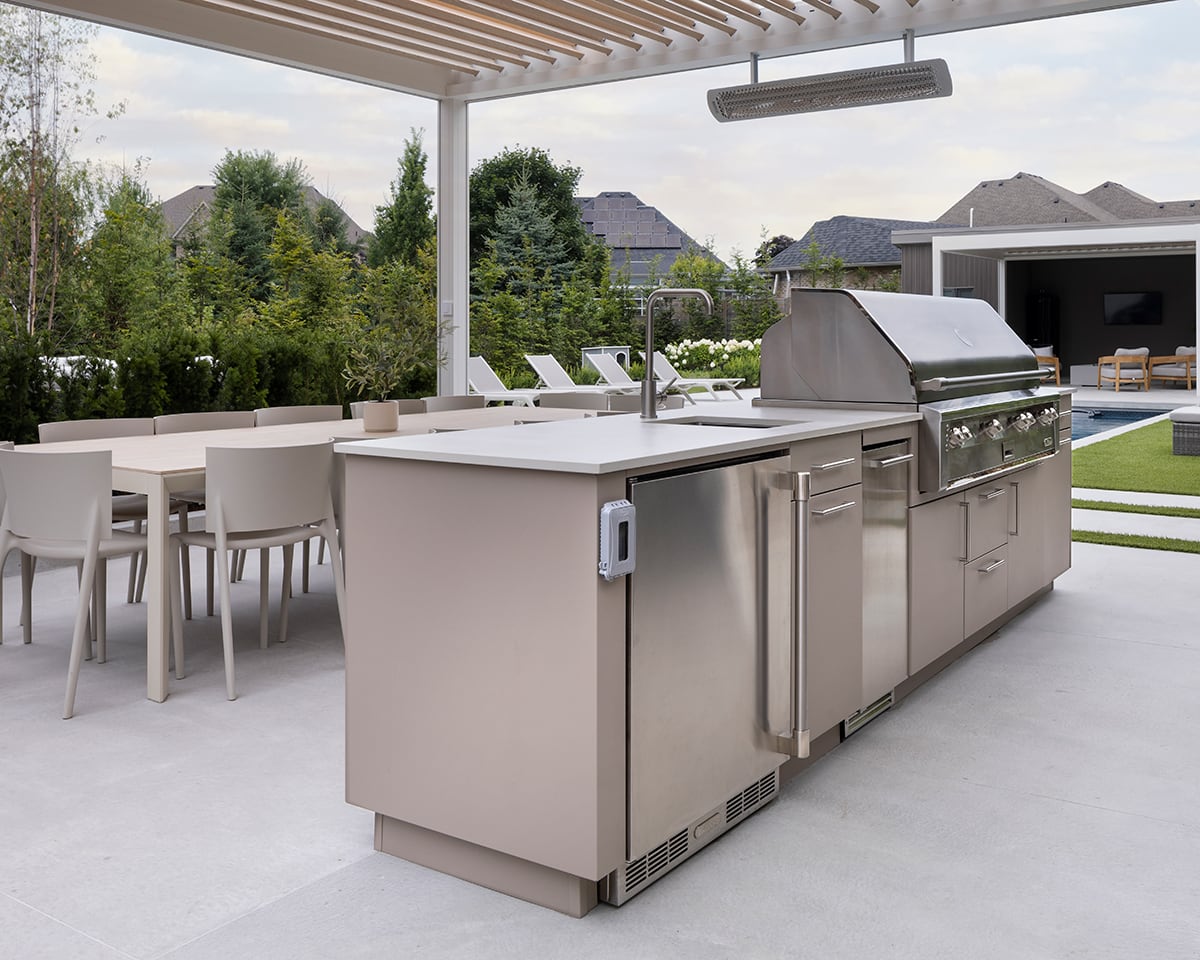
Stainless steel looks fantastic and professional, but keeping it pristine in an outdoor environment requires a specific routine. Rain, pollen, and dust will leave water spots and a film on the surfaces. To clean, always wipe with a microfiber cloth in the direction of the grain. For tougher spots or fingerprints, use a dedicated stainless steel cleaner or a simple mix of dish soap and water. Avoid abrasive sponges, which will scratch the surface. A quick wipe-down once a week is the secret to preventing buildup.
10. Tuscan Elegance with Arched Stone and a Statement Range Hood
The single element that elevates this patio from nice to truly special is the architecture itself. The arched stone entryways and columns define the space with a sense of history and permanence that you just can’t get from furniture alone. They create a graceful, sheltered feeling and provide the perfect old-world framework for the modern stainless steel appliances. Without the arches, it would just be a patio; with them, it’s a Tuscan-inspired loggia. This has a more formal feel than the casual Mediterranean look in Idea #7.
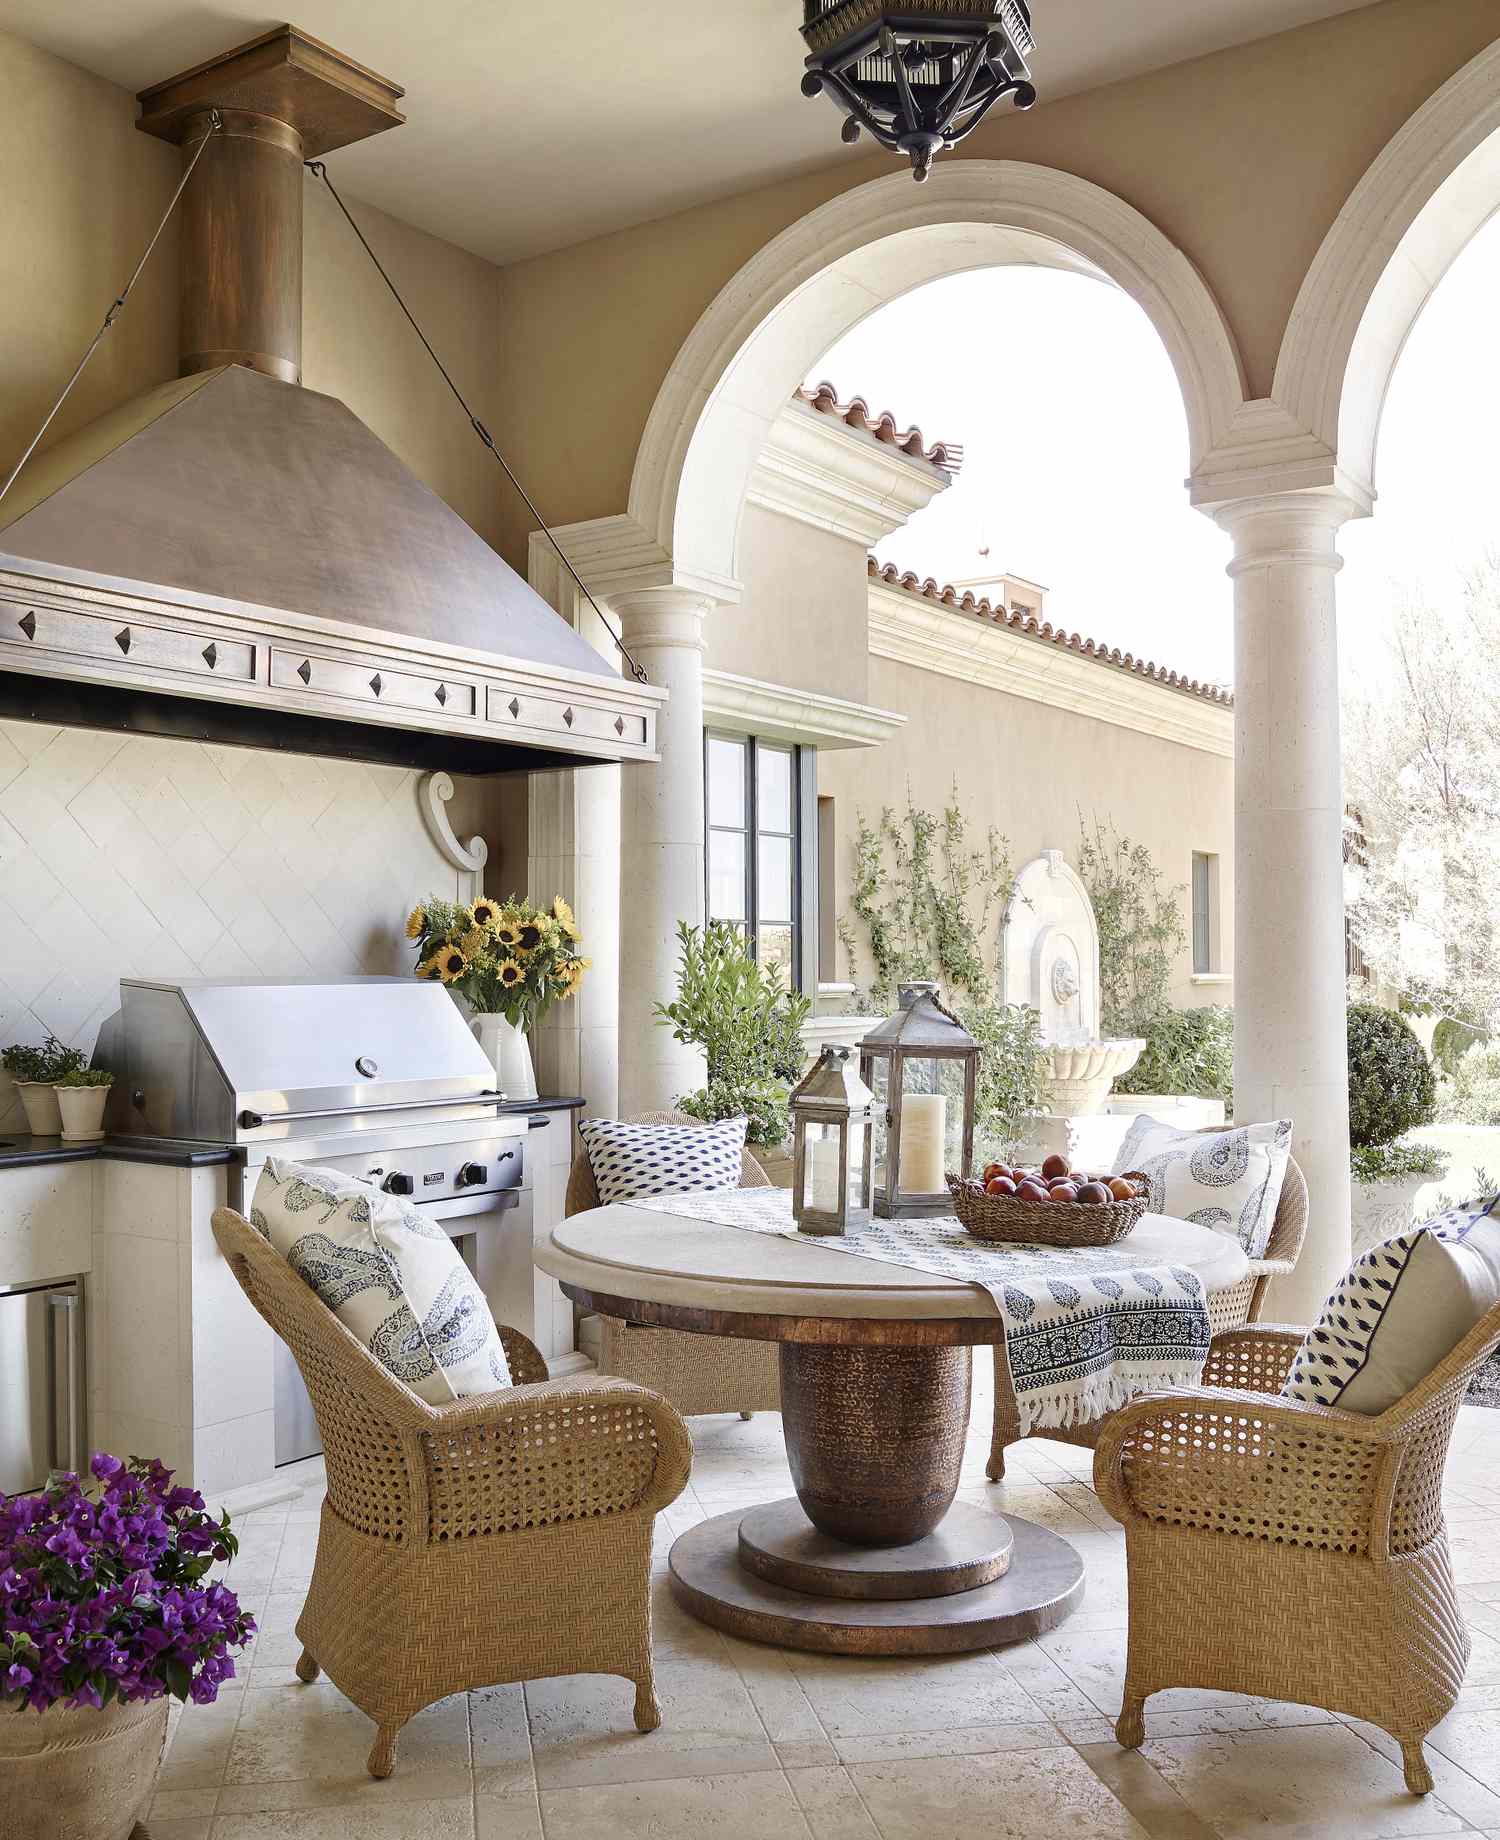
This inviting Tuscan formula is all about texture and warmth. Think of it as: 70% warm, light-colored stone + 20% dark metal + 10% pattern and texture. The creamy beige stone of the arches and columns forms the dominant, soft backdrop. The large metallic range hood, grill, and dark table frame provide strong, grounding contrast. Finally, the patterned cushions on the wicker chairs and the herringbone tile backsplash add that crucial layer of decorative detail and tactile interest that makes the space feel complete.
11. Garden Getaway: A Flagstone Patio with an Integrated Grill
This space feels so serene because it perfectly blends the man-made elements with the natural surroundings. The irregular shapes and earthy tones of the flagstone patio mirror the organic forms of the lush garden, so it feels like the patio grew there rather than being imposed on the landscape. The use of natural materials like the light wood dining set and the stacked stone retaining walls further blur the lines between the built and natural environments, creating a truly harmonious and relaxing retreat.
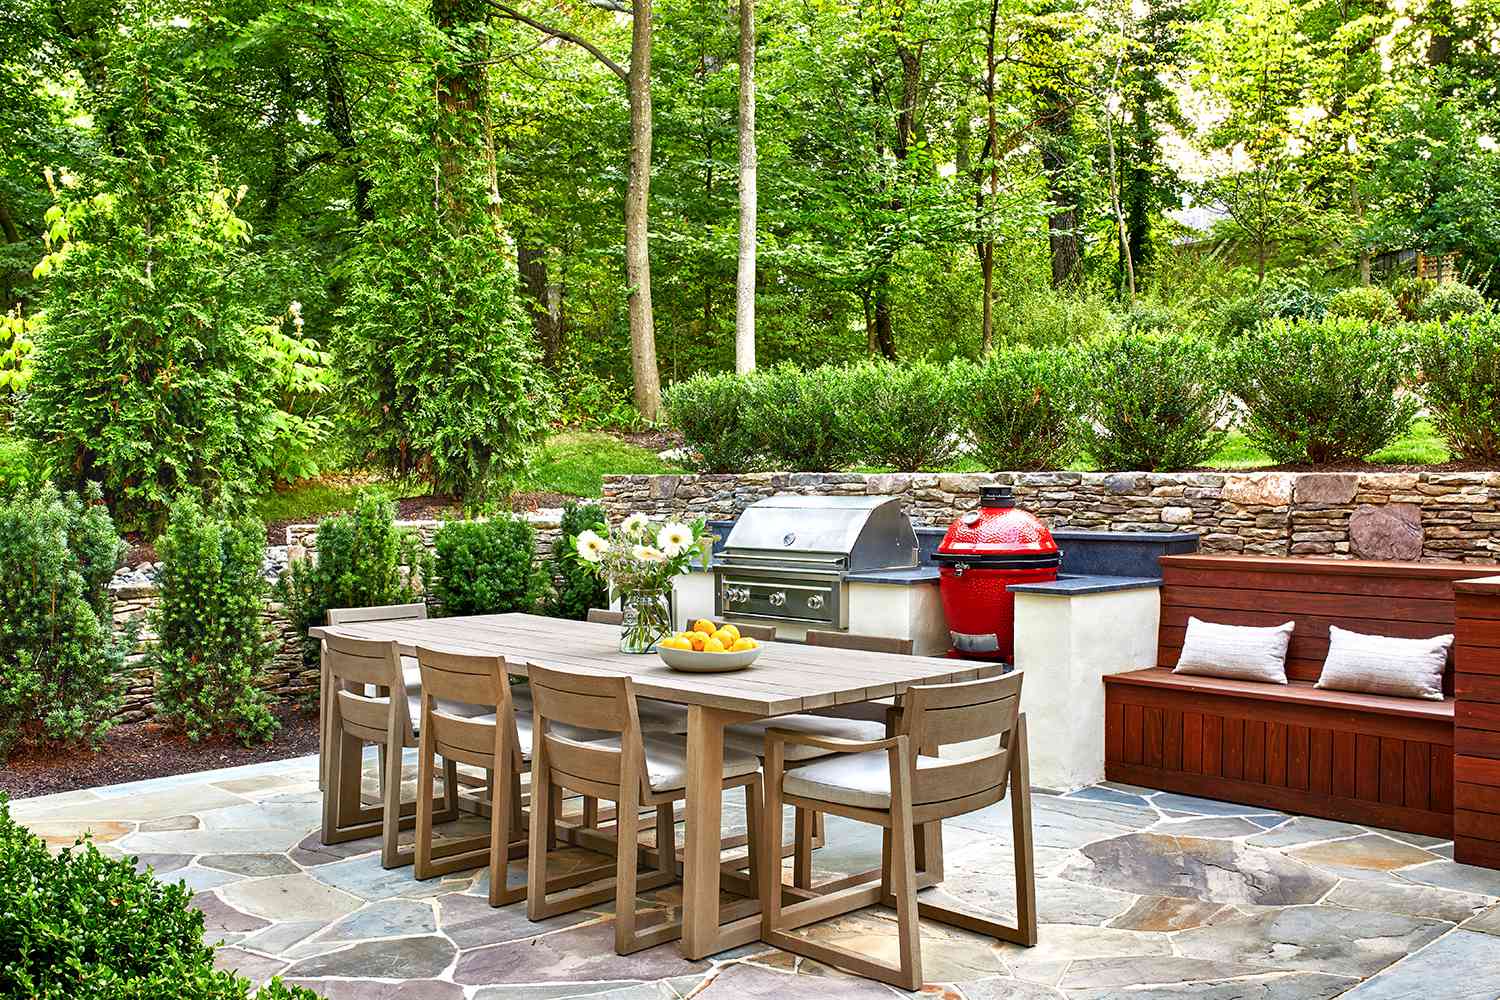
A professionally installed flagstone patio can be expensive, but you can get this rustic, integrated feel for a fraction of the cost.
- Patio Base: Instead of flagstone, use decomposed granite or pea gravel for the main area. It’s affordable, DIY-friendly, and gives a wonderful, natural crunch underfoot. Cost: $100-$300 for a 10×10 area.
- Stepping Stones: Embed a few large, inexpensive pre-cast concrete pavers or salvaged stone pieces into the gravel to create stable spots for chair legs.
- Furniture: Look for second-hand wood or metal dining sets on Facebook Marketplace. A little sanding and a fresh coat of outdoor sealant can work wonders.
12. A Chunky, Rustic Kitchen Built from Stacked Stone
When you have a rough-hewn stone countertop like this, sealing it is not optional—it’s essential. Natural stone is porous and will stain easily from things like wine, oil, and acidic foods (lemons, tomatoes). You’ll need to apply a high-quality, impregnating stone sealer right after installation. This type of sealer penetrates the stone to block liquids from soaking in. For an outdoor kitchen, you should plan to re-apply the sealer at least once a year, or whenever you see water starting to absorb into the surface rather than beading up.
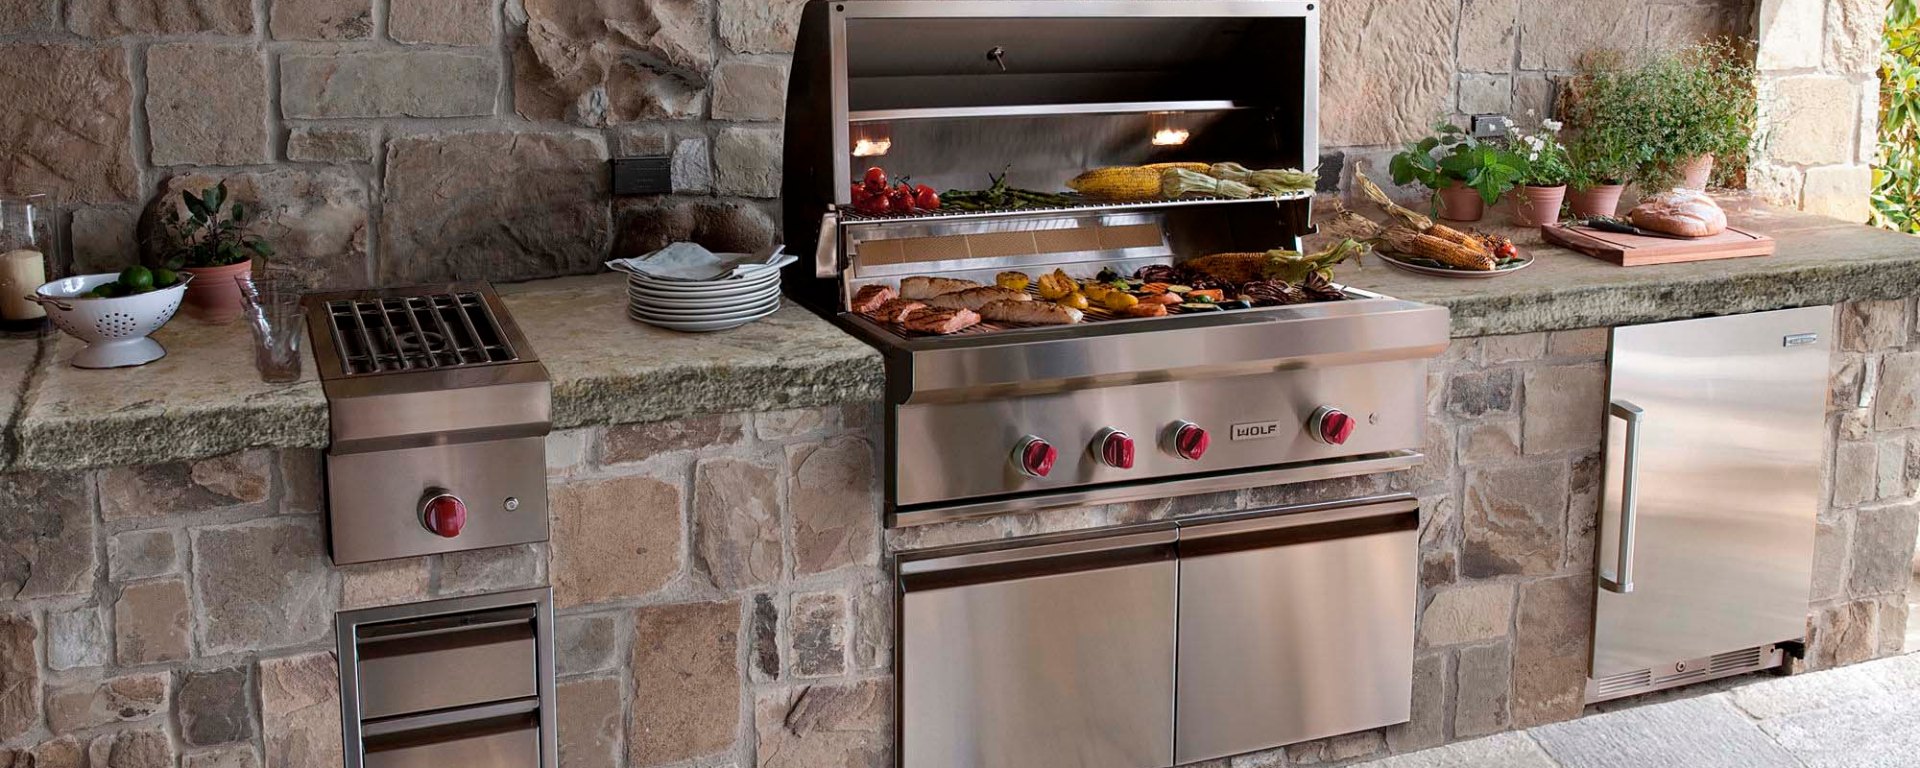
There’s no denying the beauty and permanence of a massive, stacked-stone outdoor kitchen. But ‘permanence’ is the key word here. This isn’t a grill cart you can roll to a different spot next year. Building a structure this heavy is a major commitment to its location. Before you start, be absolutely certain you’ve chosen the right spot in your yard, considering sun, shade, wind, and traffic flow to the house. There are no do-overs with a feature like this.
13. Earthy and Hand-Built: A Terracotta Oven with a Wooden Bar
What makes this space so captivating is the beautiful, hand-built terracotta cooking station. It’s more than just a place to grill; it’s a piece of functional sculpture. The earthy texture, the domed shape, the simple black iron door—it all speaks to a traditional way of cooking that feels authentic and grounded. It serves as the warm, beating heart of the entire patio, anchoring the design with its substantial and rustic character. The rest of the space, a simple bar and pavers, exists to serve it.
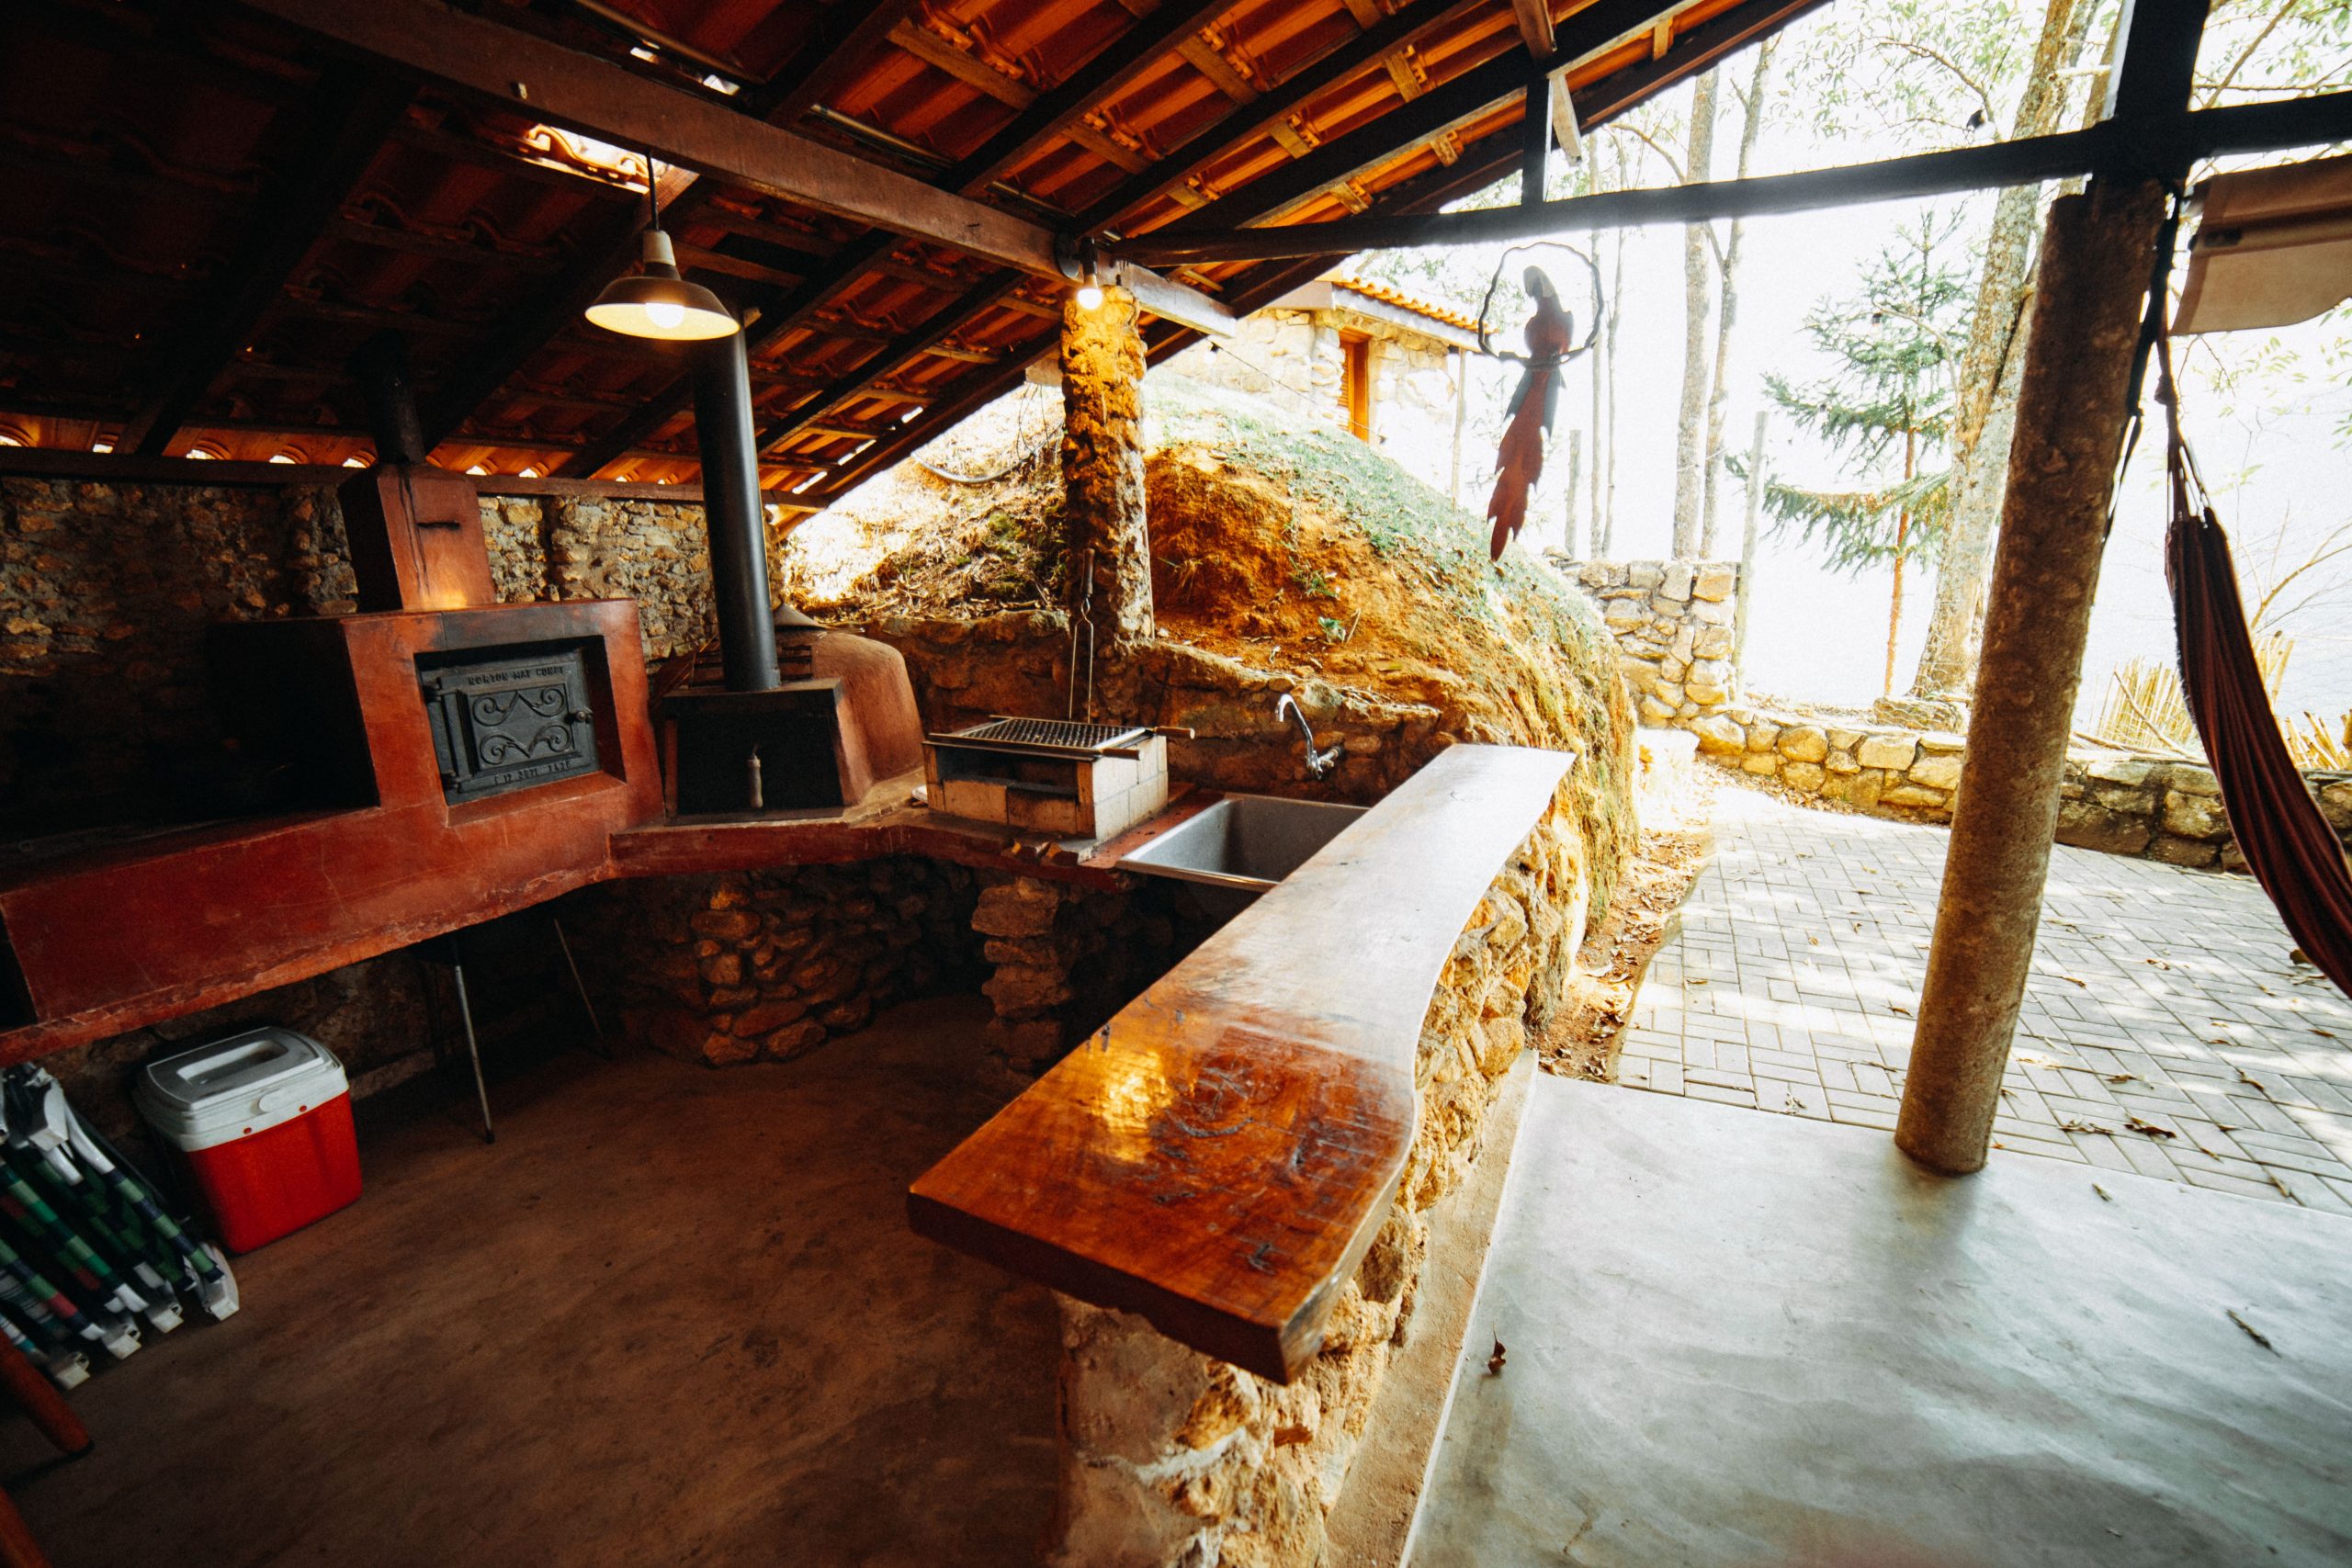
Creating a rustic bar top from a thick wood slab is a fantastic weekend project. Time: 4-6 hours (plus drying time). Cost: $150-$400.
- Source a Slab: Look for a thick, 2-3 inch slab of a durable wood like cedar, cypress, or even a treated pine ‘landscape timber’ from a lumber yard.
- Cut and Sand: Cut the slab to your desired length. Sand it thoroughly, starting with coarse 80-grit sandpaper and working your way up to a smooth 220-grit finish.
- Mount Brackets: Secure heavy-duty, L-shaped steel brackets to your supporting wall. Make sure they are level and screwed into studs or masonry.
- Seal and Secure: Apply multiple coats of an exterior-grade marine varnish or spar urethane, sanding lightly between coats. Once dry, secure the slab to the brackets from underneath with screws.
14. Urban Terrace Style: A White and Brick Outdoor Kitchenette
This compact, linear kitchenette is a perfect solution for smaller outdoor spaces like a narrow side yard, a small patio, or even a deep balcony. Because all the function is aligned against a single wall, it has a very minimal footprint. You only need about 6-8 feet of linear wall space and about 4-5 feet of depth to create a highly functional cooking zone like this one, leaving the rest of your precious square footage open for seating and plants. Compare this compact setup to the larger, more integrated kitchen in Idea #21.
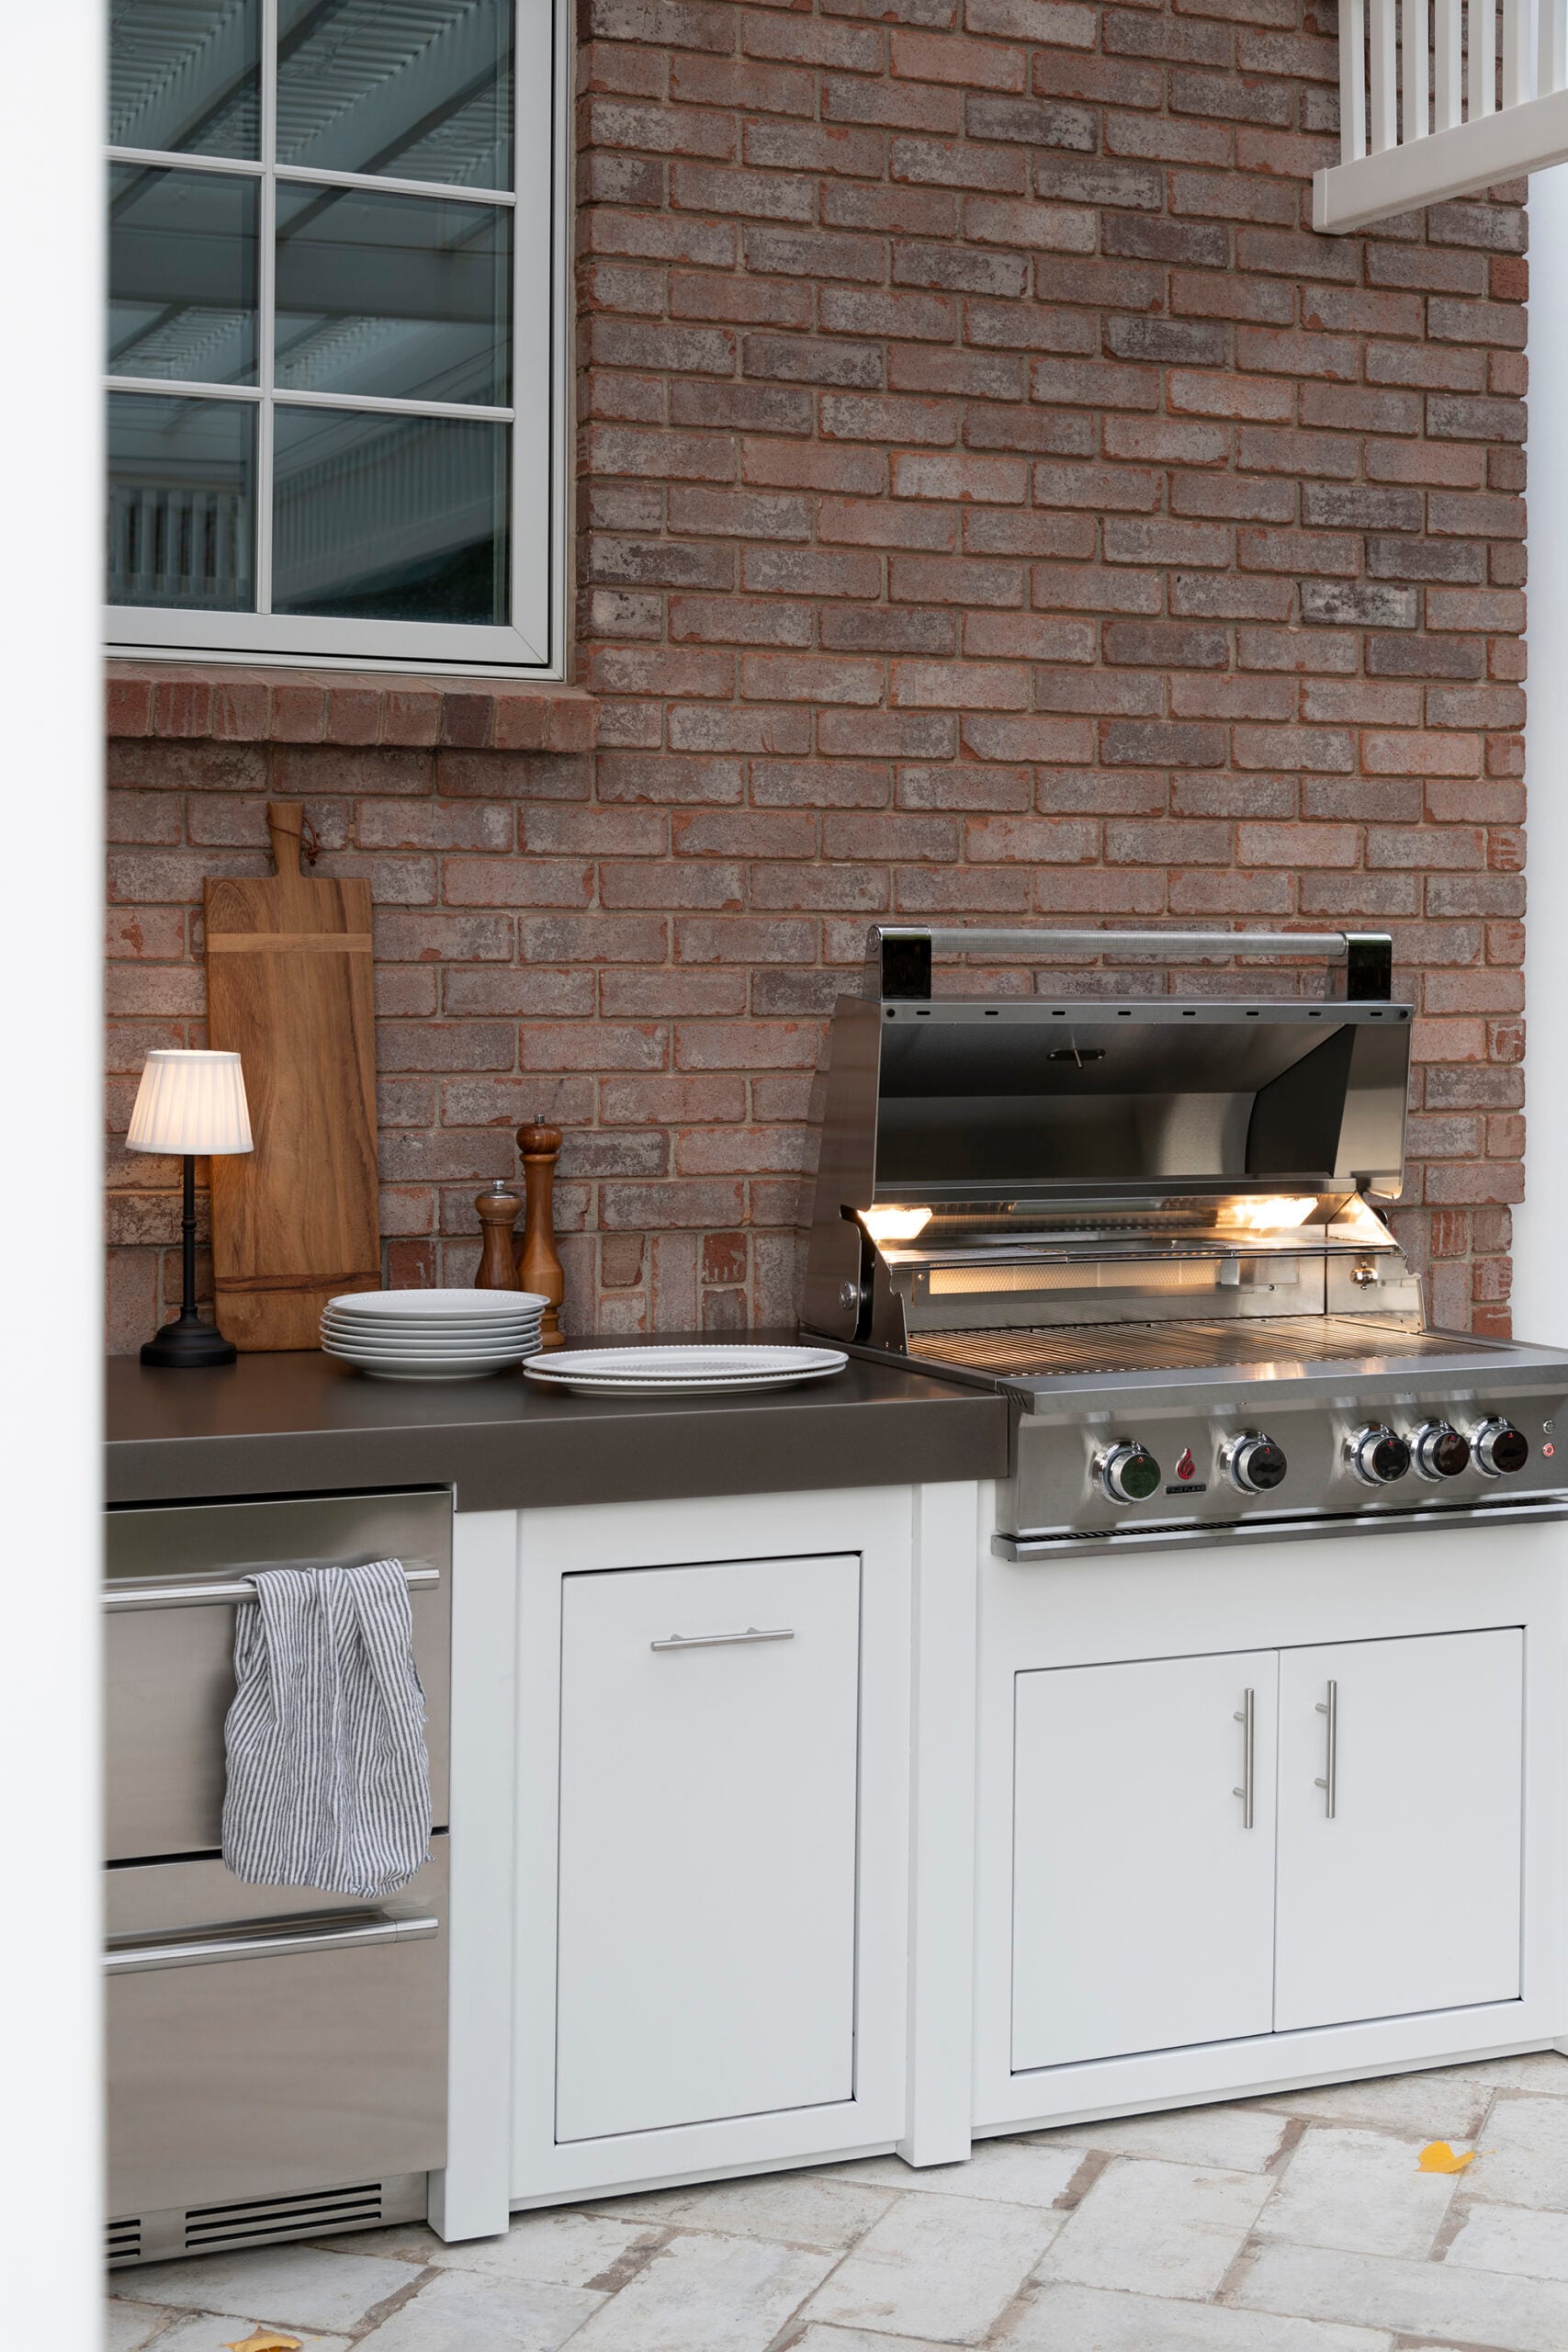
An exposed brick wall adds incredible character, but it’s important to assess its condition before you plan your kitchen around it.
- Is the brick and mortar in good shape? If it’s crumbling or flaking (a condition called spalling), it may need to be repointed or sealed by a mason before you install expensive cabinets against it.
- Will you need to run any plumbing or electrical lines? Cutting into a brick wall is a much bigger job than cutting into drywall.
- Consider applying a clear, breathable masonry sealer to the brick behind the grill to make it easier to clean off grease splatters.
15. The Modern Pellet Grill: Sleek Black and Stainless Steel
Pellet grills are exploding in popularity, and for good reason. They are the ultimate hybrid, combining the ‘set it and forget it’ convenience of a digital oven with the real wood-fired flavor of a traditional smoker. People are busier than ever but still crave authentic barbecue. A pellet grill lets you smoke a brisket or roast a chicken with minimal effort, all controlled from a digital panel or even your phone. It’s the tech-forward answer to our craving for traditional cooking methods.
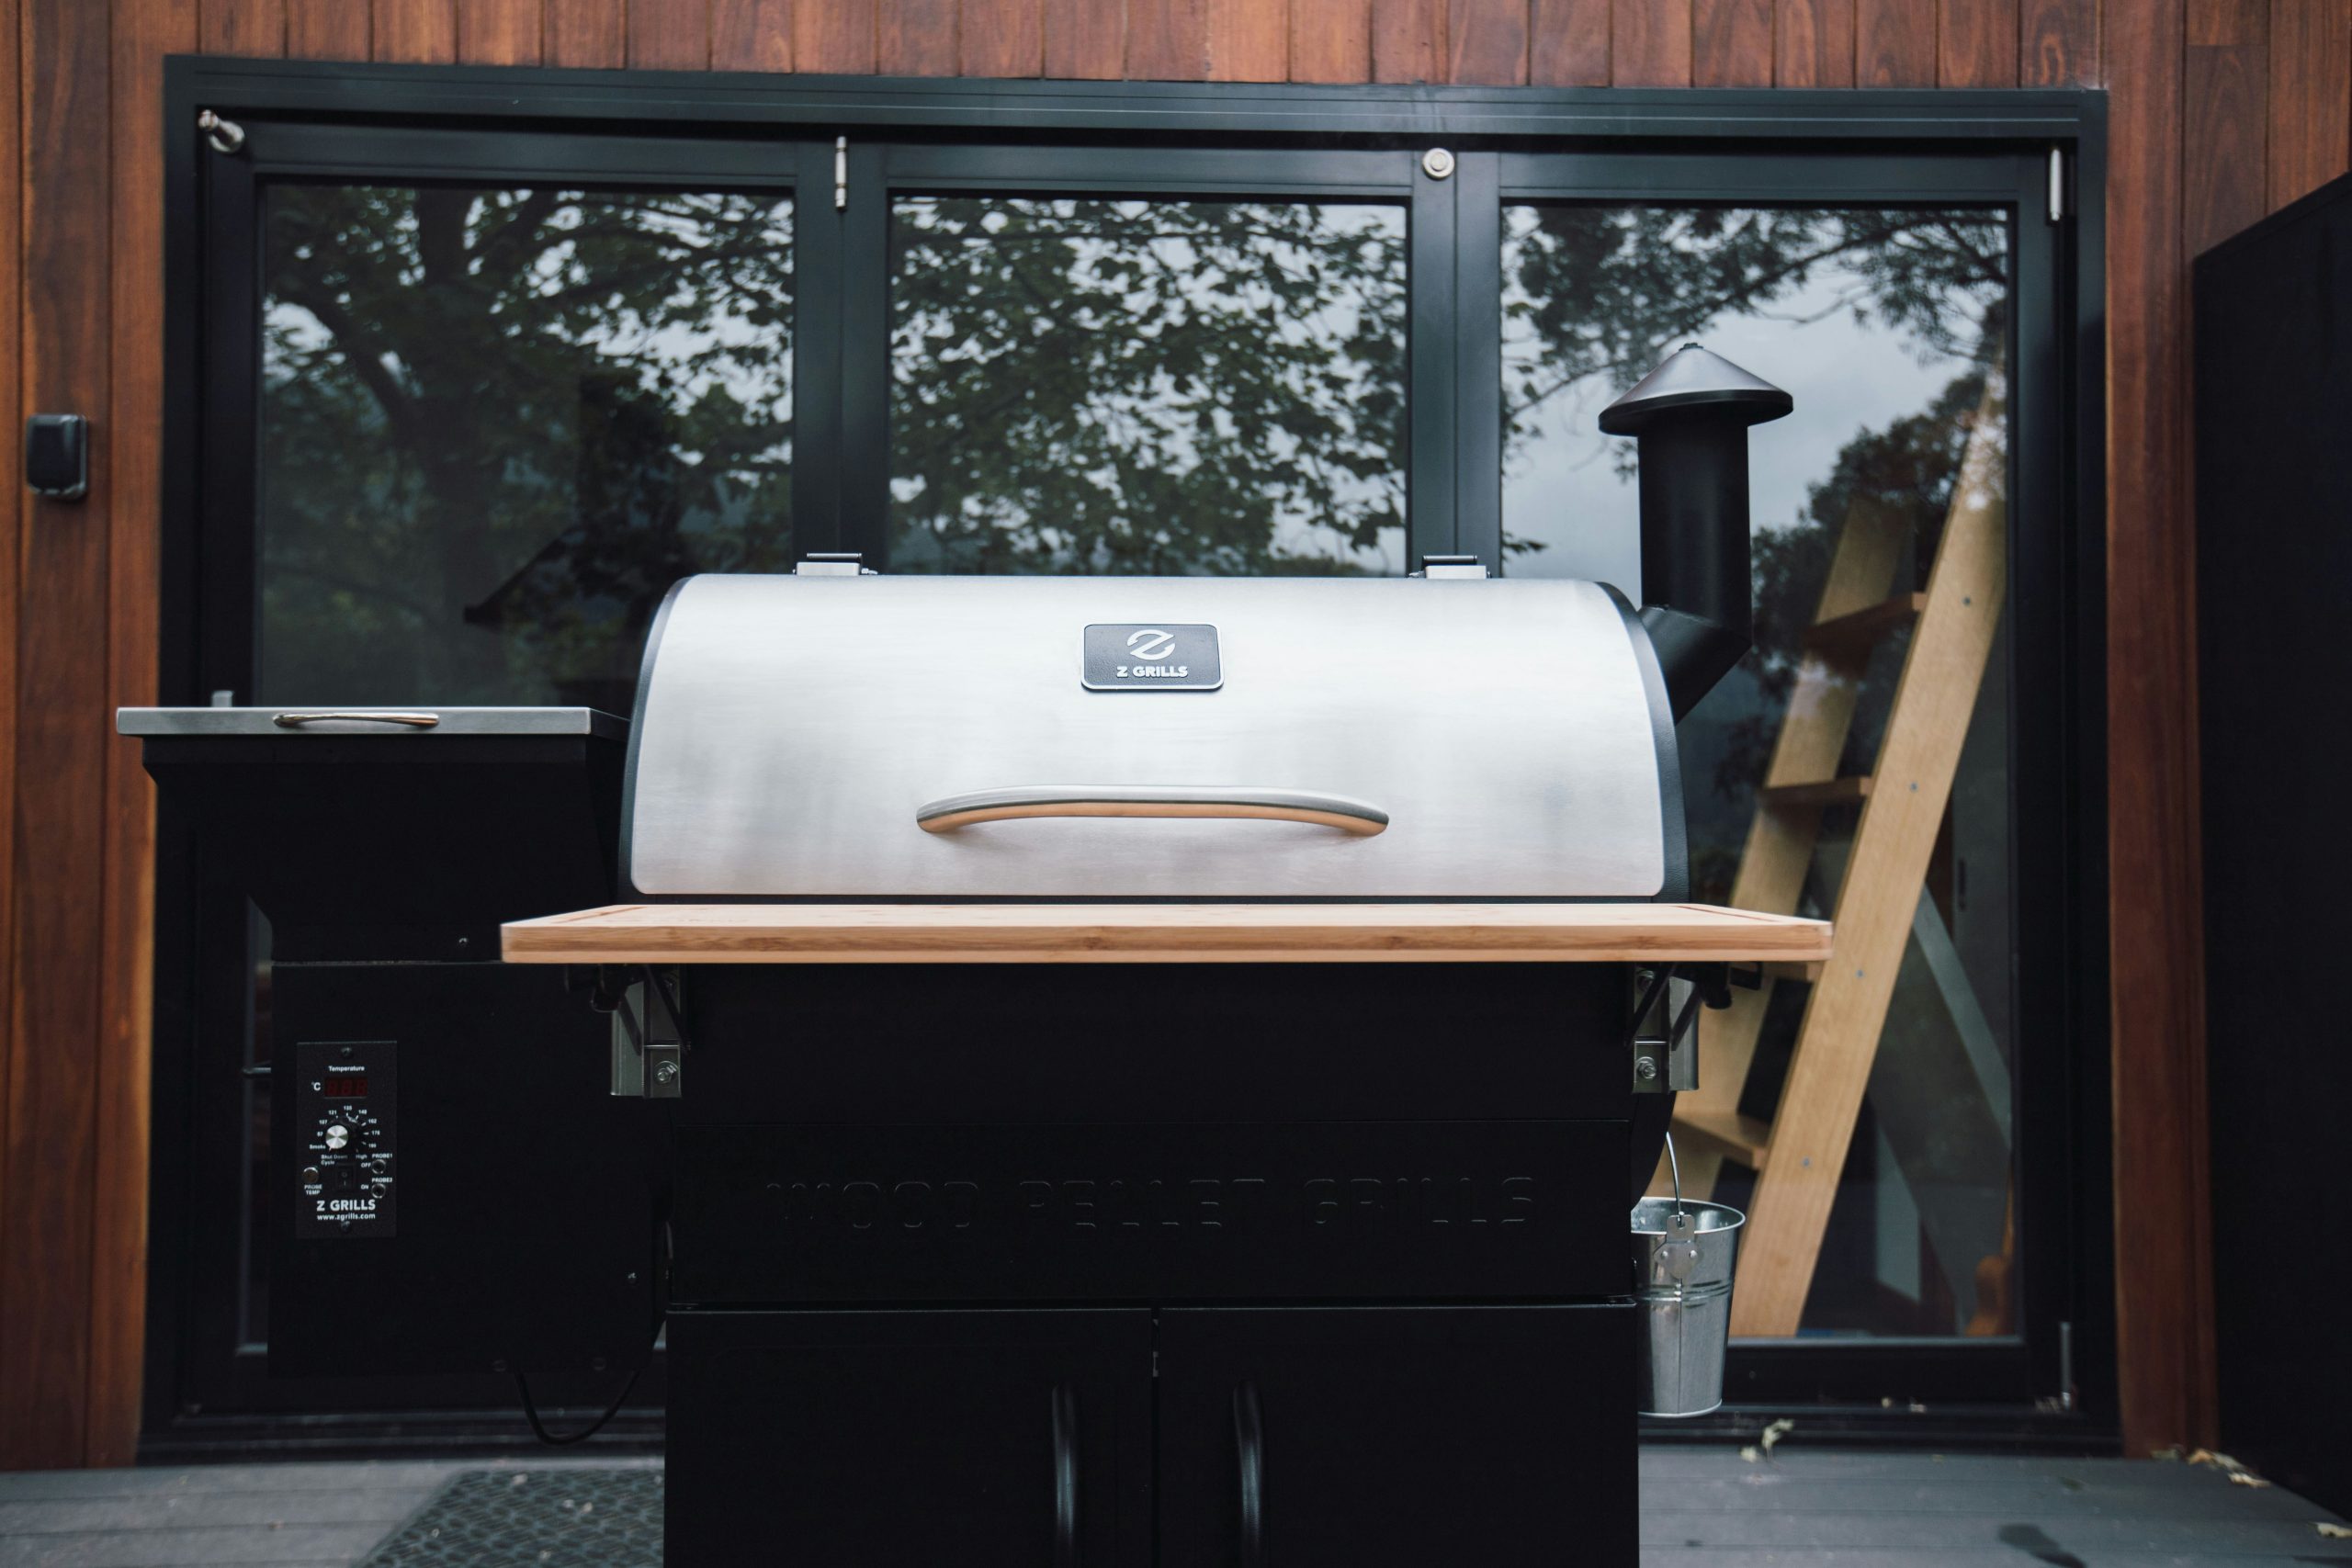
The design of this grill integrates beautifully into a modern home’s exterior aesthetic. The clean lines, the simple geometric forms, and the sophisticated palette of black, stainless steel, and a touch of light wood complement the dark siding and window frames popular in contemporary architecture. Unlike a bulky, rounded charcoal grill, this unit’s rectangular shape and crisp edges feel intentional and designed, making it look like an extension of the home rather than just an appliance sitting on the deck.
16. The Classic Backyard Cookout in Full Swing
The secret to a stress-free cookout is creating a dedicated ‘landing zone’ right next to your grill. This doesn’t have to be a fancy built-in counter. A simple, sturdy outdoor console table or a rolling kitchen cart works perfectly. It should be large enough to hold at least two platters (one for raw food, one for cooked), your sauces, spices, and tools. This prevents the frantic juggling act and keeps raw and cooked foods safely separated. Aim for a surface that’s at least 30 inches wide.
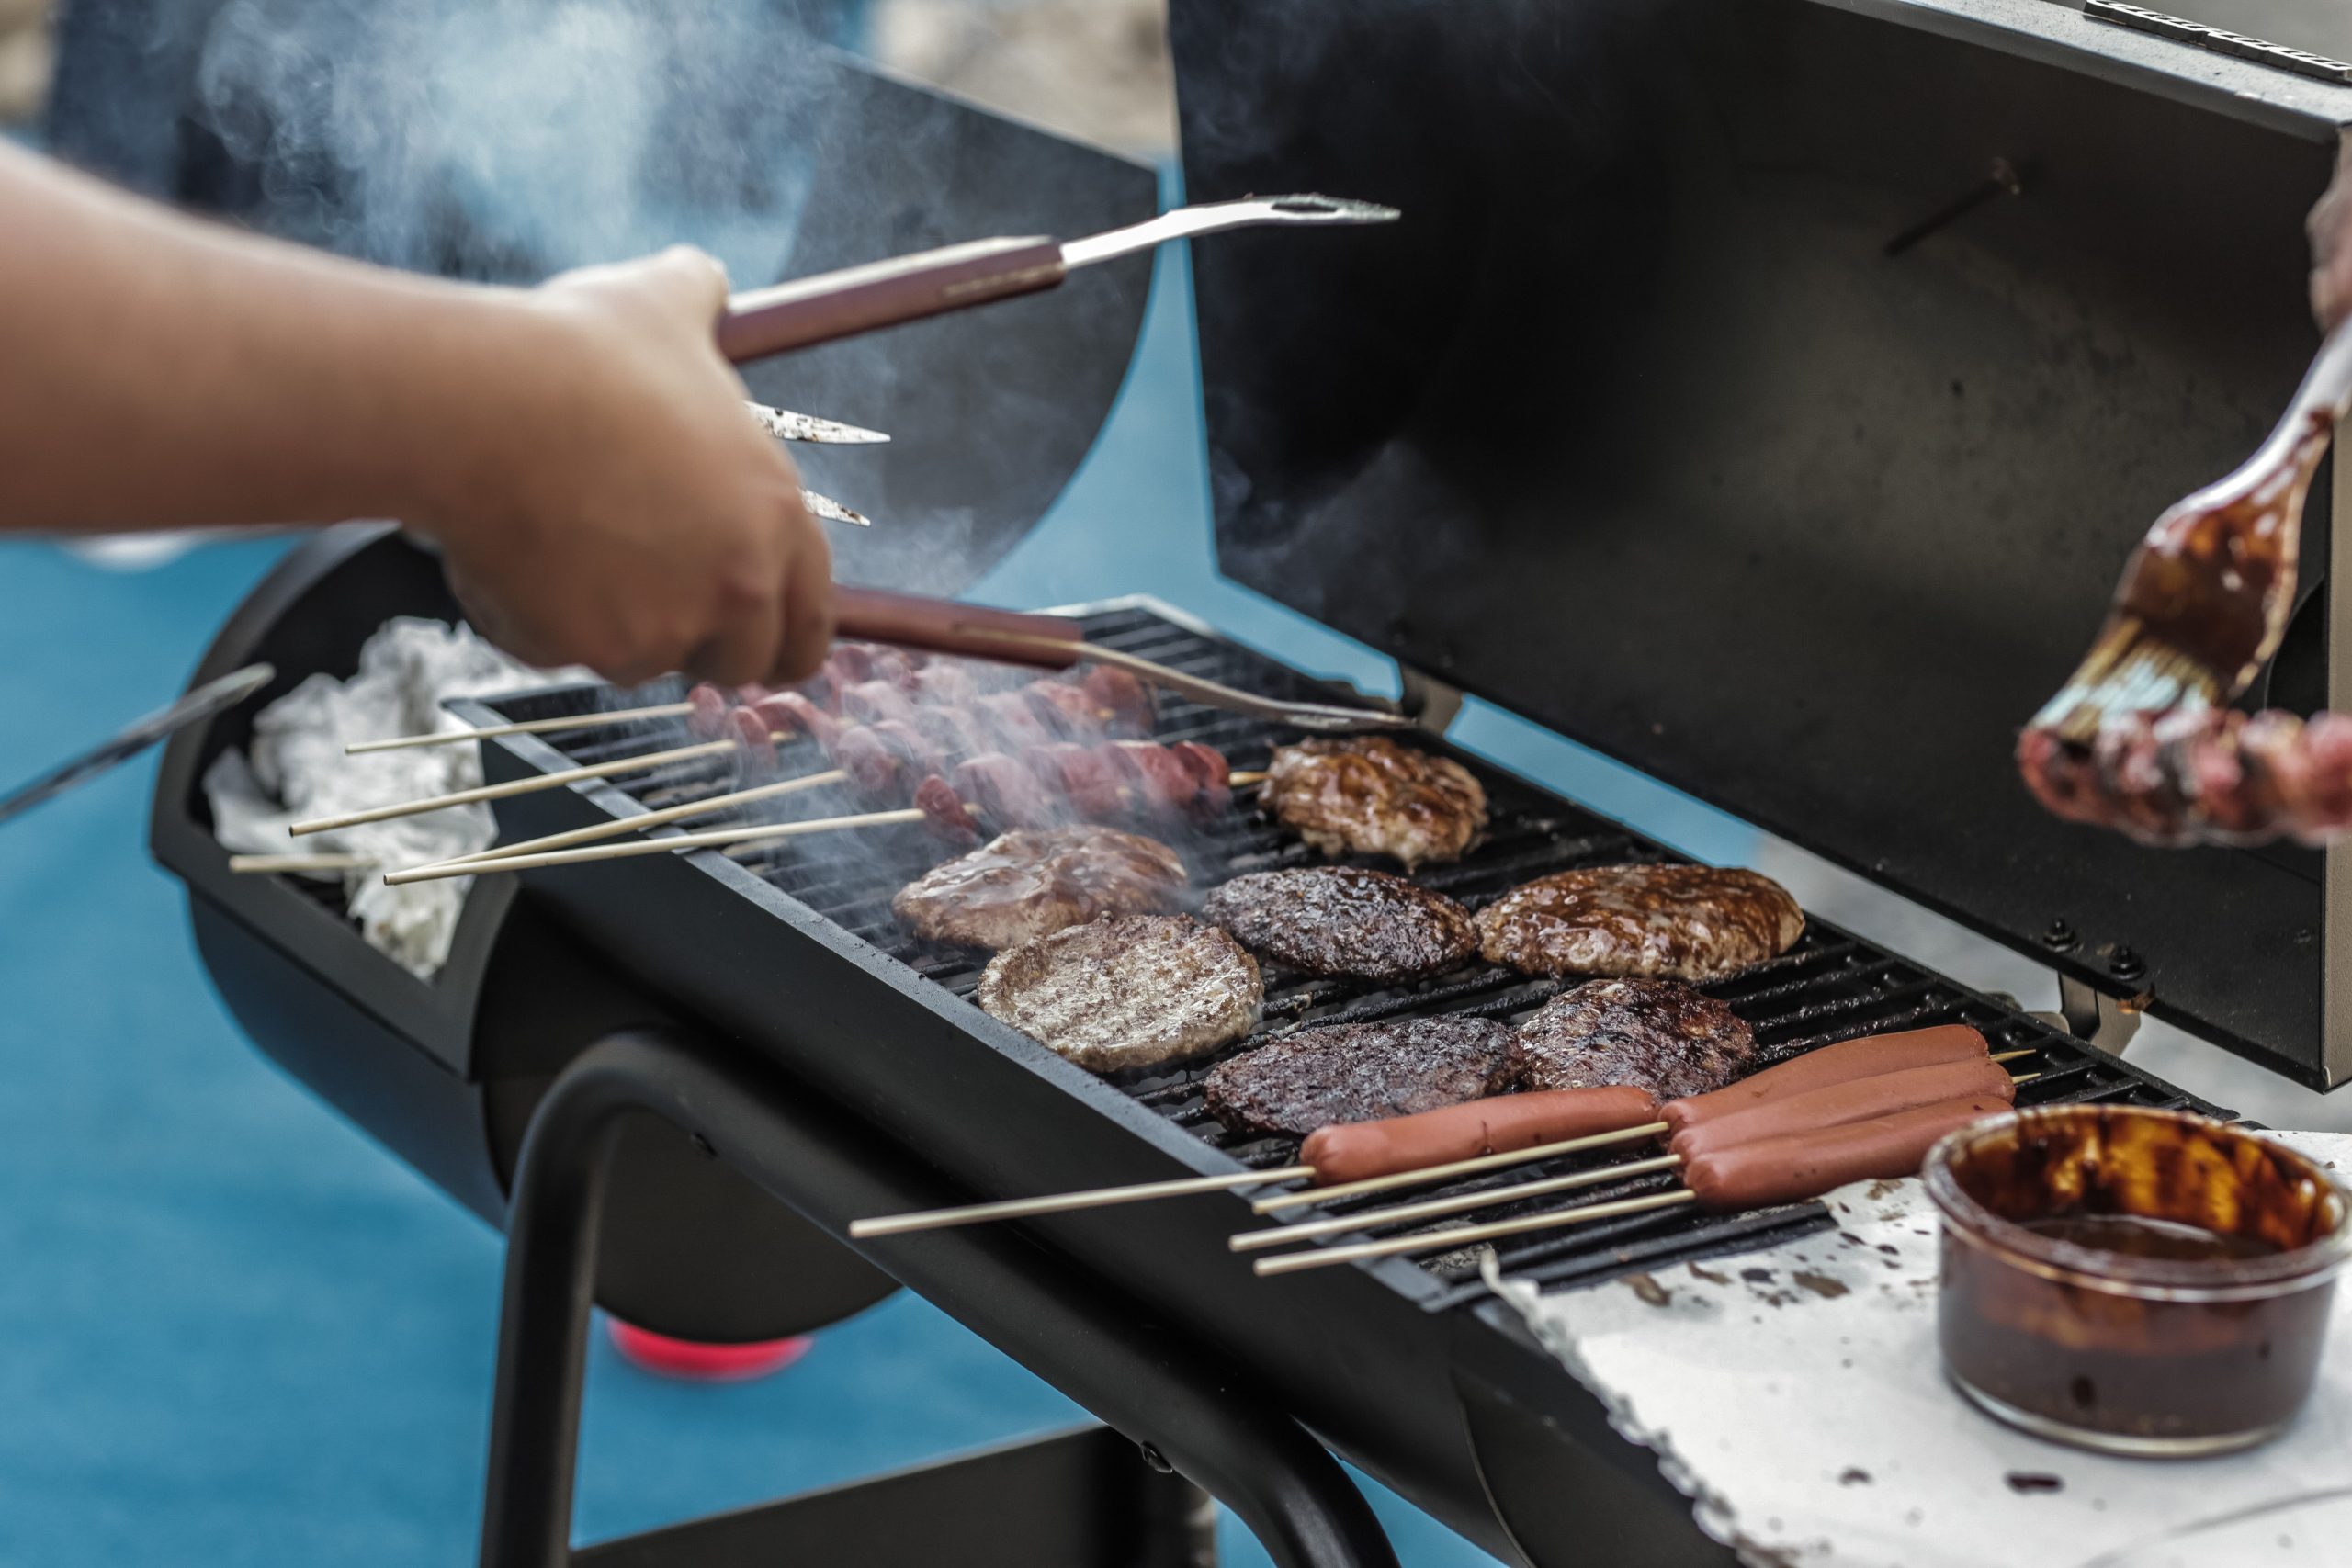
We all love the sight of a grill loaded with burgers, skewers, and hot dogs, but managing it all at once is harder than it looks. Different foods require different cooking times and temperatures. Hot dogs might be done in 5 minutes, while thick burgers need 10, and chicken skewers even longer. A grill this crowded is also prone to flare-ups and can create cool spots. The key is ‘zone grilling’—piling the hot coals on one side for searing, and leaving the other side empty for indirect cooking and keeping finished items warm.
17. The Perfect Sear: Grilling Chicken Over Live Coals
There’s a trade-off for the incredible flavor of charcoal grilling, and that’s cleanup. While a gas grill is a quick scrape and you’re done, a charcoal grill requires more effort. You have to wait for the coals to cool completely (which can take hours), then safely dispose of the ash. The grill grates also tend to get dirtier with carbon buildup from the charcoal. It’s not a deal-breaker, but it’s a more hands-on, messy process that you should be prepared for compared to the convenience of gas.

that makes this image so viscerally appealing is the unmistakable flavor that only comes from cooking over live coals. You can see it in the char on the chicken and the flicker of the orange flames. Gas grills are convenient, but they can’t replicate the smoky, primal taste that lump charcoal or briquettes impart to food. That specific flavor is the entire reason people choose charcoal, and it’s the element that defines this type of cooking experience. It’s a taste that immediately says ‘summer’.
18. A Robust Offset Smoker for the Serious BBQ Enthusiast
An offset smoker is a fantastic piece of equipment, but it’s not for small spaces. These units are large and unwieldy, with a significant horizontal footprint. To operate one safely and comfortably, you’ll need a clear, level area on your deck or patio of at least 8 feet by 4 feet. You also need to consider clearance from siding, railings, and overhead structures, as it will put out considerable heat and smoke. This is a tool that commands a dedicated space. This is a more heavy-duty version of the smoker shown in Idea #4.
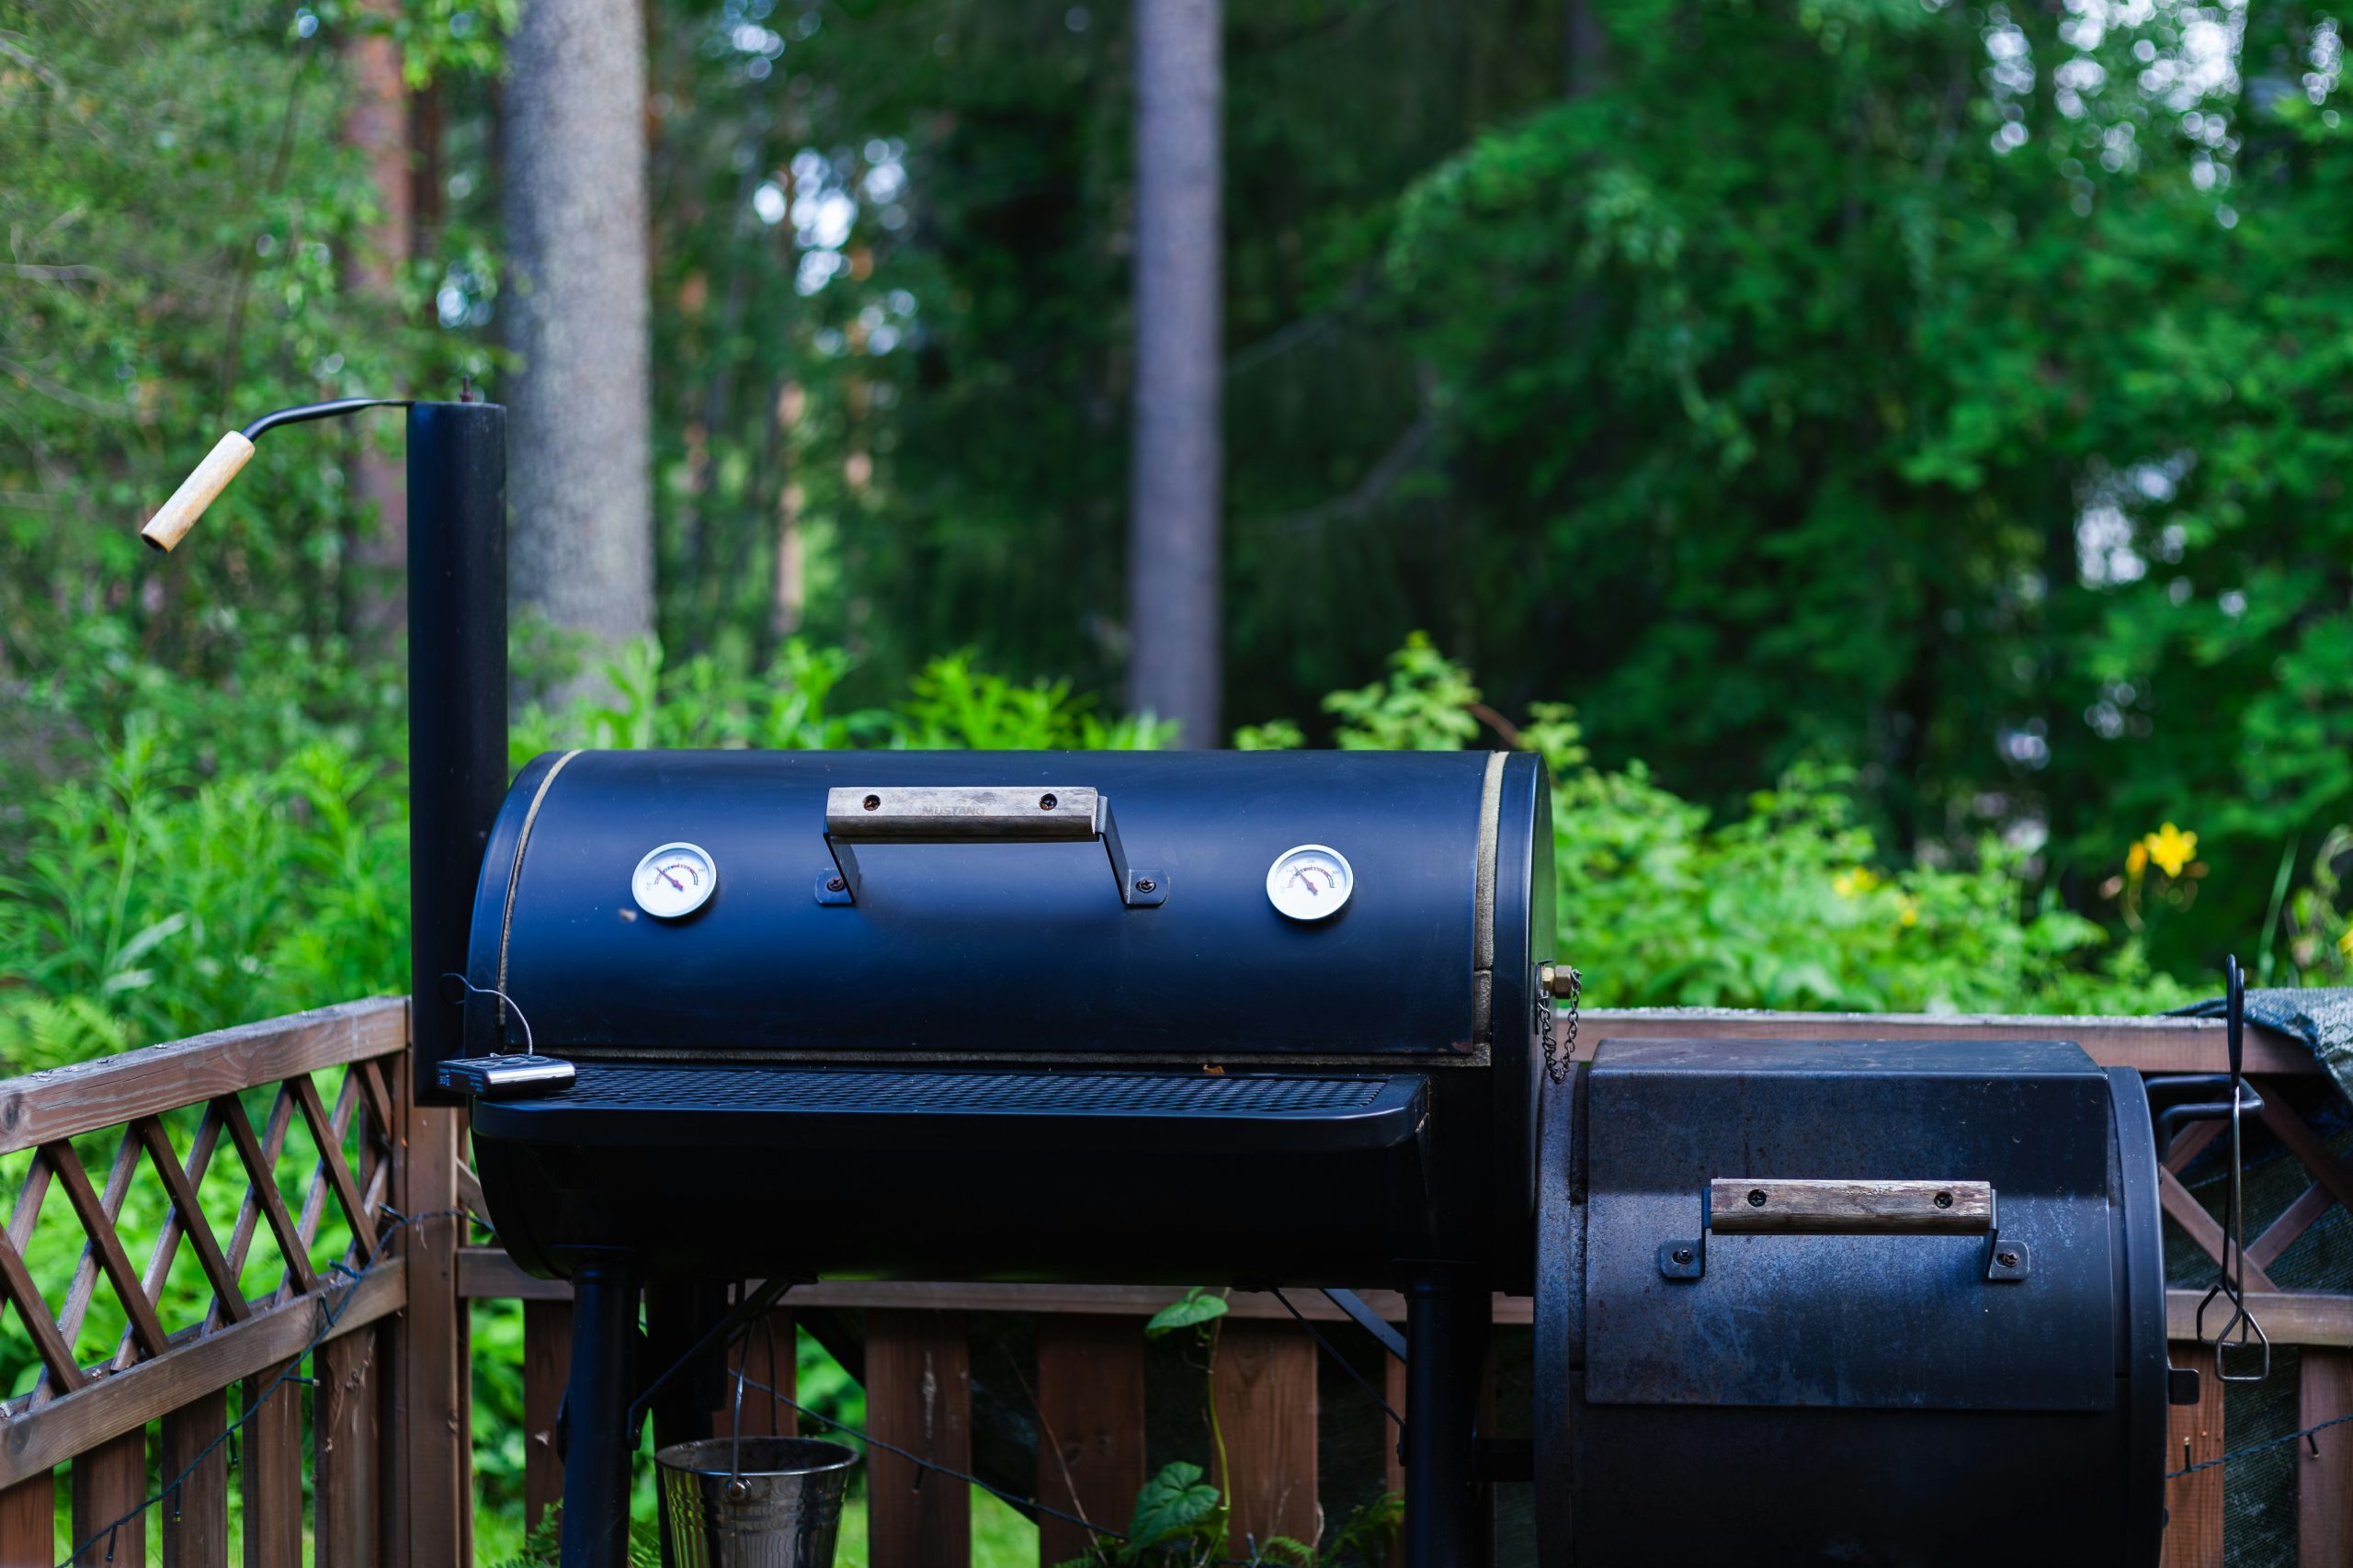
Love the idea of smoking meat but don’t have the space or budget for a big offset smoker? You have great options. Look into a ‘bullet smoker’ or Vertical Water Smoker, like the Weber Smokey Mountain. These have a much smaller vertical footprint, are more affordable (typically $200-$500), and are incredibly fuel-efficient. They can produce barbecue that is every bit as good as an offset, making them a perfect entry point into the world of smoking for those with smaller patios or budgets.
19. Contemporary Contrast: A Pellet Grill Against Dark Wood Siding
This composition is visually successful because of the smart play on materials and contrast. The cool, industrial feel of the brushed stainless steel lid and black grill body stands in sharp opposition to the warm, organic texture of the dark wood siding behind it. This contrast makes both elements pop. The light wood side shelf on the grill then acts as a perfect visual bridge, picking up the warm tones of the siding and tying the whole scene together. It’s a thoughtful pairing that feels very deliberate and high-end.
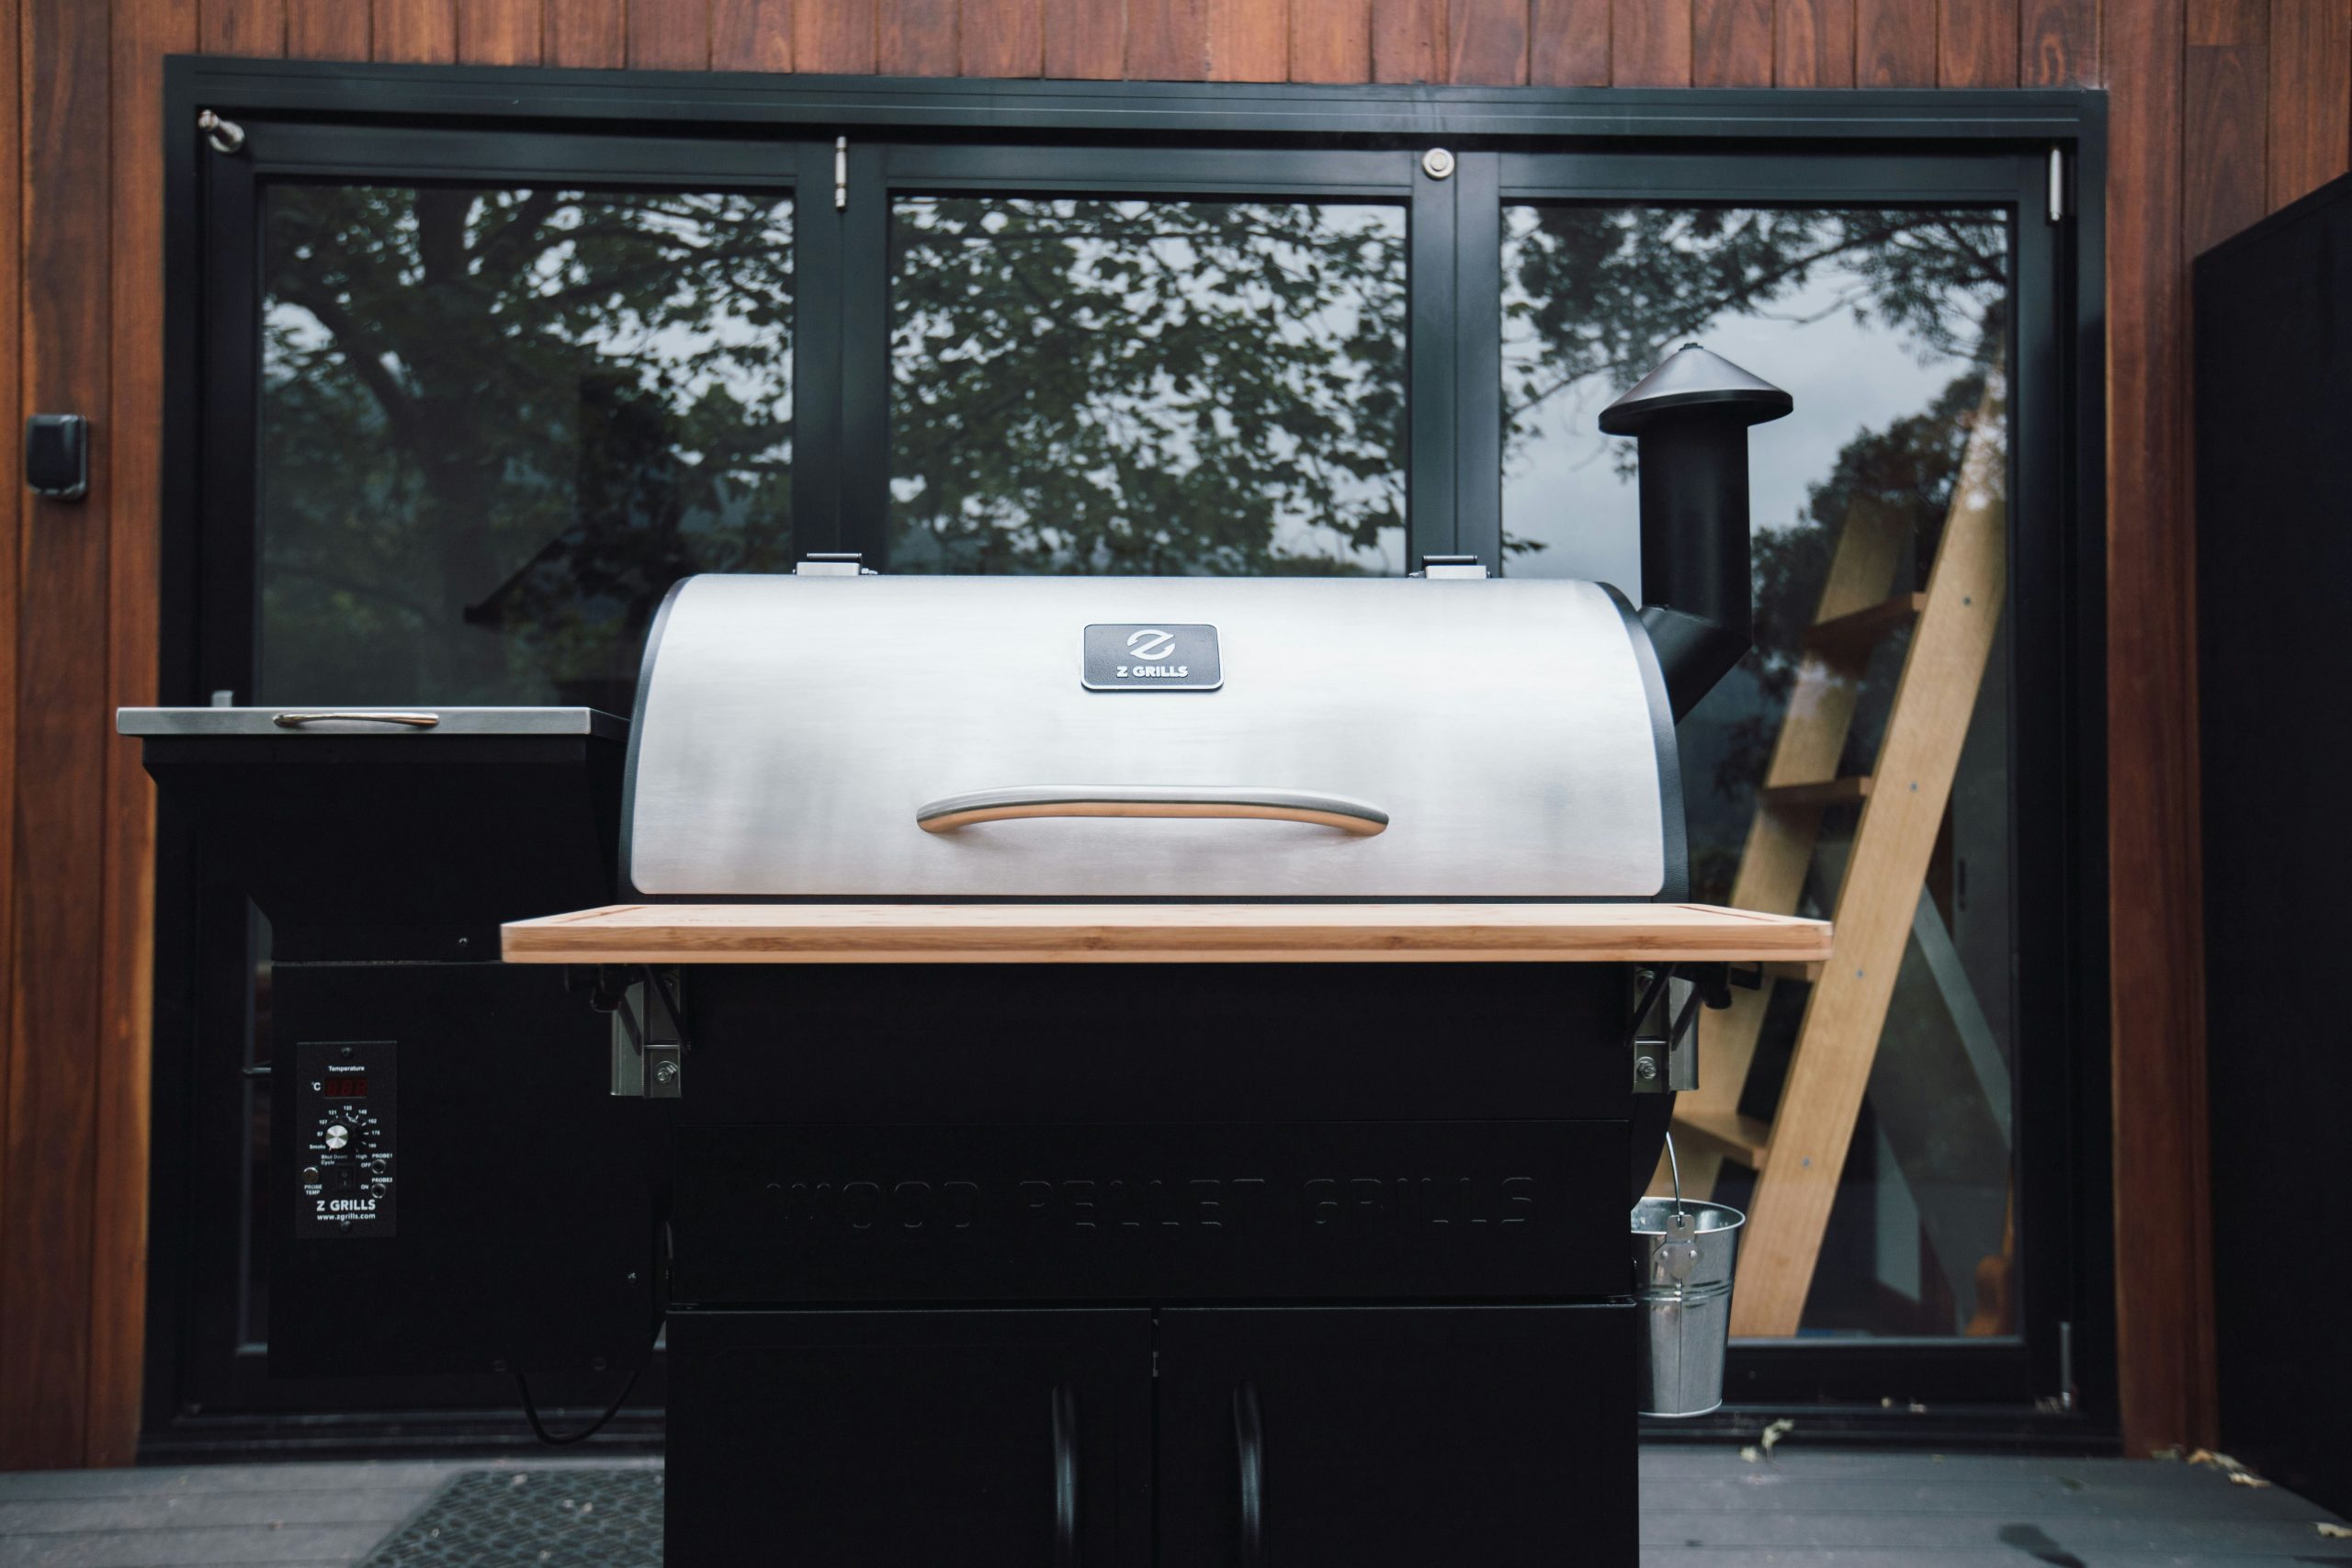
When deciding where to place your new grill, think beyond just what looks good. Consider the prevailing wind direction in your backyard. You want to position the grill so that the smoke will blow away from your house, open windows, and any outdoor seating areas. Placing it in the wrong spot can mean a house full of smoke every time you cook or guests getting blasted while they’re trying to relax. A little observation on a breezy day can save you a lot of future frustration.
20. Secluded Smoke Session on a Deck with a Lattice Fence
The key element that makes this backyard scene so appealing is the wonderful sense of privacy and seclusion. It’s not just a smoker on a deck; it’s a protected nook. The dark-stained wooden lattice fence, combined with the incredibly lush backdrop of trees and foliage, creates an intimate, enclosed feeling. It transforms the act of barbecuing from a public performance into a private, focused ritual. This feeling of being in your own little world is the true luxury here.
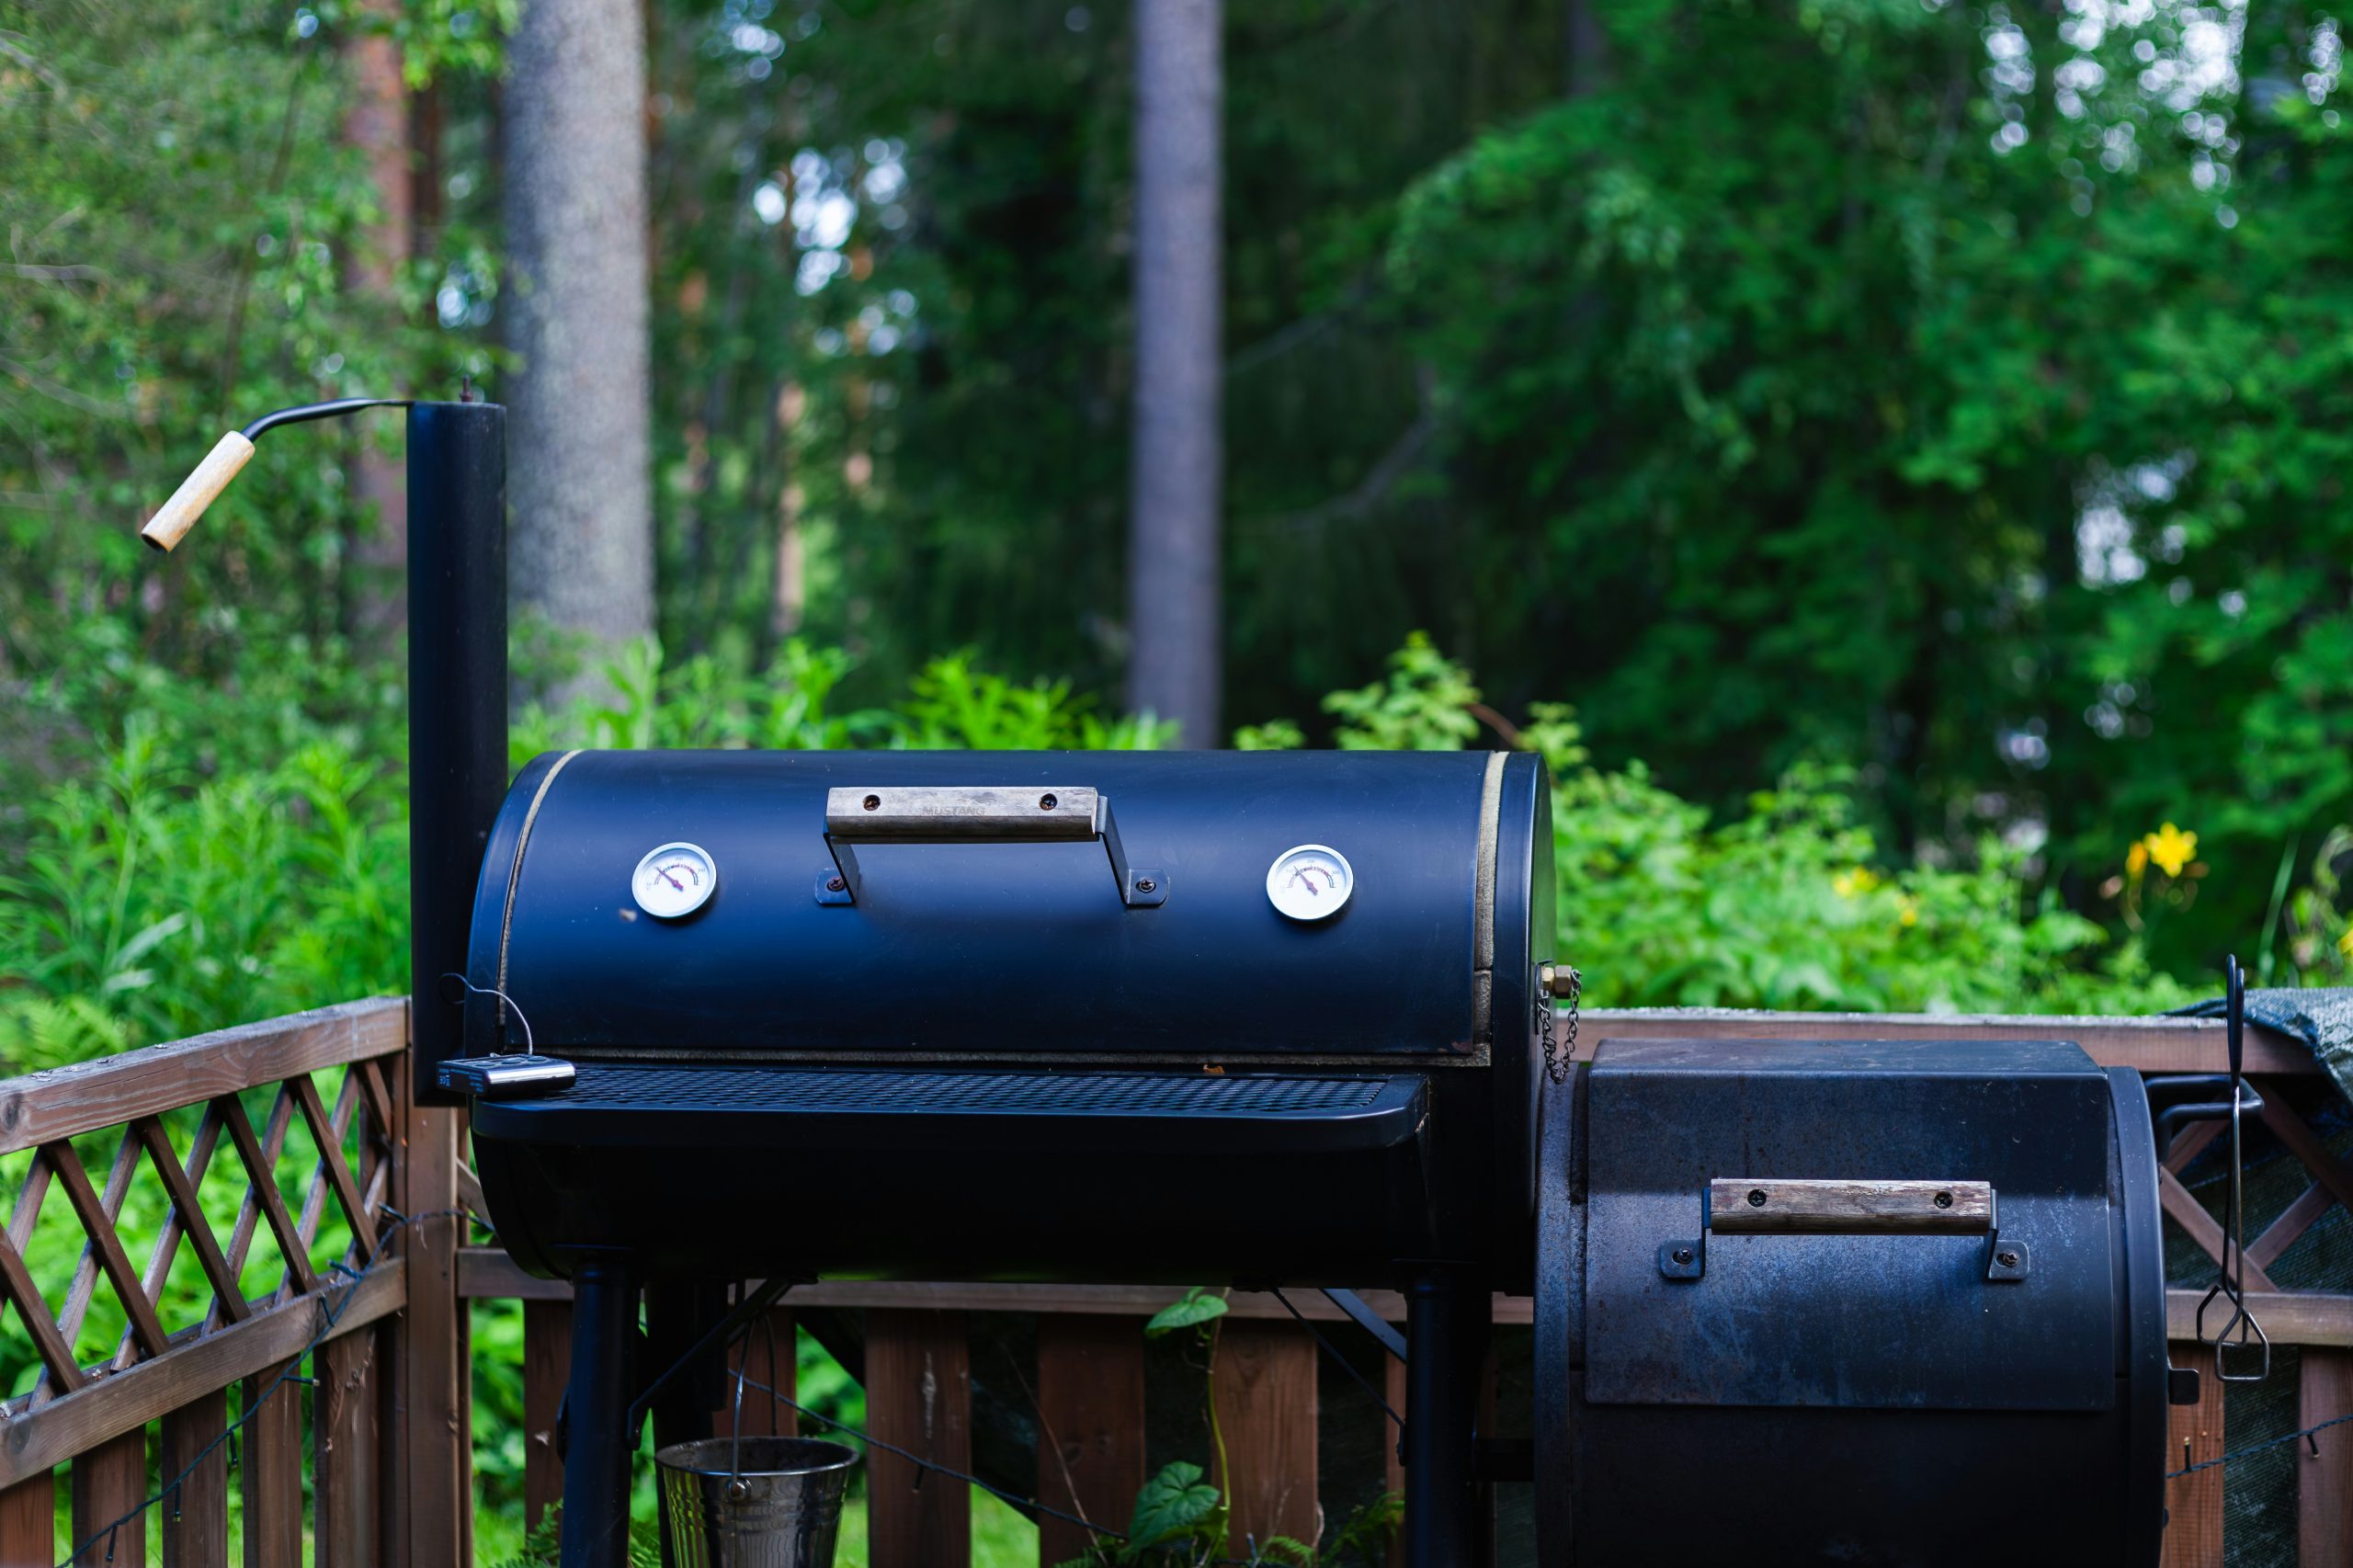
Before you cook on that brand-new smoker, you need to season it. This process burns off any manufacturing oils and coats the inside with a protective layer of smoke. Time: 2-3 hours. Cost: A few dollars for oil and wood.
- Wash Down: Lightly wash the interior grates and chamber with warm, soapy water and dry completely.
- Coat with Oil: Using a cloth or paper towels, apply a very thin coat of a high-heat cooking oil (like canola or grapeseed) to all interior surfaces.
- Light a Fire: Start a small fire in the firebox and bring the smoker’s temperature up to around 275-300°F.
- Smoke It: Let it run at that temperature for 2-3 hours, adding a few chunks of wood to create smoke. The interior will turn from shiny metal to a dull, dark brown or black. Let it cool completely before its first real cook.
21. Sleek and Functional: A Linear Outdoor Kitchen with Wood Paneling
Achieving this level of seamless integration comes at a premium. This is a high-end, custom-feeling project.
- Cabinetry & Countertop: Outdoor-rated cabinetry and a durable countertop (like quartz or Dekton): $5,000 – $12,000
- Appliances: High-quality built-in grill, sink, and under-counter beverage fridge: $4,000 – $10,000
- Finishing: Wood paneling, lighting, and faucet: $2,000 – $5,000
- Labor: Installation, plumbing, and electrical: $3,000 – $7,000
- TOTAL: $14,000 – $34,000
- Budget Alternative: Use a pre-fabricated grill island module ($2,000-$5,000) and place it against a DIY wood accent wall to get a similar feel for much less.
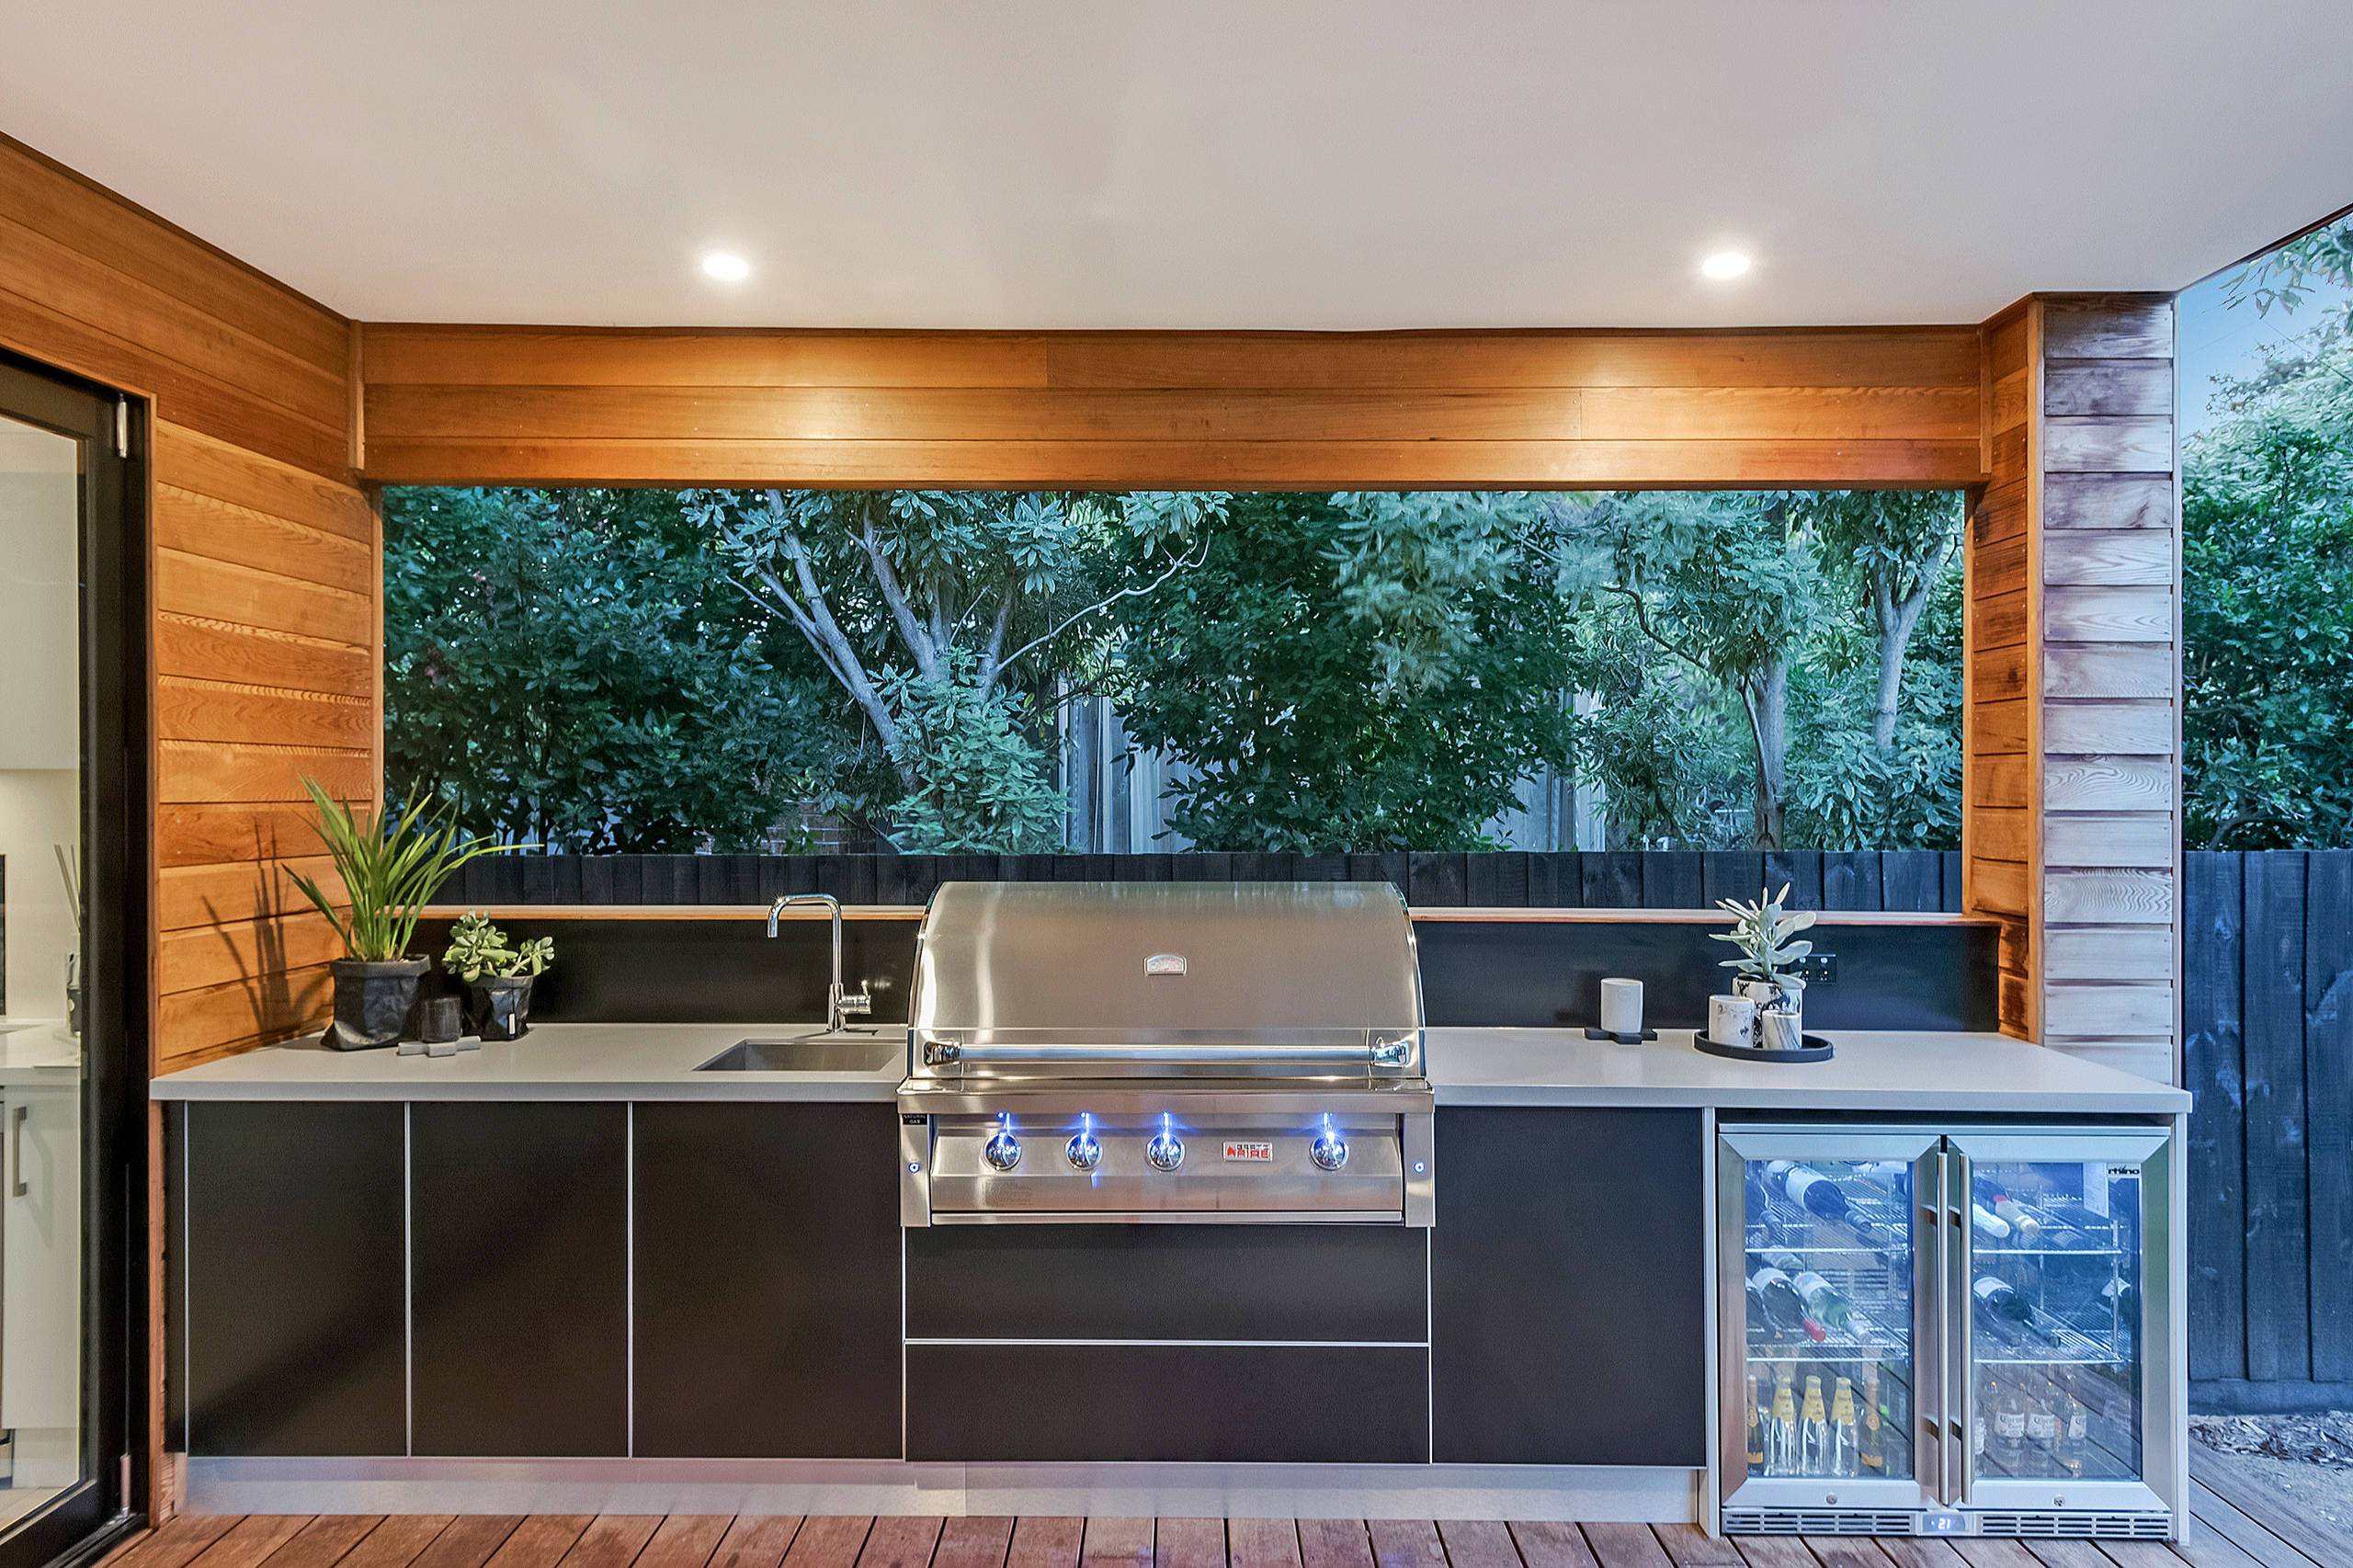
This ‘galley’ style outdoor kitchen is an excellent choice for a covered patio space that’s longer than it is wide. The single-wall layout maximizes efficiency and preserves an open corridor for foot traffic. For this to work well, the covered area should be at least 12 feet long to accommodate the different appliances, and at least 8 feet deep. This provides enough depth for the 24-inch deep counters and leaves a comfortable 6 feet of open space in front for moving around.
22. A Bright White Brick Kitchen with a Tiled Pizza Oven
This kitchen’s fresh and substantial look comes from a balanced material palette. It breaks down to roughly 50% white brick, 30% stainless steel, 10% gray countertops, and a final 10% of high-contrast pattern. The white brick provides a bright, textural base that feels both rustic and modern. The large stainless steel hoods and appliances add a professional, functional edge. The simple gray counters are quiet and don’t compete, which allows the black and white patterned tile on the pizza oven to be a stunning focal point.
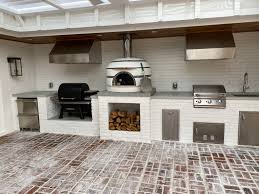
A white-painted brick kitchen is a showstopper, but it requires regular upkeep to stay looking sharp, especially outdoors.
- Grout Lines: The white mortar is prone to mildew and staining from dirt and pollen. Plan to gently scrub the grout lines with a specialized cleaner once or twice a season.
- Brick Surface: Soot from the pizza oven and grease from the grill can stain the painted brick. A product like a ‘paint-safe grease remover’ will be your best friend.
- Countertop Seal: The light gray countertops, especially if they’re concrete, need to be sealed annually to prevent stains from sauces and spills soaking in.
23. Zoned Cooking on a Two-Tier Gas Grill
Don’t ignore that upper warming rack—it’s one of your most versatile grilling tools! It’s not just for storing finished food. Use it to toast your burger buns perfectly without burning them. It’s also the ideal spot for cooking delicate items that would fall apart on the main grates, like fish fillets or sliced vegetables like the zucchini shown here. The gentler, indirect heat allows them to cook through without charring to a crisp. It essentially gives you a second, lower-temperature cooking zone.
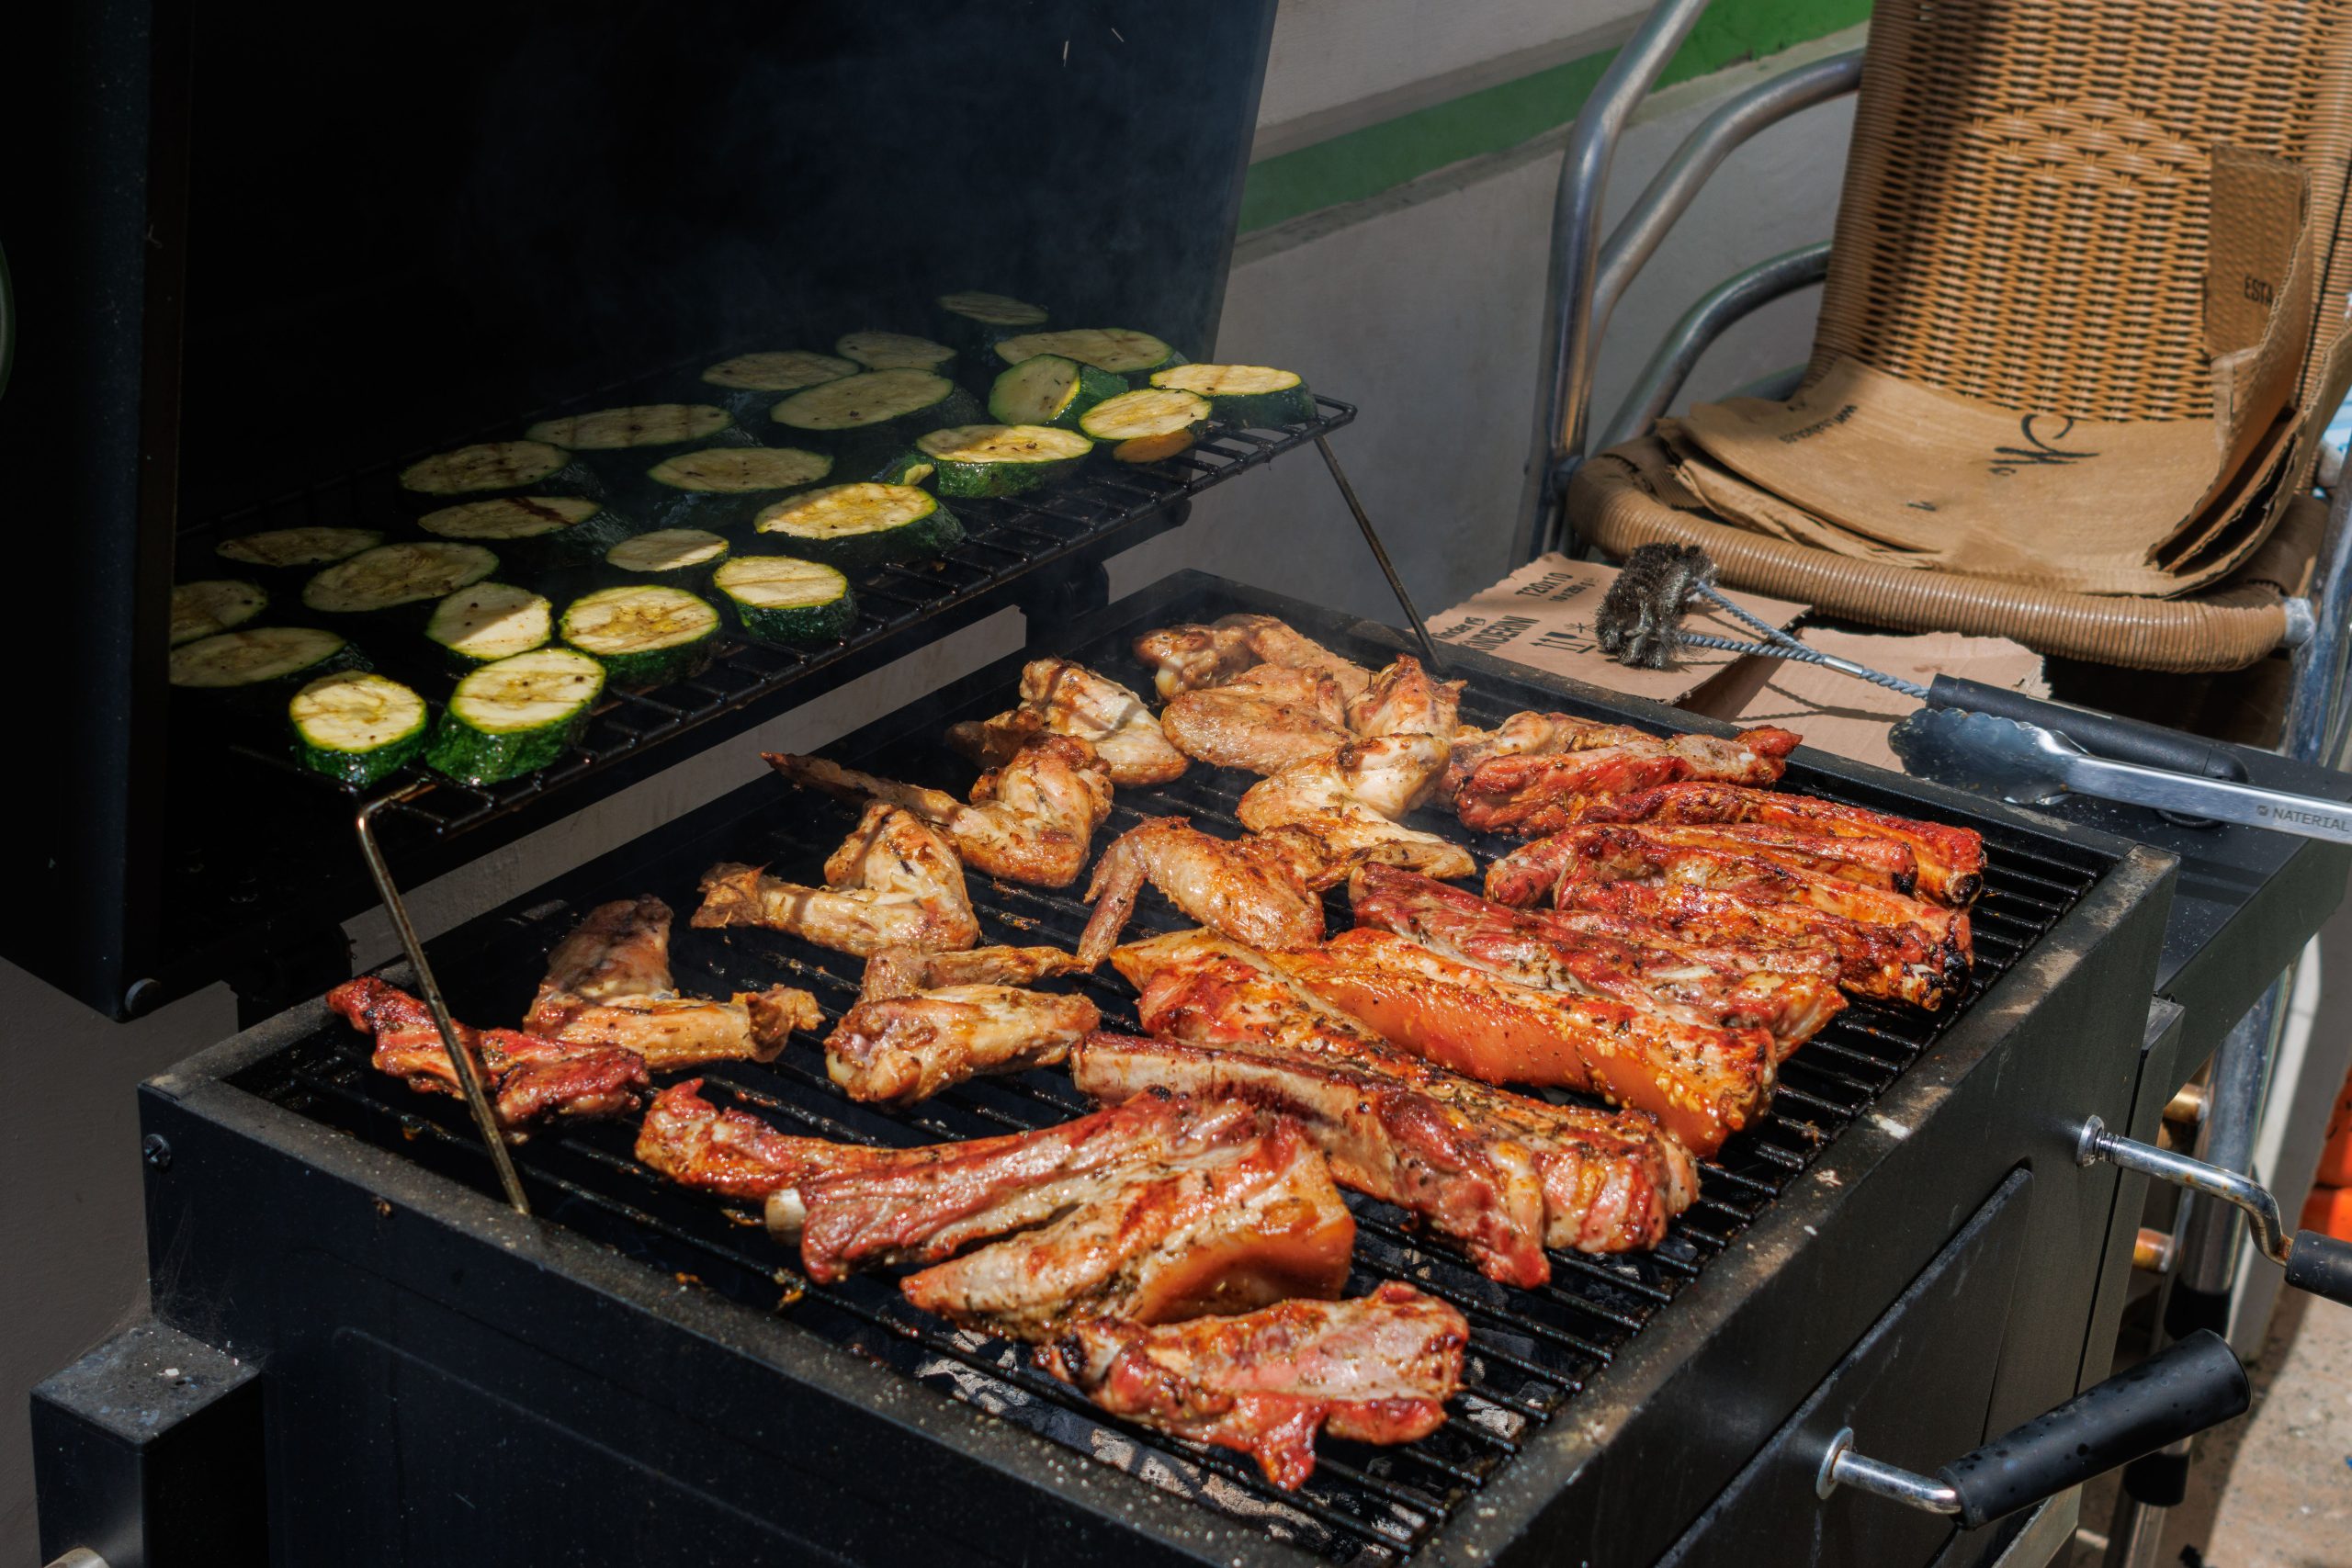
Loading up your grill grate like this might look impressive, but it can be counterproductive if you’re not careful. When you cover the entire surface with food, you block heat from circulating properly, which can lead to the food steaming in its own juices rather than getting a delicious, crusty sear. It also leaves you no ‘safe zone’—an empty spot on the grill to move things to if you get a sudden flare-up. For best results, always leave at least 25% of your grill surface empty.
24. Modern Meets Natural: Stacked Stone and Stainless Steel on a Composite Deck
The success of this design lies in its sophisticated mix of textures. It masterfully balances three distinct surfaces to create a rich, layered look. You have the rough, organic texture of the light-colored stacked stone, the smooth coolness of the brushed stainless steel appliances, and the clean, linear grain of the light gray composite decking. Each material brings its own character to the party, and together they create a composition that’s far more interesting than if just one material was used. The white railing adds a final, crisp frame. This uses a lighter, more modern stone profile than the rustic build in Idea #12.
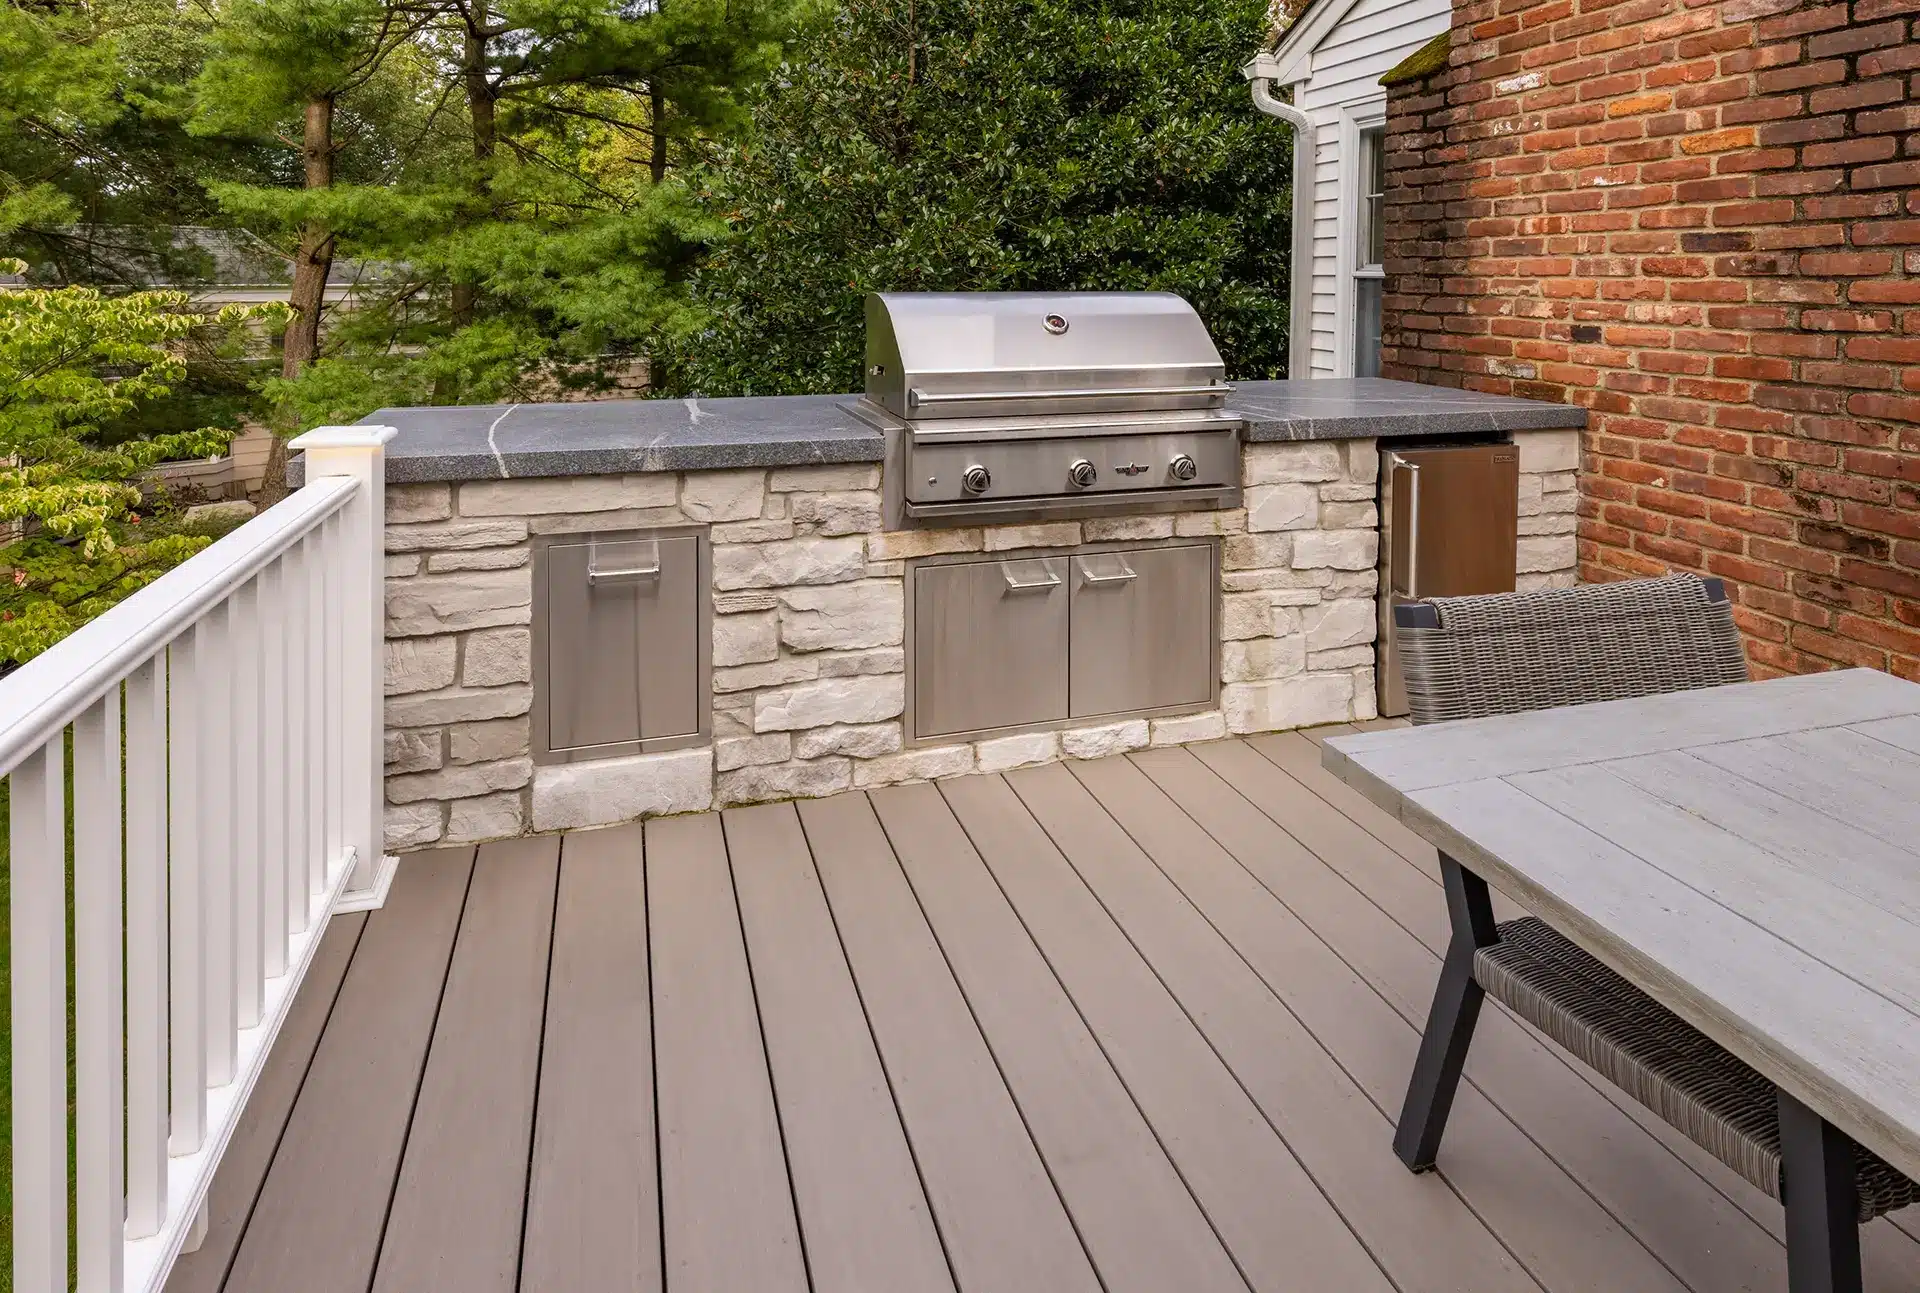
A built-in grill island is a fantastic upgrade, but it’s more than just a piece of furniture. A few things to check off before you begin:
- Have you confirmed your deck’s load capacity? A stone and countertop island is extremely heavy and may require additional support joists underneath.
- Where will the propane tank go? Is it ventilated properly inside the island, or will it sit outside?
- Have you planned for electrical? If you want outlets for a rotisserie or a blender, you’ll need to run outdoor-rated wiring.
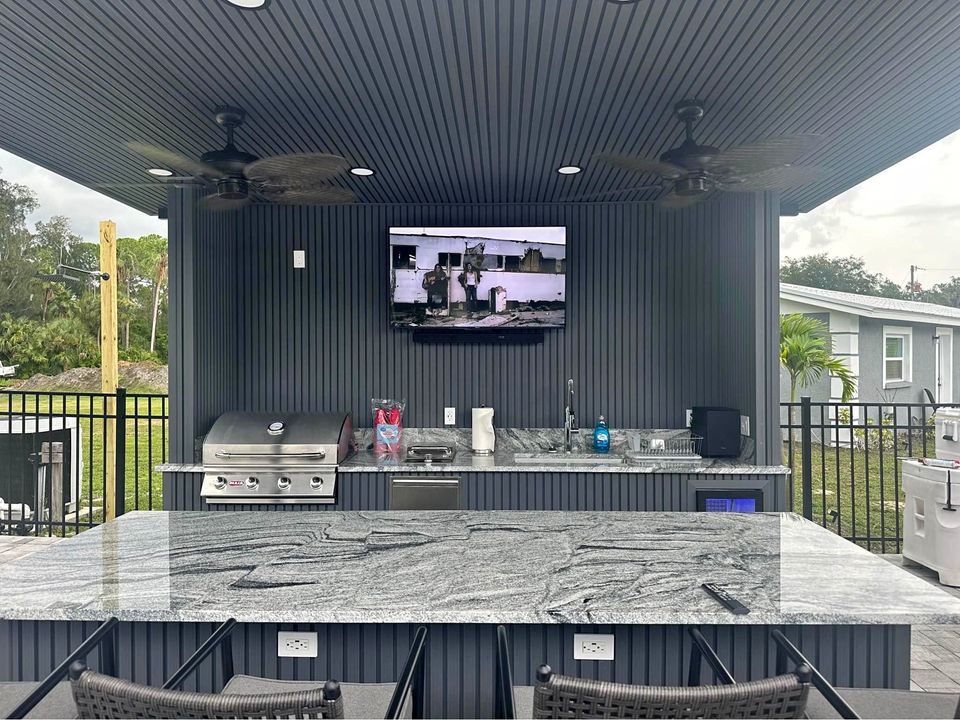
25. A Moody, Modern Outdoor Kitchen in Dark Gray
Dark, moody, and sophisticated kitchens have been a huge interior design trend, and in 2026, we’re seeing it move outdoors in a big way. Homeowners are tired of everything being beige or gray. This dark gray cabinetry feels custom, luxurious, and dramatic. Paired with the sleekness of stainless steel, it creates an outdoor kitchen that feels as much like a high-end bar as it does a cooking space. It’s a confident choice that turns the functional into the fashionable.
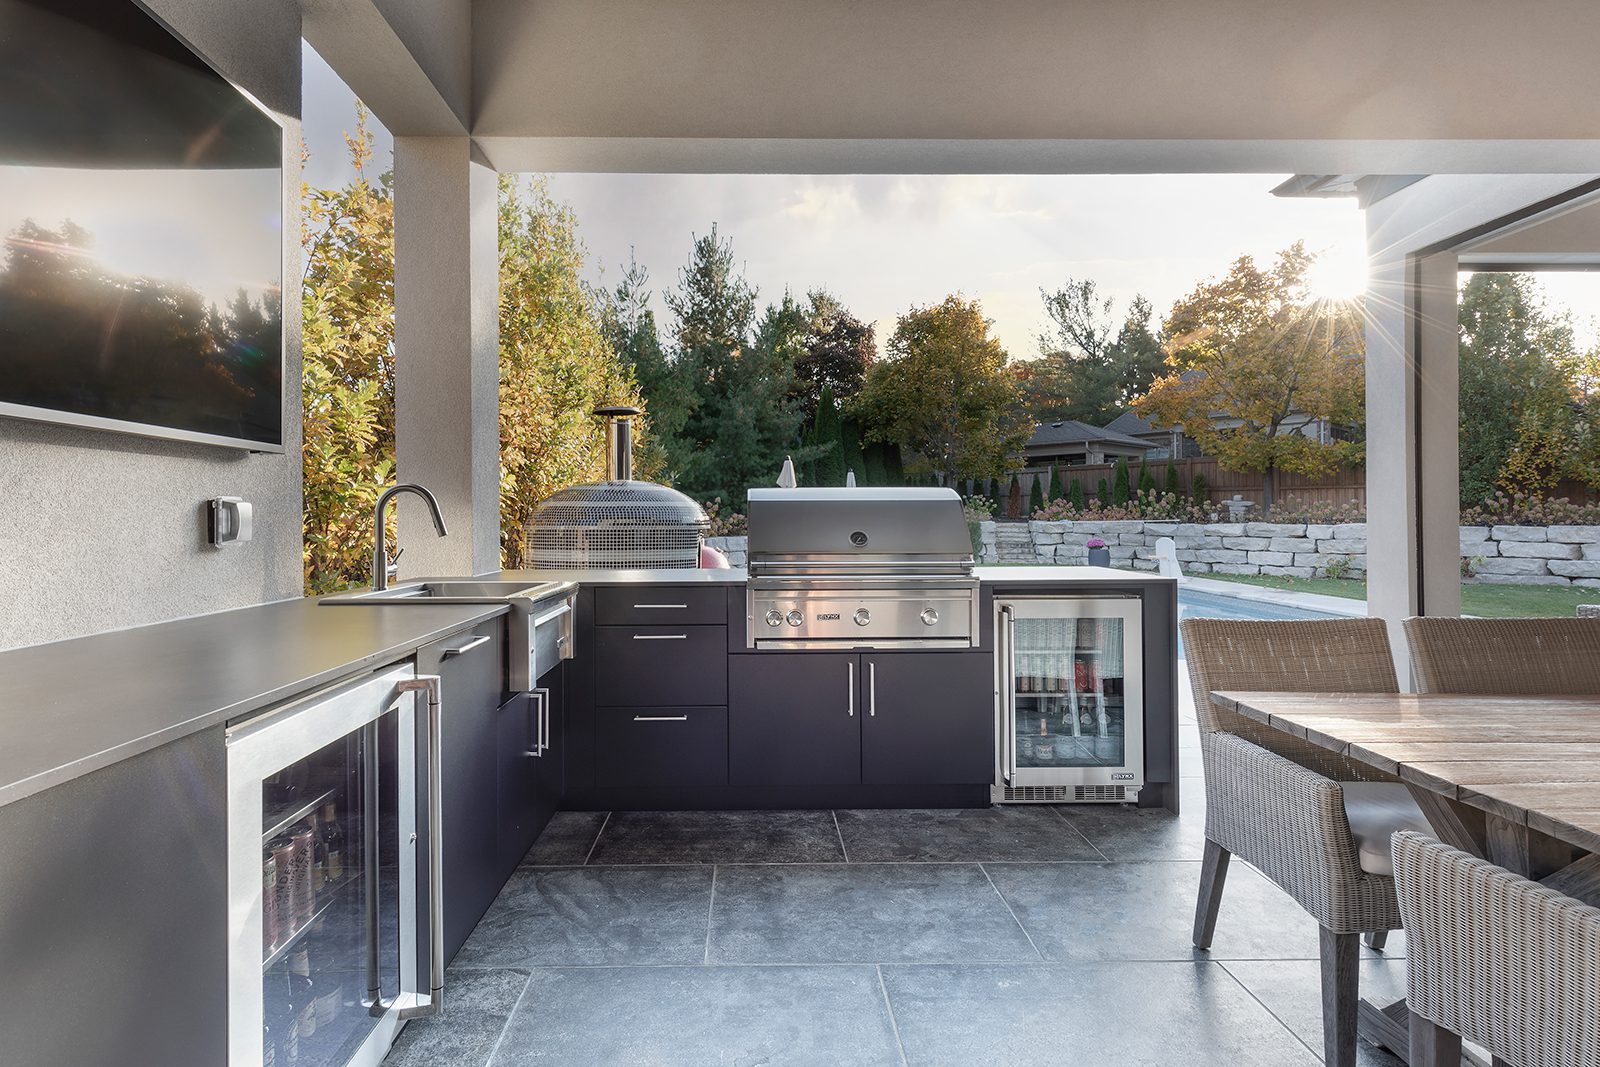
When you use a dark color palette like this deep gray, outdoor lighting becomes even more critical. You need to layer it. Start with ambient light from overhead, like recessed lights in a pergola. Then, add task lighting directly over the grill and prep surfaces—an adjustable spotlight or an under-cabinet light strip works well. Finally, add accent lighting, like the blue glow from the grill knobs here, or small lights under the countertop edge, to bring the space to life after dark and prevent it from feeling like a black hole.
26. A Substantial Brick and Granite Kitchen with a Pizza Oven
This is a serious, permanent structure with a corresponding budget. The cost is primarily in skilled labor (masonry) and high-quality materials.
- Masonry: Bricks, mortar, block for the base, and labor for a structure this size: $5,000 – $10,000
- Pizza Oven: A high-quality built-in or modular pizza oven kit: $2,000 – $5,000
- Appliances: Stainless steel grill head and cabinet doors: $1,500 – $4,000
- Countertop: A durable dark granite or similar stone countertop: $2,000 – $4,000
- TOTAL: $10,500 – $23,000
- Budget Alternative: Create a similar layout using a more affordable stucco or concrete block base instead of full brick, which can significantly reduce labor costs.
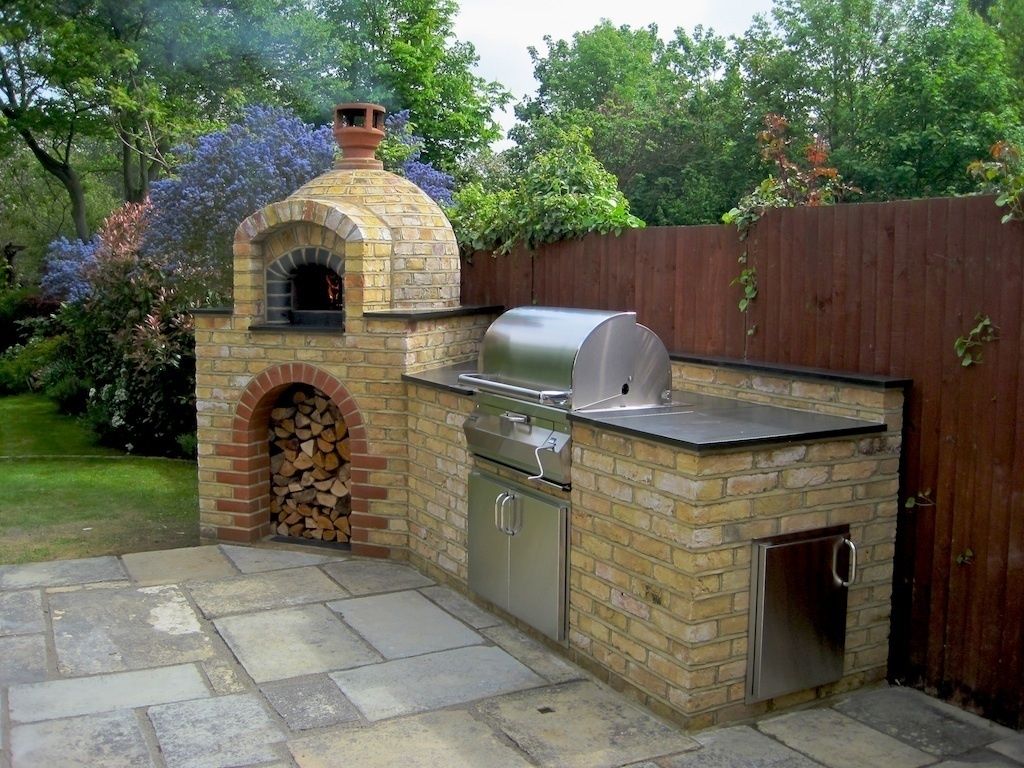
that gives this outdoor kitchen its incredible presence is its sheer architectural substance. This isn’t a collection of appliances; it’s a massive, unified brick structure that commands the space. The integration of the pizza oven’s dome, the grill, and the wood storage arch into a single, cohesive unit makes it feel like it has always been a part of the landscape. This sense of permanence and an all-in-one design is what makes it feel so robust and appealing.
27. Minimalist Rooftop Grilling with a Skyline View
This sleek, minimalist setup is perfectly suited for urban environments like rooftop terraces, balconies, or small townhouse patios where space is at a premium and often linear. The long, narrow dark gray cabinet run provides maximum function without encroaching on valuable floor space. The use of large-format tiles and a glass railing enhances the feeling of openness. This approach is all about maximizing utility and the view. If you have more ground-level space, check out the expansive layout of Idea #9.
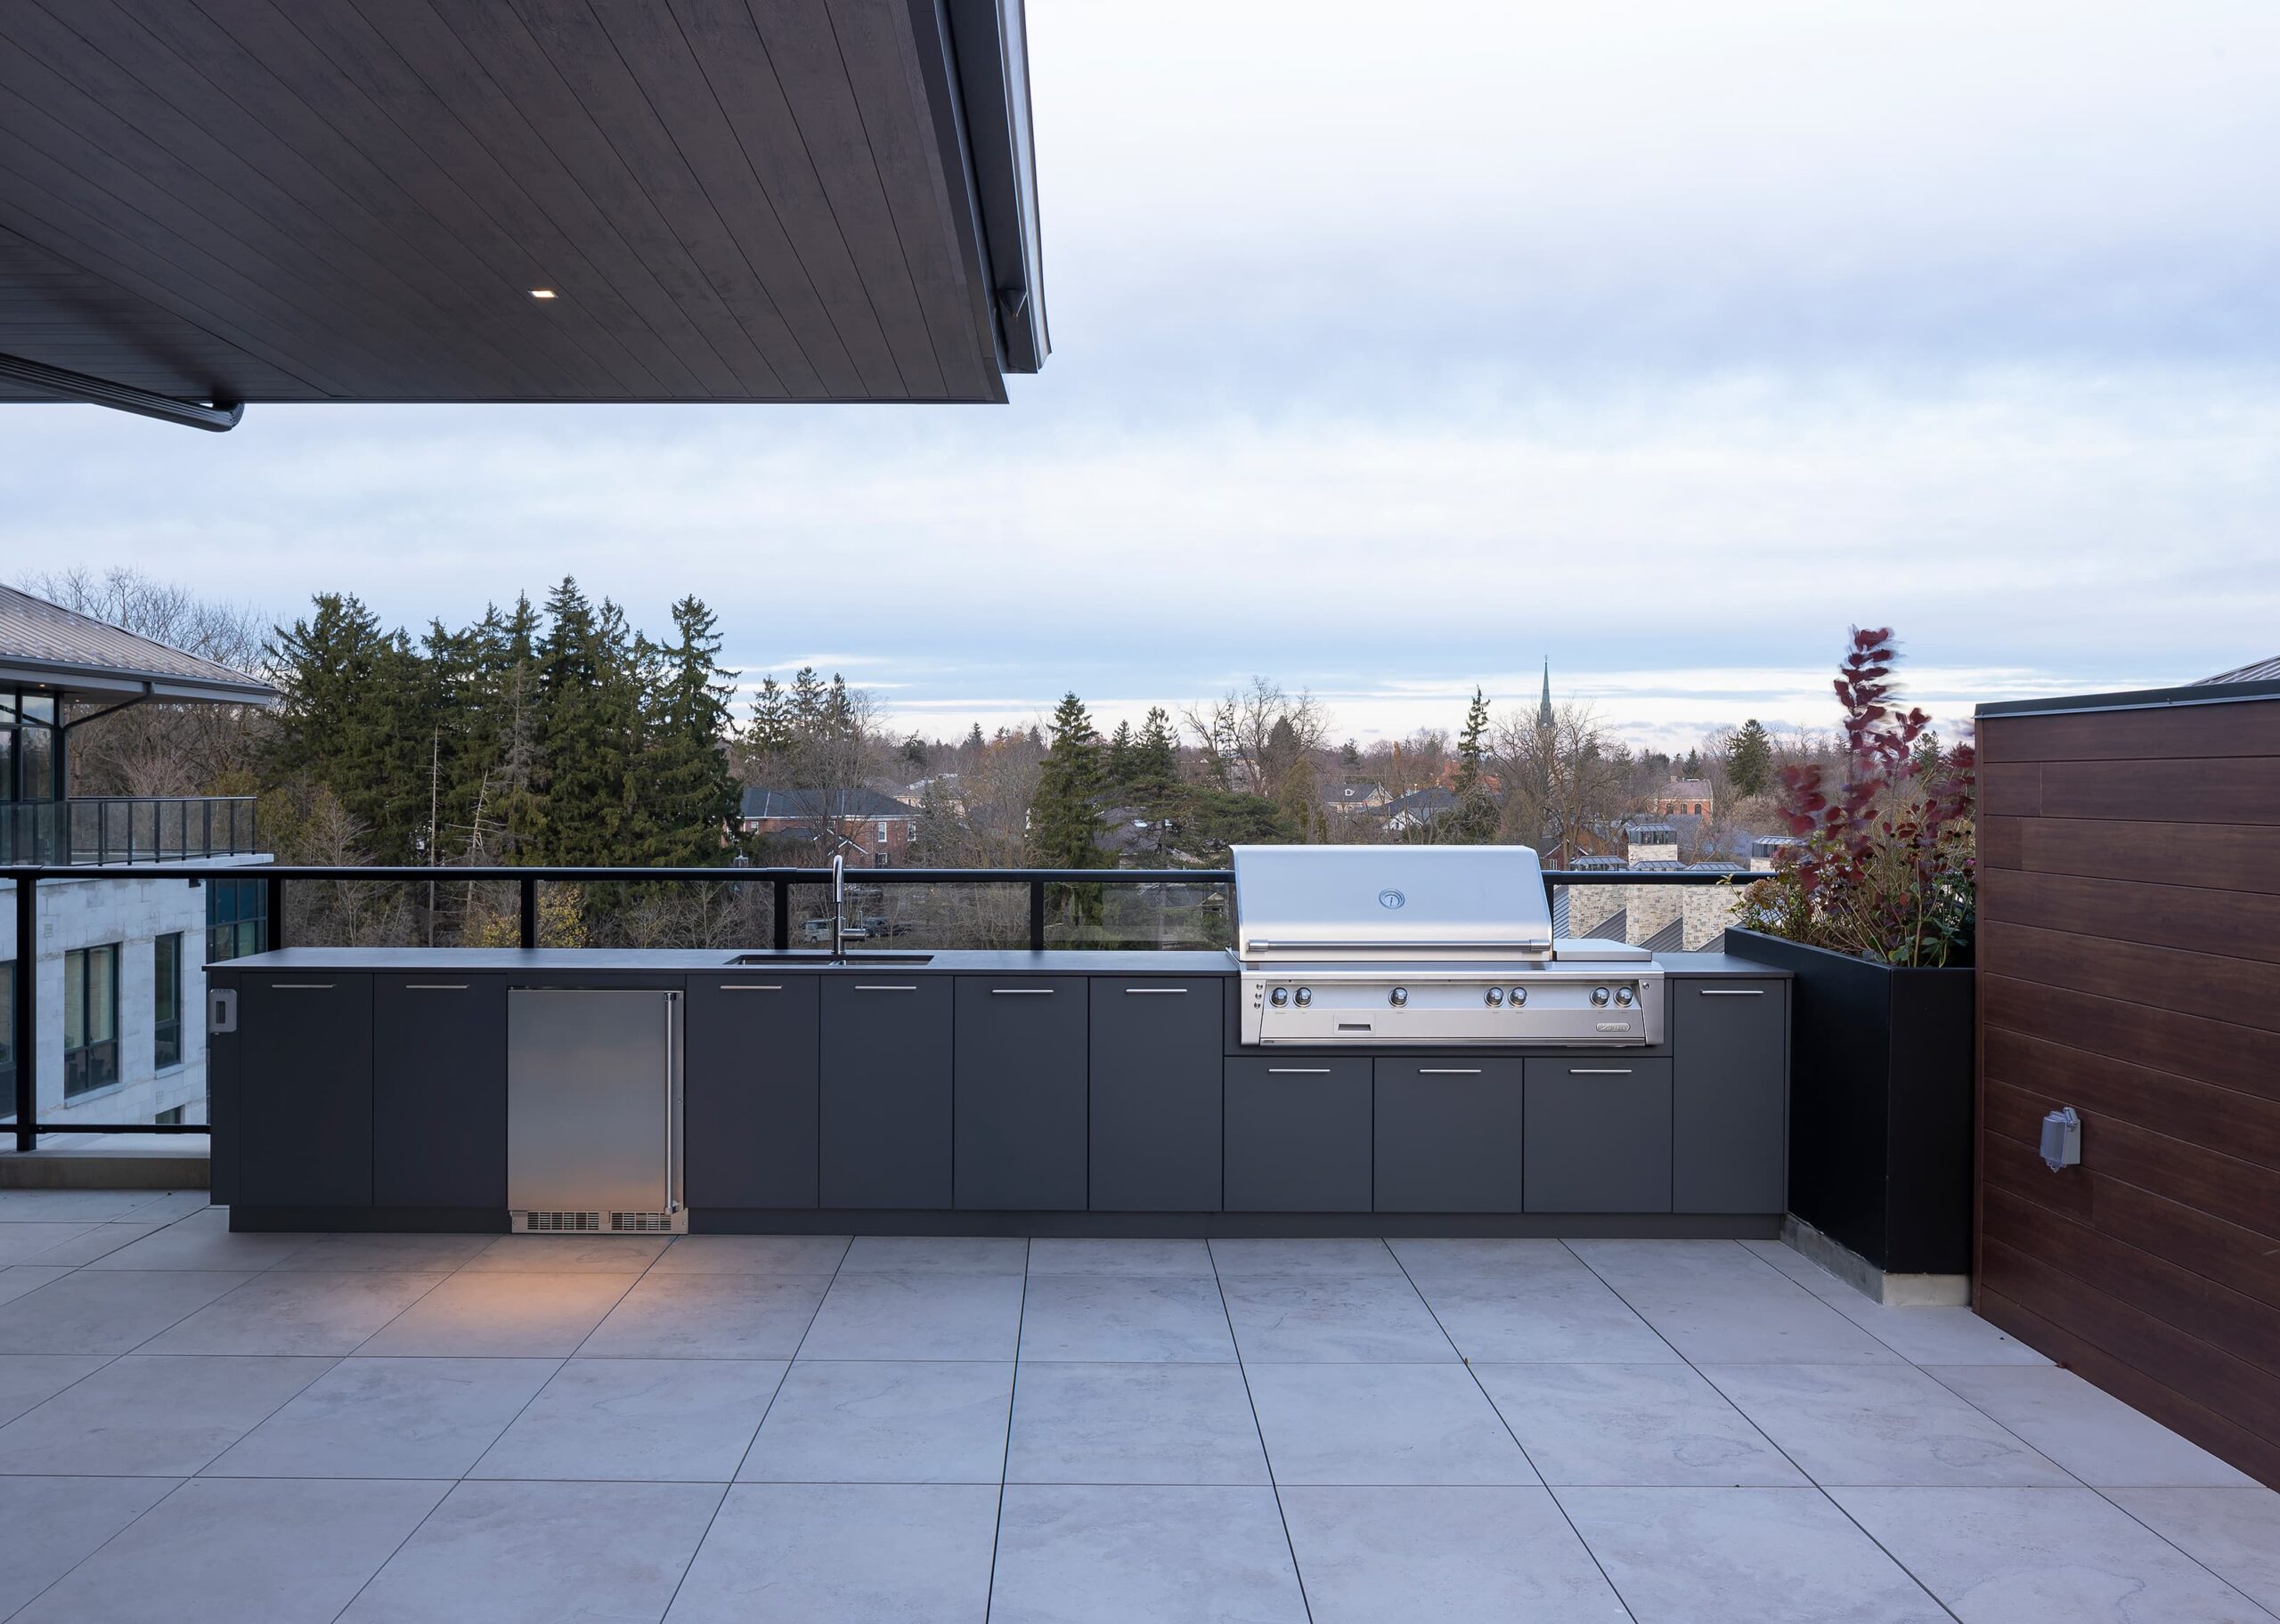
Before you run out and buy a beautiful grill for your condo or apartment balcony, you absolutely must check your building’s rules and local fire codes. Many multi-family dwellings have strict regulations prohibiting or limiting the type and size of grills allowed due to fire risk. Charcoal grills are often banned outright, and there may be size restrictions on propane grills. Getting this wrong can lead to fines or being forced to remove your brand new setup. A quick email to your HOA or property manager is the most important first step.
28. A Statement Red Ceramic Grill in a High-Contrast Kitchen
The formula for this bold, modern look is all about a controlled pop of color. It’s roughly 70% neutral base + 20% black accents + 10% saturated color. The gray cabinetry and light wood ceiling provide a calm, neutral canvas. The black countertops, dining table, and ceiling beams add graphic punch and definition. This structure allows the fiery red of the ceramic grill and pizza oven to act as a powerful, intentional accent. It’s just enough color to be exciting without overwhelming the space.
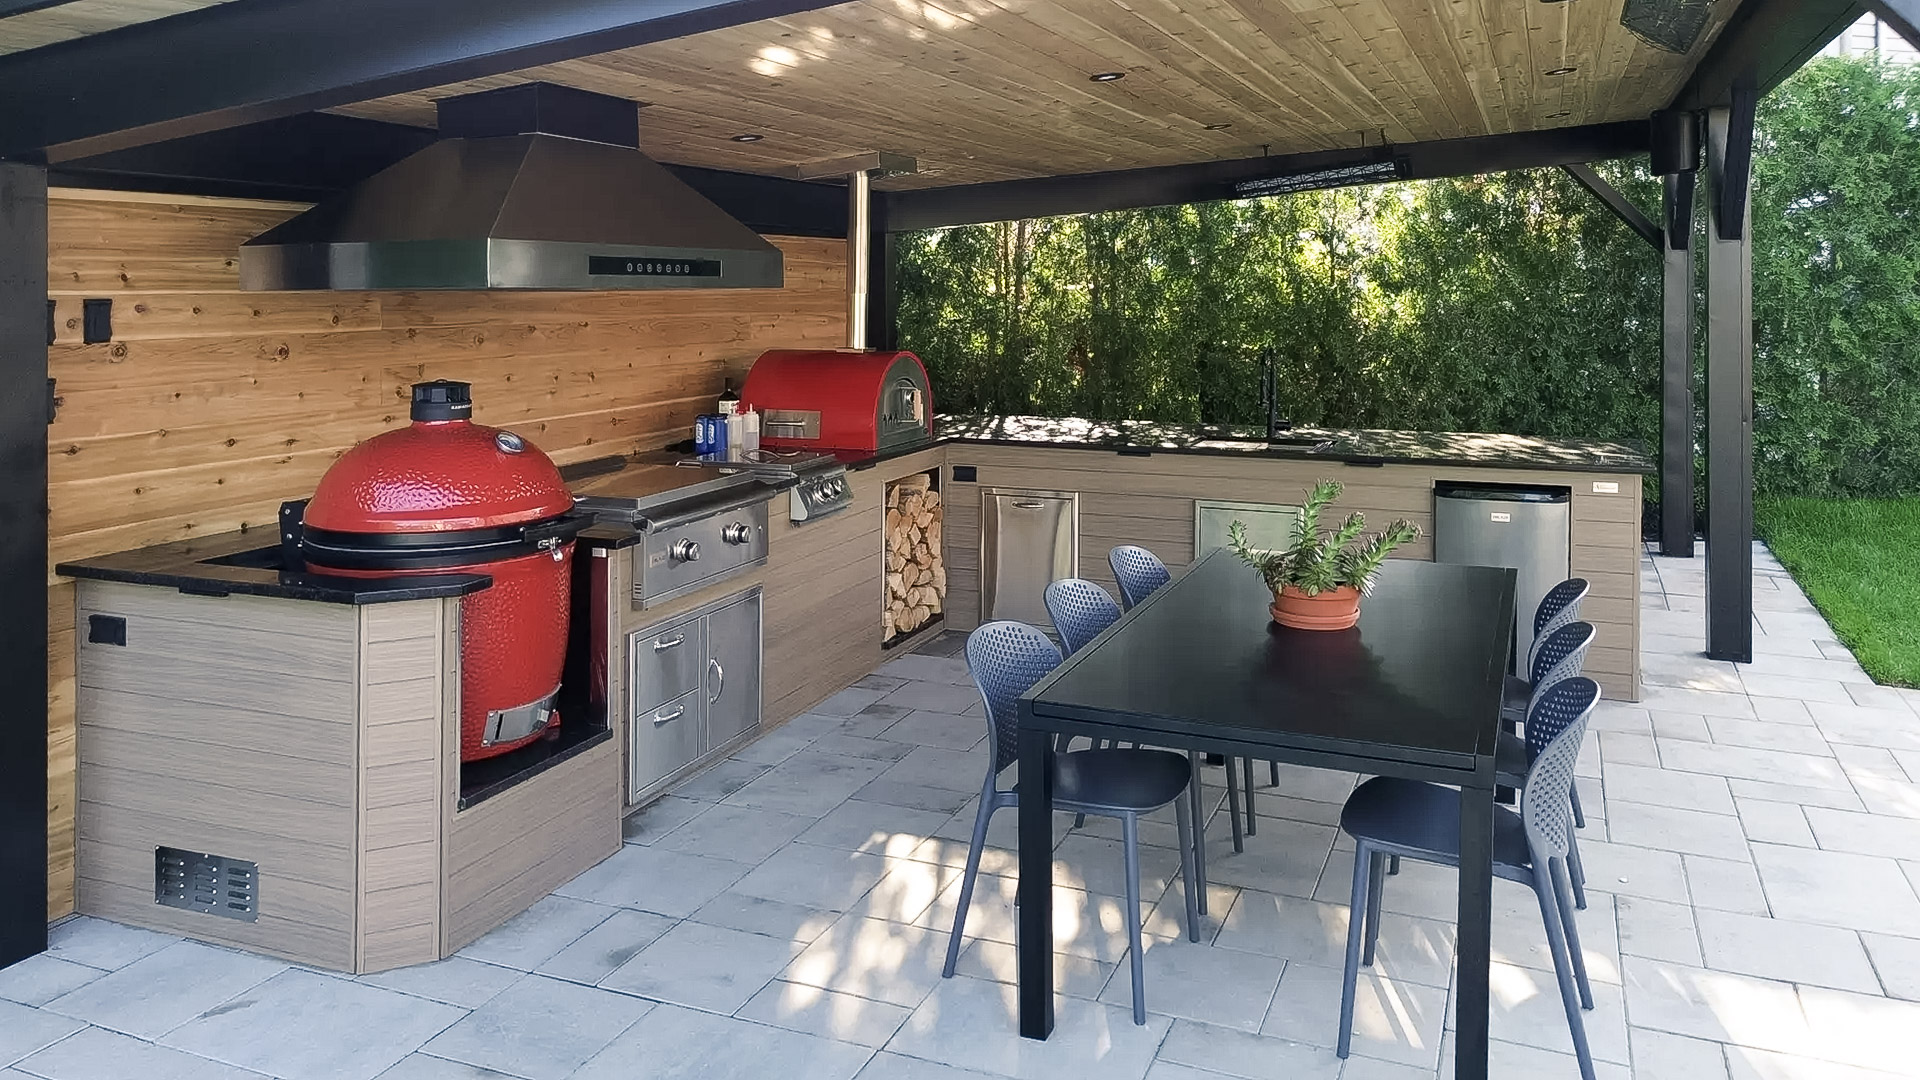
This design works so well because it understands the power of a focal point. In a sea of handsome but neutral materials—wood, grey composite, stainless steel—the bright red ceramic grill immediately draws your eye. It acts as the hero piece, the visual anchor around which the rest of the kitchen is organized. Without it, the space would still be nice, but it would lack excitement and a clear personality. The bold color choice is a confident move that gives the entire area its memorable character.
Your Backyard Cookouts Just Got an Upgrade
With so much inspiration, the perfect outdoor BBQ area is finally within reach. Whether you’re starting with a simple grill or building a full-on kitchen, focus on how you want to live and entertain in your space. Now get out there and start planning!
Don’t forget to save your favorite ideas to your Pinterest boards to come back to later!