30 Jaw-Dropping Outdoor Bar Ideas for 2026 That Will Transform Your Backyard

You know that feeling when you scroll past an outdoor bar idea and just… stop? That little spark when you can instantly picture it in your own backyard? That’s the feeling we live for. After filtering through hundreds of options, we’ve narrowed it down to the 30 best outdoor bar ideas that deliver on style and function. We’re covering everything from sleek modern designs to rustic and relaxed setups. And stay until the end — we break down the most common mistakes that can ruin these looks. 📌 Save this to Pinterest for later — you’ll want to revisit these ideas.
1. Bright White Brick Bar with Natural Wood Stools
The magic here is in the high-contrast materials. The crisp, white-painted brick provides a clean, bright texture that feels both classic and modern. Paired with the warm, natural grain of the wooden bar stools, the entire setup feels balanced and inviting. The black-framed doors in the background add a touch of graphic punch, keeping the design from feeling too soft. It’s a masterclass in mixing textures (rough brick, smooth stone, natural wood) within a tight, clean color palette.
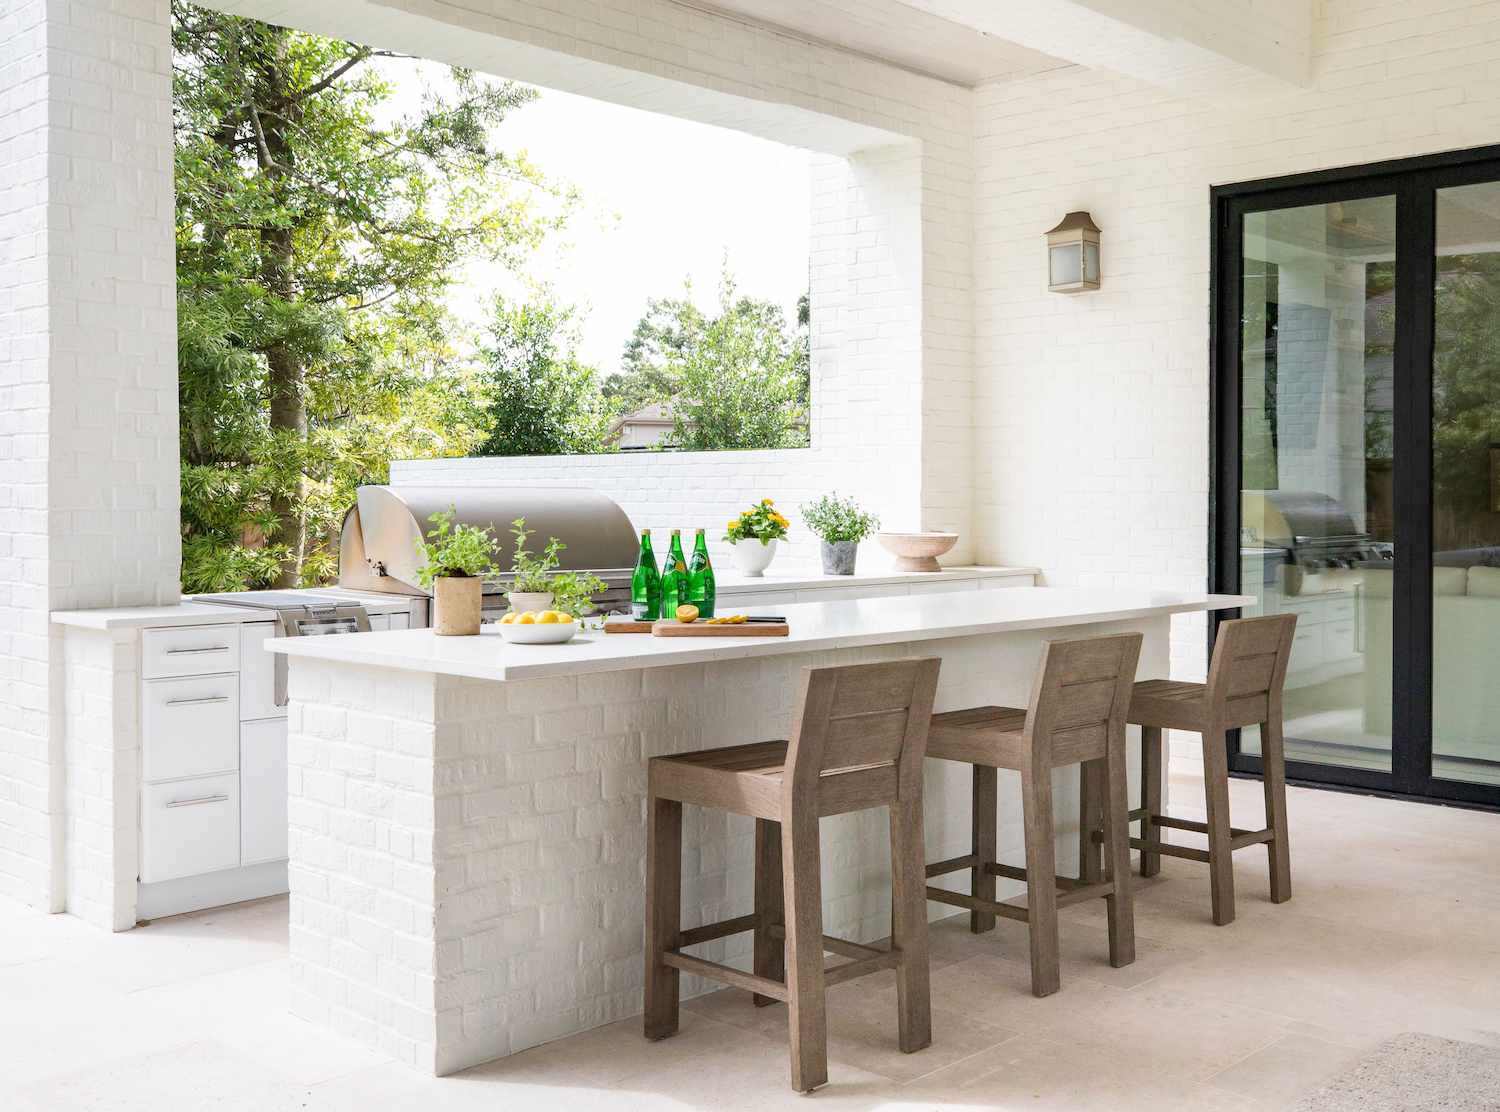
You don’t need a custom mason to get this vibe. Start with a basic outdoor bar frame from a big-box store or even a sturdy secondhand console table. Instead of real brick, use brick veneer panels, which are much lighter and easier to install. Paint them a crisp white (use exterior-grade paint!). For the seating, look for acacia wood or teak stools on Facebook Marketplace or at Target. With some DIY spirit, you could recreate the core elements of this look for under $900.
2. Modern Stone Bar with Under-Counter LED Glow
When installing under-counter lighting, always opt for a diffused channel. Don’t just stick a bare LED strip under the ledge! A frosted or milky acrylic channel will soften the light, eliminating the “dotty” look of individual diodes and creating a smooth, high-end glow. For outdoor use, ensure you get a waterproof rating of at least IP65. Position the channel closer to the front edge of the bar for task lighting, or closer to the bar base for a more atmospheric, grazing effect on the facade.
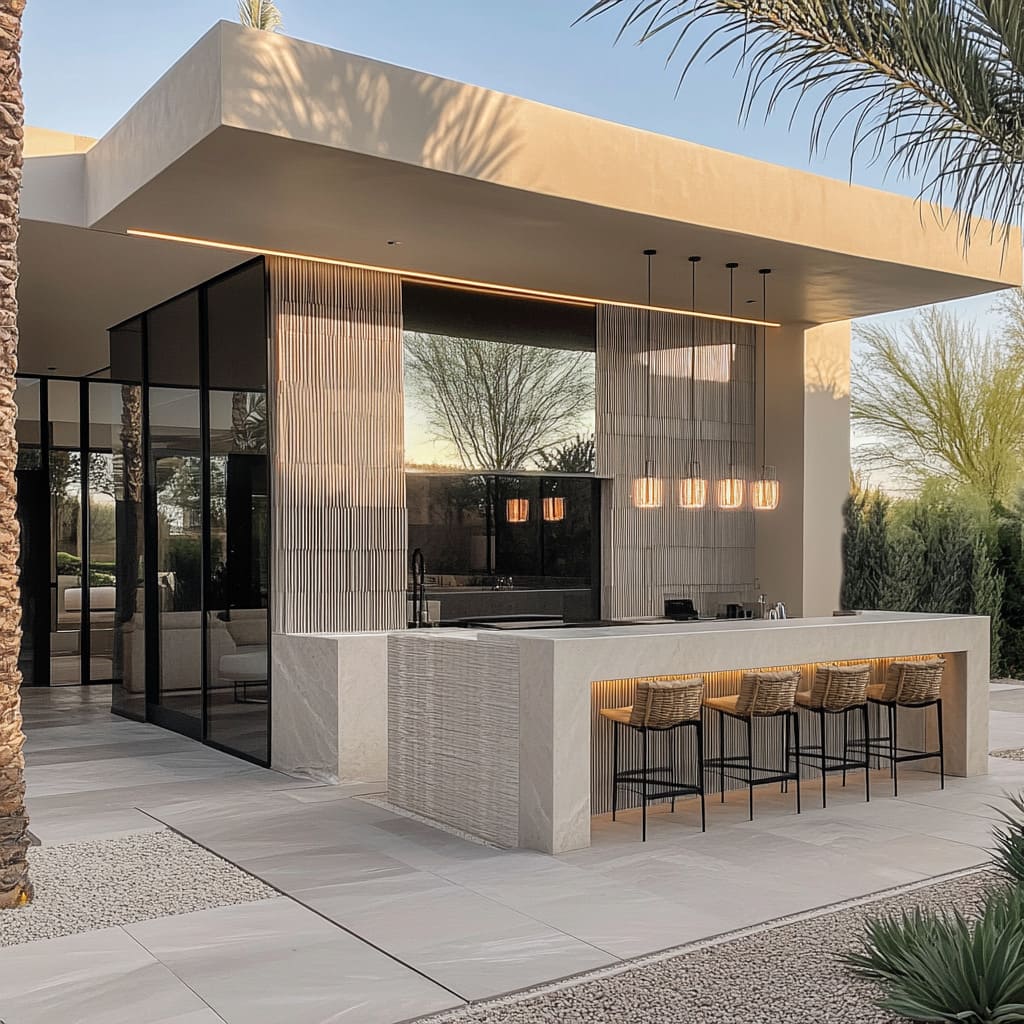
This look is a simple but powerful formula: 60% minimalist structure + 30% natural texture + 10% warm light. The clean lines of the waterfall stone counter and dark glass panels provide the modern base. The woven texture of the stools and the vertical slat wall add organic warmth and visual interest. Finally, the under-counter and pendant lighting acts as the crucial accent, making the space feel luxurious and inviting at night. You can swap the stone for polished concrete and the woven seats for wood to get a different, but equally balanced, result.
3. Sleek Garden Bar Under a Black Metal Pergola
The single element holding this entire design together is the black metal pergola. It creates a defined “room” within the open garden, giving the bar a sense of place and intention. Without it, the bar and stools would feel like they were just floating in the yard. The strong, dark lines of the pergola also provide a graphic contrast to the soft, lush greenery surrounding it, making both elements pop. It’s the architectural anchor that makes this feel like a destination.
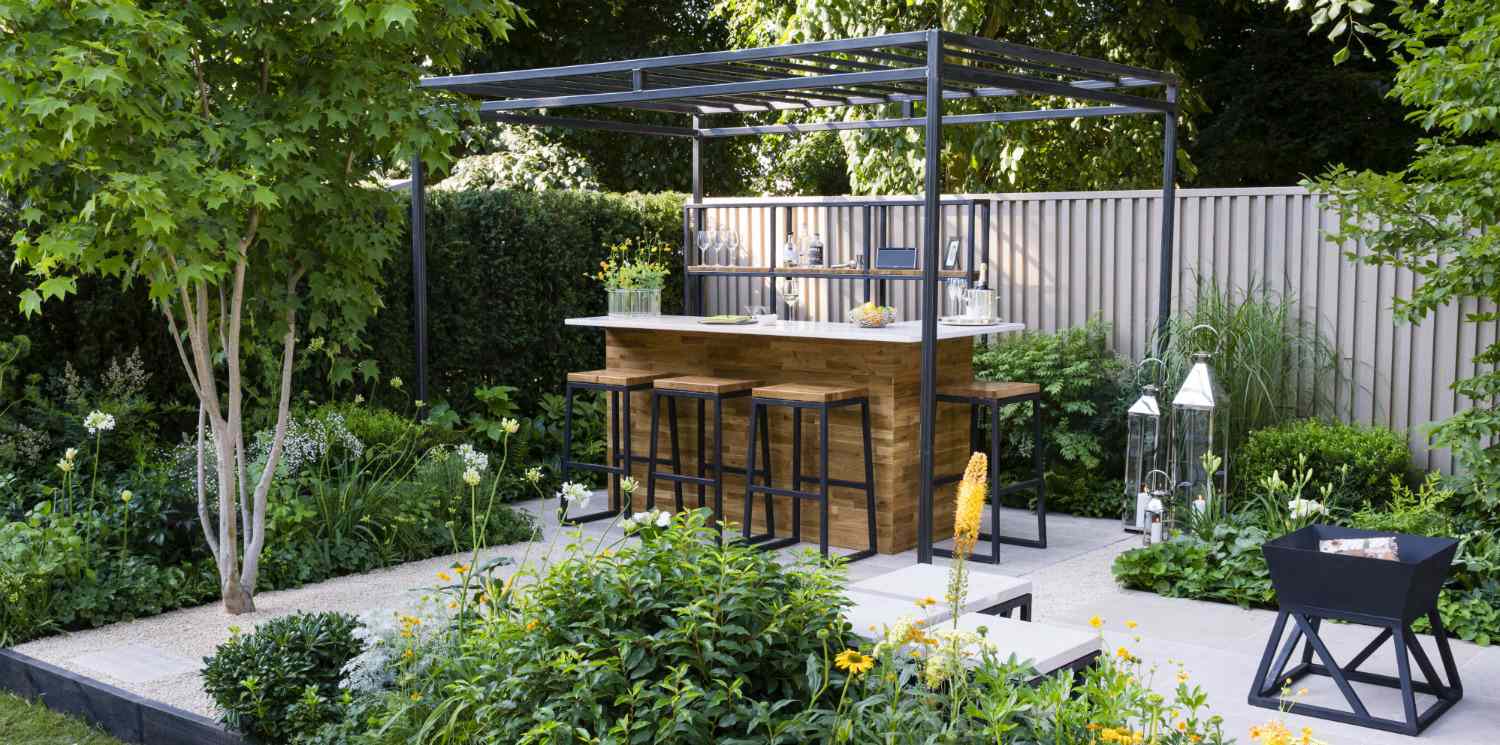
This idea is ideal for medium to large backyards, requiring a footprint of at least 12×10 feet to feel properly proportioned and not cramped. The key is having enough visual breathing room around the pergola so it feels like a feature, not a fence. A ceiling height (the bottom of the pergola beams) of at least 8 feet is essential to avoid feeling claustrophobic. If your space is smaller, consider the pass-through window concept seen in Idea #16 to save on floor space.
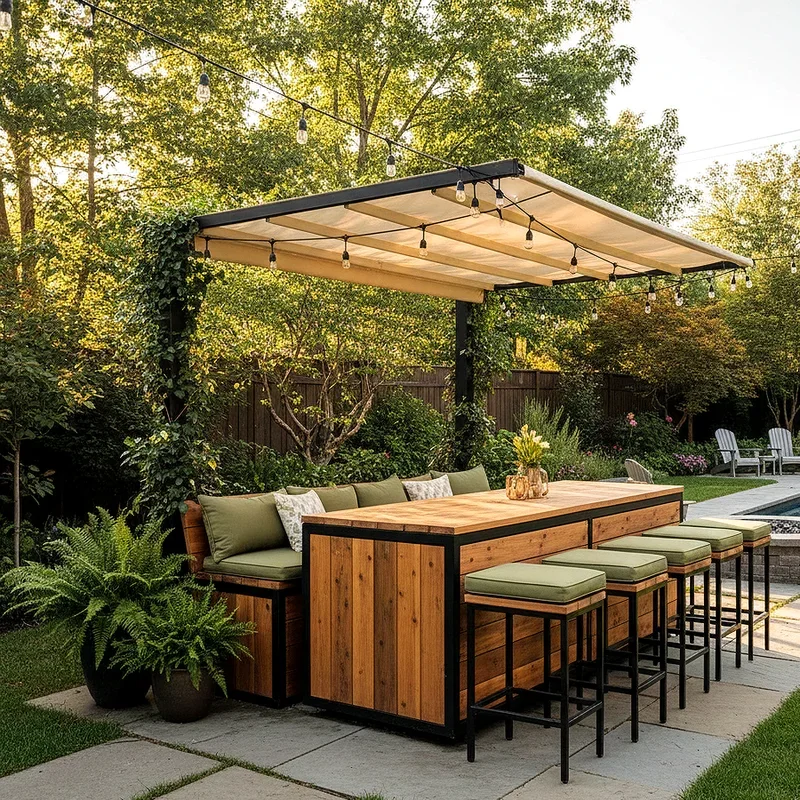
4. Pergola Bar with Integrated Bench and String Lights
Want to add that soft, filtered light with a fabric cover? Here’s a quick guide for a simple, retractable version. Time: 2 hours. Cost: $150-$300.
- Measure the inner dimensions of your pergola bays. Purchase outdoor-grade fabric (like Sunbrella) and hem the edges.
- On the two short ends of a fabric panel, create a pocket seam large enough to slide a thin metal conduit pipe through.
- Install screw eyes on the underside of your pergola beams, spaced about 12-18 inches apart, running parallel to the fabric length.
- Thread stainless steel cable wire through the screw eyes, creating taught lines.
- Use small carabiner clips to attach the fabric panel (at its grommets or edges) to the steel cables. The cables will support the fabric and allow it to slide open and closed.
A fabric pergola cover is fantastic for creating shade and ambiance, but it’s not a zero-maintenance feature. Be prepared to clean it at least twice a season to remove pollen, bird droppings, and potential mildew growth. Most outdoor fabrics can be cleaned with mild soap and water. Also, consider the weather in your area. If you experience high winds, you absolutely must have a plan to retract or remove the fabric quickly to prevent it from tearing or damaging the pergola structure itself.
5. Outdoor Kitchen with a Striking Geometric Backsplash
The geometric tile backsplash is, without a doubt, the hero of this design. While the stainless steel appliances and wood cabinetry are handsome and functional, the backsplash is what provides the personality and visual punch. It elevates the entire wall from a simple utility area to a deliberate, high-impact design feature. Removing it would leave a perfectly fine outdoor kitchen, but it would lose its unique, modern identity and that crucial “wow” factor that sets it apart.
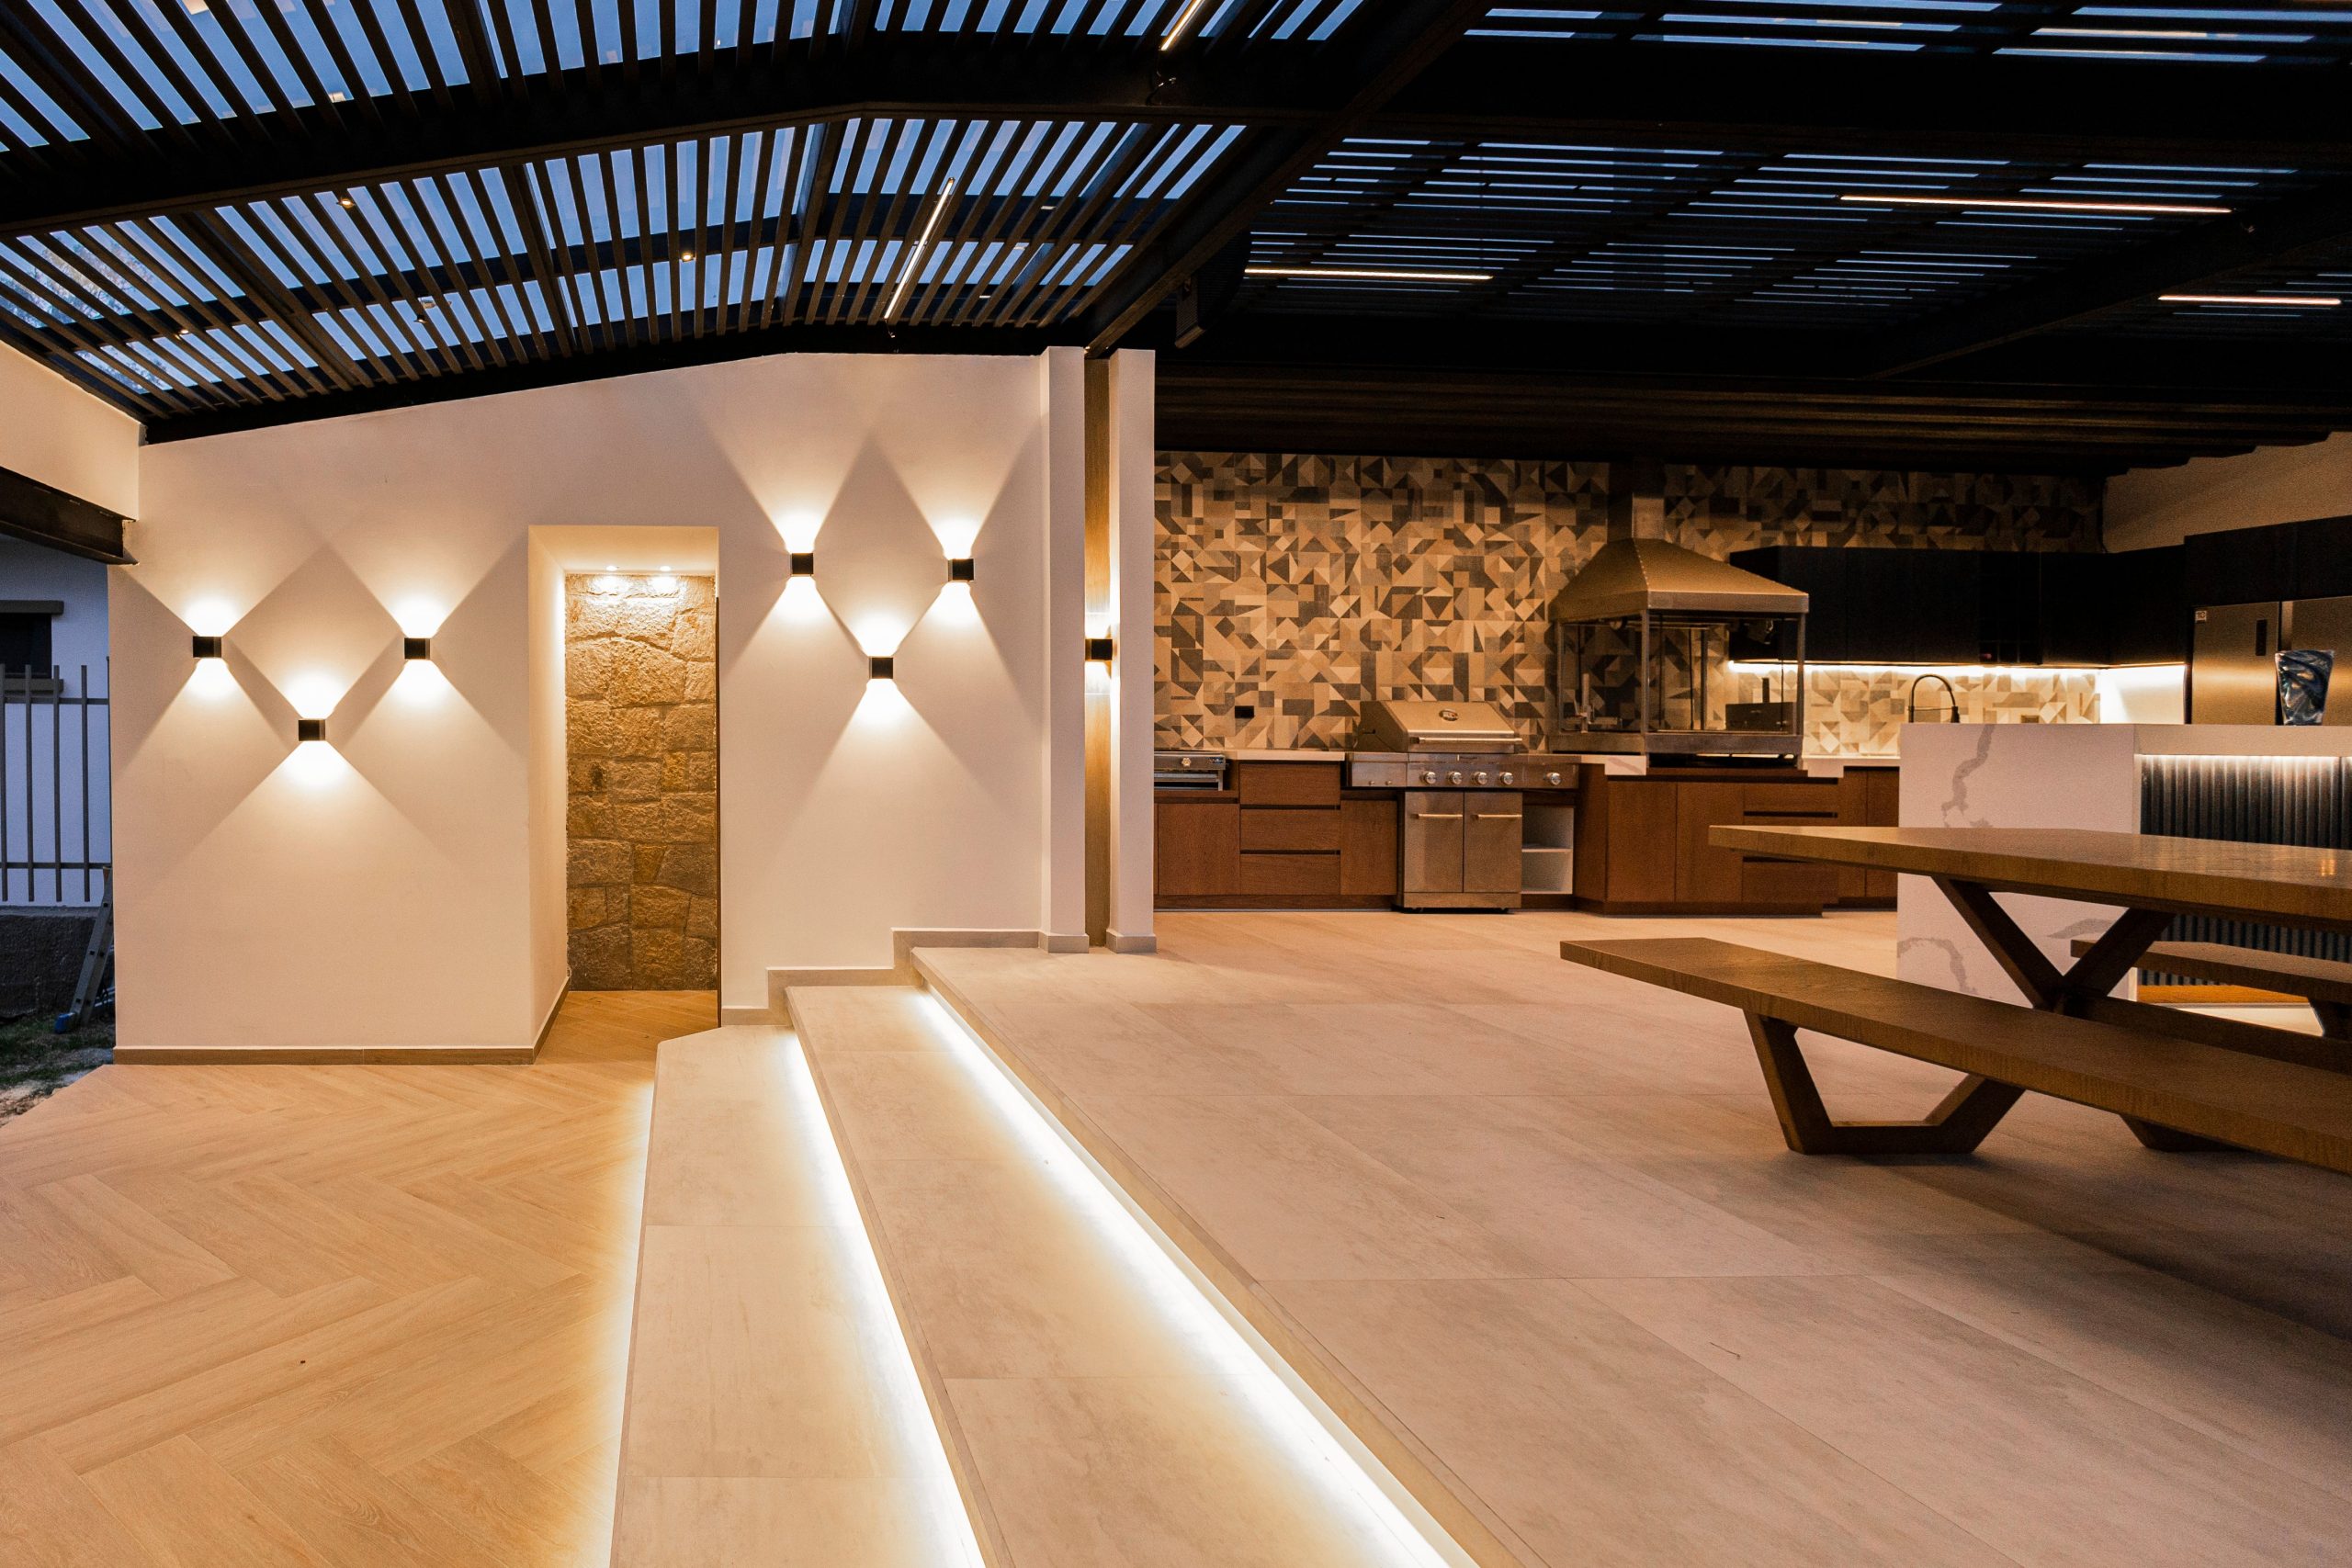
Before you commit to a full outdoor kitchen build, run through this checklist:
- Utility Lines: Have you confirmed access for running electrical, water, and possibly a natural gas line? This is the most expensive and disruptive part, so it’s priority number one.
- Appliance Specs: Do you have the exact dimensions and ventilation requirements for your grill, fridge, and any other appliances? Cabinetry is built around these, not the other way around.
- Material Samples: Have you viewed your chosen countertop, cabinet, and backsplash materials together in the actual outdoor light? Colors can look dramatically different in direct sun versus evening shade.
6. Patio Bar with a Herringbone Paver Floor
The herringbone pattern in the pavers is a brilliant design choice for two reasons. First, it adds a layer of subtle sophistication and dynamic energy to the ground plane, which is often a forgotten surface. Instead of simple squares, the zigzag pattern draws the eye and makes the whole space feel more custom and luxurious. Second, the repetition of the small pavers creates a wonderful textural contrast against the larger, smoother surfaces of the concrete bar and sofa cushions.
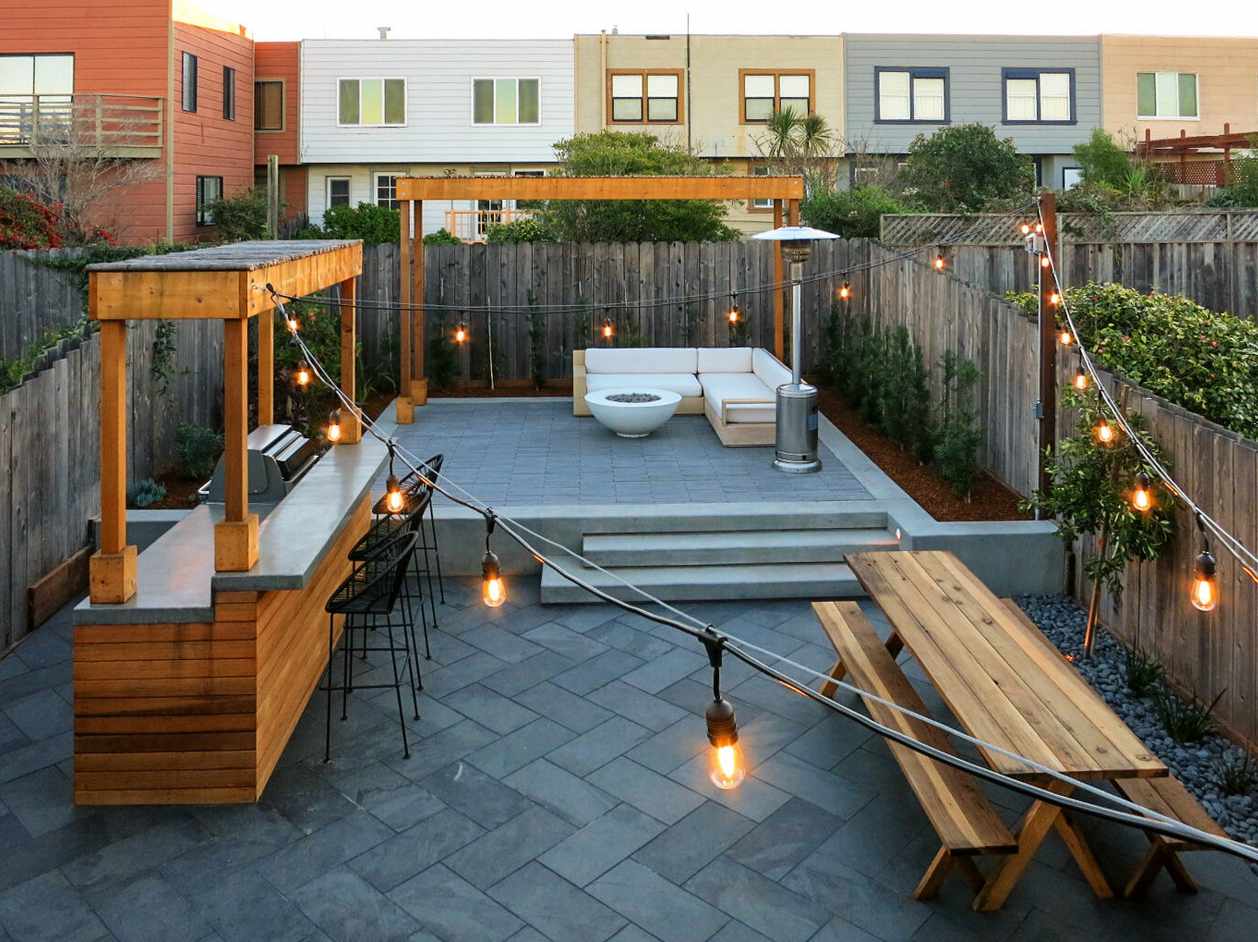
Herringbone pavers look incredible, but their beauty requires specific upkeep. The numerous grout lines are prime real estate for moss and weeds. Plan on weeding or treating the area at least 2-3 times per season. To keep the pattern crisp, you’ll want to pressure wash it annually to remove dirt buildup in the joints. The most important task is replenishing the polymeric sand between the pavers every 2-3 years. This sand locks them in place and prevents shifting and weed growth, so it’s a non-negotiable step to protect your investment.
7. Lush Pergola Bar Draped in Green Vines
This look taps directly into the heart of the biophilic design trend, which is all about blurring the lines between indoors and out. As we seek more connection to nature, designs that fully integrate plant life are becoming more than just popular—they feel necessary. This isn’t just a bar with a few potted plants; it’s a structure that is literally alive. It creates an immersive, jungle-like canopy that feels like an escape, which is something homeowners are craving more than ever.
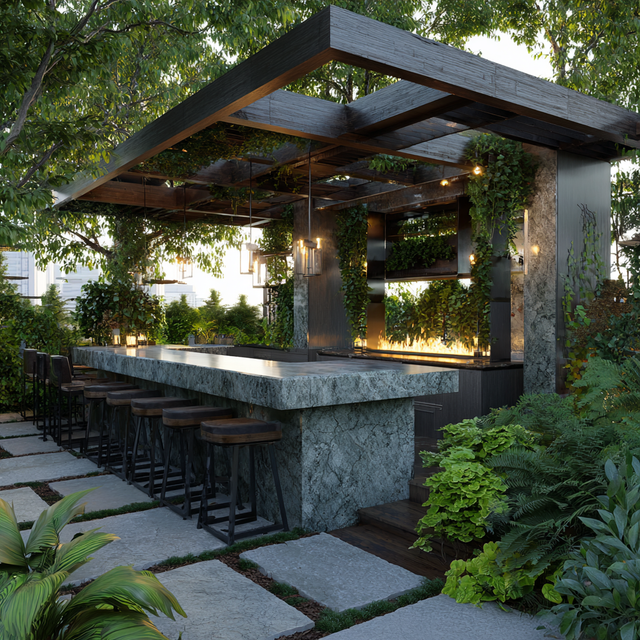
A vine-covered pergola is a romantic dream, but it’s a living thing that needs management. Fast-growing vines like wisteria can become incredibly heavy and woody, potentially damaging the structure of your pergola if not pruned aggressively every year. They can also work their way into your home’s siding and roof. Be honest with yourself about the commitment. If you’re not a dedicated gardener, consider using faux vine panels, or opt for a less aggressive, more manageable climbing plant like a clematis.
8. Modern Bar with Navy Siding and a Light Wood Counter
The formula here is simple and effective: 70% moody color + 20% natural wood + 10% industrial black. The dark, blue-gray siding creates a sophisticated, modern backdrop that makes the other elements pop. The light wood on the countertop, ceiling, and shelving adds warmth and prevents the dark color from feeling oppressive. Finally, the black metal on the pendant lights and stool frames provides a sharp, graphic accent that ties it all together. You could swap the navy for a deep forest green and it would still work beautifully.
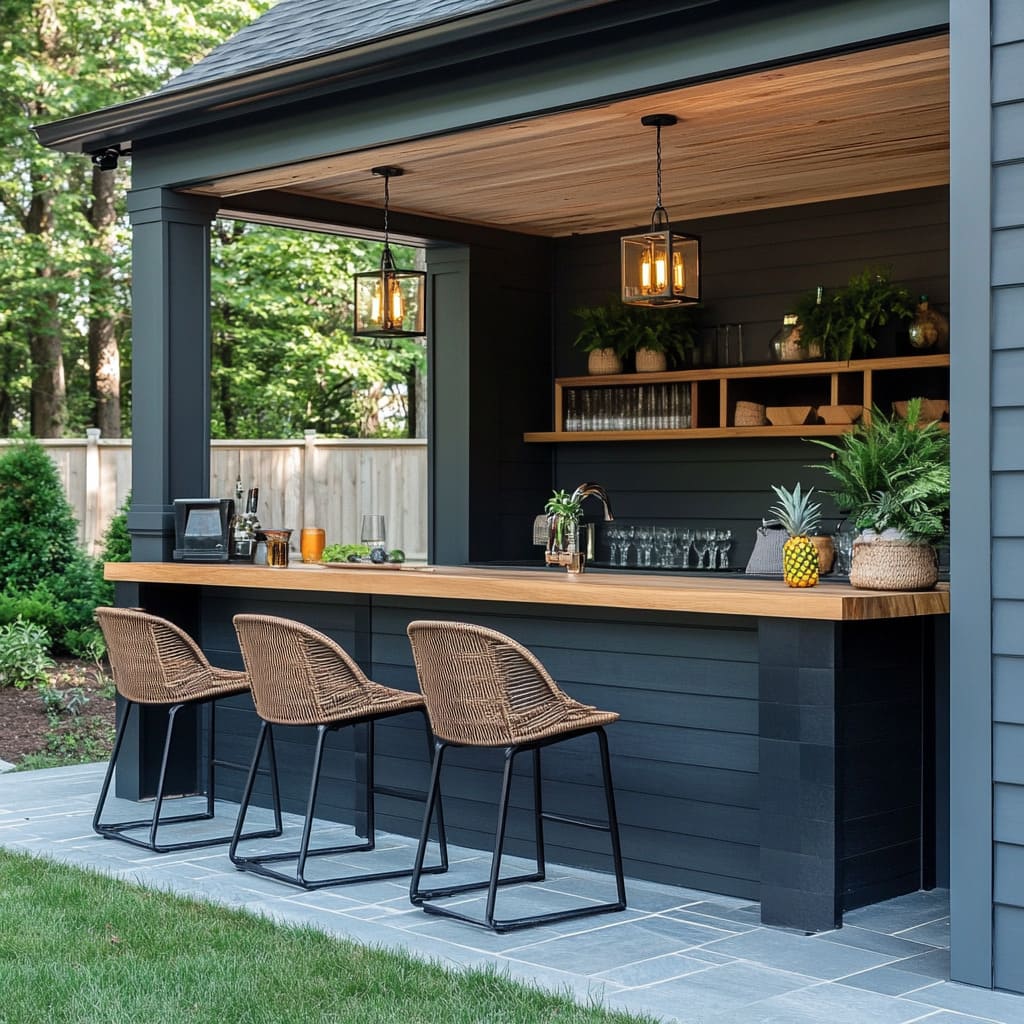
Here’s a look at what it would cost to bring this casual-cool bar to life.
- Main Structure & Siding: $1,500 – $3,500
- Lighting: $300 – $700 (for two outdoor-rated pendants)
- Wood & Shelving: $500 – $1,200 (for countertop and ceiling planks)
- Bar Stools: $400 – $800 (for a set of three)
- Decor: $150 – $300
- Budget Alternative: Paint an existing wall dark navy ($100), use a butcher block countertop from a hardware store ($300), and find similar industrial pendants from Wayfair or Amazon ($150). Total savings: approx. 60-70%.
- TOTAL: $2,850 – $6,500
9. Concrete Bar with Woven Rattan Pendant Lights
This design succeeds by perfectly balancing hard and soft elements. The long, L-shaped concrete bar is heavy, angular, and industrial. By itself, it could feel cold and imposing. However, the five oversized woven pendant lights above it introduce a soft, organic texture and warm, diffused light. This contrast is the key. The natural rattan of the lights and the woven seats of the stools soften the hard edges of the concrete, creating a space that feels both modern and incredibly relaxing. Compare this to Idea #2, which uses a similar formula with a different style of light.
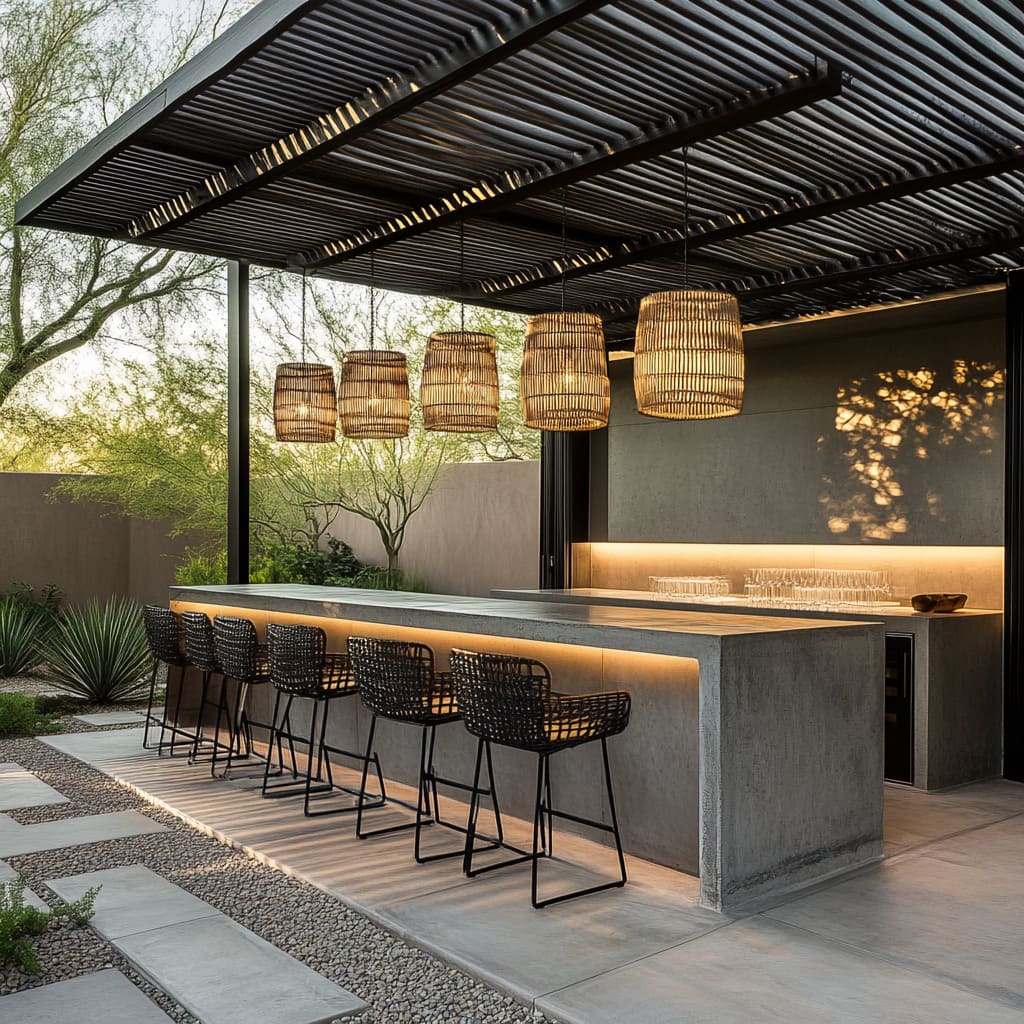
For a high-end look with concrete, the finish is everything. After the concrete is poured and cured, insist on a grinding and polishing stage. This will smooth out imperfections and allow you to choose the level of sheen. Then, and most importantly for an outdoor bar, it must be sealed with a food-safe, penetrating sealer specifically designed for concrete countertops. This is not the same as driveway sealer! This step is critical to prevent staining from things like wine, citrus, and oil.
10. Modern Bar with Concrete Counter and a Dark Wood Ceiling
The slatted dark wood ceiling is the crucial element that adds warmth and intimacy to this space. While the concrete bar communicates modern strength, the ceiling brings in a natural, almost tropical coziness. It creates a ‘roof’ over the bar, making it feel more like a room and less like an exposed slab. The dark color also helps the woven pendant lights stand out, and the warm under-counter lighting reflects beautifully against the wood tones, creating a cohesive and inviting glow.
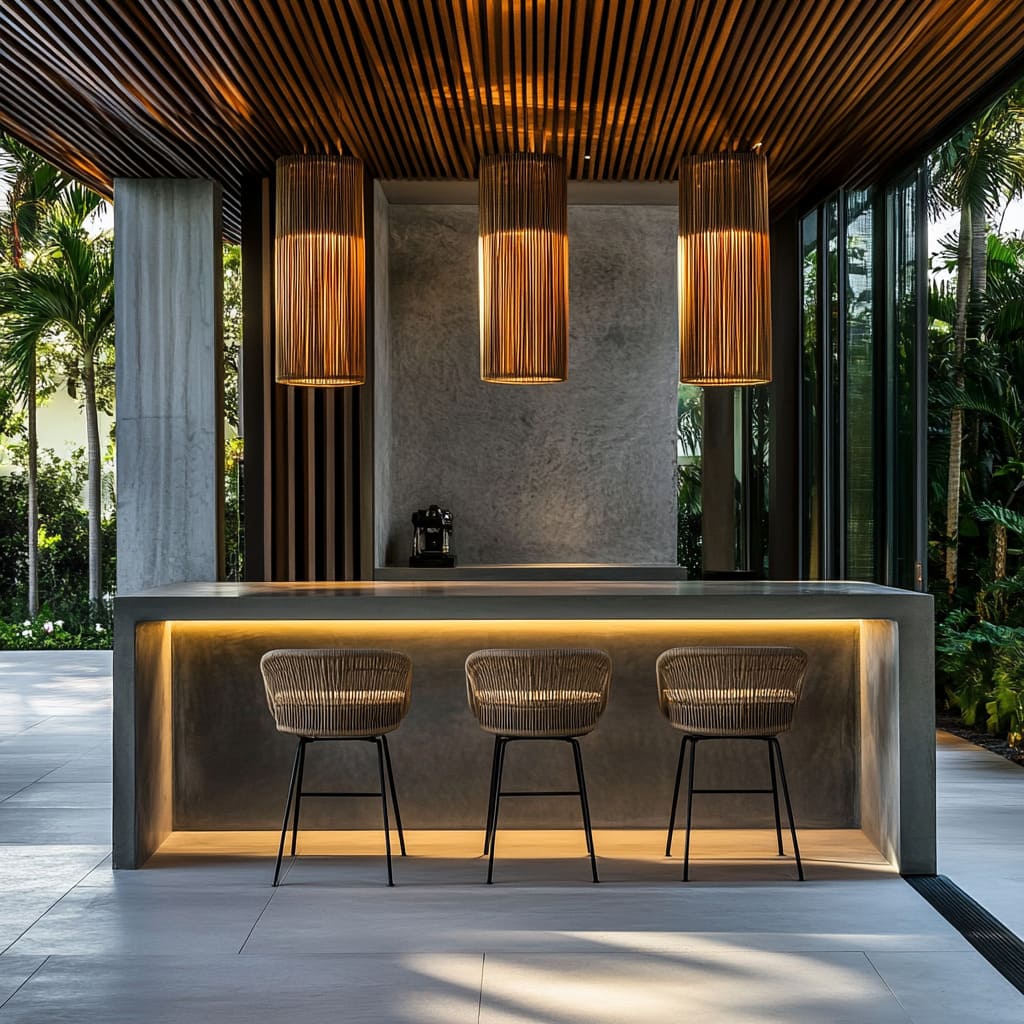
A natural wood ceiling outdoors, even if covered, requires vigilance. The biggest enemies are moisture and insects. Ensure the wood is sealed on all six sides *before* installation to prevent warping and rot. Every 2-3 years, you’ll need to reapply a coat of exterior-grade varnish or sealer, especially if you live in a climate with high humidity or extreme temperature swings. For a lower-maintenance alternative, consider a composite decking material with a realistic wood-grain finish for the ceiling—it gives a very similar look with almost no upkeep.
11. Outdoor Kitchen with a Woven Reed Ceiling Shade
This space feels so inviting because of its expert layering of light. It’s a three-tiered approach. First, the woven reed ceiling diffuses the harsh overhead sunlight, creating a soft, dappled ambient light for the whole area. Second, the linear lights integrated into the structure provide broad, functional light for the evening. Finally, the under-counter strip lighting on the island highlights its shape and provides low-level mood lighting. This combination makes the space usable and beautiful, day or night.
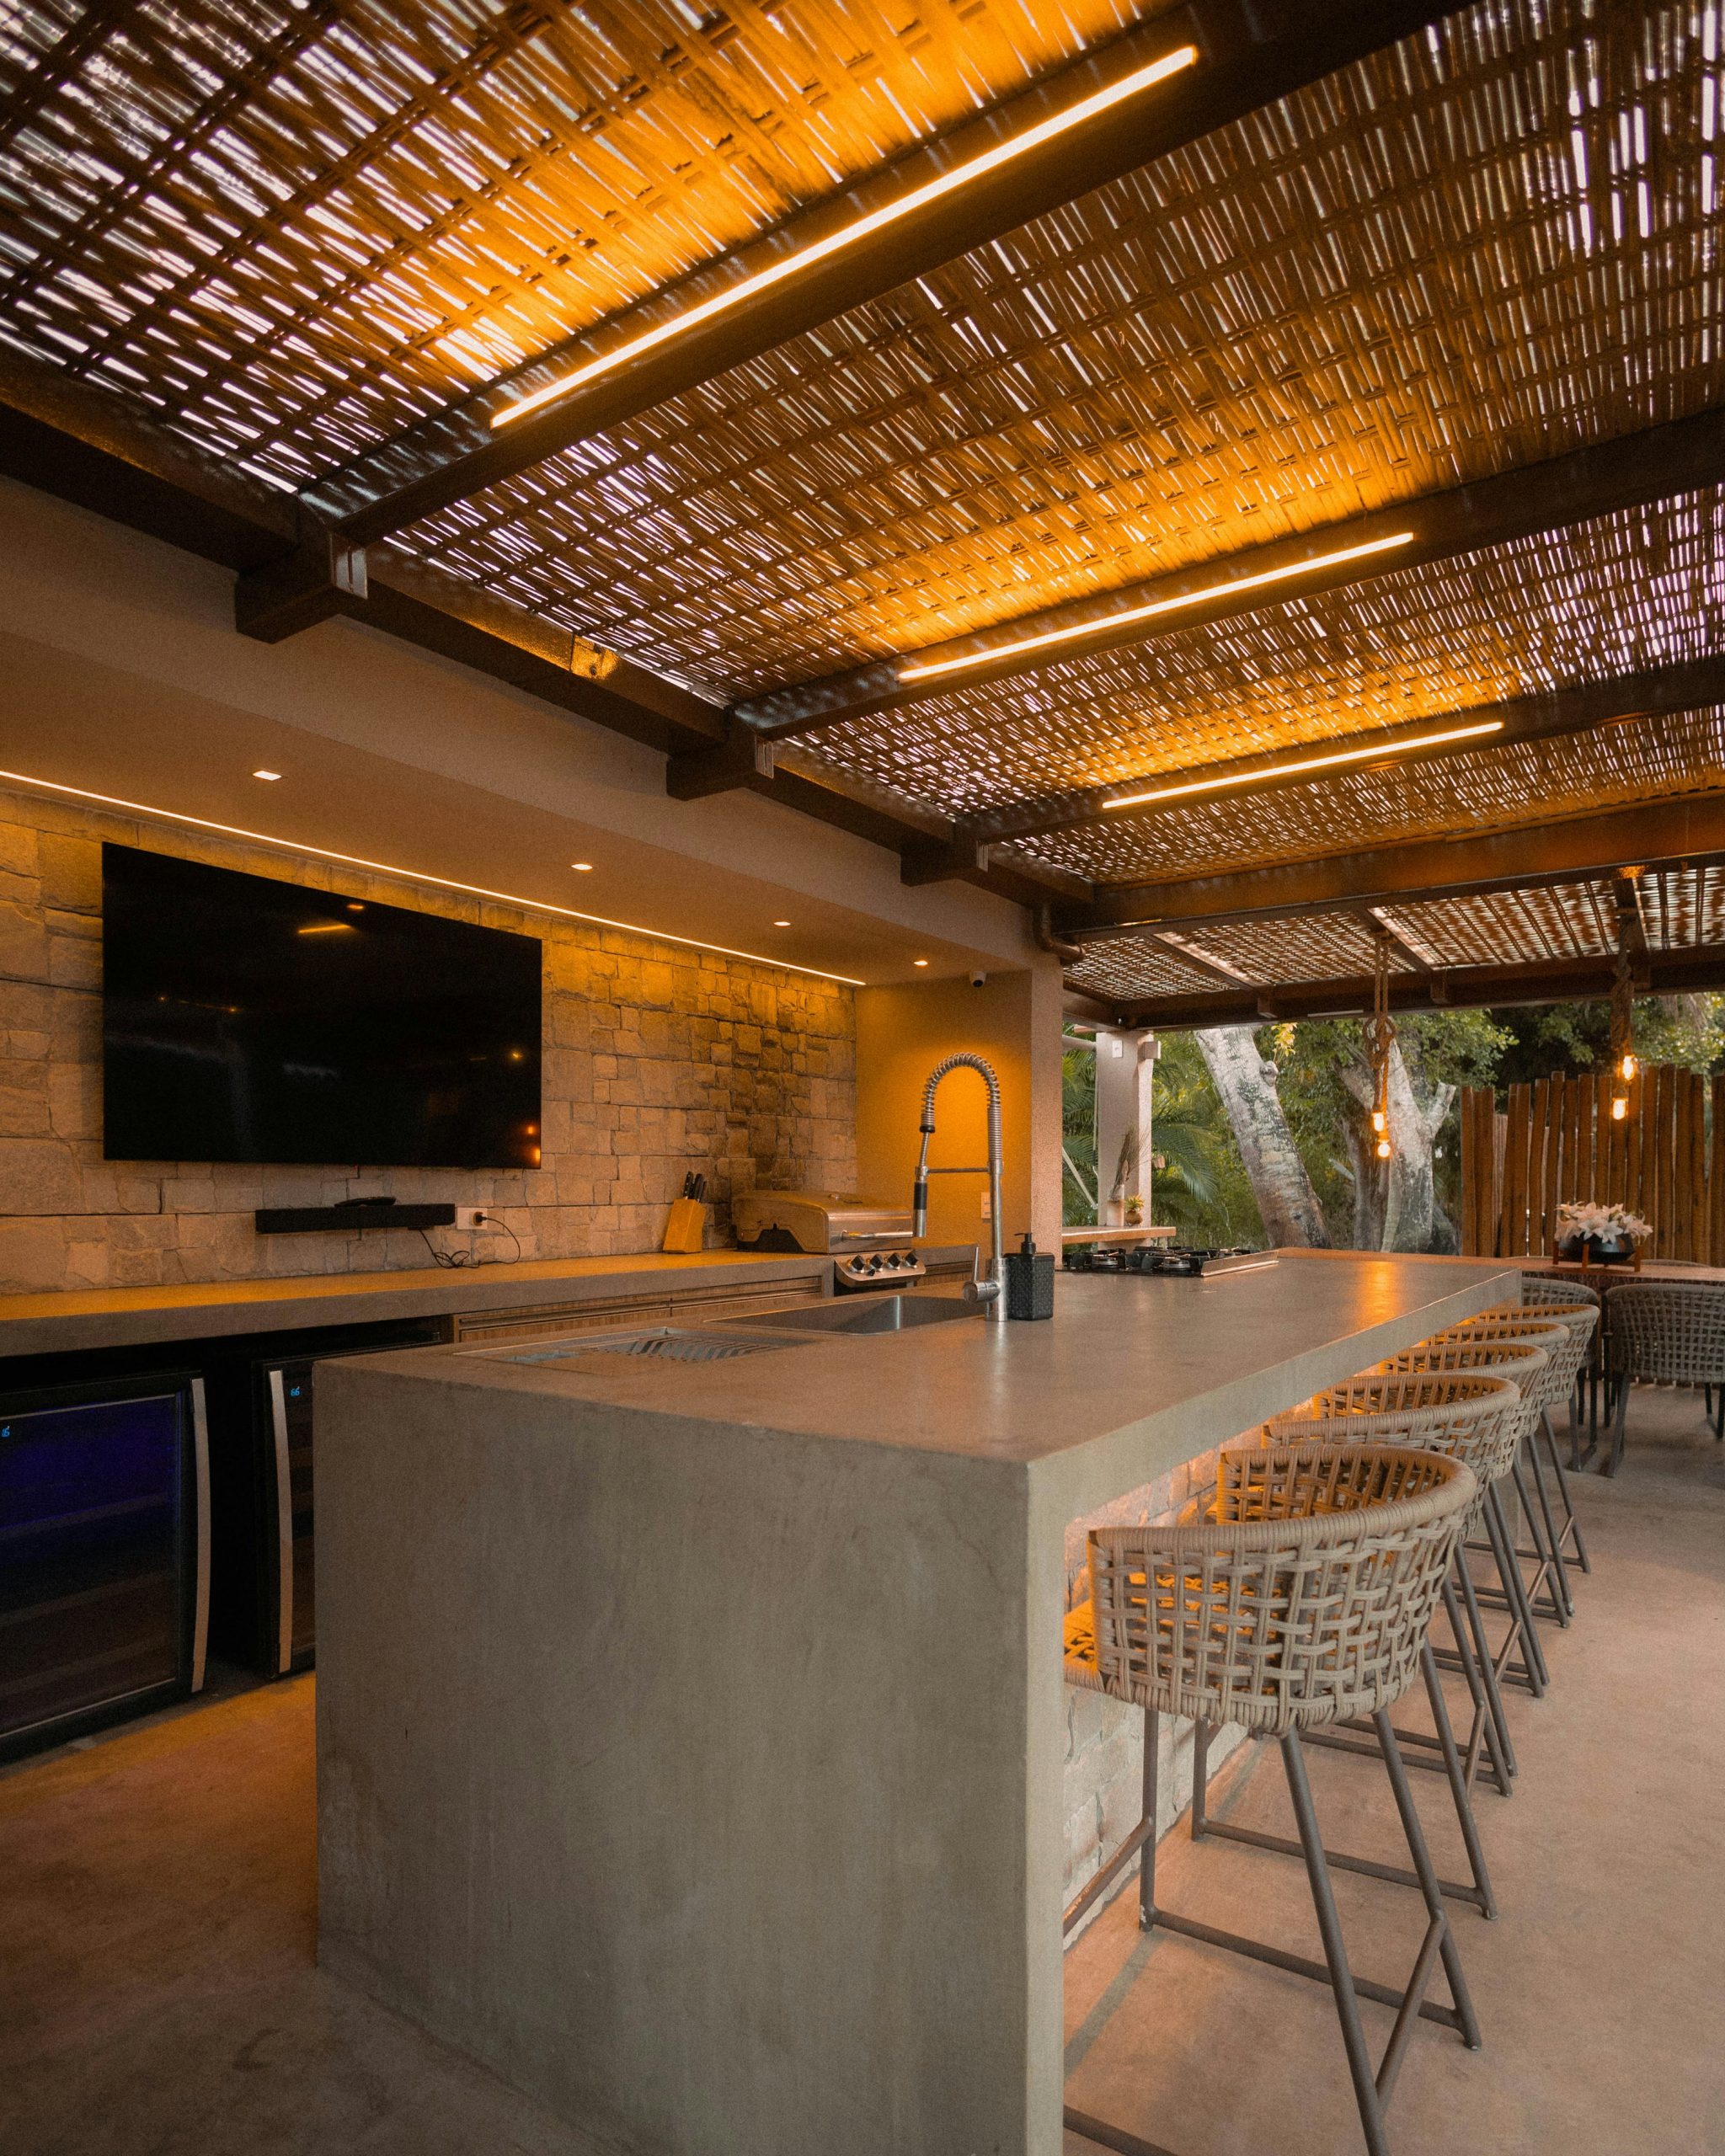
You can get this warm, shaded vibe for much less. Instead of a custom-built structure, you can buy large, pre-made bamboo or reed fence panels from a home improvement store. Stretch them across the top of a standard pergola kit or even between a few well-placed posts. For the island, a simple frame covered in cement board and then a concrete skim coat can give you the look of a solid concrete island for a fraction of the weight and cost. It’s a very approachable DIY version of the look in Idea #10 as well.
12. Rustic Stone Bar with a Billiards Table Nearby
This is a great example of a ‘destination’ backyard design, best suited for large properties with significant square footage to dedicate to entertainment. To comfortably fit a bar of this length (approx. 12-15 feet) plus a standard pool table with adequate playing room around it, you’ll need a covered patio area of at least 25×20 feet. Anything smaller will feel cramped and players will risk bumping into bar patrons. This is less of a simple bar and more of a full-blown outdoor rec room.
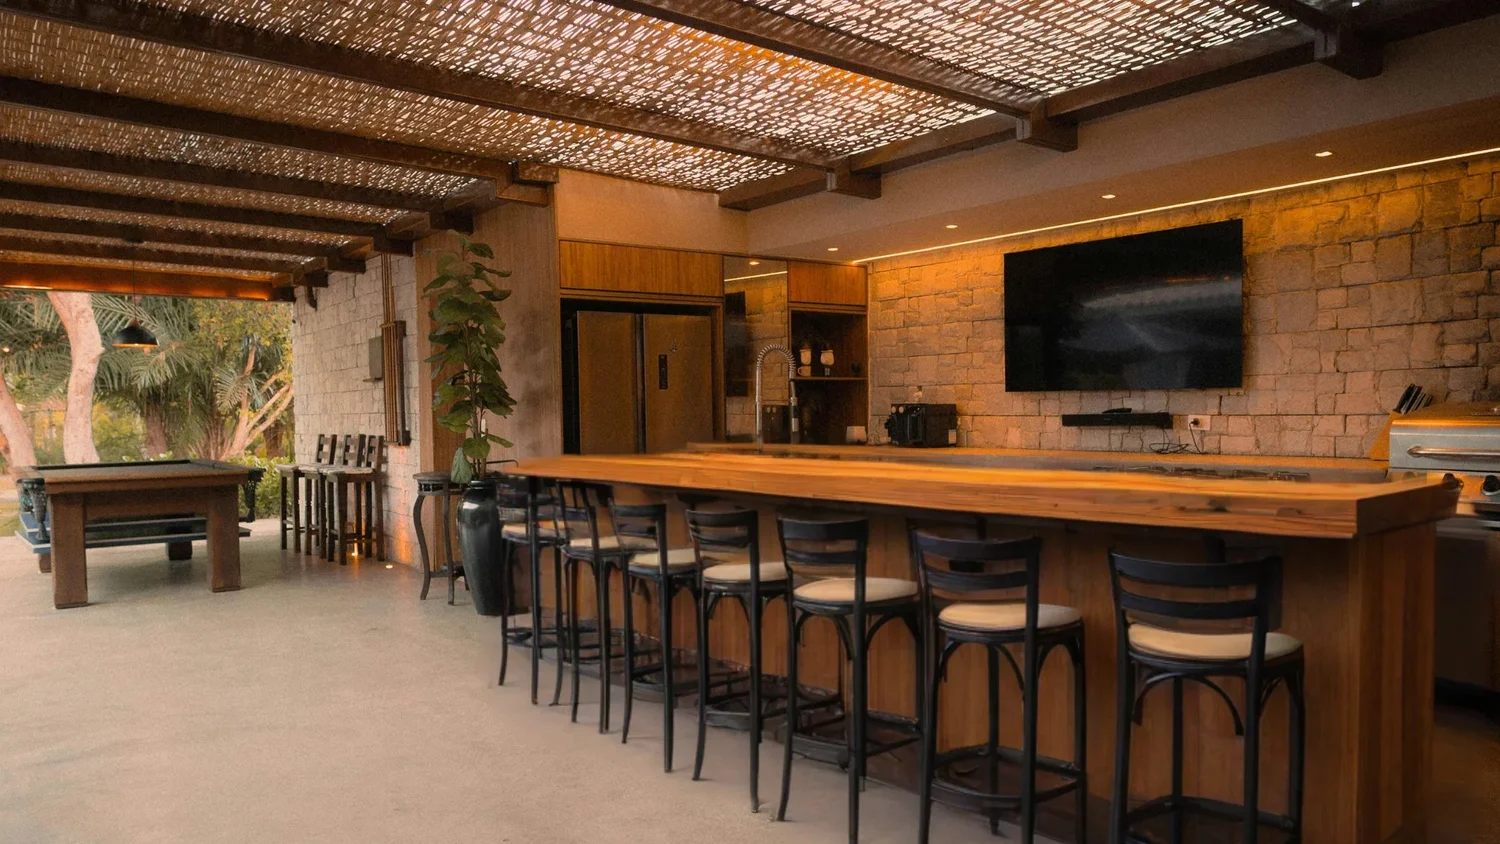
There’s a growing trend towards creating multi-zone entertainment spaces in backyards, and this hits it perfectly. It’s not just a place to cook or a place to sit; it’s a place to *do things*. By combining a passive activity (sitting at the bar, watching TV) with an active one (playing pool), you create a space that appeals to more people for longer. It encourages guests to linger and interact, which is the ultimate goal of good hospitality design, both indoors and out.
13. Urban Outdoor Kitchen with a Vibrant ‘CHICAGO’ Mural
The ‘CHICAGO’ mural is everything here. It injects a burst of color, personality, and a strong sense of place into what would otherwise be a very handsome but generic modern kitchen. It transforms the back wall into a piece of art and a conversation starter. This single element tells a story and gives the entire space its unique urban identity. It’s a bold choice that pays off by making the design unforgettable. It demonstrates how art can be just as important as appliances in a kitchen space.
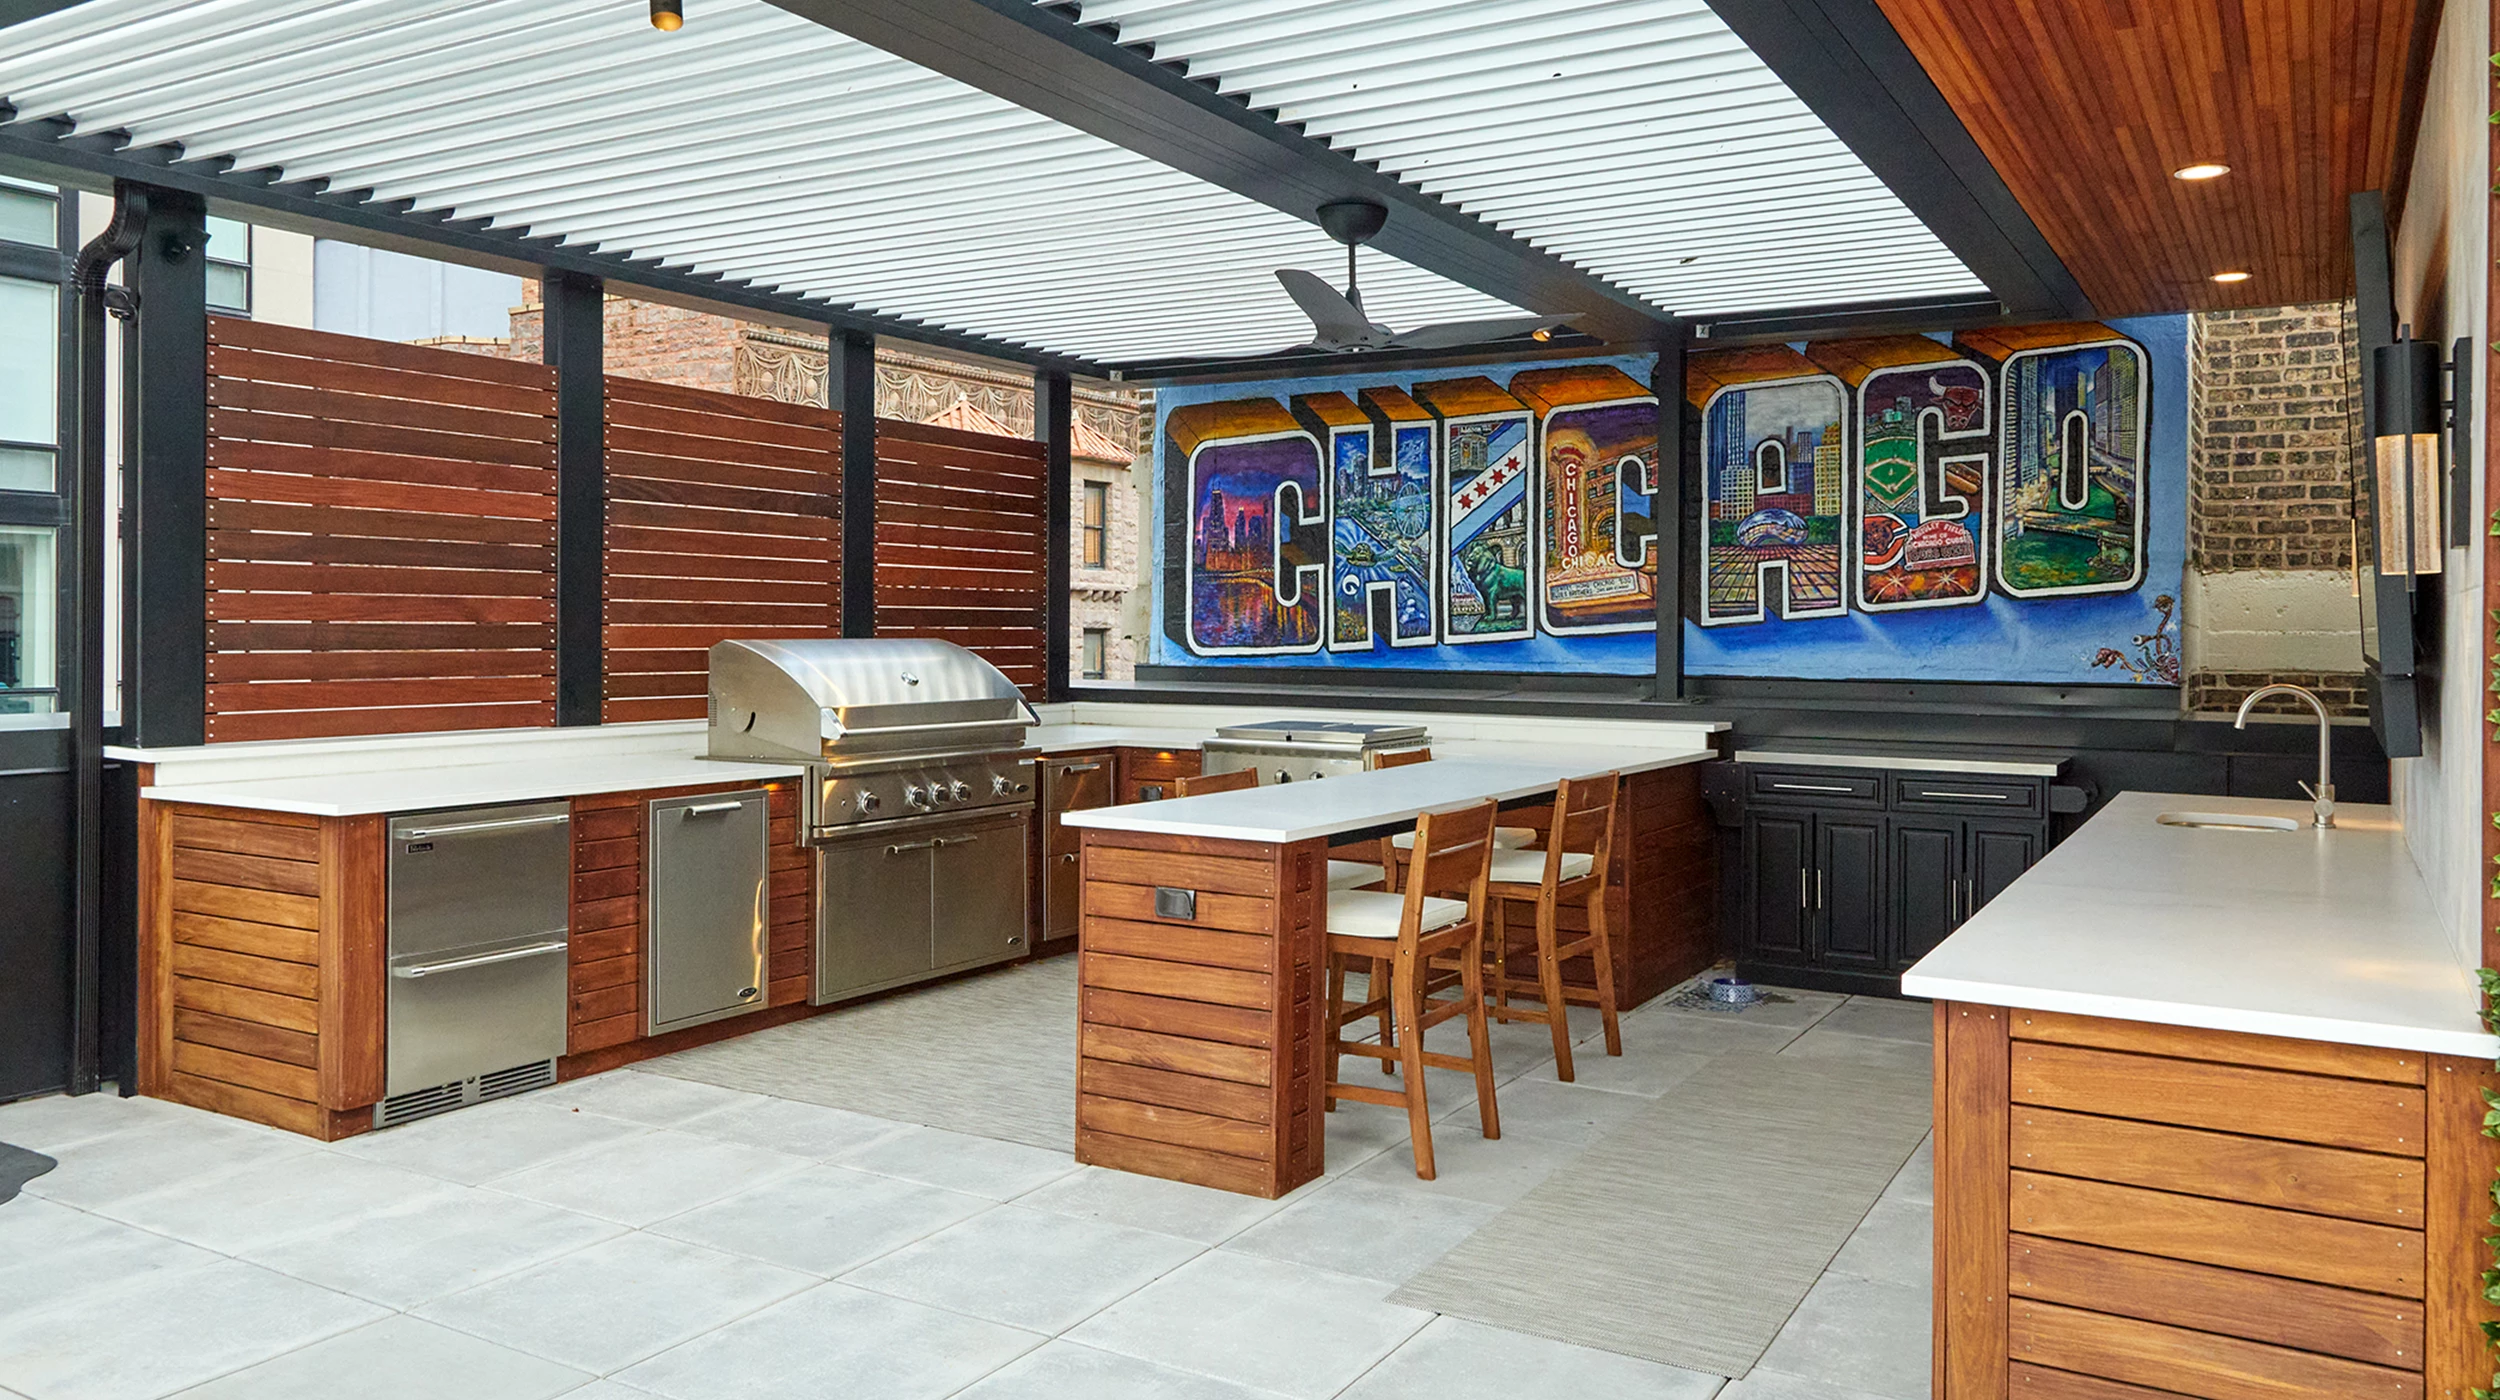
Thinking of commissioning a custom mural? Here’s how to approach it. Time: 2-4 weeks (from artist selection to completion). Cost: $500 – $5,000+.
- Find Your Artist: Use Instagram hashtags like #[yourcity]muralist or search local art collectives. Look for portfolios that match your desired style.
- Define the Brief: Provide the wall dimensions, photos of the space, and a clear concept. Don’t just say ‘a mural’; explain the feeling, colors, and any specific words or imagery you want.
- Get a Quote & Contract: The artist should provide a quote that includes design mockups, materials, and labor. A contract protects both of you.
- Prep the Surface: The wall needs to be clean, dry, and primed. The artist will specify the exact primer or base coat they need to guarantee their work.
- Schedule & Execution: Clear the area and let them work their magic!
14. Screened-In Lounge with Kitchen and Rectangular Fire Pit
This design works so well because it creates distinct ‘zones’ for different activities within a single, cohesive space. You have the cooking zone (the outdoor kitchen), the dining/bar zone, and the lounging zone (around the fire pit). The consistent color palette of grays, browns, and charcoals ties them all together, but the furniture arrangement clearly defines each area’s purpose. This makes the space highly functional for entertaining a group, allowing people to cook, chat, and relax simultaneously without feeling crowded.
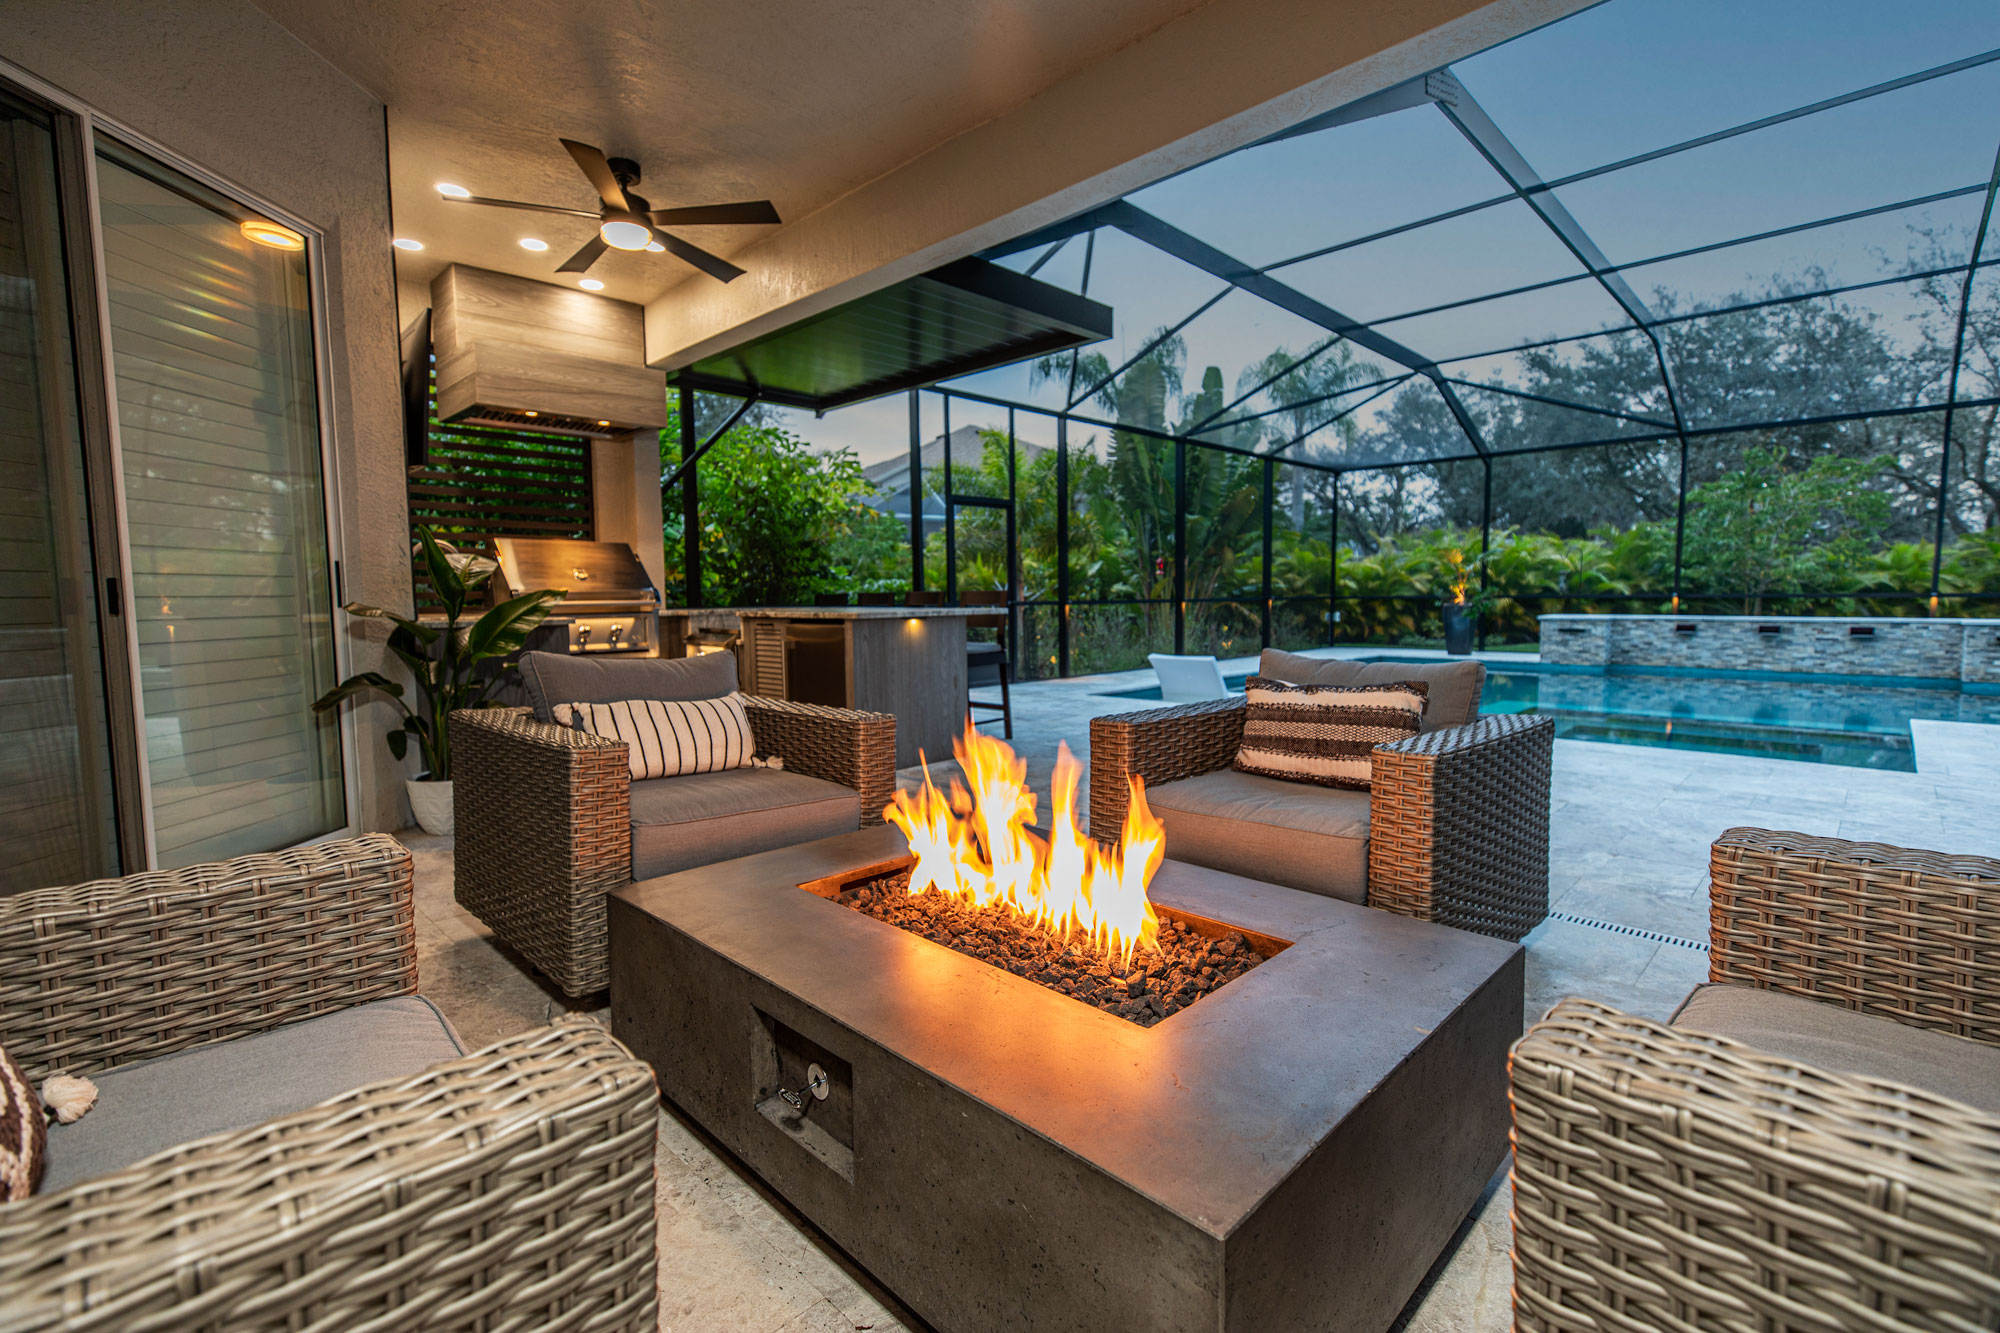
A screened enclosure is a game-changer, especially in buggy climates. It extends the usability of your outdoor space immeasurably. However, be aware of the ‘pollen-pocalypse’ in the spring. Fine yellow dust can coat every single surface inside the enclosure. You’ll need to plan for a thorough top-to-bottom cleaning each year, which usually involves hosing down the screens, wiping all furniture, and pressure washing the floors. It’s a trade-off, but for many, it’s well worth it to have a mosquito-free evening.
15. Circular Bar with an Integrated Tree Planter
When centering a bar around a tree, the biggest mistake is not leaving enough room for growth. Don’t make the opening a tight fit around the current trunk size! As a rule of thumb, allow for at least 18-24 inches of open soil diameter around the base of the trunk for a small-to-medium tree. This gives the trunk room to expand over the years and ensures the roots have access to air and water. Fill the gap with gravel or a loose ground cover, not tight pavers.
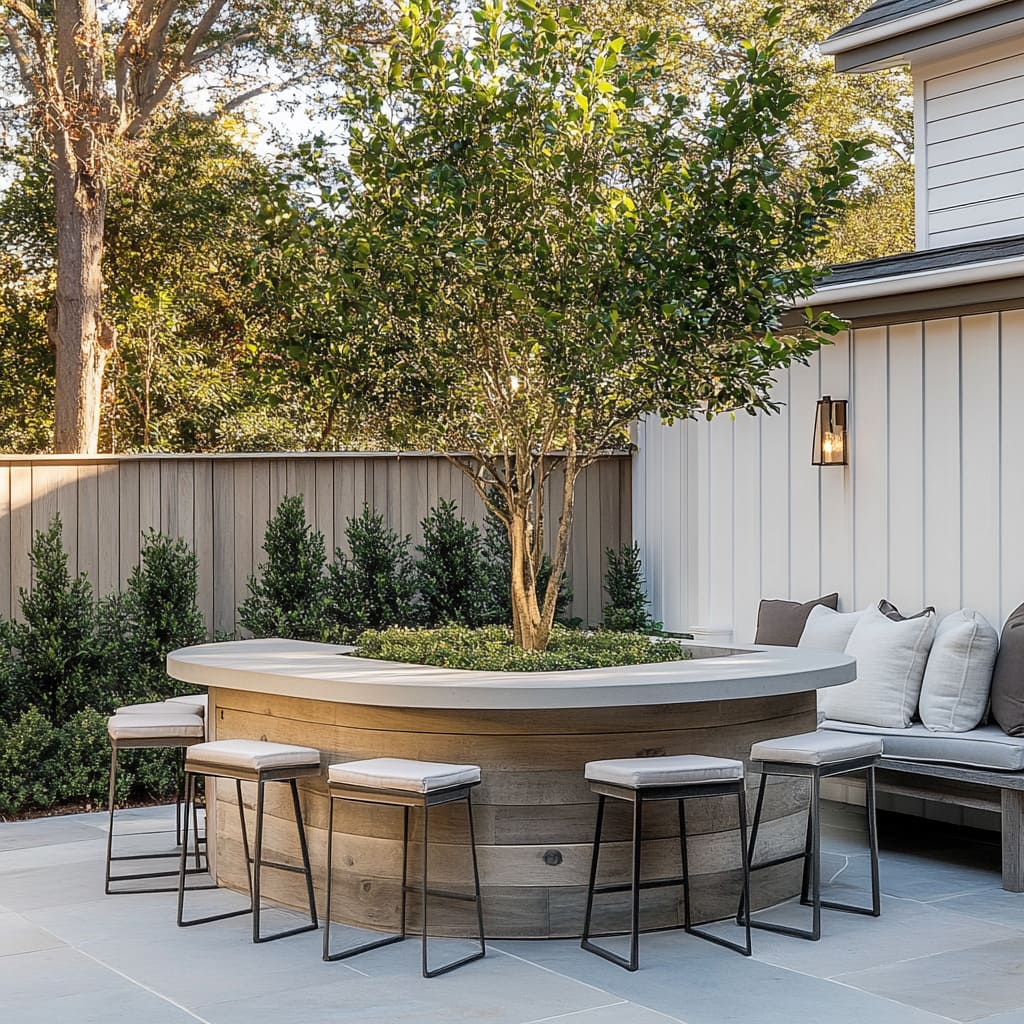
A custom-built circular bar can be pricey. For a budget-friendly take, you can achieve a similar effect with stock materials. Create the circular base using curved retaining wall blocks from a home and garden center. For the countertop, instead of a custom-poured piece, use wood decking planks, cut and fitted in a sunburst pattern. It won’t be a solid surface, but it will give you that circular shape and woody texture for a fraction of the cost. Compare with Idea #29, which shows a more integrated, high-end version of the same concept.
16. Pass-Through Bar Window with Stacked Stone Accents
The beauty of this design lies in its seamless connection between indoors and out. The bi-fold window completely erases the boundary, making the kitchen and patio feel like one large, unified space. This is not only great for socializing (no one is stuck inside cooking while the party is outside), but it’s also incredibly practical. The indoor counter can be used for prep, while the outdoor slate counter serves as the bar, doubling your functional surface area without a massive footprint.
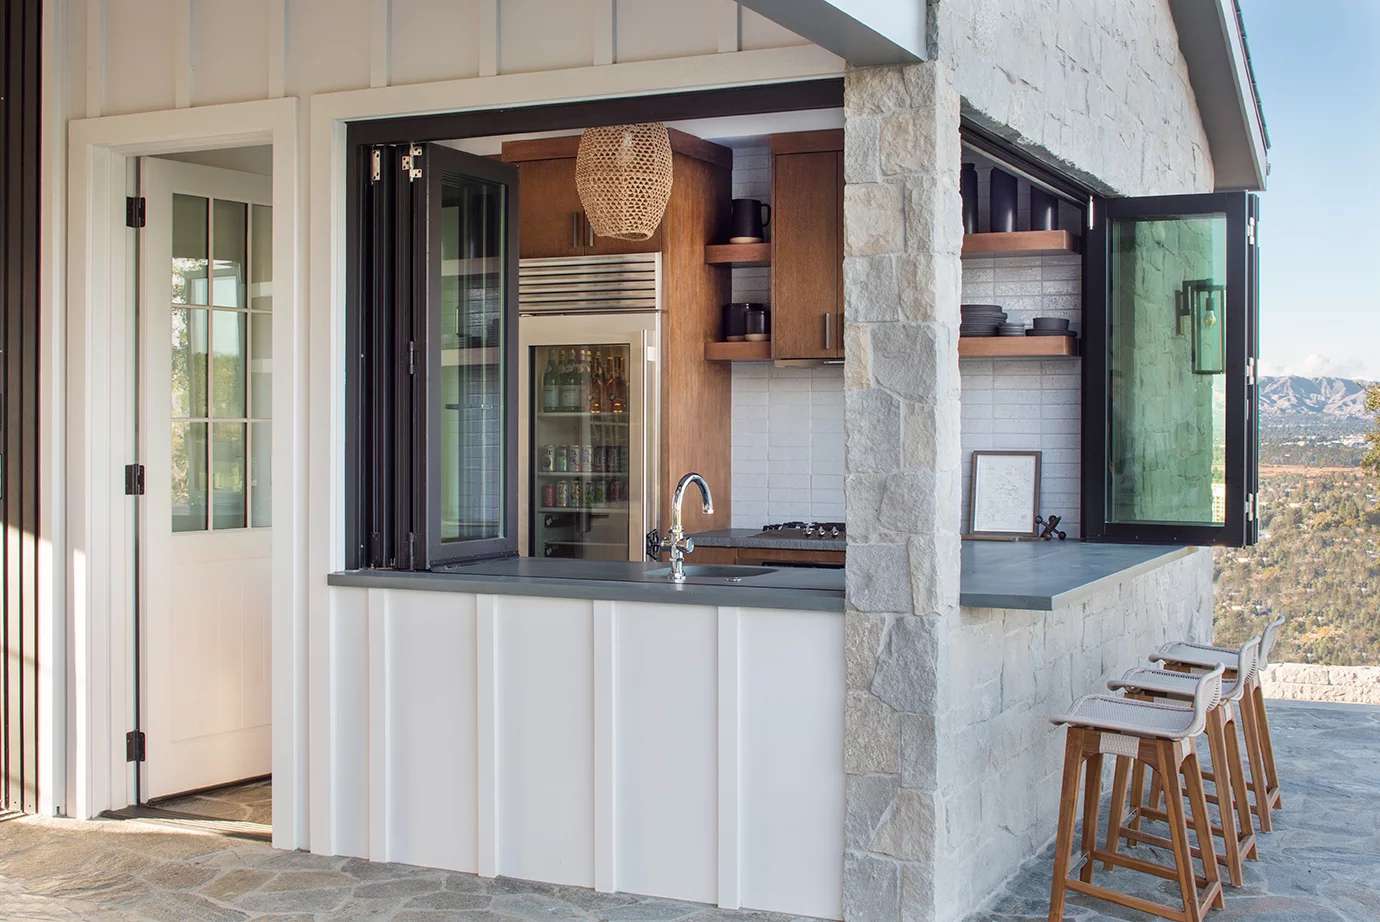
Thinking about adding a pass-through window? Hold on and check these things first.
- Is it a Load-Bearing Wall? This is the absolute first question. If it is, you will need to install a proper header to support the weight of the house above the opening. This is a job for a structural engineer and a contractor, not a weekend DIY.
- What’s Inside the Wall? Check for electrical wiring, plumbing, and HVAC ducts before you even think about cutting. Rerouting these utilities can add significant cost and complexity to the project.
- Weather Exposure: How will the window be protected from rain and wind? Is there a sufficient roof overhang? A high-quality, well-sealed window system is critical to prevent water from getting into your house.
17. Luxe Marble Bar with a Fluted Wood Base
The fluted wood base is the standout detail that elevates this bar from simply modern to truly luxurious. While a flat wood panel would have been fine, the vertical, ribbed texture of the fluting adds a layer of refinement and visual rhythm. It catches the light beautifully, creating subtle highlights and shadows that give the bar depth and a bespoke, furniture-like quality. It’s a detail that feels distinctly high-end and intentional, setting a sophisticated tone for the entire area.
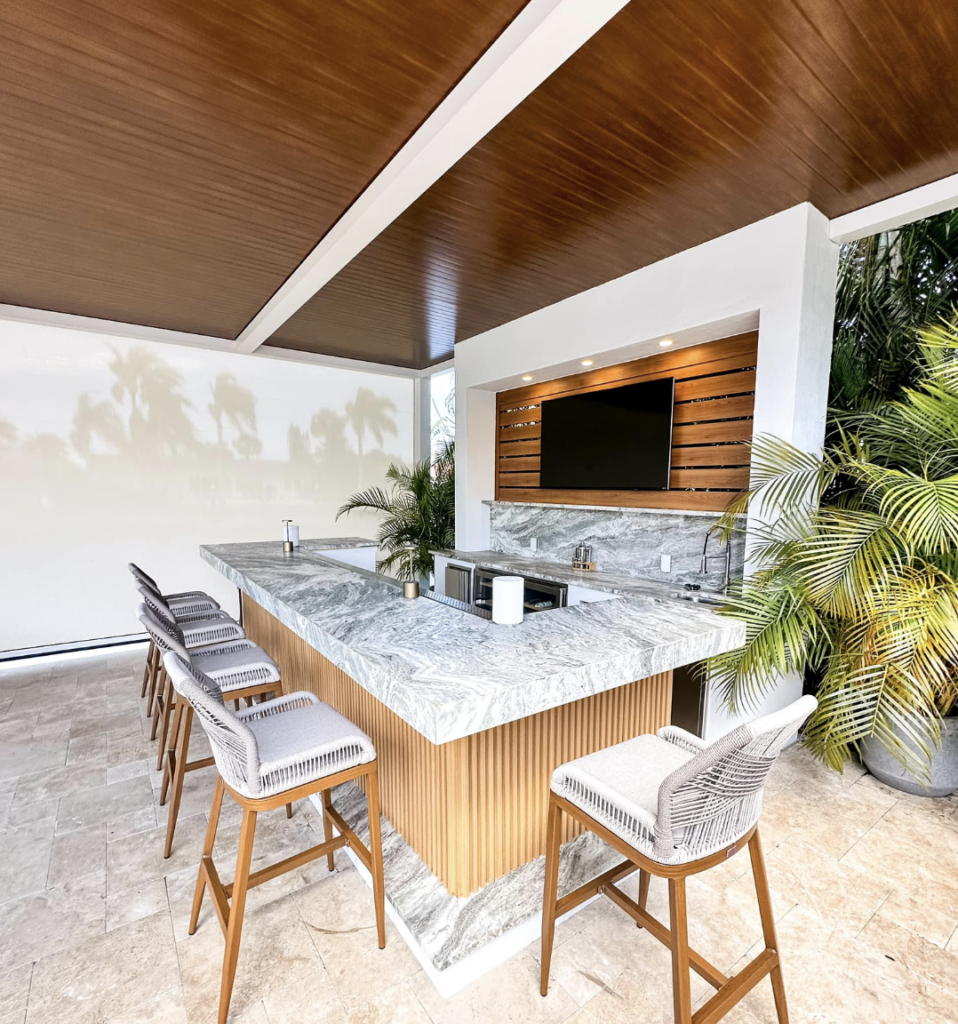
Marble is the peak of luxury, but it’s a diva. As a porous, calcite-based stone, it will etch (dull) when it comes in contact with acids like lemon juice, vinegar, or wine. An outdoor bar will see a lot of those! Sealing it helps prevent stains, but it does *not* prevent etching. You have two choices: either embrace the eventual patina of a life well-lived as part of the stone’s character, or be obsessively diligent with coasters and wipe up every single spill the second it happens. There is no in-between.
18. Tropical Bar with a Large Mirror and Checkered Floor
Using a large mirror outdoors is a brilliant, slightly unexpected trick. It does two things exceptionally well. First, it reflects the surrounding greenery, effectively doubling the amount of lushness you see and making the space feel more like a jungle oasis. Second, it bounces light around, which is especially useful if the bar is in a shady or covered area. To prevent a funhouse effect, use a single, large-pane mirror. For safety and longevity, ensure it is properly rated for outdoor use and securely mounted.
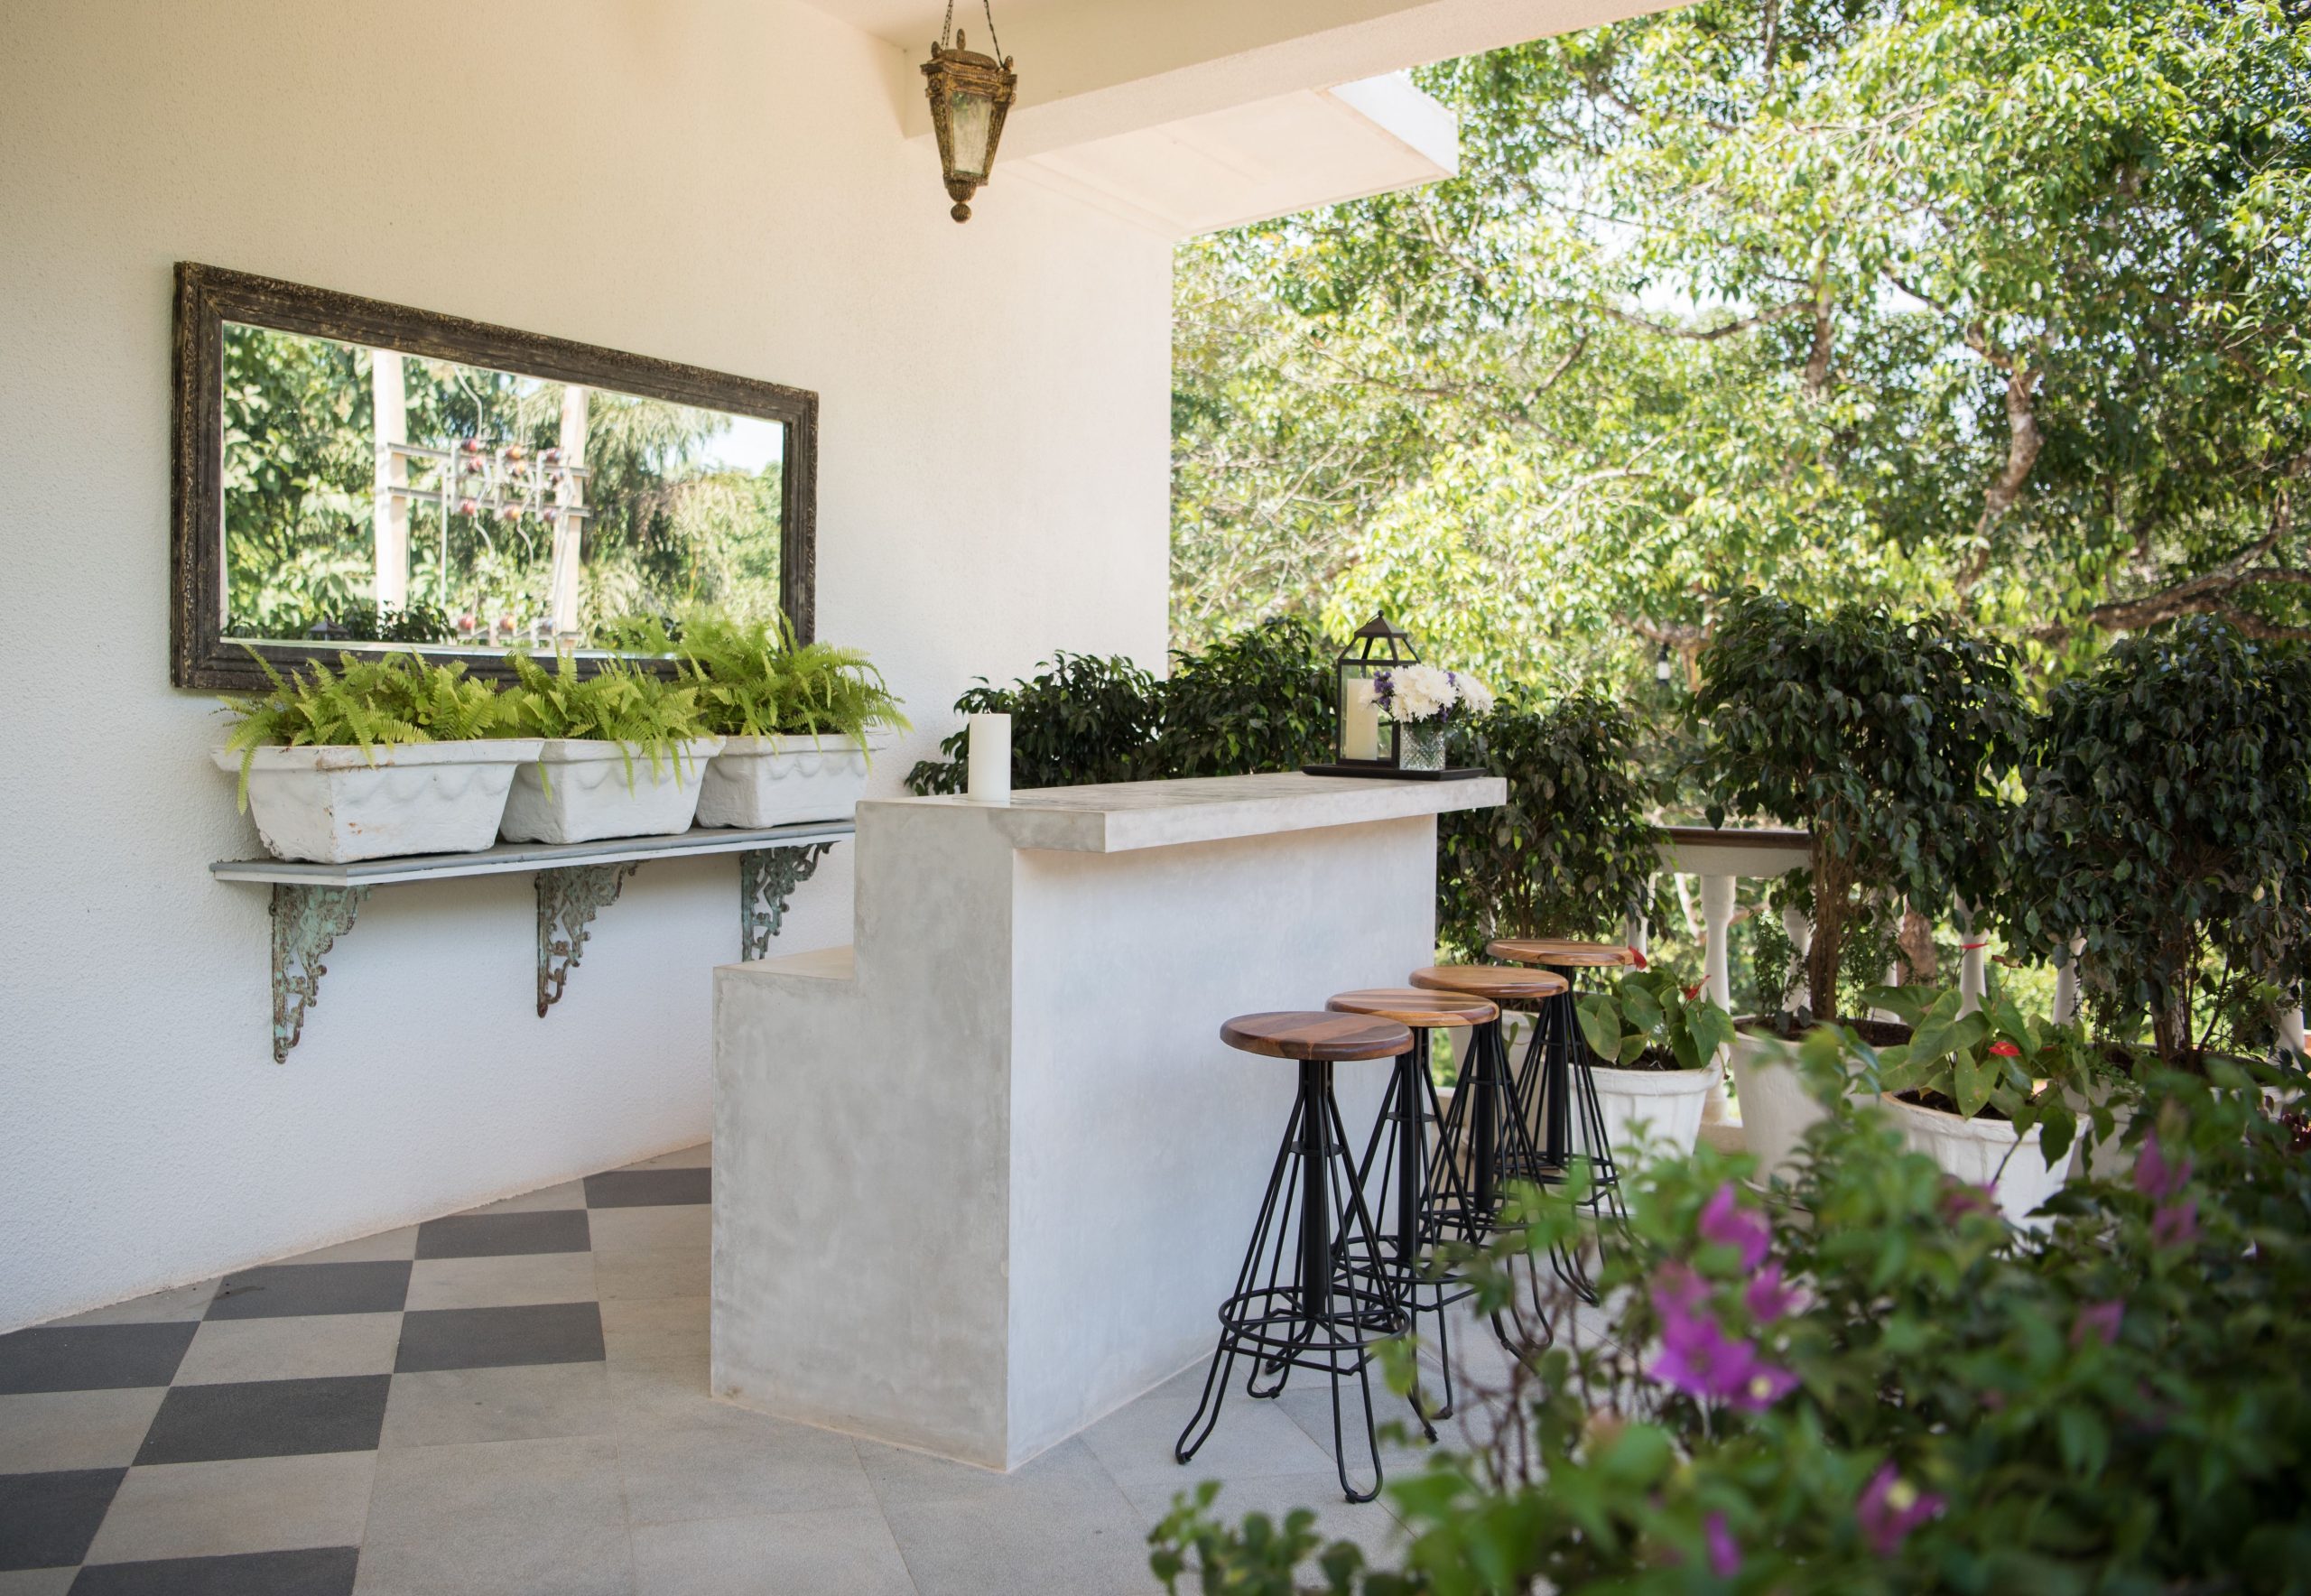
This relaxed look follows a clear recipe: 50% lush green + 30% neutral hardscapes + 20% pattern and texture. The abundant plant life is the star. The simple white walls and light grey concrete bar act as a quiet, neutral canvas. The final layer comes from the bold black and grey checkered floor pattern, the texture of the wooden stool tops, and the ornate lantern, which all add personality and visual interest. It’s a great example of how to make a simple space dynamic.
19. Rustic Outdoor Kitchen with a Live-Edge Wood Bar Top
The thick, live-edge wood bar top is the heart and soul of this rustic kitchen. It’s the primary source of warmth, character, and natural beauty. The irregular, organic edge of the wood slab stands in perfect contrast to the hard, functional surfaces of the stone, concrete, and stainless steel sink. It’s a tactile and visual focal point that feels authentic and grounded. Without this specific piece of wood, the space would be far more utilitarian and lose much of its unique, earthy charm.
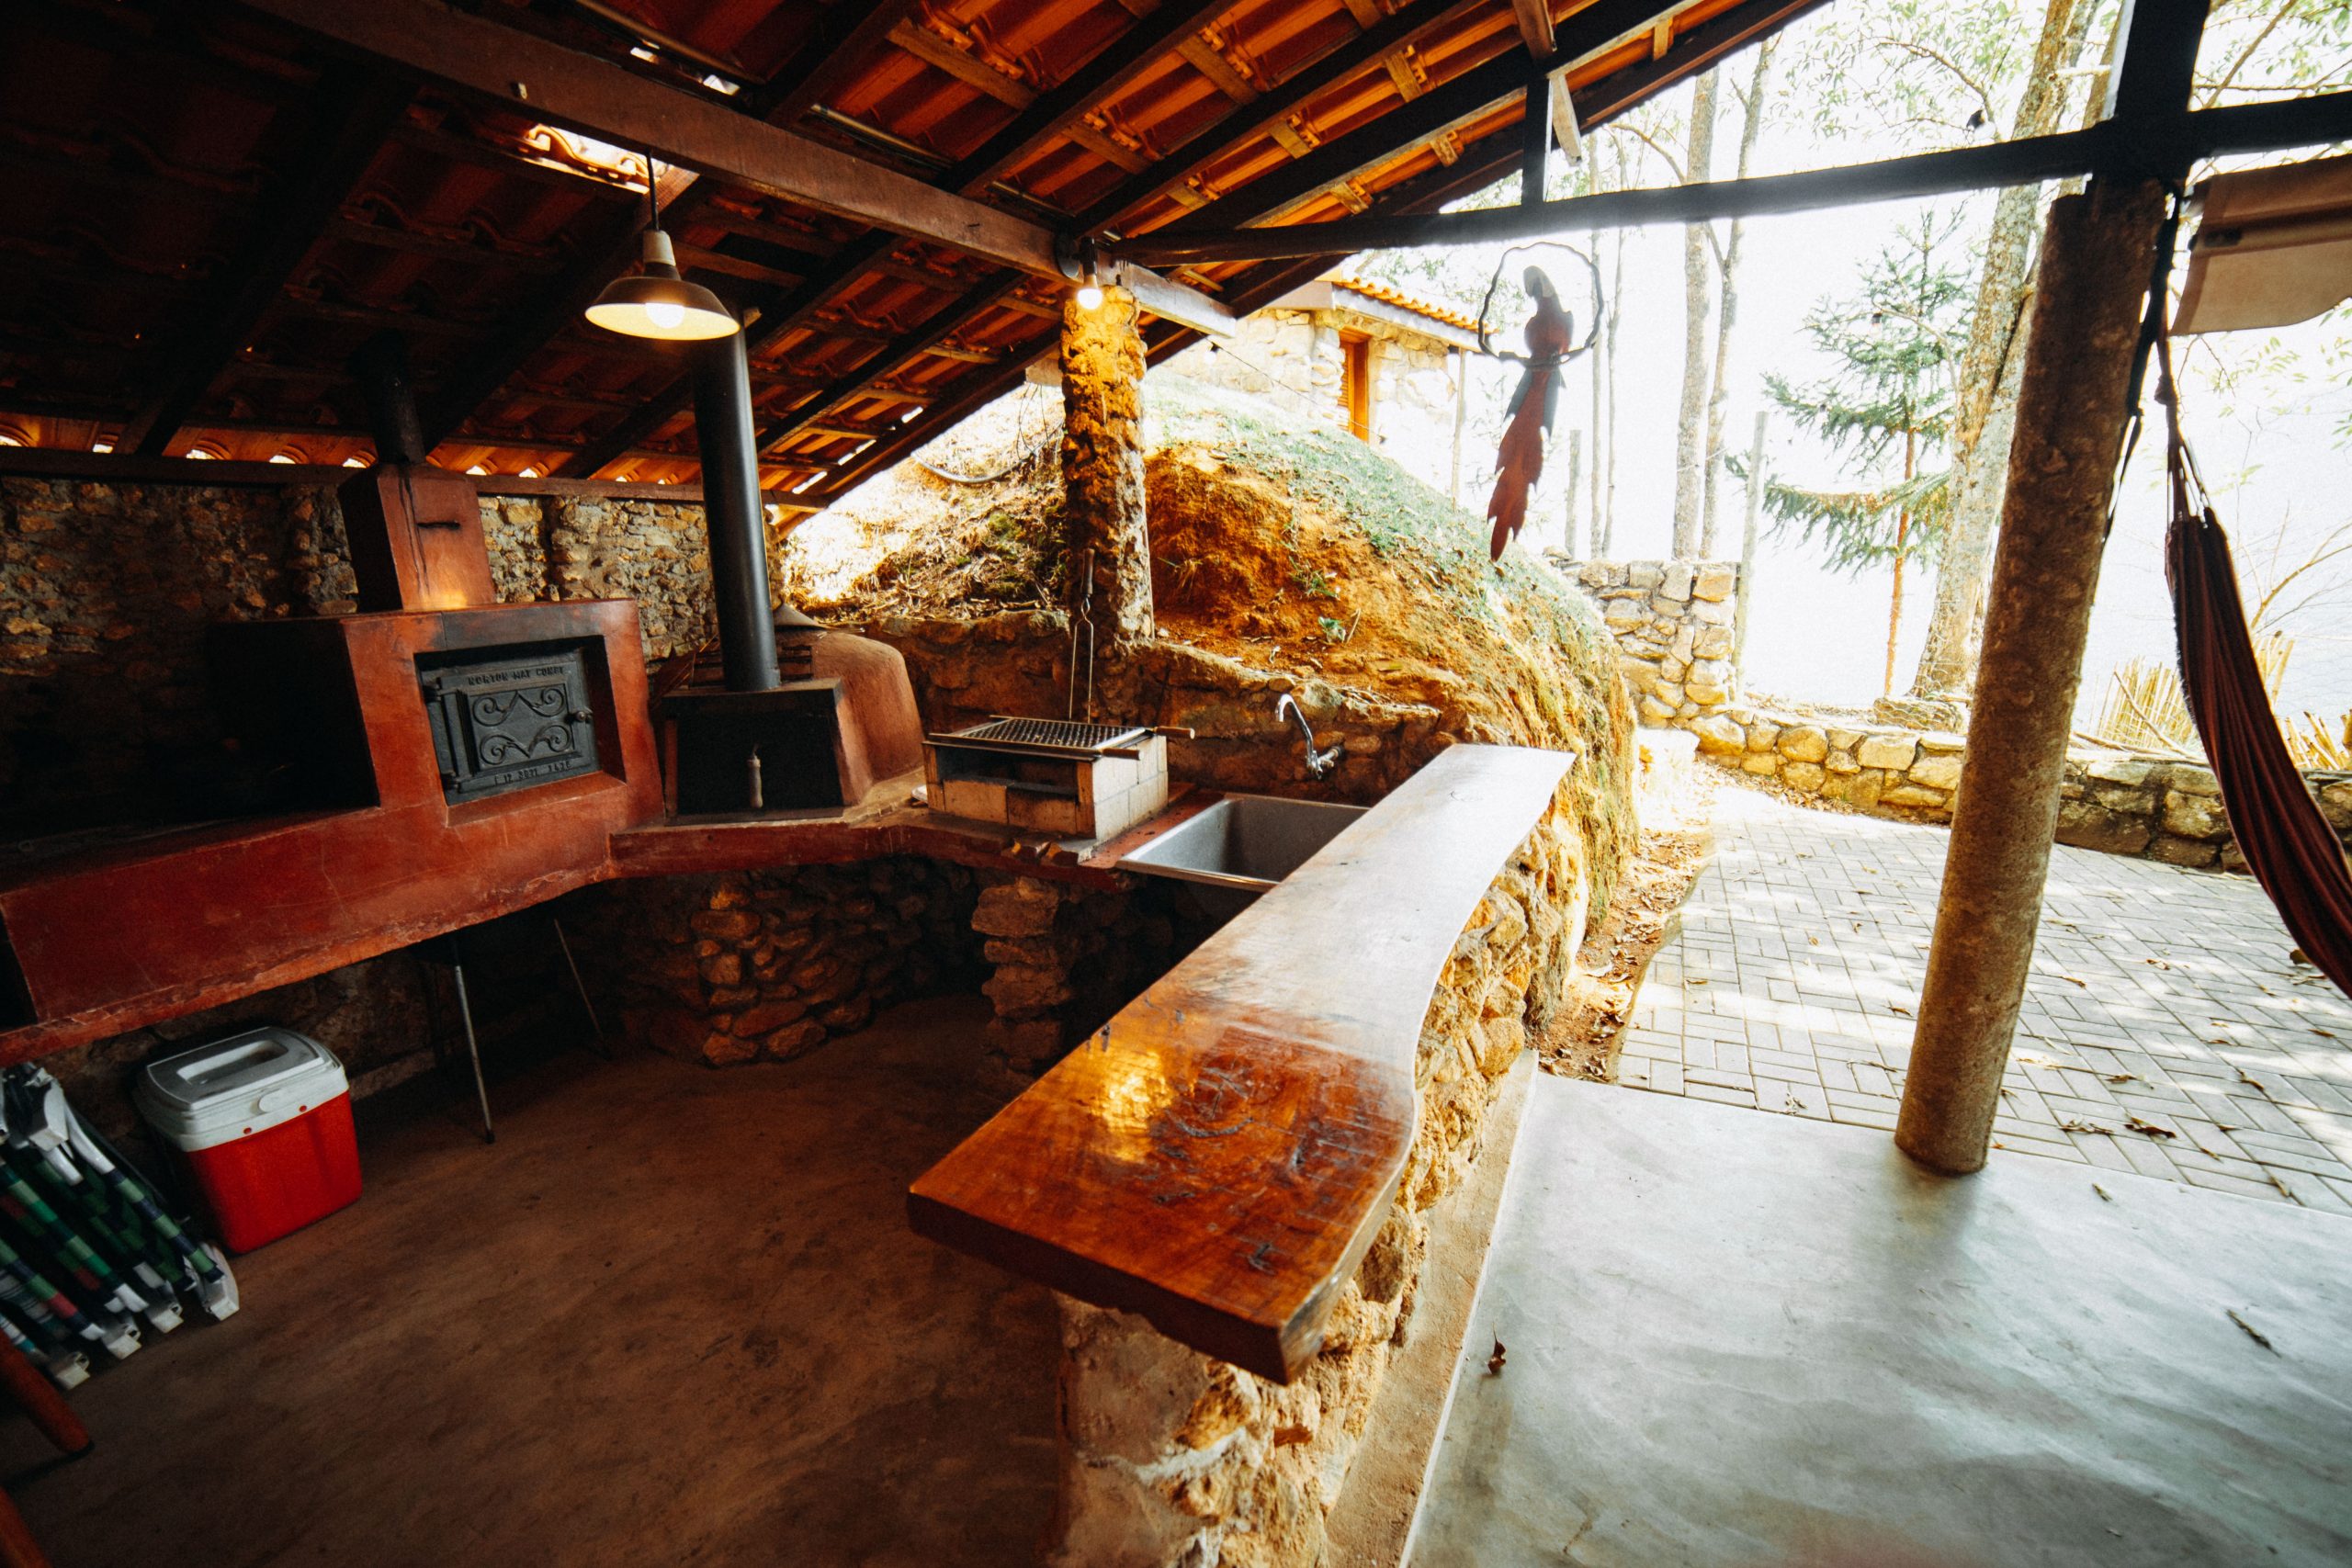
A true live-edge slab countertop is stunning, but it’s not ‘set it and forget it.’ Wood expands and contracts with changes in temperature and humidity. A thick outdoor slab is prone to developing small cracks or ‘checks’ over time—this is a natural part of its character, not a defect. It absolutely must be sealed with a marine-grade varnish or a specialized exterior oil finish, and you should expect to lightly sand and reapply that finish every 1-2 years to protect it from the sun and rain.
20. Kitchen Island with Distressed Turquoise Cabinetry
This design is all about the power of a single, bold color choice. The distressed turquoise island acts as the undeniable focal point, injecting a huge amount of personality and life into an otherwise traditional, neutral kitchen. The surrounding off-white cabinets and light gray walls are quiet and classic, which is precisely why the vibrant island works so well. They provide a calm backdrop that allows the turquoise to take center stage without overwhelming the space. The distressing on the paint adds a layer of texture and a cozy, lived-in feel.
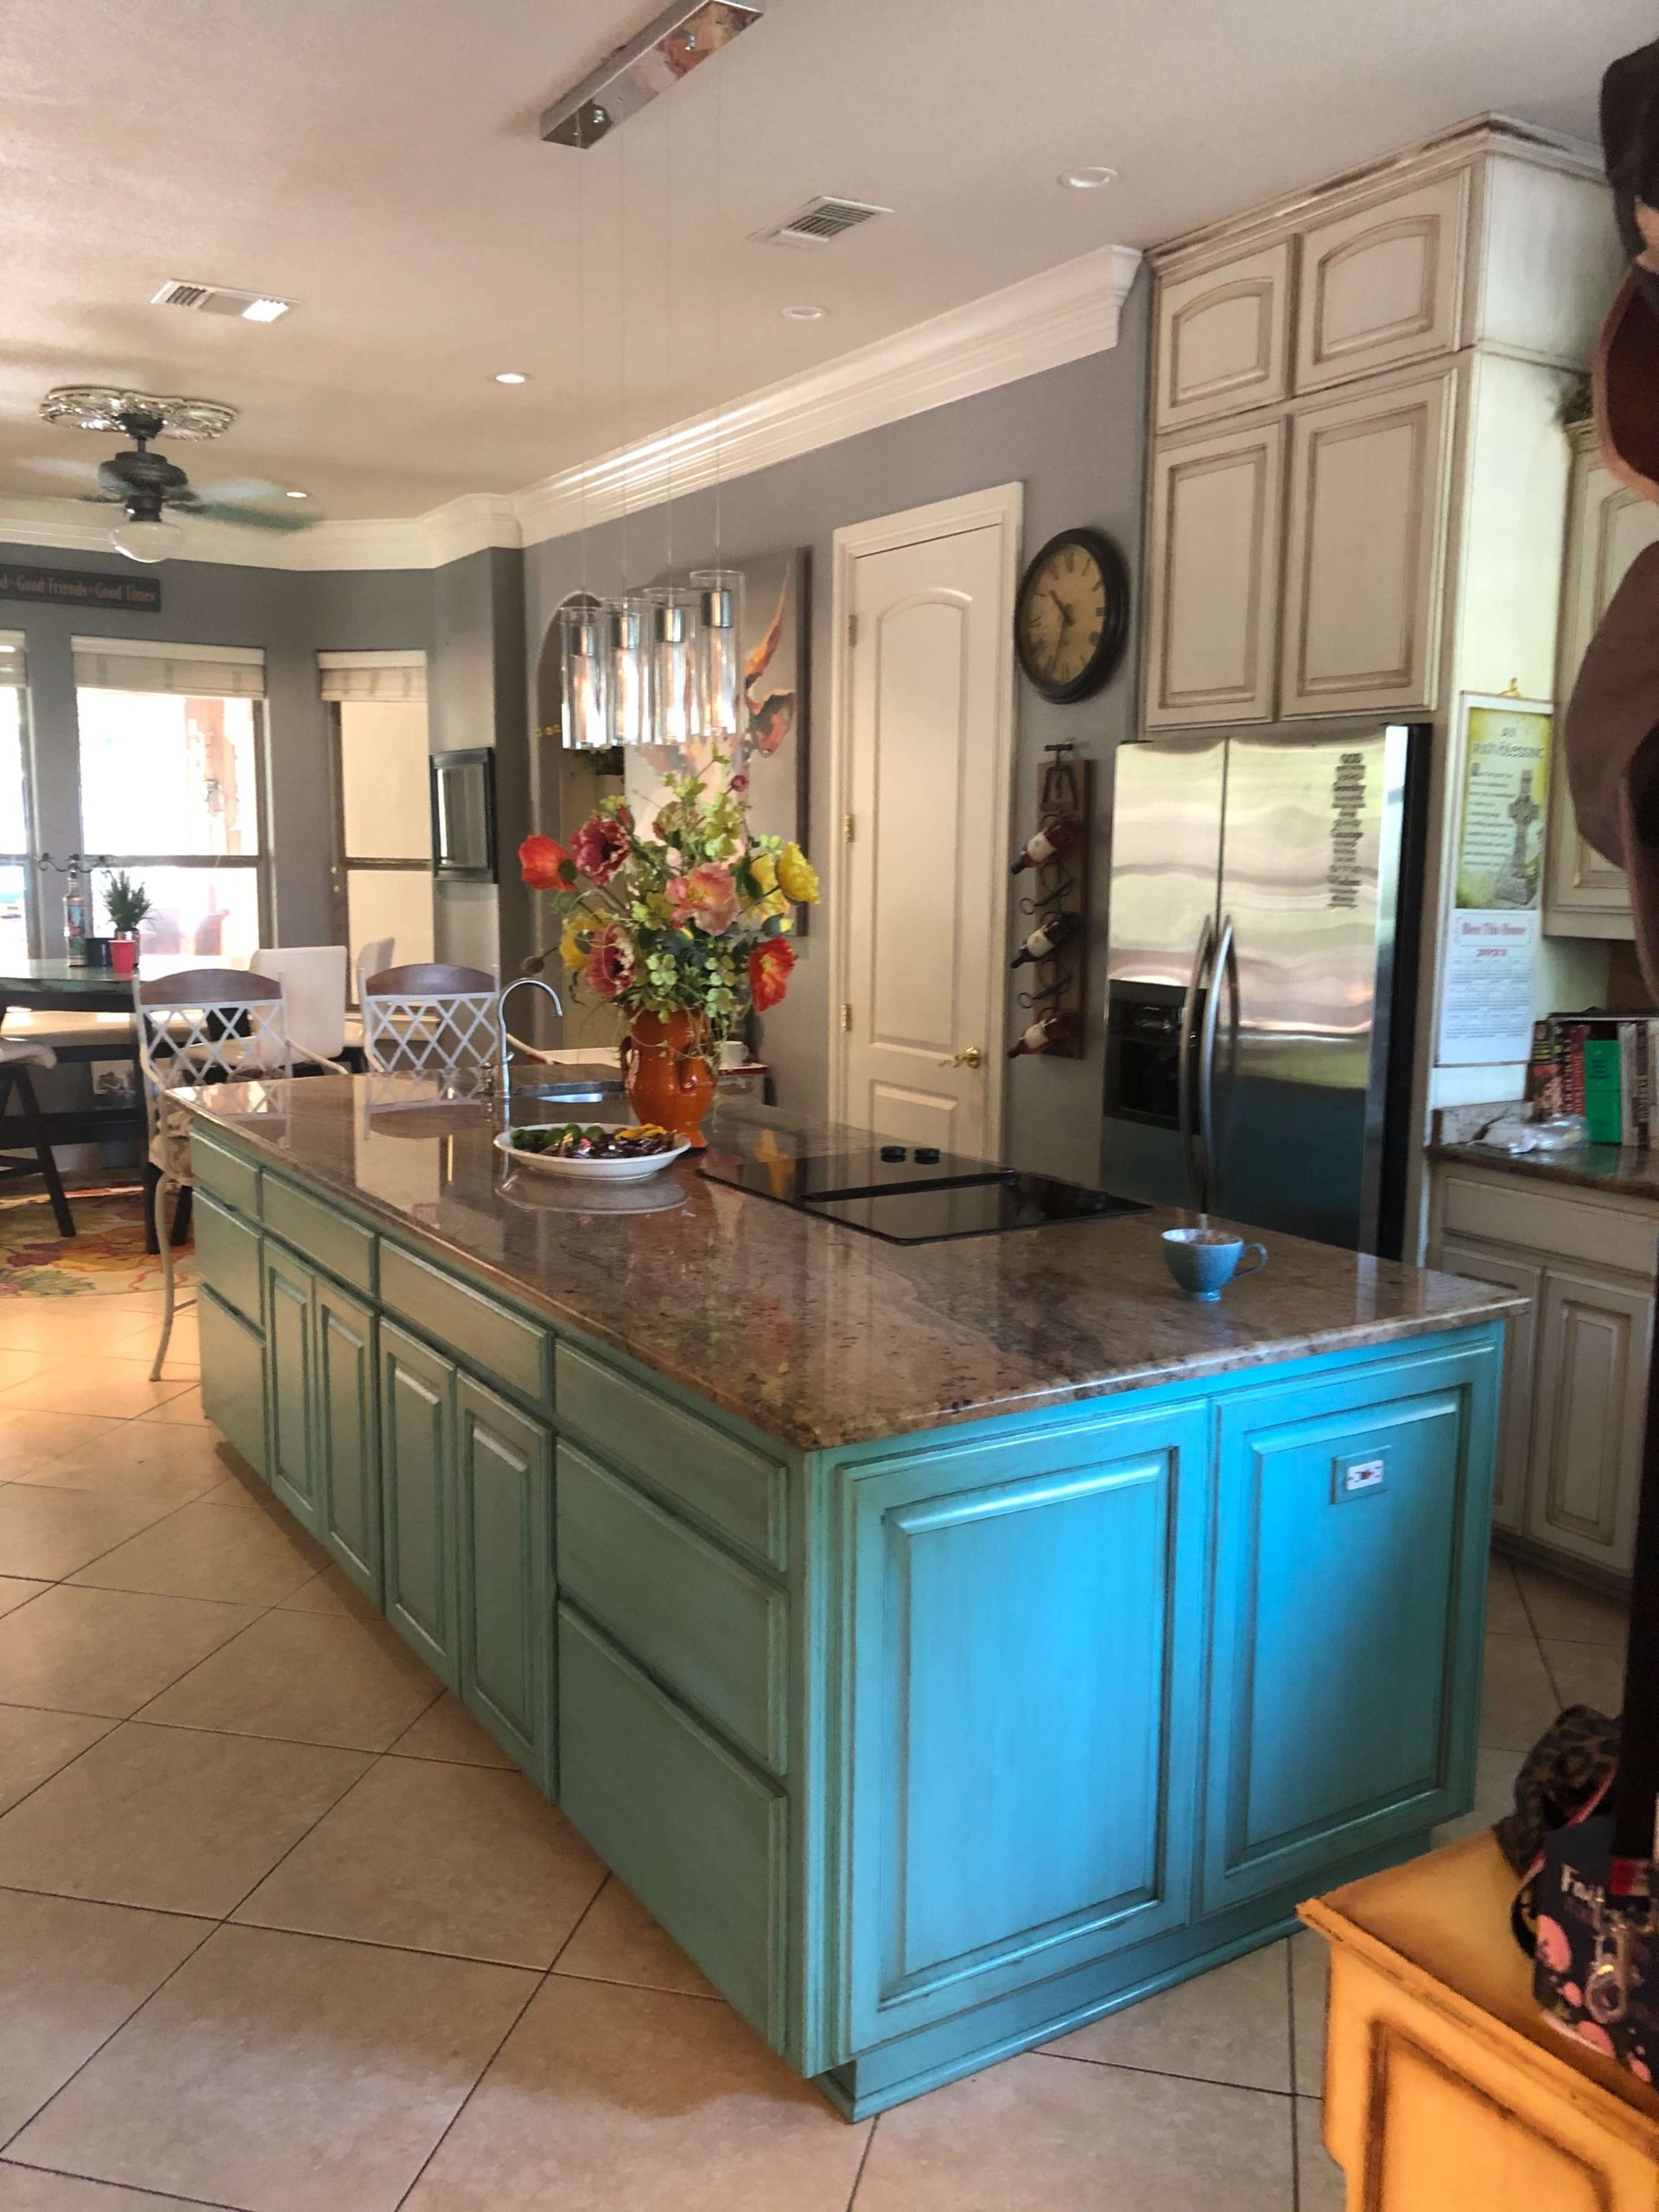
Love that distressed look? You can do it yourself on an existing cabinet or piece of furniture. Time: 4-6 hours. Cost: $75.
- Base Coat: Paint your piece with a dark base color (like dark brown or gray) and let it dry completely. This is the color that will peek through.
- Wax On: Using a candle or wax block, rub the wax onto the edges, corners, and any areas where natural wear would occur.
- Top Coat: Paint the entire piece with your main color (like this turquoise). Two coats may be needed. Let it dry fully.
- The Reveal: Using a putty knife or a fine-grit sanding block, gently scrape and sand the waxed areas. The top coat of paint will flake off the wax, revealing the darker base coat underneath.
- Seal It: Apply a clear matte or satin polycrylic sealer to protect your work.
21. Stacked Stone Grill Bar with a Wooden Pergola
A substantial, built-in setup like this is an investment. Here’s a general idea of the costs.
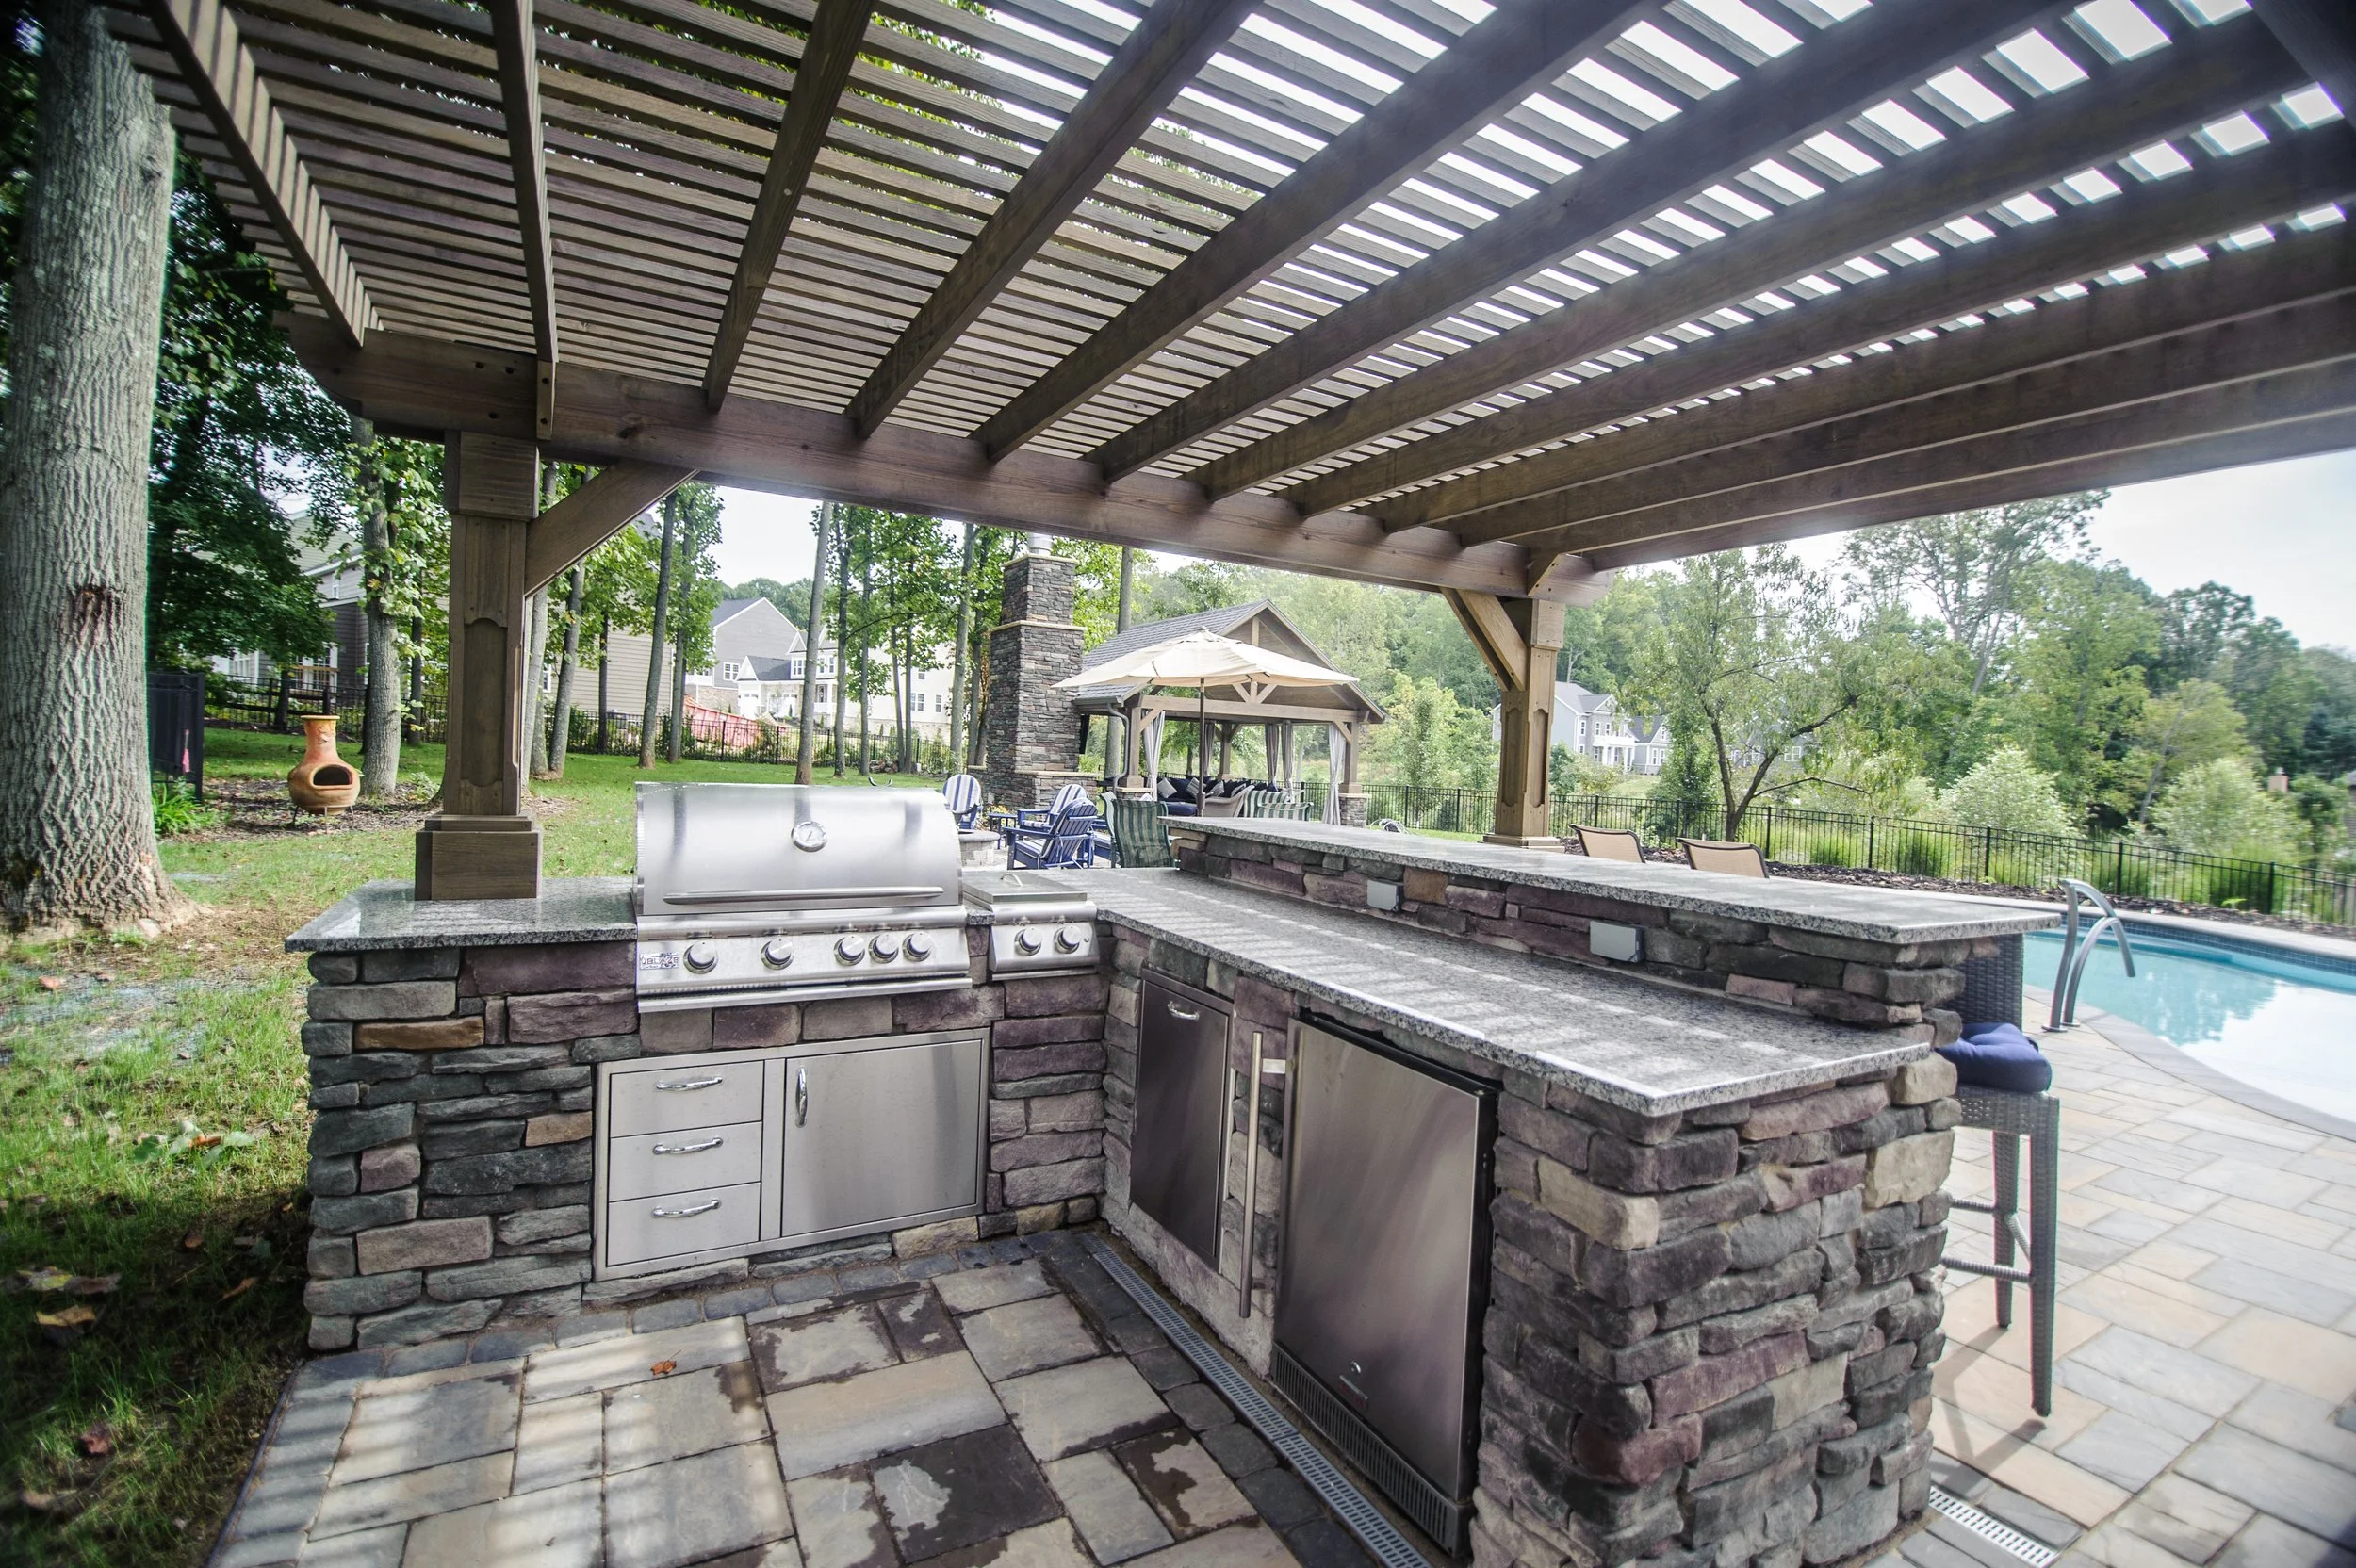
- Stone & Masonry Work: $5,000 – $12,000 (This is the biggest variable, depending on labor and stone veneer vs. full stone)
- Appliances: $2,500 – $8,000 (A good built-in grill, side burner, and fridge)
- Countertops: $1,500 – $4,000 (for outdoor-rated granite)
- Pergola: $3,000 – $7,000 (for a solid wood structure)
- Budget Alternative: Use a pre-fabricated grill island module ($2,000-$4,000) and a standard 10×12 pergola kit ($1,500). You get a very similar function for a fraction of the custom price.
- TOTAL: $12,000 – $31,000
Stacked stone veneer requires surprisingly little maintenance, but it does need some care. The main issue is efflorescence—a white, powdery deposit that can appear as moisture evaporates from the stone. This can be scrubbed off with a stiff brush and water. It’s also a good idea to gently pressure wash the stone annually on a low setting to remove any dirt or mildew buildup. Avoid using harsh, acidic cleaners which can damage the stone and the mortar.
22. Modern Covered Patio with a Pebble-Filled Fire Pit
When selecting seating for an outdoor lounge area, don’t just think about the number of seats. Think about the *types* of seating. This space cleverly mixes a multi-person sofa with individual armchairs. This creates more versatile conversation groupings than a single, massive sectional would. It allows two people to have a quiet chat, or for a larger group to gather. Always aim for at least two different types of seating in a lounge zone to make it more dynamic and user-friendly.
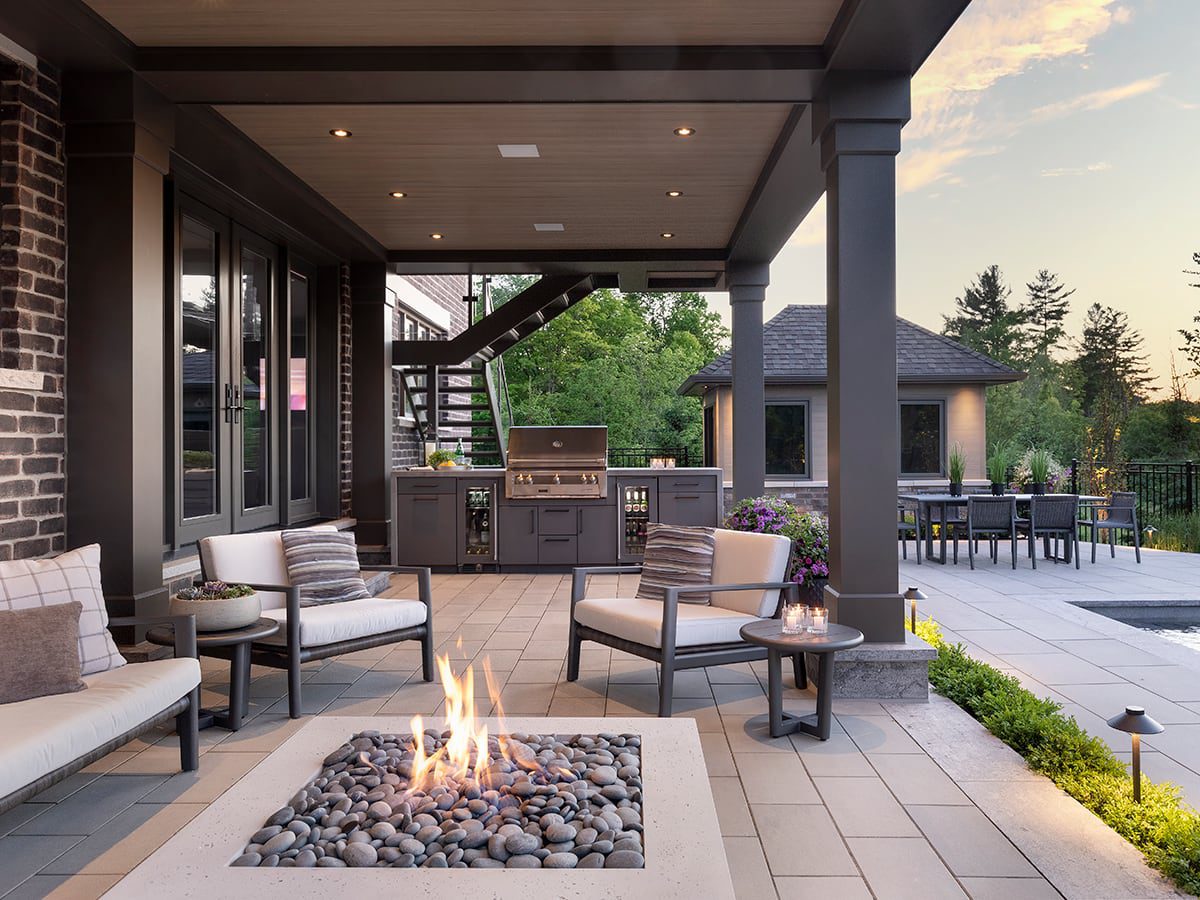
The success of this patio lies in its strong, dark framework. The charcoal-colored columns, roof structure, and window frames create a bold, graphic outline that defines the space. This dark ‘skeleton’ makes the lighter elements—the beige paving stones, the off-white cushions, the glow of the fire—pop with greater intensity. It’s a classic contrast principle that gives the entire area a sense of structure and sophisticated drama, preventing the neutral palette from looking bland.
23. Relaxed Bar with Wood Screens and a Stone Wall
This design is a perfect equation for a relaxed, tropical vibe: 40% warm wood + 40% natural stone + 20% lush greenery. The wood, used for the bar, pergola, and bench, provides the main architectural structure and warmth. The heavy stone wall acts as a textural, earthy anchor. Finally, the strategic placement of potted plants and the view of the garden beyond provide the final layer of life and color. The striped green cushions are the accessory that ties the furniture directly to the natural elements.
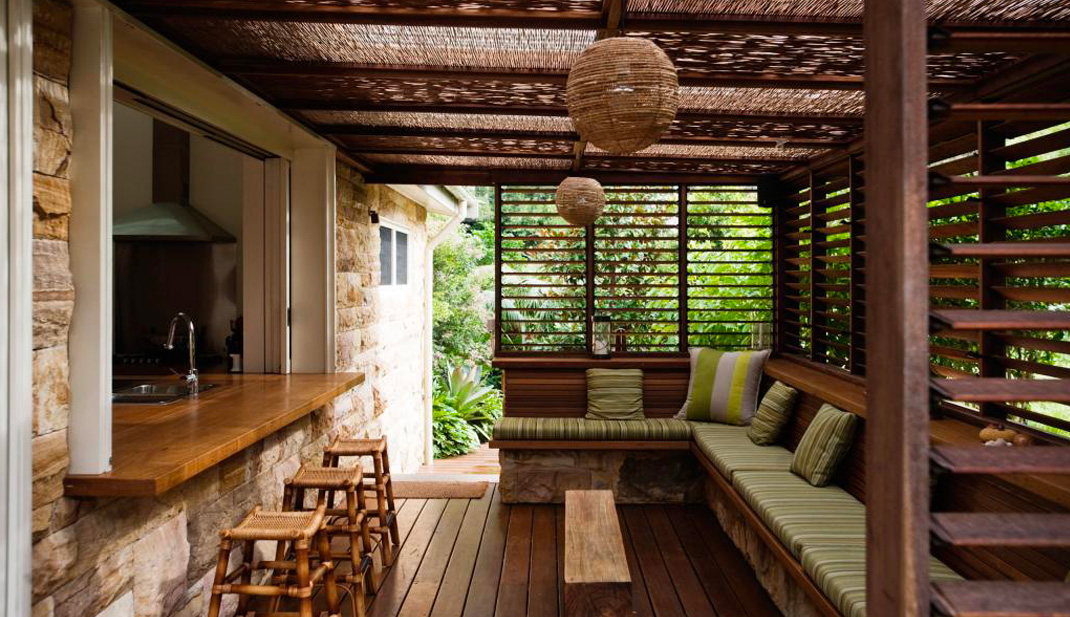
You can get this look without a major build. Use pre-made slatted wood screen panels (available at most home improvement stores) to create the sense of enclosure and the pergola effect. Instead of a custom built-in bench, find a simple L-shaped outdoor sofa with a wood frame. For the stone, you could use a stone-veneer panel to create an accent wall behind the seating area instead of building a massive, structural wall. It’s about creating the same feeling with lighter, more affordable components.
24. Sleek Outdoor Bar with a Green Tile Backsplash
The glossy green tile backsplash is the undeniable star of this outdoor bar. The rest of the components—the marble top, the stainless grill, the woven stools—are stylish and modern, but they are all neutrals. The saturated green tile is the element that injects life, color, and a specific personality into the space. It draws the eye, provides a beautiful, reflective surface, and gives the whole setup a fresh, vibrant energy that it would otherwise lack. It’s a perfect example of how a small area of bold color can define a large space.
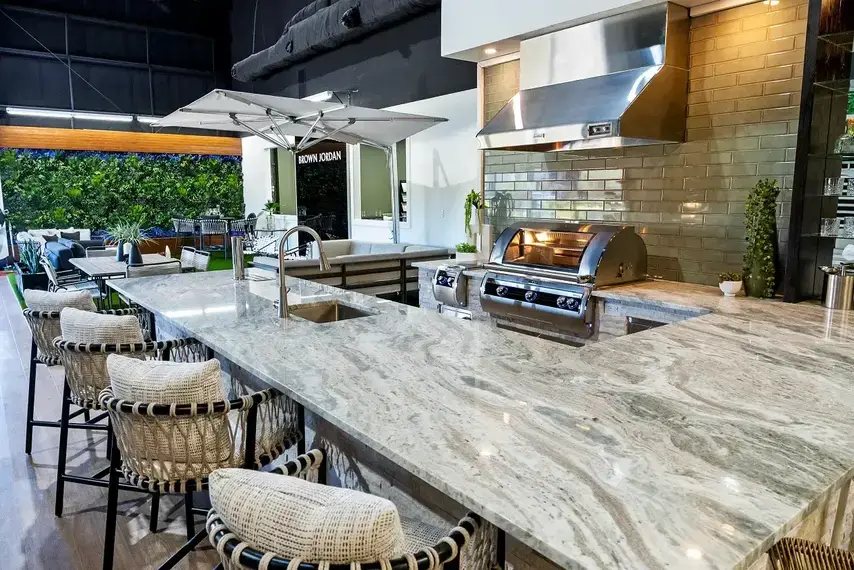
When you’re tiling an outdoor backsplash, especially behind a grill, the choice of grout is more important than you think. Don’t use standard indoor grout. You need to use an epoxy grout or a high-performance, polymer-fortified exterior grout. These are much more resistant to water, UV degradation, and staining from grease splatters. Also, ensure the tile itself is rated for outdoor use and is frost-proof if you live in a cold climate to prevent cracking.
25. Shingle-Sided Home with a Grand White Pergola Bar
This is a design that thrives on a grand scale. To support a long bar, a full kitchen, and ample walking room, the pergola structure itself needs to be substantial. This setup is best for a large, open patio area, likely requiring a space of at least 20×15 feet. The height of the pergola is also key; it should be proportional to the house, with the beams likely sitting at or just below the roofline of the first floor (around 9-10 feet high) to feel integrated and not like a small, separate kit.
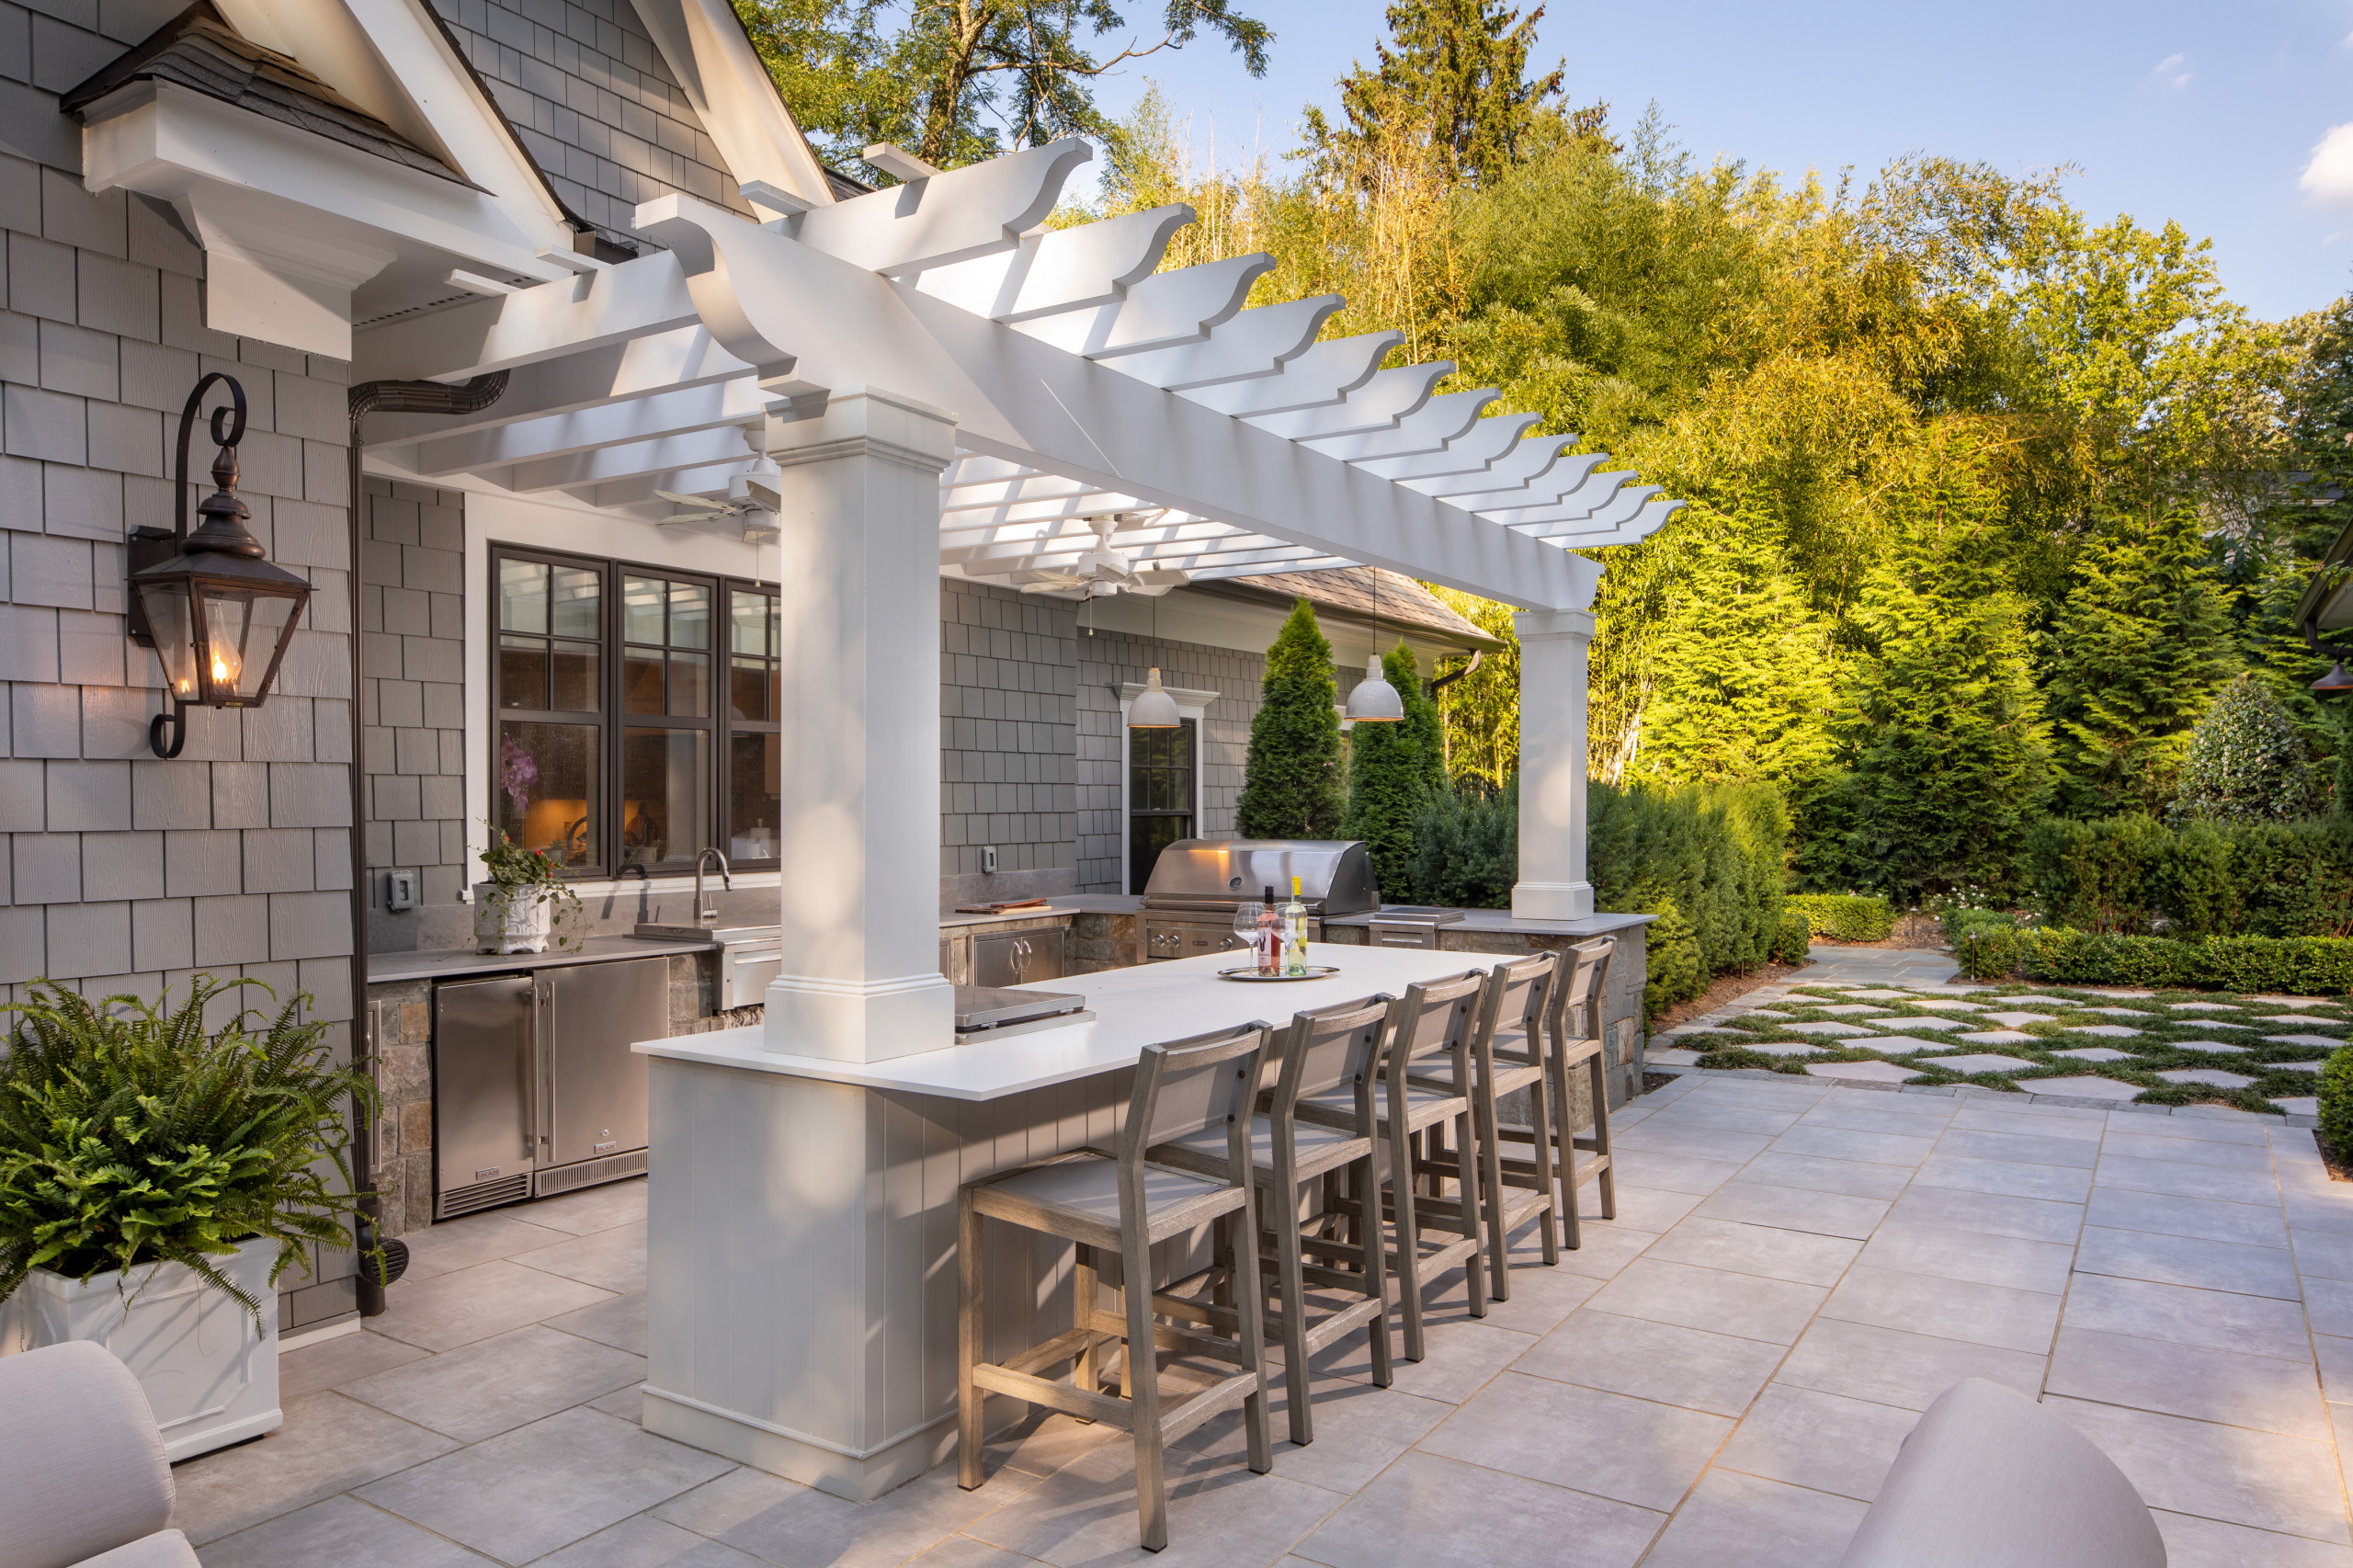
This setup works because it perfectly matches the architectural style of the home it’s attached to. The clean white color of the pergola mirrors the home’s white trim. The decorative, curved beam ends have a classic, almost coastal feel that complements the traditional grey shingle siding. By echoing the home’s existing design language, the outdoor kitchen feels like a natural and original extension of the house, rather than a disconnected afterthought. This harmony is the key to its success.
26. Complete Outdoor Kitchen with Stone Veneer and a Pizza Oven
The outdoor pizza oven has moved from a niche luxury to a mainstream anchor of backyard design. This reflects a broader shift in how we view home entertaining. It’s no longer just about grilling; it’s about creating experiences. A pizza oven is interactive and communal, turning dinner into an activity. As homeowners continue to invest in making their backyards true destinations, appliances that offer more than just utility are taking center stage. This is a look with staying power.
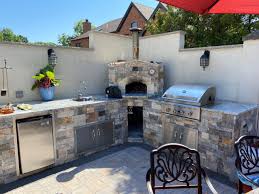
Building a full-service outdoor kitchen station like this is a serious project. Let’s break down the potential costs.
- Structure & Stone Veneer: $6,000 – $15,000
- Appliances (Grill, Fridge, Sink): $3,000 – $9,000
- Pizza Oven: $1,500 – $7,000 (big range from kits to custom builds)
- Countertops & Labor: $2,000 – $5,000
- Budget Alternative: Skip the built-in and get a high-quality freestanding grill ($1,000) and a countertop pizza oven like an Ooni or Gozney ($400-$800). Place them on a sturdy outdoor work table. You get 90% of the function for 20% of the price.
- TOTAL: $12,500 – $36,000
27. Covered Outdoor Kitchen with a Louvered Ceiling
The louvered ceiling is the most significant feature in this outdoor kitchen. It’s not just a roof; it’s a dynamic climate control system. It provides the full shade and rain protection of a solid roof but can also be opened to let in the sun or ventilate smoke from the grill. This versatility is its superpower, dramatically extending the usability of the space across different weather conditions and times of day. It’s the element that transforms the patio from a fair-weather amenity to a true three-season outdoor room.
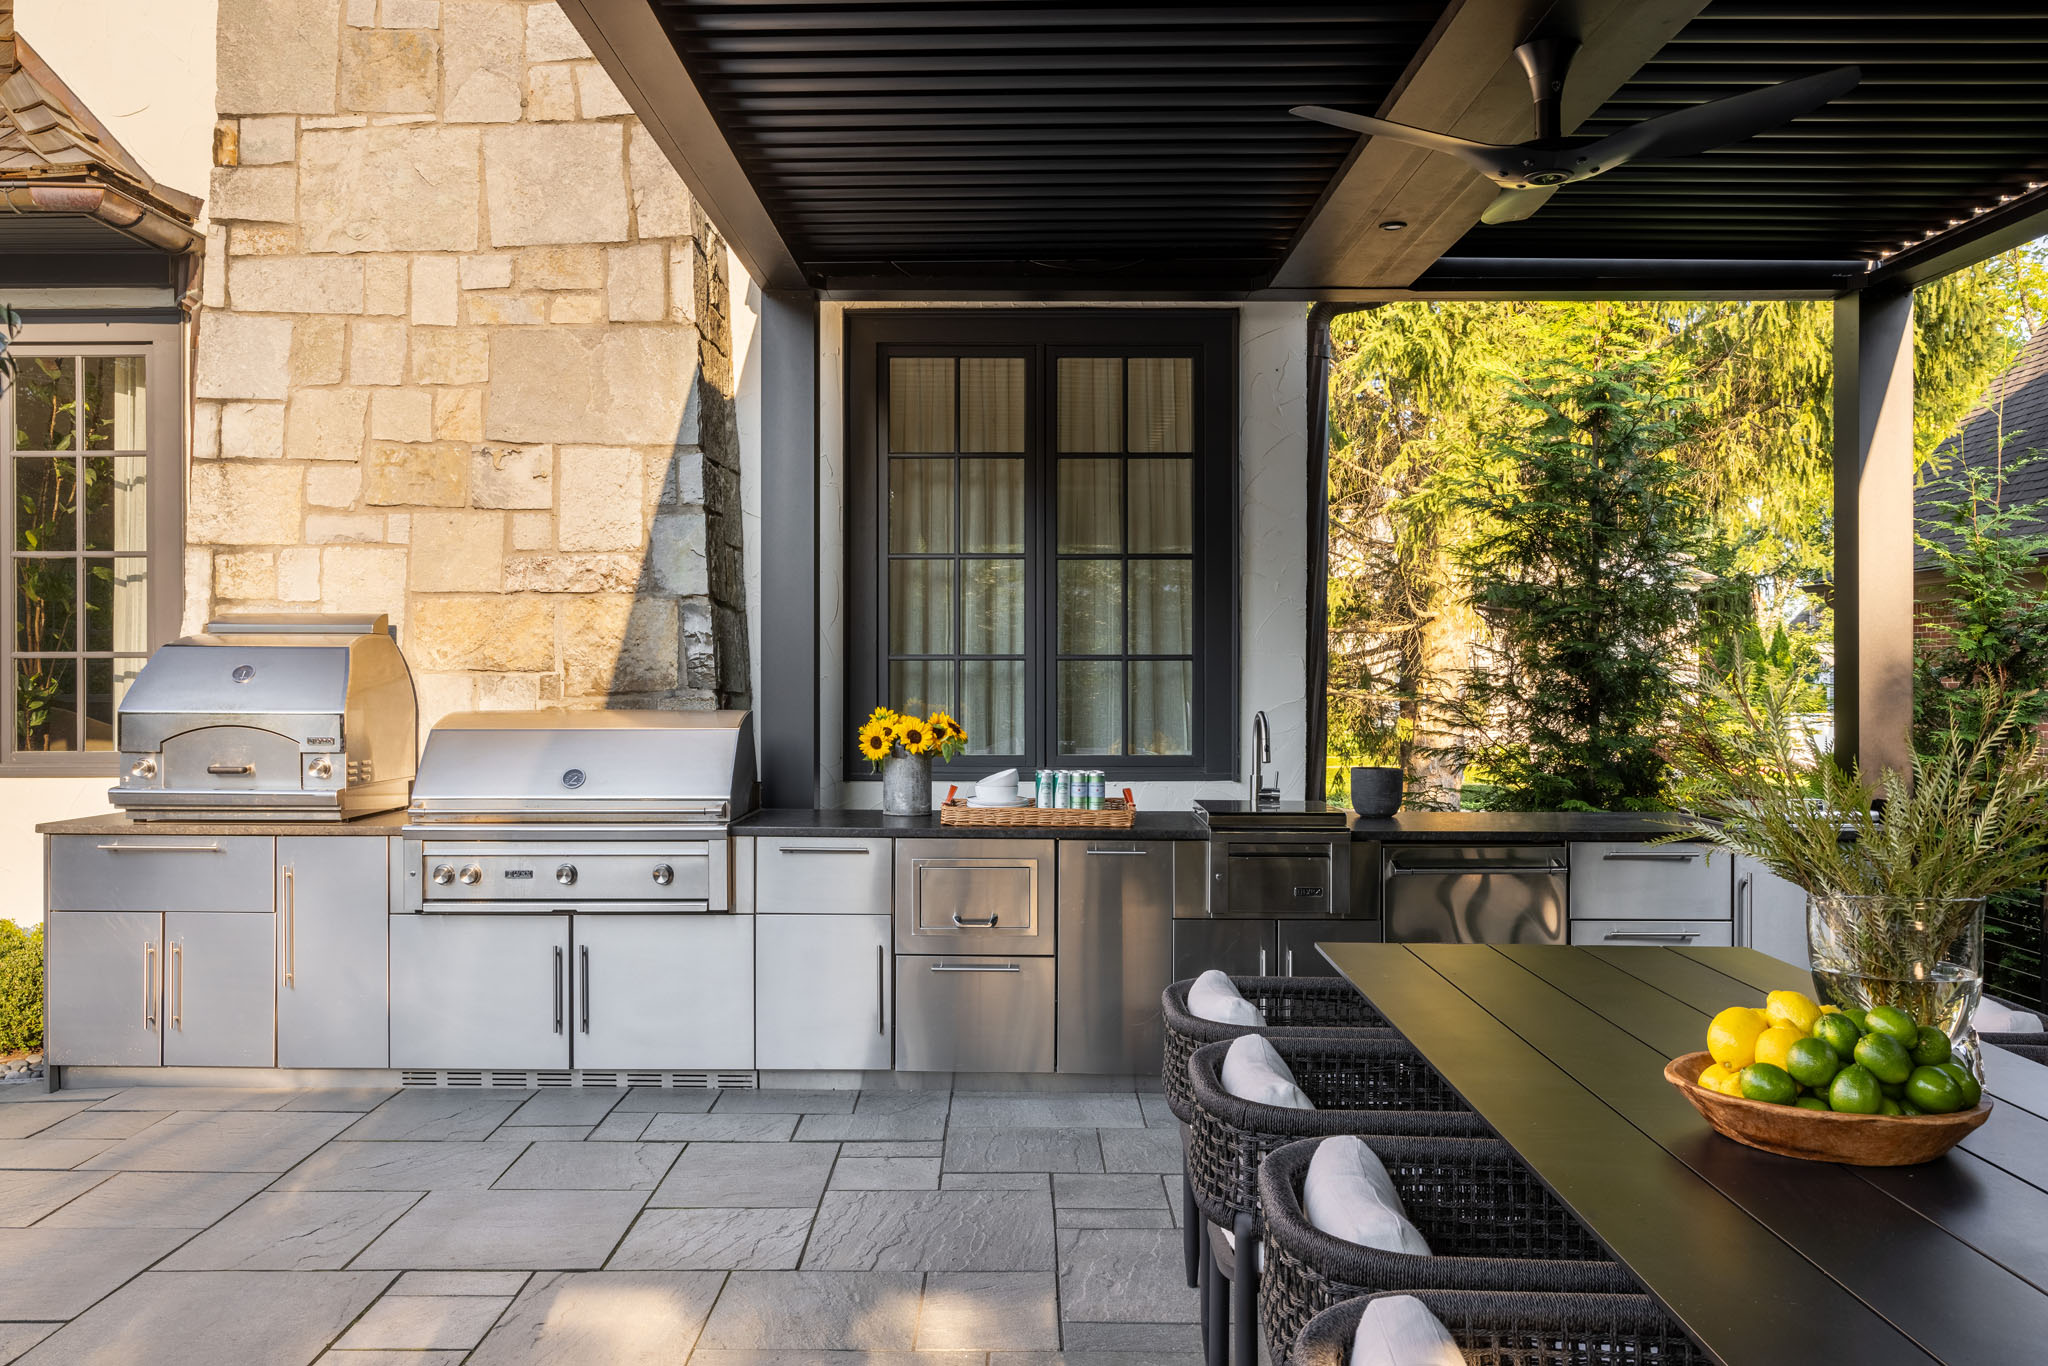
A louvered roof system is a fantastic piece of engineering, but it’s not without its maintenance needs. The gutters integrated into the system must be cleared of leaves and debris regularly to prevent clogging and water overflow, just like the gutters on your house. The moving parts—the louvers themselves and the motor—should be inspected and lubricated annually according to the manufacturer’s specifications to ensure smooth operation. Think of it less like a roof and more like a car’s convertible top; it needs periodic service.
28. Minimalist Outdoor Bar with Natural Rattan Stools
This striking, minimalist look is all about a restrained composition: 80% monochrome + 20% natural texture. The dark grey slatted wall and floor create a deep, continuous canvas that is intensely modern and moody. The clean white bar table cuts through the darkness with a single, sharp line. The entire look is then softened and made inviting by the five rattan stools, which introduce a crucial element of warmth, organic shape, and textural variation. It’s a confident and highly curated formula.
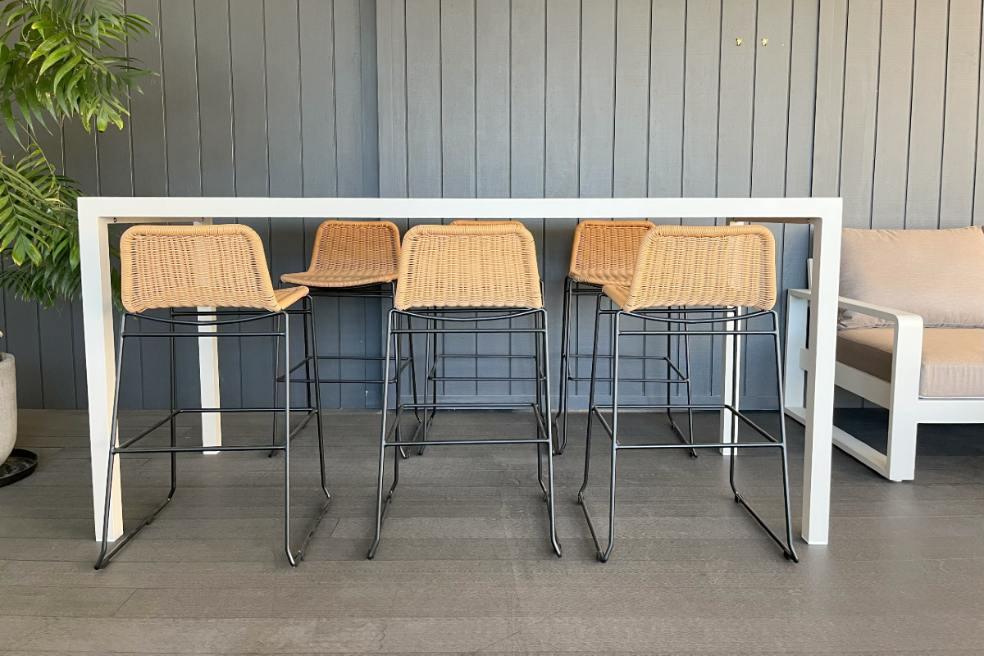
A setup this minimal and exposed to the elements comes with a reality check. Natural rattan or wicker stools, while beautiful, will not last long if left in direct sun and rain. They will fade, become brittle, and eventually disintegrate. To keep this look, you either need to commit to bringing the stools indoors when not in use, or you must invest in higher-quality all-weather wicker (which is a synthetic resin material) that is specifically designed to withstand the elements. The natural look requires more effort.
29. Seamless Circular Bar Wrapped Around a Mature Tree
This design is a masterstroke of integration. Instead of clearing a space for a bar, the bar is built *around* the most beautiful natural feature—the tree. This makes the design feel completely harmonious with its environment. The circular shape is key; it flows organically around the tree trunk, with no harsh angles to disrupt the sense of nature. By making the tree the hero, the entire setup feels tranquil, established, and effortlessly elegant. It’s a much more sophisticated approach than the simpler version in Idea #15.
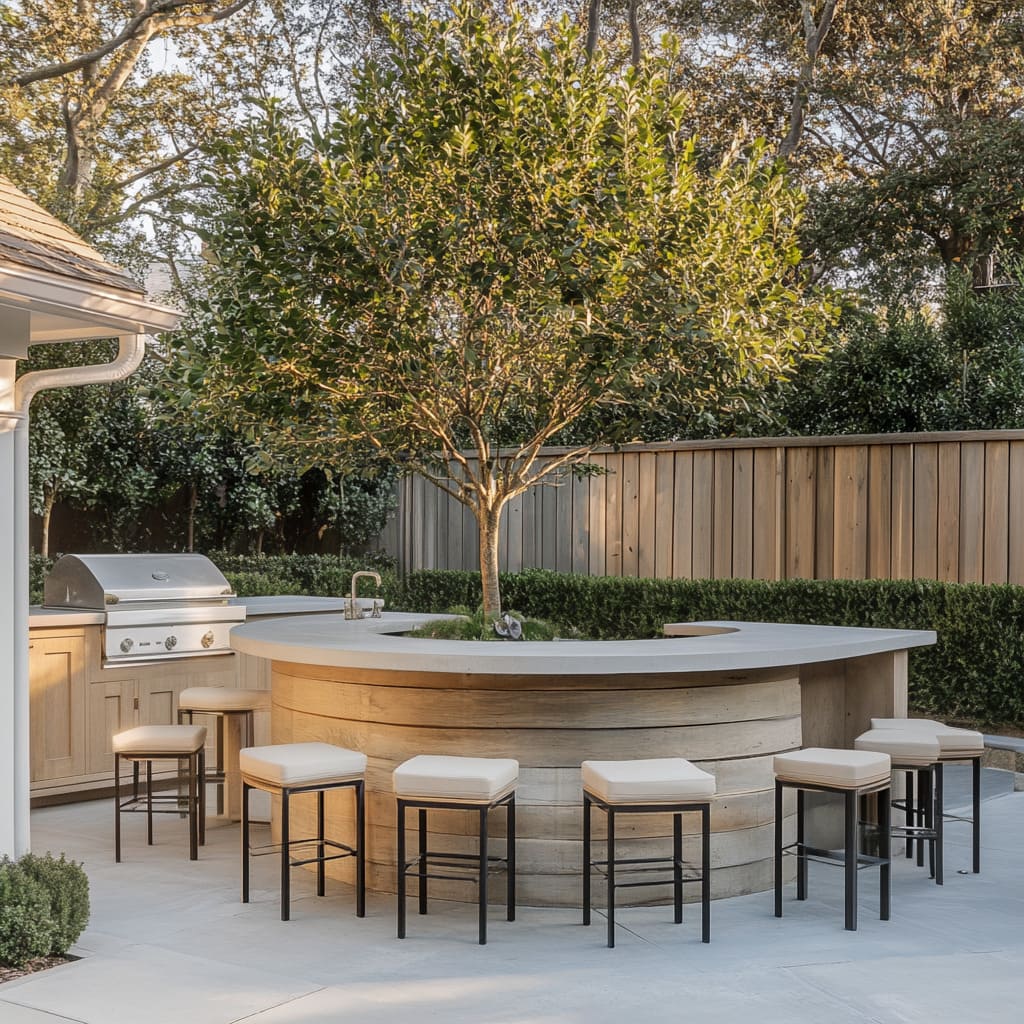
Want to build that matching grill station? Here’s the basic workflow for creating a cohesive outdoor kitchen piece. Time: 2 weekends. Cost: $800-$2000.
- Frame It: Build the base structure out of steel studs. They are lighter than wood, won’t rot, and are non-combustible, which is critical around a grill.
- Clad It: Cover the steel frame with 1/2-inch cement backer board, screwing it directly to the studs. This provides a stable, weather-proof surface.
- Wrap It: Apply the same exterior material as your main bar. For this look, adhere the light wood planks using a strong exterior-grade construction adhesive and finishing nails.
- Cut & Drop: Carefully measure and cut the openings for your drop-in grill and sink using a jigsaw. Follow the manufacturer’s template precisely.
- Install Counter & Appliances: Install the countertop, then drop in the grill and sink, and connect your utilities.
30. A Compact & Contemporary Backyard Bar Solution
This concept is the perfect solution for smaller patios or backyard corners where a large, permanent kitchen isn’t feasible. The key is its linear, efficient footprint. A simple bar table setup requires a space no more than 10 feet long and 5 feet deep to be comfortable, including room for the stools and a walkway behind them. This allows you to tuck a functional, stylish bar into a narrow side yard or against the back of a garage, proving you don’t need a huge yard to have a dedicated outdoor entertaining space.
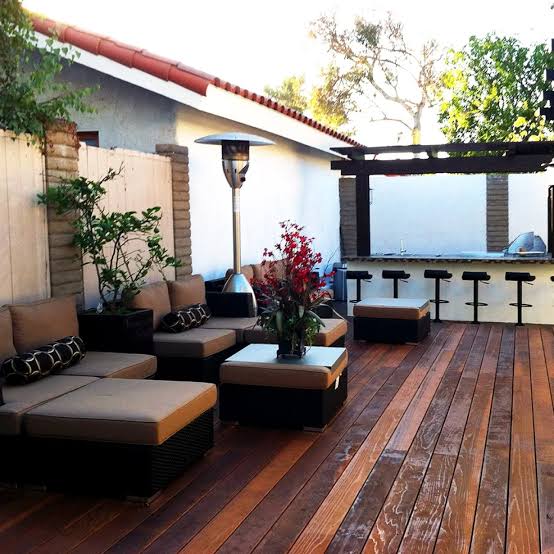
The core of this idea—a simple, contemporary bar table and stools—is incredibly accessible. You can find almost this exact look at stores like IKEA, Target, or Wayfair. Look for a ‘counter height outdoor dining set’ or ‘bar set’. Expect to pay between $350 and $700 for a table and four stools. This is a fantastic way to get a defined bar area without any construction, offering maximum style for minimal investment and commitment.
It’s Time to Head Outside
That empty corner of your patio is officially out of excuses. With a little planning, you can create a spot that will be the backdrop for so many great memories. Whether you start small or build the ultimate destination, the best outdoor bar is the one you actually use.
Ready to get started? Pin your favorite ideas from this article to your dream backyard board on Pinterest!