
Still scrolling through endless Patio Shade Ideas for 2026 without a clue where to begin? It’s easy to get lost in a sea of pretty pictures. After filtering through hundreds of options from high-end designers to budget-friendly finds at IKEA and Target, we narrowed it down to the looks that really deliver. Inside, you’ll find 29 curated ideas covering everything from modern pergolas and retractable awnings to breezy sail shades. As we head into 2026, the focus is all about creating a true outdoor living room—an extension of your home, not just a place to put a grill. And stay until the end — we break down the most common mistakes that can ruin these looks.
📌 Save this to Pinterest for later — you’ll want to revisit these ideas.
1. Create a Poolside Resort with a White Fabric Gazebo
The magic here is in the mix of materials and the open, airy feeling. The crisp white fabric of the gazebo against the dark wrought iron frame creates a beautiful high-contrast look that feels both classic and fresh. This is softened by the natural texture of the rattan furniture. The structure defines a distinct ‘room’ on the open patio, making the large space feel more intimate and inviting without closing it off from the pool and lawn. It’s a vacation vibe, right in your own backyard.
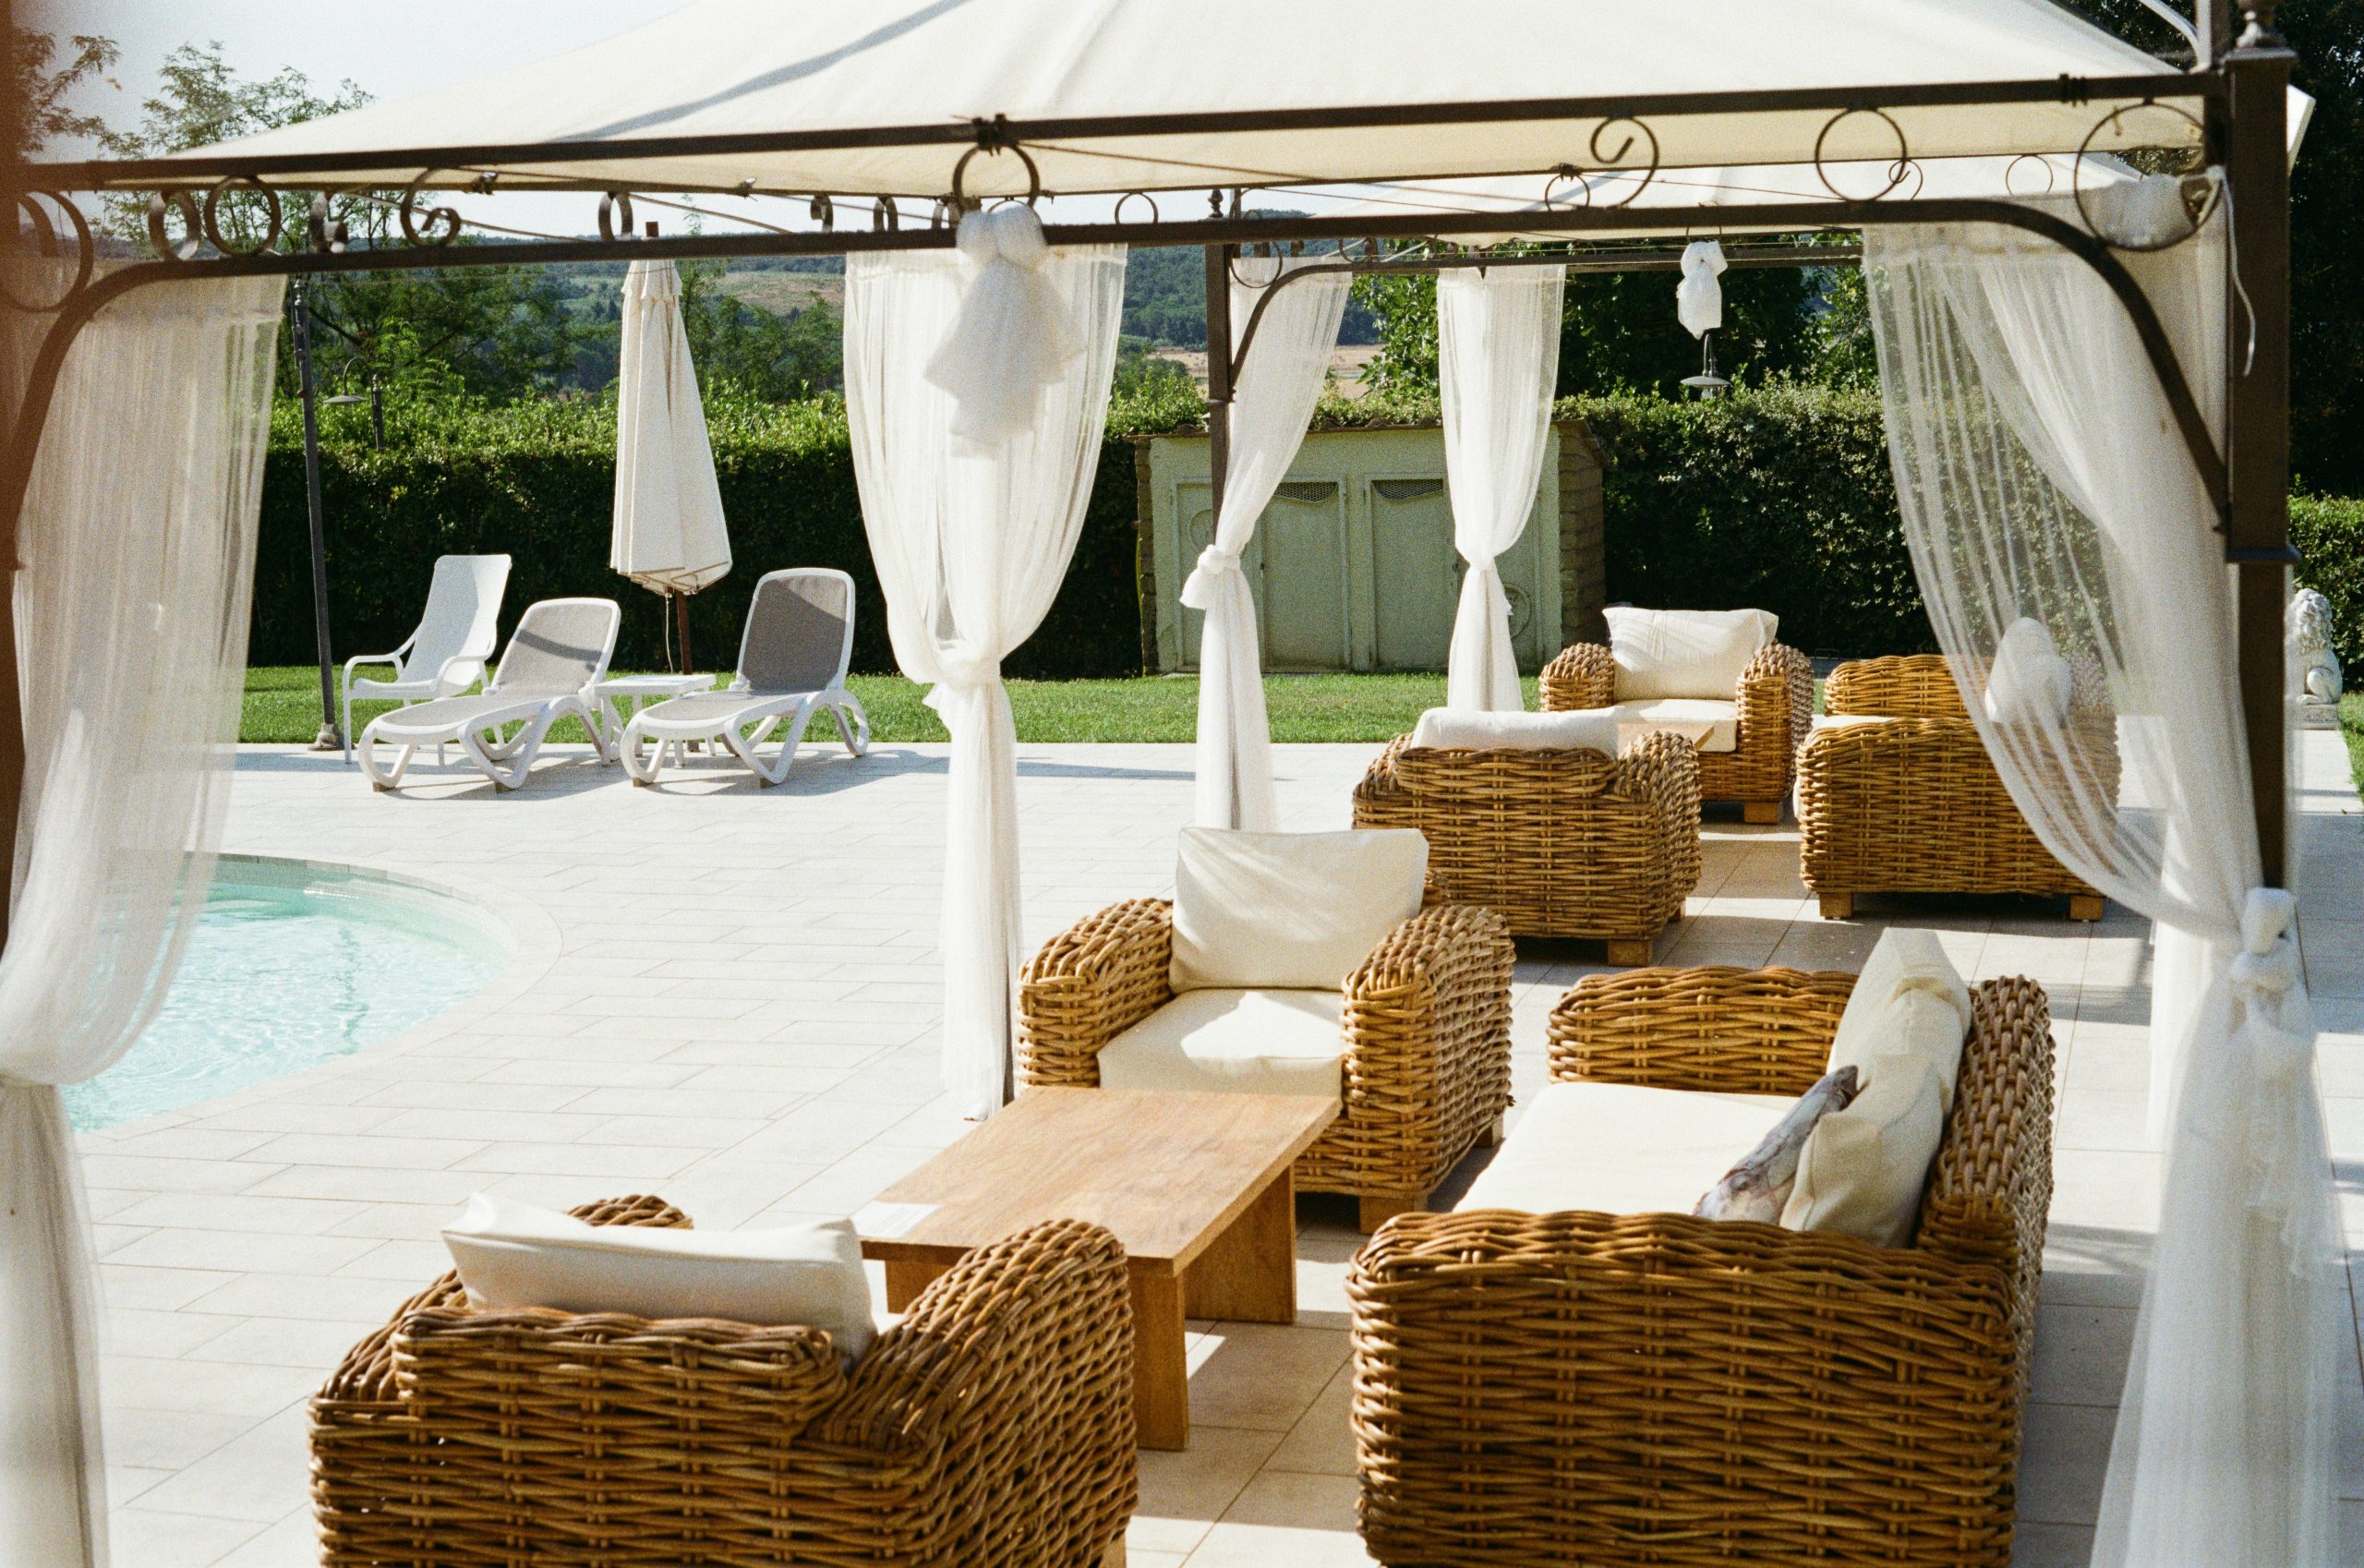
For a truly polished look, secure your gazebo fabric properly. Most kits come with simple ties, but for a high-end finish, use heavy-duty Velcro straps or even custom-made button tabs. This prevents the fabric from sagging or flapping loudly in the wind. Also, consider adding weighted plates to the base of the gazebo legs—even if you plan to stake it down—for extra stability and a more permanent, grounded appearance. An extra 50-100 lbs at each corner makes a world of difference.
2. Cast Graphic Shadows with a White Slatted Pergola
This look is a simple but effective formula: 60% clean structure + 30% soft lighting + 10% lush greenery. The white slatted pergola is the architectural hero, creating those gorgeous, shifting stripes of light and shadow. The string lights add a layer of warmth and ambiance for the evening, turning the functional into the magical. The final 10% of greenery frames the whole scene, ensuring it feels like a garden escape, not a sterile box. You could swap the white for black for a more modern edge and the formula would hold perfectly.
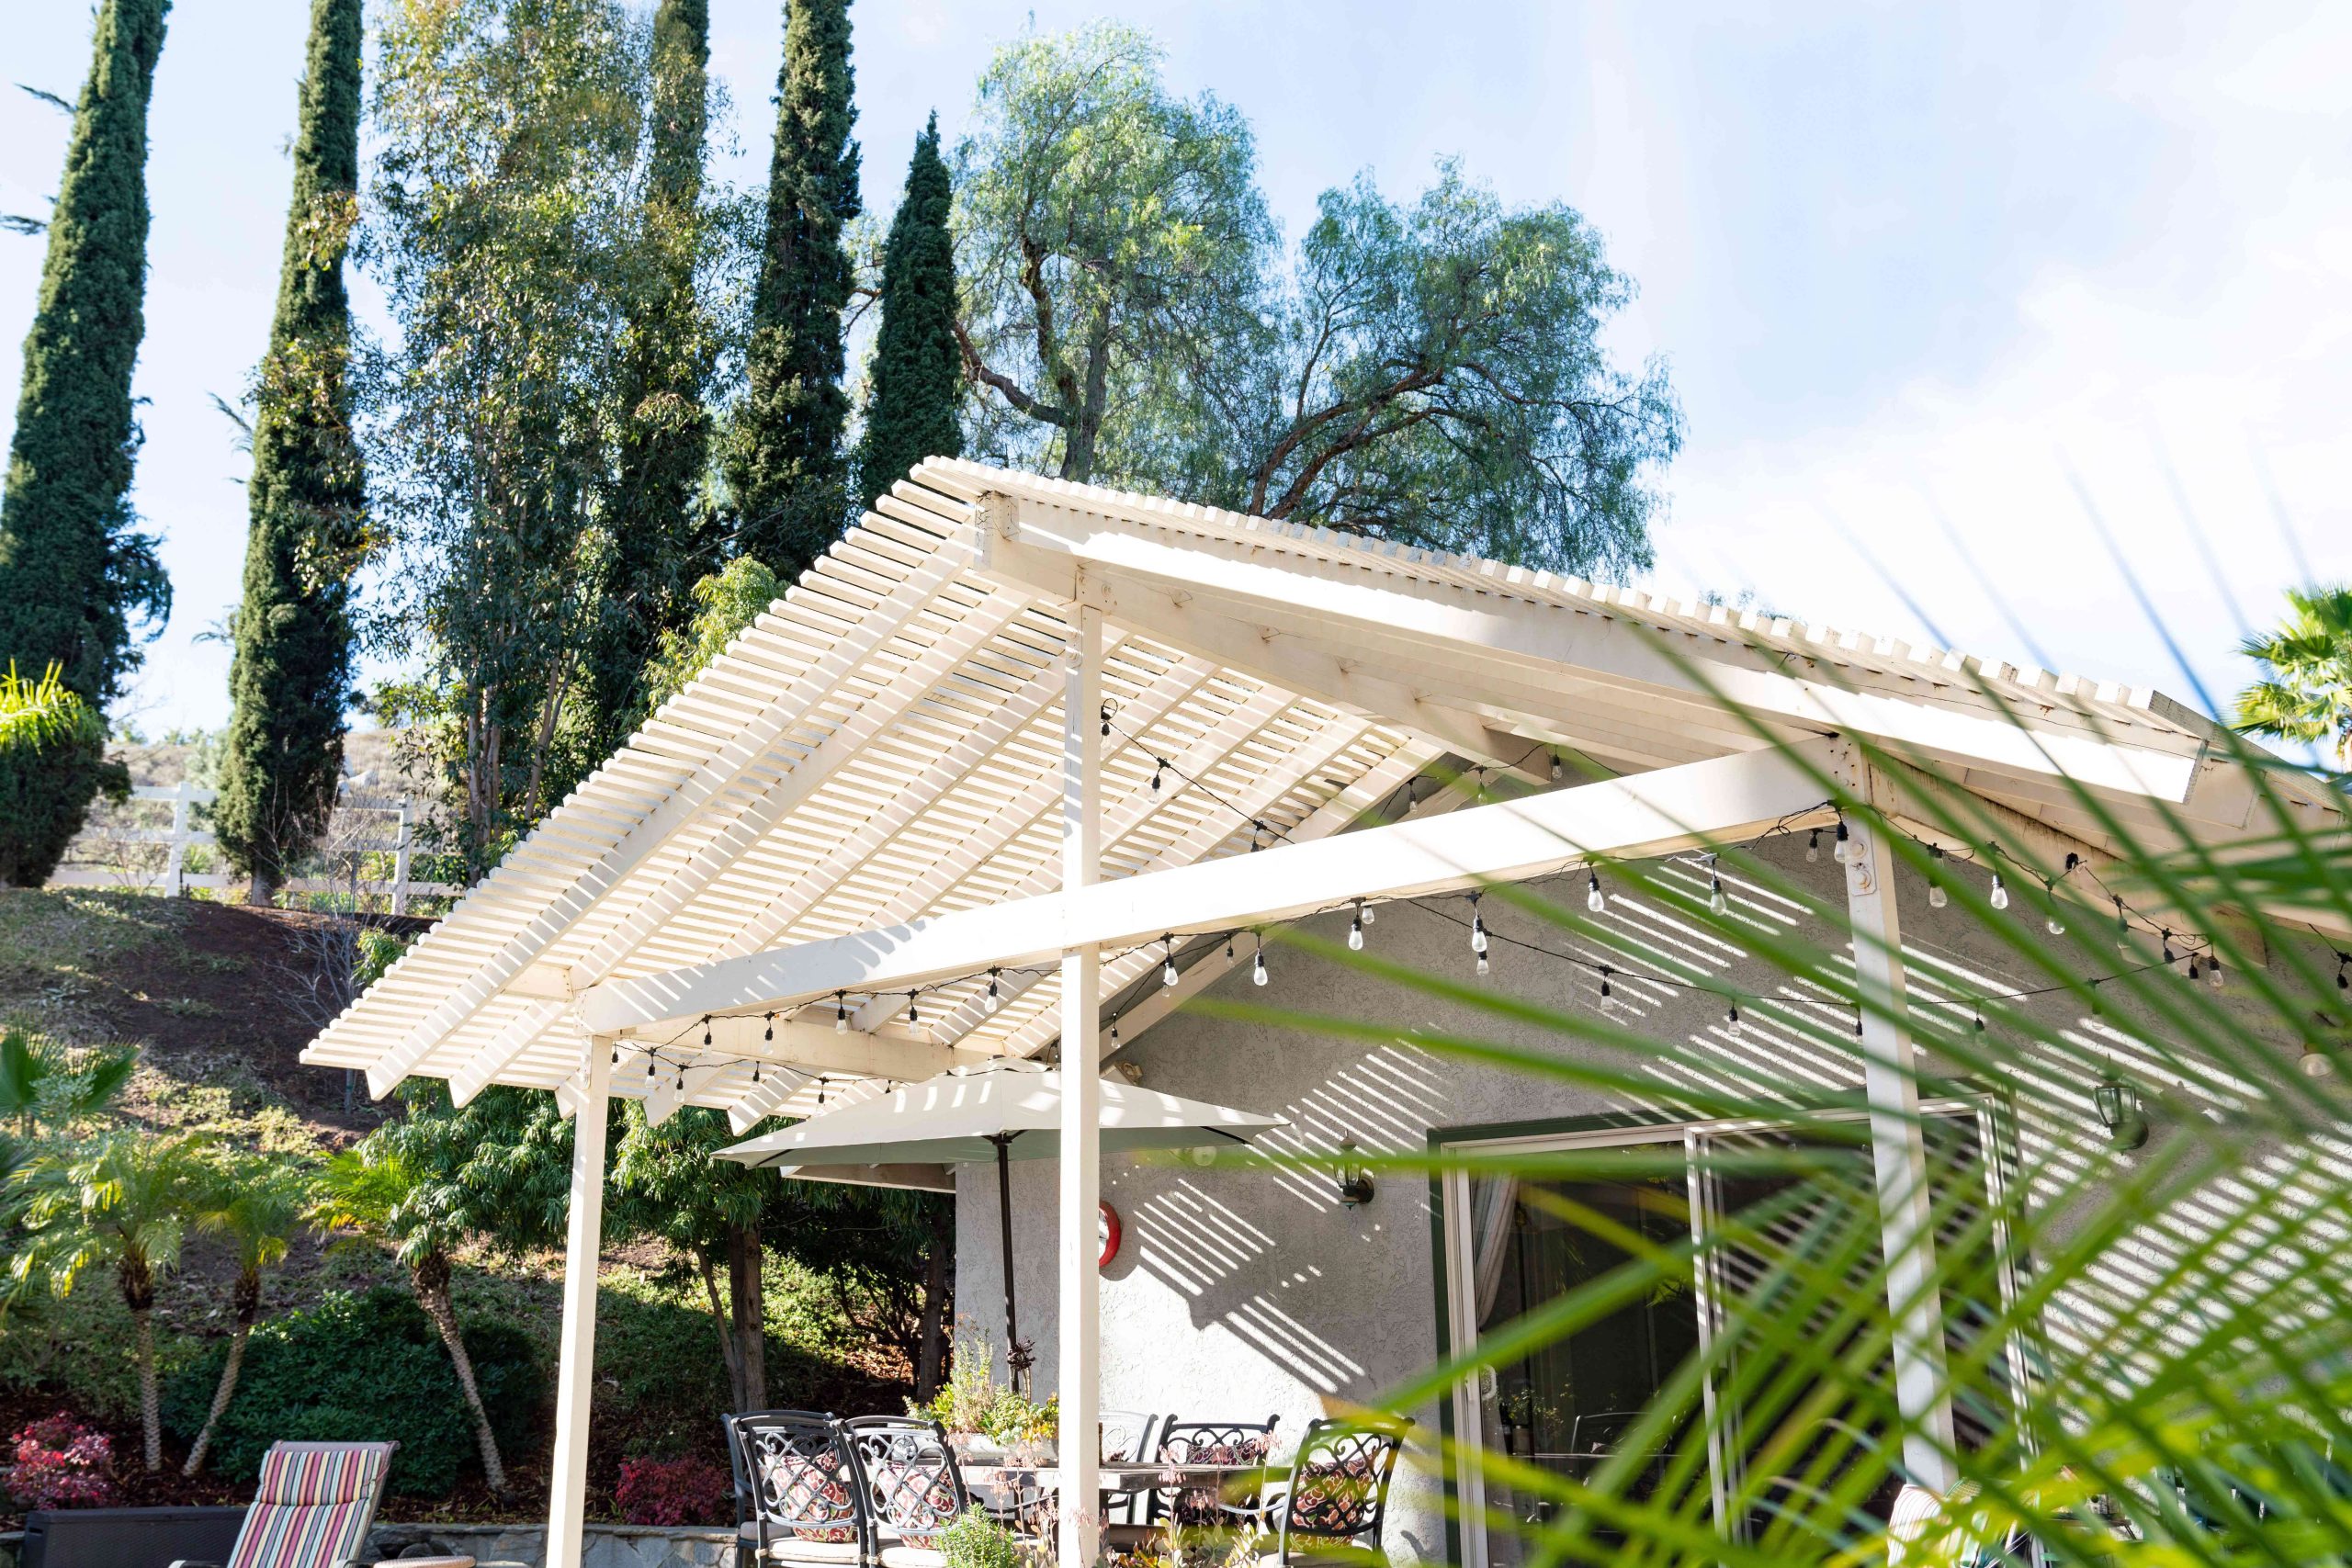
A slatted pergola provides partial shade, not a full block-out. Be honest with yourself about how much sun your patio gets and when you plan to use it. On a south-facing patio at high noon in July, this setup might not offer enough protection. The beautiful striped shadows are lovely, but they mean direct sun is also hitting your furniture and your guests. This is a perfect solution for morning coffee or late afternoon cocktails, but maybe not for an all-day lounge spot unless paired with that large umbrella you see tucked away.
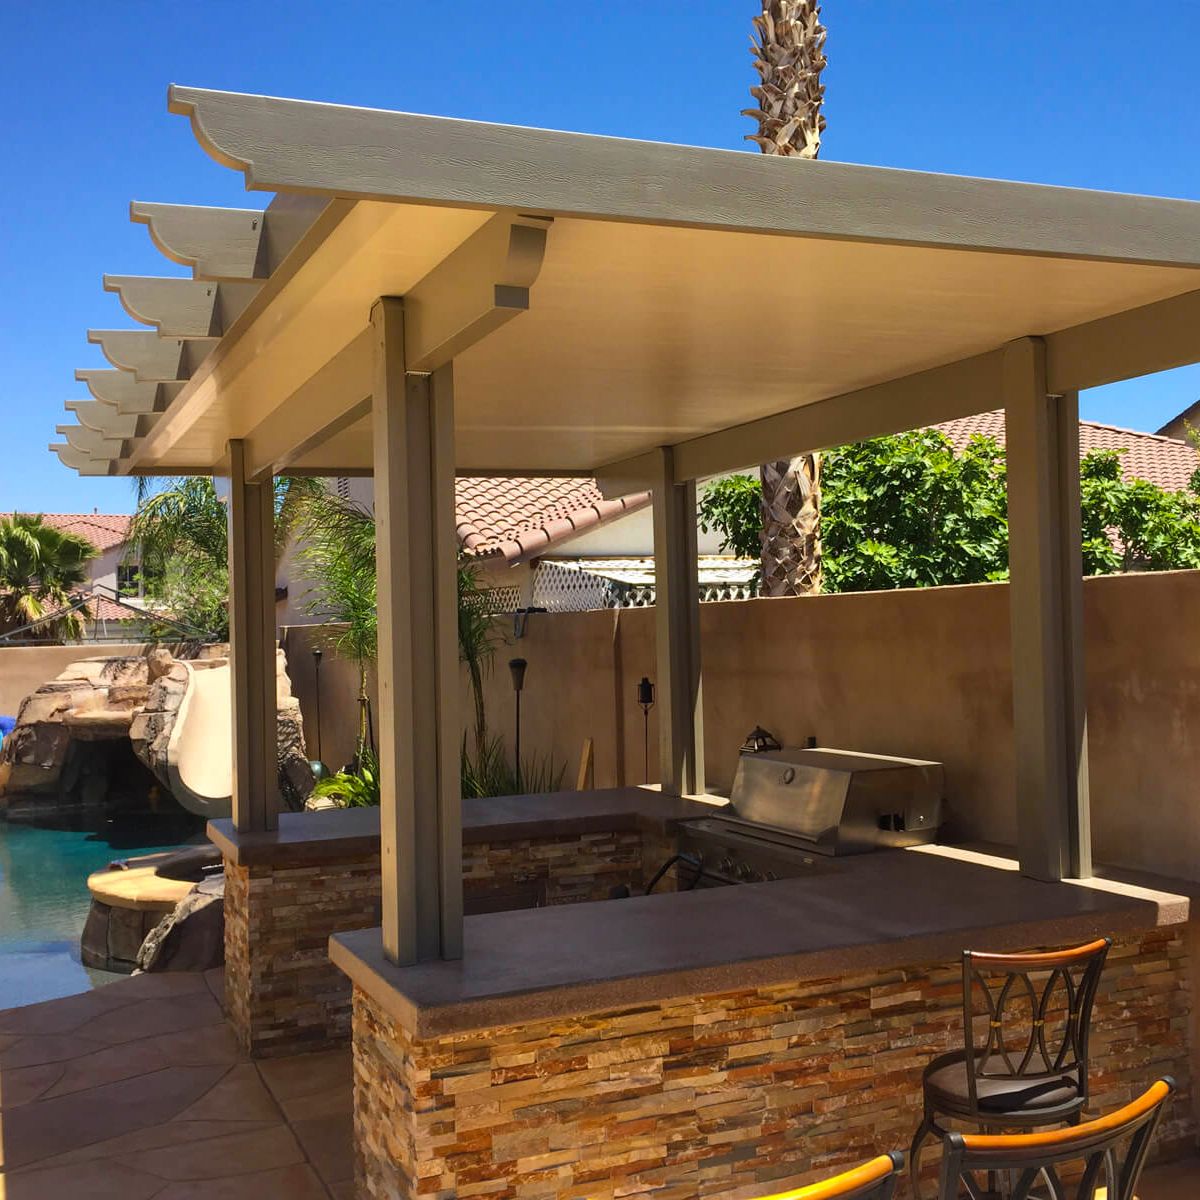
3. Build a Permanent Outdoor Kitchen with a Solid Covered Pergola
This is a significant investment in outdoor living, and the costs reflect its permanence and functionality.
- Structure (Solid Pergola & Foundation): $8,000 – $15,000
- Outdoor Kitchen Unit (Grill, Cabinetry, Stone Veneer): $7,000 – $20,000+
- Countertops (Dark Granite/Quartz): $2,000 – $5,000
- Furniture (Bar Stools): $800 – $2,000
- TOTAL: $17,800 – $42,000+
- Budget Alternative: A pre-fab grill island ($1,500) under a standard wood pergola kit ($2,000) with freestanding furniture can give a similar zone for around $4,500.
The single element that makes this entire space work is the solid roof. Unlike a slatted pergola, the full coverage guarantees this outdoor kitchen is usable in scorching sun or a light drizzle, dramatically increasing its utility. It transforms the patio from a ‘sometimes’ space into a reliable, all-weather extension of the home. Without it, the high-end grill, stone finishes, and comfortable bar seating would be far less practical and, therefore, far less valuable.
4. Add Flexible Shade with a Retractable Canvas Canopy
This idea is brilliant for large, rectangular patios, typically those at least 15 feet wide and 20-30 feet long. The pergola structure gives the space a grand scale, and the retractable canopy makes it incredibly versatile. It requires a ceiling height of at least 9 feet to prevent the canopy from feeling too low or trapping heat. This is a substantial look that balances a large house and a long patio; on a smaller deck, it might feel overwhelming. For a more compact space, consider the striped awning in Idea #6, which offers similar flexibility without the large frame.
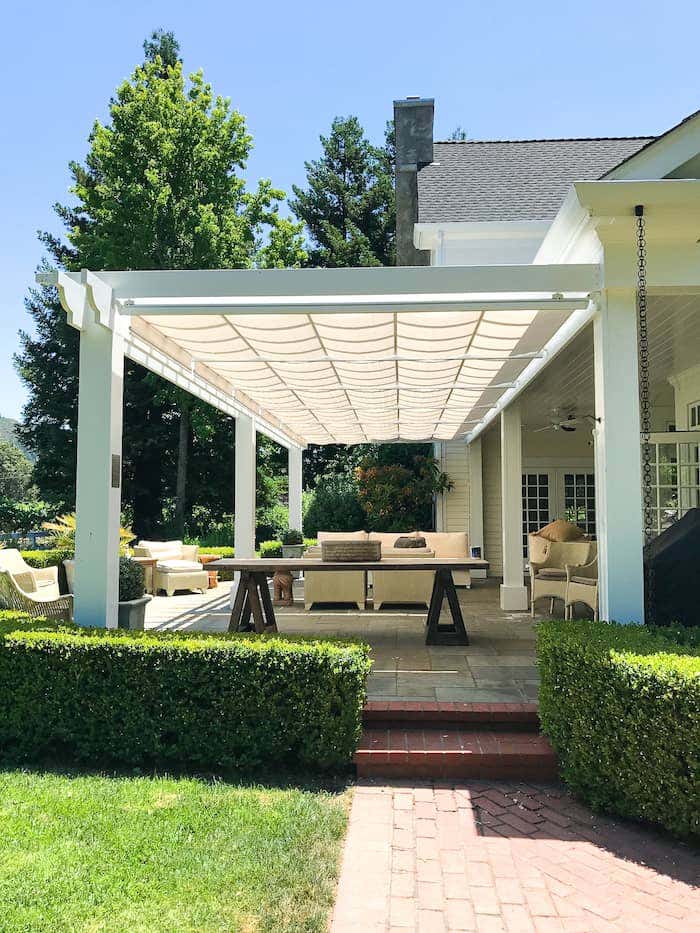
You don’t need a custom-built pergola to get this effect. You can achieve a very similar vibe for a fraction of the cost. Start with a standard 12’x16′ wood pergola kit from a big box store (around $1,500 – $2,500). Instead of a built-in retractable system, buy a separate ‘slide-on-wire’ retractable canopy kit online for about $400-$800. For seating, a long wooden dining table from IKEA or Target paired with simple benches can keep costs under $1,000. It’s the same concept—grand scale, flexible shade—for under $4,000.
5. Layer Overlapping Sail Shades for a Modern, Organic Look
Sail shades are having a huge moment because they’re the antithesis of the bulky, traditional patio cover. They feel light, sculptural, and a bit playful. This look, with multiple overlapping sails, is trending on Pinterest because it solves a practical problem—shading a large, irregularly shaped area—in a way that feels like a deliberate art installation. It aligns with the move toward more organic, less rigid design in outdoor spaces. Homeowners are leaning into asymmetry, and this is a perfect example of that shift in action. It’s functional shade that doubles as garden sculpture.
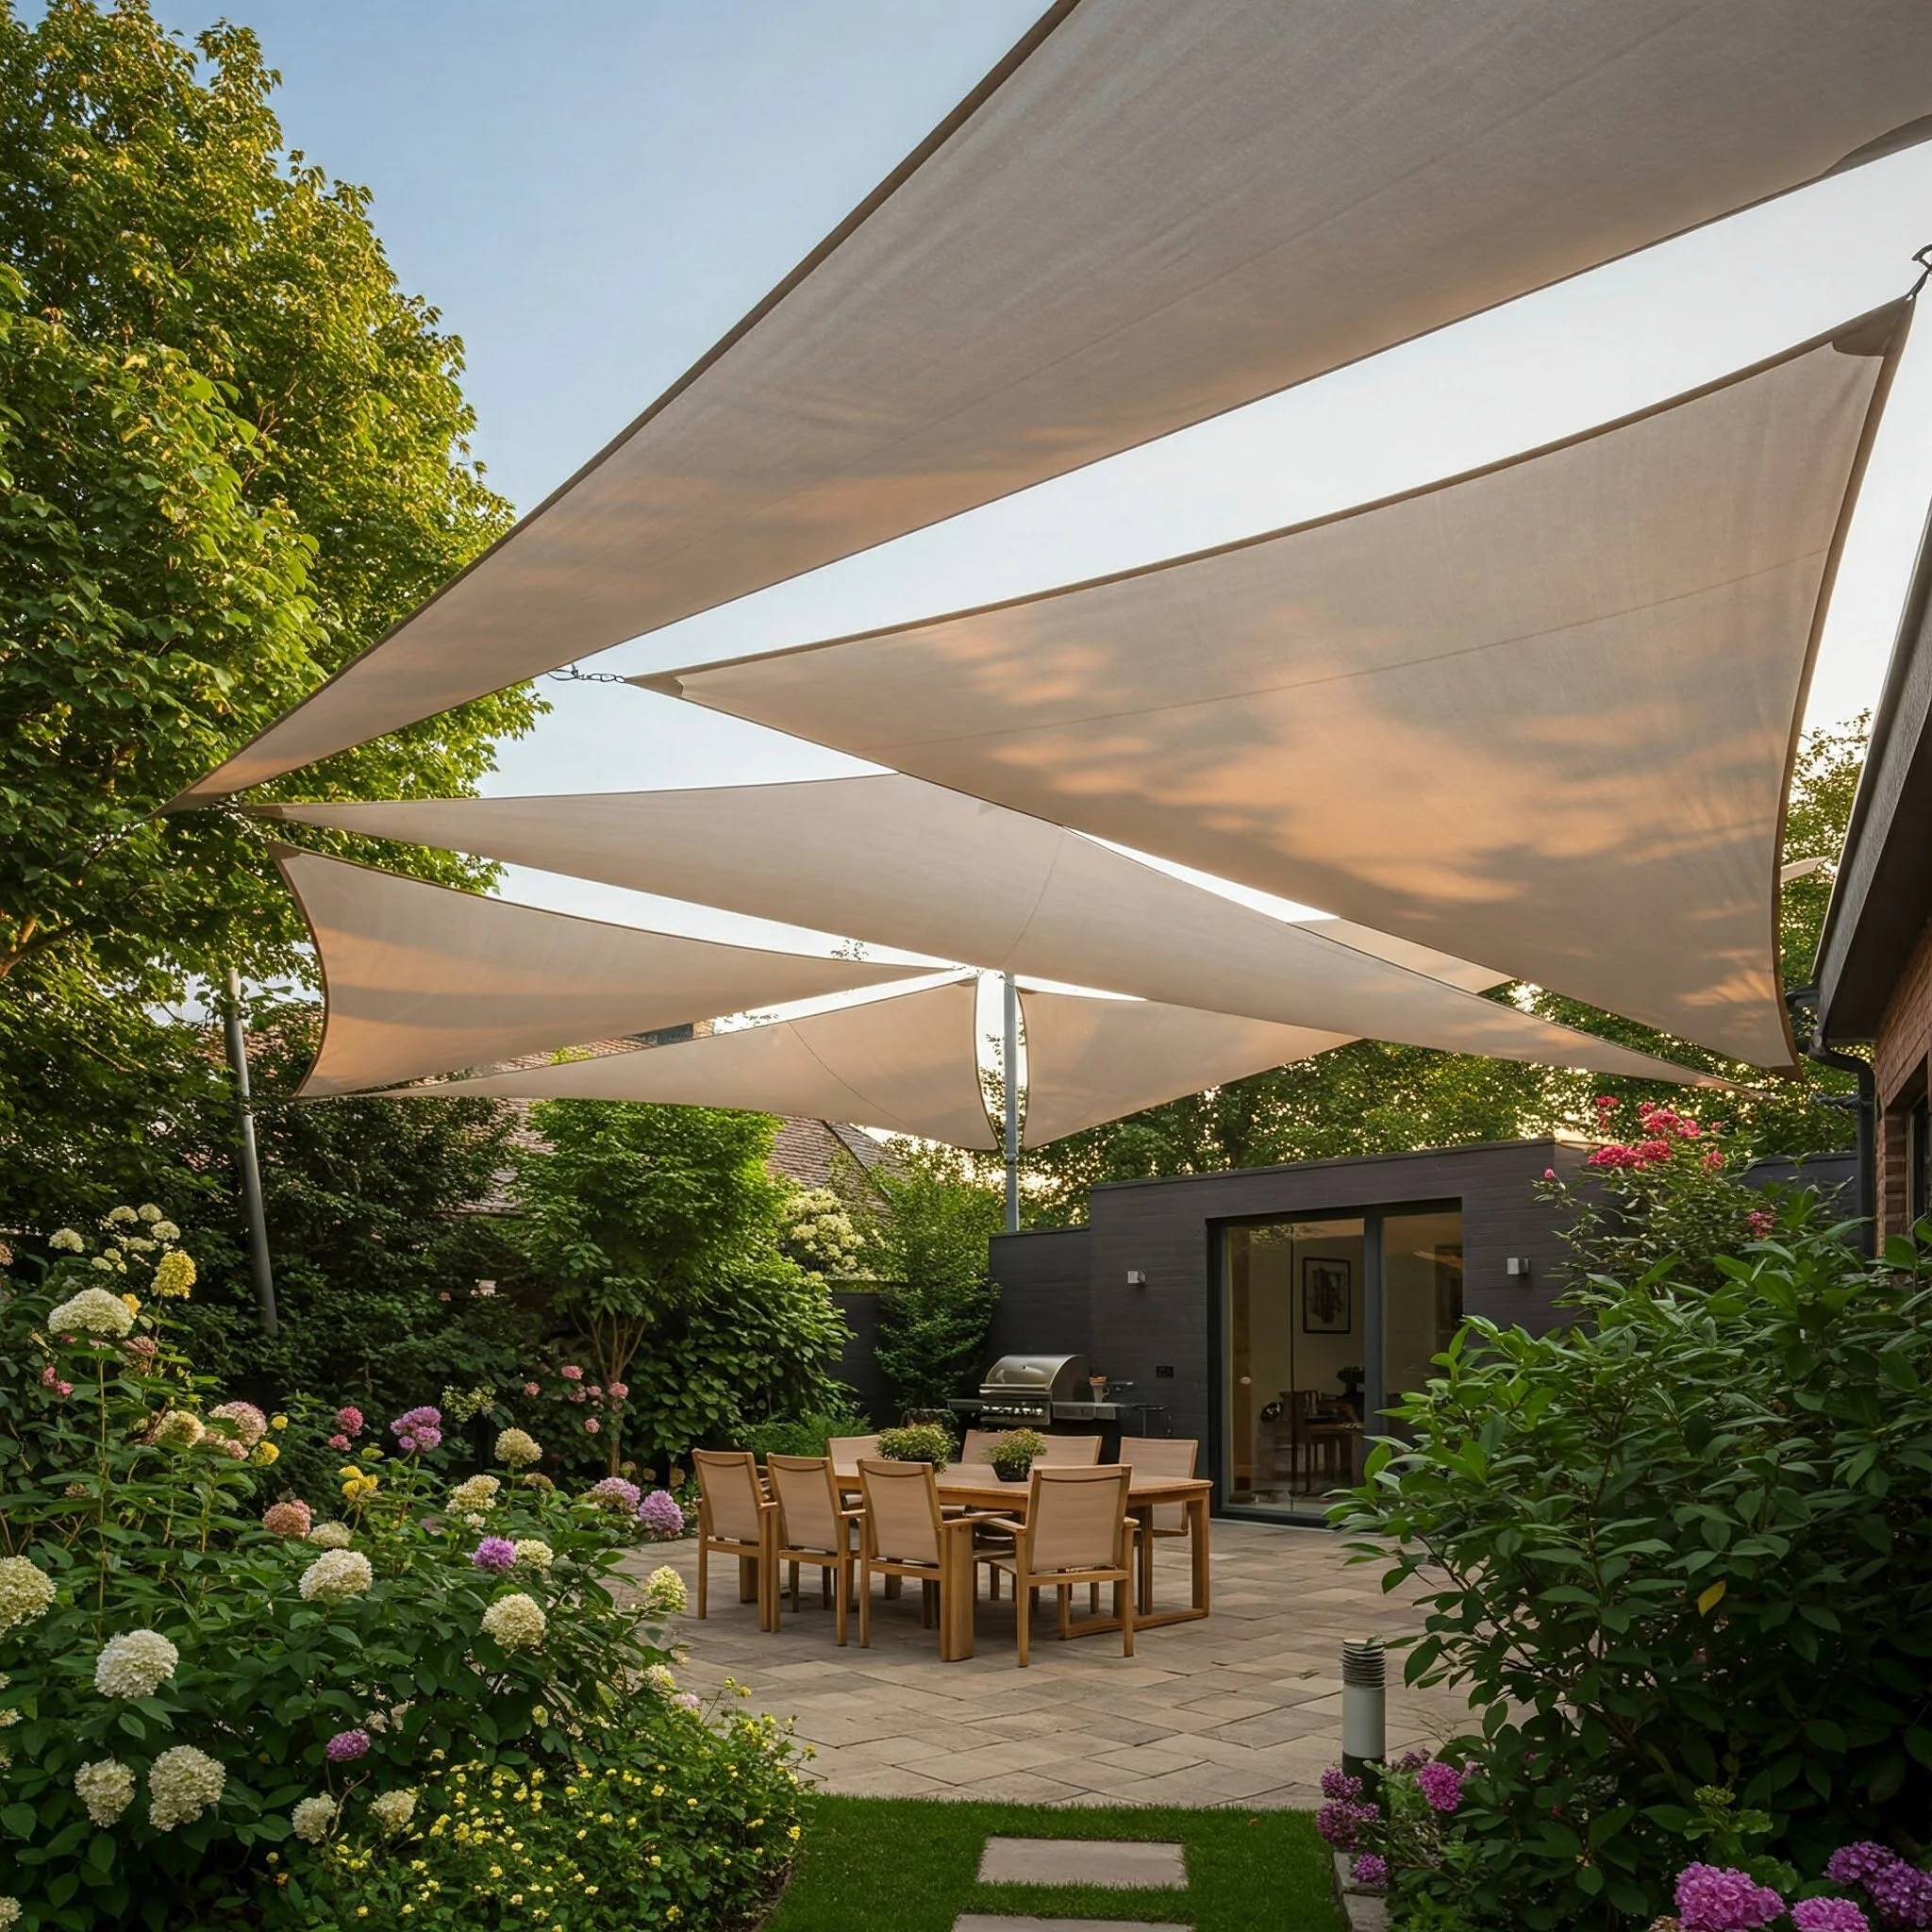
When installing multiple sail shades, the key to a professional look is varying the heights of your anchor points. Don’t attach all corners at the same level. For a dynamic, taut installation, ensure each sail has at least one ‘high’ corner and one ‘low’ corner. This not only looks better but is crucial for rain runoff. A flat sail will pool water and sag, potentially damaging the fabric or the anchor points. A difference of 12-24 inches in elevation between corners is a good rule of thumb to create tension and prevent pooling.
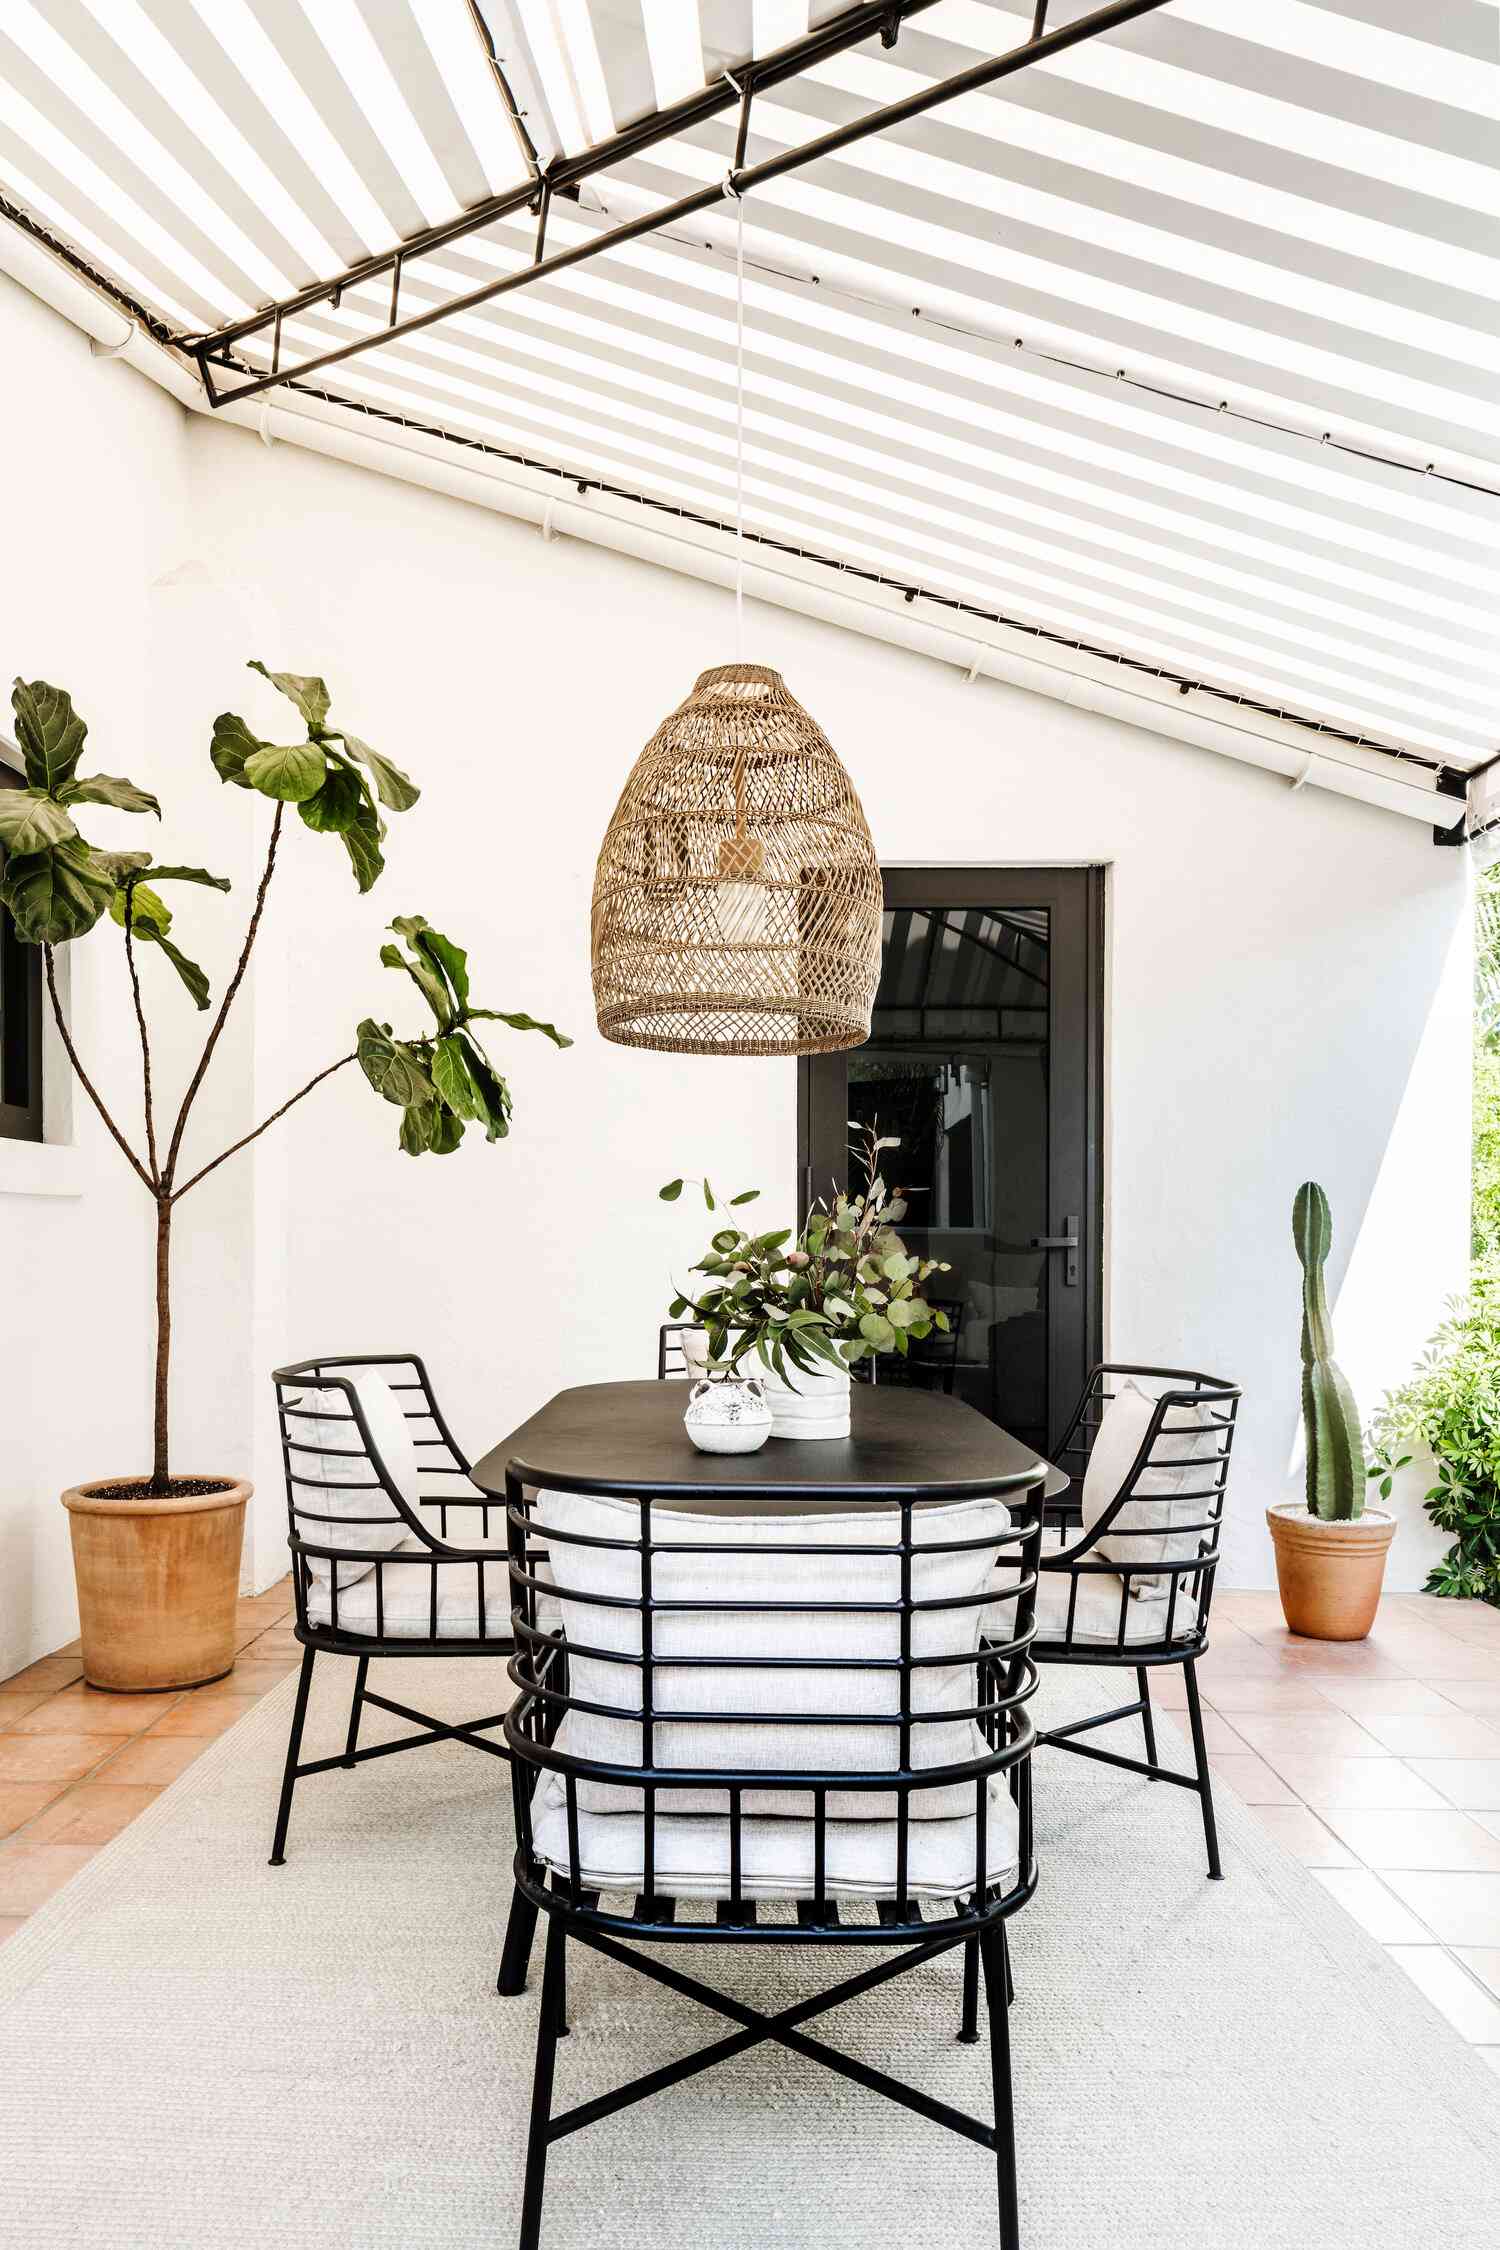
6. Go Parisian Bistro with a Striped Awning and Rattan Pendant
This look comes together with that amazing rattan pendant, but hanging an electrical fixture outdoors requires care. Here’s a quick guide:
- Time & Cost: 1-2 hours, $50-$150 (plus the light fixture).
- Choose a Fixture: Select a pendant light rated for ‘damp’ or ‘wet’ locations. The rattan here is decorative, but the internal wiring must be sealed.
- Plan the Location: The fixture must be under a solid cover like this awning, protected from direct rain.
- Run the Power: This is a job for an electrician. They will run outdoor-rated cable (usually in a conduit) from a GFCI-protected outlet to a wet-rated junction box mounted securely above the light.
- Install and Seal: Connect the fixture and ensure all connections are tight and sealed with silicone caulk where the box meets the wall or ceiling.
While that striped fabric awning looks incredibly chic, be prepared for some upkeep. Lighter colors like this white and grey are prone to showing dirt, pollen, and mildew, especially if you live in a damp climate or have a lot of trees. Plan to clean it twice a year. Use a soft brush, mild soap (like Dawn), and water. Avoid harsh chemicals or pressure washers, which can damage the fabric’s water-resistant coating. For retractable awnings, always let the fabric dry completely before retracting it to prevent mildew growth while it’s rolled up.
7. Embrace Natural Tones with a Slatted Wood Pergola
This design feels so cohesive because of repetition and a tight color palette. The warm wood tone of the pergola is repeated in the deck flooring, tying the overhead structure to the ground plane. The natural, woven texture of the rattan-backed sofa is echoed in the area rug, creating a layered, cozy feel. The color scheme is simple: wood tones, cream cushions, and the deep green from the garden. The red of the house provides a single, bold point of contrast that makes all the neutrals pop. It’s a beautifully balanced and harmonious composition.
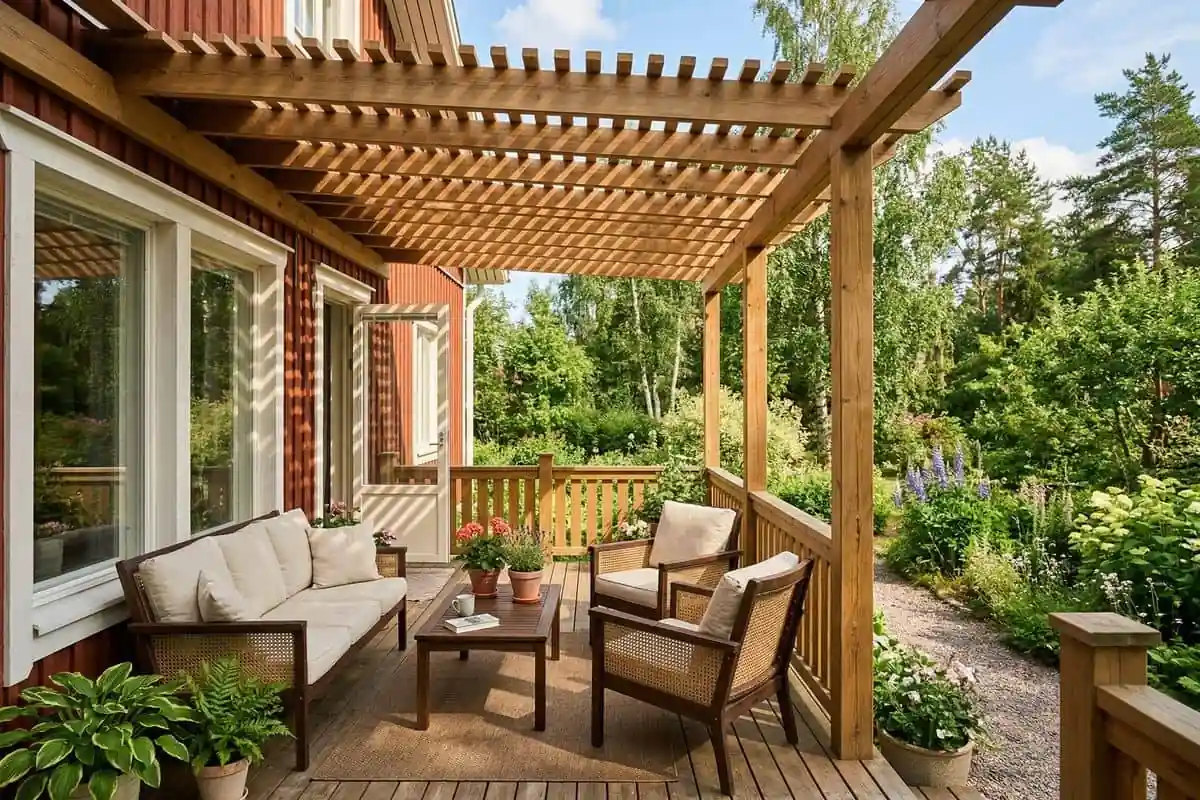
That gorgeous rattan-backed furniture is a showstopper, but it’s not invincible. Natural rattan and wicker are highly susceptible to moisture and sun damage. If left completely exposed to the elements, they will crack, fade, and eventually rot. A pergola like this offers partial protection, but it won’t stop driving rain or harsh UV rays. To keep this furniture looking good, you’ll need to invest in high-quality, waterproof covers and be diligent about using them whenever the seating is not in use. This look is high-style, but it’s also high-maintenance.
8. Define Zones with a Modern Black Pergola and Outdoor Kitchen
Think of this space as 50% structure, 30% softness, and 20% natural elements. The strong, dark lines of the pergola and the solid mass of the stone kitchen island form the architectural backbone. The softness comes from the plush white sofa and the warm wood of the dining set, which invite you to sit down and relax. The final 20% is the explosion of greenery in the potted plants, which breathe life into the modern design and prevent it from feeling too cold or sterile. It’s a perfect balance of hard and soft, modern and natural.
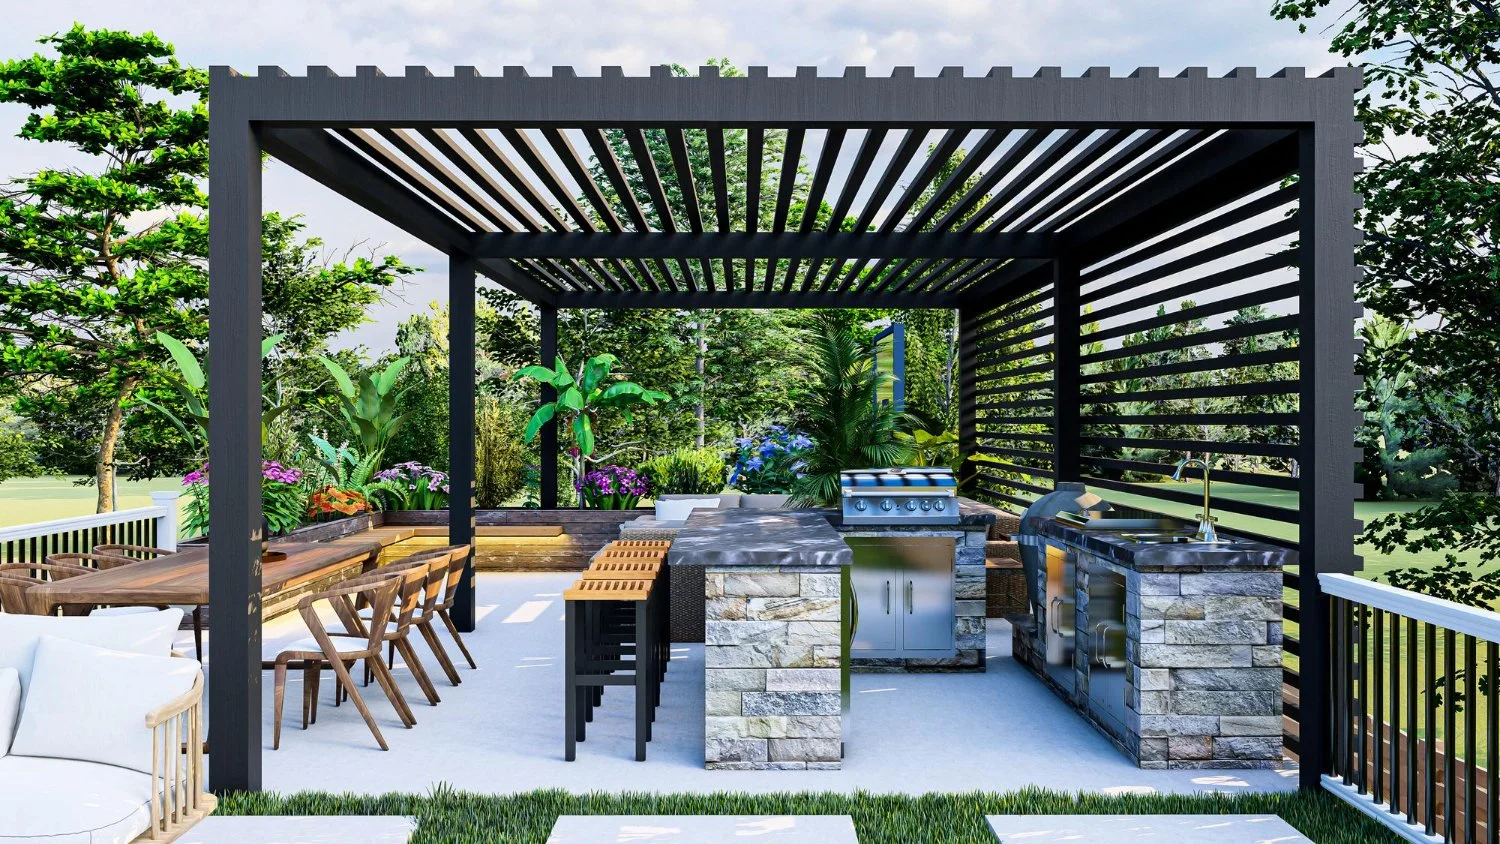
When designing an outdoor space with multiple ‘zones’ like this one (kitchen, dining, and lounging), use rugs to define each area. Even though it’s all one patio, placing an outdoor rug under the dining table and another under the sofa seating area, as seen here, creates distinct ‘rooms’. This simple trick makes the entire space feel larger, more organized, and more intentional. Use rugs that coordinate in color but have different patterns to add visual interest without clashing.
9. Integrate Indoors and Out with a Retractable Roof Pergola
The retractable roof is the hero of this entire design. It’s the single element that allows this patio to function as a true extension of the living room just inside. With the roof open, it’s a sun-drenched poolside lounge. With it closed, it’s a shaded, protected room that’s comfortable even in the midday glare or a light rain. This flexibility is what enables the seamless indoor-outdoor flow promised by those large sliding glass doors. Without the adjustable roof, it would just be a patio; with it, it’s a convertible outdoor room.
![Beautiful Patio Awning Ideas To Enhance Your Outdoor Experience [2025]](https://felvane.com/wp-content/uploads/2026/06/beautiful-patio-awning-ideas-to-enhance-1.webp)
A large, automated pergola is a major upgrade. Before you commit, run through this checklist:
- Sun Path Analysis: Where does the sun hit and at what time of day? A retractable roof is great, but make sure it solves your specific sun problem.
- Structural Support: Will this be freestanding or attached to the house? An attached pergola adds load to your home’s structure. Consult an engineer or a specialized installer.
- Electrical and Drainage: You’ll need a power source for the motor and a plan for water drainage from the closed roof panels. This often requires integrated gutters.
- Permits: A structure this significant almost always requires a building permit. Check with your local municipality before you even get a quote.
10. Elevate a Deck with a Double-Tier Umbrella and Cozy Seating
This is one of the most accessible ways to create a shaded living area. Forget the pergola and focus on the furnishings. A large cantilever or market umbrella is your shade solution ($300 – $800). You can find wicker-look sectional sofas made from all-weather resin at Target, Walmart, or on Wayfair for $700 – $1,500. The key is the outdoor rug, which pulls it all together—great options are available for under $200. This entire cozy, stylish setup can be yours for under $2,500, no construction required. It’s a perfect renter-friendly shade solution.
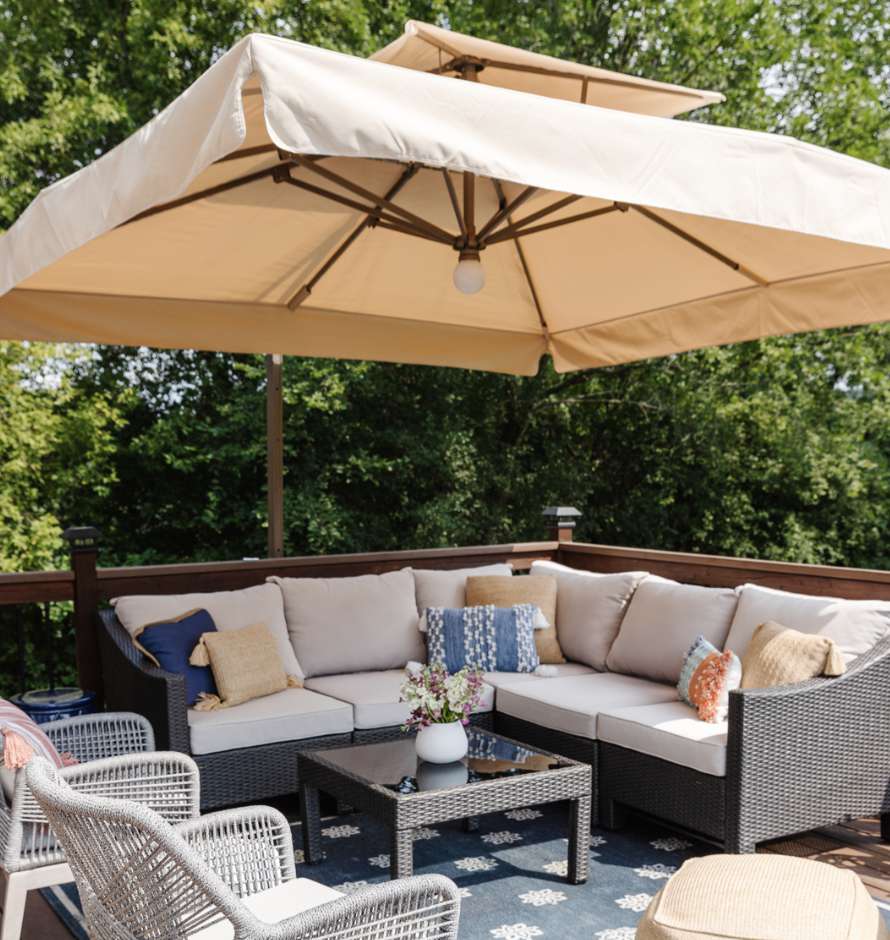
A large umbrella, especially a double-tiered one like this, acts like a sail in the wind. Always close the umbrella when it’s not in use. A strong gust of wind can snap the pole, tear the fabric, or, worse, send it flying across your deck or into a window. Invest in a heavy base—at least 75-100 lbs for an umbrella this size, or even a base you can bolt directly to the deck. The vented, double-tier design helps with airflow, but it’s not invincible. Taking 30 seconds to close it can save you hundreds of dollars in replacement costs.
11. Achieve a Minimalist Look with a Grey Slatted Pergola
This design’s success lies in its strict monochromatic palette and clean lines. The light grey of the pergola and the concrete patio creates a serene, unified canvas. The dark grey river rocks provide a subtle, textural contrast without introducing a new color, maintaining the minimalist discipline. The natural wood of the fence and coffee table adds just enough warmth to keep the space from feeling cold. It’s a study in tone and texture, where every element is carefully chosen to contribute to a sense of calm and order. It feels intentional and incredibly peaceful.
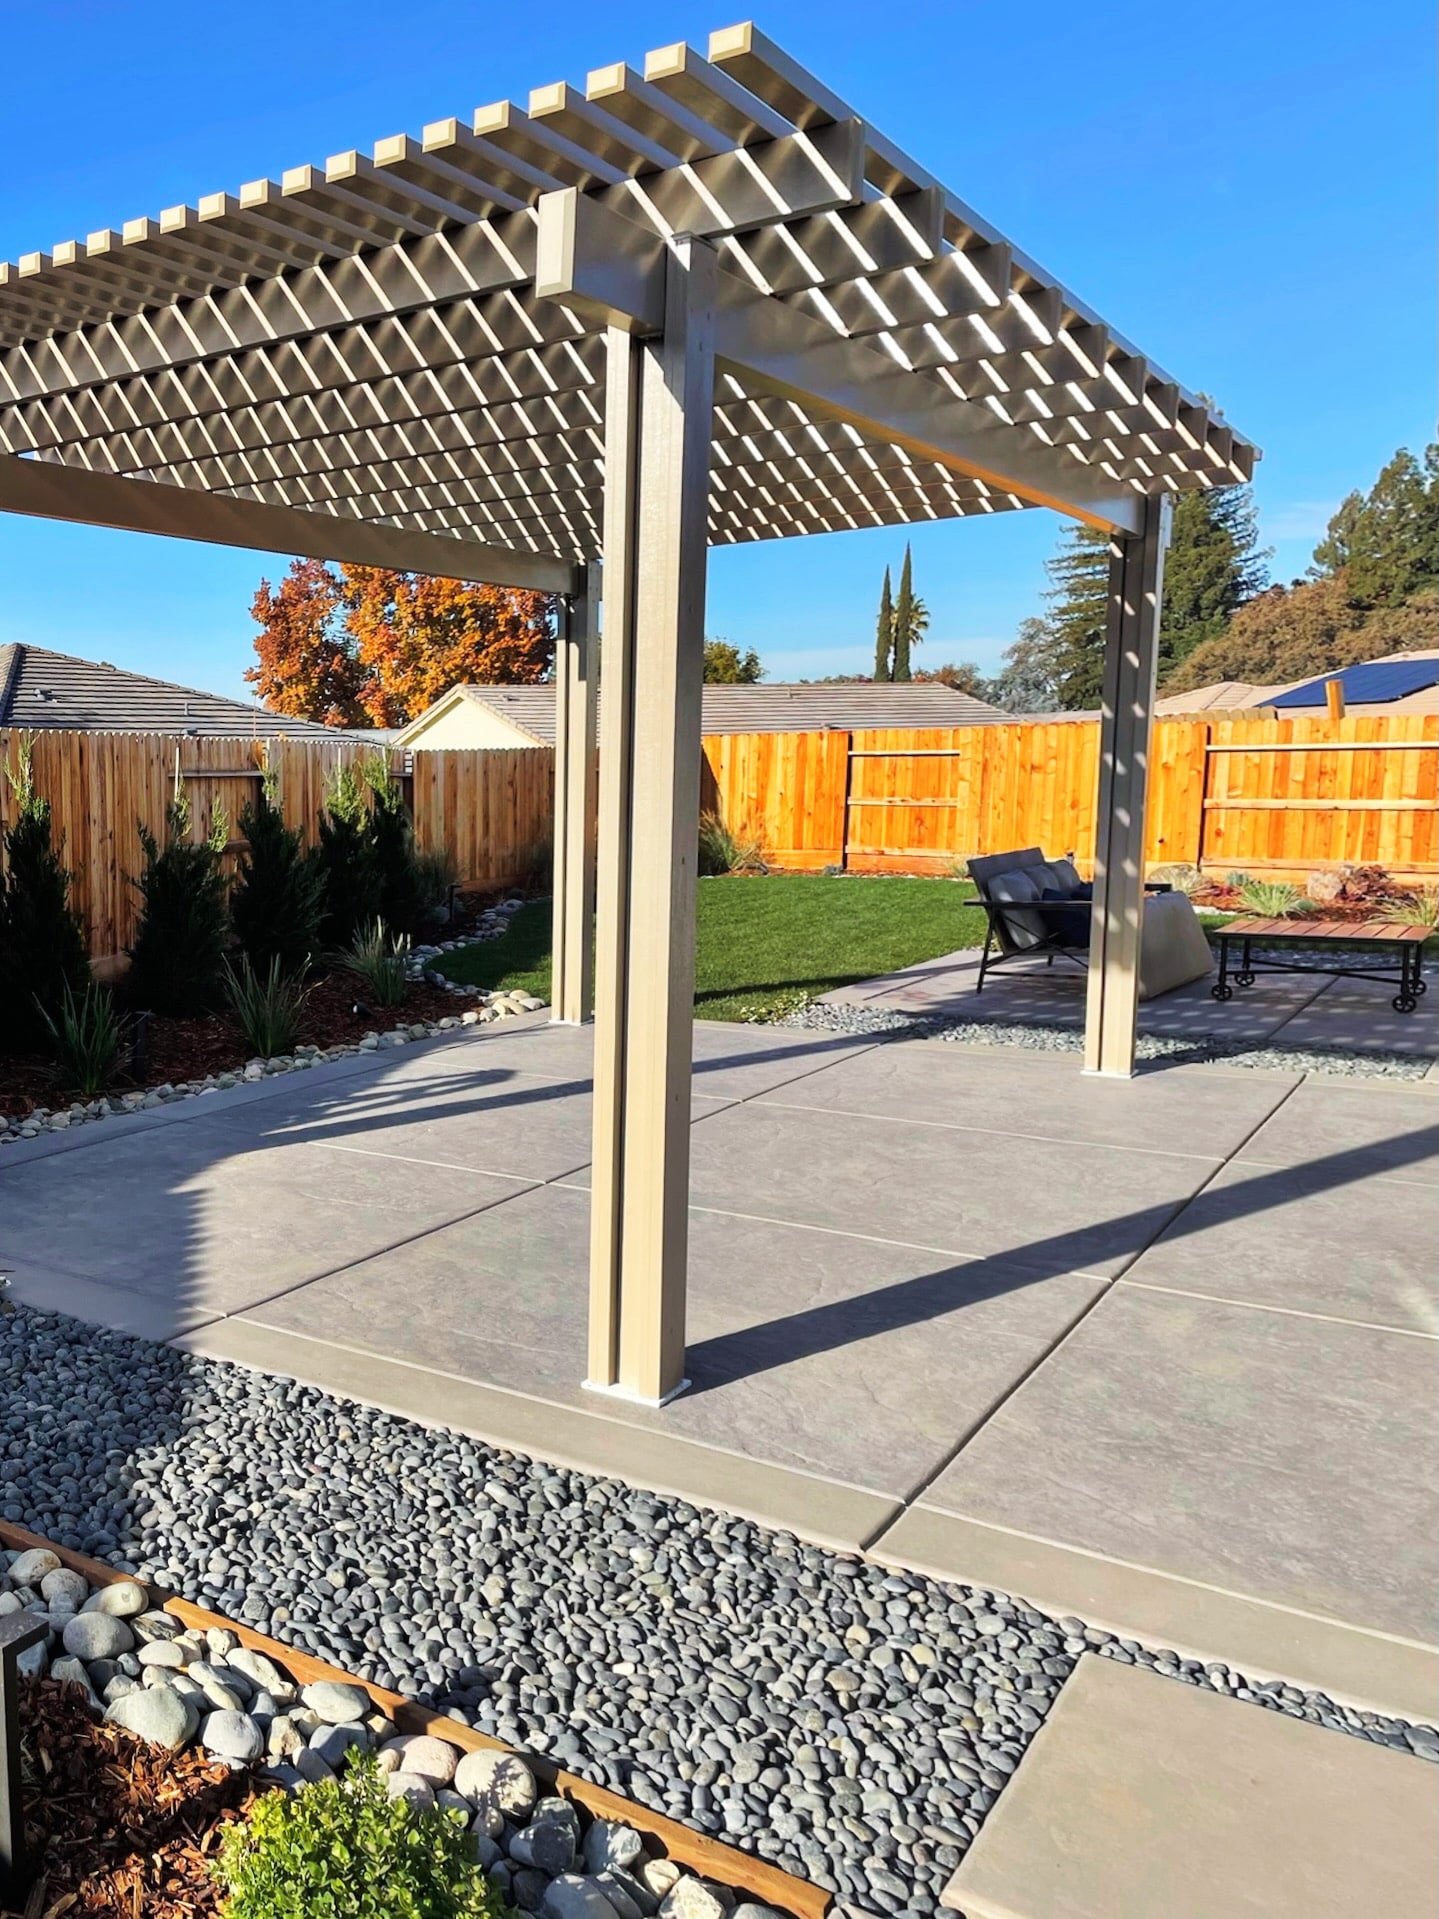
This minimalist approach works best in small to medium-sized yards where creating a sense of clean, uncluttered space is a priority. It’s ideal for a patio area of about 10×12 to 15×20 feet. The strong geometry—the lines of the pergola, the edges of the patio, the defined rock border—could feel too rigid or stark in a very large, sprawling backyard. It excels at bringing structure and a modern, gallery-like feel to a more contained outdoor area, making it a great choice for townhouse gardens or compact suburban lots.
12. Get On-Demand Shade with a Wall-Mounted Retractable Awning
Retractable awnings are fantastic for flexibility, but they have limitations. They are only as strong as the wall they’re mounted to. On a brick or concrete wall, you can go quite large. But on a standard wood-frame house with siding? You need to ensure the mounting brackets are bolted directly into studs or, even better, a structural header over a door or window. Improper mounting is the #1 cause of failure. Also, they offer zero protection from the sides, so if you’re dealing with low evening sun, you might still get glare underneath it.
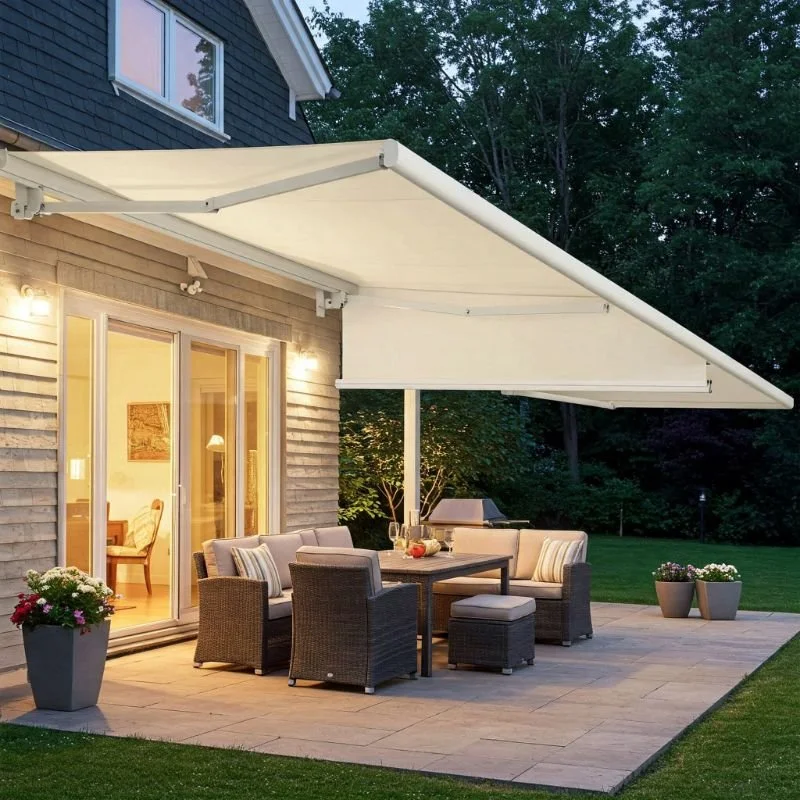
When selecting a fabric color for your awning, think beyond aesthetics. The color can significantly impact the light and heat underneath. A dark color like navy or forest green will provide deeper, cooler shade but may make the area feel darker. A light color, like this cream, will block direct sun but allow for a brighter, more ambient light underneath, which can also keep the adjacent indoor rooms from feeling dark. For a good balance, a mid-tone like a light grey or tan is often the perfect compromise. Check out the striped version in Idea #17 for another take.
13. Add Architectural Interest with a Dark Wood Pergola and Slatted Wall
The slatted side wall is the feature that elevates this from a standard pergola to a stunning piece of architecture. While the overhead slats provide shade from high sun, that one partial wall provides privacy, blocks low-angled light, and creates a much stronger sense of enclosure and ‘room-ness’. It frames the view of the garden beyond and makes the entire structure feel more substantial and intentionally designed. Without that wall, it would just be a nice pergola; with it, it’s a destination. Contrast this with the open design of Idea #7.
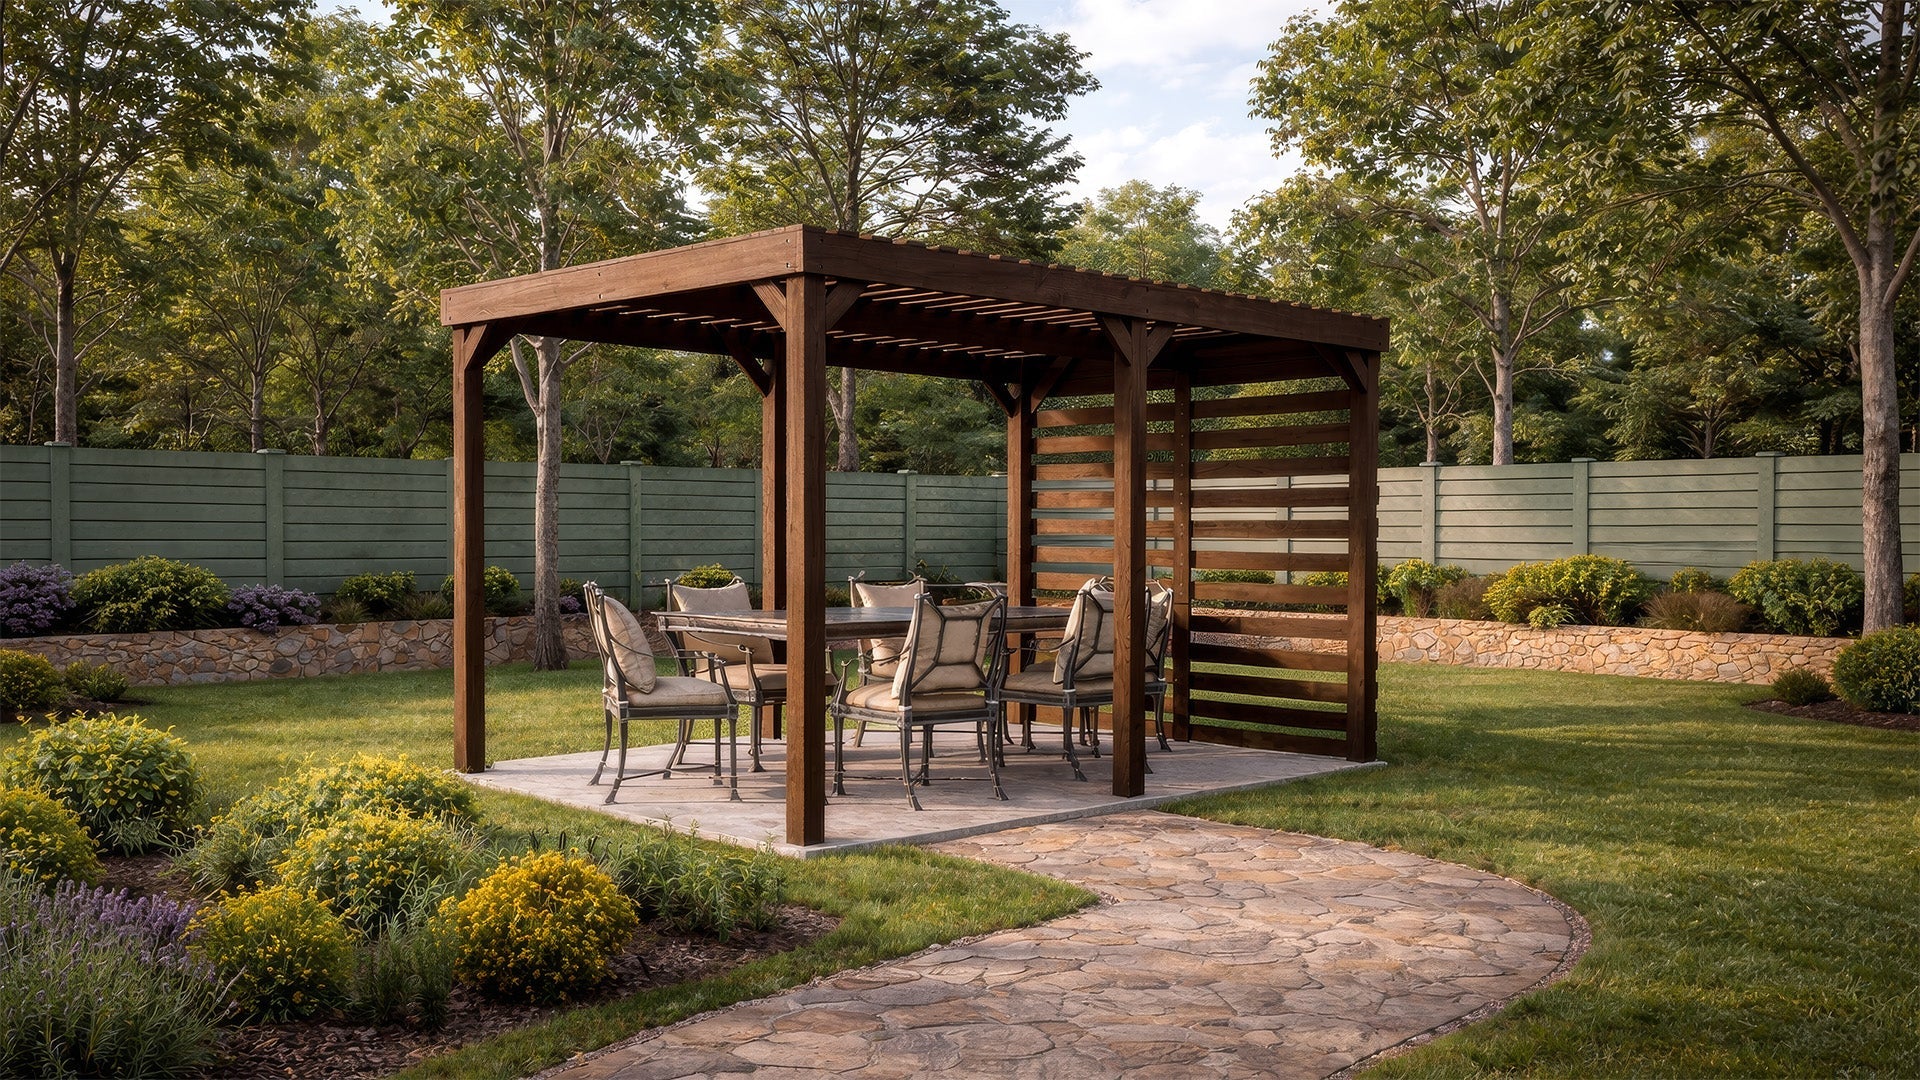
The formula here is about balancing solid and void: 40% solid structure (the dark wood posts and main beams) + 40% open slats (on the roof and side wall) + 20% negative space (the views through the structure). This ratio makes the pergola feel substantial without being a heavy, dark box. It provides shade and a sense of place while still feeling connected to the surrounding lawn and garden. You could use a lighter wood or even a painted finish, and as long as you maintain that balance of solid, slatted, and open, the architectural effect would remain.
14. Gather ‘Round a Fire Pit Under a Slatted Wood Pergola
This space feels like a natural retreat because it masterfully layers natural materials. The warm tones of the wooden pergola and built-in benches create a cozy, cabin-like enclosure. This is set against the rough, organic texture of the stacked stone fire pit and the irregular shapes of the stone patio floor. Even the plants, like the suspended fern, are integrated into the structure. Nothing is perfectly smooth or slick; it all has texture and a natural feel, which is why it encourages you to relax and settle in.
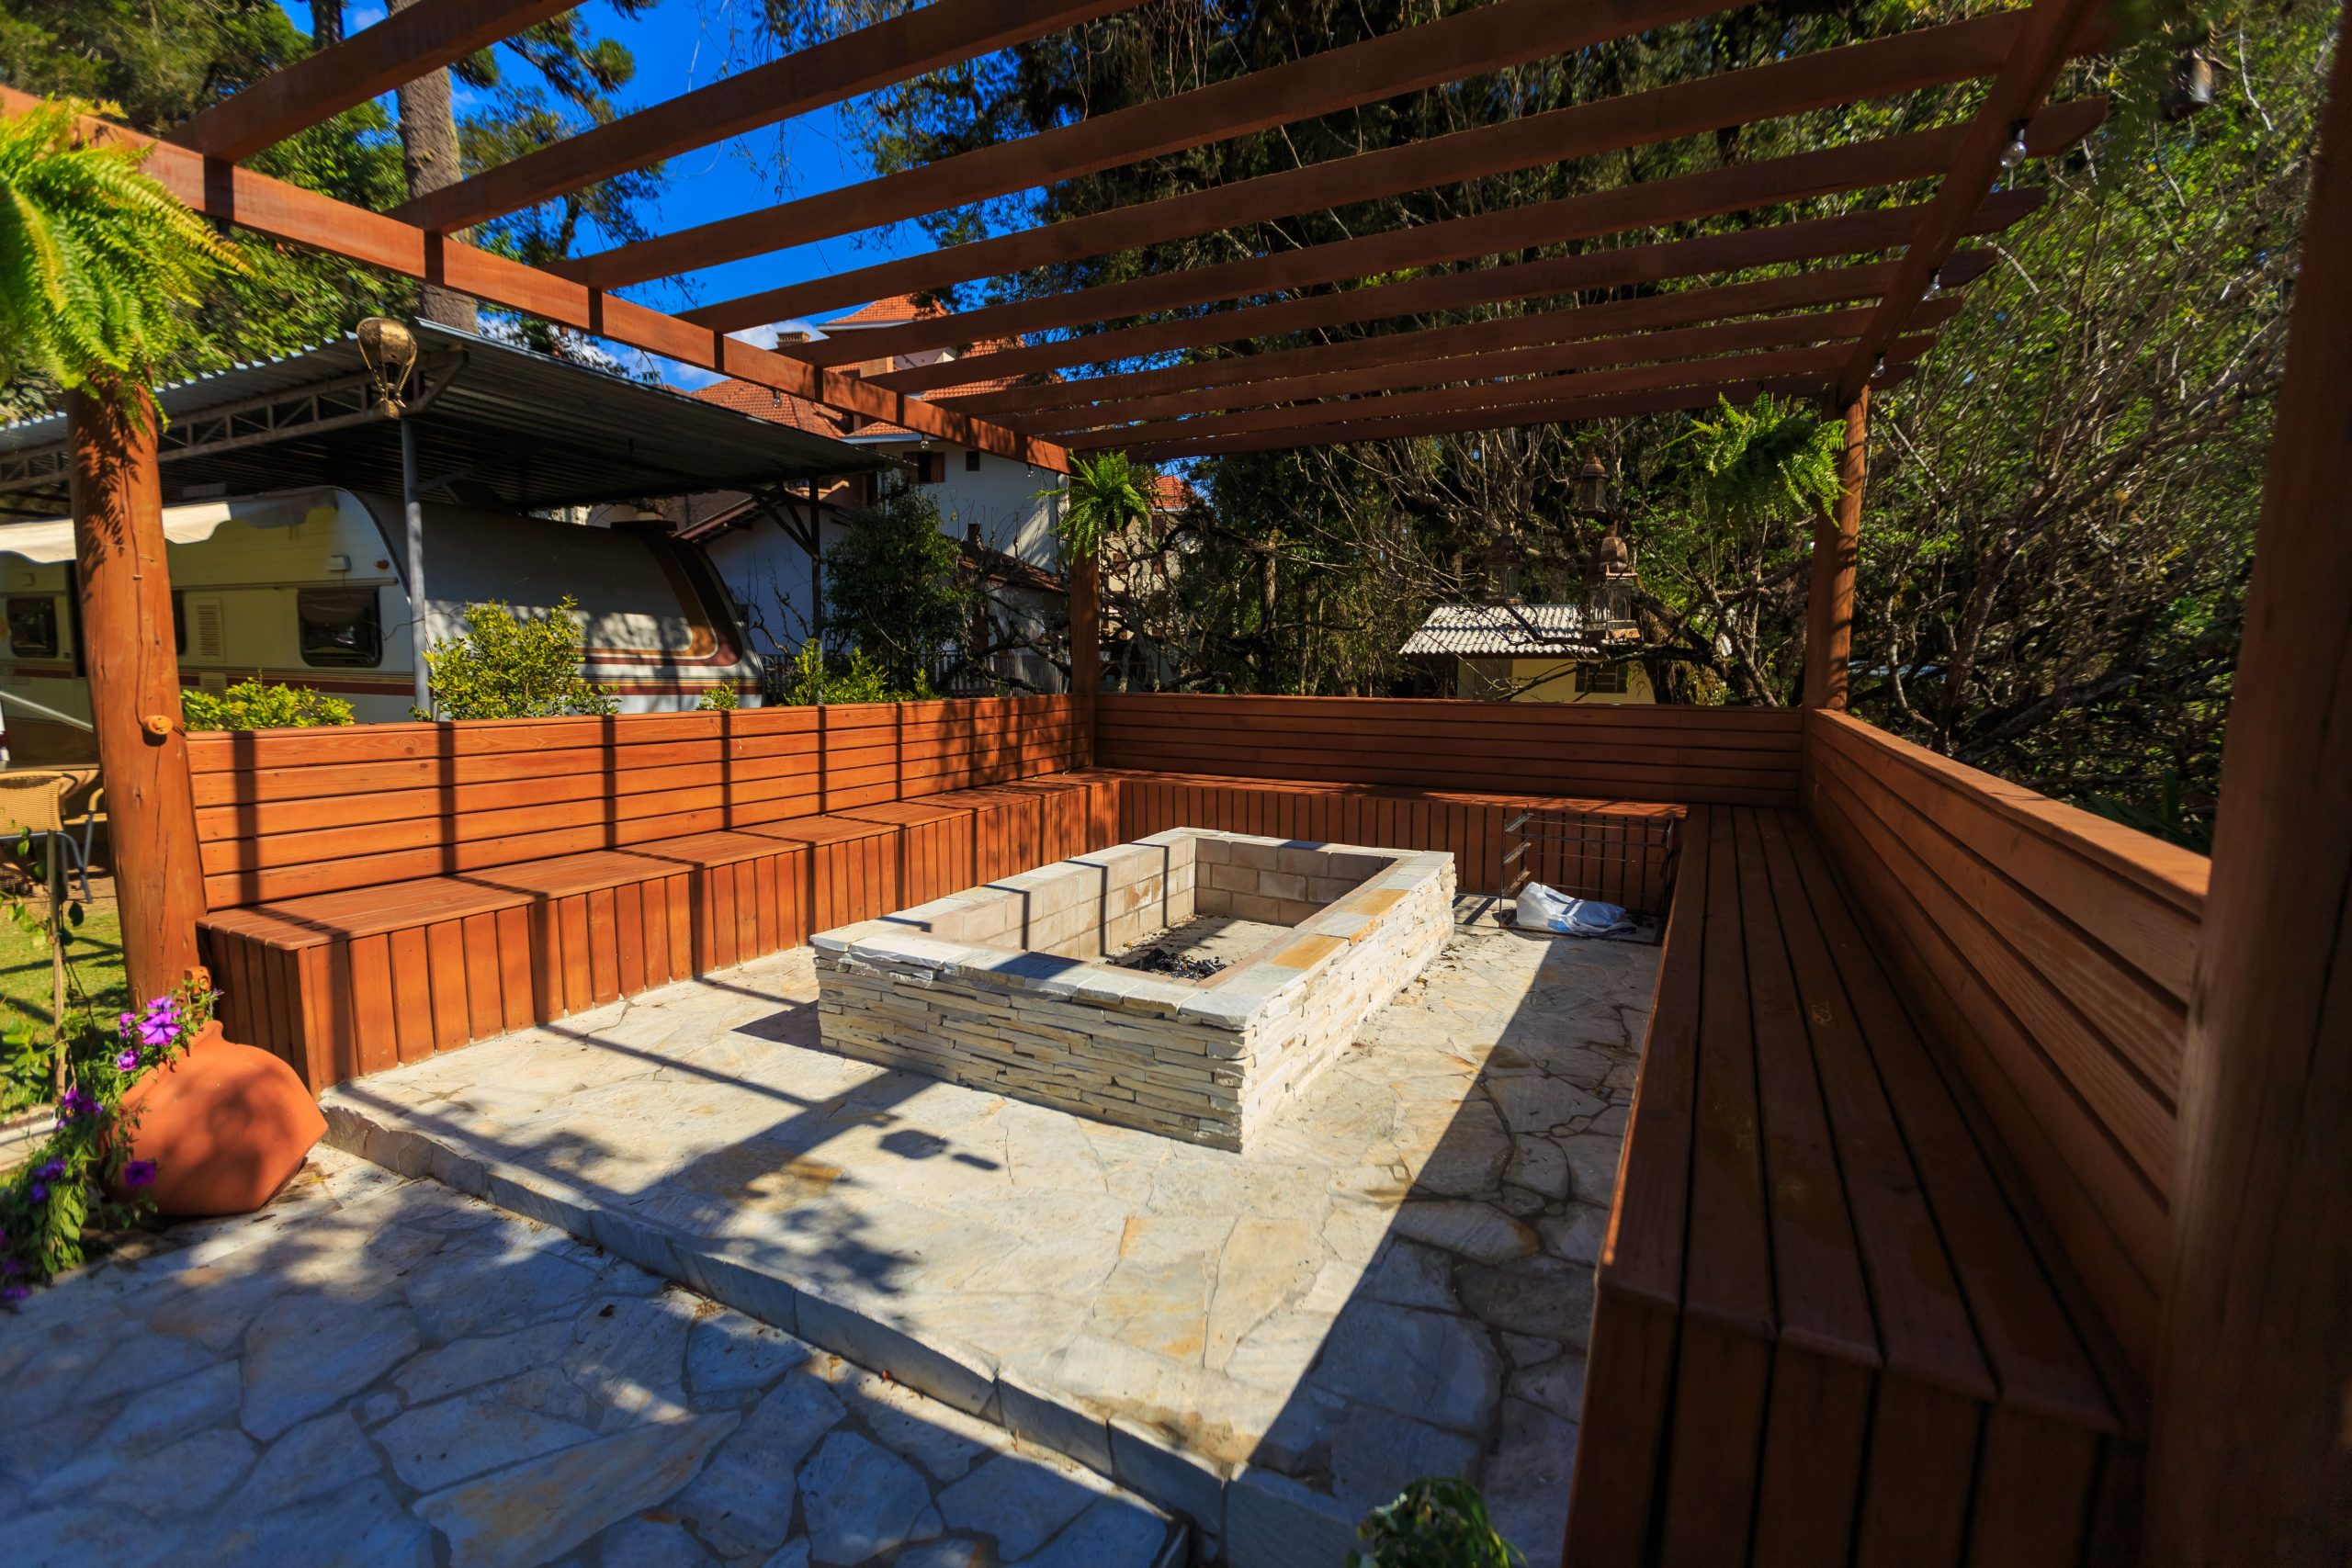
Before you build a fire pit under any kind of overhead structure, even an open slatted one, safety is paramount. Here’s your checklist:
- Check Local Codes: Many cities have regulations about the minimum distance between a fire feature and any structure, including pergolas. Verify this first.
- Measure Vertical Clearance: You need adequate height for smoke and heat to dissipate. A minimum of 10-12 feet from the top of the fire pit to the bottom of the pergola beams is a safe starting point, but more is better.
- Consider the Fuel: A natural gas or propane fire pit (which have controlled flames) is a much safer choice under a structure than a wood-burning one (which can throw sparks and embers).
- Ventilation is Key: An open, slatted roof is the only option here. Never install a fire pit under a solid-roofed patio cover.
15. Create Evening Ambiance with a Black Pergola and String Lights
The secret to making string lights look chic, not collegiate, is how you hang them. Don’t just drape them loosely. For a clean, professional look, use a grid pattern and keep the lines taut. Install small cup hooks or screw eyes on the inside faces of the pergola beams. Run the string lights from one side to the other, hooking them as you go to create straight, parallel lines. For an even more polished installation, use a thin steel cable as a guide wire and attach the string lights to it with zip ties. This prevents sagging and makes the lights themselves look like a deliberate architectural detail.
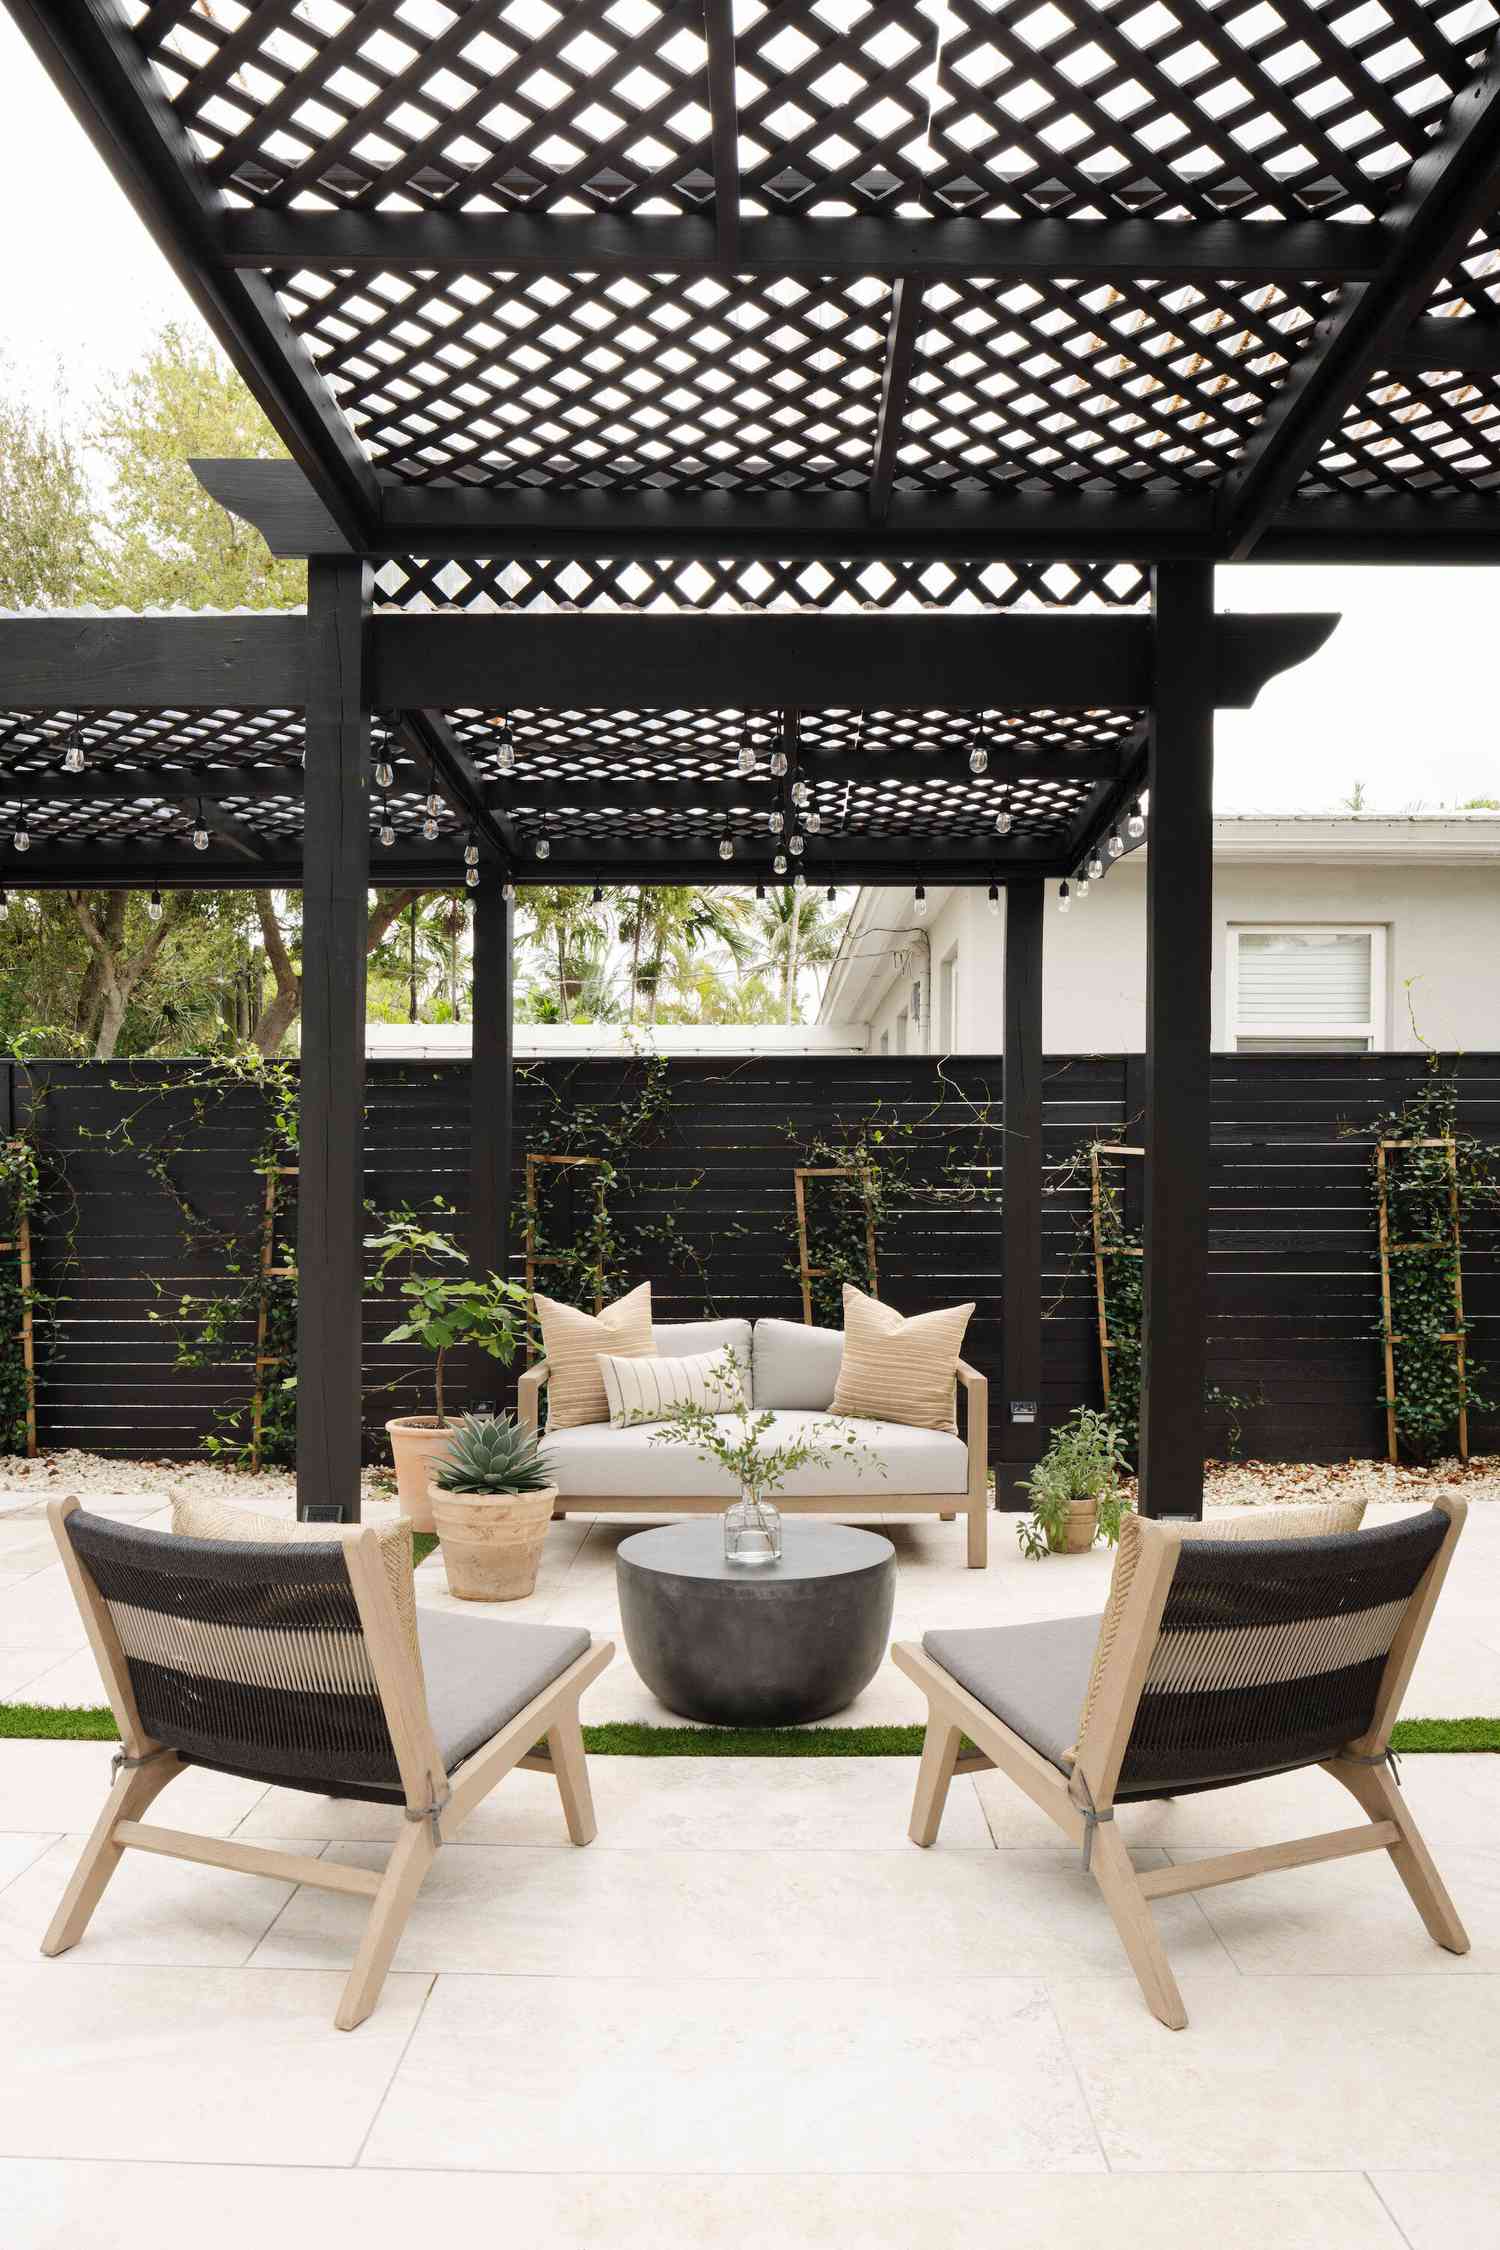
A black pergola is incredibly stylish and modern, but it can be a heat magnet. On a hot, sunny day, the dark metal or painted wood will absorb a lot of solar energy and can become quite hot to the touch. More importantly, it can radiate that heat downward, making the area underneath feel warmer than you’d expect. While it provides shade from direct UV rays, it might not be the coolest possible option in a scorching hot climate. A lighter color, like the white pergola in Idea #2, will reflect more heat.
16. Go for Ultimate Luxury with an Automated Pergola and Integrated Lighting
The integrated lighting is the element that pushes this space from merely ‘nice’ to truly luxurious. By building lighting directly into the pergola structure and the surrounding landscape, the design creates a seamless, resort-quality ambiance. There are no clumsy extension cords or cheap-looking solar stakes. The light is part of the architecture. It highlights the textures of the stone wall, illuminates pathways for safety, and casts a warm, inviting glow over the seating and dining areas, making the space usable and beautiful 24/7.
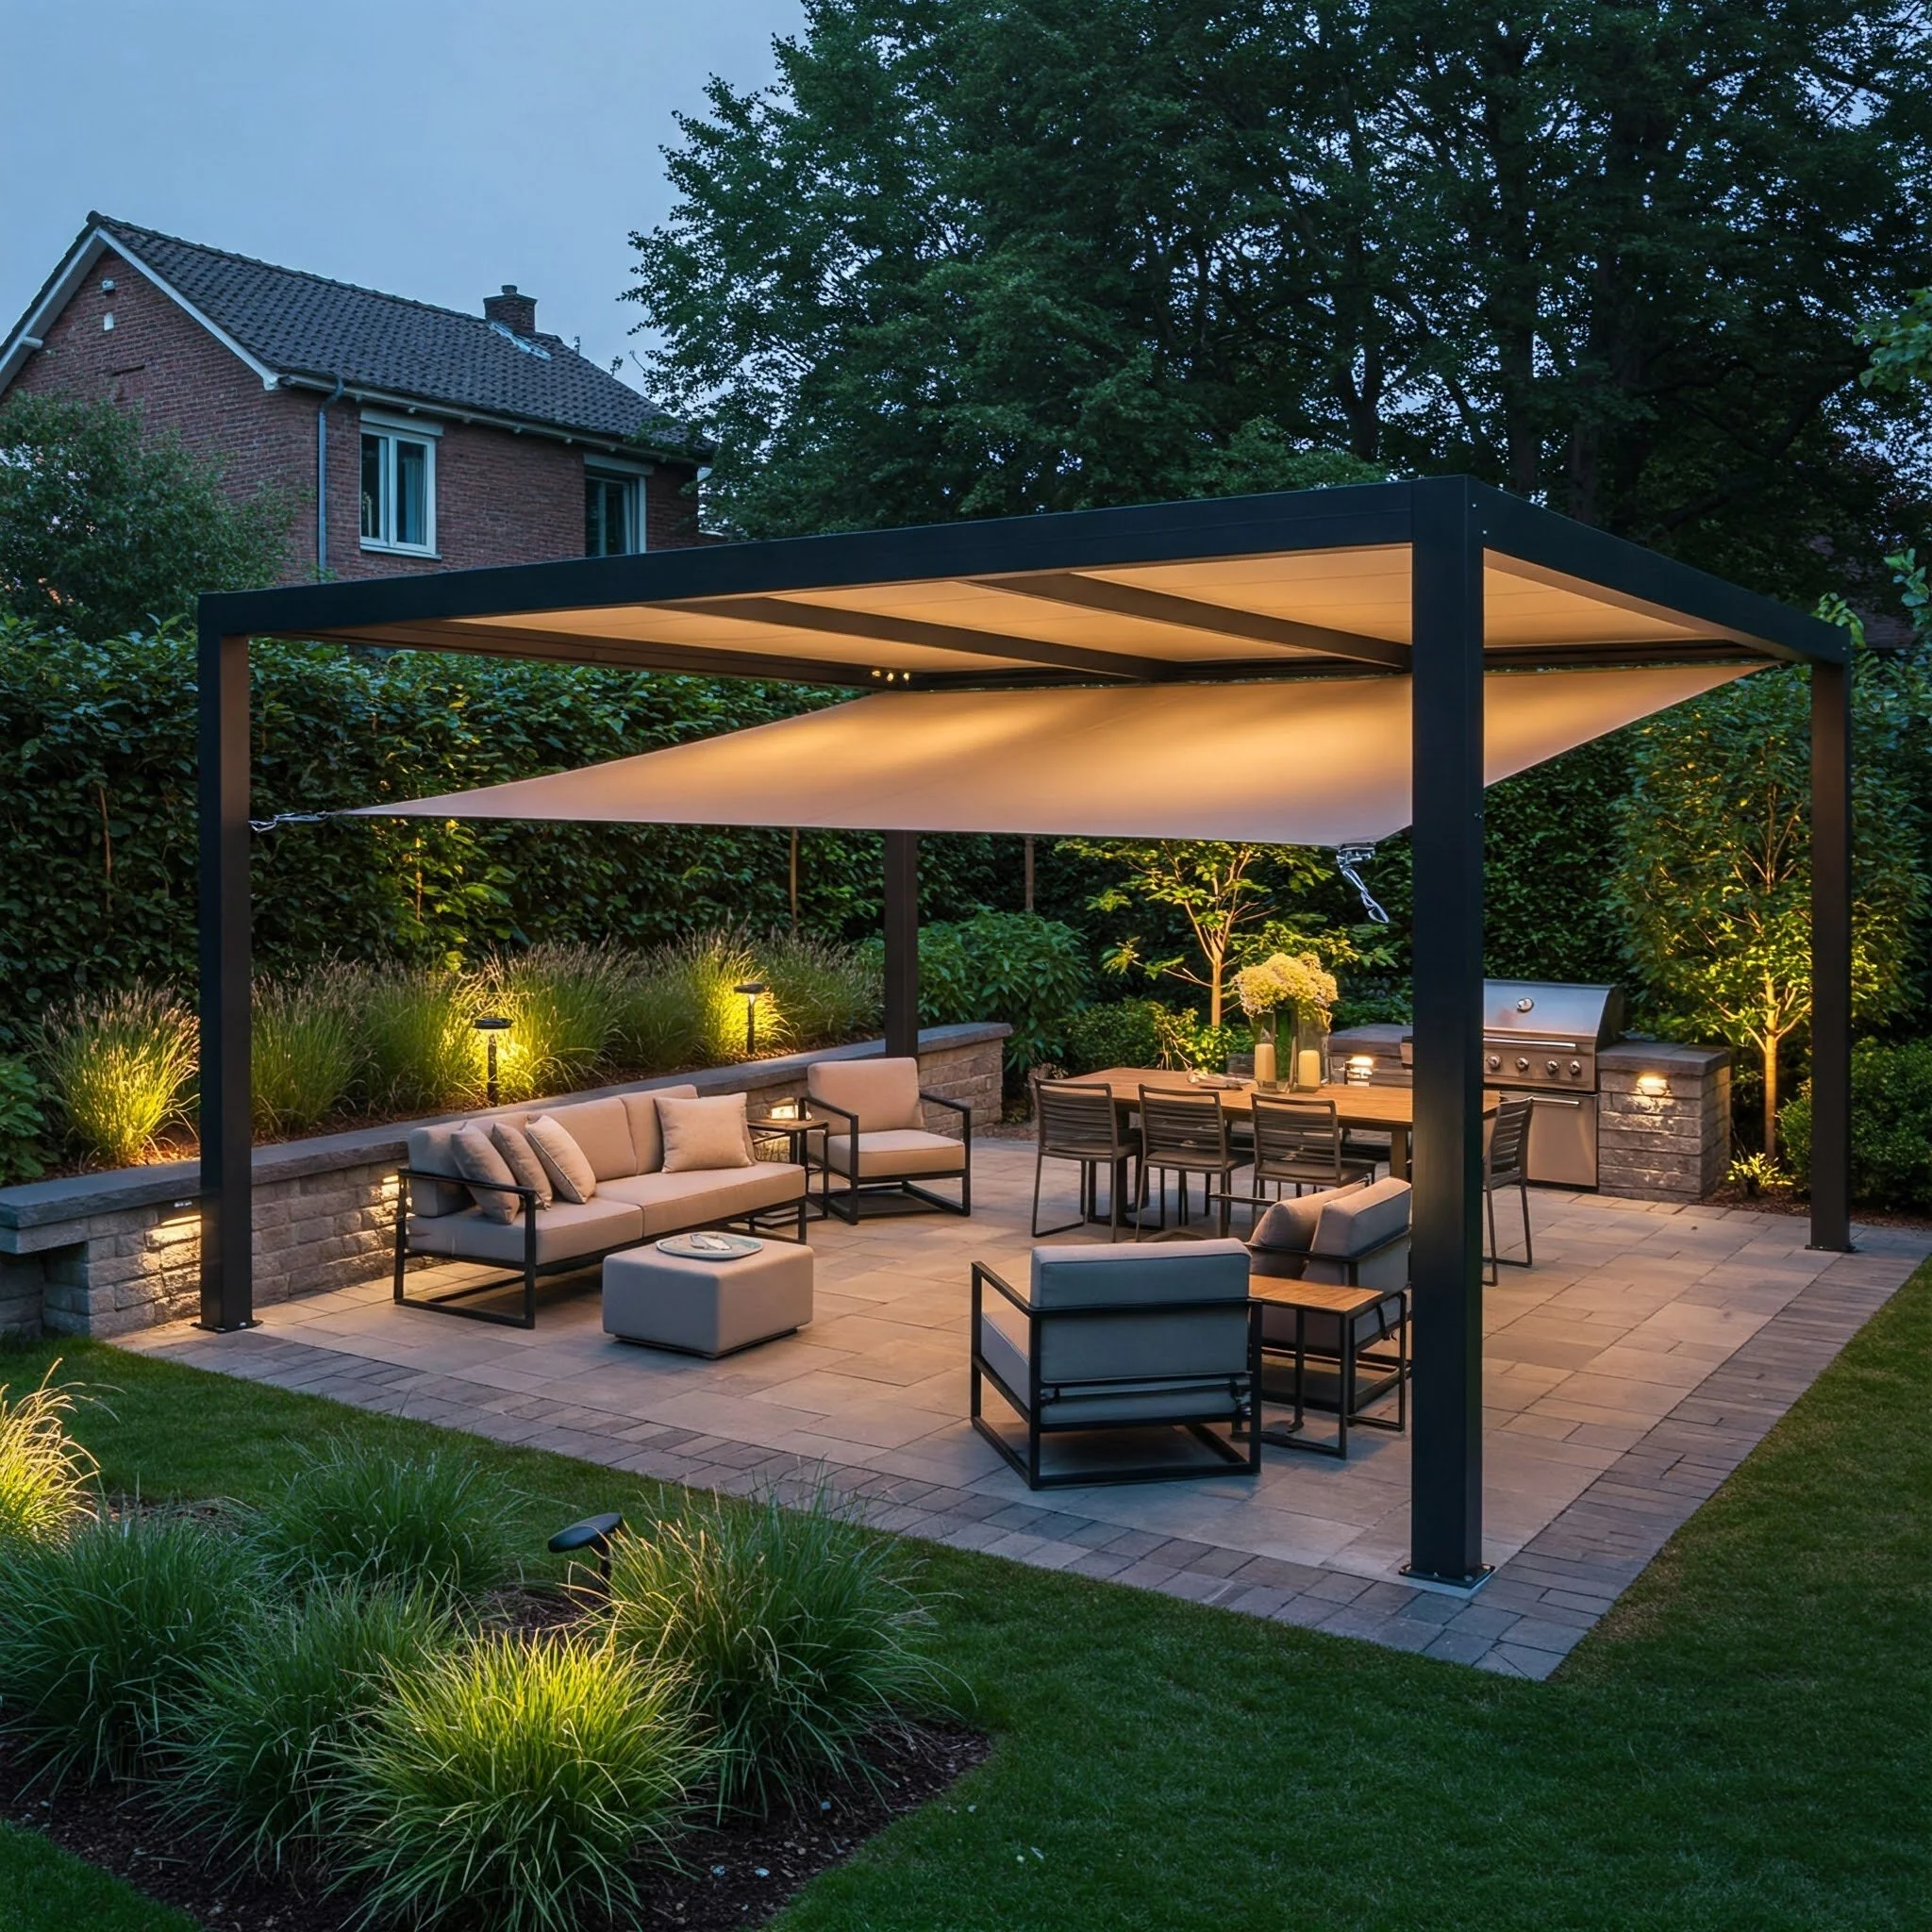
A high-spec outdoor living space like this is a serious construction project, and the budget reflects that.
- Pergola (Large, black metal, likely automated): $15,000 – $30,000+
- Lighting (Integrated LED, landscape lights, professional installation): $5,000 – $12,000
- Patio & Retaining Wall (Extensive pavers, stone wall): $10,000 – $25,000
- Furniture (High-end lounge and dining sets): $5,000 – $15,000
- TOTAL: $35,000 – $82,000+
- Budget Alternative: A DIY wood pergola ($3,000), professionally installed string lights ($1,500), and mid-range furniture ($4,000) on an existing patio can capture a similar zone-based feel for under $10,000.
17. Add a Pop of Classic Color with a Striped Automatic Awning
This feels so cheerful and put-together because of the smart color coordination. The crisp blue and white stripes of the awning create a classic, almost nautical focal point. This blue isn’t random; it connects to the cool tones in the gray stone patio and the green of the nearby foliage. The choice of a beige house wall and white trim acts as a perfect neutral background, allowing the blue and white to stand out without competing. The scalloped edge of the awning adds a touch of traditional, playful detail that finishes the look perfectly.
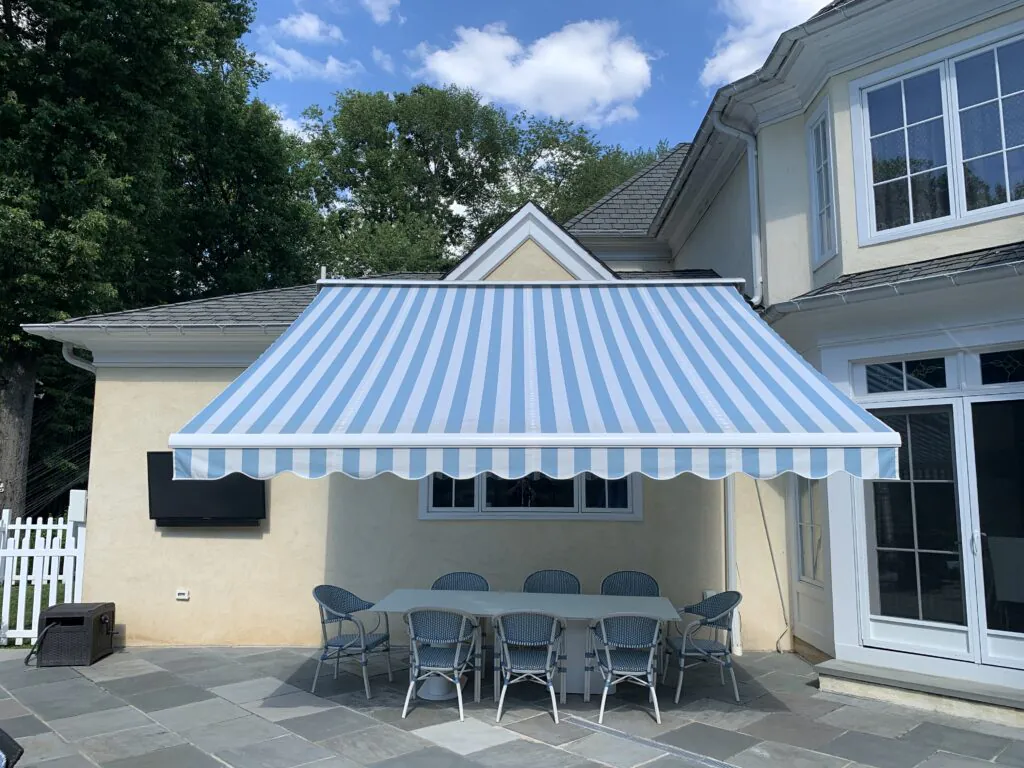
An automatic, retractable awning is a dream for convenience, but the motor and mechanical arms are the most common points of failure. To keep it running smoothly, operate it at least once a month, even in the off-season, to keep the parts from seizing up. Once a year, clean the housing and lightly lubricate any moving joints with a silicone-based spray (check your manual for approved products). Also, be aware of the wind sensor. While helpful, they can sometimes be too sensitive or not sensitive enough. Never rely on it completely; if it’s windy, retract the awning manually.
18. Fuse Minimalism and Nature with a Pergola and Board-Formed Fireplace
This look is at the forefront of a movement often called ‘Architectural Zen’. It’s about using raw, honest materials like concrete and metal and placing them within a soft, natural landscape. The board-formed concrete of the fireplace—where you can see the grain of the wood used to cast it—is a hugely popular detail in high-end design right now. It celebrates the construction process itself. This blend of stark, minimalist structure with the organic shapes of rocks and bamboo is a direct response to a desire for spaces that feel both calmingly modern and deeply connected to nature.
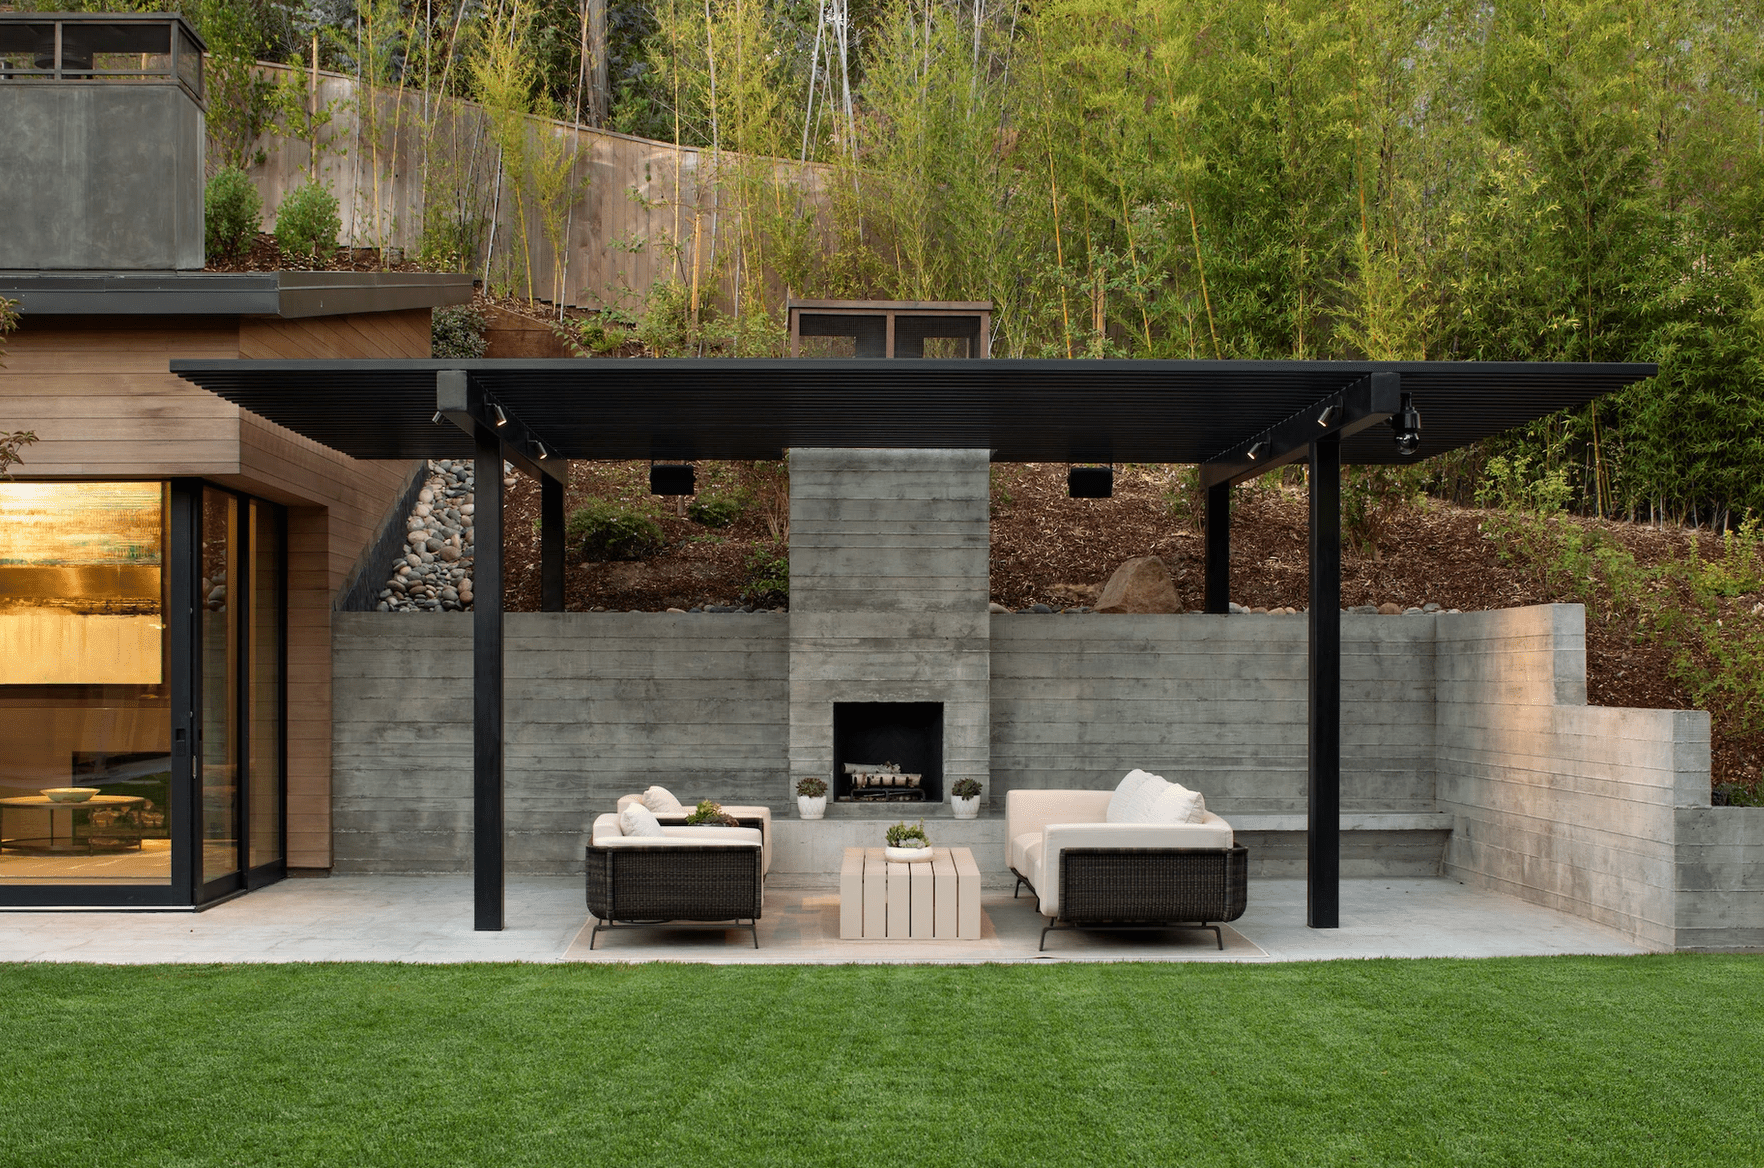
The board-formed concrete fireplace is, without a doubt, the heart of this design. It provides a powerful focal point and architectural anchor for the entire patio. It’s more than just a fireplace; it’s a massive sculptural element that balances the strong horizontal lines of the black pergola. Remove it, and you’re left with a nice but somewhat generic patio. The fireplace gives the space weight, purpose, and an unforgettably modern character. The a similar vibe is seen in Idea #19 but with a more rustic stone finish.
19. Design a Multi-Zone Resort Patio with a Louvered Pergola
This luxurious space breaks down into 40% hardscape, 40% amenities, and 20% lush planting. The hardscape—the dark pergola frame and extensive paving—creates the foundation. The amenities are the ‘destinations’: the outdoor kitchen, the cozy fireplace seating, the poolside lounging. These are what give the space its purpose. The final 20% is the masterfully placed tropical foliage and fire features that add drama, texture, and a true resort-like atmosphere. The balance is key; it’s just enough structure and just enough softness.
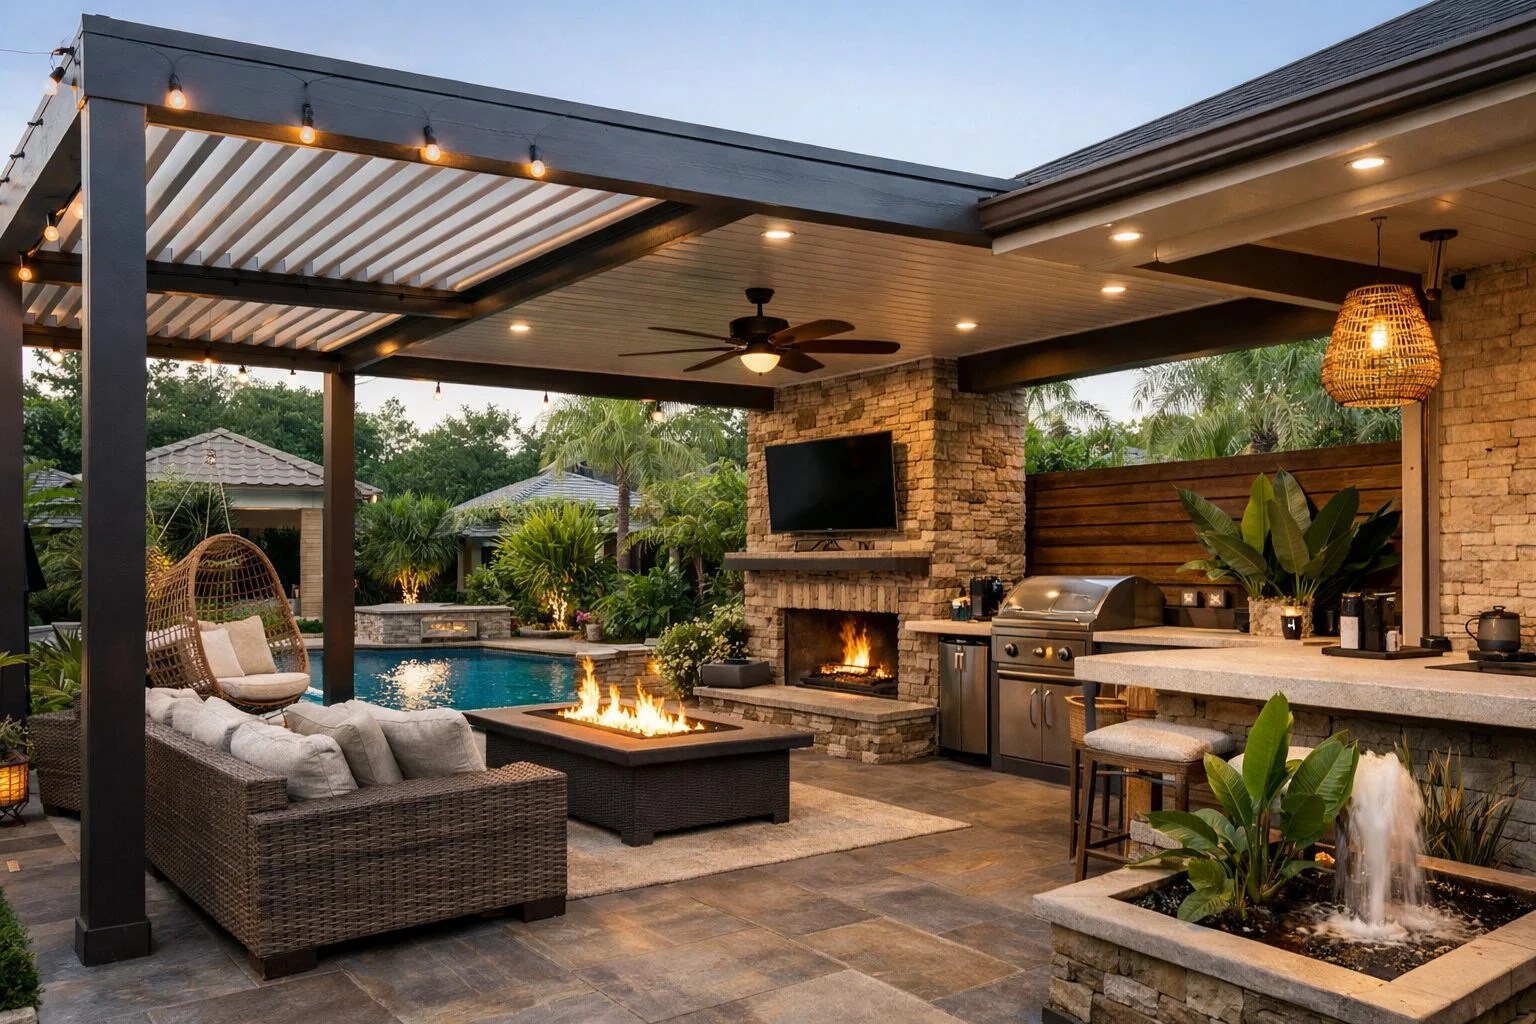
This is not a small-scale idea. To accommodate distinct zones for cooking, dining, lounging by a fire, and swimming, you need a significant amount of space. A minimum footprint for a multi-zone layout like this would be around 800-1,200 square feet, ideally on a relatively level plane. A standard 20×20 foot patio could perhaps fit two of these zones, but not all of them with the same sense of luxurious separation. This is a design for a generous suburban backyard or a custom-built home where the outdoor space is a primary feature.
20. Consider Elegant, Freestanding Pergola Structures
When choosing a freestanding pergola, the proportion of the posts to the roof structure is critical. A common mistake is choosing a kit with posts that are too thin (e.g., 4×4 inches), which can make the entire structure look flimsy and cheap. For a substantial, elegant look, opt for posts that are at least 6×6 inches, or even 8×8 inches for larger pergolas. This creates a sense of permanence and architectural solidity, even if the structure is a simple kit. The visual weight of the posts should feel like it can confidently support the roof.
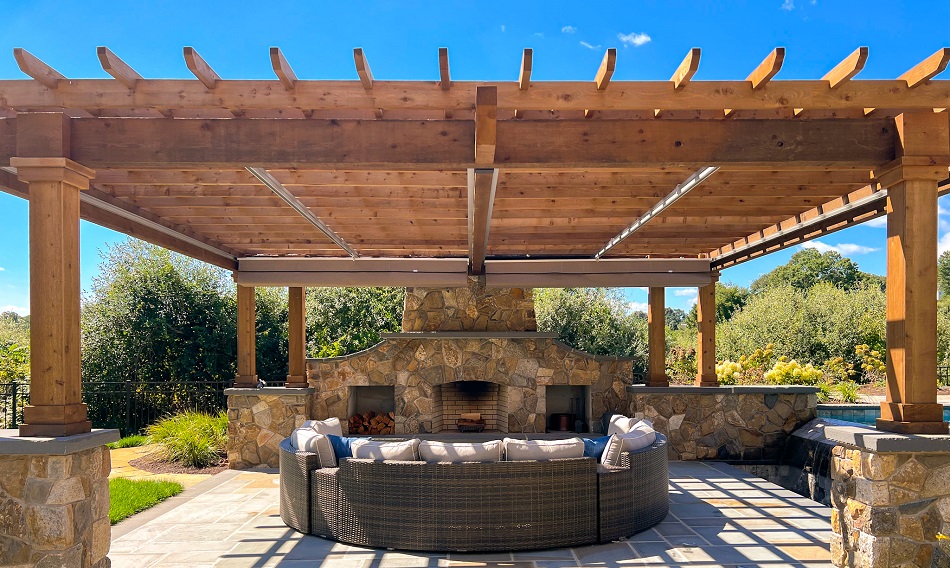
A freestanding structure offers great flexibility but requires a solid foundation. Before you fall in love with a design, figure out what’s underneath your desired location.
- On a Deck: Can you bolt directly into the deck’s structural joists? You may need to add blocking underneath for support.
- On a Patio: You’ll need to anchor it to the concrete slab. Are you comfortable drilling into your patio?
- On Grass or Gravel: You absolutely must pour concrete footings for each post. Simply using ground stakes is not safe for a structure of this size. This is the most labor-intensive but most stable option.
21. Stay Cool with a Louvered Pergola and Ceiling Fan
A louvered roof is fantastic for adjustable shade, but it’s not always 100% waterproof when closed. In a light shower, most systems will keep you dry. In a heavy, wind-driven downpour, however, you might experience some drips between the slats or from the edges of the gutter system. It’s a major step up from a slatted pergola, offering about 98% water resistance, but don’t expect it to be as watertight as a fully solid roof. Think of it as a three-season room, not a four-season sunroom.
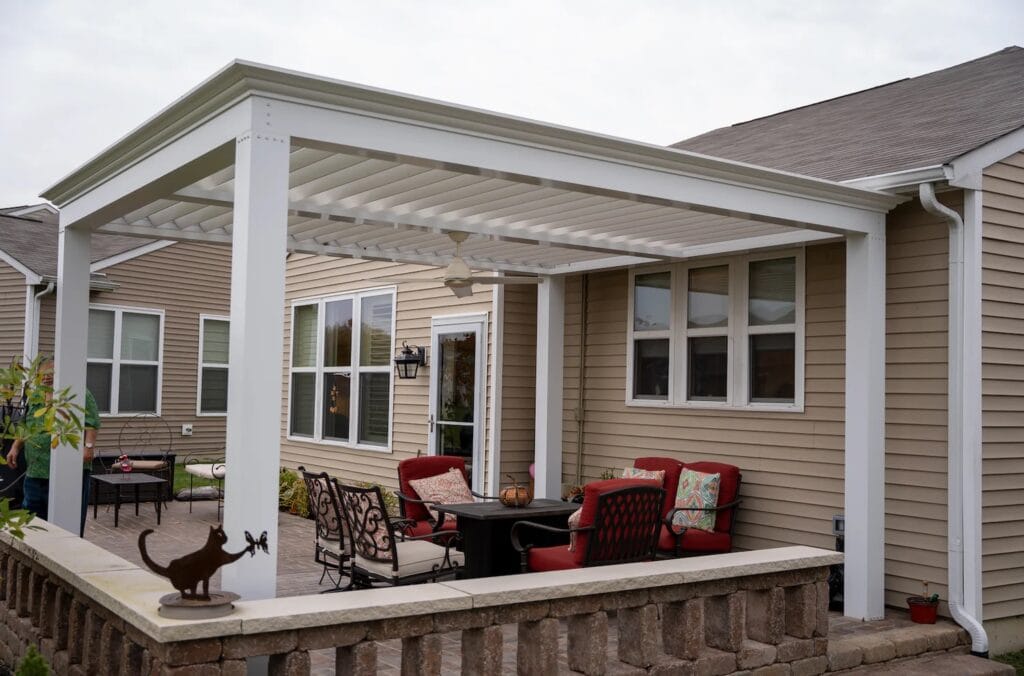
The combination of adjustable shade and air movement is what makes this setup so effective. The louvered pergola roof allows you to control the amount of direct sunlight, dialing it from fully open to fully closed. The ceiling fan tackles a different problem: stagnant, humid air. On a hot day with no breeze, even full shade can feel oppressive. The fan keeps the air moving, creating a cooling evaporative effect on your skin. It’s a two-pronged attack on heat that makes the space comfortable on a much wider range of days.
22. Create a Modern Oasis with a Louvered Roof and Fire Pit
That checkerboard pattern of concrete pavers and artificial grass is a high-style look that requires precision. The key is in the base preparation. The entire area must be excavated and leveled with a compacted gravel base. Then, you must build a precise grid framework, often out of treated lumber or plastic edging, to hold the pavers and grass sections separately. Each paver is then set perfectly level within its square. It’s a labor-intensive detail that delivers a huge graphic punch. This is not a simple weekend DIY; hire a landscape contractor for this one.
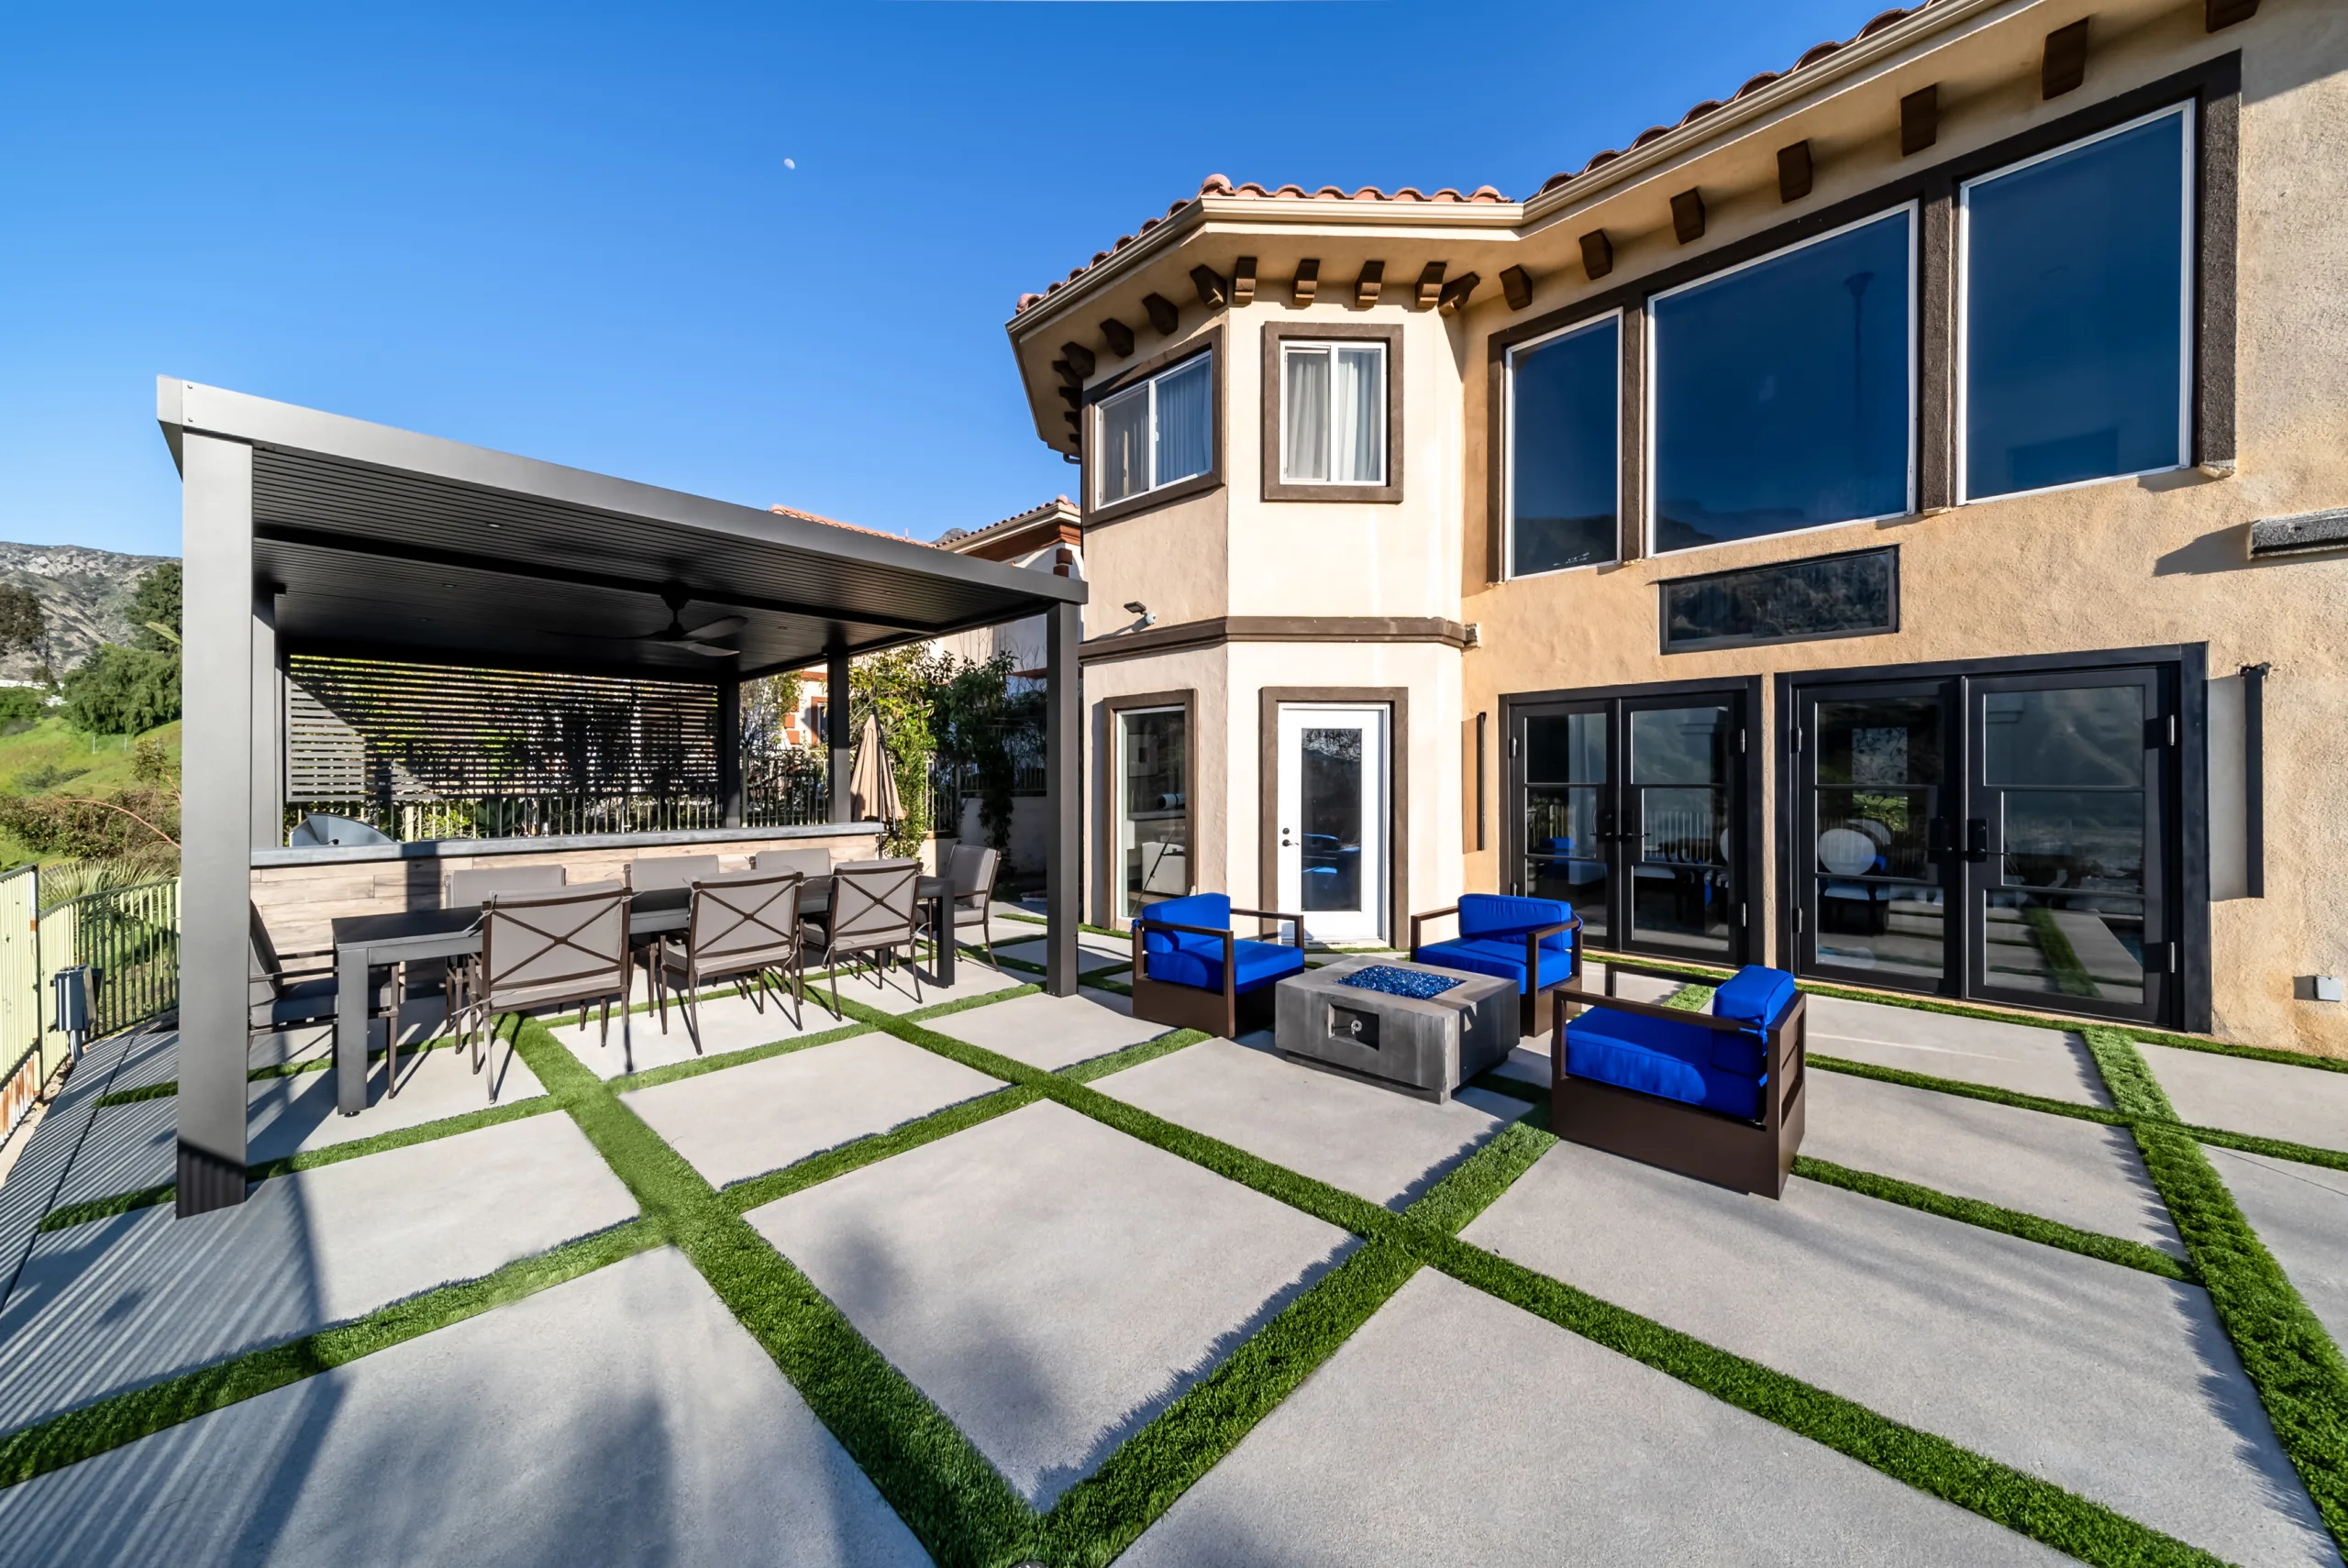
This design is a masterclass in using color to create a mood. The formula is roughly 70% cool neutrals + 30% warm accents. The dominant elements—the dark grey pergola, the concrete pavers, the beige stucco building—are all cool and calming. Then, you get that powerful 30% dose of warmth from the vibrant blue cushions and the rich brown of the armchairs. This pop of color brings the space to life, giving it personality and energy. Without the blue, the space would still be nice, but it wouldn’t be nearly as memorable.
23. Make a Bold Statement with a Black and White Striped Awning
The graphic power of the black and white stripes is everything here. It’s a classic, bold pattern that instantly injects personality and a touch of drama into an otherwise neutral setting. The wide stripes feel confident and modern. They turn a purely functional element—the awning—into the patio’s main design feature. If this were a solid beige or grey awning (like the one in Idea #12), the whole area would feel much more subdued. The stripes are a commitment, and they pay off by creating a truly dynamic and stylish outdoor space.
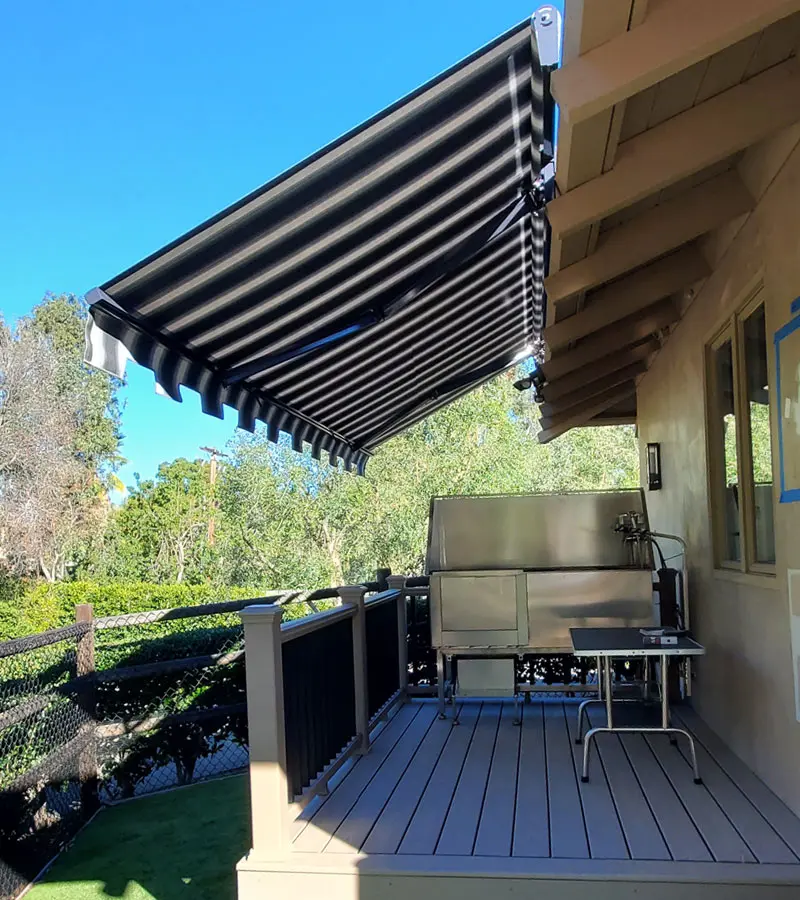
A large, custom retractable awning can be pricey, running from $3,000 to $7,000. But you can get this same high-contrast, graphic look on a budget. Look for non-retractable, fixed awnings online; a 10-foot wide striped version can be found for $300-$600. Alternatively, if you have a structure like a pergola, you can buy outdoor-rated striped fabric and create a simple canopy yourself. A few yards of fabric and a staple gun or grommet kit can give you the same bold pattern for under $200. It’s all about capturing the spirit of the stripe.
24. Use a Slatted Structure for Architectural Shadow Play
This is successful because of the strong dialogue between the building and the shade structure. The dark gray, minimalist facade of the house sets a modern, architectural tone. The black slatted patio cover isn’t just a functional add-on; it’s designed as a continuation of that same architectural language. The use of repeating geometric lines in both the wall panels and the overhead slats creates a cohesive, unified aesthetic. The light wood deck provides a warm, organic contrast that keeps the whole composition from feeling too severe. It is very similar in concept to Idea #11 but with a darker, moodier palette.
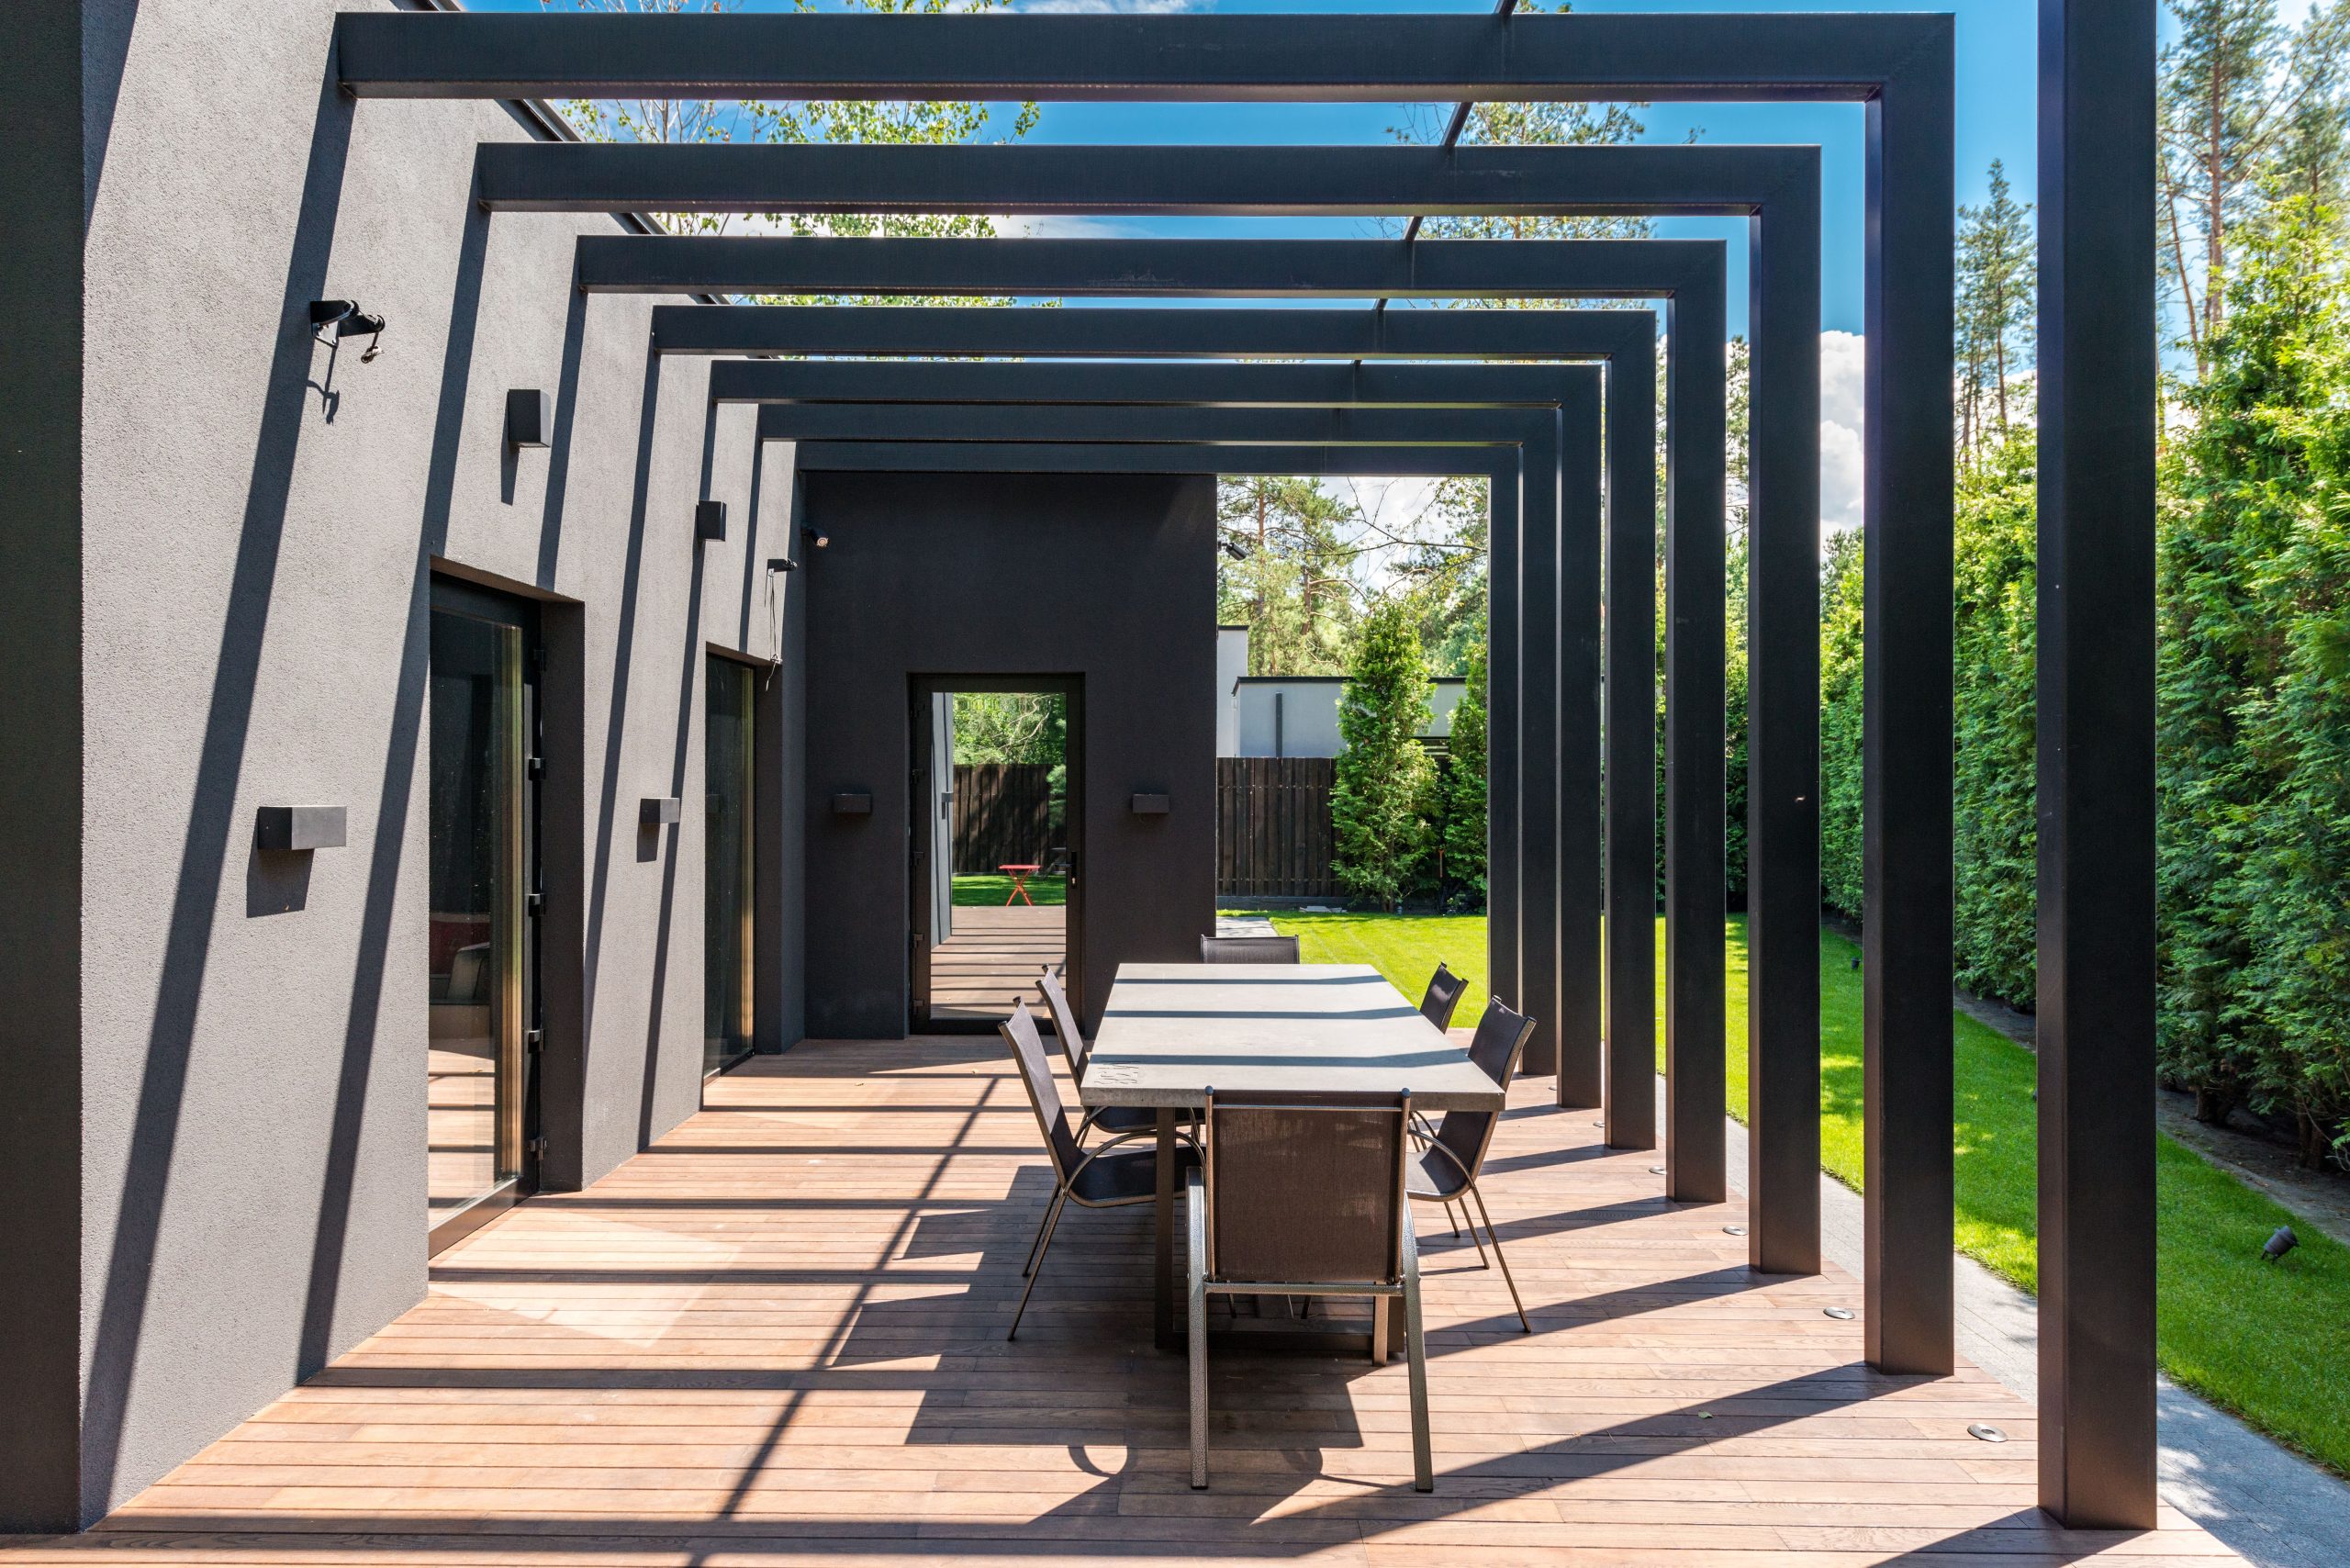
We’re seeing a major trend toward using shade structures not just to block sun, but to actively shape light. Designers are treating sunlight as a material to be sculpted. The sharp, geometric shadows cast by this slatted cover are just as much a part of the design as the metal beams themselves. This approach, where the shadow patterns are a key visual element, is all over design blogs and Pinterest. It reflects a desire for outdoor spaces that feel dynamic and change throughout the day as the sun moves across the sky.
25. Enjoy Dinner Under a Retractable Beige Canopy
That ‘slide-on-wire’ canopy is a fantastic, often DIY-friendly, shade solution. Here’s the basic process:
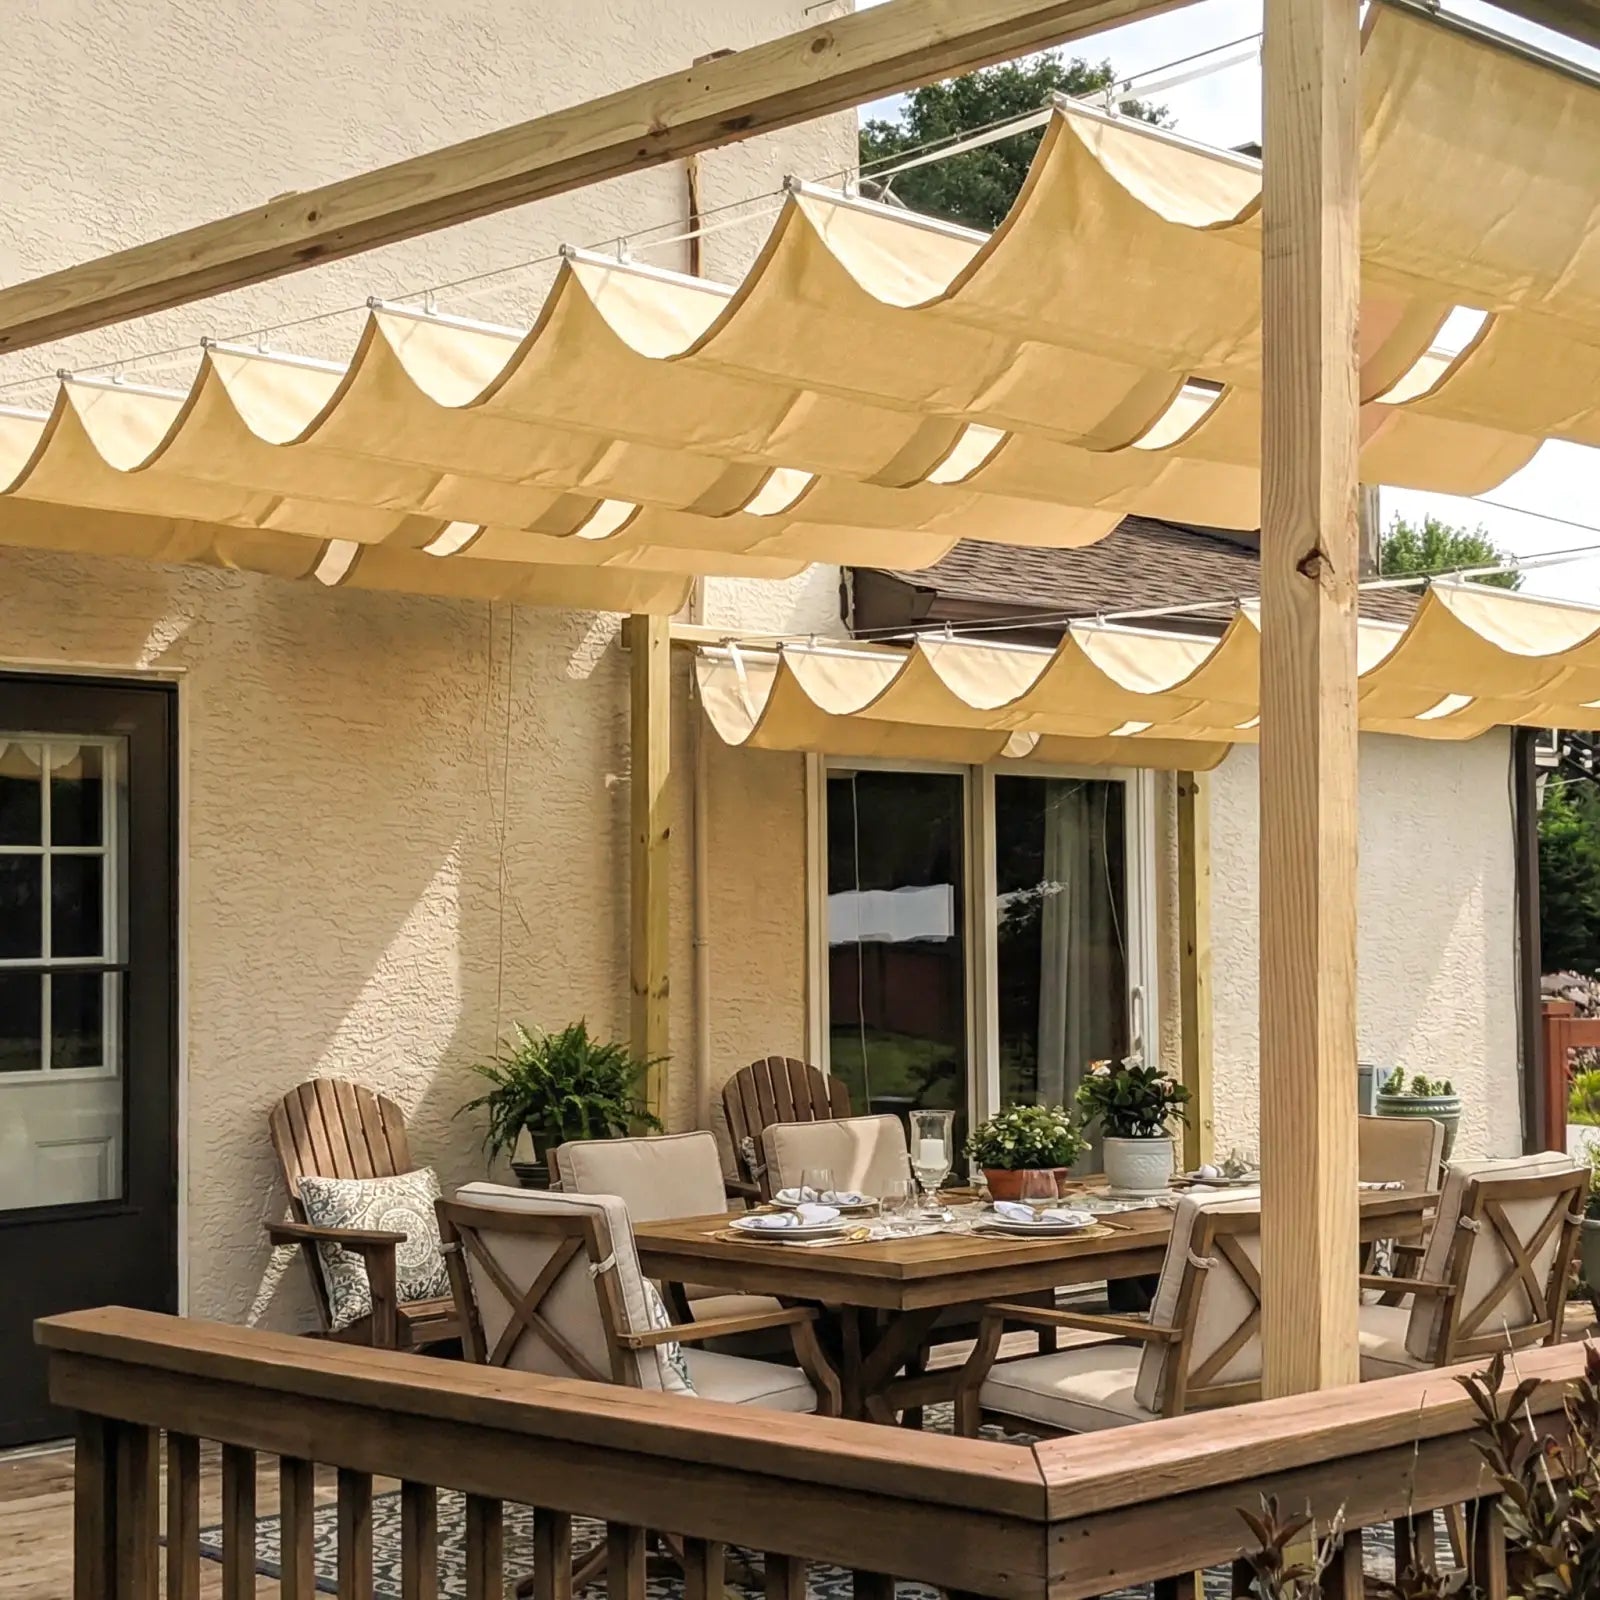
- Time & Cost: 3-4 hours, $400 – $900 for a kit.
- Install Guide Wires: Mount parallel steel cables across the top of your pergola or between two structures. They must be extremely taut; use turnbuckles to tighten them properly.
- Prepare the Fabric: The fabric panels will have sleeves or grommets. Lay them out in order.
- Thread the Panels: Slide the fabric panels onto the guide wires. Most systems have small clips or hooks that slide along the wire.
- Manage the Cords: Attach the pull cords that allow you to extend and retract the canopy. Ensure they are secured and not a tripping hazard.
A retractable fabric canopy is wonderful for flexibility, but it’s not a ‘set it and forget it’ solution for rain. While many are made of water-resistant material, they are not designed to handle heavy, pooling water. If you leave the canopy extended during a downpour, the weight of the collected water can stretch the fabric permanently or even snap the guide wires. You must retract it when you’re expecting serious rain. For true rain protection, a solid roof or a louvered system like in Idea #3 is a much better bet.
26. Zone a Large Patio with a Pergola and Umbrella
This space works because it clearly defines separate ‘rooms’ for different activities, making a large concrete slab feel like a multi-purpose destination. The dark wood pergola creates a dedicated ‘kitchen and bar’ zone, firmly anchored by the built-in grill area. The umbrella, meanwhile, carves out a separate, more casual ‘dining’ zone. This division of space is much more effective than just placing furniture randomly on a patio. It tells people how to use the space—’we cook here, we eat over there’—making it feel more organized, functional, and inviting.
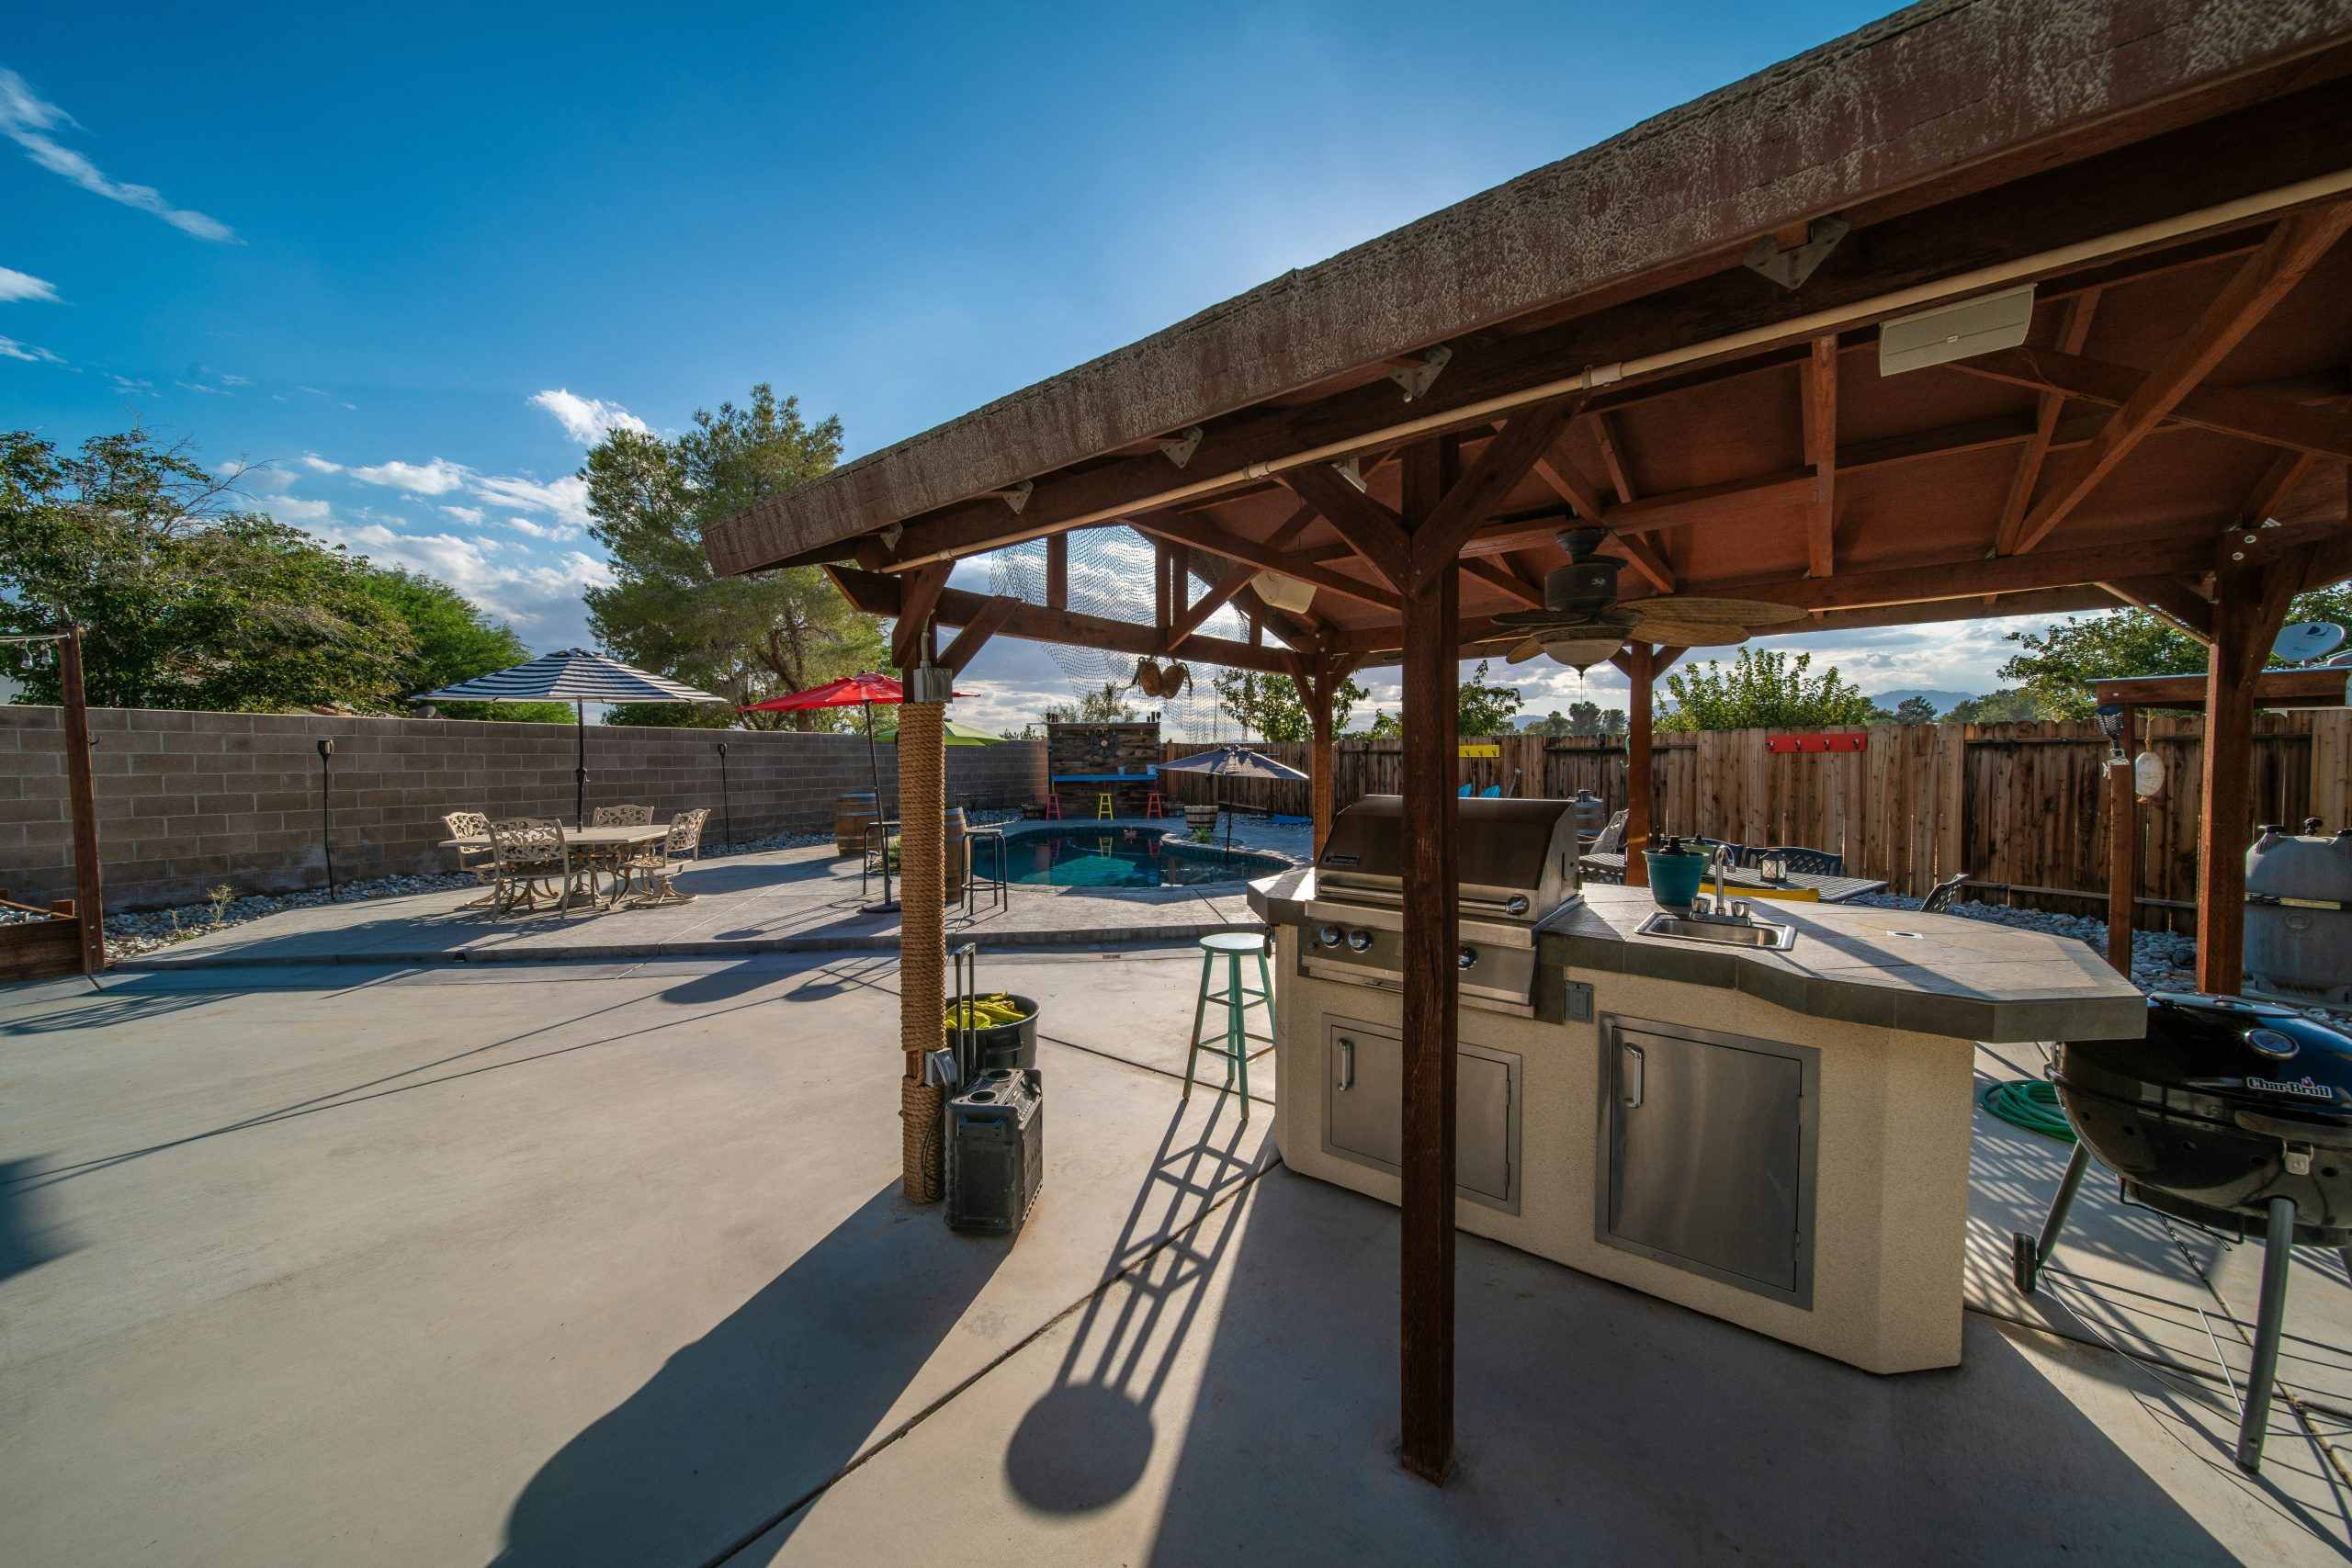
This multi-zone approach is perfect for large, open patios that are 30 feet or longer. The key is giving each zone enough room to breathe. The pergola-covered kitchen area needs about 12-15 feet of width to feel comfortable. The dining area needs at least a 10×10 foot space for a table and chairs. By using two different types of shade structures (one permanent, one flexible), the design adds visual interest and avoids the monotony of one single, massive structure covering the entire expanse.
27. Get a Sleek Look with a Black Slatted Pergola and Outdoor Bar
This sleek, modern look is achieved with a simple formula: 50% sharp, black lines + 40% cool, light surfaces + 10% metallic shine. The black metal pergola and bar stools provide the strong, graphic structure. This is balanced by the light, cool tones of the grey stone countertop and the large beige patio tiles, which prevent the space from feeling too dark. The final 10% comes from the stainless steel grill and cabinet doors, which add a touch of professional gleam and reflect the light, adding a bit of sparkle to the composition.
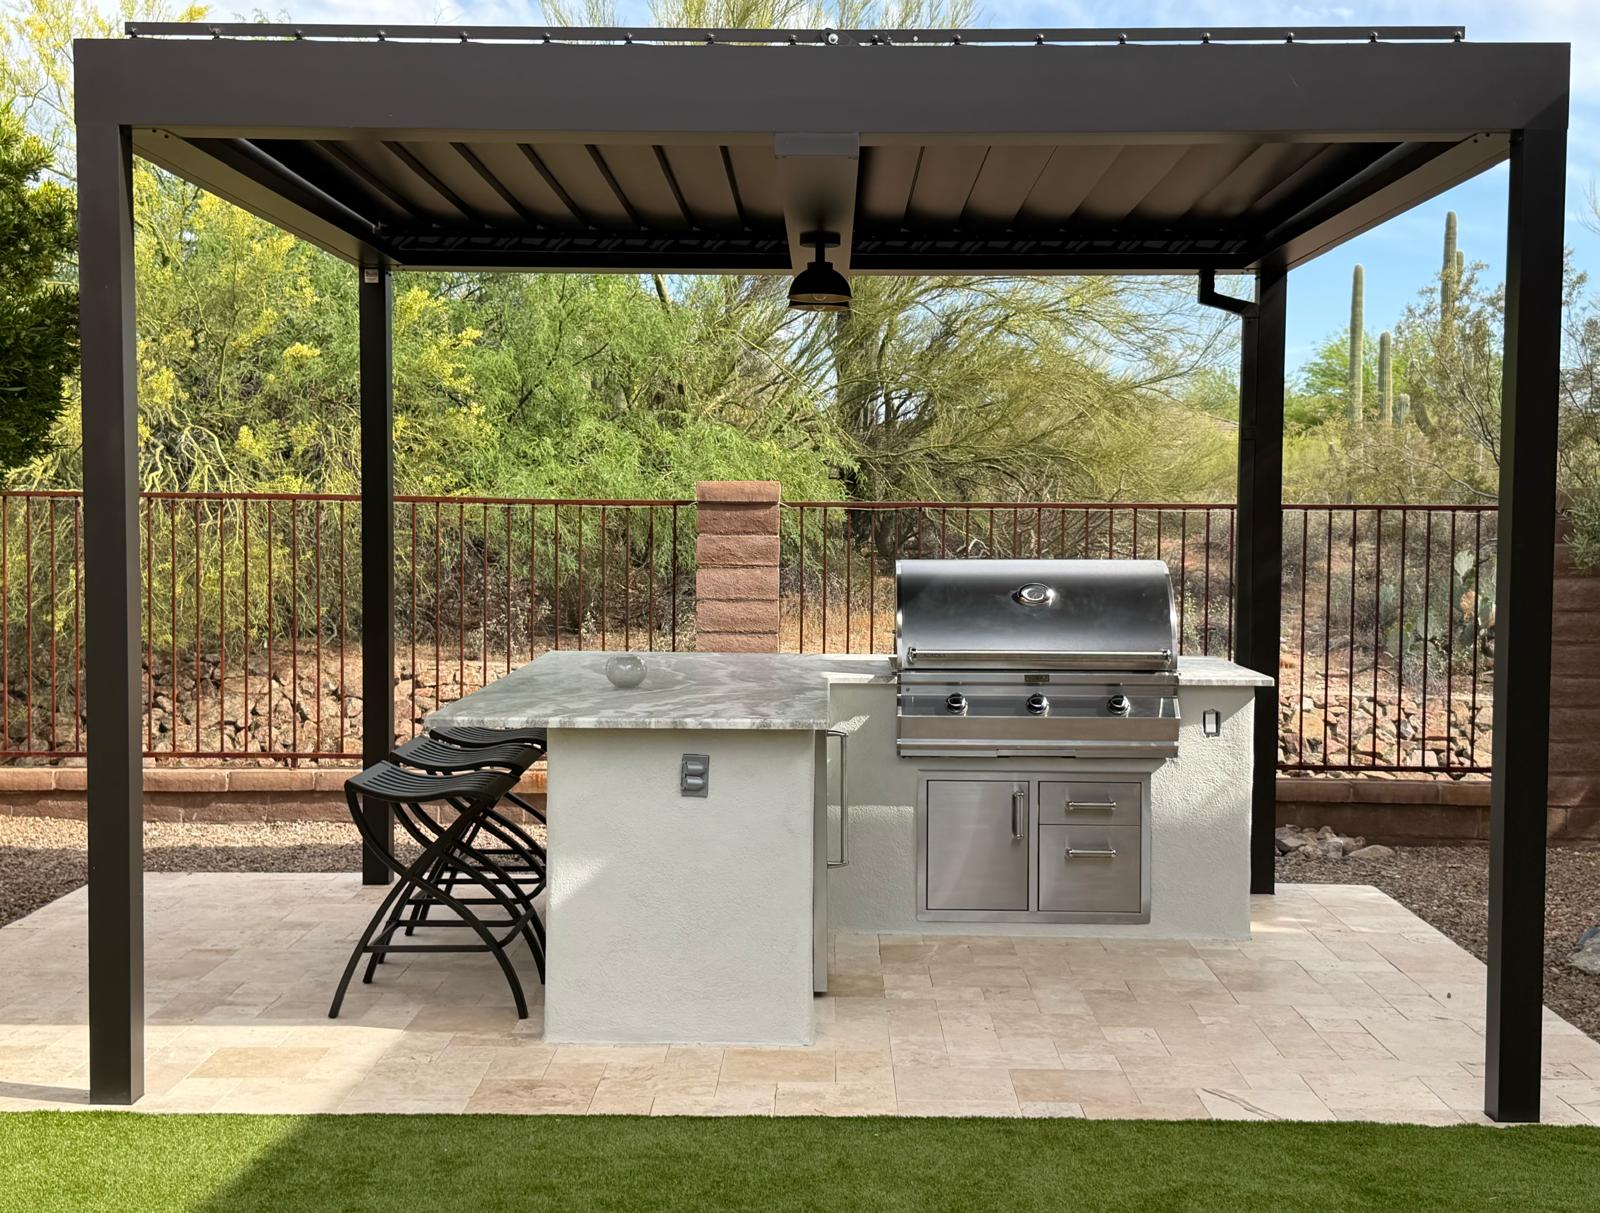
That beautiful stainless steel cabinetry looks amazing, but it requires diligent cleaning to keep it that way. It’s a magnet for fingerprints, smudges, and water spots. In an outdoor kitchen, it will also collect pollen, dust, and grease splatter. You’ll want to wipe it down with a microfiber cloth and a stainless-steel-specific cleaner at least once a week to keep it looking sharp. Also, be mindful of scratches; use non-abrasive cloths and avoid setting rough-bottomed pots or tools directly on the surface.
28. Combine Classic Wicker and a Striped Awning for Timeless Appeal
This design feels so classic and comfortable because it leans into familiar, proven combinations. The pairing of dark wicker furniture with light, neutral cushions is a timeless outdoor look. The blue and white striped awning evokes a sense of coastal or cottage style that is perpetually appealing. The design doesn’t try to reinvent the wheel; instead, it perfects it. The symmetry of the French doors, flanked by lanterns and comfortable seating, creates a sense of order and welcome. It’s an enduring look that won’t feel dated in a few years.
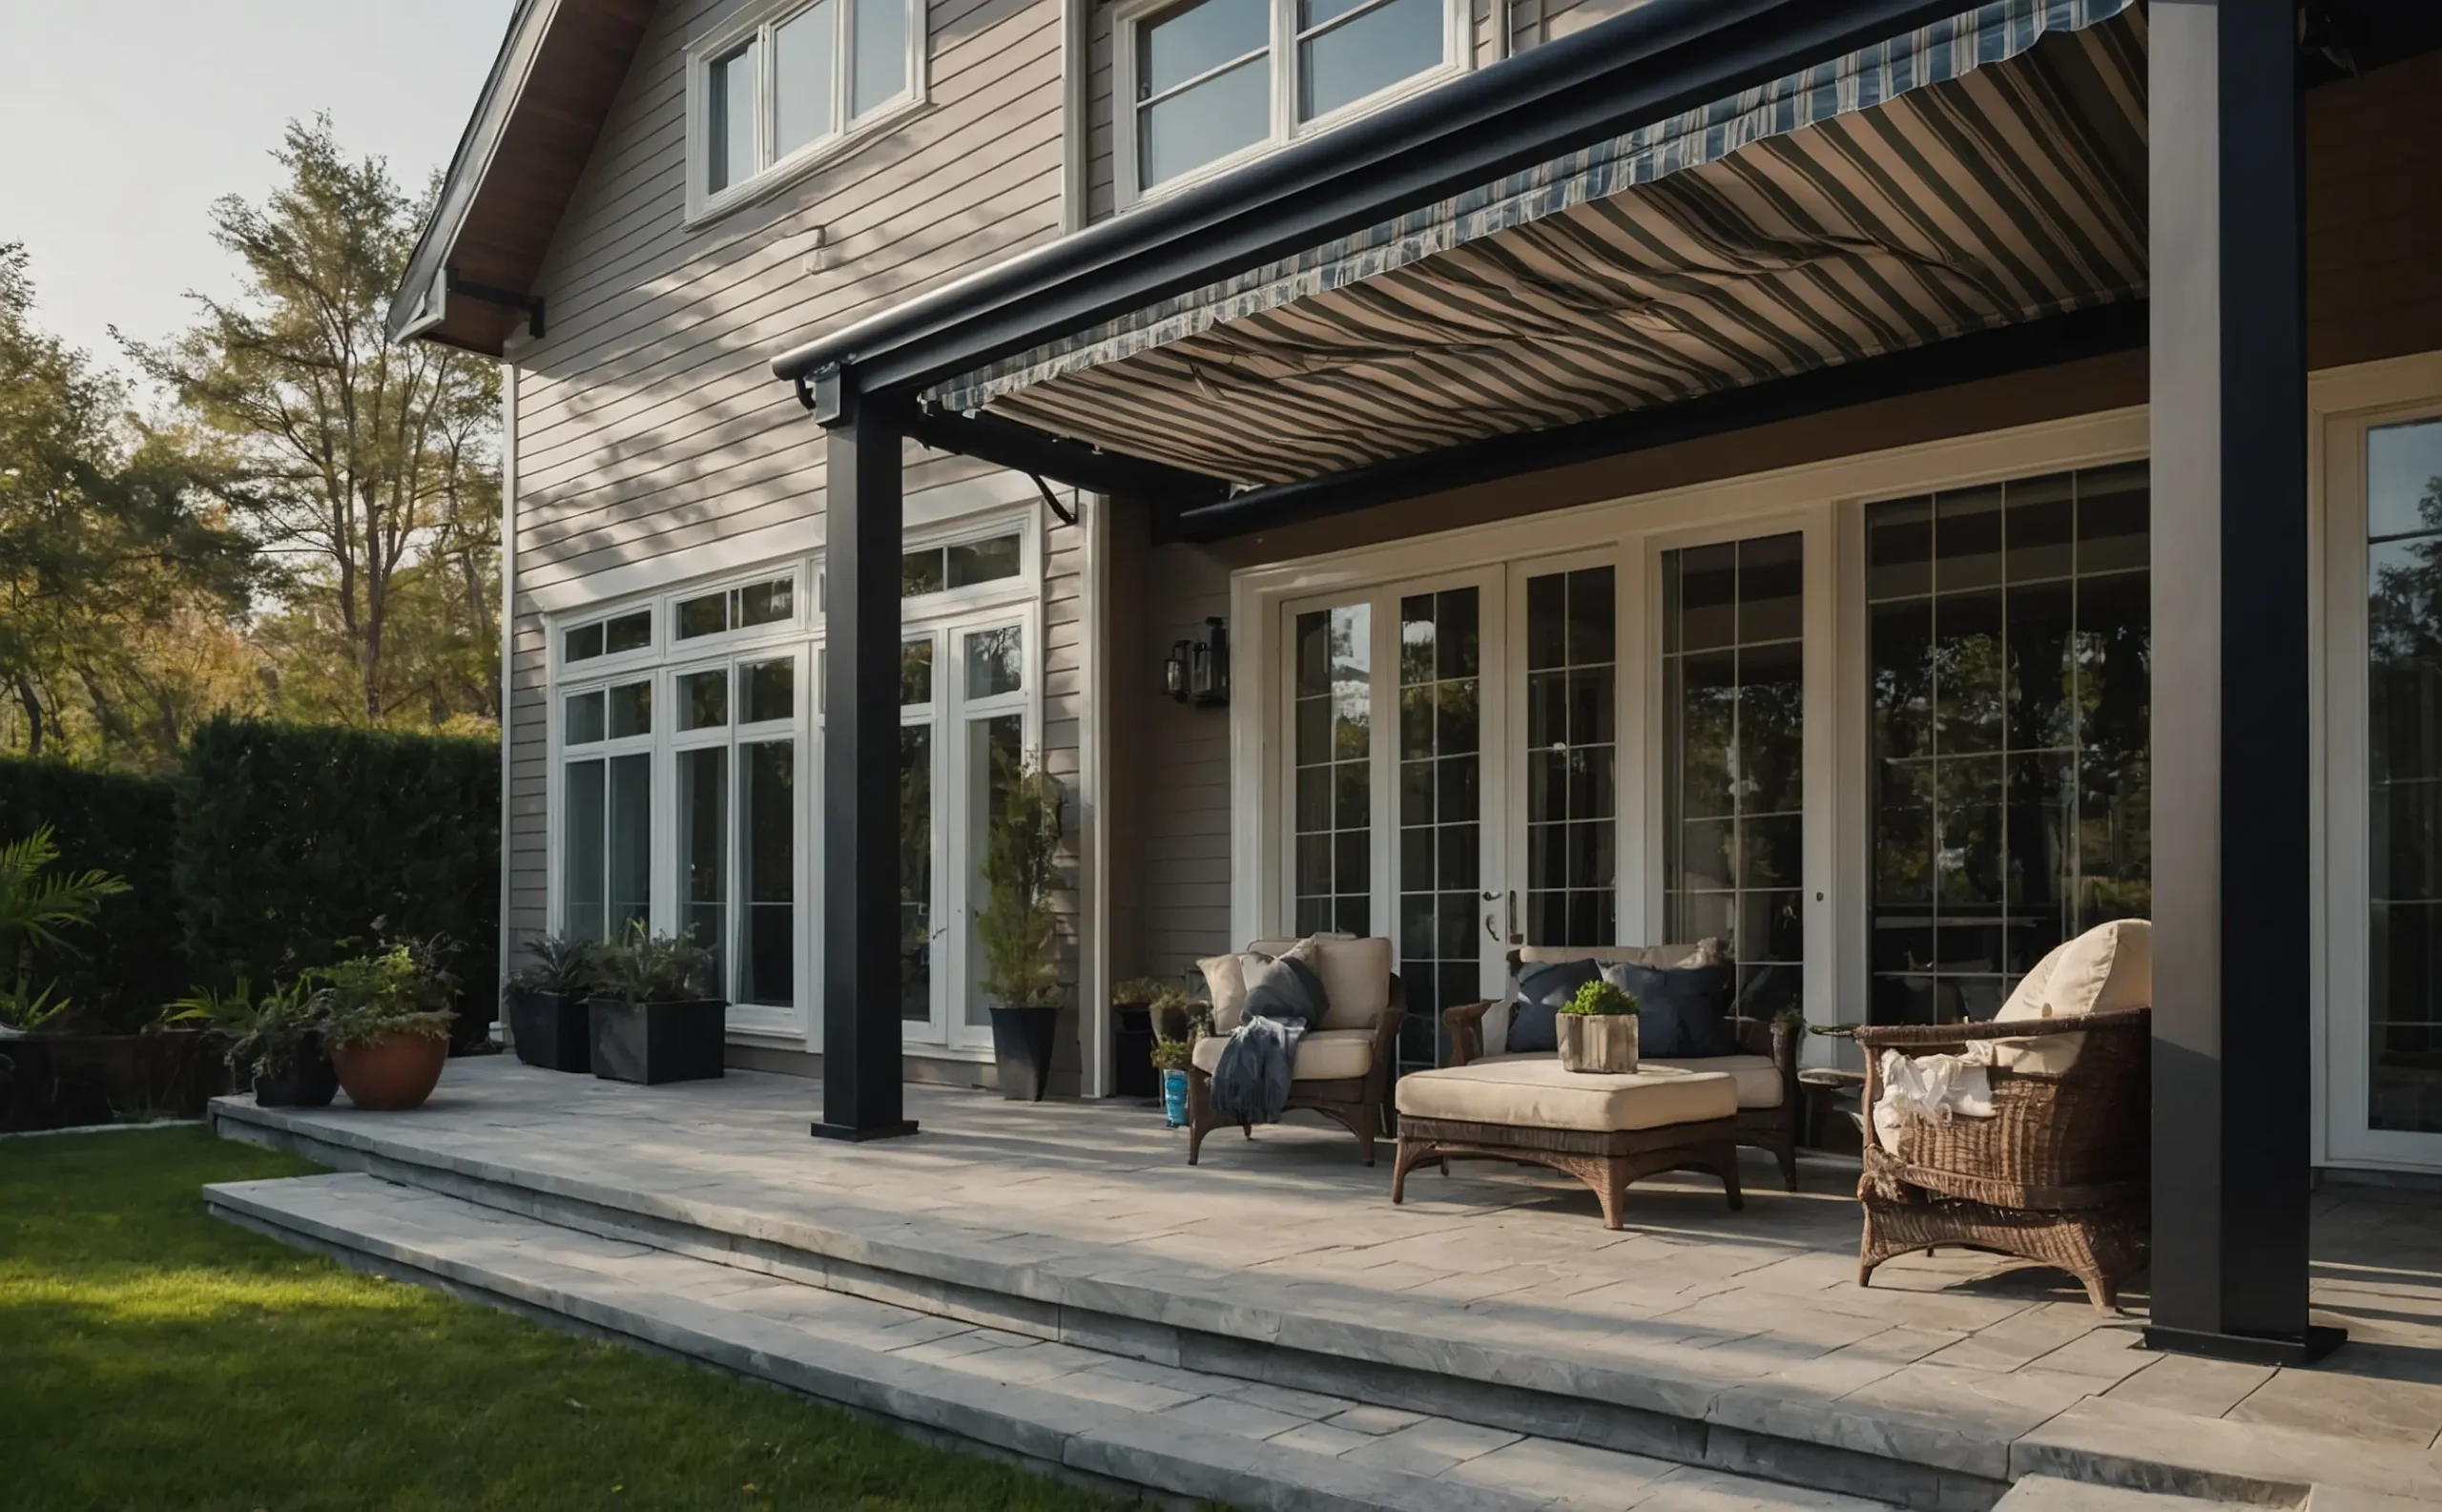
Want to make your patio furniture set feel more custom and less ‘straight from the box’? The secret is in the pillows. Ditch the matching pillows that often come with a set. Instead, bring in 2-3 accent pillows in a coordinating but different color and pattern. Here, the solid blue-gray pillows connect to the awning’s stripes without being identical. This simple swap adds a layer of depth and personality, making the whole arrangement feel more thoughtfully curated. It’s the easiest, most affordable designer trick in the book.
29. Mount a TV Under a White Pergola for an Outdoor Media Room
An outdoor TV is a fantastic idea, but be realistic about when you can actually use it. Glare is a huge issue. Even under a slatted pergola like this one, watching a movie in the middle of a bright, sunny day is going to be difficult. The picture will look washed out. This setup is perfect for evening or overcast-day viewing, or for watching the game after the sun is lower in the sky. If you want true daytime viewing, you’d need a much more solid roof and perhaps even side shades to block ambient light.
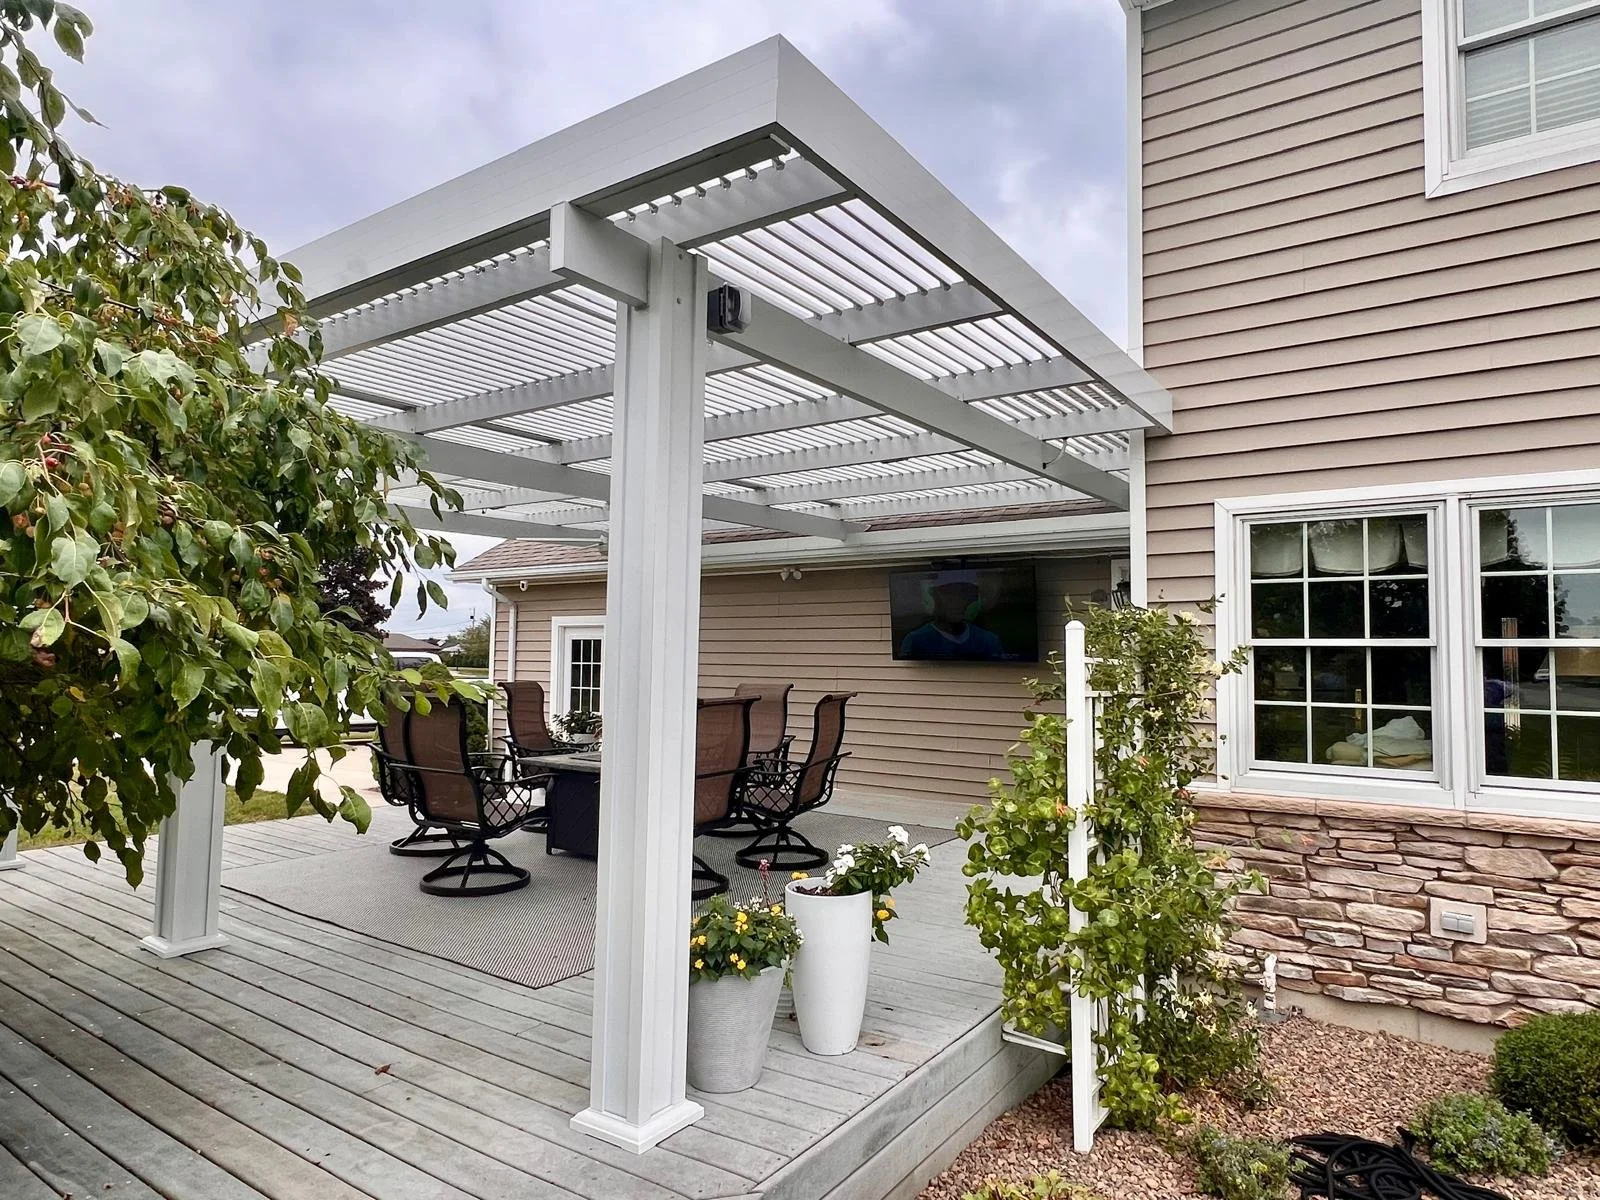
Installing a TV outdoors requires more than just an extension cord. You need to do it safely to protect the TV and your home.
- Time & Cost: 2-4 hours, $300-$800 (plus TV).
- Choose an Outdoor TV: They are built to withstand humidity and temperature fluctuations. A standard indoor TV will fail quickly.
- Select a Mount: Use an outdoor-rated, articulating mount so you can tilt and turn the TV to reduce glare.
- Power and Signal: Have an electrician install a GFCI-protected, weatherproof outlet box directly behind the TV. Run HDMI cables through the wall from an indoor source.
- Add a Cover: Even with an outdoor-rated TV, a weatherproof cover will protect your investment from dust, pollen, and direct water exposure.
Your Perfect Patio Awaits
Finding the right shade is about more than just escaping the sun; it’s about defining how you want to live outdoors. Whether it’s a simple umbrella for your rental balcony or a full-blown outdoor kitchen, the perfect solution is the one that gets you outside more often.
Ready to start planning? Save your favorite ideas to your Pinterest board and turn that inspiration into your new favorite spot.