28 Jaw-Dropping Garden Lighting Ideas for 2026 You Absolutely Need to See

You know that magical feeling when you stumble upon a photo of a garden at night, and it just stops your scroll? It’s not just lit; it’s alive. But translating that inspiration into your own yard can feel daunting. That’s why we did the heavy lifting. We filtered through hundreds of options to bring you these 28 incredible garden lighting ideas that genuinely work for real homes. Inside, you’ll find everything from DIY-friendly string light setups to professionally-designed landscapes that turn trees into sculptures, with styles covering cozy, modern, romantic, and dramatic looks. This year, the biggest trend is creating an outdoor space that feels just as considered and inviting as your living room. And stay until the end—we break down the most common mistakes that can ruin these looks. 📌 Save this to Pinterest for later — you’ll want to revisit these ideas.
1. Enchanting Garden Path with Layered String Lights and Lanterns
The single element that elevates this scene from pretty to truly magical is the layering of light sources at different heights. You have the string lights overhead creating a starry canopy, the ground lanterns defining the path’s gentle curves, and the subtle uplighting giving the mature trees a sense of volume and presence. If you were to remove any one of these layers, the scene would lose its immersive, three-dimensional quality. It’s this thoughtful interplay between high, mid, and low light that transforms a simple walkway into what feels like a secret garden escape.
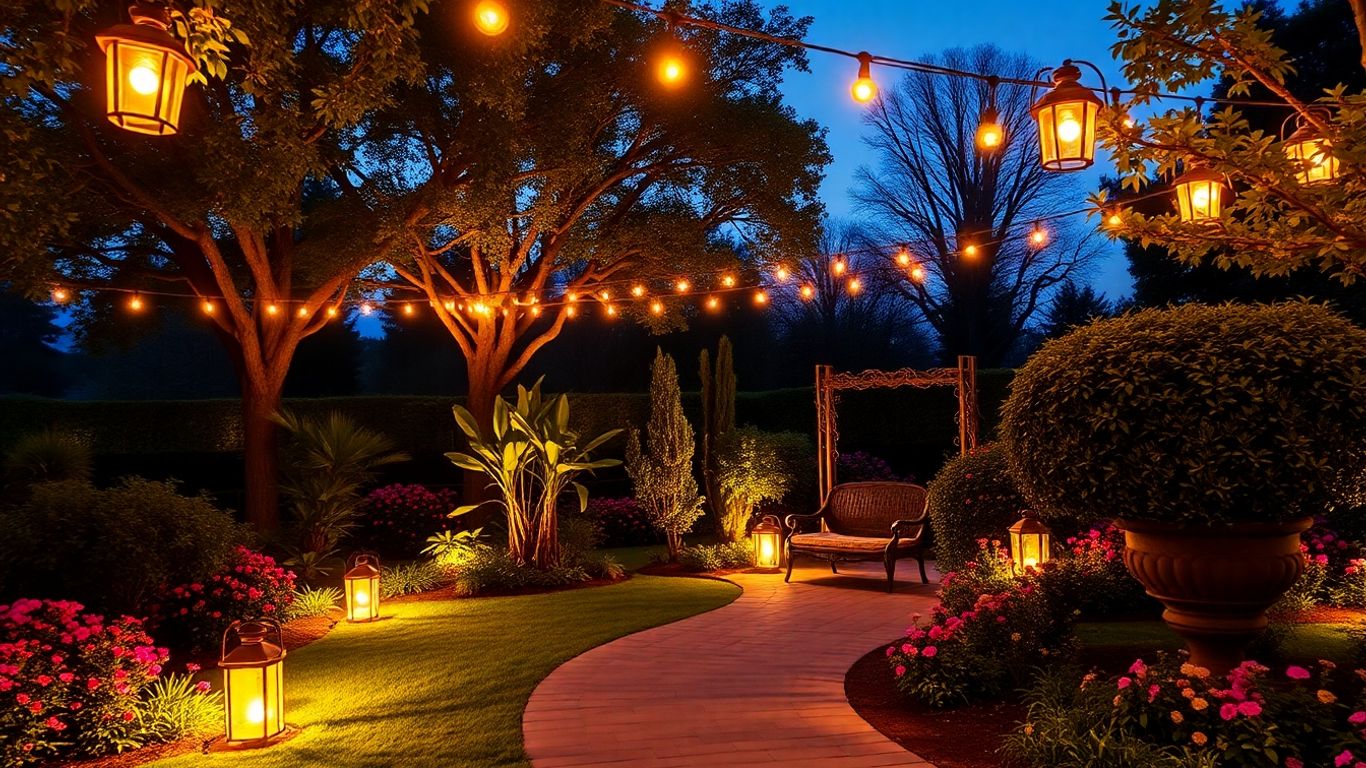
When illuminating a winding path, always try to place the ground-level lights on the inside of the curves. This clever trick accentuates the bend in the path, making it feel more organic and drawing the eye forward with a sense of mystery. As for spacing, resist the urge to overdo it. A good rule of thumb is to place fixtures just far enough apart that their pools of light barely meet or have a small gap. A distance of 6-8 feet is often perfect for creating a gentle rhythm without turning your serene path into an airport runway.
2. Warm Architectural Lighting for a Grand Stone Home
This design succeeds by using a classic technique called “grazing.” By placing spotlights close to the home’s exterior, the light washes across the stone facade at a sharp angle. This catches the natural texture of the stone, creating beautiful highlights and deep shadows that reveal its character and depth. This architectural focus is balanced with soft uplighting on the surrounding shrubs, which forms a lush, green perimeter and prevents the house from looking like it’s floating in an abyss. The combination gives the entire property a cohesive, elegant, and anchored feel.
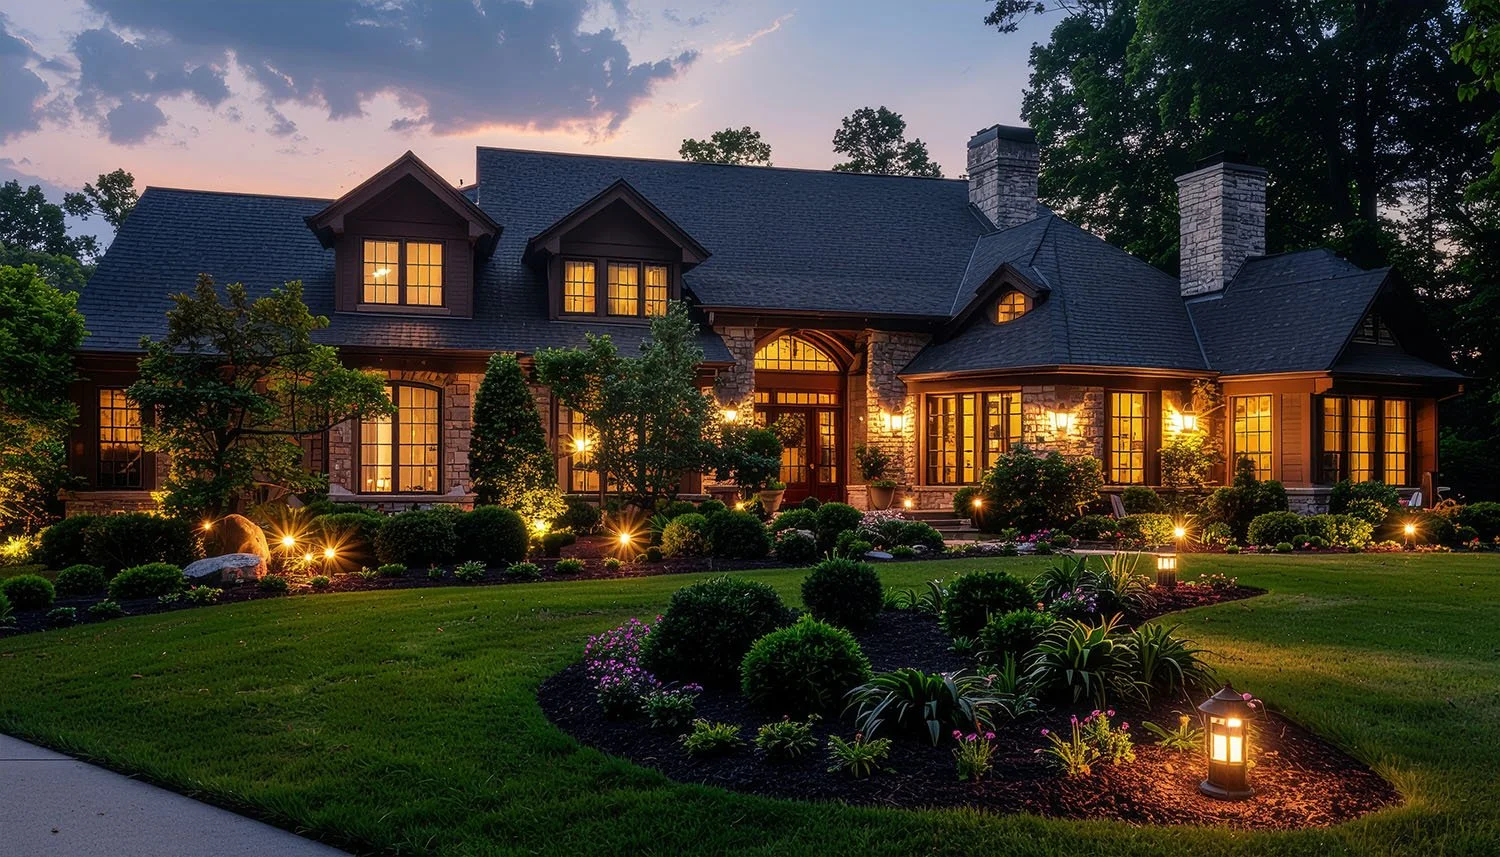
An expansive lighting scheme like this is best suited for larger, two-story homes, typically with 40-60 feet of frontage to work with. The key is allowing enough space for the landscape lighting to “breathe” so it doesn’t feel crammed against the house’s foundation. For smaller homes or those with less property, you can beautifully adapt this concept by focusing on just one or two key architectural features—perfectly illuminating an entryway or a single textured column, for instance. You can see a more focused version of this in Idea #25.
3. Modern Desert Landscape with Rusted Steel and Sculptural Uplighting
The visual formula here is all about elegant restraint. Think of it as 50% minimalist hardscape (like the gravel and rusted metal planters) + 30% bold, sculptural plants (like agave and cacti) + 20% dramatic, focused lighting. The magic is in what *isn’t* lit. The warm uplighting is aimed exclusively at the plants, turning them into living works of art against the dark canvas of night. You could easily swap the rusted corten steel for board-formed concrete and the tan gravel for black pebbles, and the powerful, modern equation would still hold true.
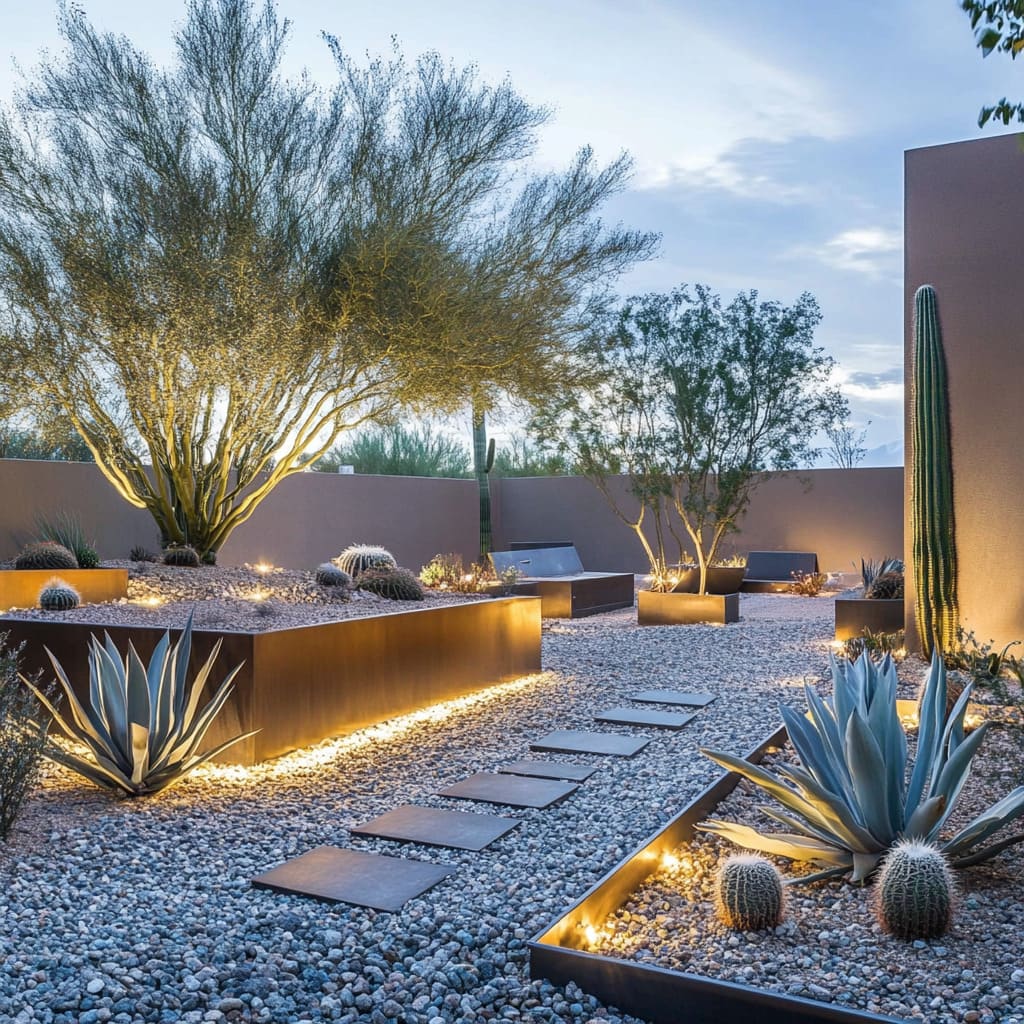
While desert-style landscaping is famously low-water, low-maintenance does not mean no-maintenance. The gravel ground cover will need occasional weeding and periodic raking to keep the surface looking crisp and uniform. More importantly, be aware that new corten steel (the material used for that beautiful rust patina) can have some rust runoff for the first year or two as its protective layer forms. This runoff can stain light-colored concrete or pavers. Plan ahead by using a border of dark gravel between the steel and any light surfaces.
4. Subtle Uplighting on Deciduous Trees Along a Sloped Lawn
that makes this design so successful is its subtlety. Instead of blasting the trees with intense light, small, discreet uplights are used to cast a gentle glow. This technique highlights the natural texture of the tree trunks and makes the canopy seem to float, creating depth and drama without feeling artificial. The focus isn’t on the light fixtures themselves—which are nearly invisible—but on the beautiful forms of the trees they reveal. It’s a perfect example of how a little light can go a very long way in creating a serene and inviting atmosphere.
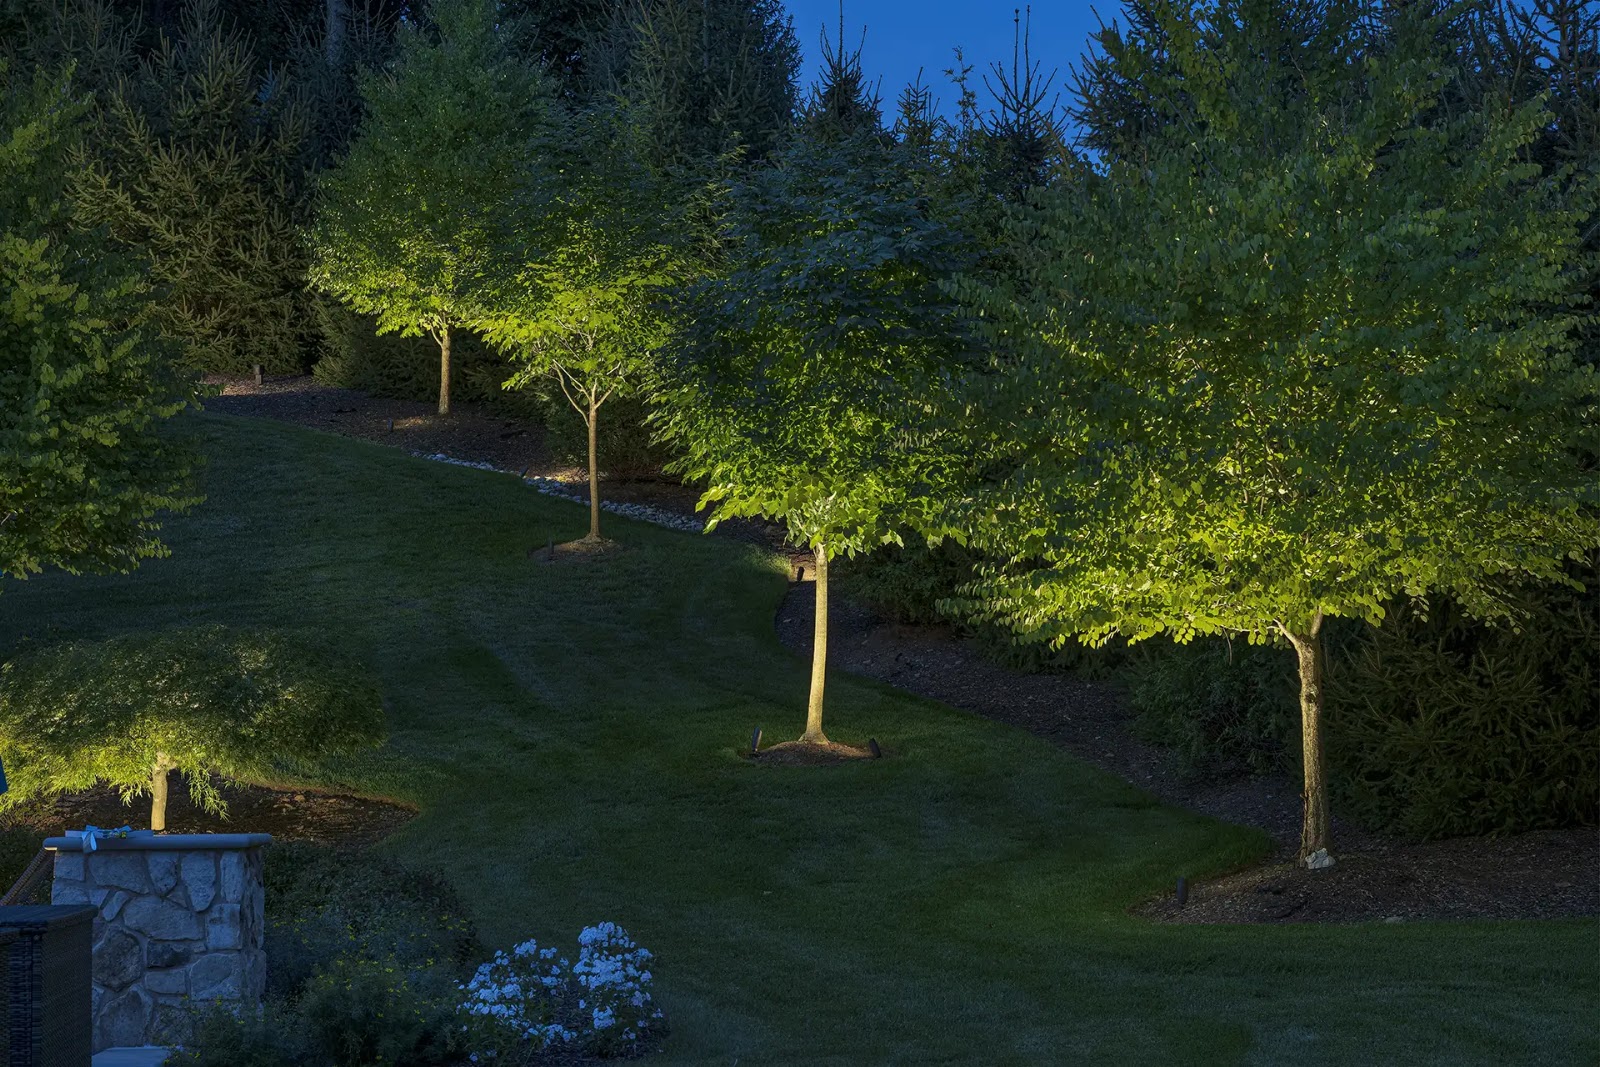
A word of caution when uplighting deciduous trees: leaf cover changes everything. The beautiful, full-canopy effect you have in the summer will disappear in the fall, leaving you with light that shines up into the bare branches and the night sky. This can still be beautiful, creating a more stark, architectural look. However, you must ensure the lights are not aimed towards any bedroom windows (yours or your neighbors’!), as the effect can be surprisingly bright and intrusive without the leaves to diffuse it.
5. Modernist Home with Square Pathway Lights and Understated Uplighting
What makes this lighting scheme feel so cohesive and high-end is its strict adherence to the home’s modern architecture. The square, ground-level lights are not a random choice; they echo the clean lines and geometric forms of the building itself. This repetition of shape creates a visual language that ties the landscape directly to the structure. Furthermore, the light is kept low to the ground, emphasizing the horizontal planes of the design and preventing the lighting from competing with the beautifully lit interior visible through the large windows.
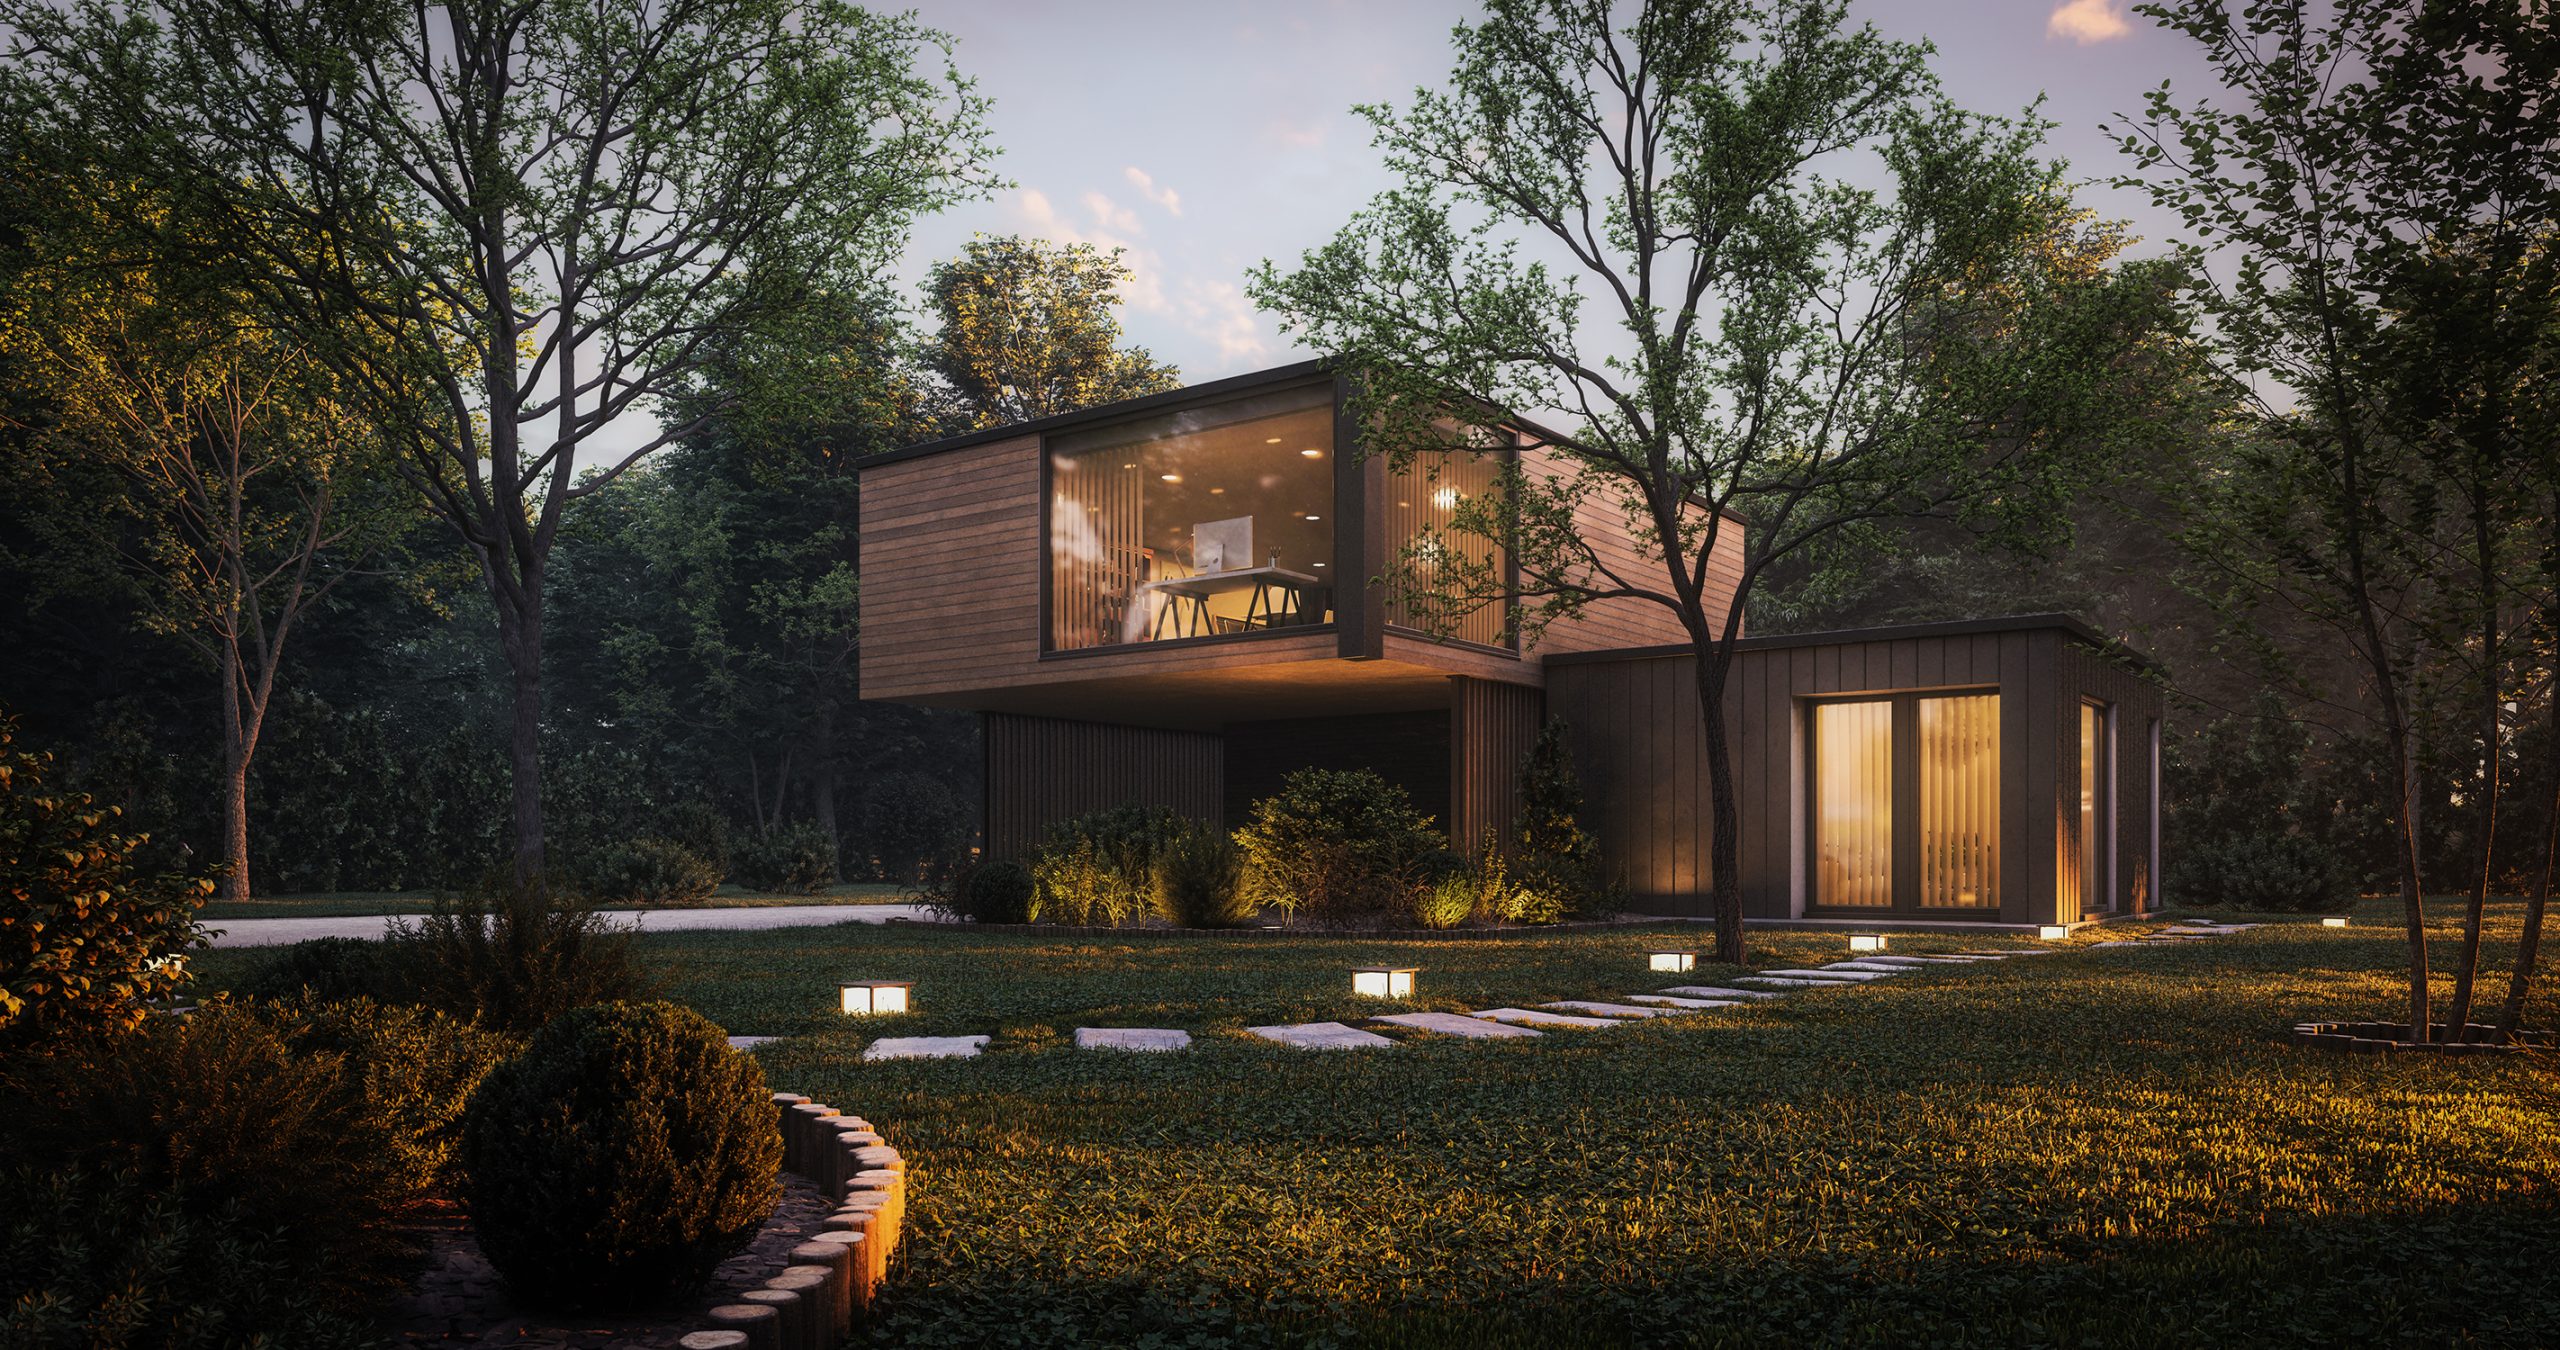
When using pathway lights near a lawn, placement is key to long-term success and easier maintenance. Install the fixtures within the garden bed itself, not in the grass. This serves two purposes: first, it protects the fixtures from being damaged by lawnmowers and edgers. Second, it allows the light to spill softly onto the path from the side, creating a more pleasant and indirect glow. This is a simple detail that separates amateur installations from professional-grade designs. Compare this to the integrated path lighting in Idea #7.
6. Dramatic Uplighting for a Line of Trees Beside a Backyard Court
The single most impactful element here is the creation of a “living wall.” By placing an uplight at the base of each tree, the row of individual trees is transformed into a single, unified visual feature. It serves as a glowing, textured backdrop for the sports court, providing both ambient light and a strong vertical design element. This technique effectively uses light to define the edge of the property, making the entire yard feel more contained and intentional, even at night. The illuminated canopy creates a ceiling effect, adding to the sense of an outdoor room.
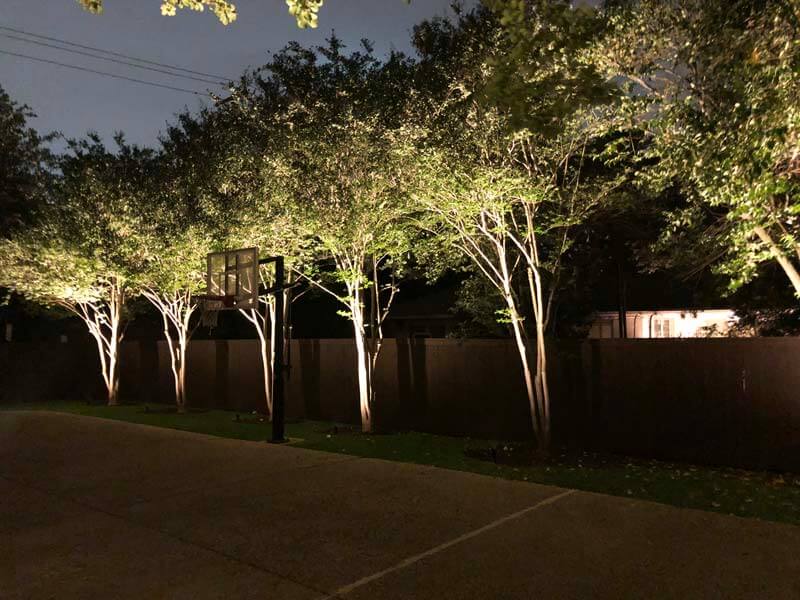
You don’t need a professionally installed system to get this look. You can achieve a very similar effect with a set of solar-powered spotlights. Look for models with a warm-white color temperature (around 2700K-3000K) to replicate this inviting glow. A pack of 4-6 solar uplights can be found online or at big-box stores for $50-$100. The key is to get lights with adjustable heads so you can aim them perfectly to graze the trunk and illuminate the leaves above. It’s a weekend project that delivers major impact for a minor investment.
7. Modern Home with Linear Lighting Embedded in a Gravel Path
This works because of the brilliant use of contrast. The design plays with multiple opposing forces: the dark, smooth stone steps versus the bright, textured white gravel; the crisp, linear light strips versus the soft, organic forms of the layered plantings; the dark facade of the building versus the warm wood soffits. The lighting doesn’t just illuminate the path; it becomes a central graphic element that highlights all these beautiful tensions, guiding the eye through the space and making the journey from the building to the garden a deliberate, sensorial experience.
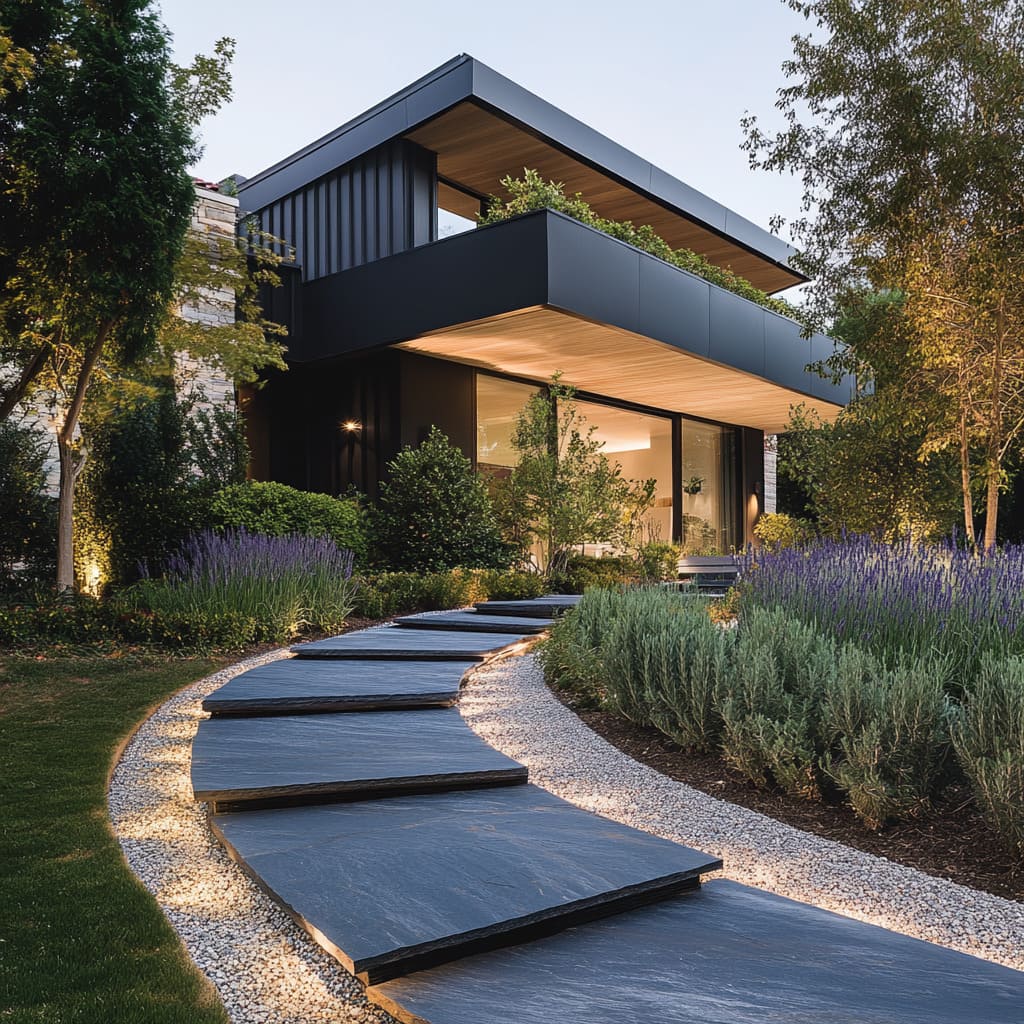
An integrated lighting solution like this is perfect for side yards or connecting paths where you want a clean, uncluttered look. It works best on paths that are between 3 to 5 feet wide. Any narrower and the effect can feel cramped; any wider and you may need multiple parallel runs to provide adequate, even illumination. Because the light source is flush with the ground, it’s also a fantastic choice for areas where you don’t want tall fixtures obstructing a view or creating a trip hazard, making it both stylish and highly practical.
8. Warm Path and Landscape Lighting on a Classic Brick House
The formula for this timeless look is all about balance: 40% architectural uplighting to highlight the texture of the brick and eaves, 40% landscape lighting to bring the trees and shrubs to life, and 20% pathway lighting to ensure safe and inviting passage. The key is that all three types of lighting use the same warm color temperature (around 2700K). This consistency is what makes the different elements feel like part of a single, harmonious design rather than a jumble of competing lights. It creates a welcoming glow that wraps the entire property in a blanket of warm light.
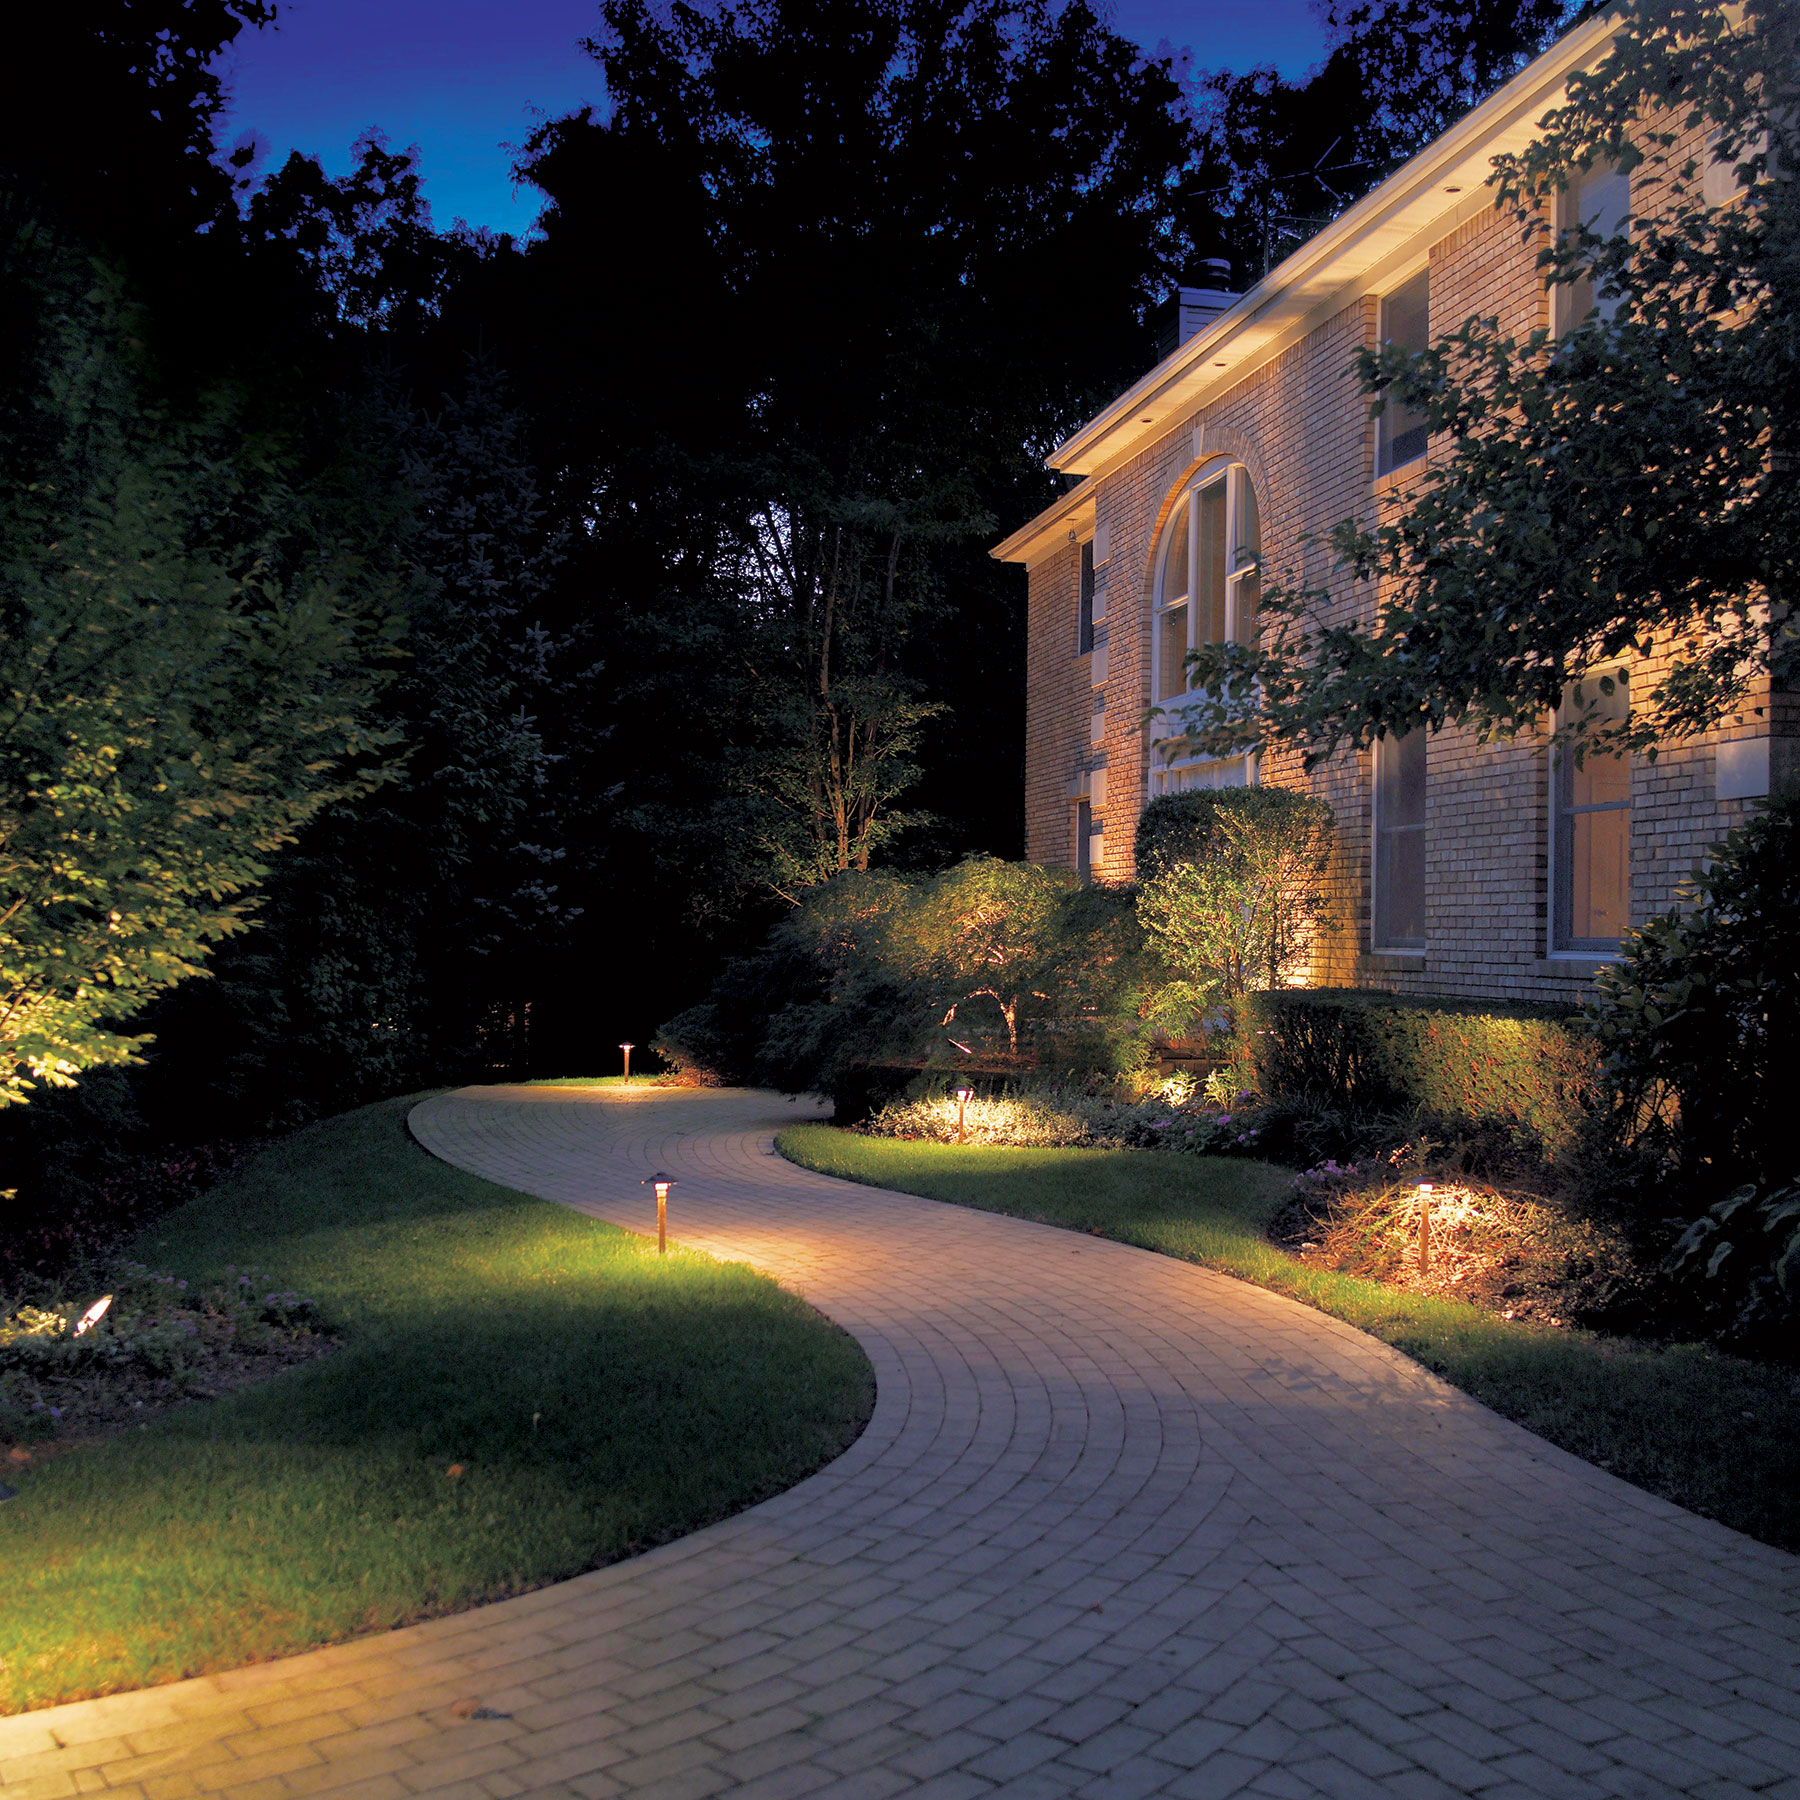
To avoid the dreaded “runway” look on a curved path, don’t place your path lights in a rigid, evenly spaced line. Instead, stagger them. Place a light on the outside of the first curve, then on the inside of the next. This creates a more natural, meandering feel that complements the organic shape of the path. The goal is to provide just enough light to guide the way safely, not to illuminate every single inch. This staggered approach feels much more sophisticated and custom.
9. Dramatic Orange Uplighting on a Palm Tree by the Entrance
The undisputed star of this show is the single, dramatic uplight on the palm tree. While the rest of the landscape lighting is warm and functional, the intense, almost theatrical orange glow on the palm transforms it from a simple plant into a major sculptural statement. It acts as a stunning focal point, drawing the eye and signaling the entrance to the home with flair and confidence. This bold choice injects a dose of personality and drama that elevates the entire facade from simply “well-lit” to “unforgettable.” It’s a perfect example of how one brave decision can define a space.
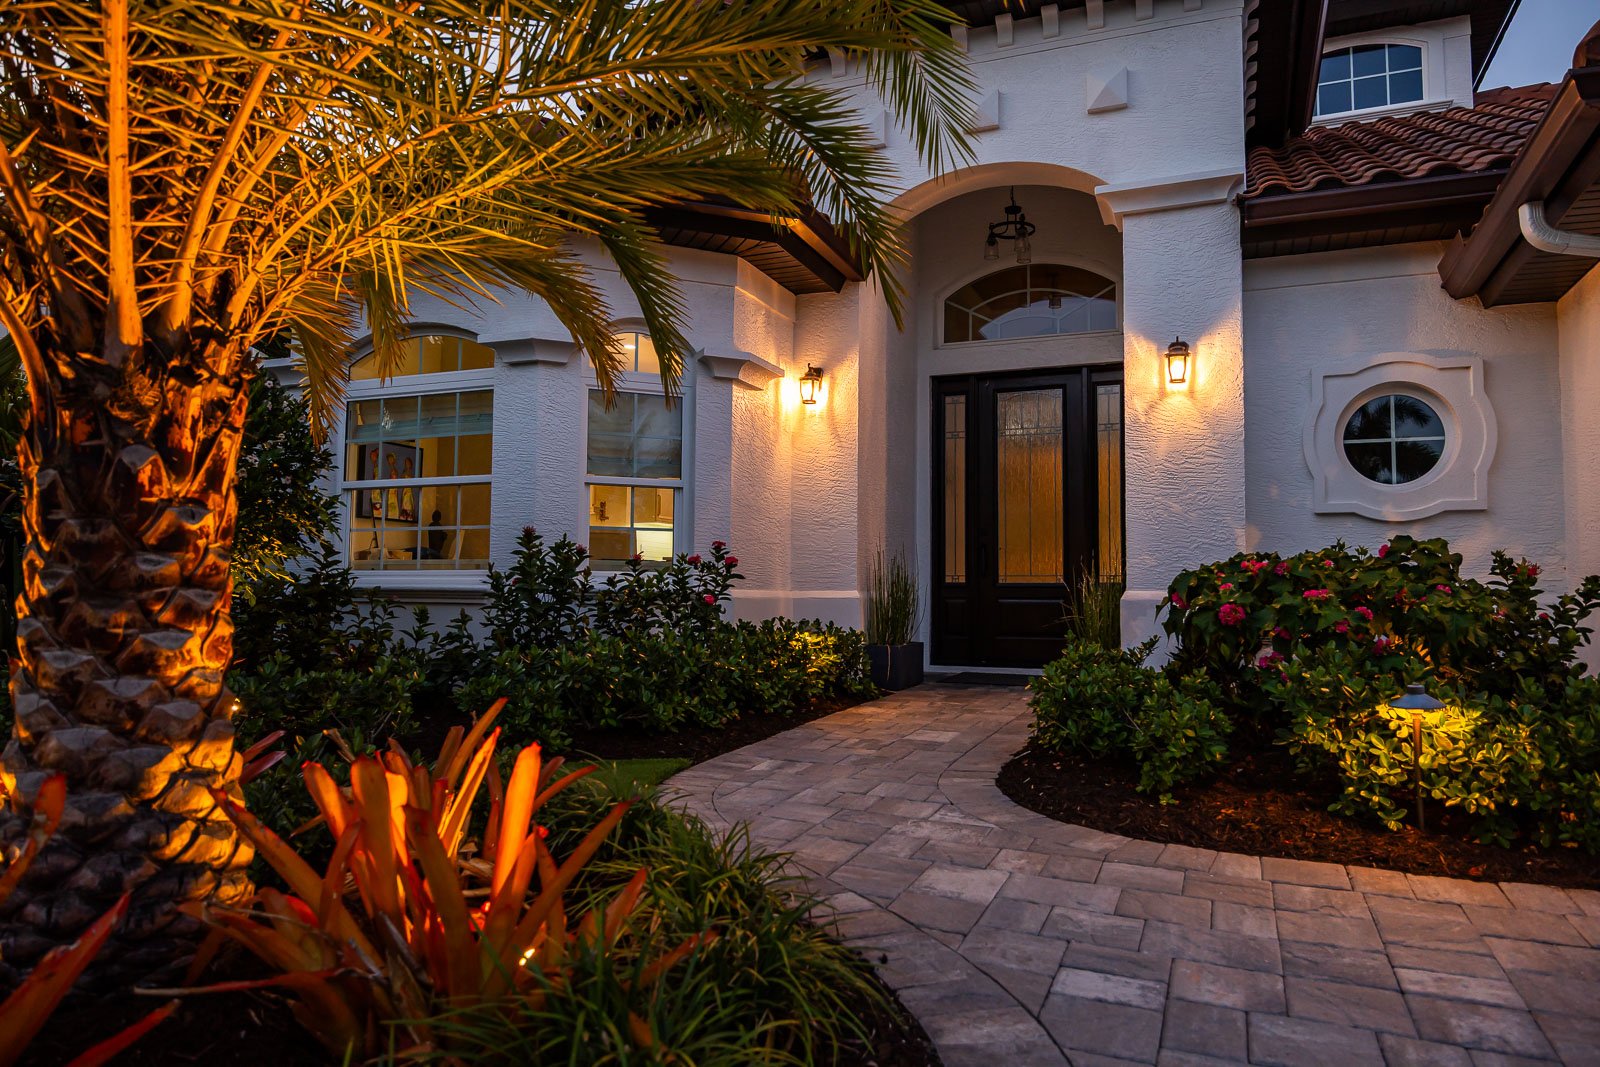
A little color goes a long way. While this warm orange glow is stunning, it’s a specific choice that creates a very particular mood. If you’re considering colored landscape lighting, it’s wise to use smart bulbs that allow you to change the color and intensity. This gives you the flexibility to go for a dramatic orange on a Saturday night, but switch to a soft, classic warm white for the rest of the week. This flexibility ensures your bold statement doesn’t become a choice you get tired of over time.
10. Classic Black Hat-Style Light Illuminating a Path and Plants
This is a classic for a reason. The “hat” or “mushroom” style fixture is designed to do one thing perfectly: cast a soft, controlled pool of light downwards and outwards, minimizing glare. By aiming the light onto the ground, it illuminates the path for safety while also catching the edge of the adjacent plantings—like the red-leafed bush—for visual interest. The dark finish of the fixture itself helps it recede into the landscape during the day, so the focus remains on the garden, not the hardware. It’s a simple, effective, and timeless solution.
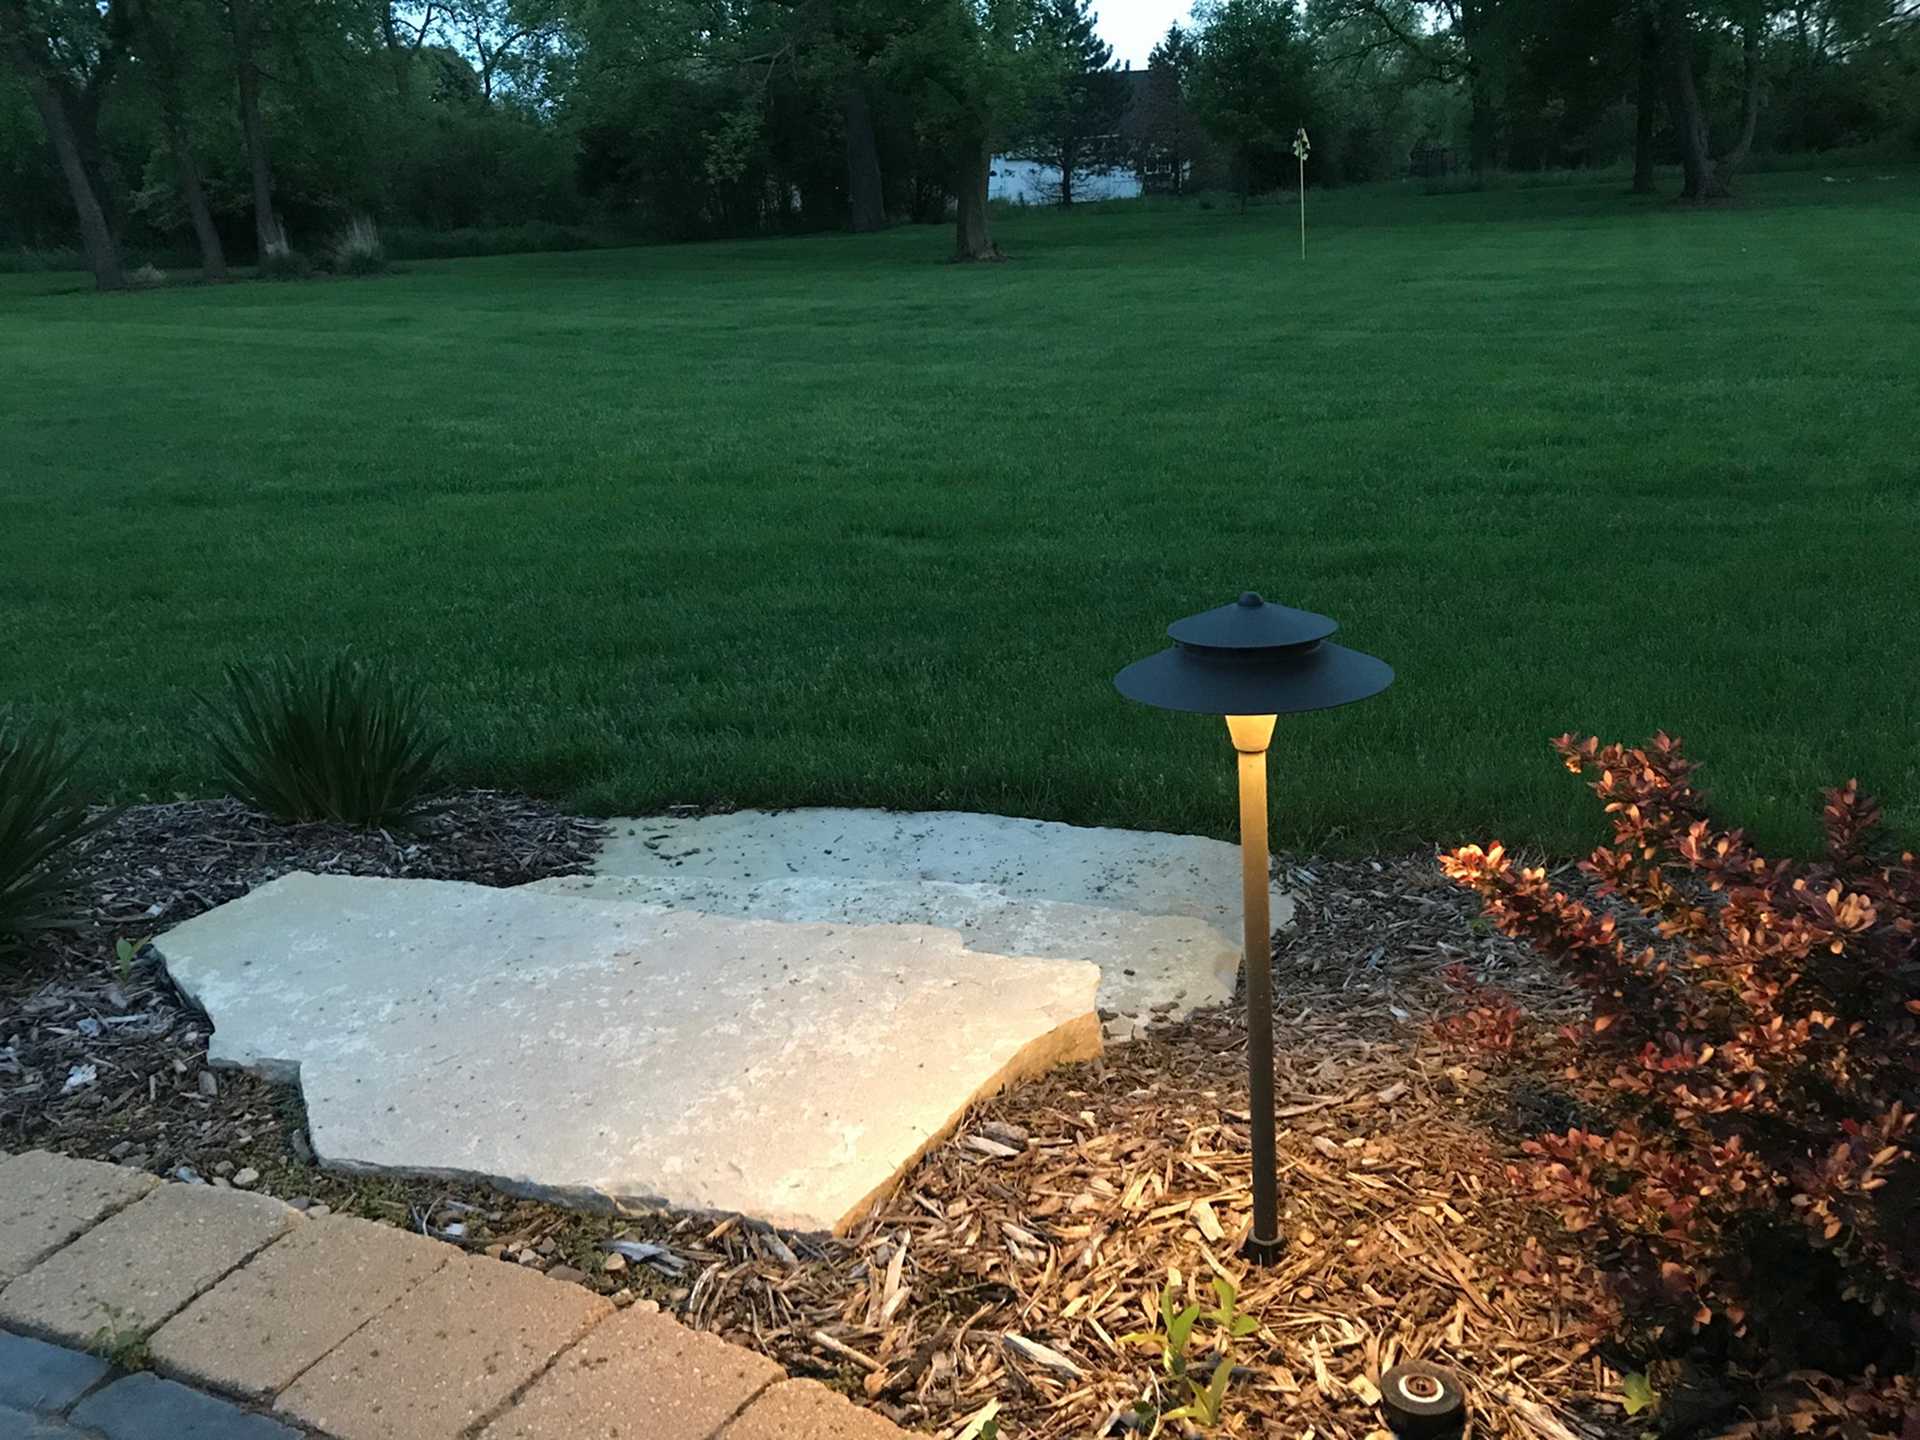
This classic look is one of the most accessible lighting styles to achieve on a budget. Solar-powered versions of these hat-style lights are widely available at stores like Target, Walmart, and Amazon. You can often find a set of 6-8 lights for under $50. While they may not be as bright or as durable as a professional low-voltage system, they are incredibly easy to install (just push them into the ground) and require no wiring. They are a fantastic entry point into landscape lighting, offering major ambiance for a minimal investment.
11. Dramatic Garden Uplighting on a Tree with Layered Accent Lights
To create a truly dramatic tree uplighting effect, use two separate lights. Place one light close to the trunk and aim it almost straight up to highlight the texture of the bark and the structure of the main branches. Place a second light further away from the trunk, aimed up into the canopy at about a 60-degree angle. This second light is what will give you that gorgeous, full glow in the foliage. This two-light technique adds a professional level of depth and dimension that a single light source simply can’t replicate.
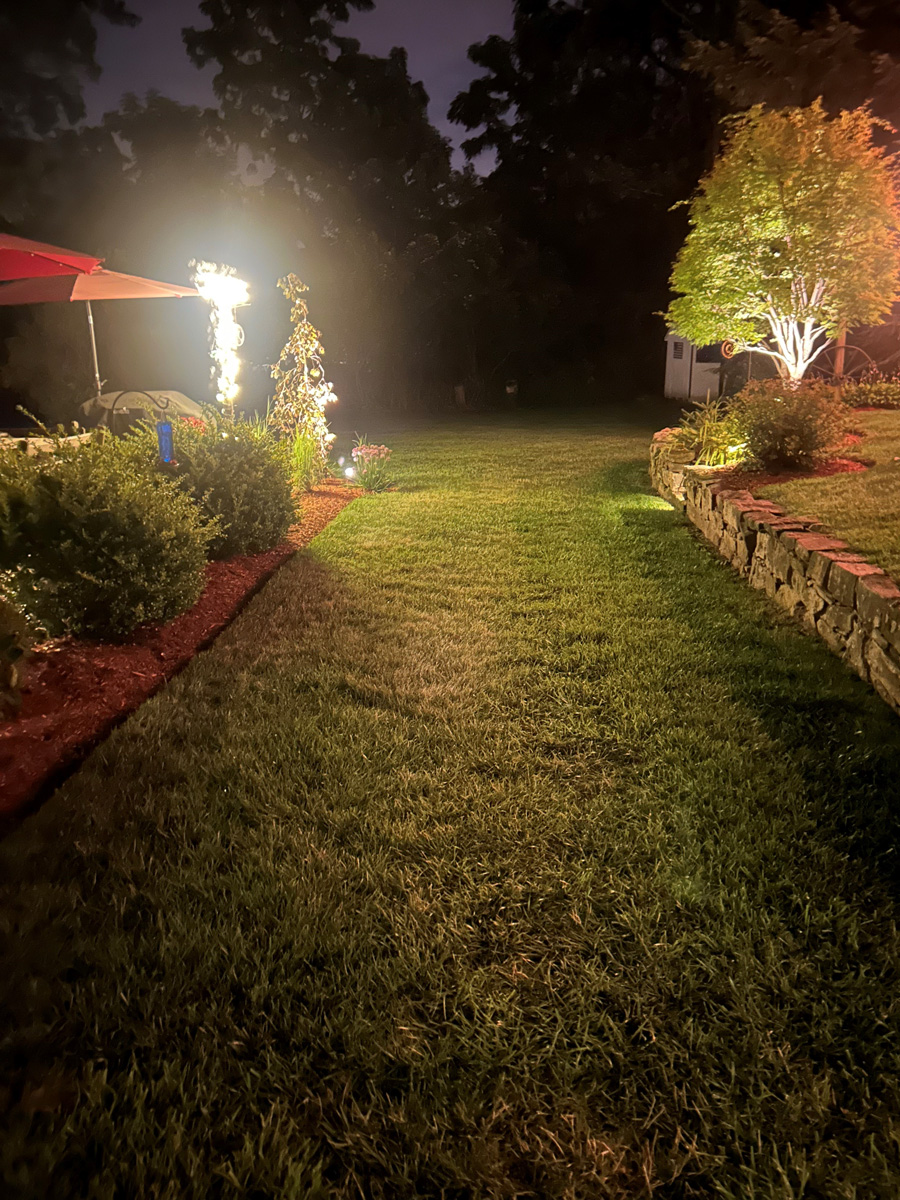
This kind of dramatic, multi-point landscape lighting is best suited for a medium to large garden with some established features. You need a yard with a bit of depth and some mature trees or large shrubs to act as focal points. If your garden is very small or consists of only low-lying flower beds, this layered approach can feel overwhelming. In a smaller space (under 500 sq ft), it’s often better to focus on subtler techniques, like the path lighting in Idea #10 or the cozy string lights in Idea #15.
12. Pathway Lit by Bollards with Swirling Shadow Patterns
that makes this idea so special is that the light fixtures themselves are a decorative art piece. Instead of just casting a simple pool of light, these bollards are designed to throw intricate, swirling patterns onto the pathway. The light is not just for illumination; it’s an active element of the design, creating texture and movement on an otherwise plain concrete surface. This turns a functional walk from A to B into an enchanting experience, proving that lighting hardware can be as beautiful as the light it produces.
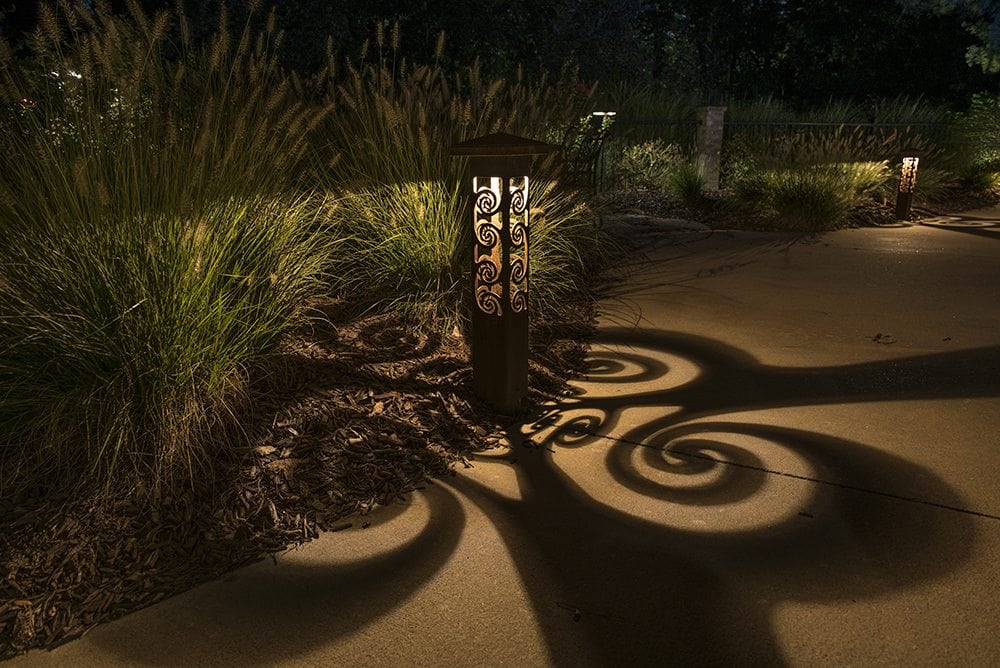
While visually stunning, be aware that this type of patterned lighting prioritizes form over function. The intricate shadows, while beautiful, can make the path harder to navigate for those with unsteady footing, as it can be difficult to distinguish between a shadow and a change in elevation or an obstacle. This style is best used on a flat, even, and well-maintained surface. For areas with stairs or uneven ground, it’s safer to opt for more uniform, non-patterned lighting like the step lights in Idea #21.
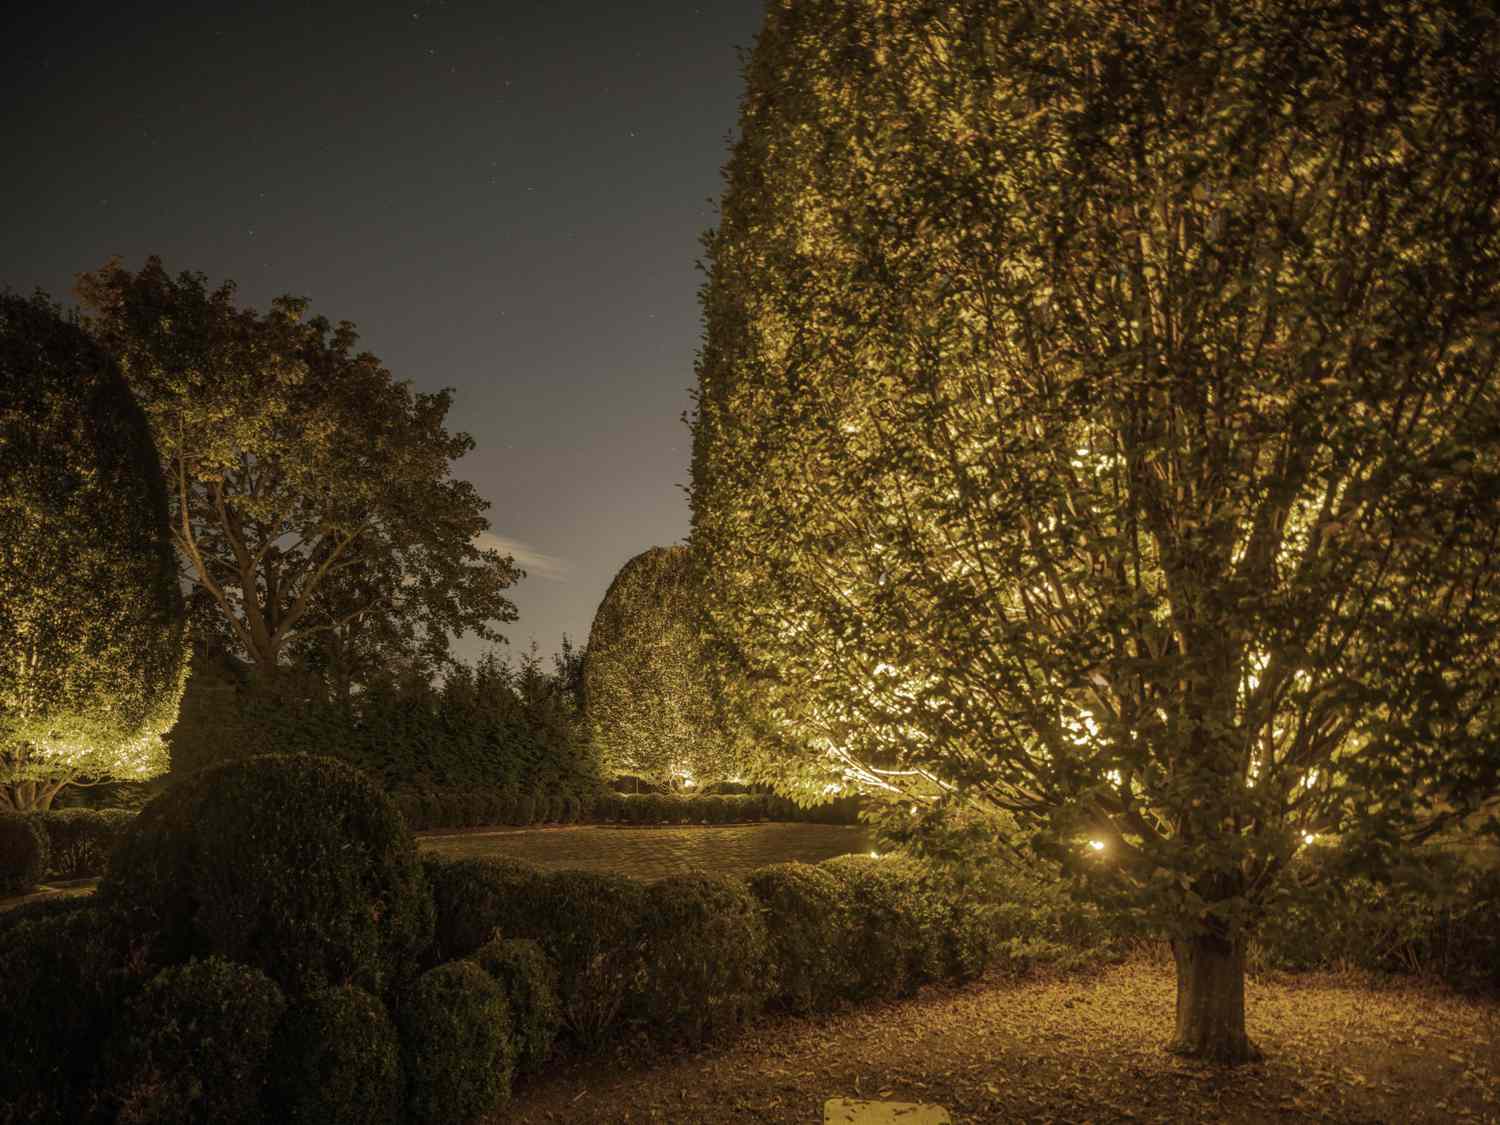
13. Dramatic Nighttime Ambiance with Uplit Garden Trees and Hedges
This scene is a masterclass in creating depth with light. By uplighting the trees and hedges in the mid-ground and background, the designer creates distinct layers against the dark night sky. The brightly lit foliage appears closer and more vibrant, while unlit areas recede, giving the garden a sense of vastness and mystery that doesn’t exist during the day. The warm color temperature of the lights keeps the overall feeling inviting and serene, preventing the dramatic shadows from feeling spooky. It’s a perfect illustration of painting with light.
14. Cozy Fire Pit Nook Illuminated by Overhead Fairy Lights
Here’s a realistic cost estimate to recreate this inviting fire pit area:
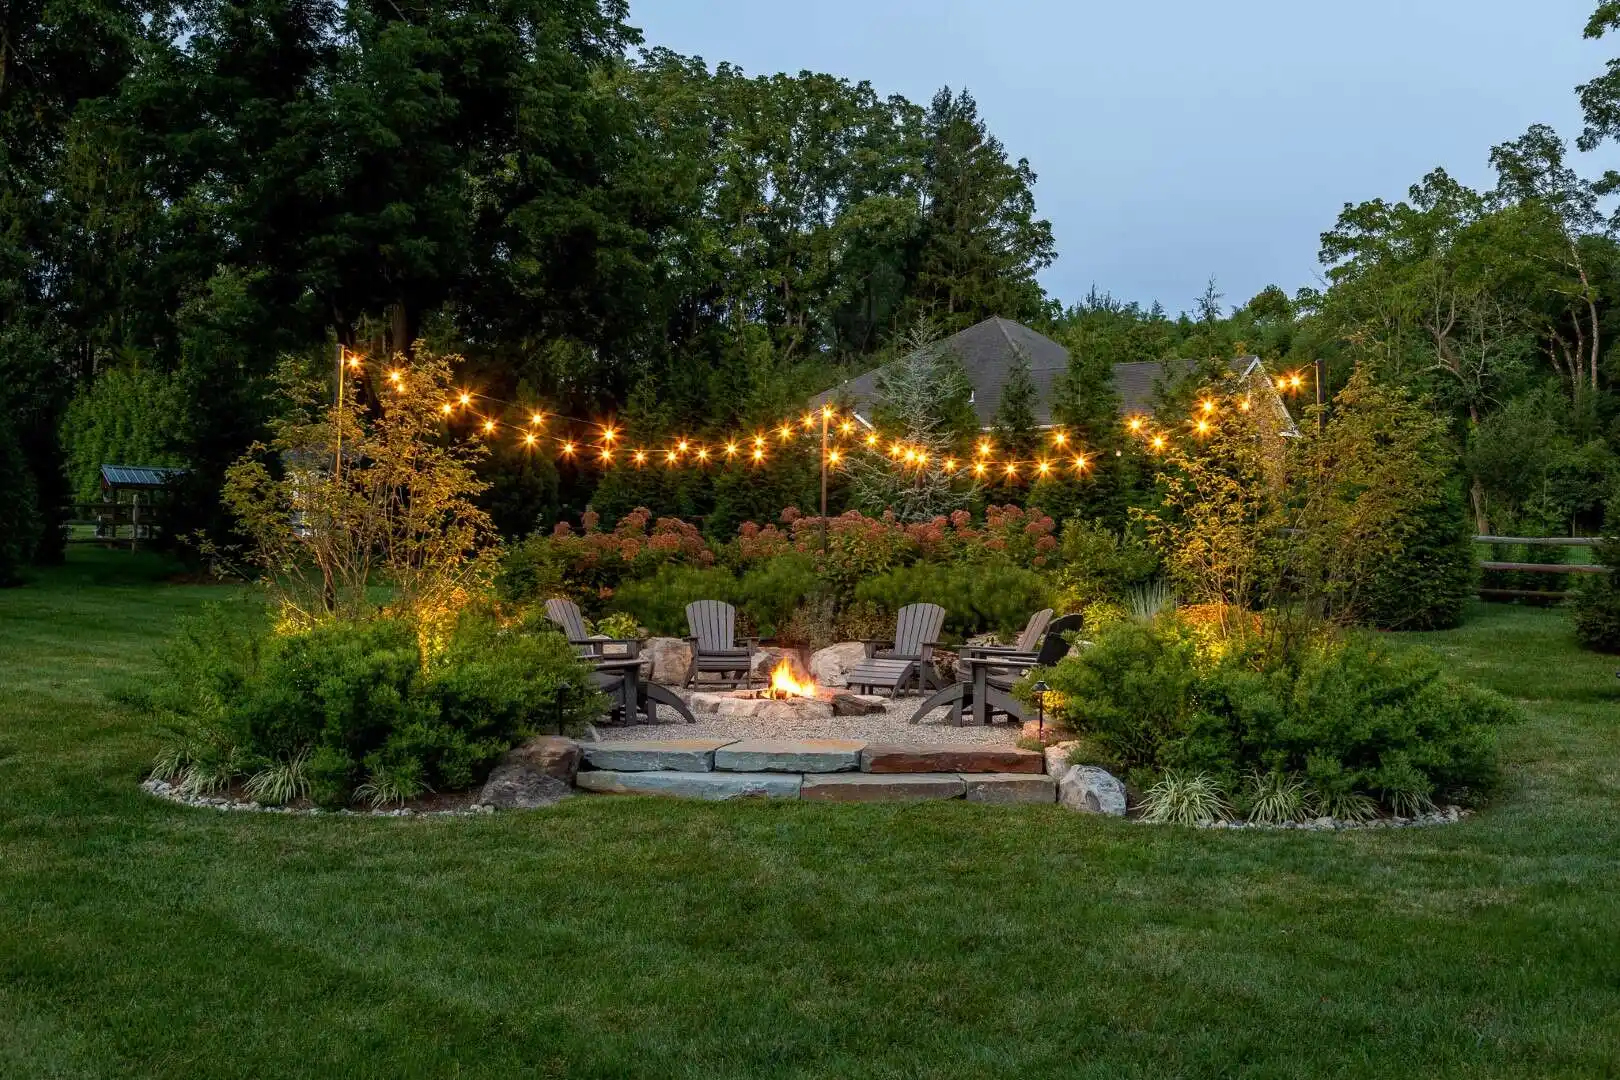
- Adirondack Chairs (7): $700 – $2,100
- Freestanding Metal Fire Pit: $250 – $800
- Commercial-Grade Outdoor String Lights (2-3 strands): $150 – $300
- Gravel & Large Edging Stones: $400 – $1,000 (depending on area size)
- Professional Installation (labor for gravel/lights): $500 – $1,500
- TOTAL: $2,000 – $5,700
Budget alternative: You could achieve a very similar vibe for under $800 by sourcing chairs from Facebook Marketplace, using reliable solar-powered string lights, and opting for a smaller DIY fire pit ring from a home improvement store.
digging, run through this quick checklist:
- Check local fire codes! Many towns have strict rules about the placement and type of fire pits allowed, especially regarding distance from structures, fences, and trees.
- Measure your space. You need at least a 10-foot diameter circle for the chairs and fire pit, plus extra clearance for walking around them safely.
- Identify sturdy anchor points for your string lights. Do you have mature trees, a fence, or the side of your house that you can safely drill into?
- Confirm you have access to an outdoor-rated GFCI outlet. If not, you’ll need to factor in the cost of an electrician or commit to using solar-powered lights.
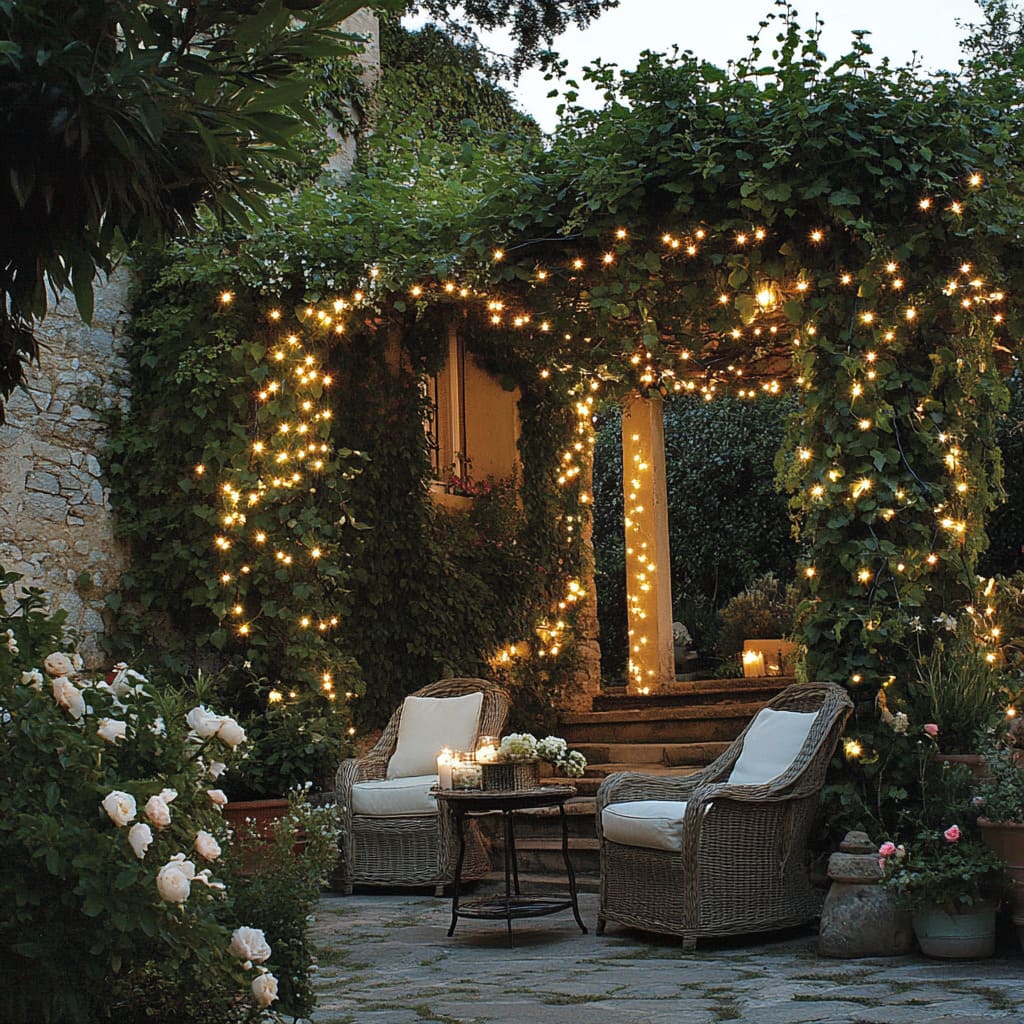
15. Intimate Patio Nook with String Lights and Climbing Vines
that makes this space so utterly enchanting is the combination of the man-made lights with the living, breathing greenery. The string lights aren’t just hung in an empty space; they are woven through the dense vines covering the arbor. This integration of light and nature is what creates the magical, secret-garden feeling. The light seems to emanate from within the foliage itself, casting a soft, dappled glow that feels organic and romantic. Without the vines, you’d just have lights on a patio; with them, you have a fairytale.
Creating your own vine-covered arbor for string lights is a rewarding long-term project. Here’s a mini guide:
- Time: 2-4 hours for setup; 2-3 years for full vine coverage. Cost: $200-$800 for the arbor and plants.
- Choose a sturdy arbor material like cedar, vinyl, or metal that can withstand the elements and the weight of mature vines.
- Select a fast-growing, non-invasive climbing vine suitable for your climate. Wisteria, climbing roses, or trumpet vine are popular choices.
- Plant your vines at the base of each side of the arbor and gently guide the initial growth up the structure using soft plant ties.
- As the vine grows, continue to train it to weave through the top of the arbor. Once established, you can weave your outdoor-rated string lights through the branches.
16. DIY Fairy Light Lanterns in Mason Jars Along a Treeline
This is one of the most charming and budget-friendly lighting ideas you can find. It’s a fantastic DIY project that delivers a huge amount of magical ambiance for very little cost. All you need are some glass mason jars ($1-2 each), battery-operated or solar-powered fairy light strings (around $10-20 for a multi-pack), and some wire or twine for hanging. You can assemble a dozen of these enchanting lanterns for under $50. It’s a perfect way to add a touch of sparkle to a garden party, an outdoor dinner, or just a quiet evening by the pool.
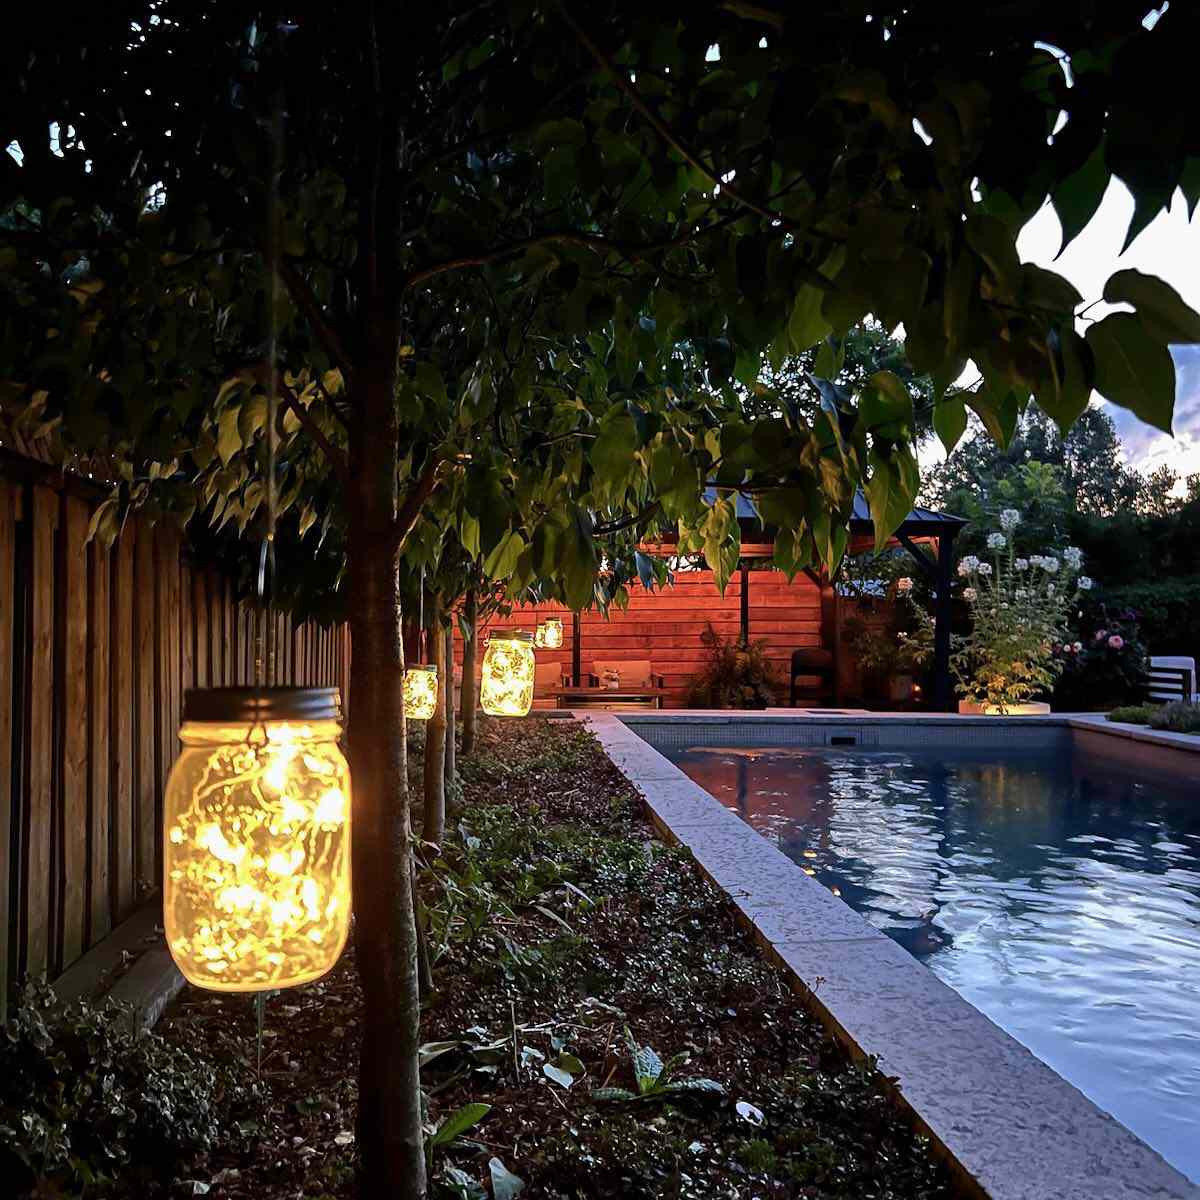
This idea works so well because it creates clusters of concentrated light, like capturing fireflies in a jar. Unlike evenly spaced string lights, these lanterns provide bright, contained focal points that draw the eye. Hanging them at slightly different heights along a natural feature like a treeline or fence enhances the organic, whimsical feel. The reflection of the bright jars on the dark water of the pool doubles the visual impact, creating a scene that feels both serene and deeply enchanting. This is a much more delicate look than the bold string lights in Idea #17.
17. Cozy Courtyard with Edison-Style String Lights
Edison-style string lights have been a dominant trend for the past few years, and they show no signs of fading. Why? Because they perfectly capture the popular “industrial-meets-rustic” aesthetic. The exposed filaments and classic bulb shape provide a vintage, almost nostalgic charm, while the simple black cord keeps the look clean and modern. They create an instant “outdoor cafe” or “beer garden” vibe, which is all about creating a casual, communal, and highly photogenic atmosphere in your own backyard. It’s the go-to choice for a reason.
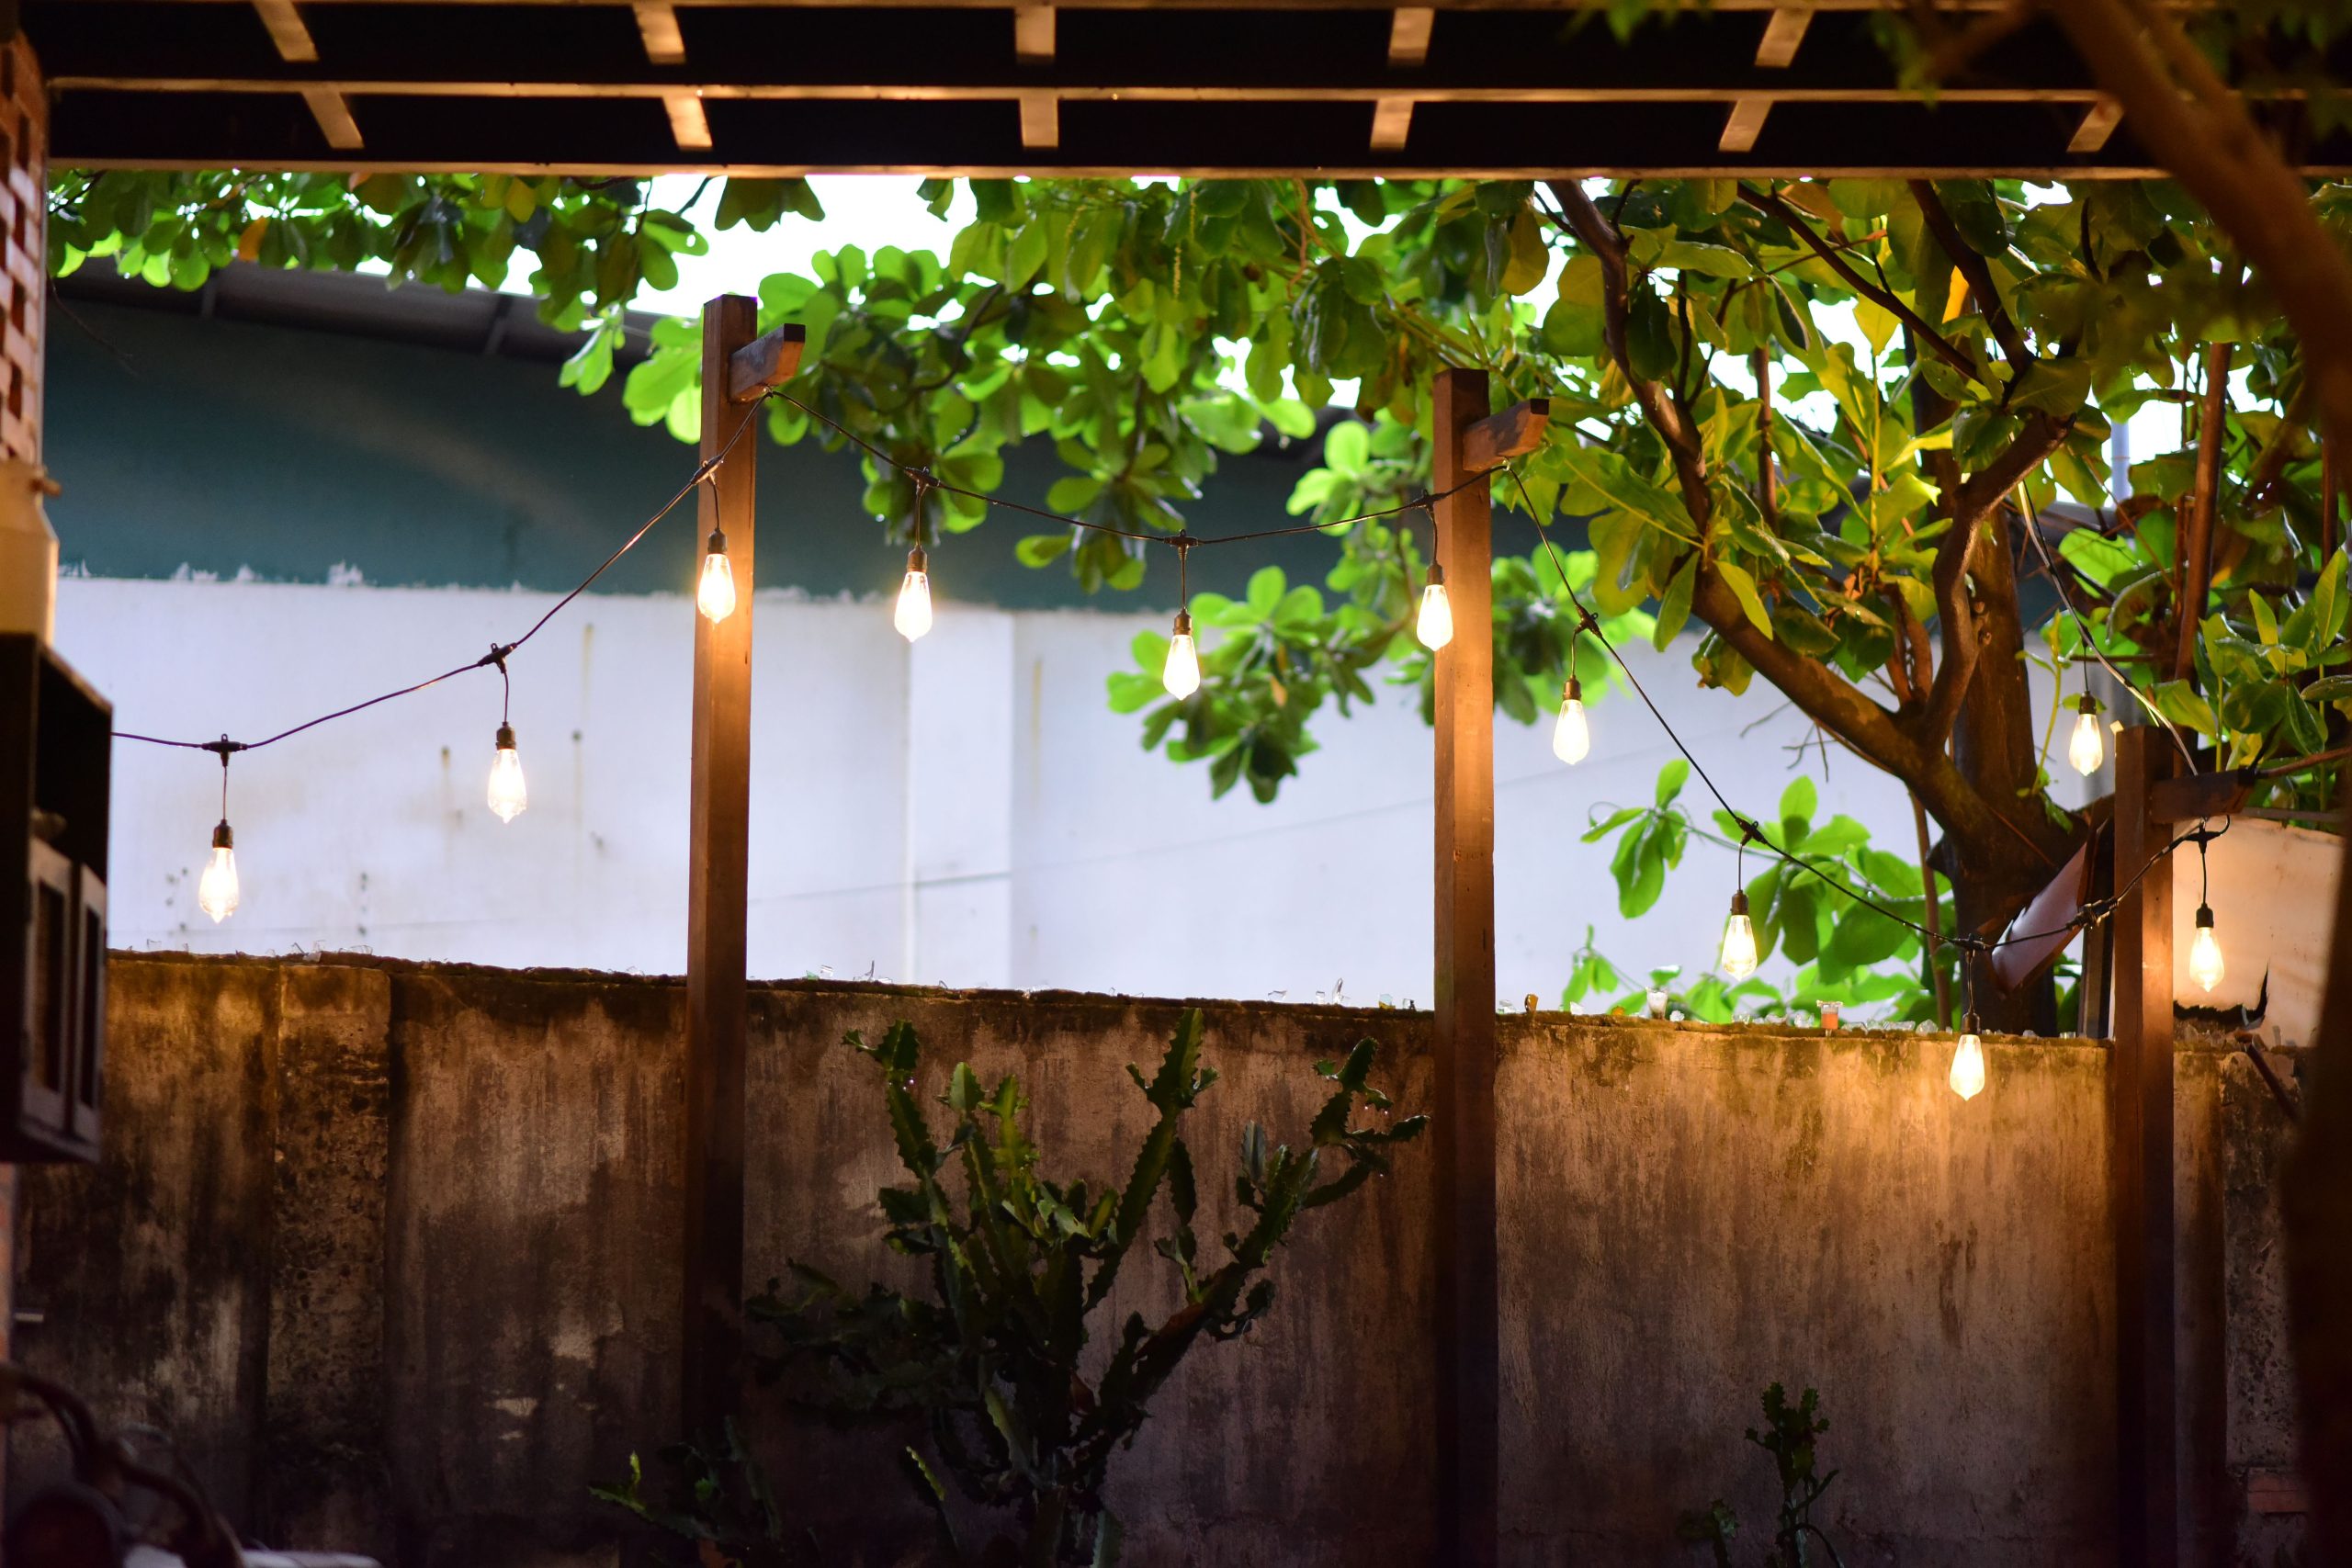
A practical tip for hanging string lights: always use a guide wire, especially for spans longer than 15 feet. Commercial-grade string lights can be heavy, and they will sag over time. A taut metal guide wire, secured with tensioning hardware, provides the structural support the lights need. You simply attach the light string to the guide wire every foot or two with zip ties or clips. This prevents sagging, protects the light cord from stretching and damage, and gives you a perfectly straight, professional-looking installation that will last for years.
18. Warm String Lights with a Red and White Cord Amidst Foliage
In a world of standard black and white cords, the single element that makes this stand out is the playful red-and-white twisted cord. It’s a small detail that injects a huge amount of personality and a touch of retro charm. It signals that every element of this design was a conscious choice, right down to the wire. This simple swap turns a basic string light into a considered decorative object, proving that the functional parts of your lighting can—and should—be beautiful too. It’s a subtle nod to vintage style that feels fresh and unexpected.
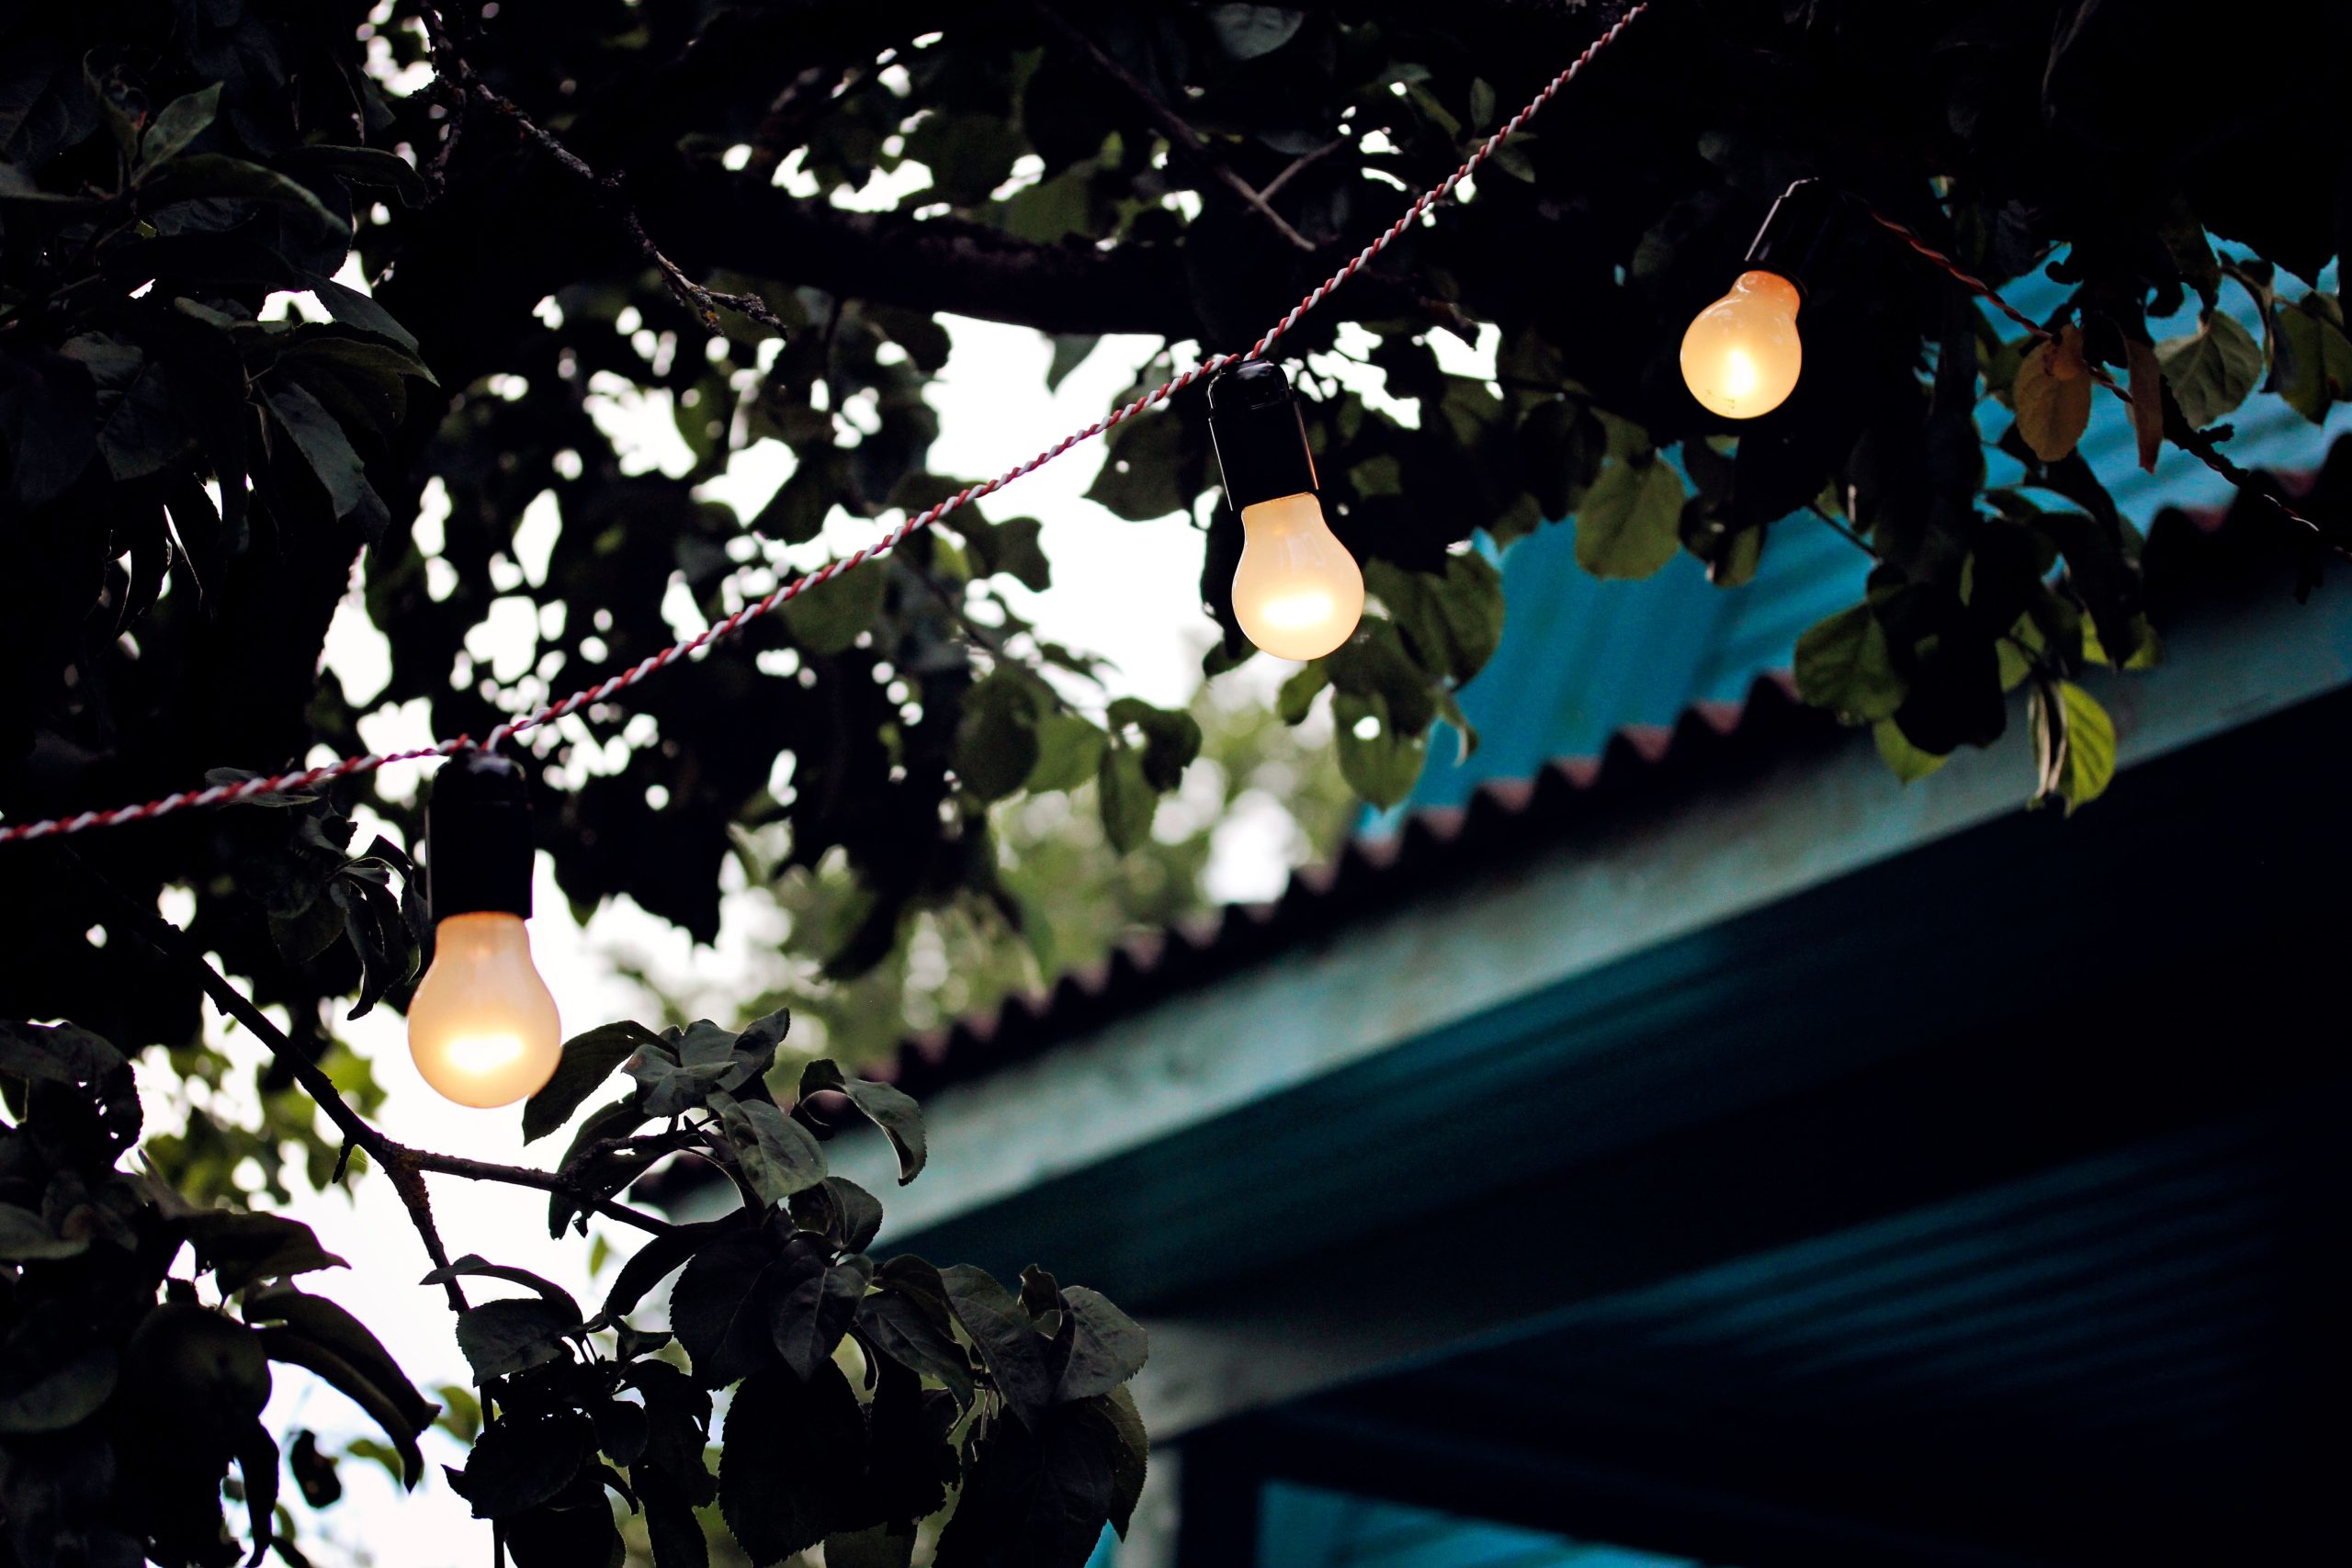
Don’t be afraid to let your string lights interact with your garden’s foliage. Tucking them into the branches of a tree or letting them rest against a leafy backdrop creates a more integrated and natural look. The leaves will help diffuse the light, casting a softer, dappled glow and creating beautiful silhouettes. Just ensure you’re using high-quality, outdoor-rated (UL listed) lights that are designed to be safe for this kind of application, and avoid letting bulbs rest directly against dry leaves or twigs as a precaution.
19. Eclectic Cluster of Pendant Lights Hung Amidst Lush Greenery
This design is a perfect example of a “curated cluster.” The magic comes from the fact that the three pendant lights are intentionally different, yet harmonious. They are united by their warm glow and their proximity, but their varied shapes, materials (textured glass, solid white, exposed bulb), and hanging heights create a dynamic, sculptural focal point. This controlled eclecticism feels personal and collected over time, rather than purchased as a matching set. It’s a much more interesting approach than hanging three identical lights.
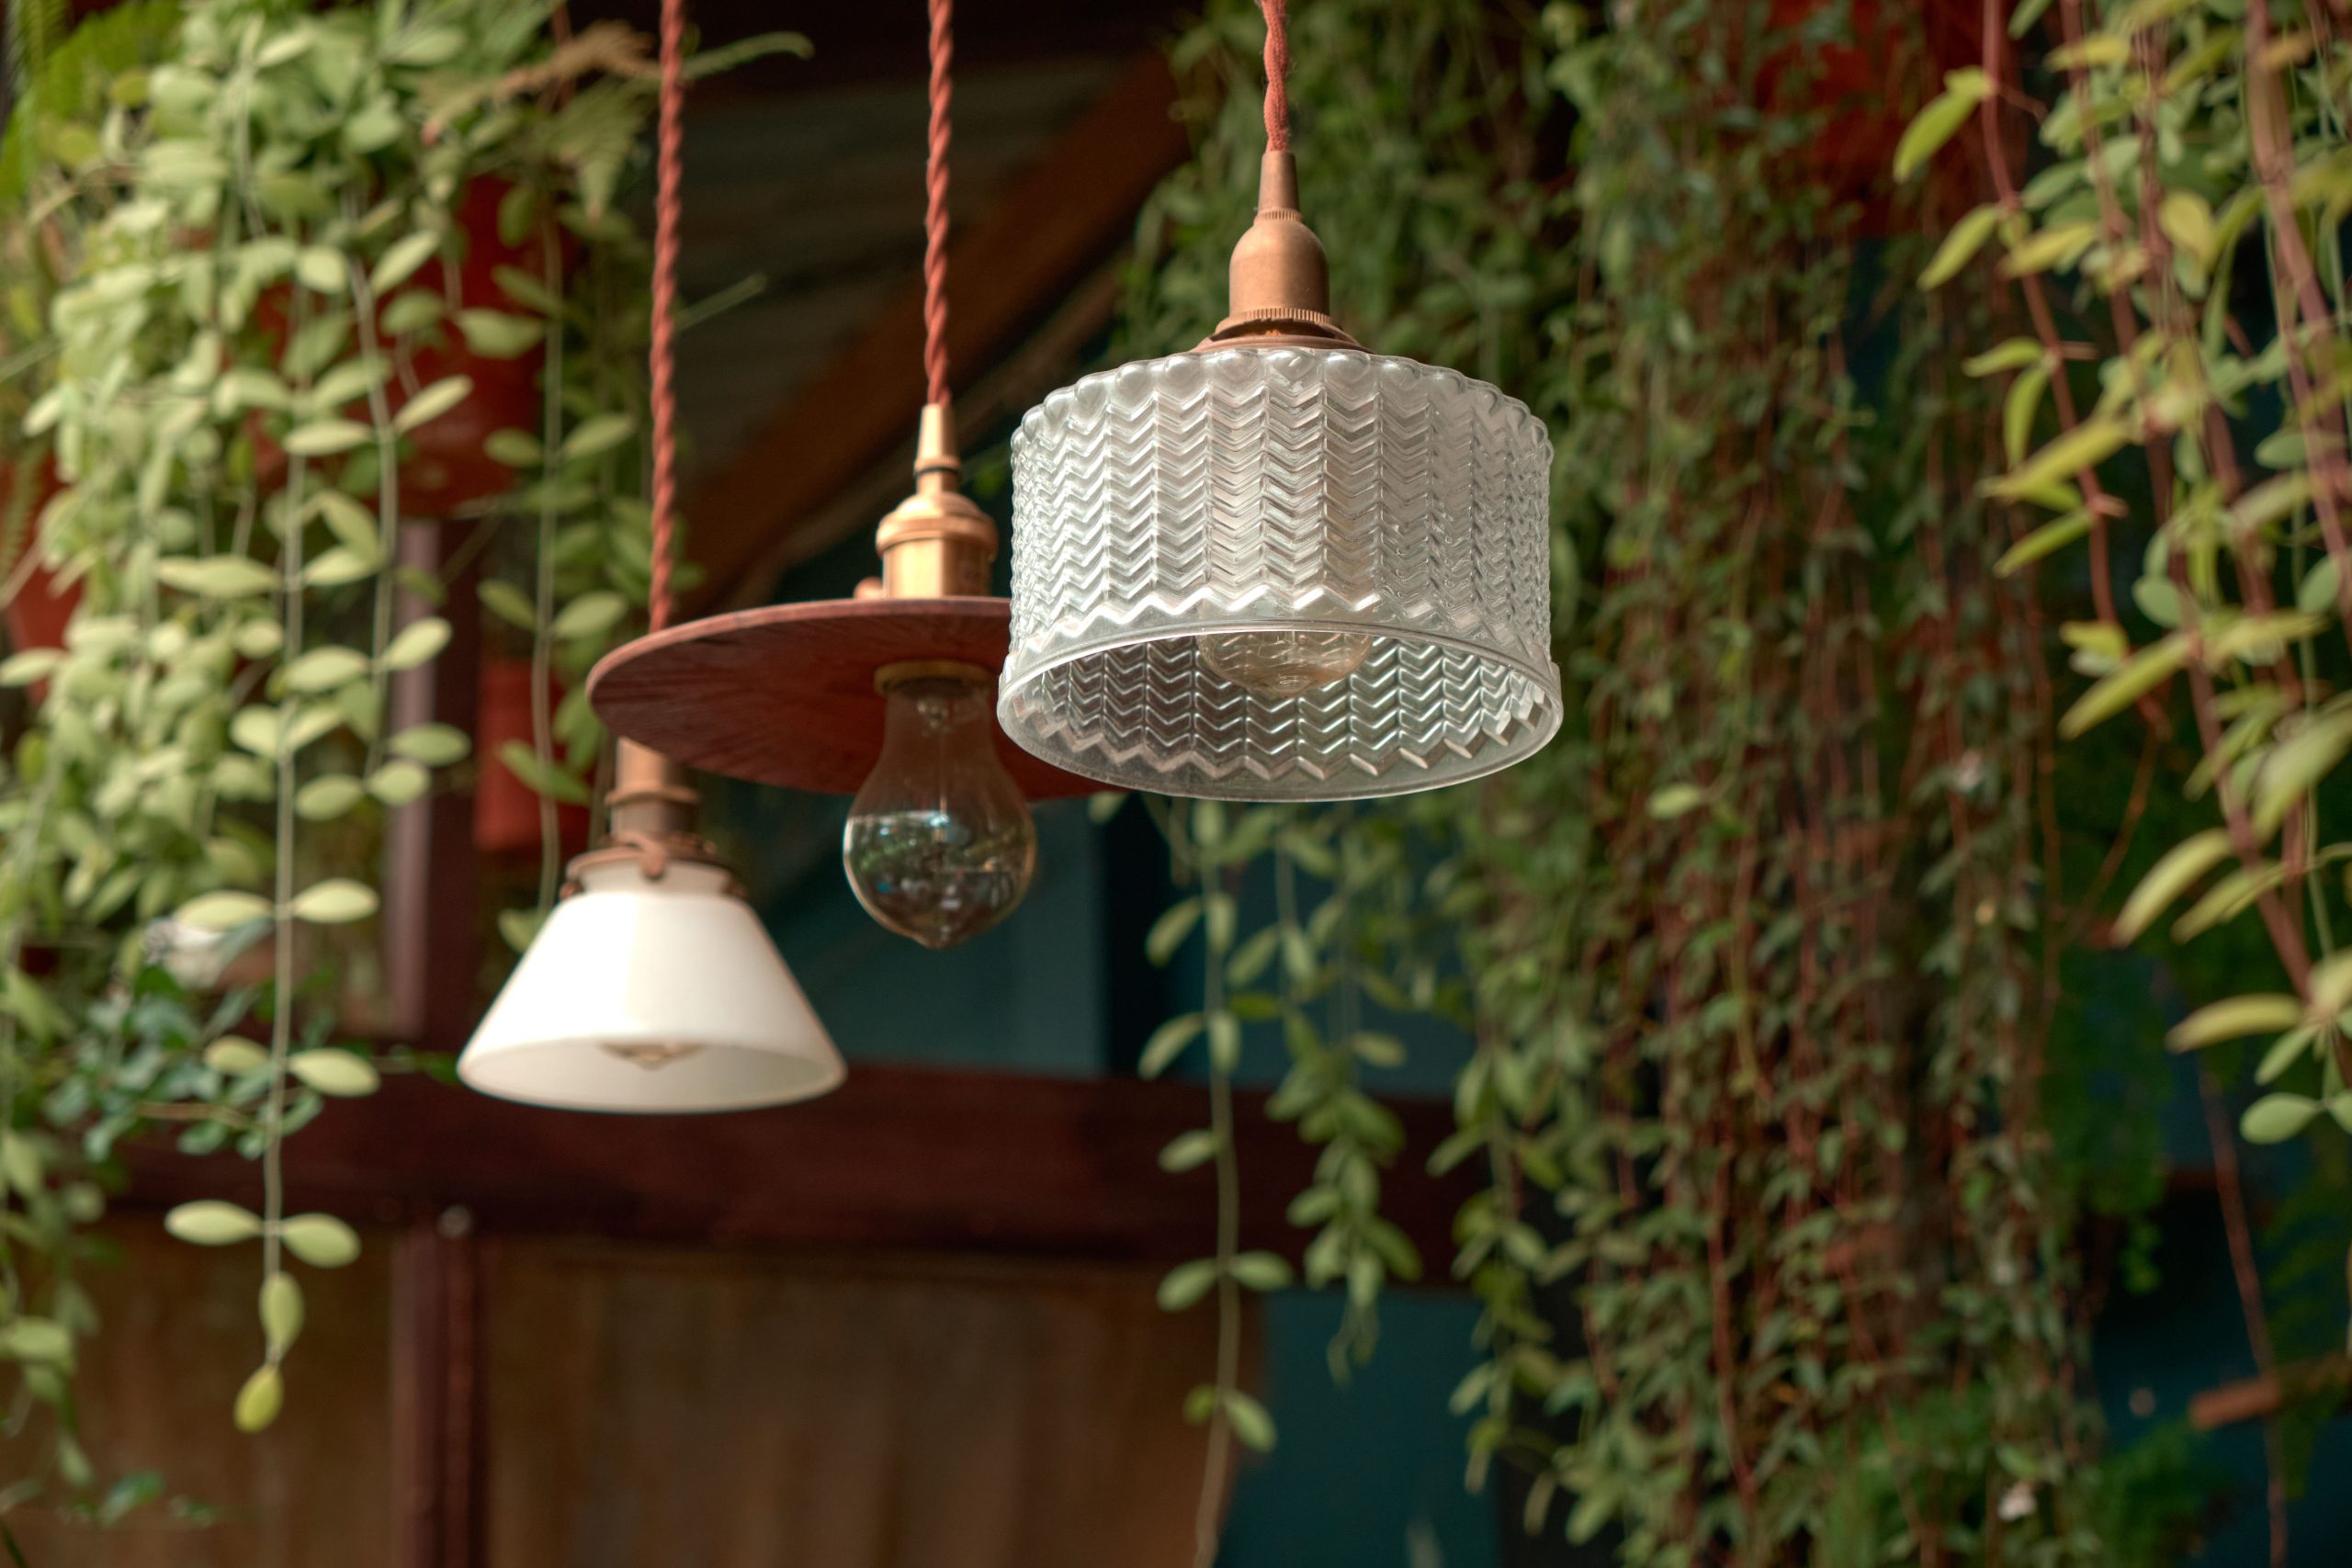
The formula for this bohemian look is about textural layering. It’s roughly 60% lush, draping greenery + 30% a mix of lighting styles and materials + 10% earthy, natural containers like terracotta. The key is abundance; the plants should feel like they are almost overtaking the space. You could swap the specific pendants for different shapes or even woven rattan shades, and as long as you maintain the clustered, varied-height installation and surround them with plants, you’ll keep that same effortlessly cool, eclectic vibe.
20. Minimalist Warm String Lights on a Simple Dark Cord
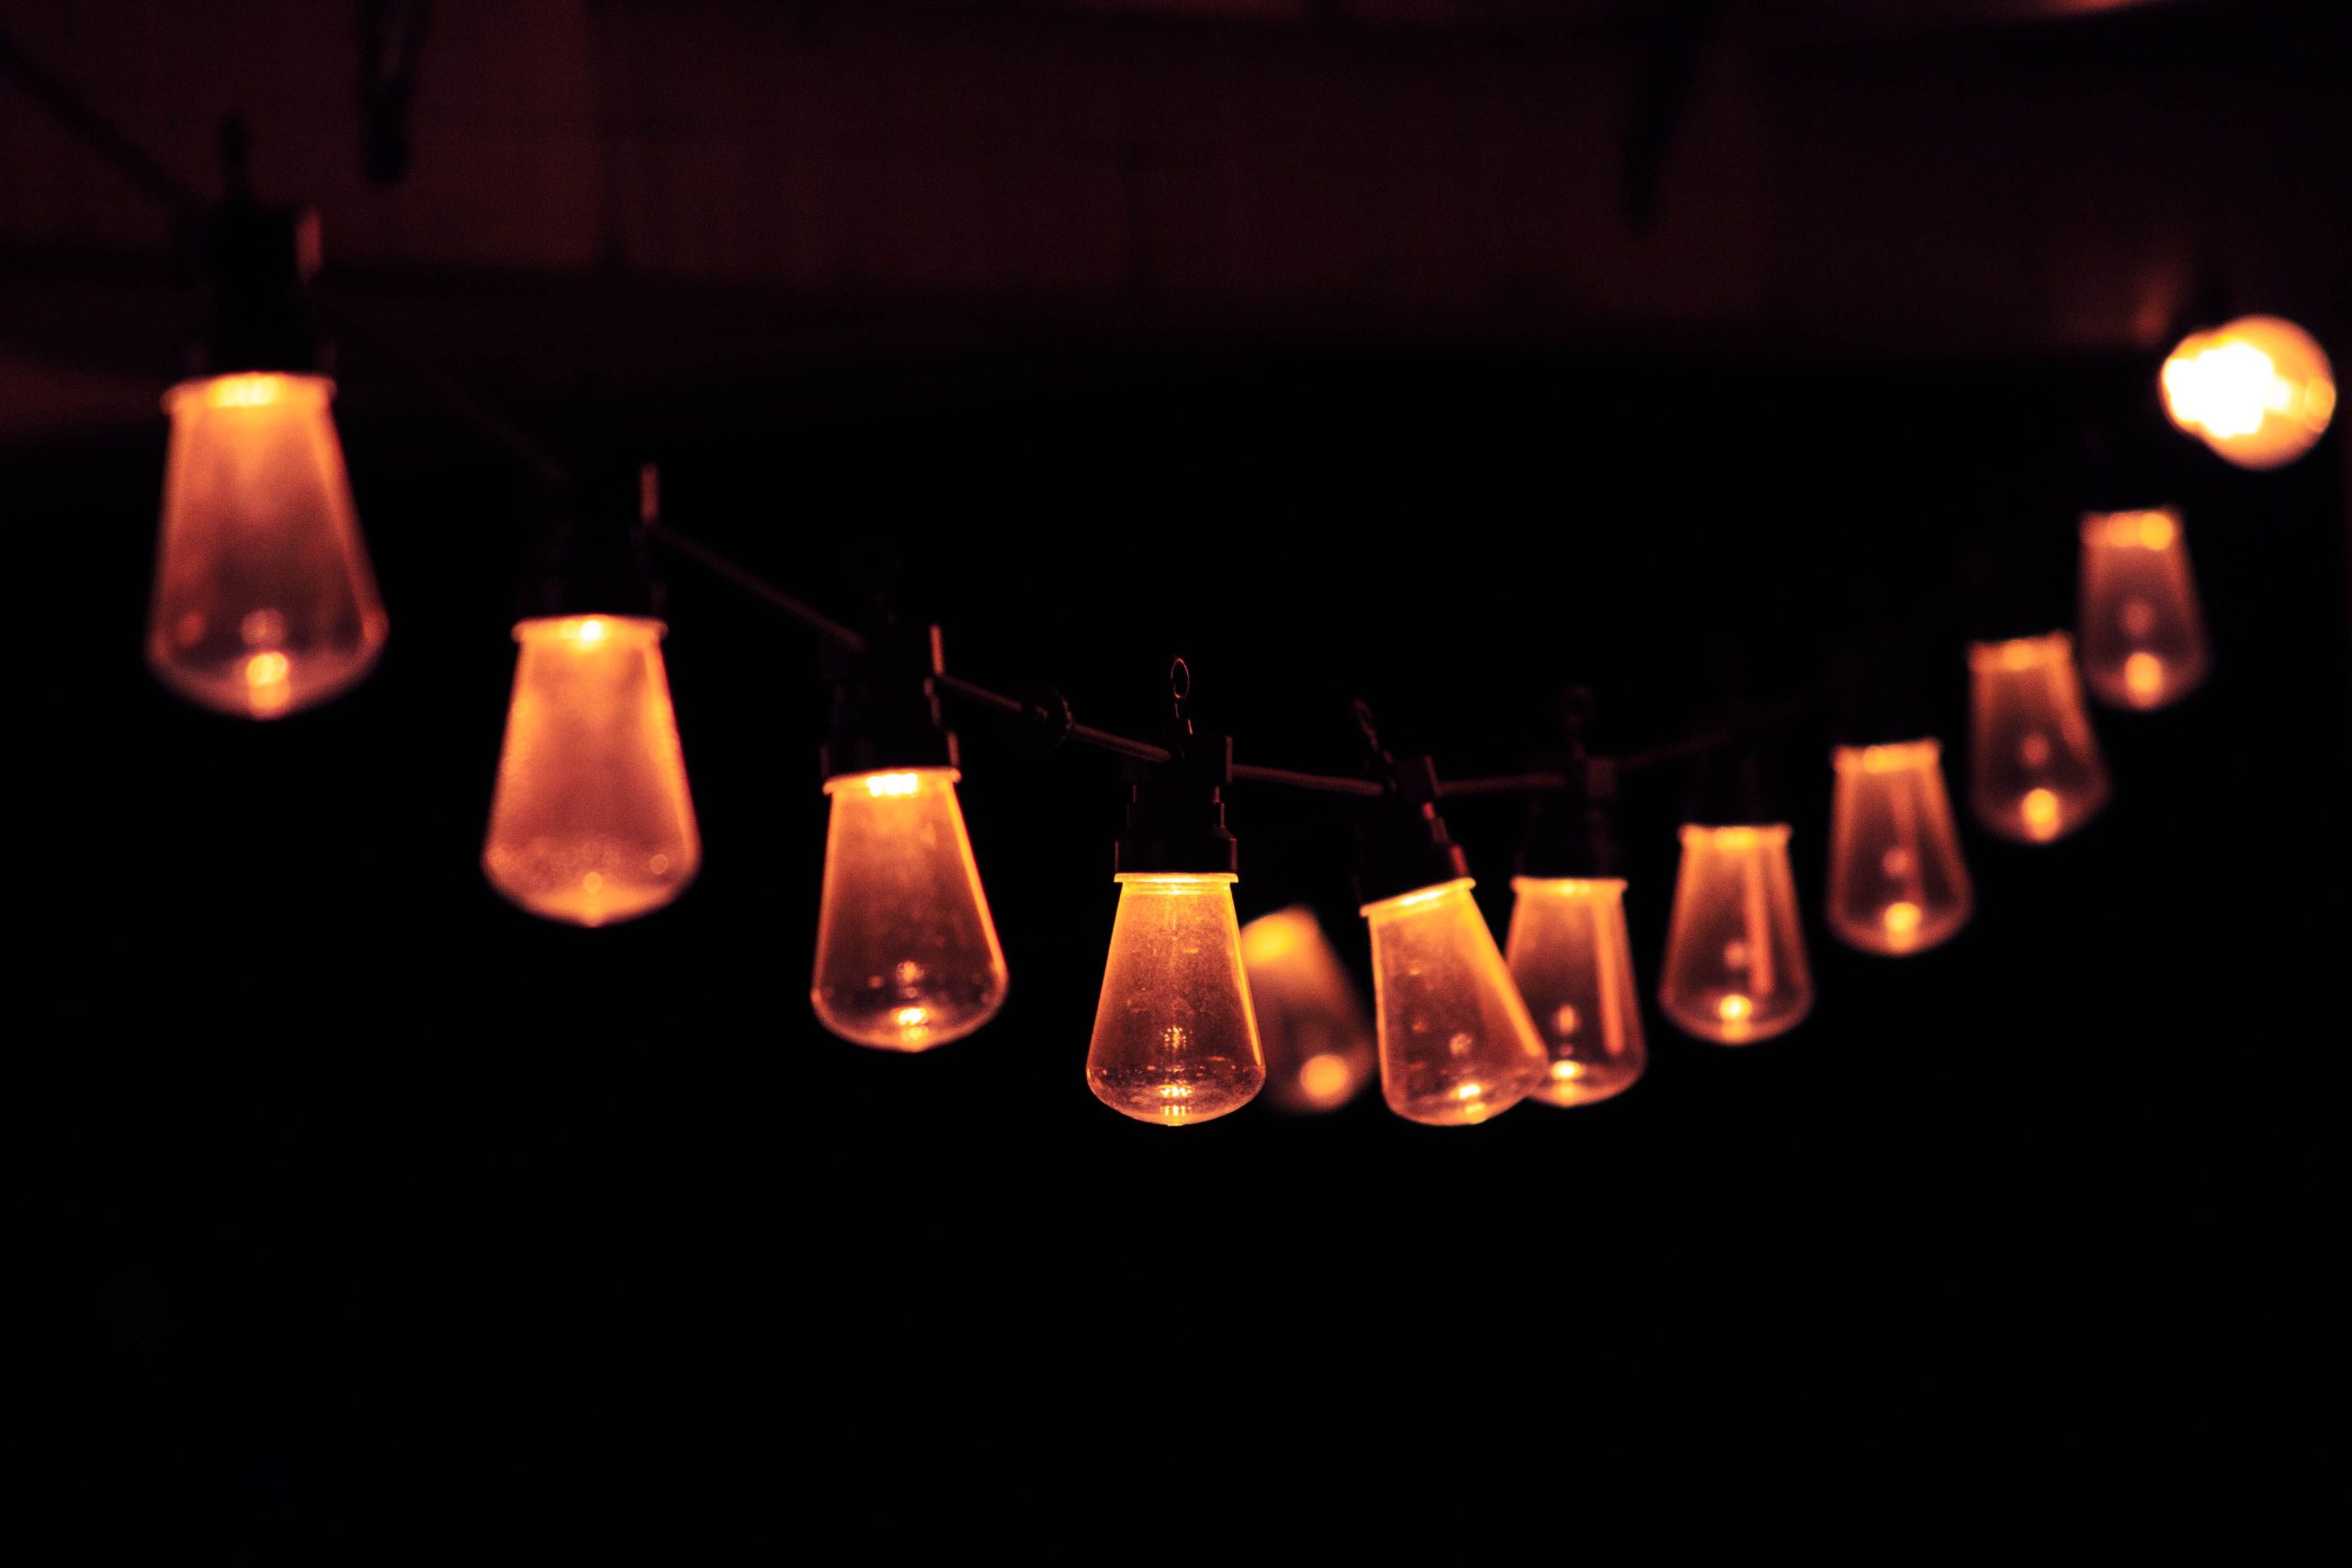
that makes this image so compelling is its absolute simplicity. There is nothing here but light itself. By showing the string lights against a completely dark, featureless background, the focus is entirely on the pure, warm glow of the incandescent bulbs and the gentle arc of the cord. It’s a celebration of light in its most elemental form. This stripped-back presentation reminds us that sometimes, you don’t need a fancy fixture or a complex landscape—the simple act of introducing a warm light source is enough to create an atmosphere of coziness and invitation.
21. Multi-Level Stone Patio with Integrated Step and Wall Lighting
Installing integrated step lights is a project that adds major polish and safety. Here’s a quick overview for an existing stone or paver staircase:
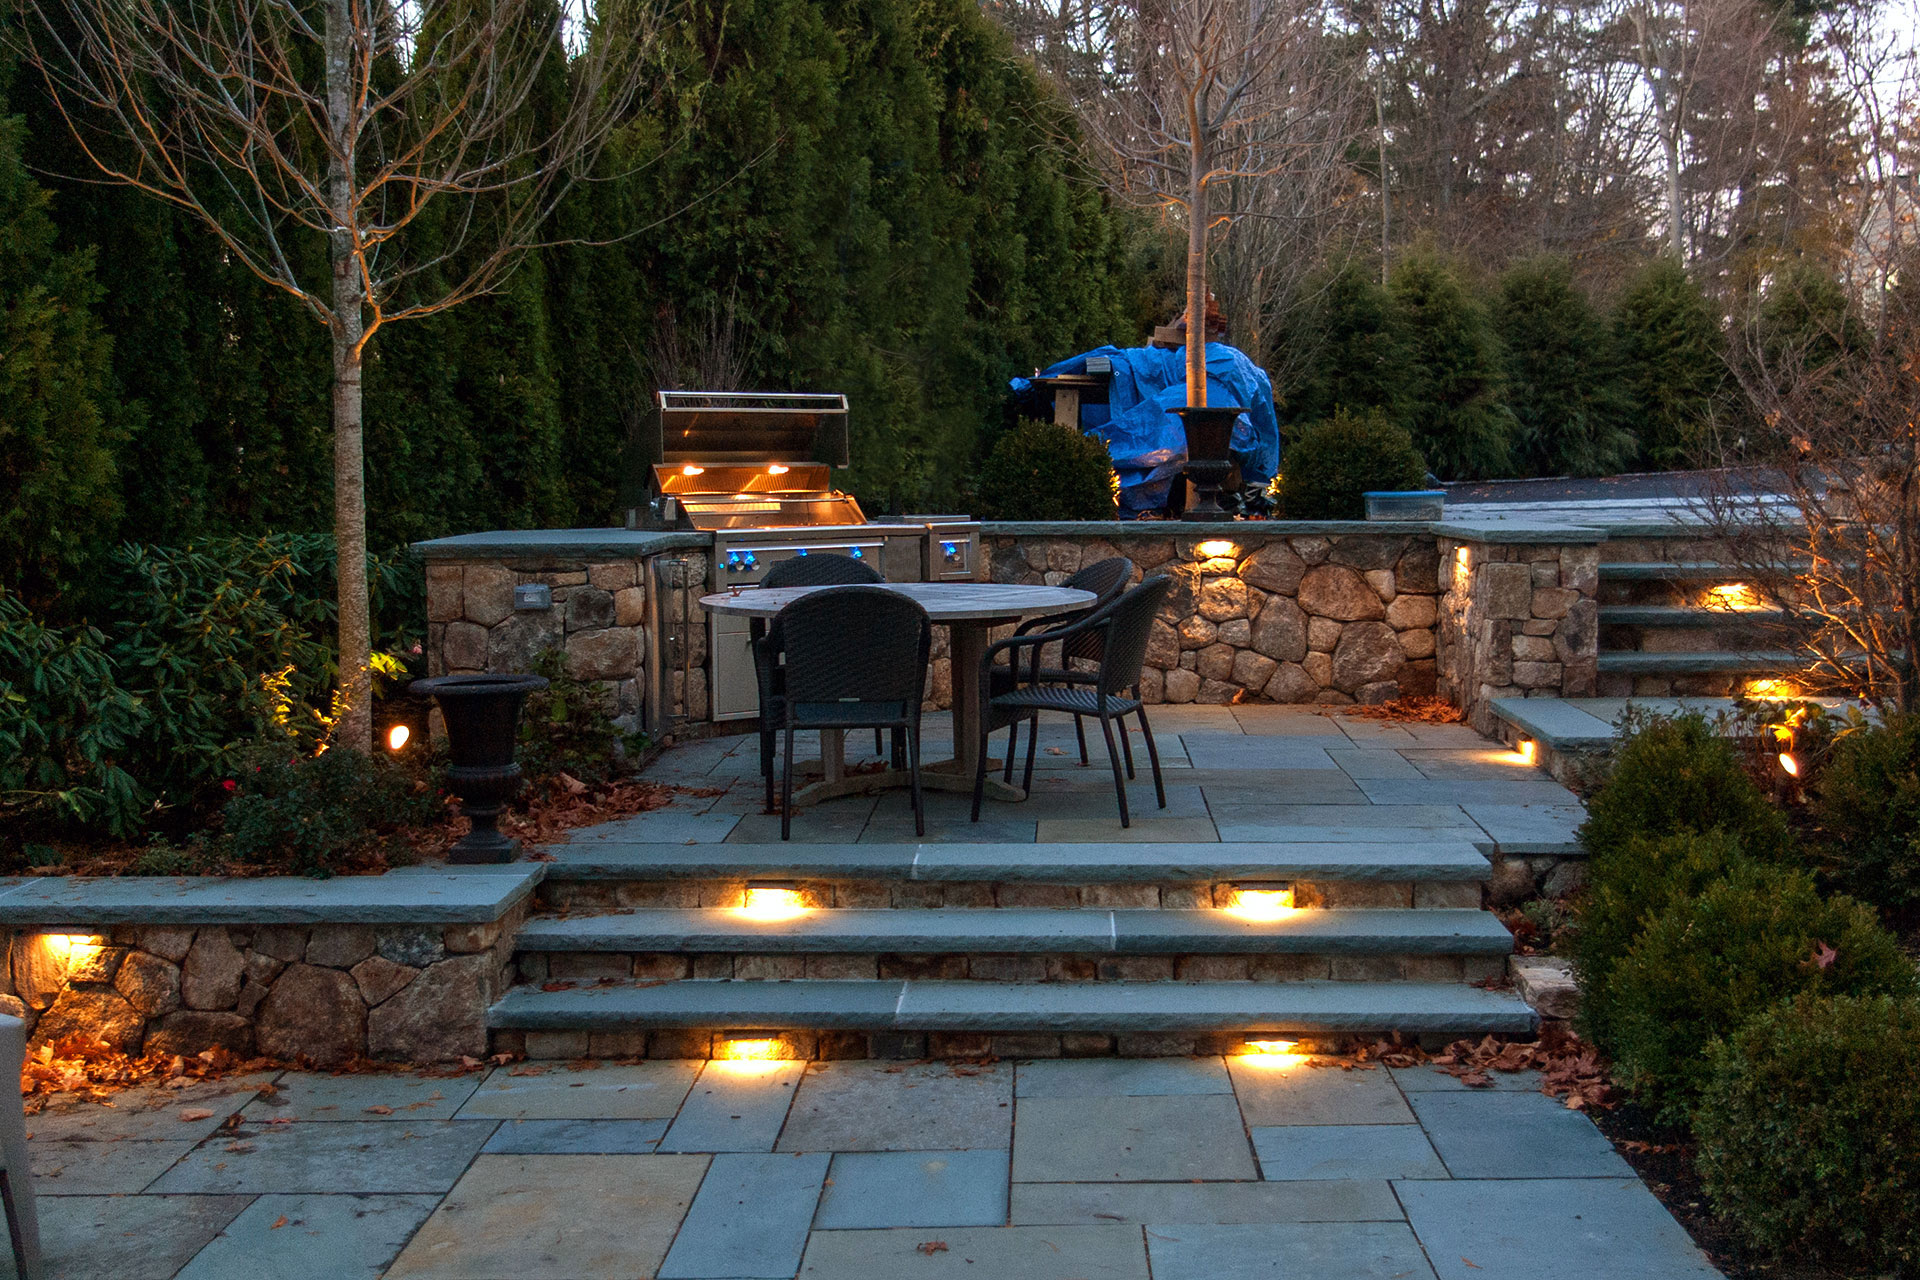
- Time & Cost: 4-8 hours, $30-$80 per light fixture.
- Plan & Power Off: Turn off all power at the breaker. Plan your wiring path from a central low-voltage transformer.
- Create the Recess: This is the trickiest part. Use a masonry drill bit and a small chisel to carefully carve out a space for the light fixture in the step’s vertical face (the riser). Go slow to avoid cracking the stone.
- Run Low-Voltage Wire: Route your main low-voltage landscape wire from the transformer to each light location.
- Connect & Secure: Connect each fixture to the main line using waterproof wire connectors. Secure the fixture in the recess with a strong, outdoor-rated construction adhesive. Test before you walk away!
Integrated lighting is stunning, but it represents a significant commitment. Unlike a stake light you can easily move, these fixtures are physically built into your hardscape. This means that if a light fails 5-10 years from now, replacing it can be a complex job, sometimes requiring a mason to repair the surrounding stone. Here’s the pro tip: when you buy your lights, buy a few extras of the exact same model. Stashing them in your garage is a very cheap insurance policy against that model being discontinued down the line. It can save you a world of trouble.
22. Illuminated Winding Brick Path Through a Lush Night Garden
This scene is a masterclass in using light to guide the eye. The low-level path lights create a clear, illuminated route, but it’s the supporting uplighting on the surrounding trees and shrubs that truly makes it work. This background light creates context and depth, preventing the path from feeling like a stark line through a black void. The combination of functional path lighting and aesthetic landscape lighting makes the garden feel cohesive, lush, and endlessly explorable. The light invites you to take a stroll and discover what’s around the next bend.
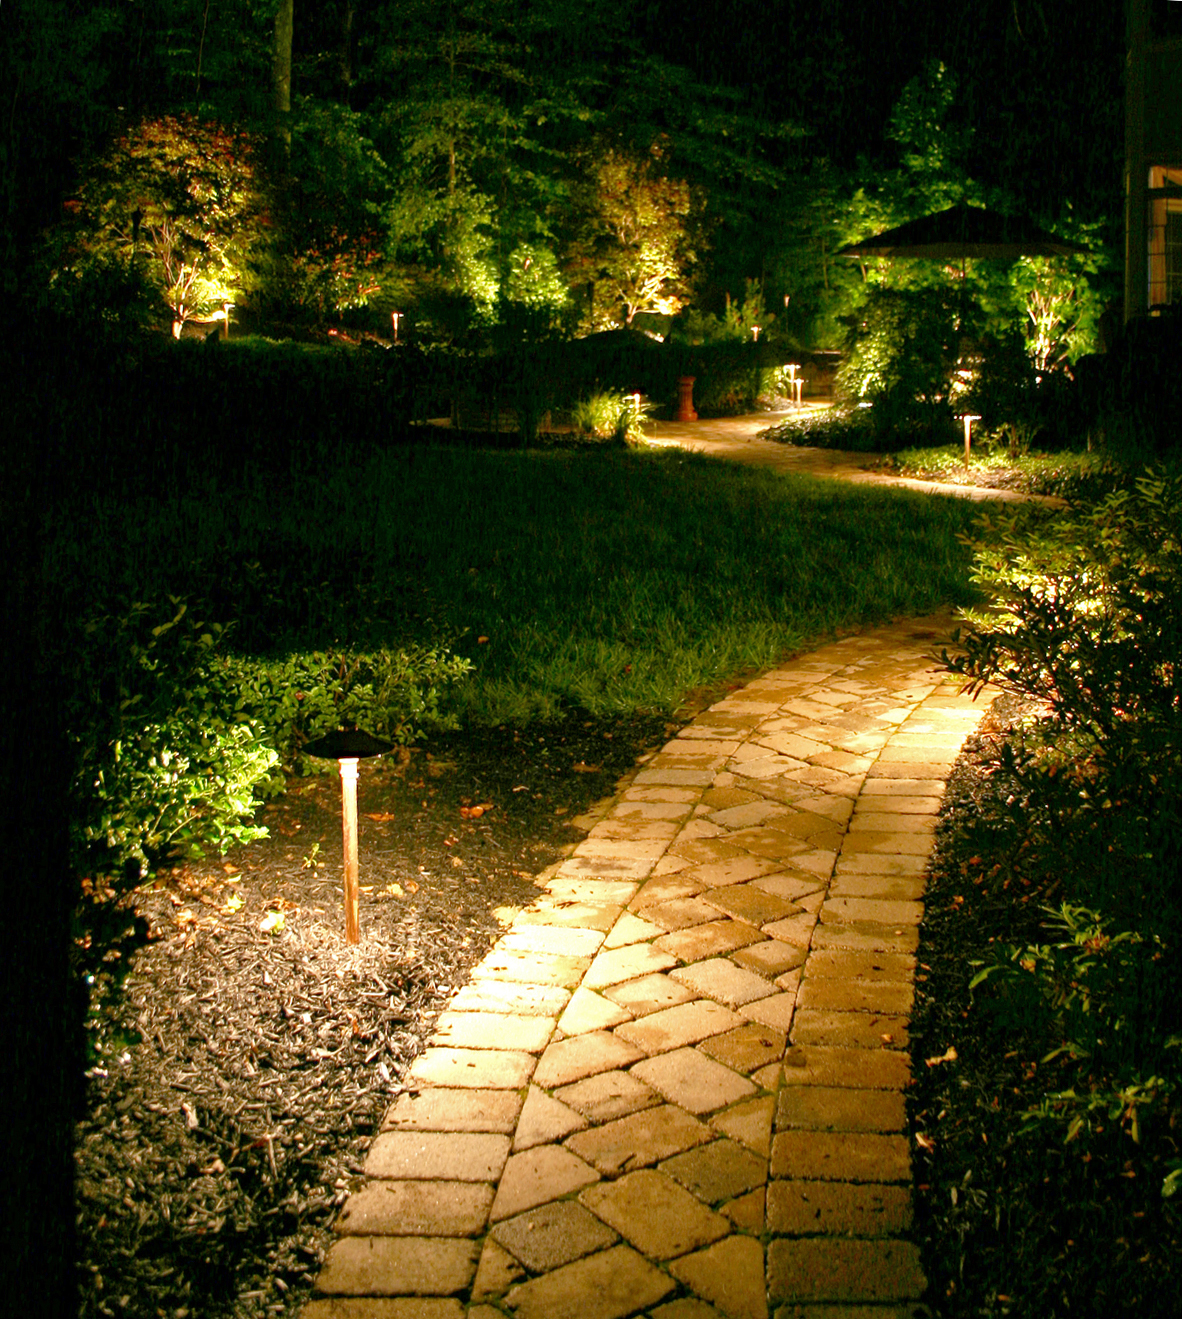
When lighting a garden, think in layers: base, mid, and high. The path lights form the “base” layer, ensuring safety and defining the ground plane. The lit shrubs and medium-sized plants are the “mid” layer, adding texture and filling the space. The tall, uplit trees provide the “high” layer, creating a dramatic ceiling and sense of scale. A truly well-designed scheme has elements at all three levels, which is what gives a nighttime garden that rich, immersive, and professional look. Even starting with just one layer is better than none!
23. Enchanting Stone Slab Path with Dramatic Uplighting at Dusk
The single most important element here is the use of dramatic uplighting on the foliage and large rocks. While pathway lights would have been functional, using uplights transforms the space into a theatrical experience. The light source is hidden, so you only see its effect: glowing leaves, textured rock faces, and long, artistic shadows. This indirect approach creates mystery and wonder, making the garden feel like a magical, undiscovered world at dusk. It’s a pure mood-setter, prioritizing atmosphere over simple utility.
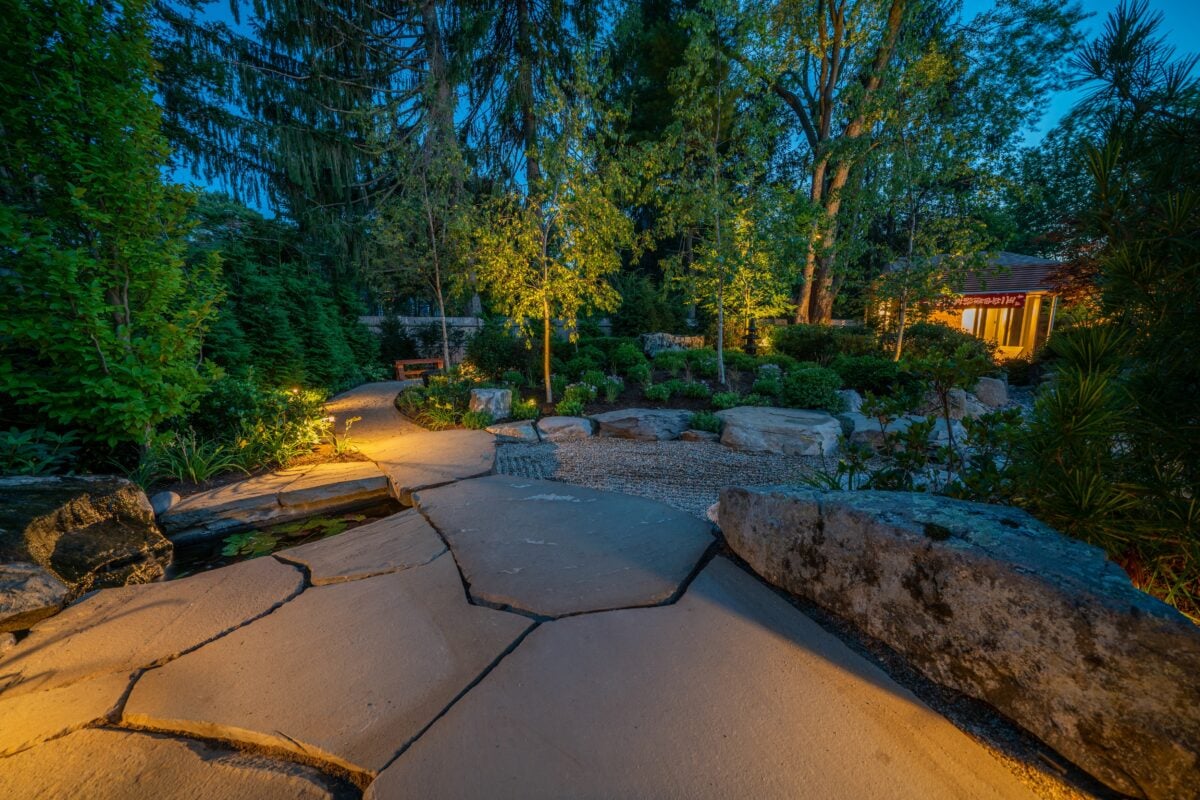
An intricate landscape with features like a pond and extensive lighting requires consistent upkeep to look its best. Ground-level uplights can be easily obscured by falling leaves, mulch, or plant growth, so they need to be cleared every few weeks to maintain their effectiveness. Light lenses should be wiped clean 2-3 times a year to remove hard water spots and dirt that can dim their output. Finally, a small pond like this will require regular skimming to remove debris and periodic checks of the pump and filter to ensure the water stays clear and healthy for the lilies.
24. Layered Landscape Lighting with a Fire Pit Under a Full Moon
This stunningly comprehensive design follows a sophisticated formula: 50% broad uplighting on mature trees to create a tall, structural backdrop and a sense of enclosure. 30% low-level path and wall lighting to define spaces, guide movement, and highlight stone textures. 20% accent lighting for specific features, like the decorative pottery and the ambient glow from the fire pit. It’s the combination of these wide, medium, and tight focuses of light that creates such incredible depth, making the large yard feel like a series of intimate outdoor rooms.
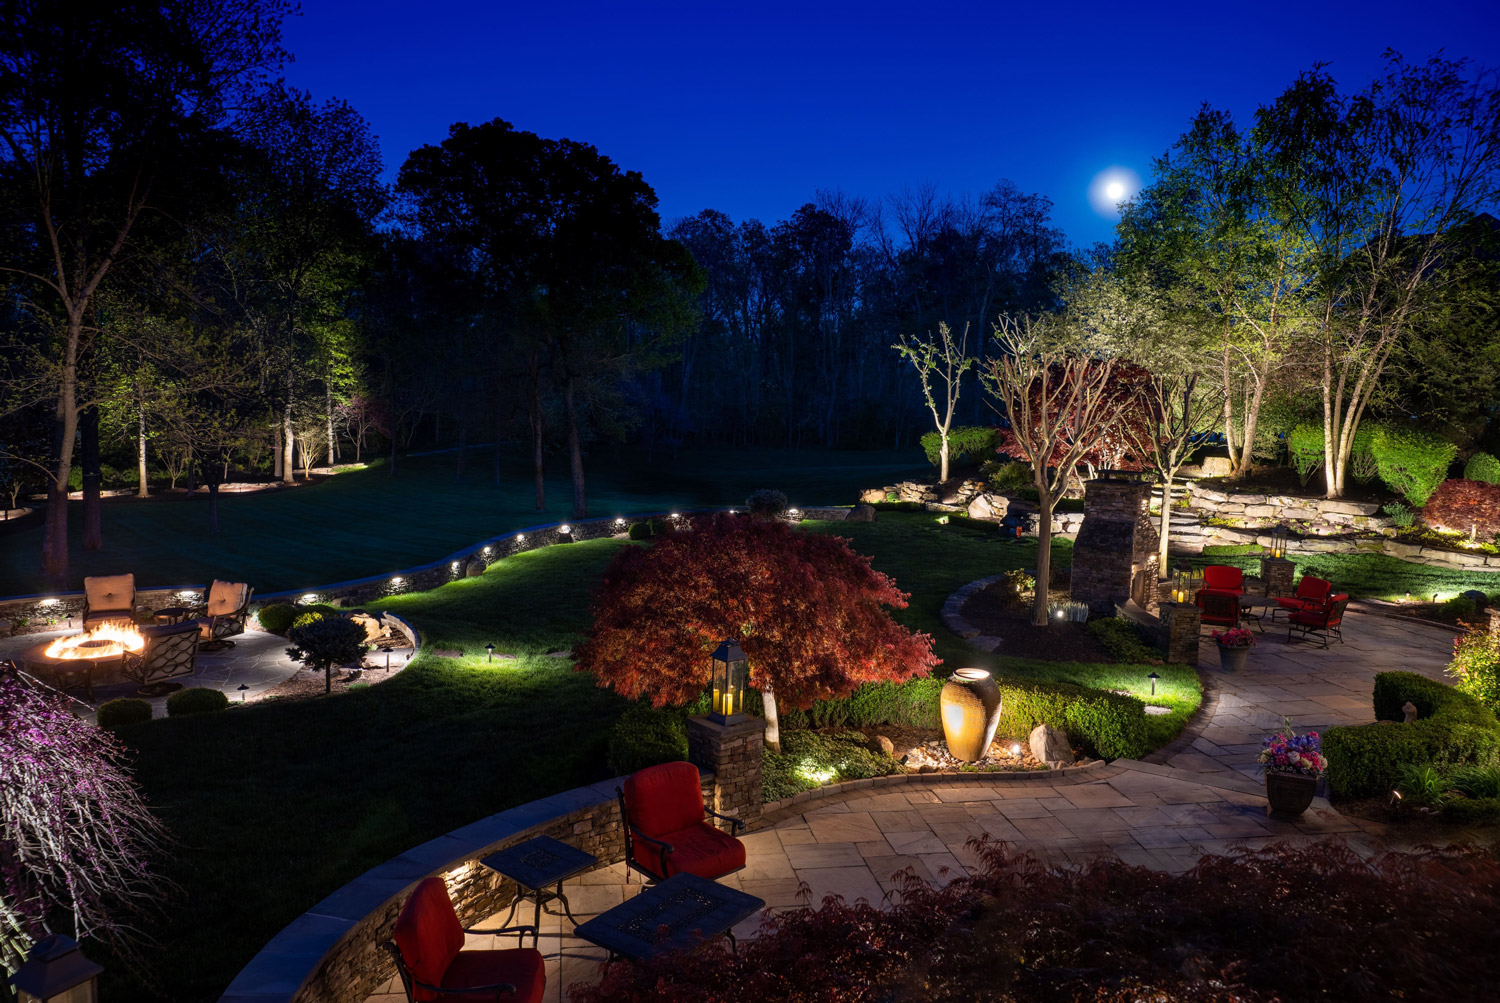
A landscape lighting system this extensive is a significant investment, not just in the initial installation but in potential maintenance. With dozens of individual fixtures, bulbs, and hundreds of feet of buried cable, troubleshooting a problem can be complex. A cut wire from a rogue shovel or a failed transformer can cause a whole zone of lights to go out. If you’re investing in a system of this scale, it’s wise to either learn the basics of low-voltage electrical work or establish a relationship with a reliable landscape lighting professional for annual check-ups and repairs.
25. Warm Uplighting Grazing a Stone Wall and Garden Path
The success of this design lies in the “grazing” technique used on the stone wall. By placing the uplight very close to the base of the wall and aiming it almost straight up, the light rakes across the surface, catching every nook, cranny, and rough texture. This creates dramatic shadows and highlights that bring the stone to life, turning a simple wall into a stunning feature. This is then balanced by the softer, downward-facing path lights, which provide functional illumination without competing with the dramatic focal point of the wall.
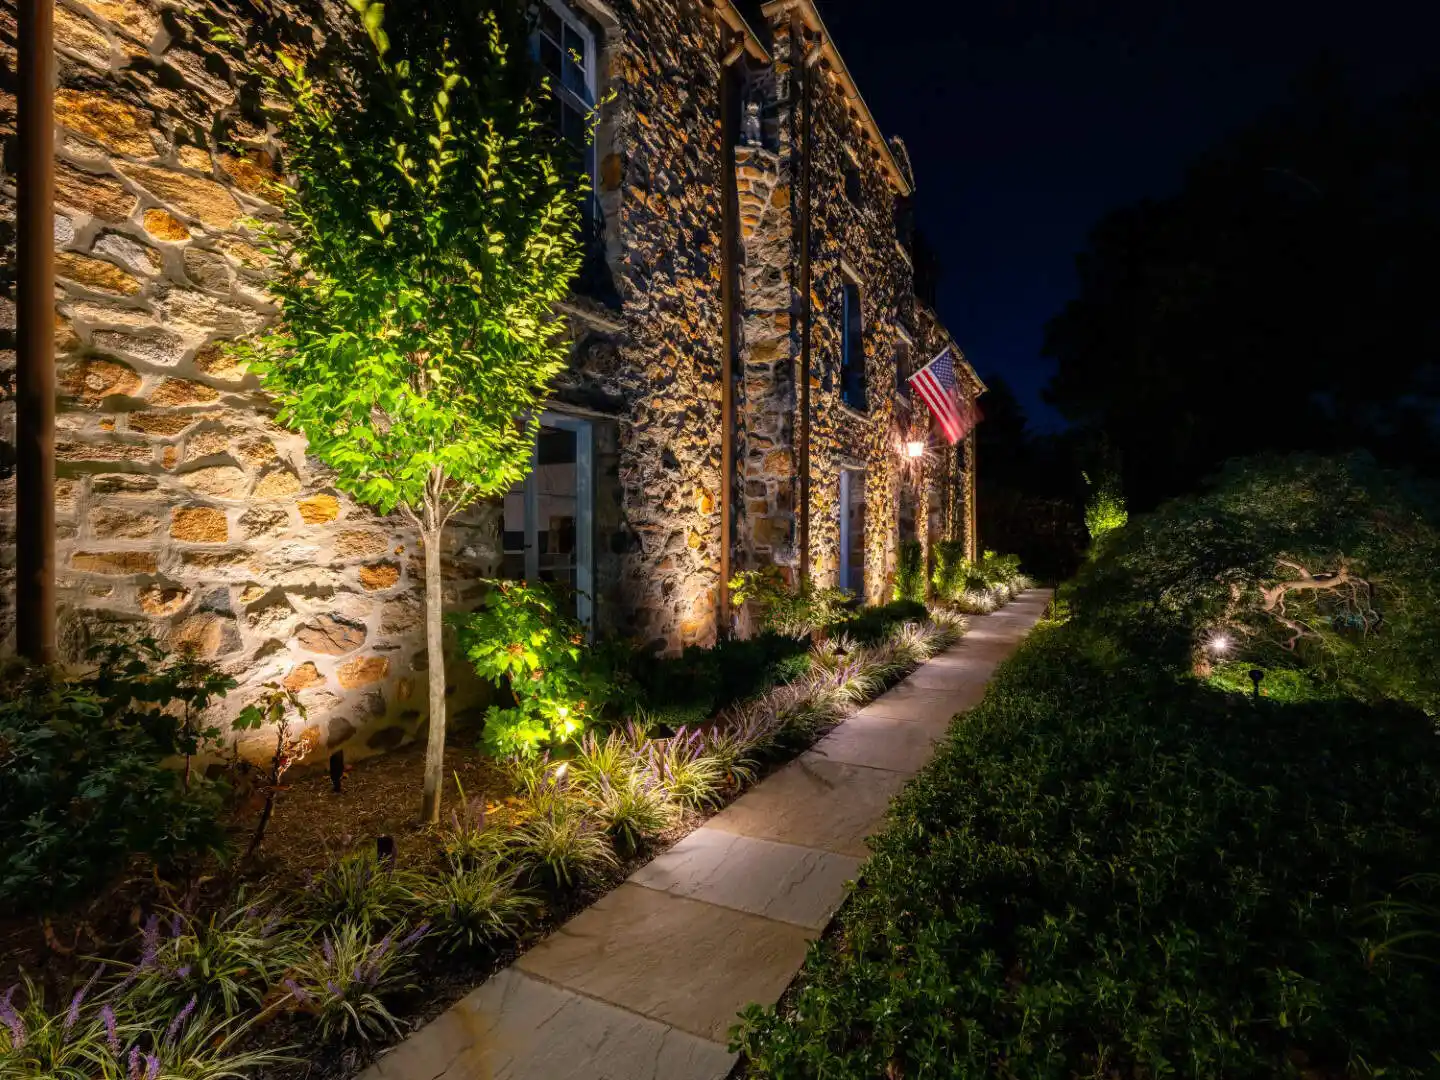
You can replicate this high-impact “grazing” technique on a budget using a single, well-placed solar spotlight. Look for a model with a bright output (at least 100-200 lumens) and a warm color temperature. For around $20-$30, you can get a single, powerful solar light that you can place at the base of a feature wall, a fence with interesting texture, or even a large tree trunk as seen in Idea #4. It’s a low-cost, no-wiring way to add a dose of professional-looking drama to your yard in minutes.
26. Modern Pathway Mixing Cool and Warm Uplighting on Lush Plants
Mixing light temperatures can create a sophisticated, high-end look, but it must be done with intention. A great rule of thumb is to use warm light (2700K-3000K) on man-made elements like wood, stone, or architectural surfaces to make them feel inviting. Then, use a cooler, more neutral white light (around 4000K) on green foliage. This cooler light has more blue in it, which can make greens look exceptionally lush, vibrant, and almost hyper-real, as seen on the large leafy tree here. This deliberate contrast feels thoughtful and professionally designed.
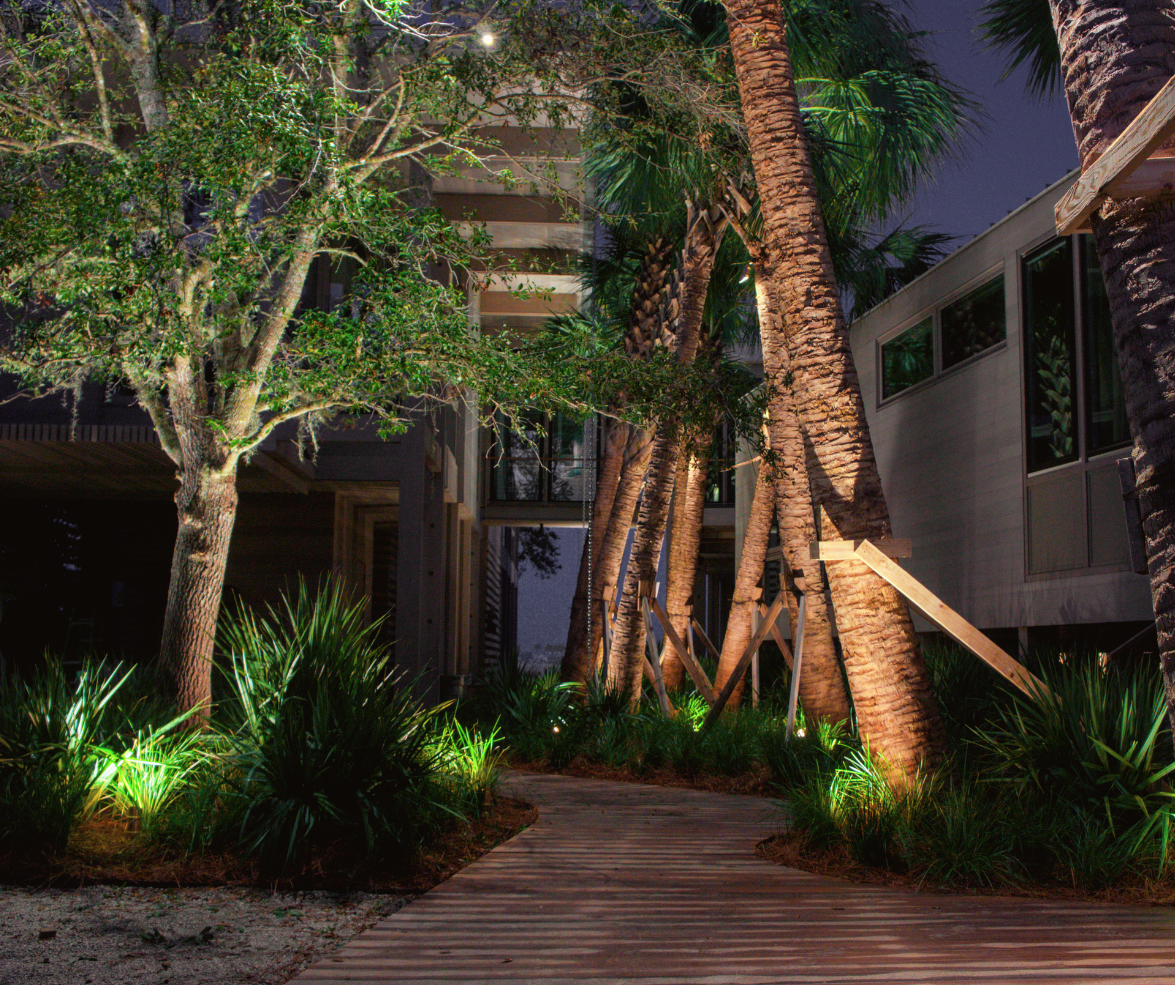
Mixing color temperatures is an advanced technique that can go wrong if not handled carefully. If you mix them without a clear strategy, it can look messy and accidental. Furthermore, be aware that LED color temperatures can vary slightly from brand to brand. A “warm white” from one company might look different next to another’s. For a cohesive look, it’s best to buy all your warm-light fixtures from one brand, and all your cool-light fixtures from another, to ensure consistency within each temperature group.
27. Warm Uplighting on Tiered Garden Beds with Dark Mulch
that makes this garden bed pop is the dark wood mulch. It serves as the perfect canvas for the lighting design. During the day, it provides a rich, dark contrast that makes the green and burgundy foliage stand out. At night, it becomes a dark, non-reflective ground plane, disappearing into the shadows and allowing the illuminated plants to take center stage without any visual clutter. Swapping this for light-colored gravel or straw would completely change the effect, proving how crucial this simple material choice is to the overall success of the scene.
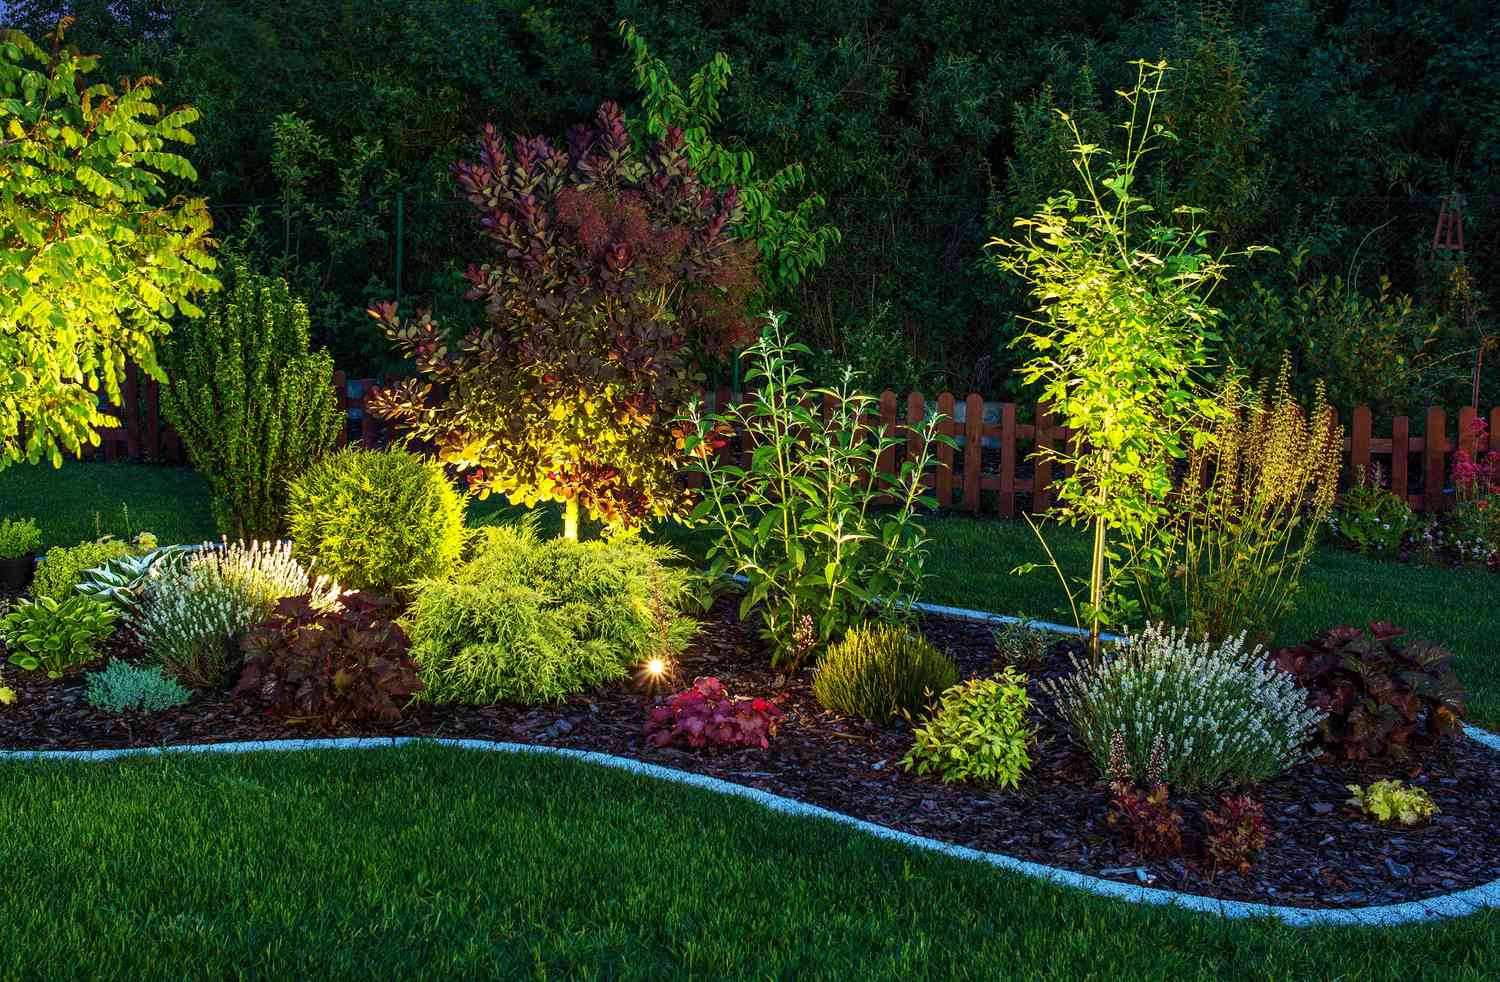
This design works because it uses light to paint a picture. The uplighting is selectively aimed at plants with interesting shapes and colors, like the feathery texture of the small tree and the deep burgundy of the shrubs. This selective illumination creates pools of light and color that draw the eye, while the unlit areas provide negative space and give the composition room to breathe. The gentle curve of the garden bed adds a sense of flow, guiding the viewer’s gaze through the beautifully lit vignette.
28. Vibrant Uplighting on Red and Green Foliage in a Tiered Garden
To light a multi-layered garden bed like this, you’ll want a variety of low-voltage fixtures. Here’s a sample breakdown:
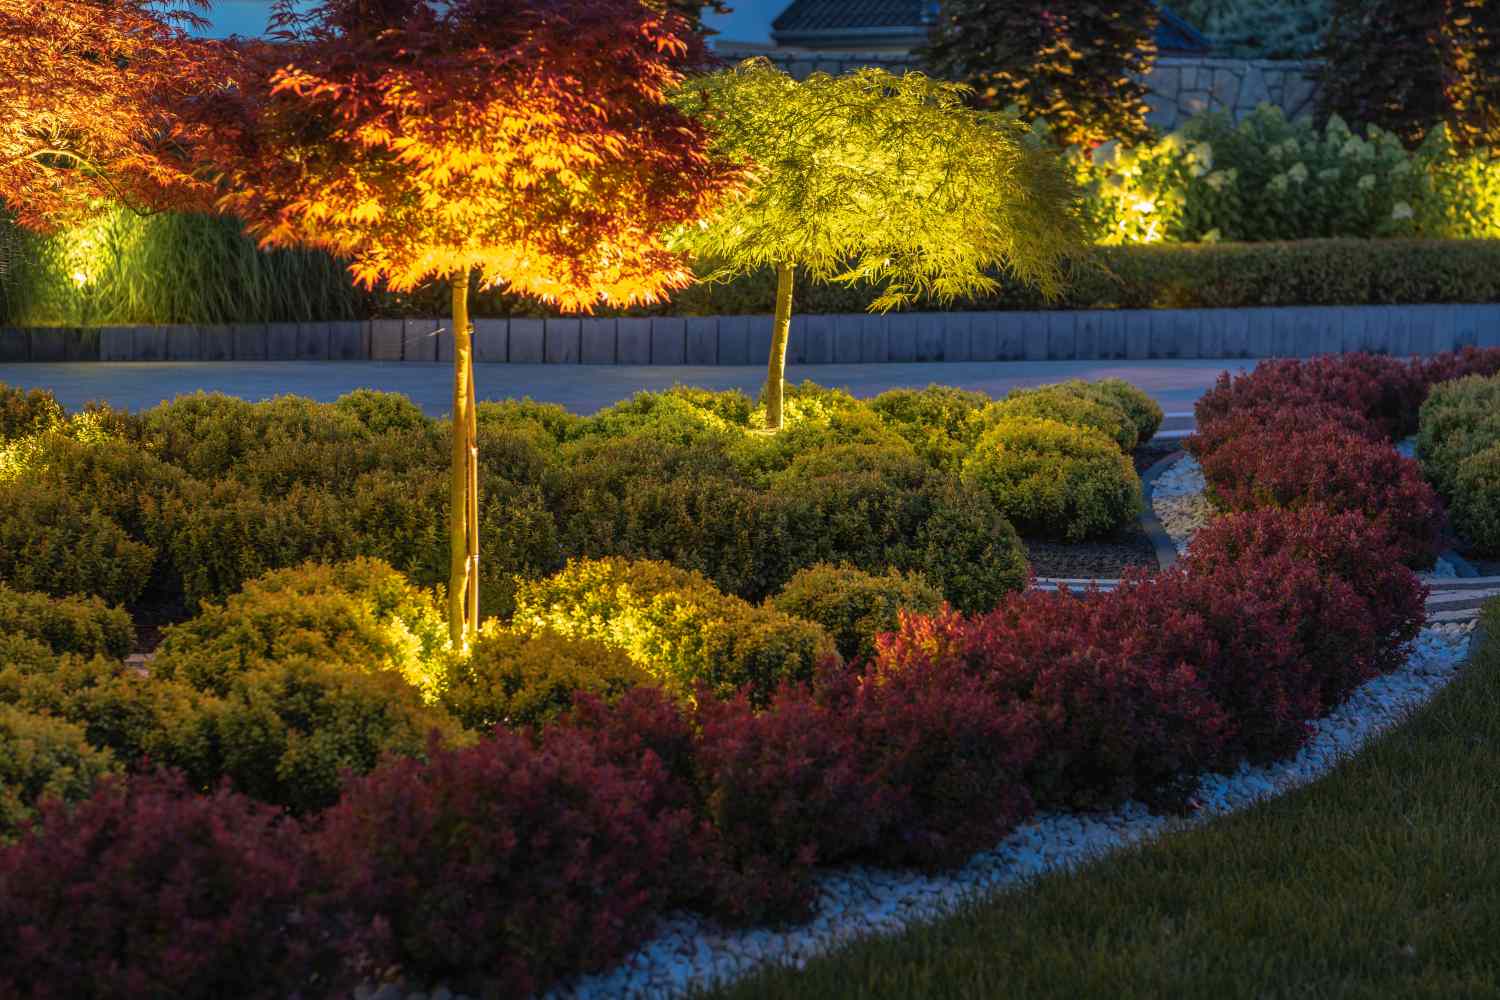
- Low-Voltage Transformer (150-watt): $70 – $150
- Flood Lights for Trees (2): $80 – $200
- Spotlights for Shrubs (4-6): $120 – $300
- Low-Voltage Landscape Cable (100 ft): $50 – $80
- Waterproof Connectors & Stakes: $30 – $50
- TOTAL (DIY): $350 – $780
Budget alternative: A pack of 6-8 high-quality solar spotlights can achieve a similar, albeit less powerful, effect for $80-$150, with no wiring or transformer needed.
Before you commit to lighting your prize-winning Japanese maple, run through this list:
- Identify Your Stars: Which plants have the best color, texture, or shape to justify being a focal point? Not everything needs a light.
- Check Your Power Source: Do you have an accessible outdoor GFCI outlet to power a transformer? If not, a solar setup might be your best bet.
- Consider the Angles: Where will you and your guests see the garden from? Plan your lighting angles from the primary viewing points (e.g., the patio, a kitchen window).
- Choose Your Temperature: Decide if you want a consistent warm white (2700K-3000K) for a cozy feel or if you plan to mix temperatures for a more modern look, like in Idea #26.
Your Garden’s Evening Story Begins
Now that you’re full of ideas, the next step is to start sketching out your own garden’s lighting story. Pick a favorite look, start small with a single focal point or one string of lights, and watch how it instantly transforms your evenings outdoors. Don’t forget to save your top picks to your Pinterest board to keep the inspiration flowing!