27 Jaw-Dropping Landscaping With Large Rocks Ideas for Your Front Yard and Backyard in 2026

You know that feeling when you finally find the perfect inspiration for your yard? That one photo that just clicks. If you’ve been scrolling through rock landscaping ideas waiting for that moment, you can stop now. After filtering through hundreds of options, from local stone yards to big-box stores, we narrowed it down to 27 distinct ideas that actually work for real yards. We’ve covered everything from serene Zen gardens to rustic, functional retaining walls, making sure there’s something for every style and budget.
And for 2026, it’s all about creating outdoor spaces that feel like a true extension of your home—natural, intentional, and deeply personal. Using large rocks is the fastest way to add that permanent, elemental structure that gardens often lack. And stay until the end—we break down the most common mistakes that can ruin these looks.
📌 Save this to Pinterest for later—you’ll want to revisit these ideas.
1. Follow a Natural Path with Integrated Boulders
What makes this feel so right is the masterful blend of materials. The design uses both fine gravel and large, flat stone pavers for the path, which creates textural variety underfoot and avoids the monotony of a single material. The large rocks aren’t just decoration; they’re integrated directly into the landscape as retaining walls and borders. This functional approach makes the design feel intentional and organic, as if the path was discovered rather than built. The dense, layered plantings, from tall trees to low ferns, soften the hardscape and complete the picture.
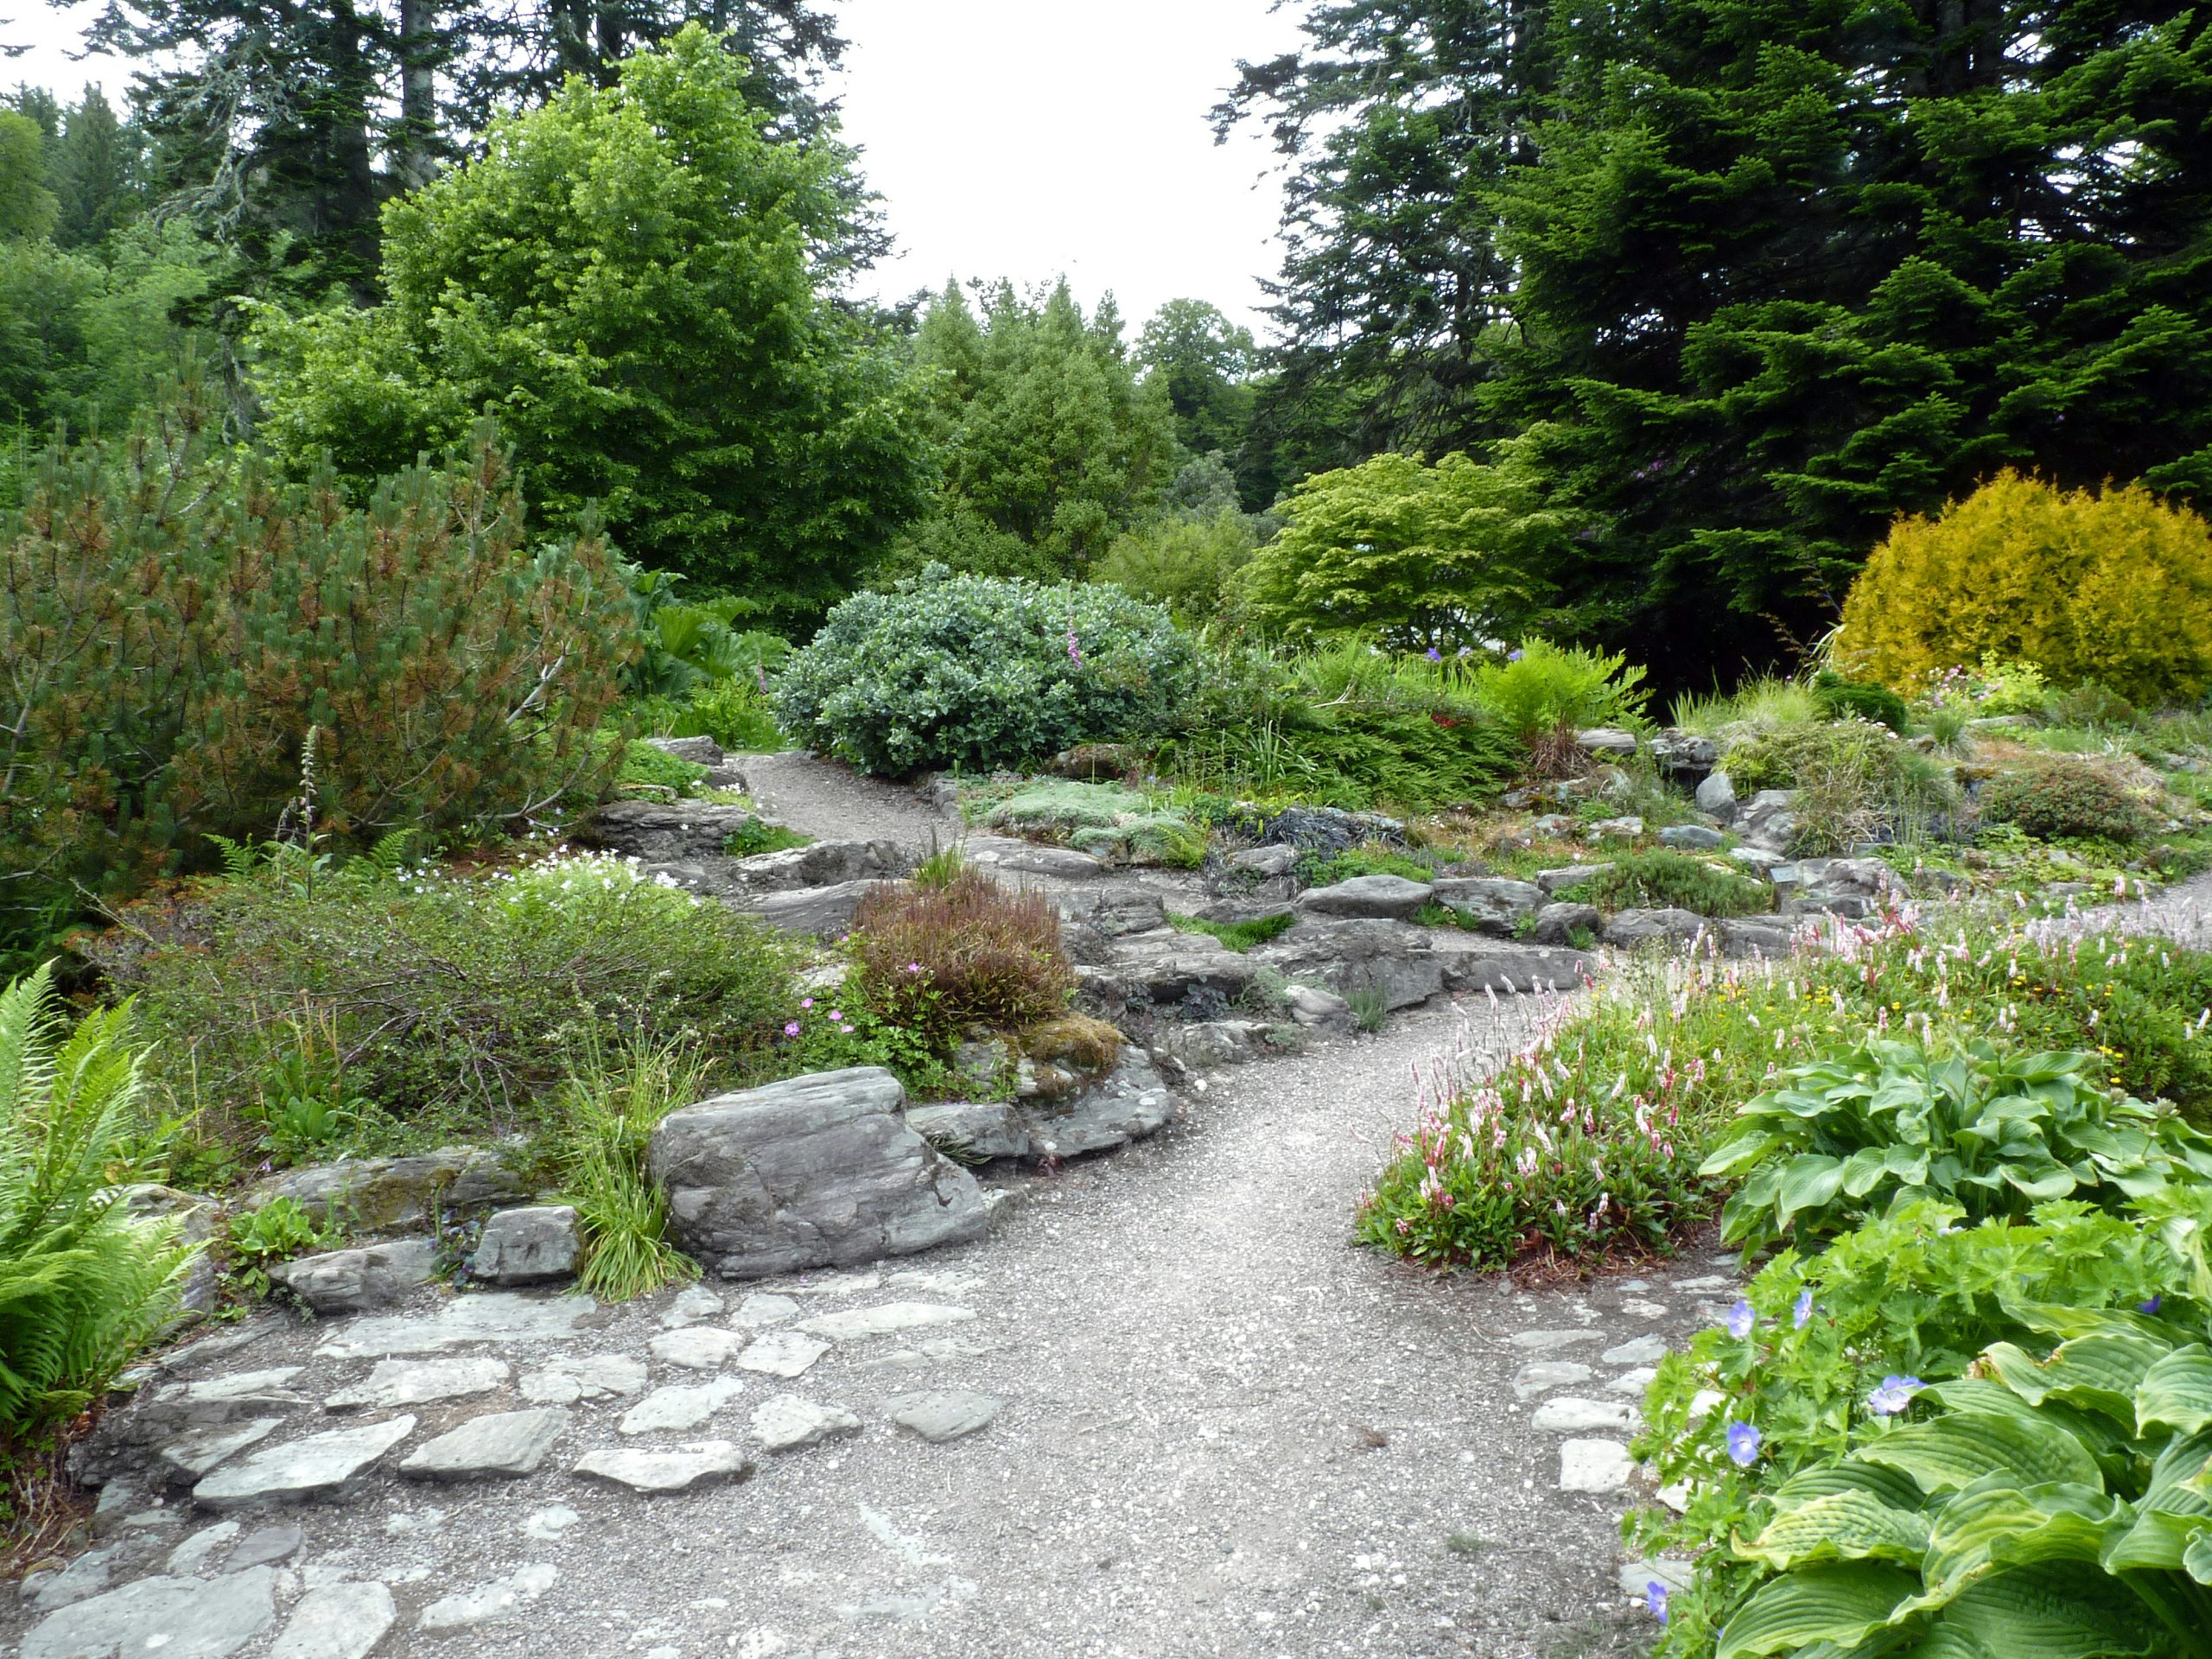
When laying a path with both gravel and pavers, aim for a 60/40 ratio. Use gravel for about 60% of the length to keep costs down and improve drainage, and place stone pavers at key transition points—like curves, entryways, or steps—for stability. For a truly natural look, ensure the top of the pavers sits just a half-inch above the gravel line. This subtle height difference provides a satisfying foot feel and prevents gravel from constantly migrating onto the stones. Use a heavy-duty landscape fabric underneath it all to stop weeds in their tracks.
2. Build Terraced Beds with Dry-Stacked Stone Walls
The formula here is all about repetition and rhythm. Think of it as 70% structured hardscape + 30% lush, wild planting. The dry-stacked stone walls provide a strong, repeating horizontal element that gives the entire hillside a sense of order and stability. The plants—a mix of neat green shrubs and wilder grasses—spill over the edges, softening the stone and preventing the design from feeling too rigid. You could swap the green shrubs for lavender or rosemary for a similar effect with a Mediterranean twist, keeping the core formula intact.
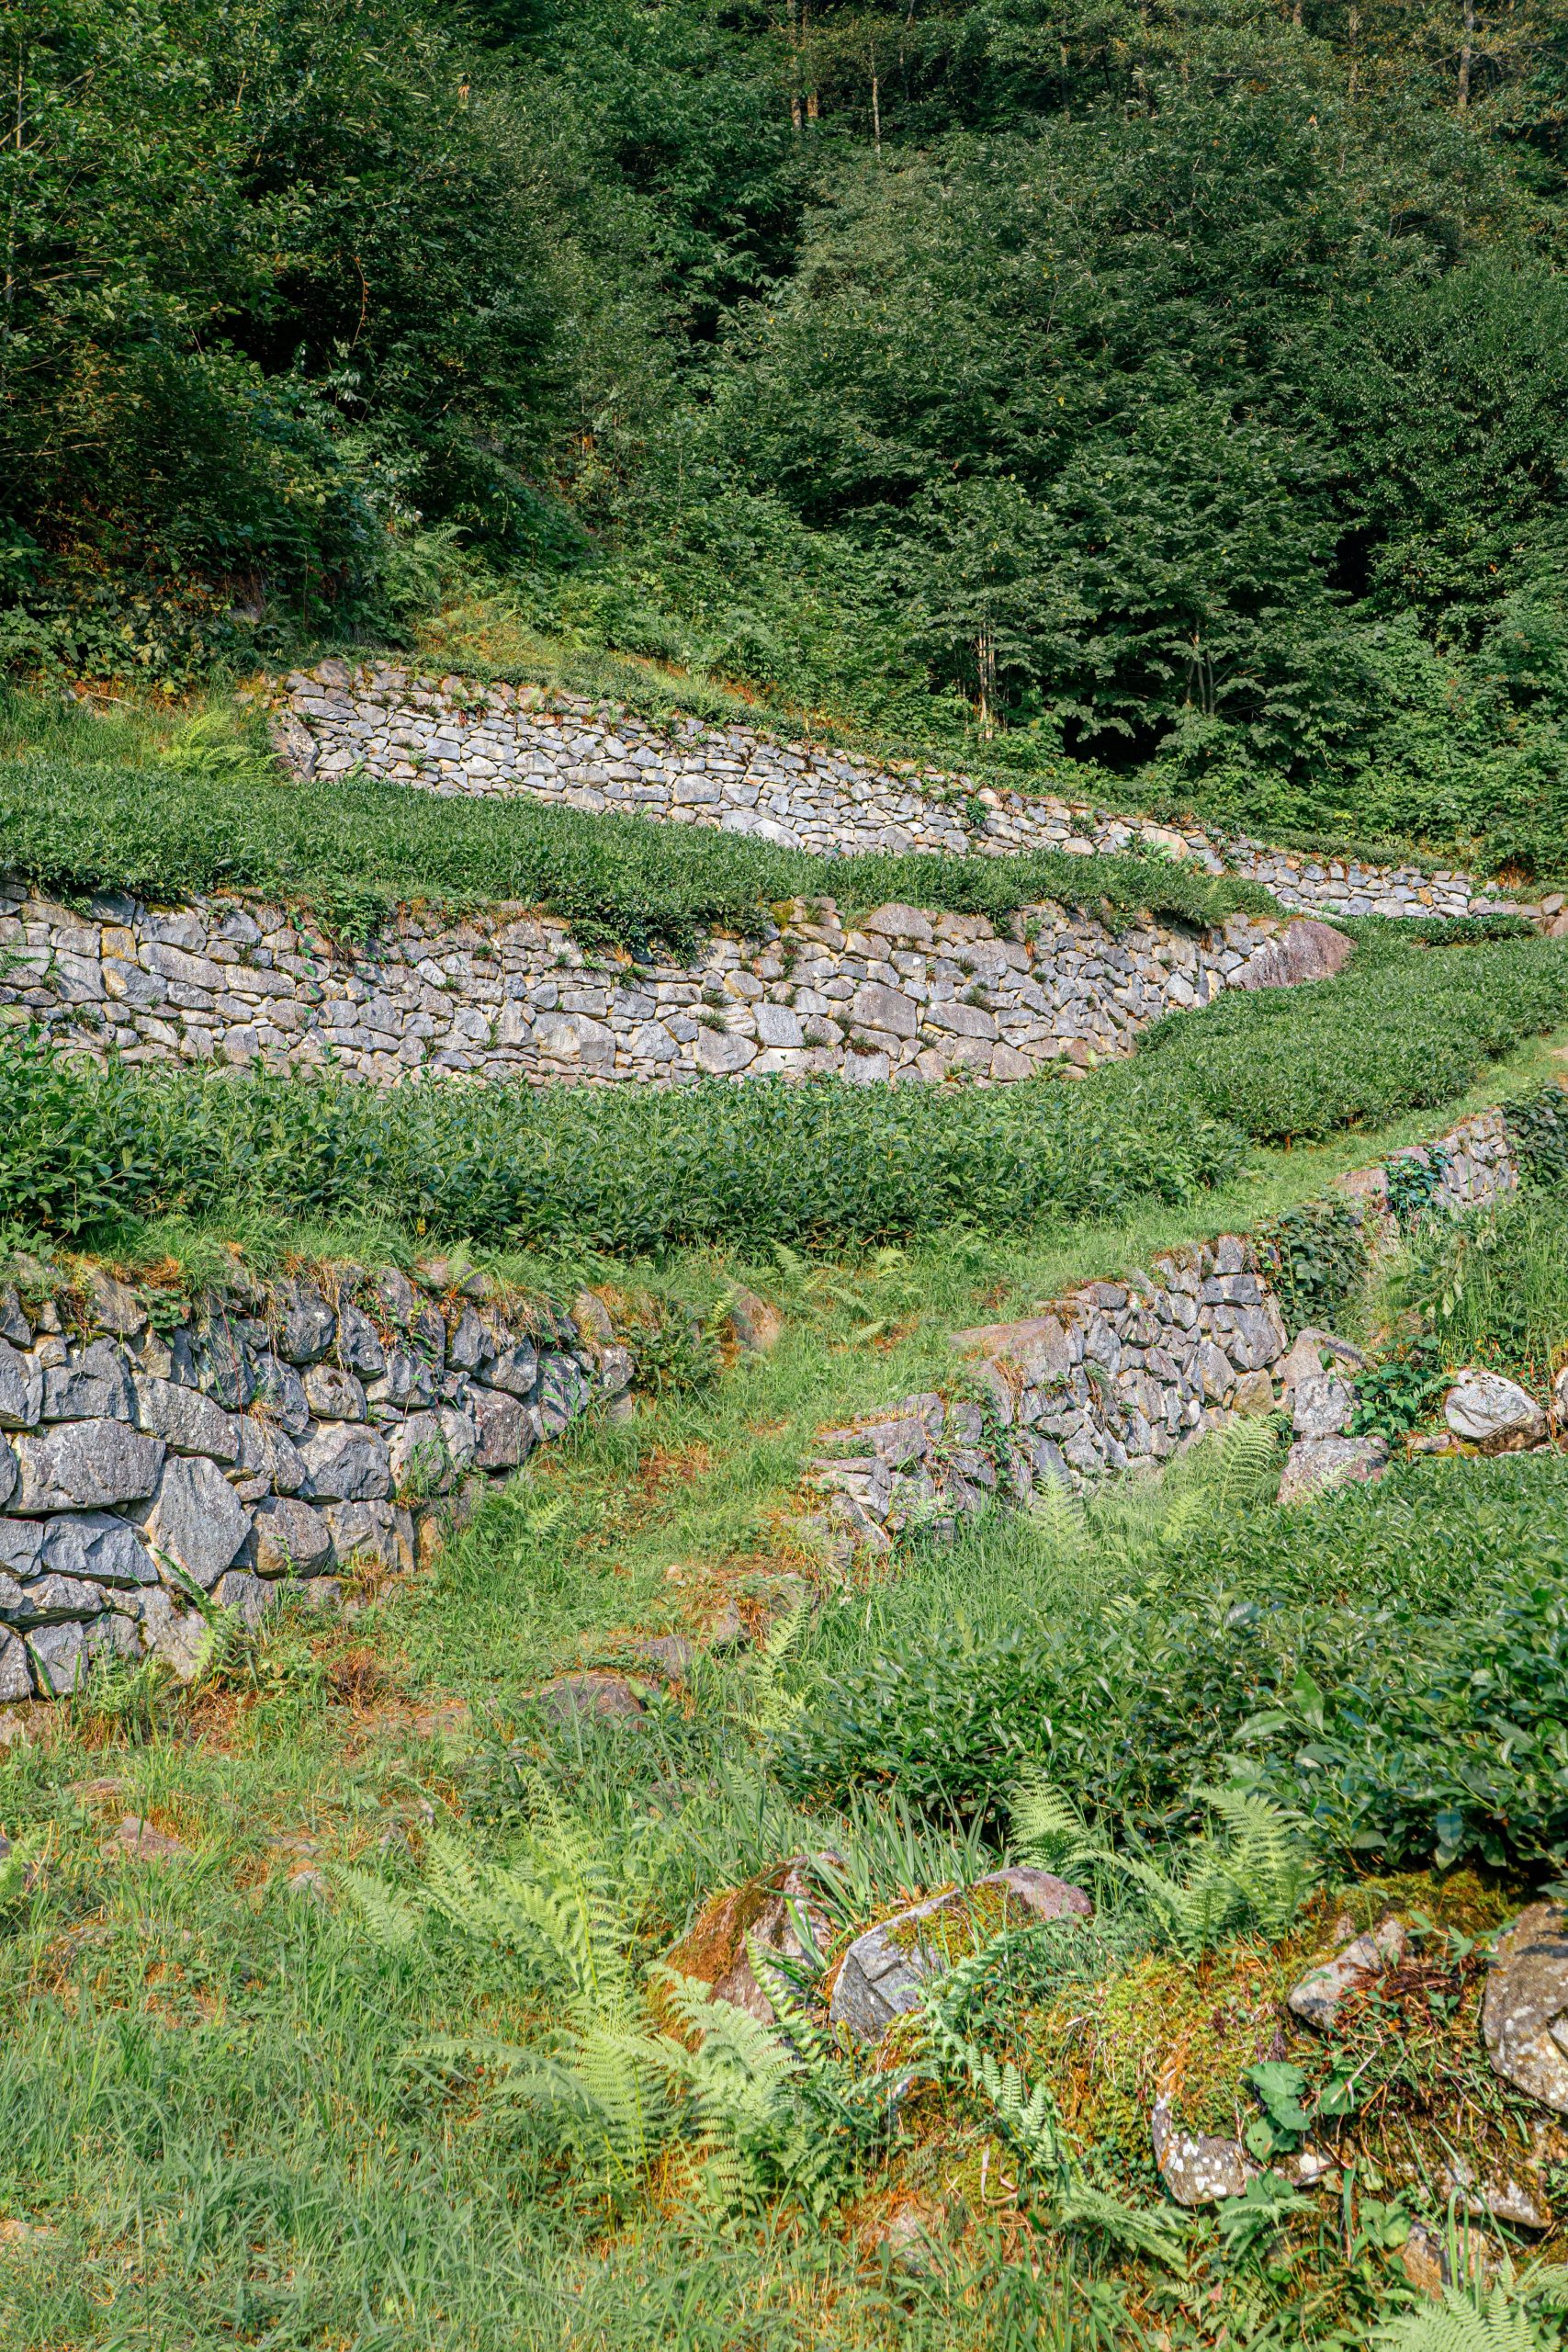
A project like this is a serious commitment of labor. Dry-stacking stone is a skill that requires patience and a good eye; getting the stones to lock together securely without mortar isn’t easy. Hillside erosion is another major factor. Before you begin, you absolutely must assess your soil type and the slope’s grade to ensure your walls can handle water runoff during heavy rains. Without proper drainage and a solid foundation, these beautiful walls could shift or collapse over time. This isn’t a weekend project; it’s a mini-excavation.
3. A Backyard Waterfall and Pond with Lush Plantings
The single element that makes this entire concept work is the sound of moving water. Without the cascading waterfall, you just have a pretty pond. But the motion and noise of the water introduce a dynamic, sensory experience that transforms the garden into a true retreat. It masks neighborhood noise, attracts birds and wildlife, and creates a focal point that is constantly changing with the light. All the rocks and plants are there to support this one central feature: the waterfall itself. It’s what gives the space its serene, vibrant energy.
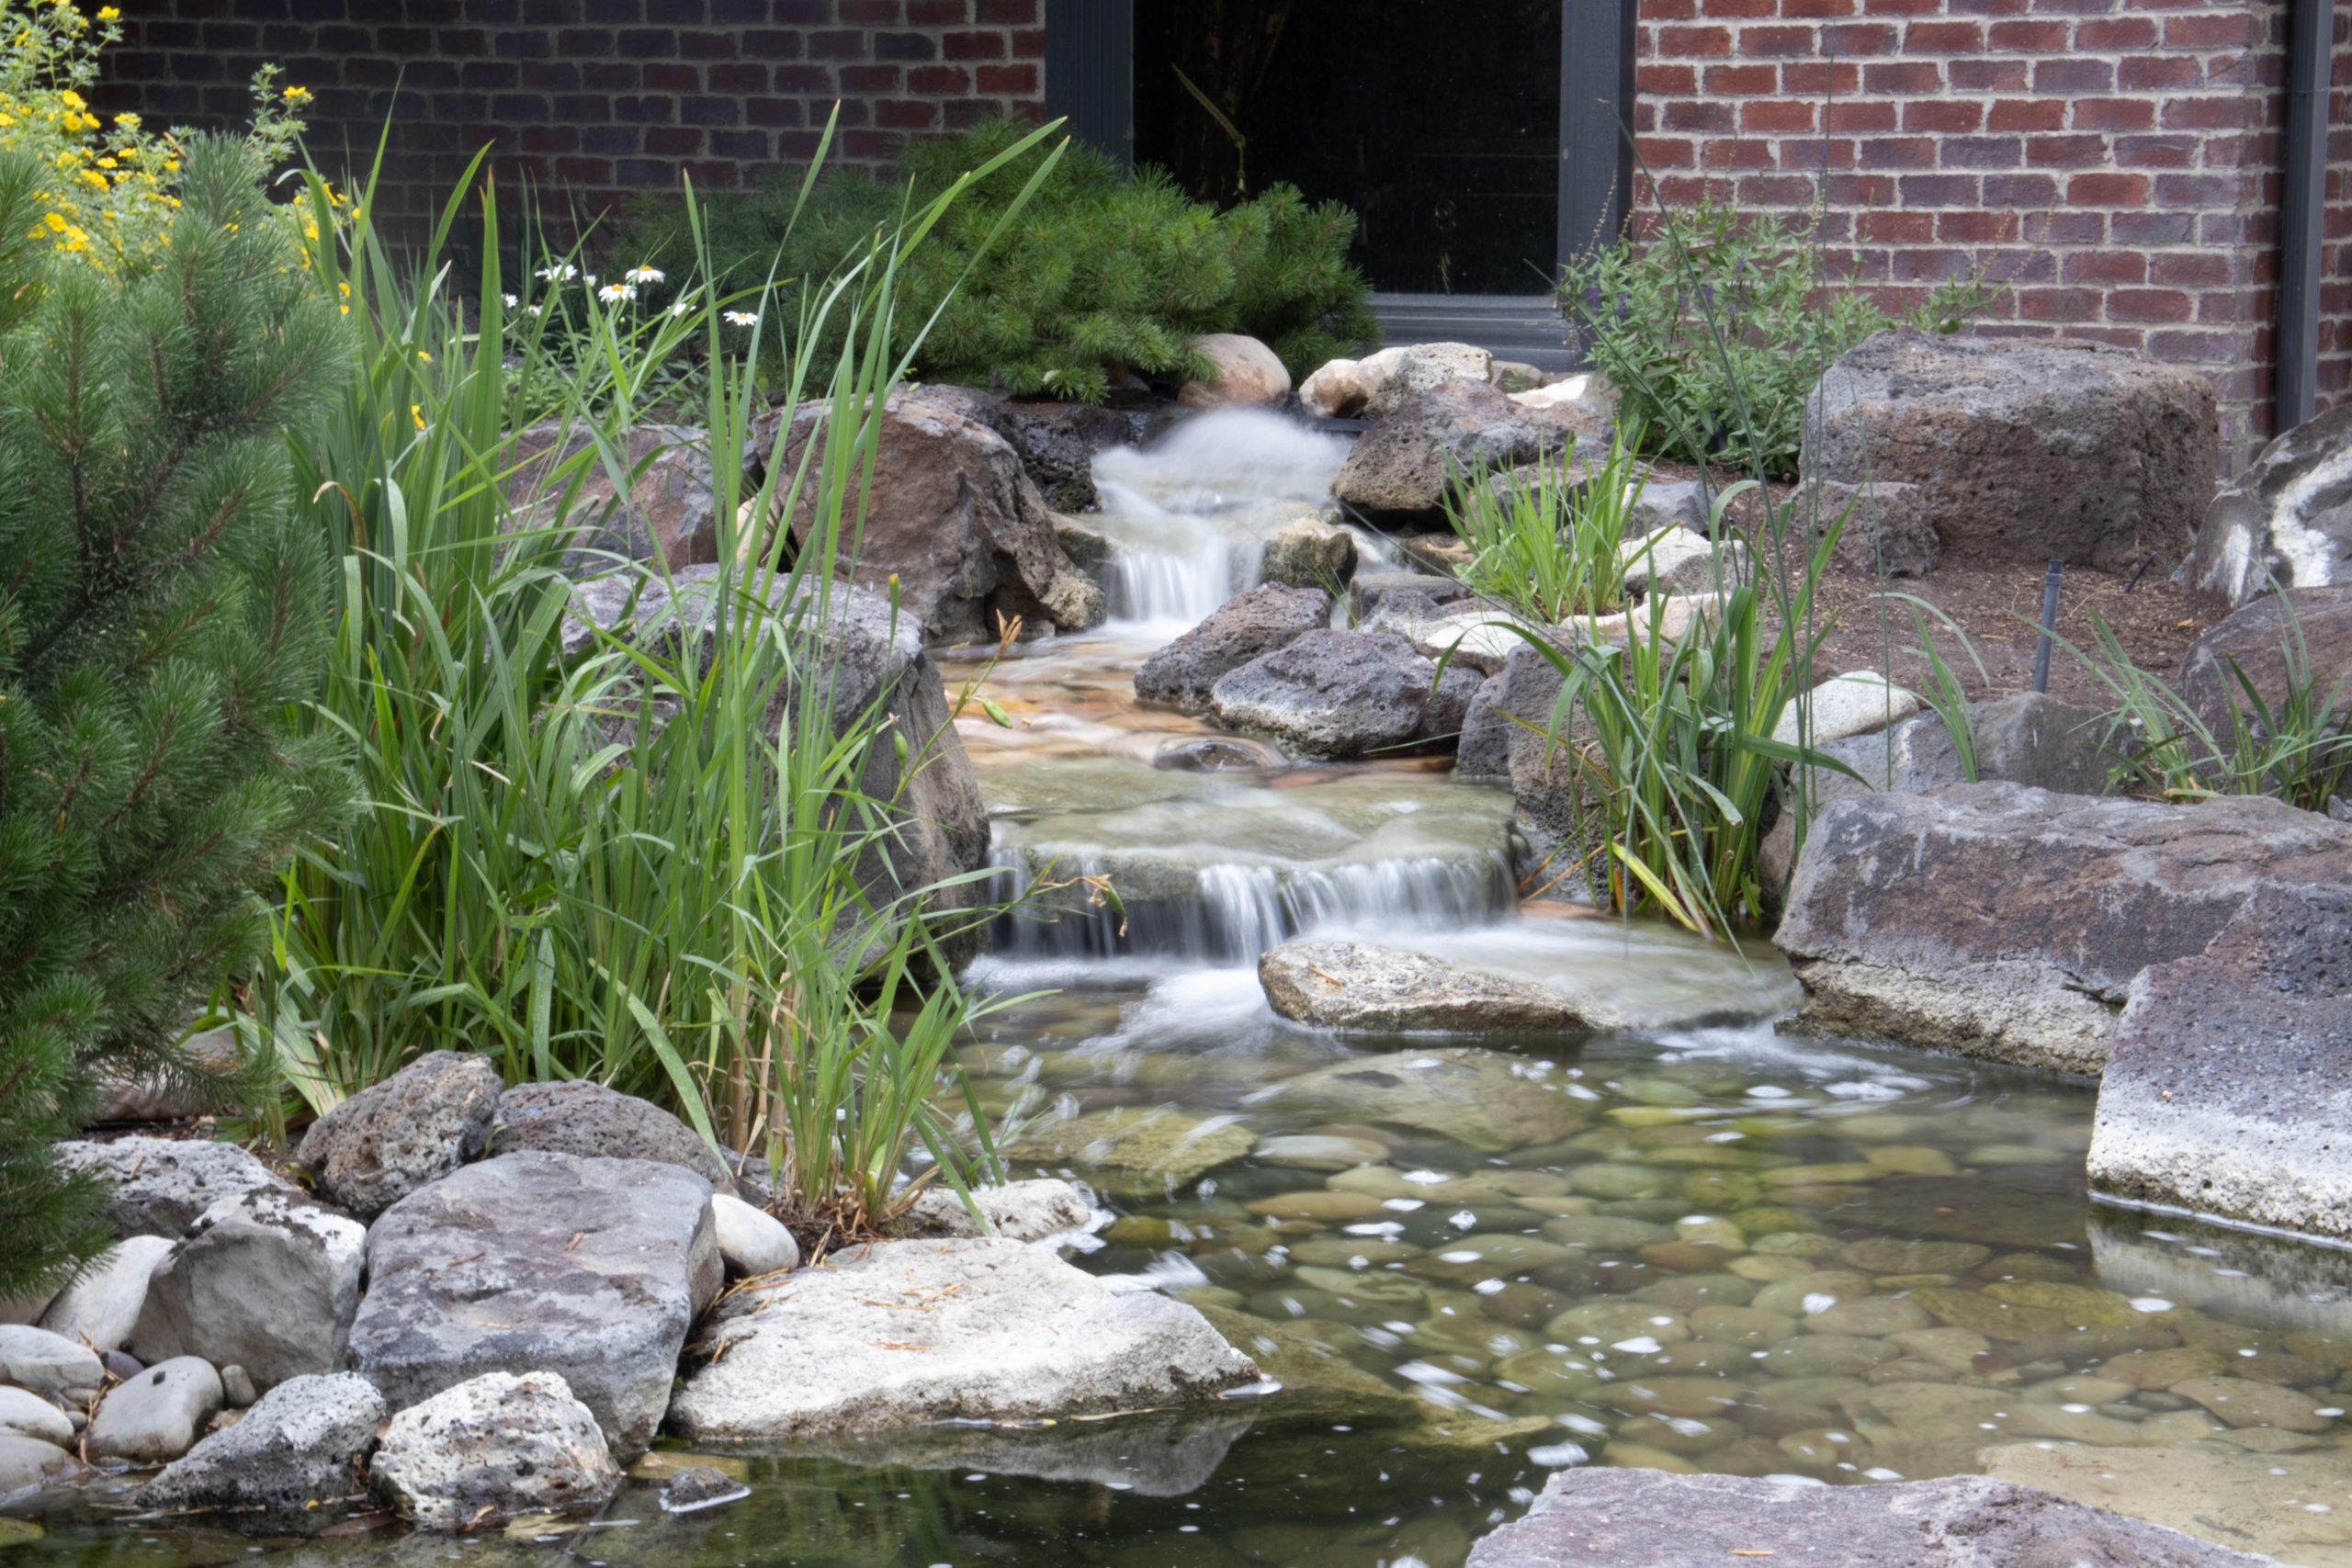
Be prepared for the reality of pond maintenance. A waterfall feature requires a pump, which needs to be checked regularly for clogs from leaves and debris, especially in the fall. You’ll also need to manage algae growth, which can quickly turn your clear pond into a green mess in sunny weather. This often involves adding beneficial bacteria or barley straw extract. In colder climates, you’ll need a plan for winterizing your pump and protecting your aquatic plants. It’s a beautiful feature, but it’s an active ecosystem, not just a static decoration.
4. Juxtapose a Massive Boulder with Tropical Foliage
This design is a masterclass in contrast. The success of this look hinges on the dramatic interplay between the massive, rough grey rock and the soft, vibrant leaves of the tropical plants. The rock provides a solid, static anchor, while the dark red and varied green foliage introduces color, texture, and a sense of life and movement. The textured stone wall in the background adds another layer of complexity without competing, creating a rich tapestry of natural materials. It’s proof that a single, well-placed boulder can have more impact than a dozen smaller stones. It feels like a slice of a natural cliff face.
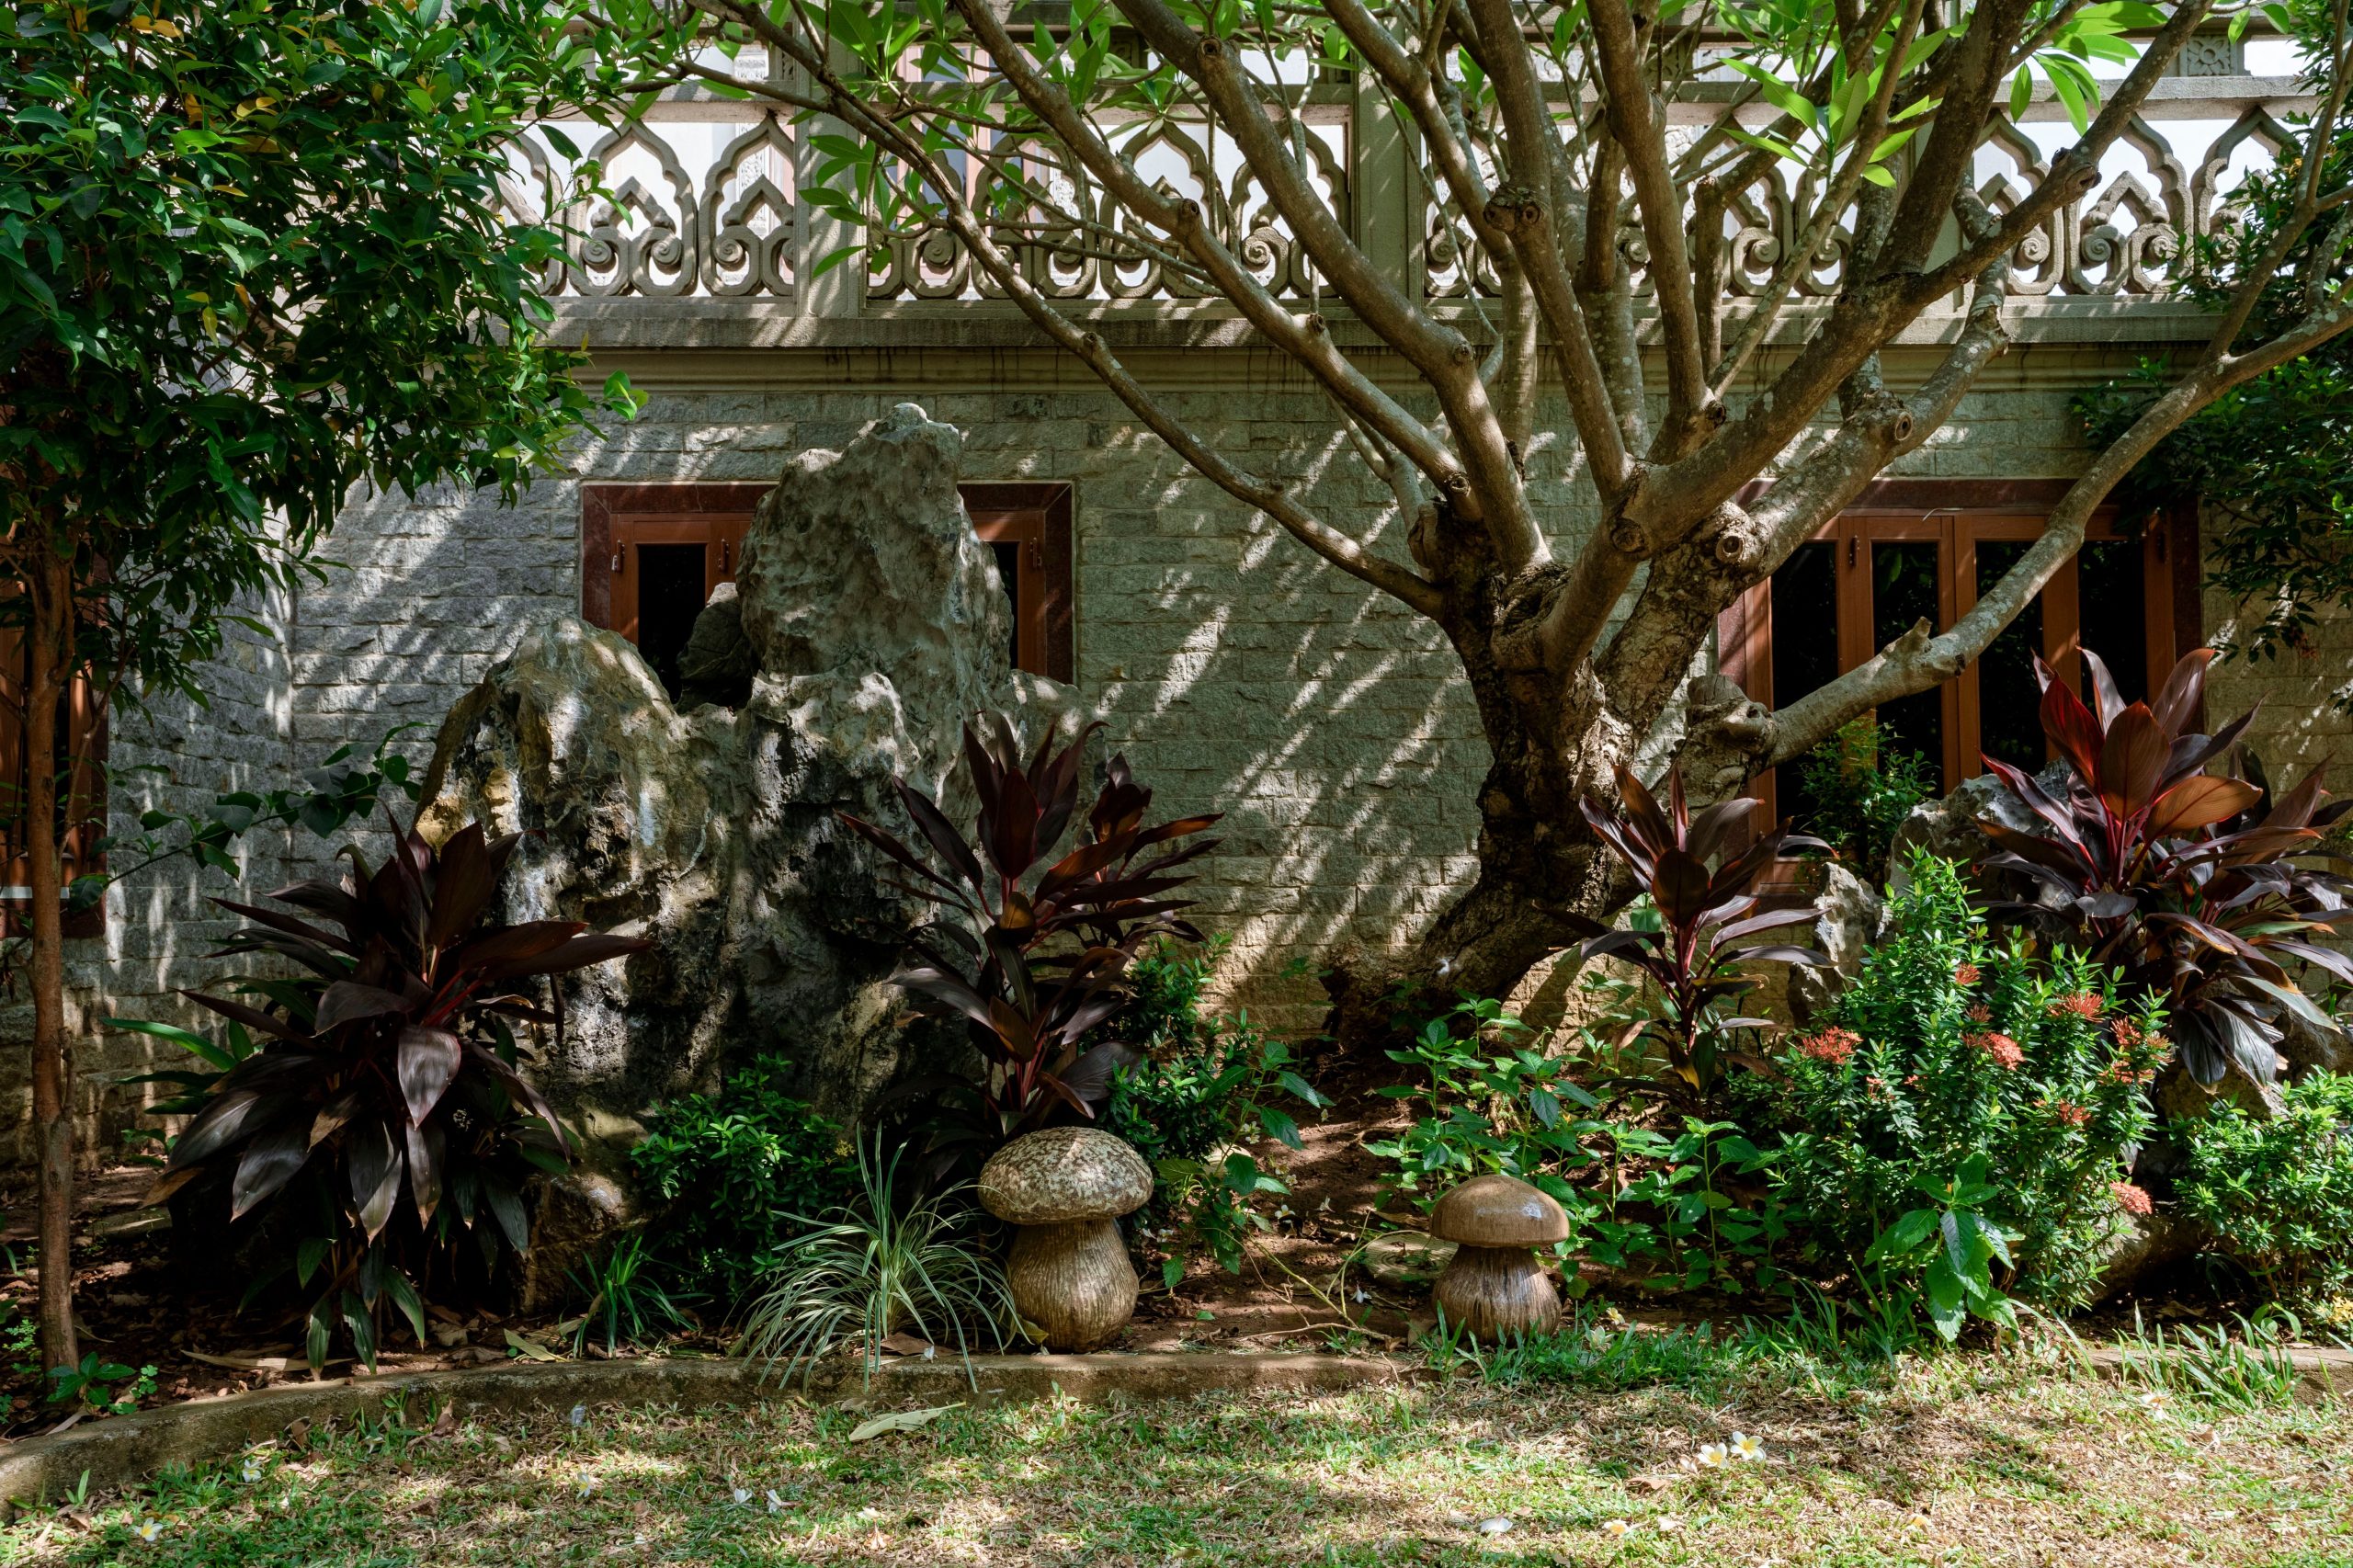
An idea this bold needs vertical space to work. To pull off a feature of this magnitude, you’ll want a wall or backdrop that is at least 10-12 feet high. The large rock itself should be at least 5-6 feet tall to achieve the right sense of scale and not look like an afterthought. This concept is perfect for narrow side yards with a tall retaining wall or the wall of a two-story home, where it can turn a boring space into a dramatic focal point. For a smaller yard, you can scale this down, as seen in Idea #18, by using smaller rocks with more delicate plants.
5. Weave a Simple Path with Stone and Decorative Gravel
The secret to a high-end looking gravel path is in the edging and the depth. Use a high-quality steel or aluminum edging that is barely visible, rather than bulky plastic or brick. This creates a crisp, clean line between your path and garden beds. For the gravel itself, use a multi-layered approach: a 2-inch base of compacted crusher run for stability, a layer of landscape fabric, and then a 2-inch top layer of your decorative gravel. This depth provides a satisfying crunch underfoot and prevents the fabric from showing through over time.
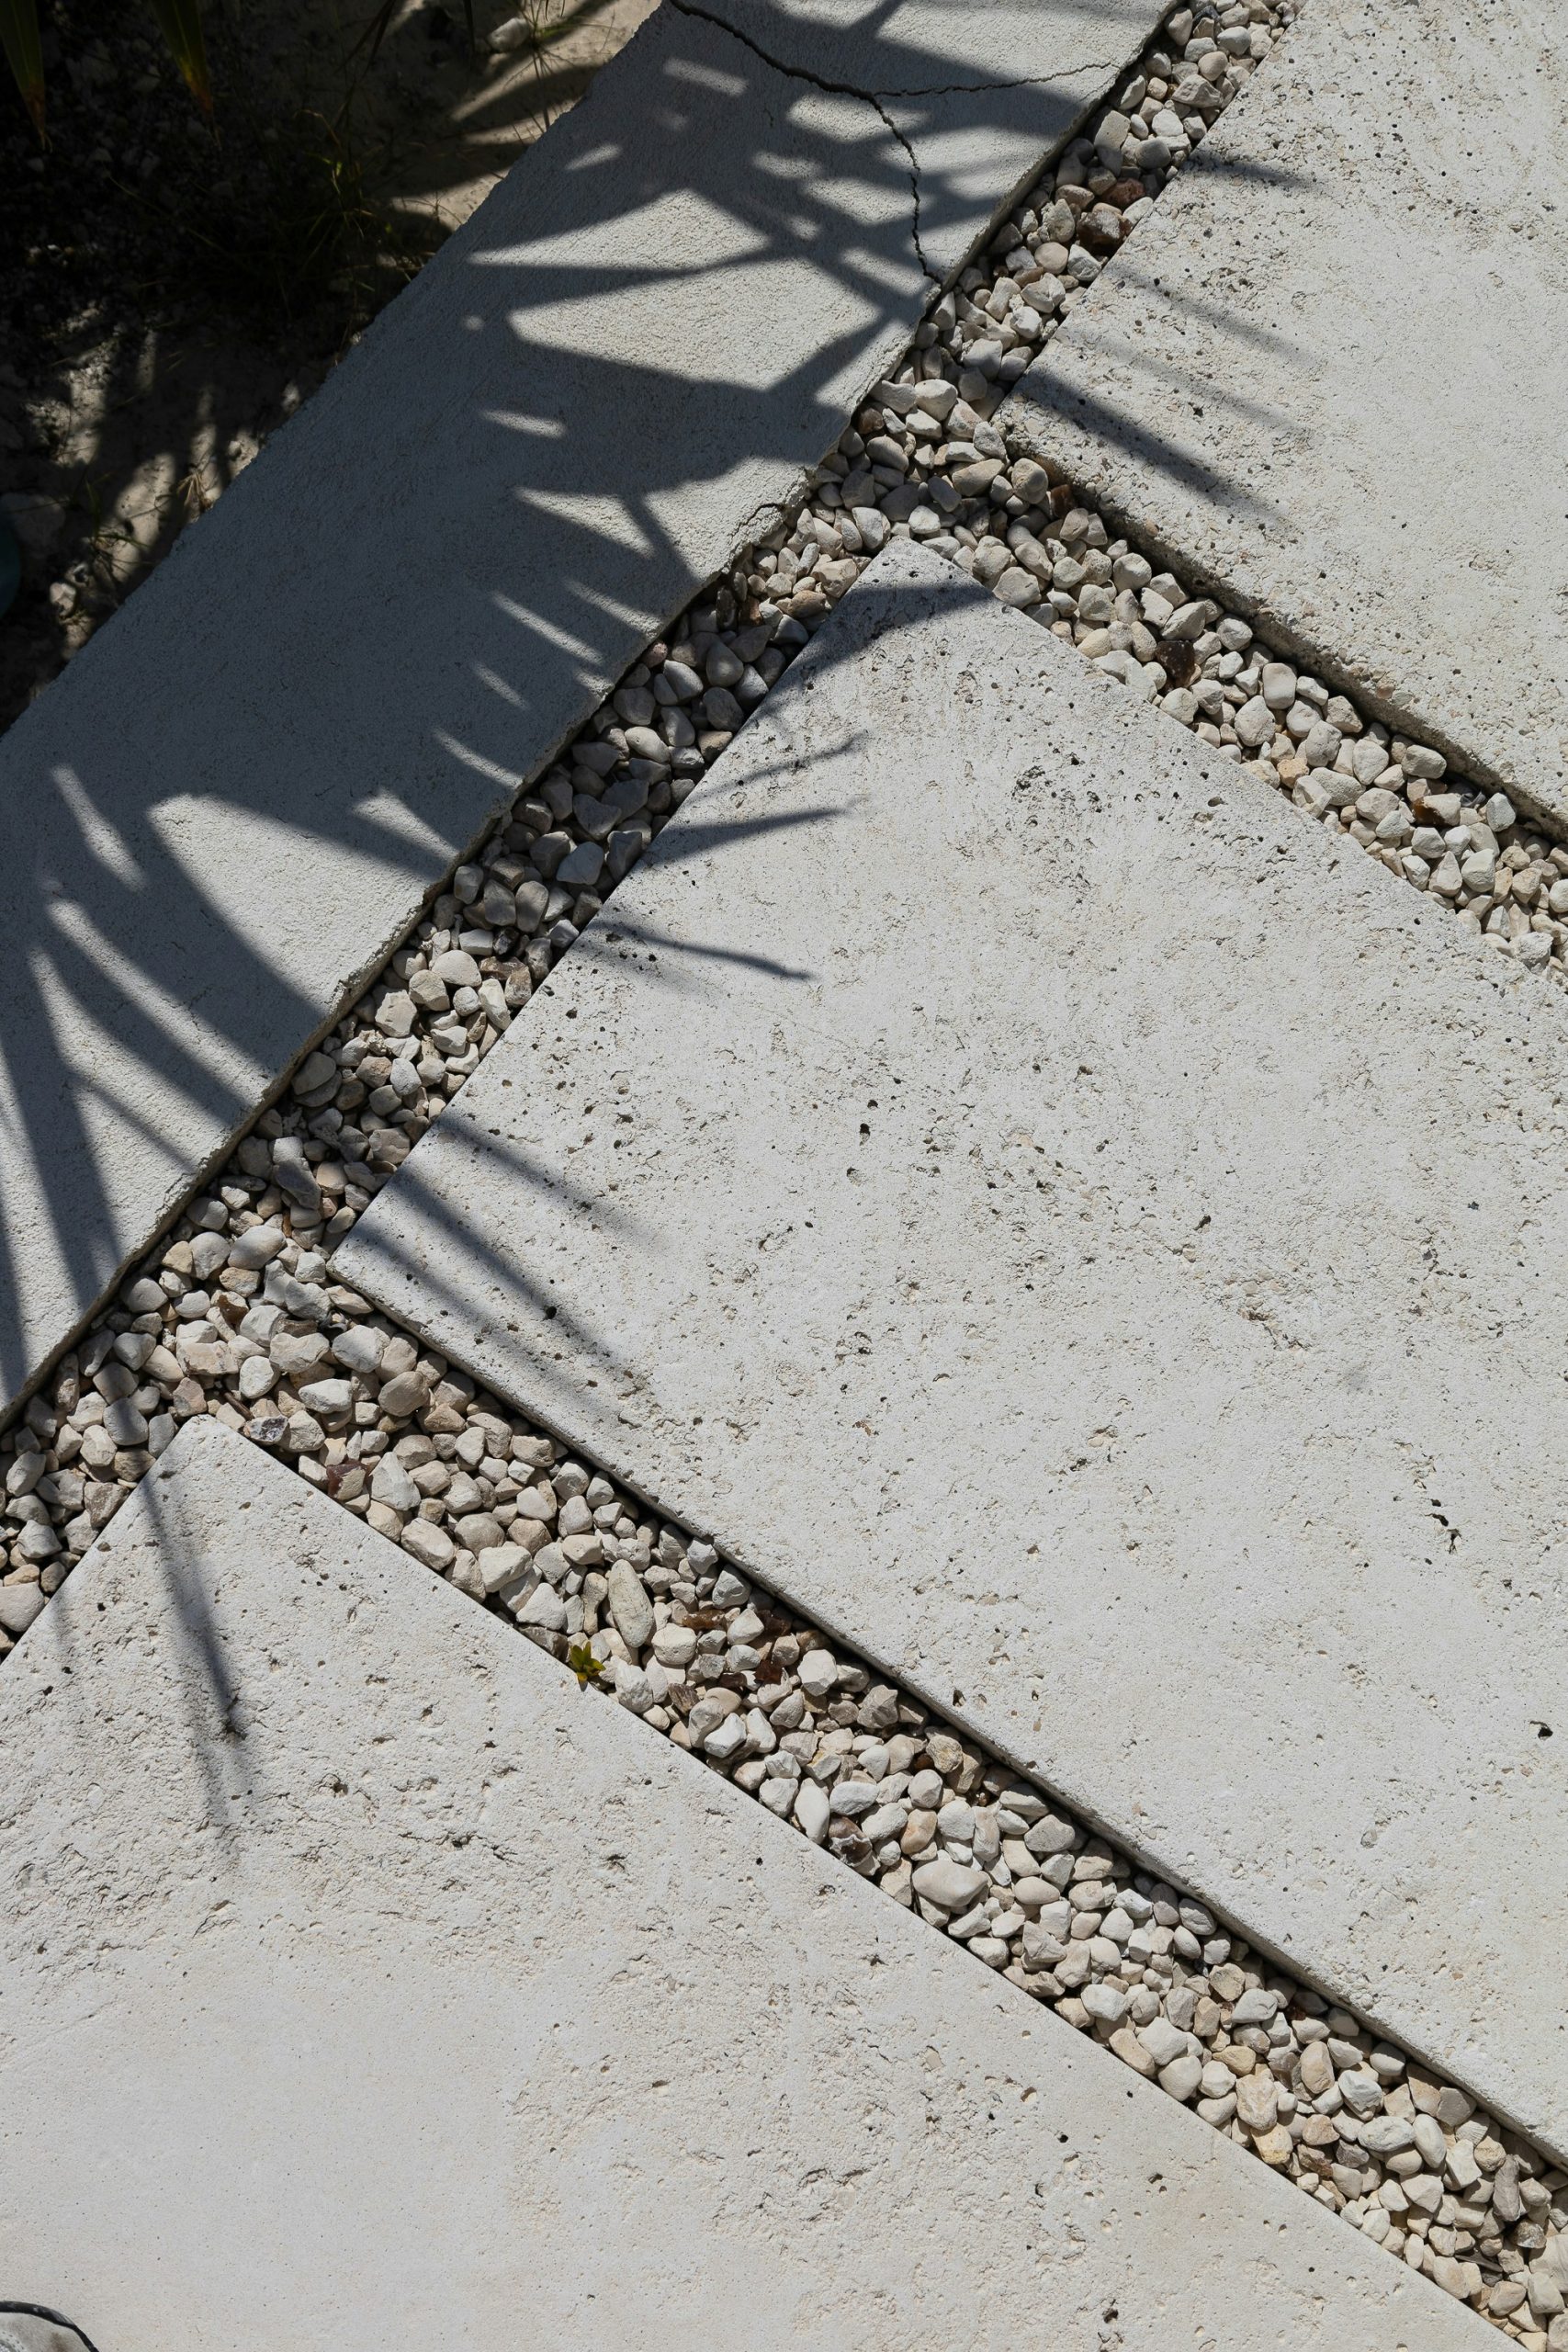
You don’t need to spend a fortune on Mexican beach pebbles to get this look. Pea gravel is an incredibly affordable option, often costing 60-70% less than more decorative stones. Check with local landscape suppliers for a “buckshot” or “river rock” blend, which is often sold by the ton at a great price. For the pavers, instead of buying new flagstones, look on Facebook Marketplace or Craigslist for people giving away old patio stones. A little bit of searching can get you the raw materials for a path like this for under $200.
6. Create a Sun-Drenched Succulent Rock Garden
The visual recipe for a thriving succulent garden is balanced and textural: 50% large feature rocks + 30% pebble groundcover + 20% diverse plants. The large, light-colored rocks provide the architectural “bones” and vertical interest. The white pebbles act as a clean, bright mulch that reflects sunlight and suppresses weeds. Finally, the succulents themselves, with their varied shapes and colors, are the living jewels. By keeping the plant coverage to just 20% of the surface area, you ensure each one has space to be seen and that the overall look feels arid and intentional, not overgrown.
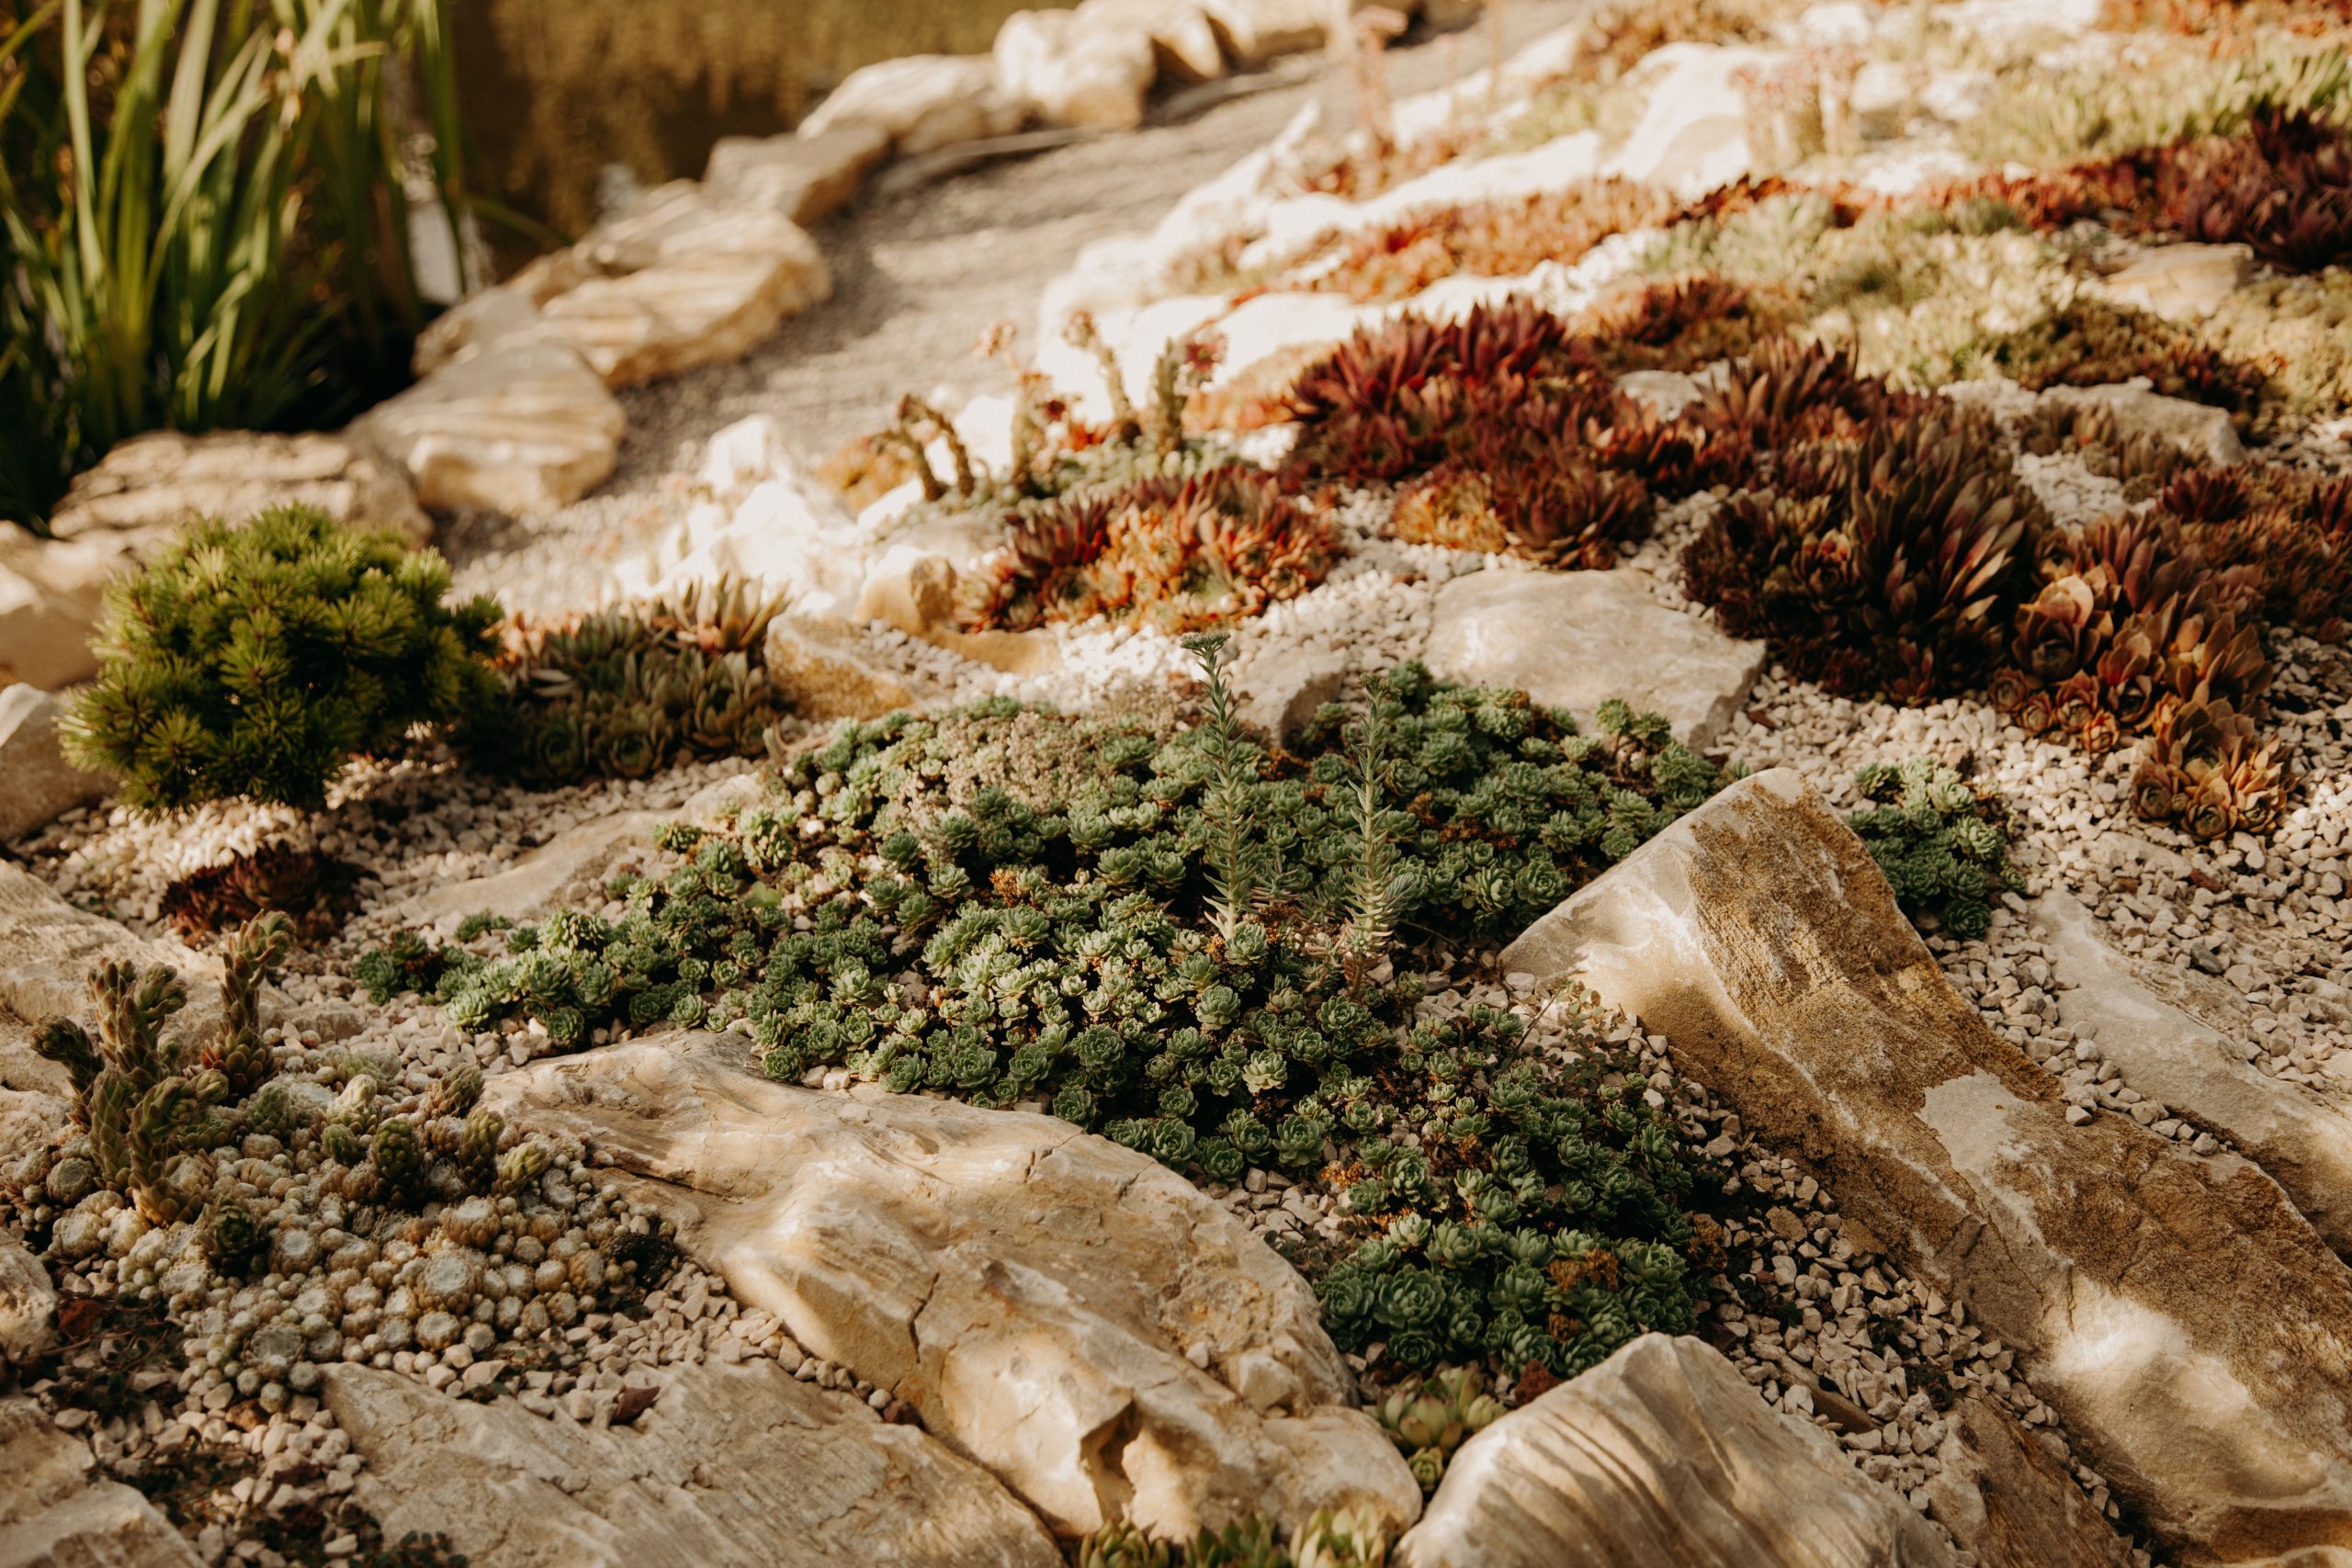
Before you commit to a succulent garden, make sure you can check off these essential conditions. This look is beautiful but not for every yard.
- Sunlight: Does this spot get at least 6-8 hours of direct, unfiltered sunlight per day? Most succulents will get leggy and sad without it.
- Drainage: Is the soil sandy or loamy? If you have heavy clay, you will need to amend it heavily with sand and gravel or build a raised bed. Poor drainage is the #1 killer of succulents.
- Climate: Check the hardiness zone for your chosen succulents. If you have harsh winters with frost, you’ll need to select cold-hardy varieties like certain sedums and sempervivums.
7. Go for a Rugged, All-Natural Rock Formation
that makes this landscape feel so authentic is the complete lack of uniformity. The rocks are all different sizes, shapes, and shades of gray, arranged in a seemingly random cluster that mimics a natural rockslide or cliff base. There are no straight lines, no perfect spacing, no decorative mulch. Just rocks and plants, exactly as you might find them in a forest. This intentional avoidance of order is what creates the serene, organic mood. If you tried to make the rocks symmetrical or evenly spaced, you would lose the entire effect. For a similar but more contained approach, see the wall in Idea #23.
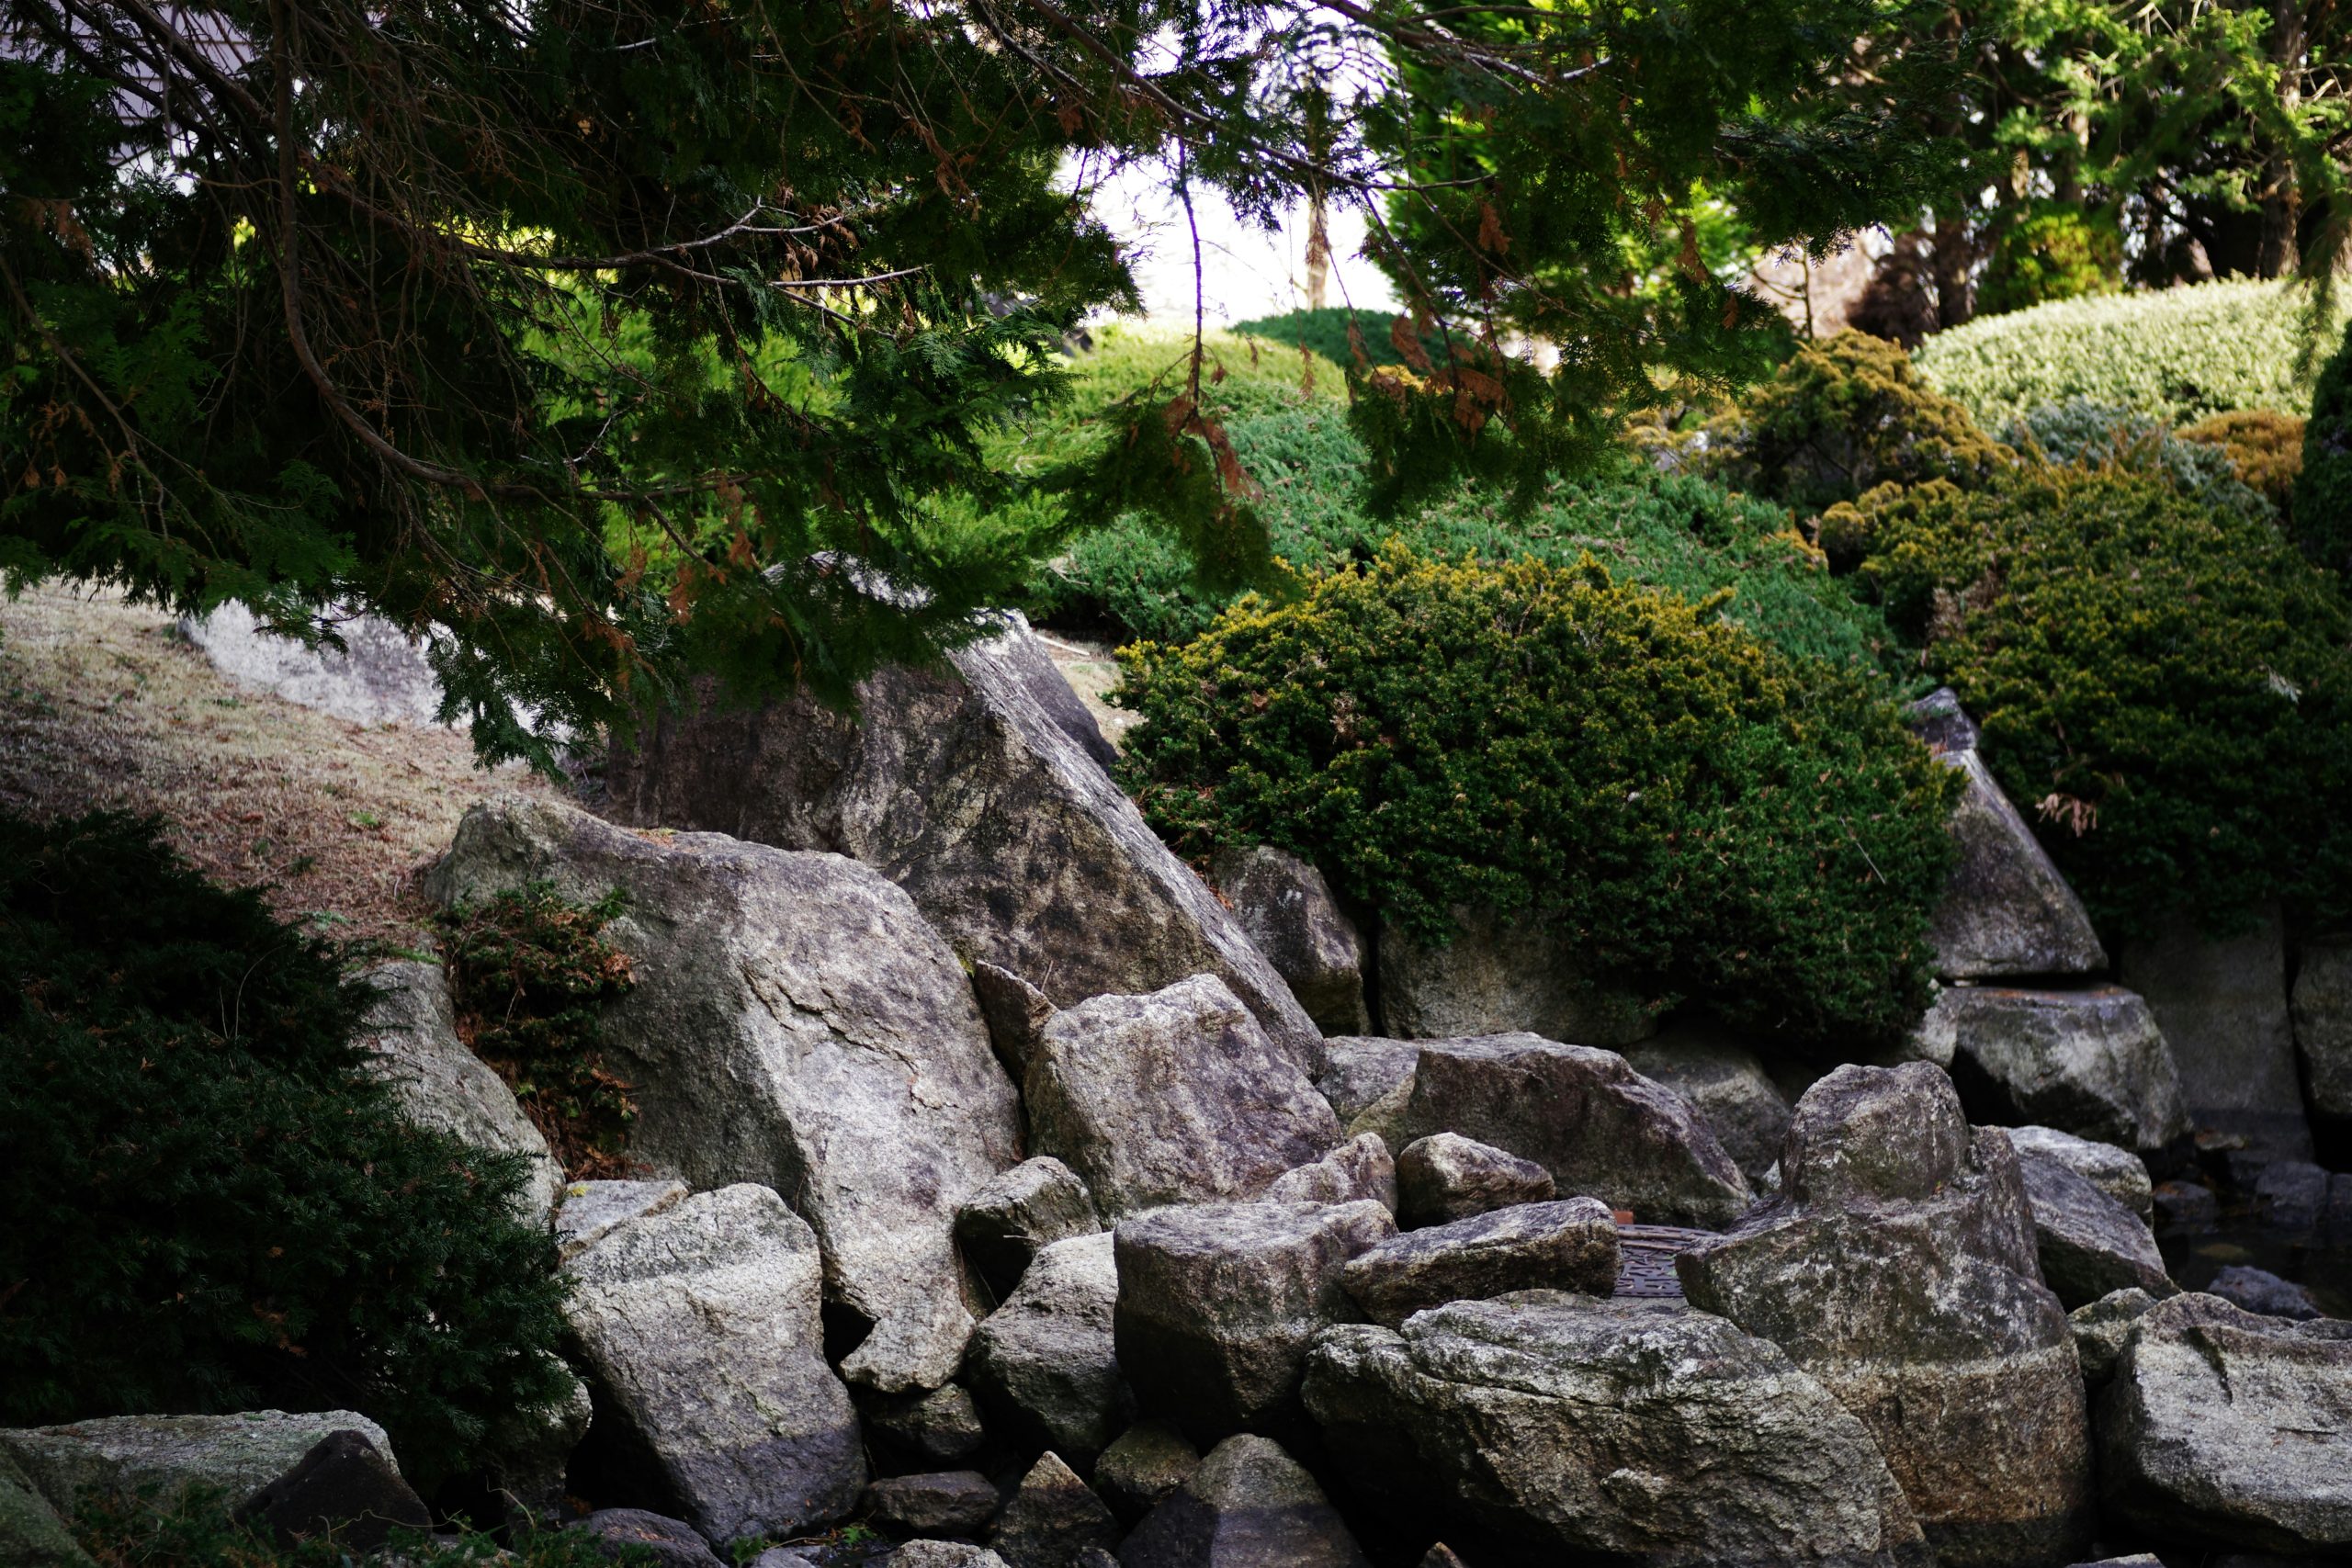
This idea is perfect for a medium to large-sized yard with a natural slope. You need a minimum area of about 15×10 feet to create a convincing cluster of this size. If your space is too small, a dense arrangement of large rocks can feel overwhelming and claustrophobic. It also requires some verticality; it looks best on a gentle incline where the rocks can be partially buried to look like they are emerging from the earth. On a perfectly flat lot, you would need to build up a berm of soil first to achieve the same naturalistic look.
8. Create Ledges and Layers with Large Gray Stones
This composition works because it creates multiple sight lines and levels of interest. The large gray rocks aren’t just piled up; they’re intentionally placed to form ledges and planting pockets. This breaks up the space vertically, allowing for a mix of taller background trees and lower-growing bushes that creates a sense of depth. The subtle inclusion of a small water feature tucked between the rocks adds a hint of sound and movement, rewarding closer inspection. The limited color palette—mostly greens and grays—keeps the focus on the interesting textures and forms.
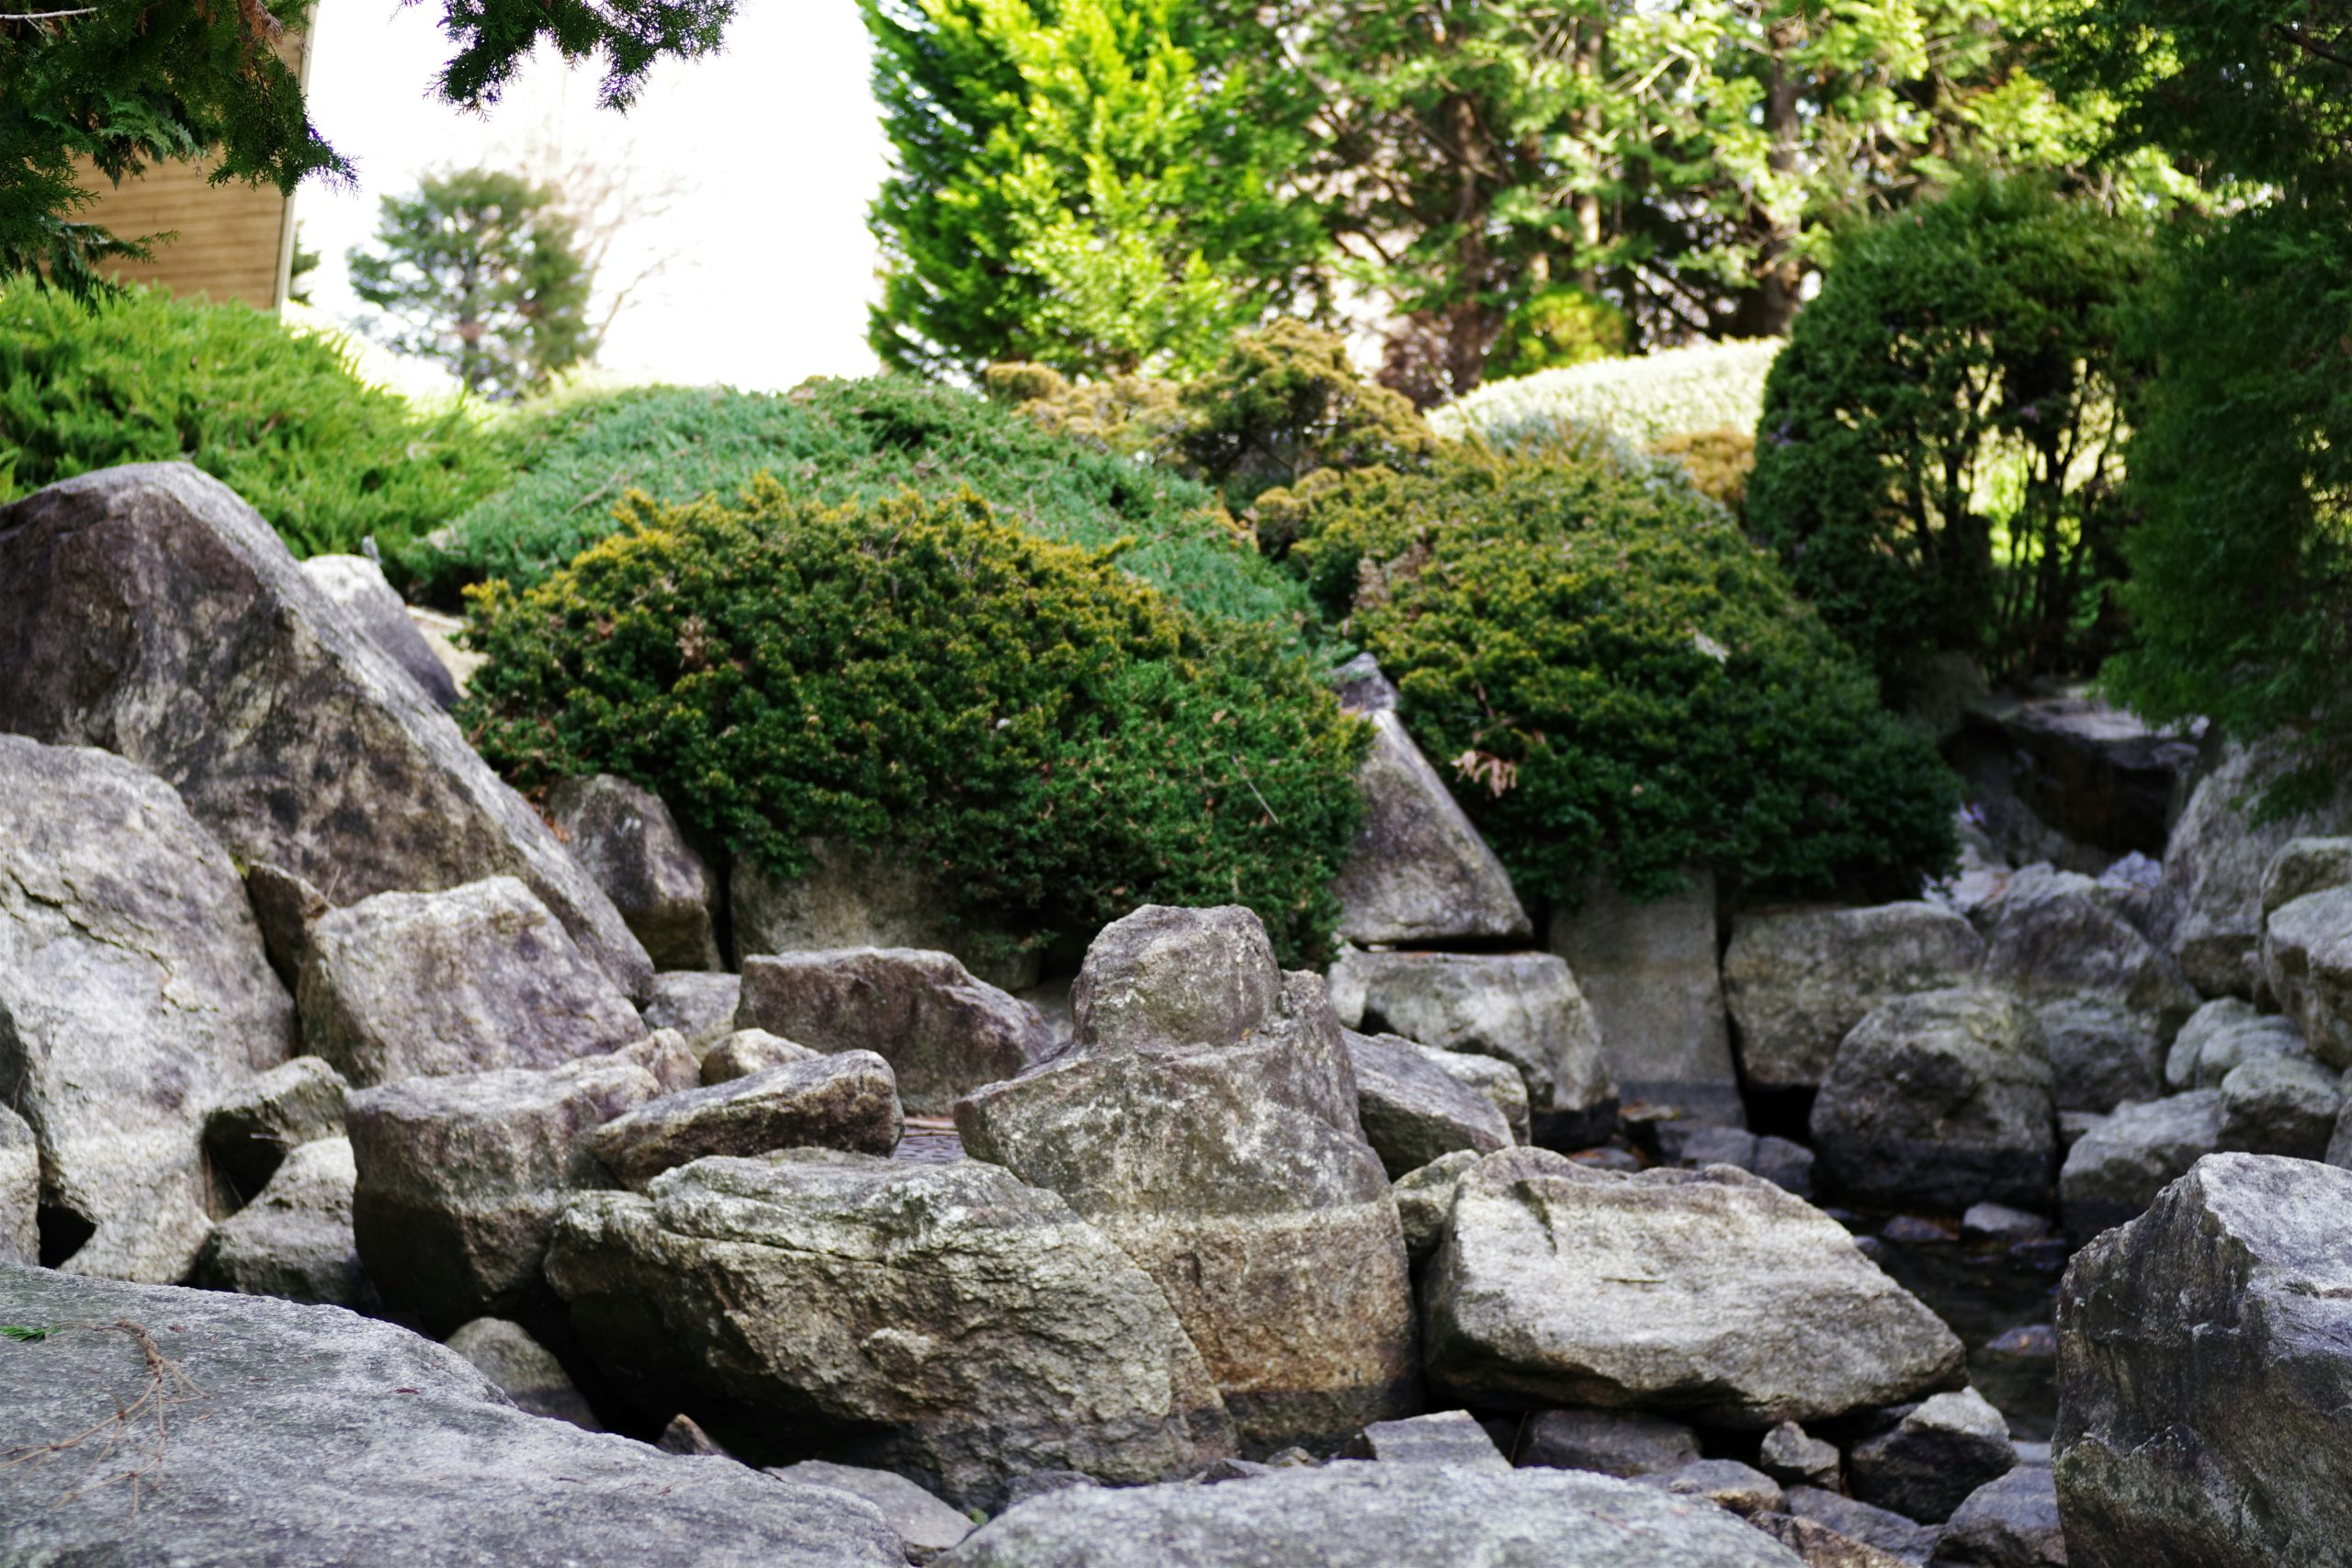
Recreating this layered, naturalistic look requires a significant investment in both stone and mature plants to avoid looking sparse.
- Main Furniture (Boulders): $1,500 – $4,000 (depending on size and delivery access)
- Lighting: $300 – $800 (for subtle uplighting on key rocks)
- Textiles (Plants): $1,000 – $2,500 (for a mix of shrubs and trees)
- Decor/Accessories (Water pump): $200 – $500
- TOTAL: $3,000 – $7,800
Budget alternative: Focus on one or two large statement boulders ($500) and fill the rest of the area with more affordable river rock and smaller, younger plants that will grow in over time. Total cost: $1,200 – $2,500.
9. Install a Gabion Wall for a Modern, Rustic Look
A gabion wall combines industrial and natural elements for a surprisingly chic look. Here’s a simplified guide to building one.
- Prepare the Base (2 hours): Excavate a level trench 6 inches deep and slightly wider than your gabion basket. Fill it with a 4-inch layer of compacted gravel to create a stable, well-draining foundation.
- Assemble the Baskets (1 hour): Assemble the flat-packed wire mesh gabion baskets using the supplied spiral binders. Position the empty baskets in your trench.
- Start Filling (3-5 hours): Begin filling the baskets with your chosen stone. This is the most time-consuming part. Place larger, flatter stones against the visible faces for a neater look, and use smaller, cheaper rubble for the core to save money.
- Brace the Baskets (30 mins): As you fill, install horizontal bracing wires every 12 inches of height to prevent the mesh from bulging outwards under the weight of the rocks.
- Cap it Off (30 mins): Once full, secure the lid with the final spiral binders. This project can cost between $30-$60 per linear foot.
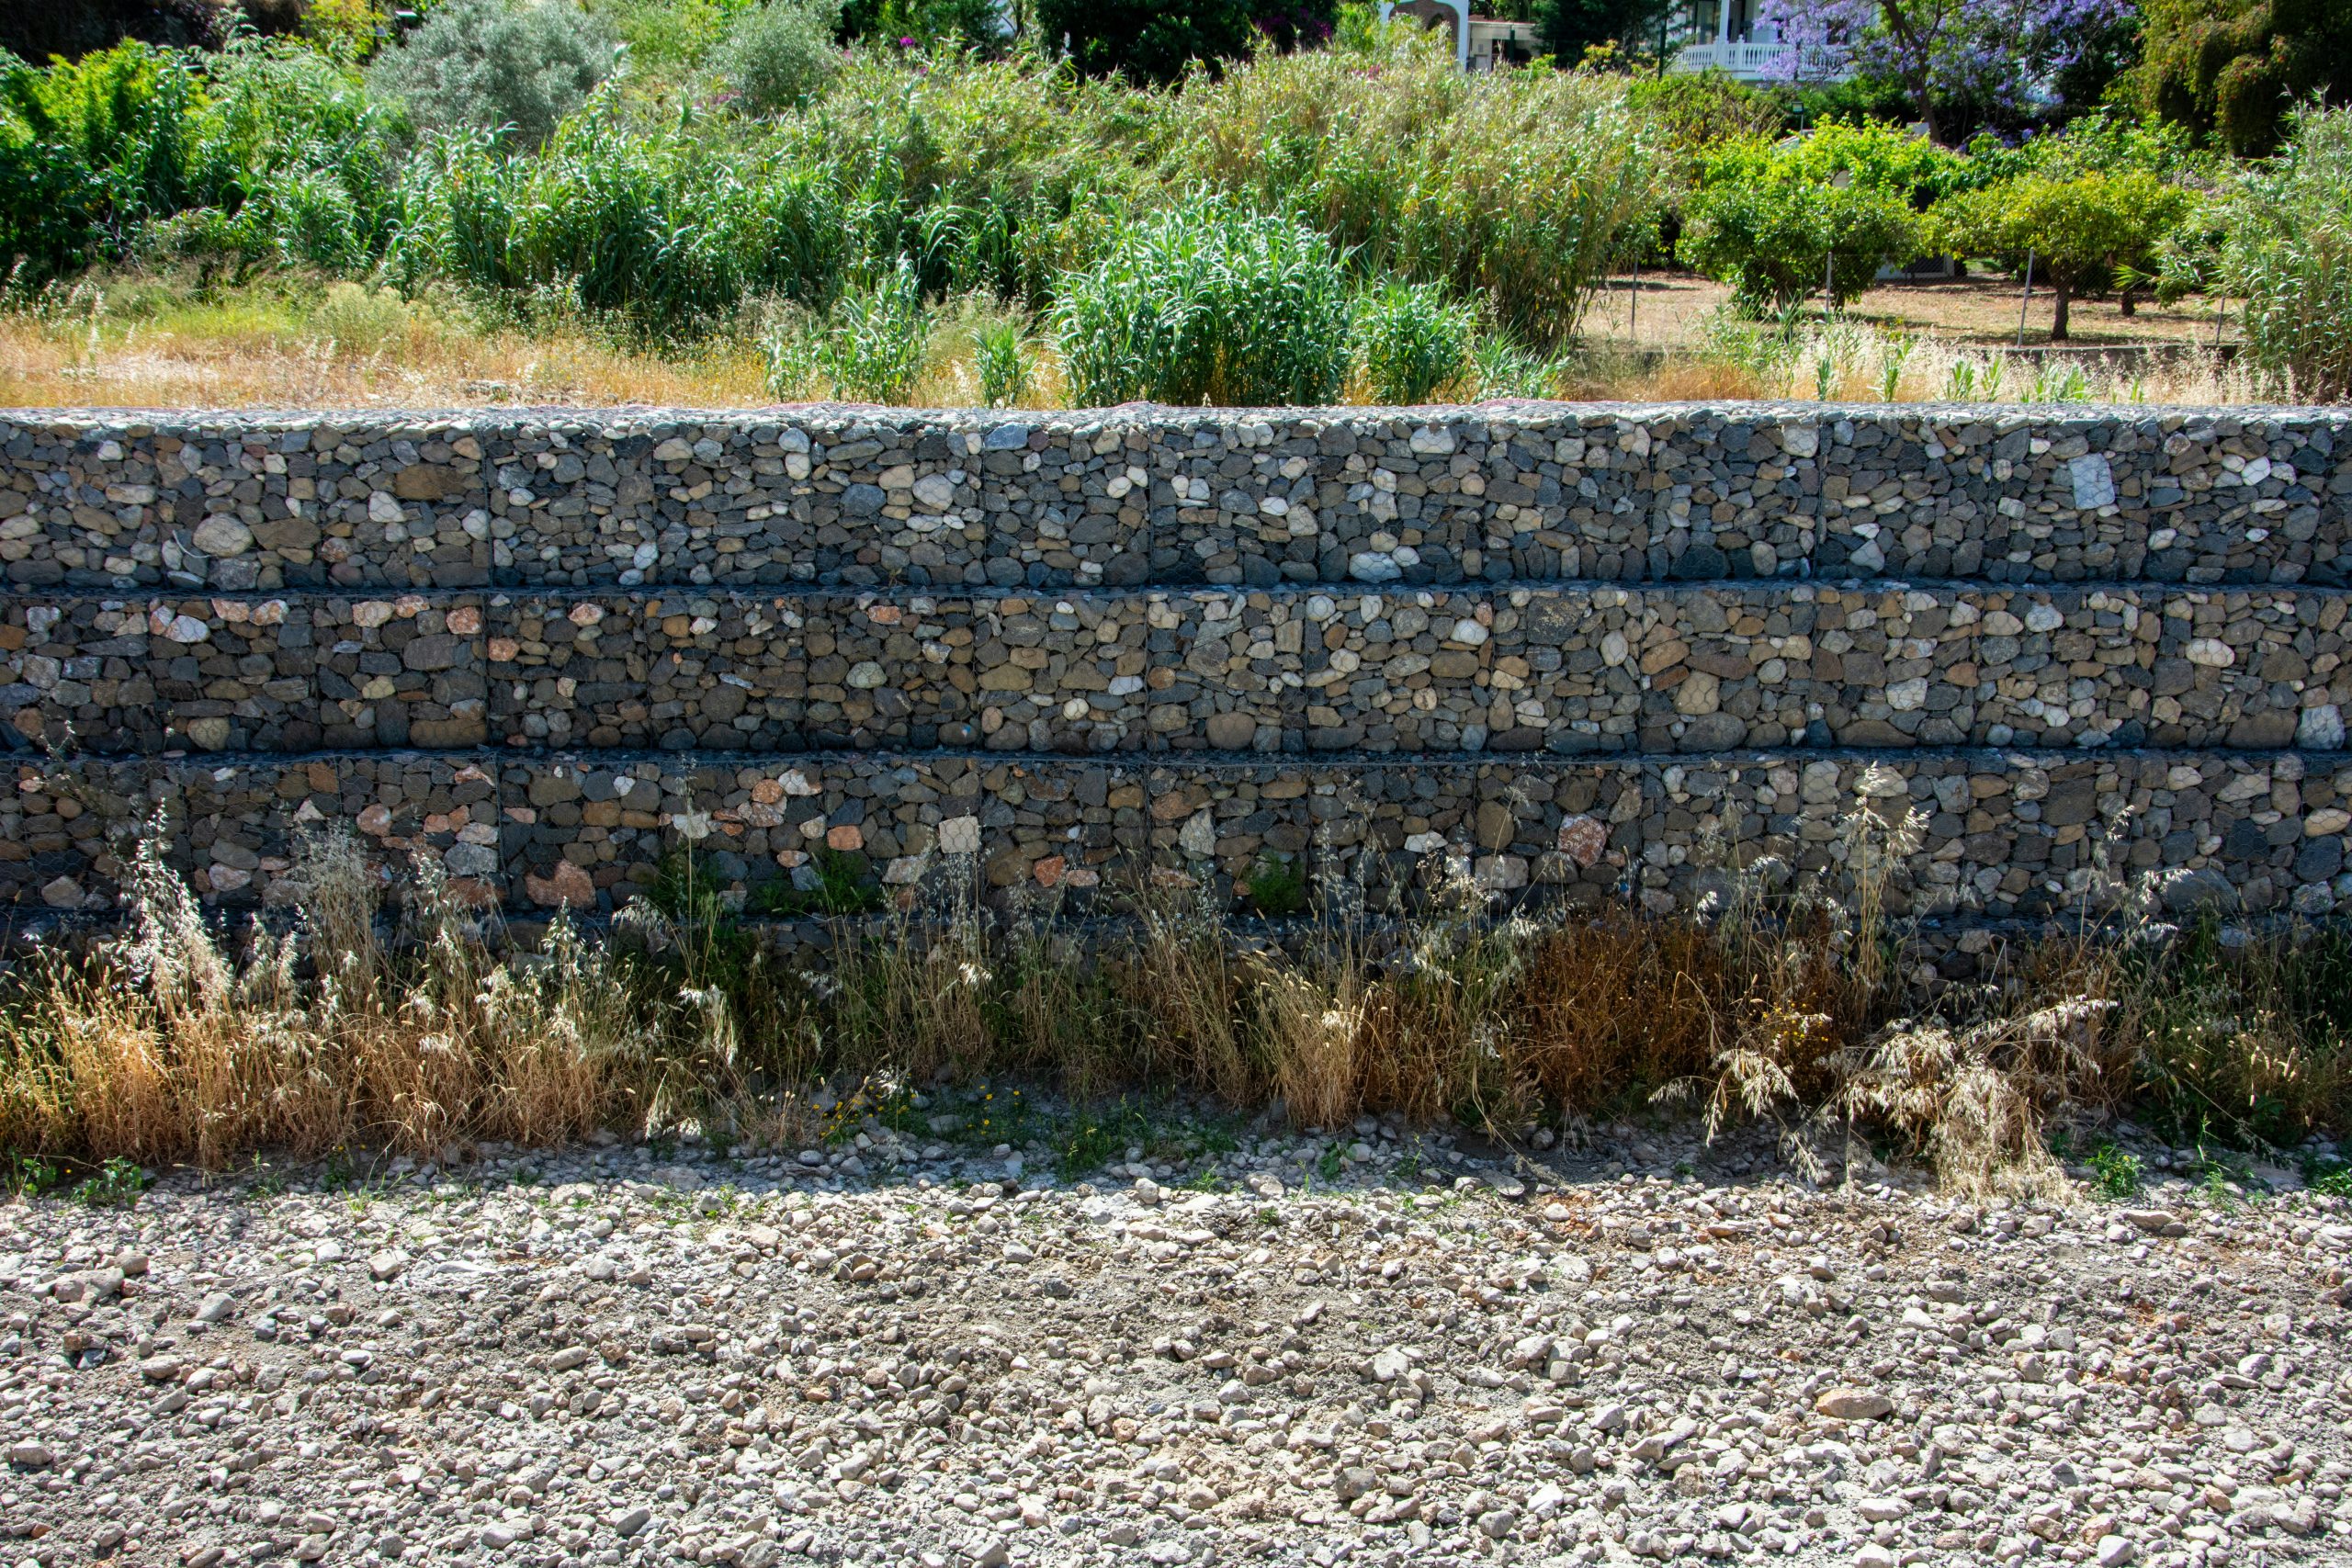
Gabion walls are gaining traction because they sit at the perfect intersection of several current trends. They have the clean lines and modular form of modern design, but they’re filled with natural, rustic stone. This duality makes them incredibly versatile. As homeowners continue to embrace raw, honest materials (think concrete countertops and plywood walls), gabions feel like a natural extension of that ethos into the garden. They are also a nod to sustainable design, as they can often be filled with recycled concrete or locally sourced stone, reducing their carbon footprint.
10. Build a Grand Entry with a Tiered Stone Staircase
When building steps within a rock wall, the key to a professional look is consistency in the riser height. Each step should be between 6.5 and 7.5 inches tall. Any more, and they feel difficult to climb; any less, and you risk tripping. Use a tape measure and level for every single step. The treads (where your foot goes) should be at least 12 inches deep to feel safe and comfortable. Also, slightly cant the treads forward—a barely perceptible slope of about 1/8 inch per foot—to ensure water runs off and doesn’t pool or freeze on the surface.
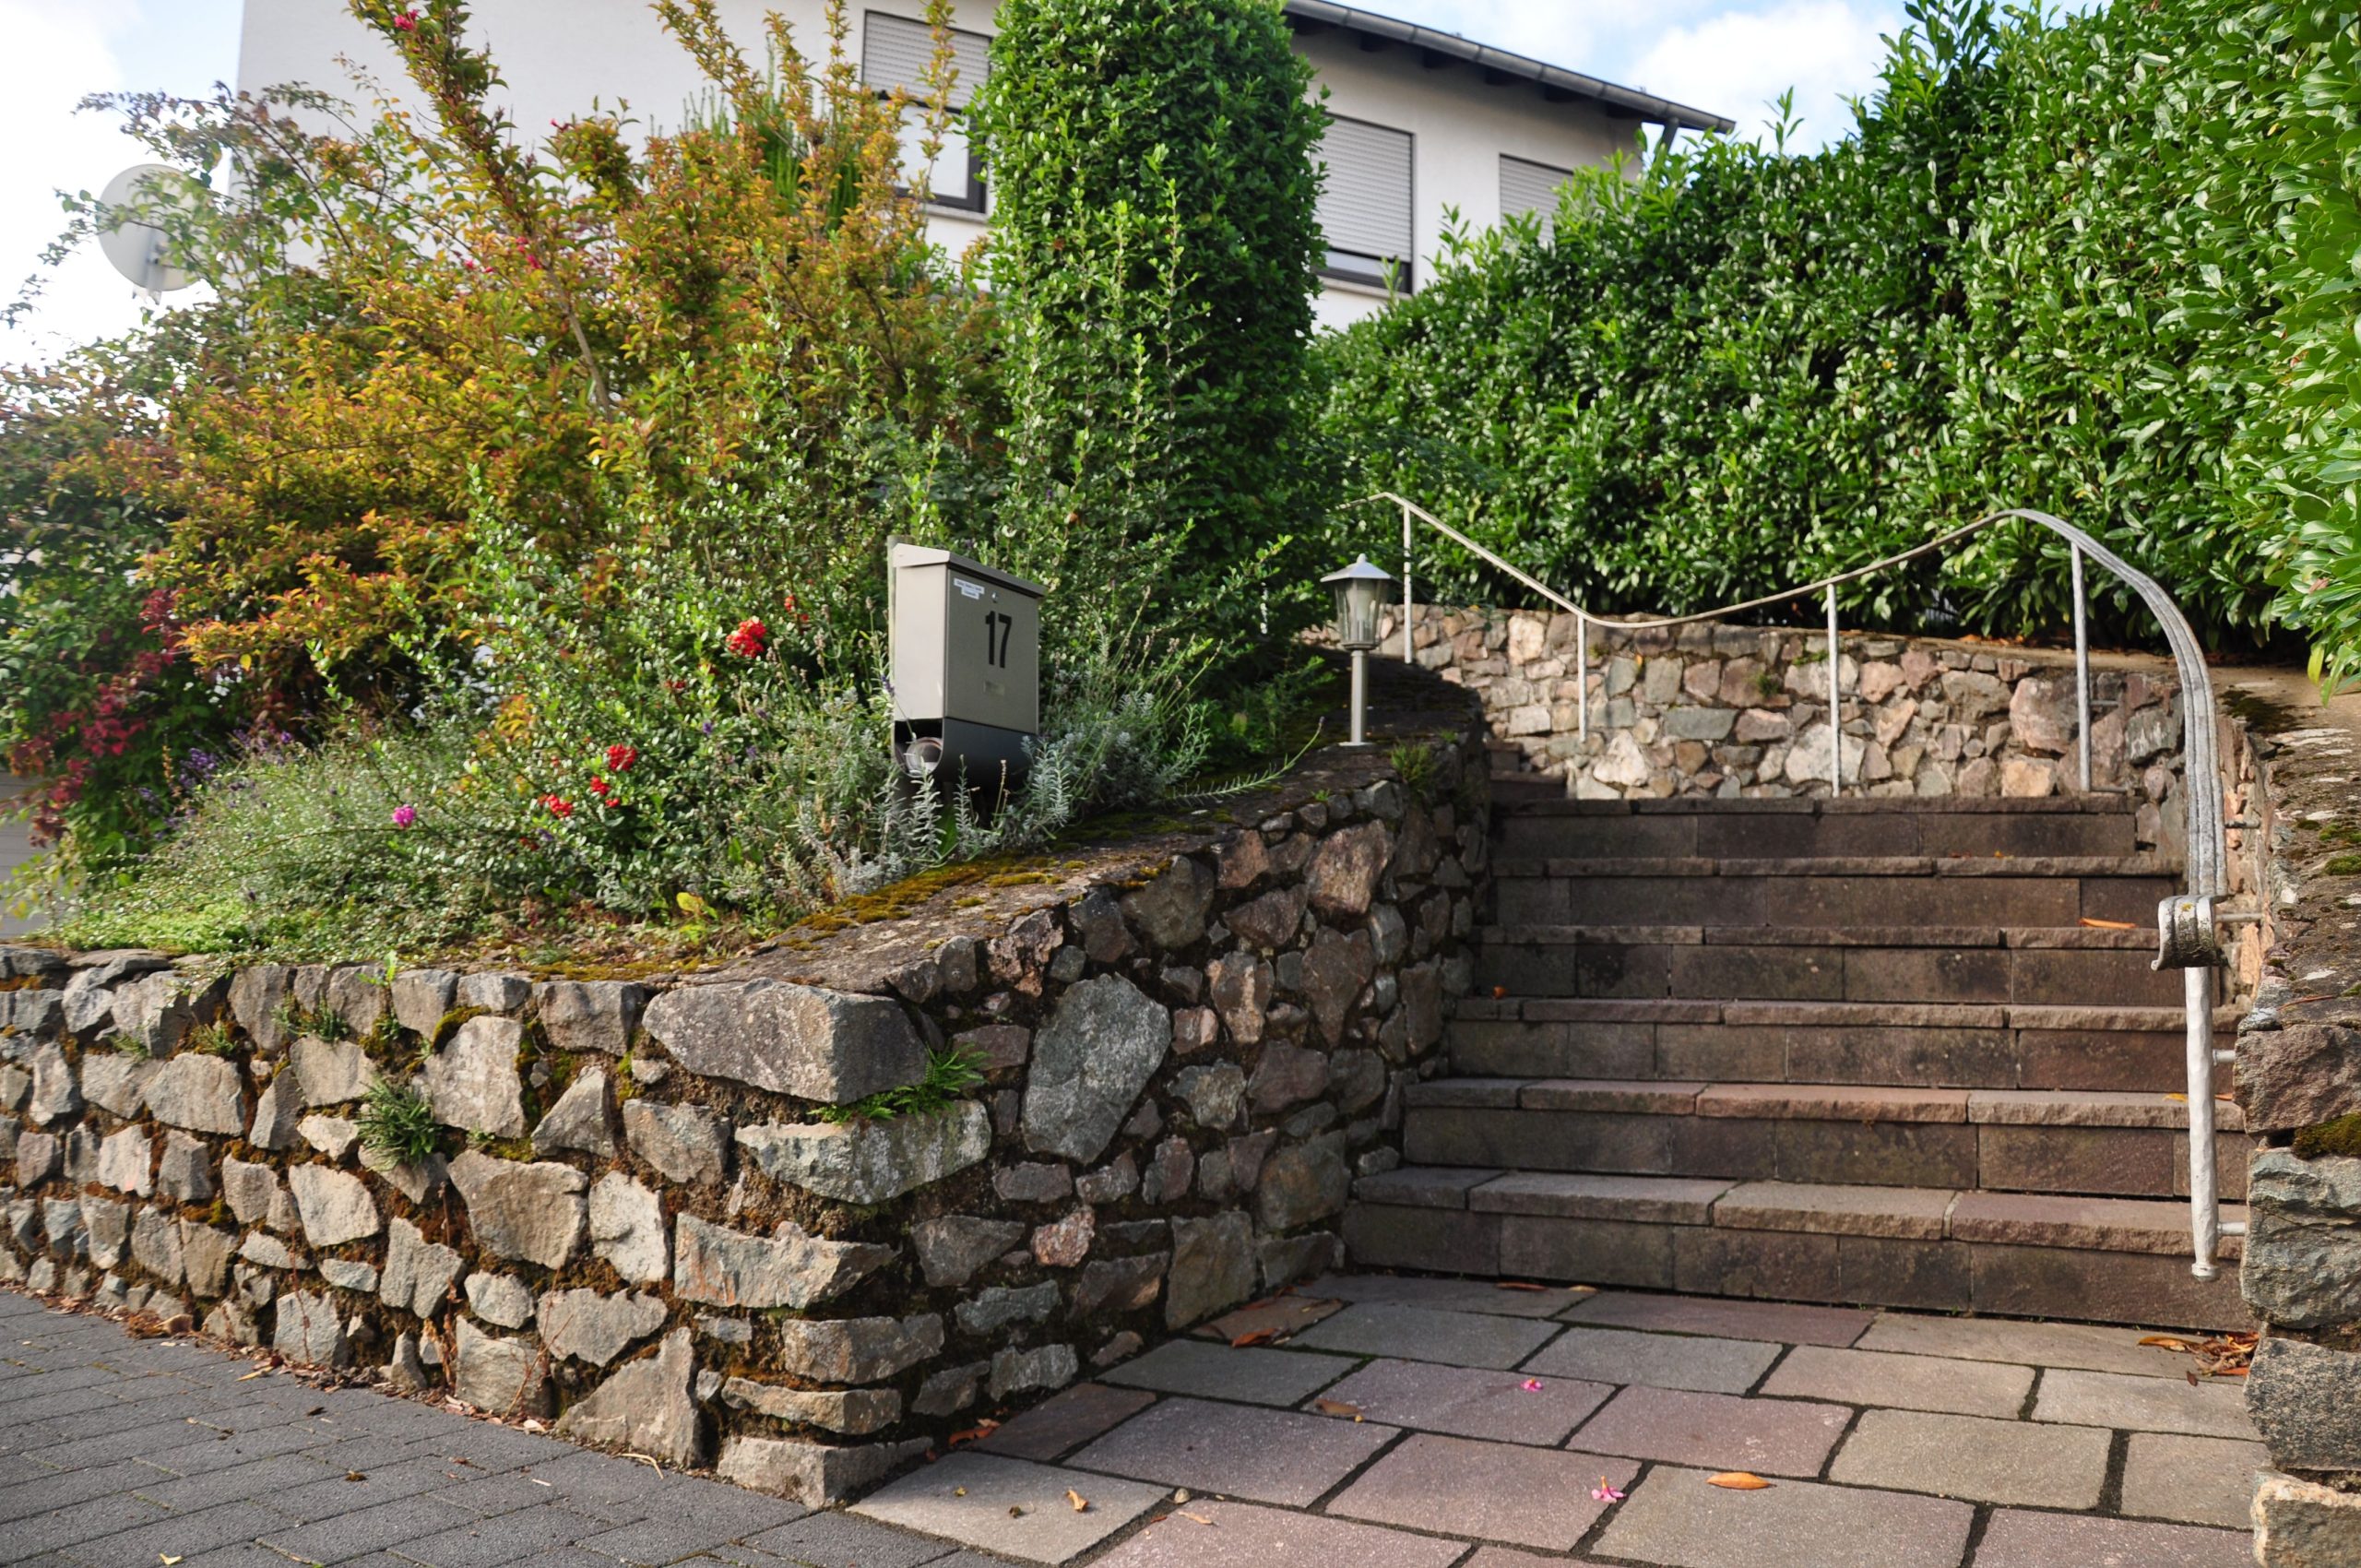
This is not a project for the faint of heart or weak of back. Building a multi-level retaining wall and staircase is heavy, difficult work that requires serious planning. A wall over 4 feet high (including the part buried underground) often requires a building permit and an engineer’s stamp to ensure it’s designed to handle the immense pressure from the soil behind it. A collapse could be catastrophic. Unless you have extensive experience with stonework and excavation, this is one job that is absolutely worth hiring a professional for.
11. Design a Serene Zen Garden with Contrasting Rocks
The classic Zen garden formula is all about restraint and balance. It follows a simple rule: 70% emptiness + 20% rock + 10% plant life. The “emptiness” is the raked white gravel, which represents water and provides negative space that allows the mind to rest. The reddish-brown rocks are the mountains or islands, grouped in an asymmetrical cluster (often in threes) to feel natural. The minimal greenery, like the pine trees here, provides a touch of life without overwhelming the scene. Swapping the reddish rocks for dark grey ones would create a more monochrome, moody feel while keeping the formula intact.
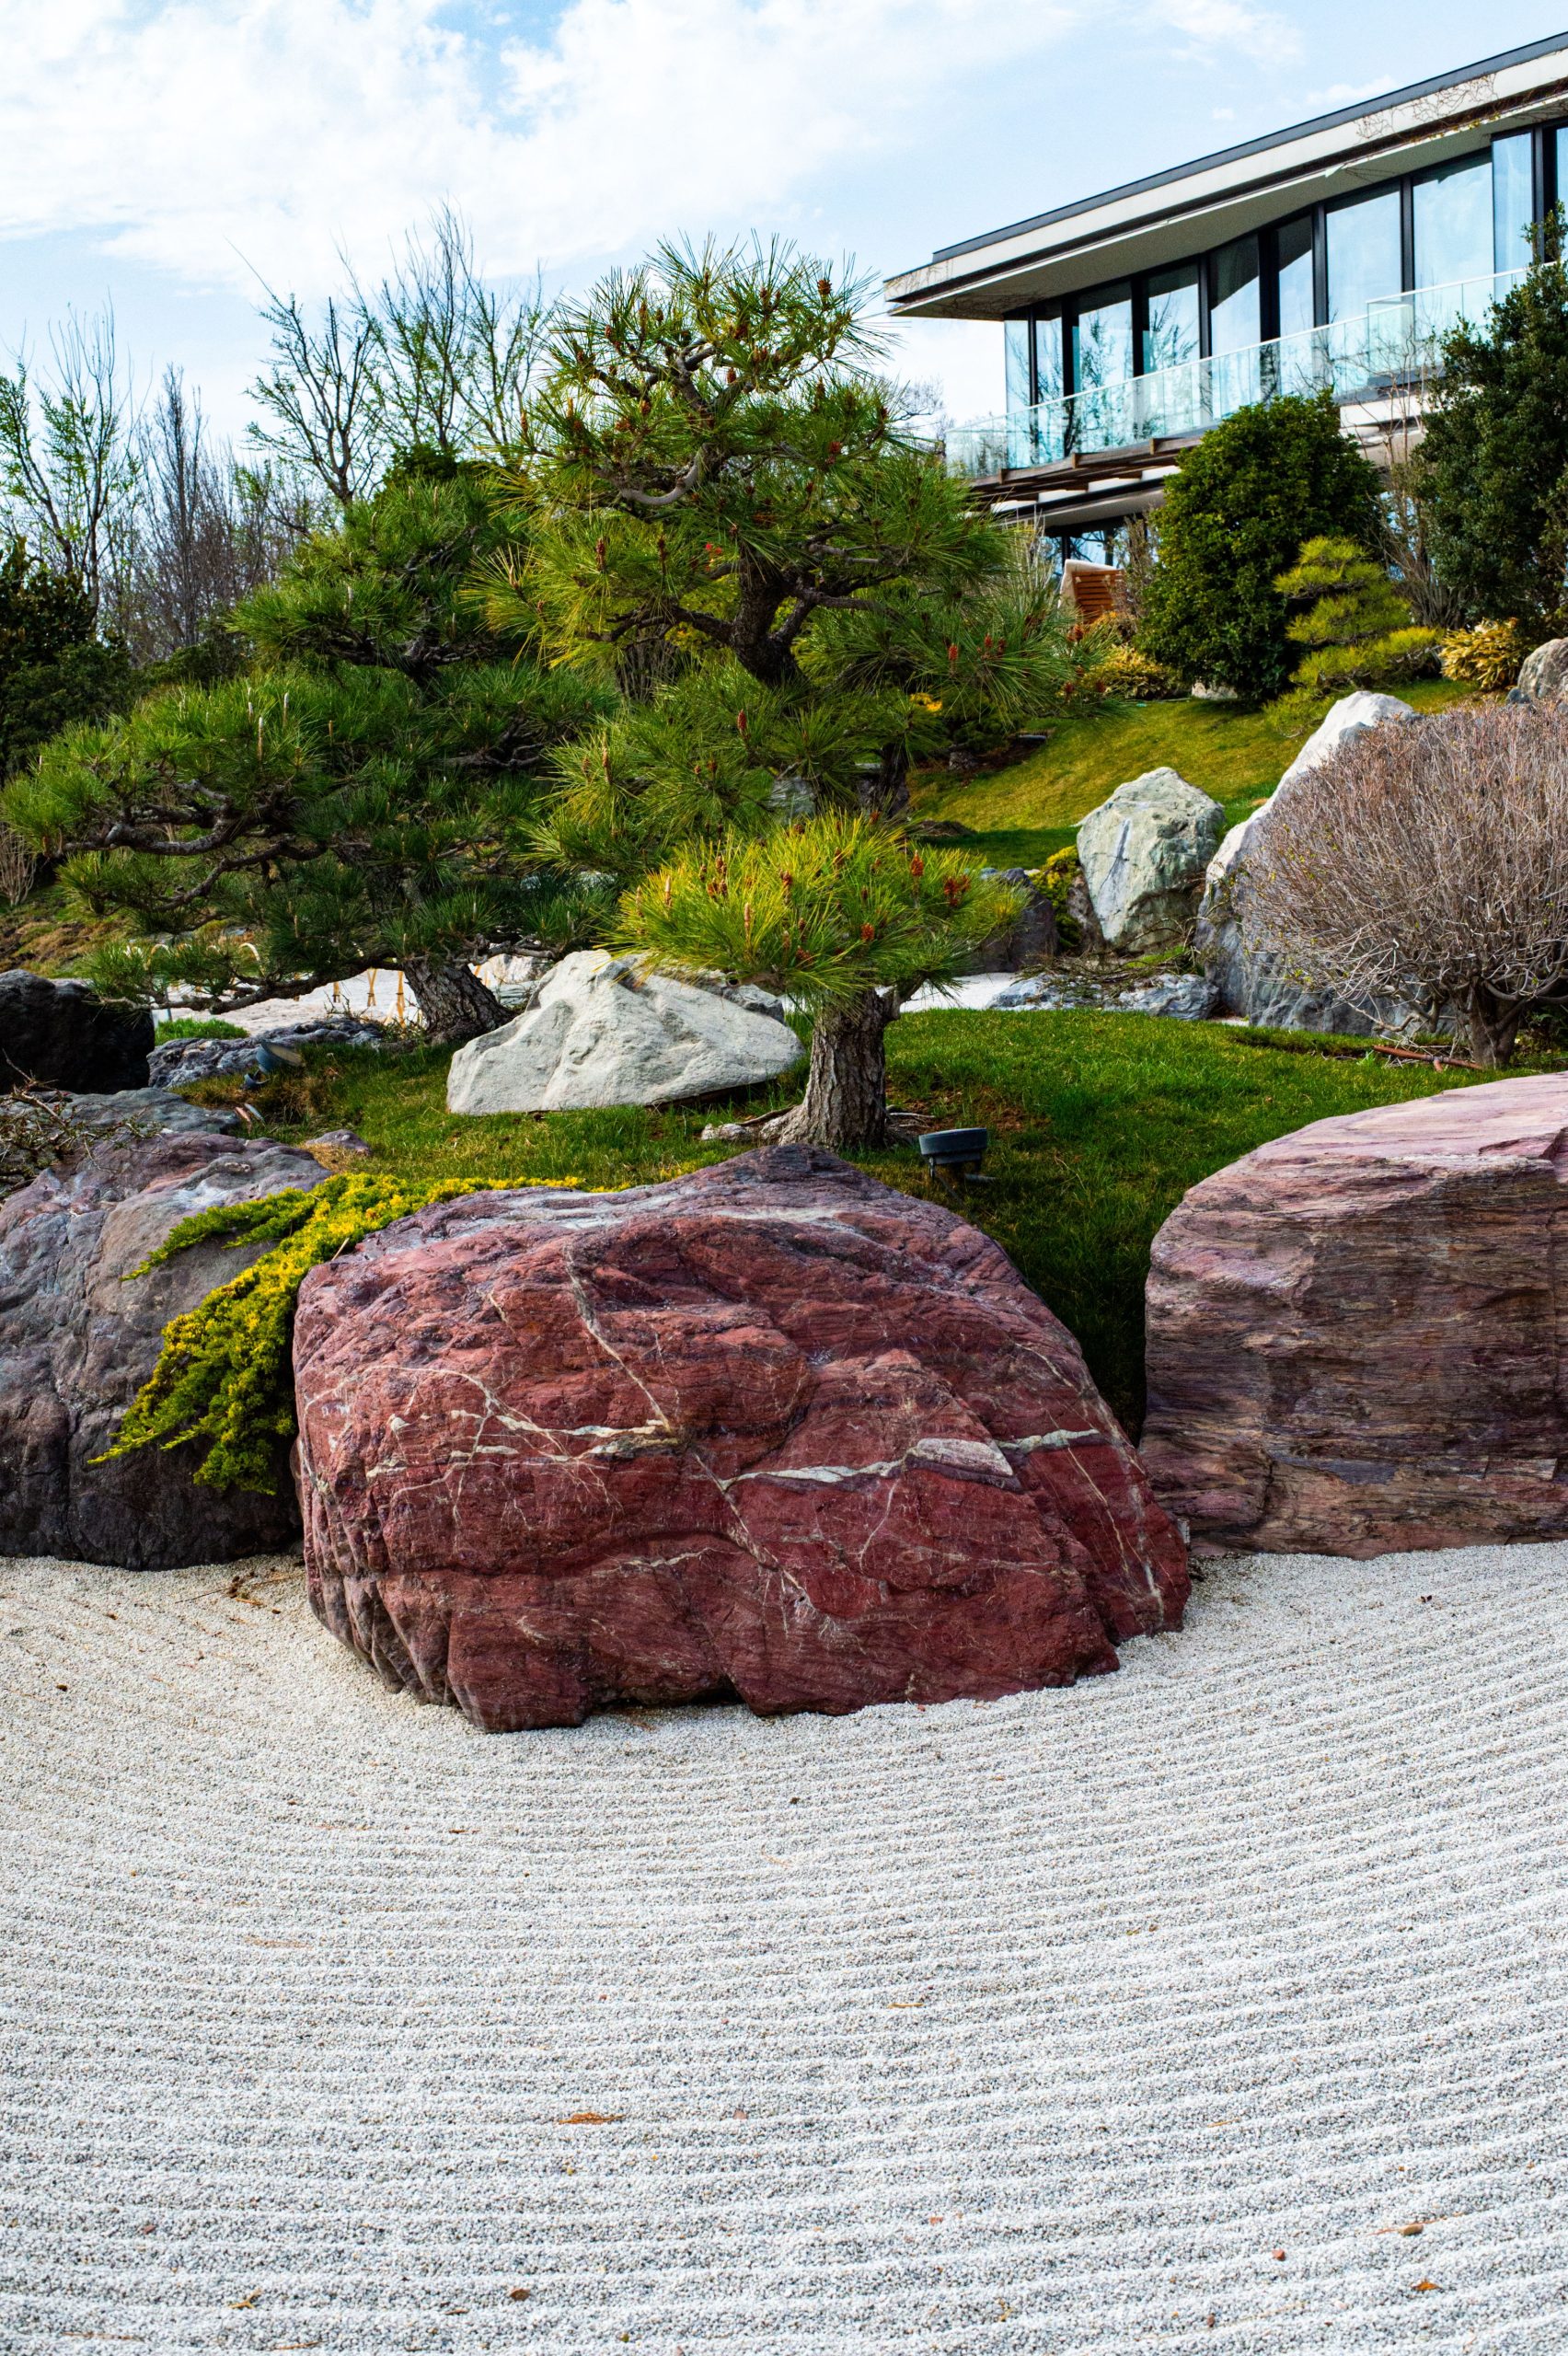
That perfectly raked gravel? It doesn’t stay that way on its own. Be prepared to spend time maintaining the pristine look. You’ll need to re-rake the gravel at least once a week, and after any heavy rain, wind, or visits from neighborhood cats. Leaves and pine needles are a constant battle; a leaf blower on its lowest setting is your best friend here. Weeds can and will eventually poke through, so periodic hand-weeding is a must. It’s a garden that requires meditative practice not just to view, but to maintain.
12. Cluster Large Grey Boulders for a Forest Floor Feel
The single most important element here is scale. It’s the sheer size of the boulders that makes this landscape feel powerful and timeless. Using smaller rocks would have resulted in a “rock garden” look, but these massive, rugged stones create the feeling of a genuine, untouched slice of nature. They provide a sense of permanence and history that smaller materials can’t replicate. The way the evergreen trees and shrubs are nestled right up against the stones makes it look as though they grew there together over decades. Everything else is secondary to the impressive weight and presence of the boulders themselves.
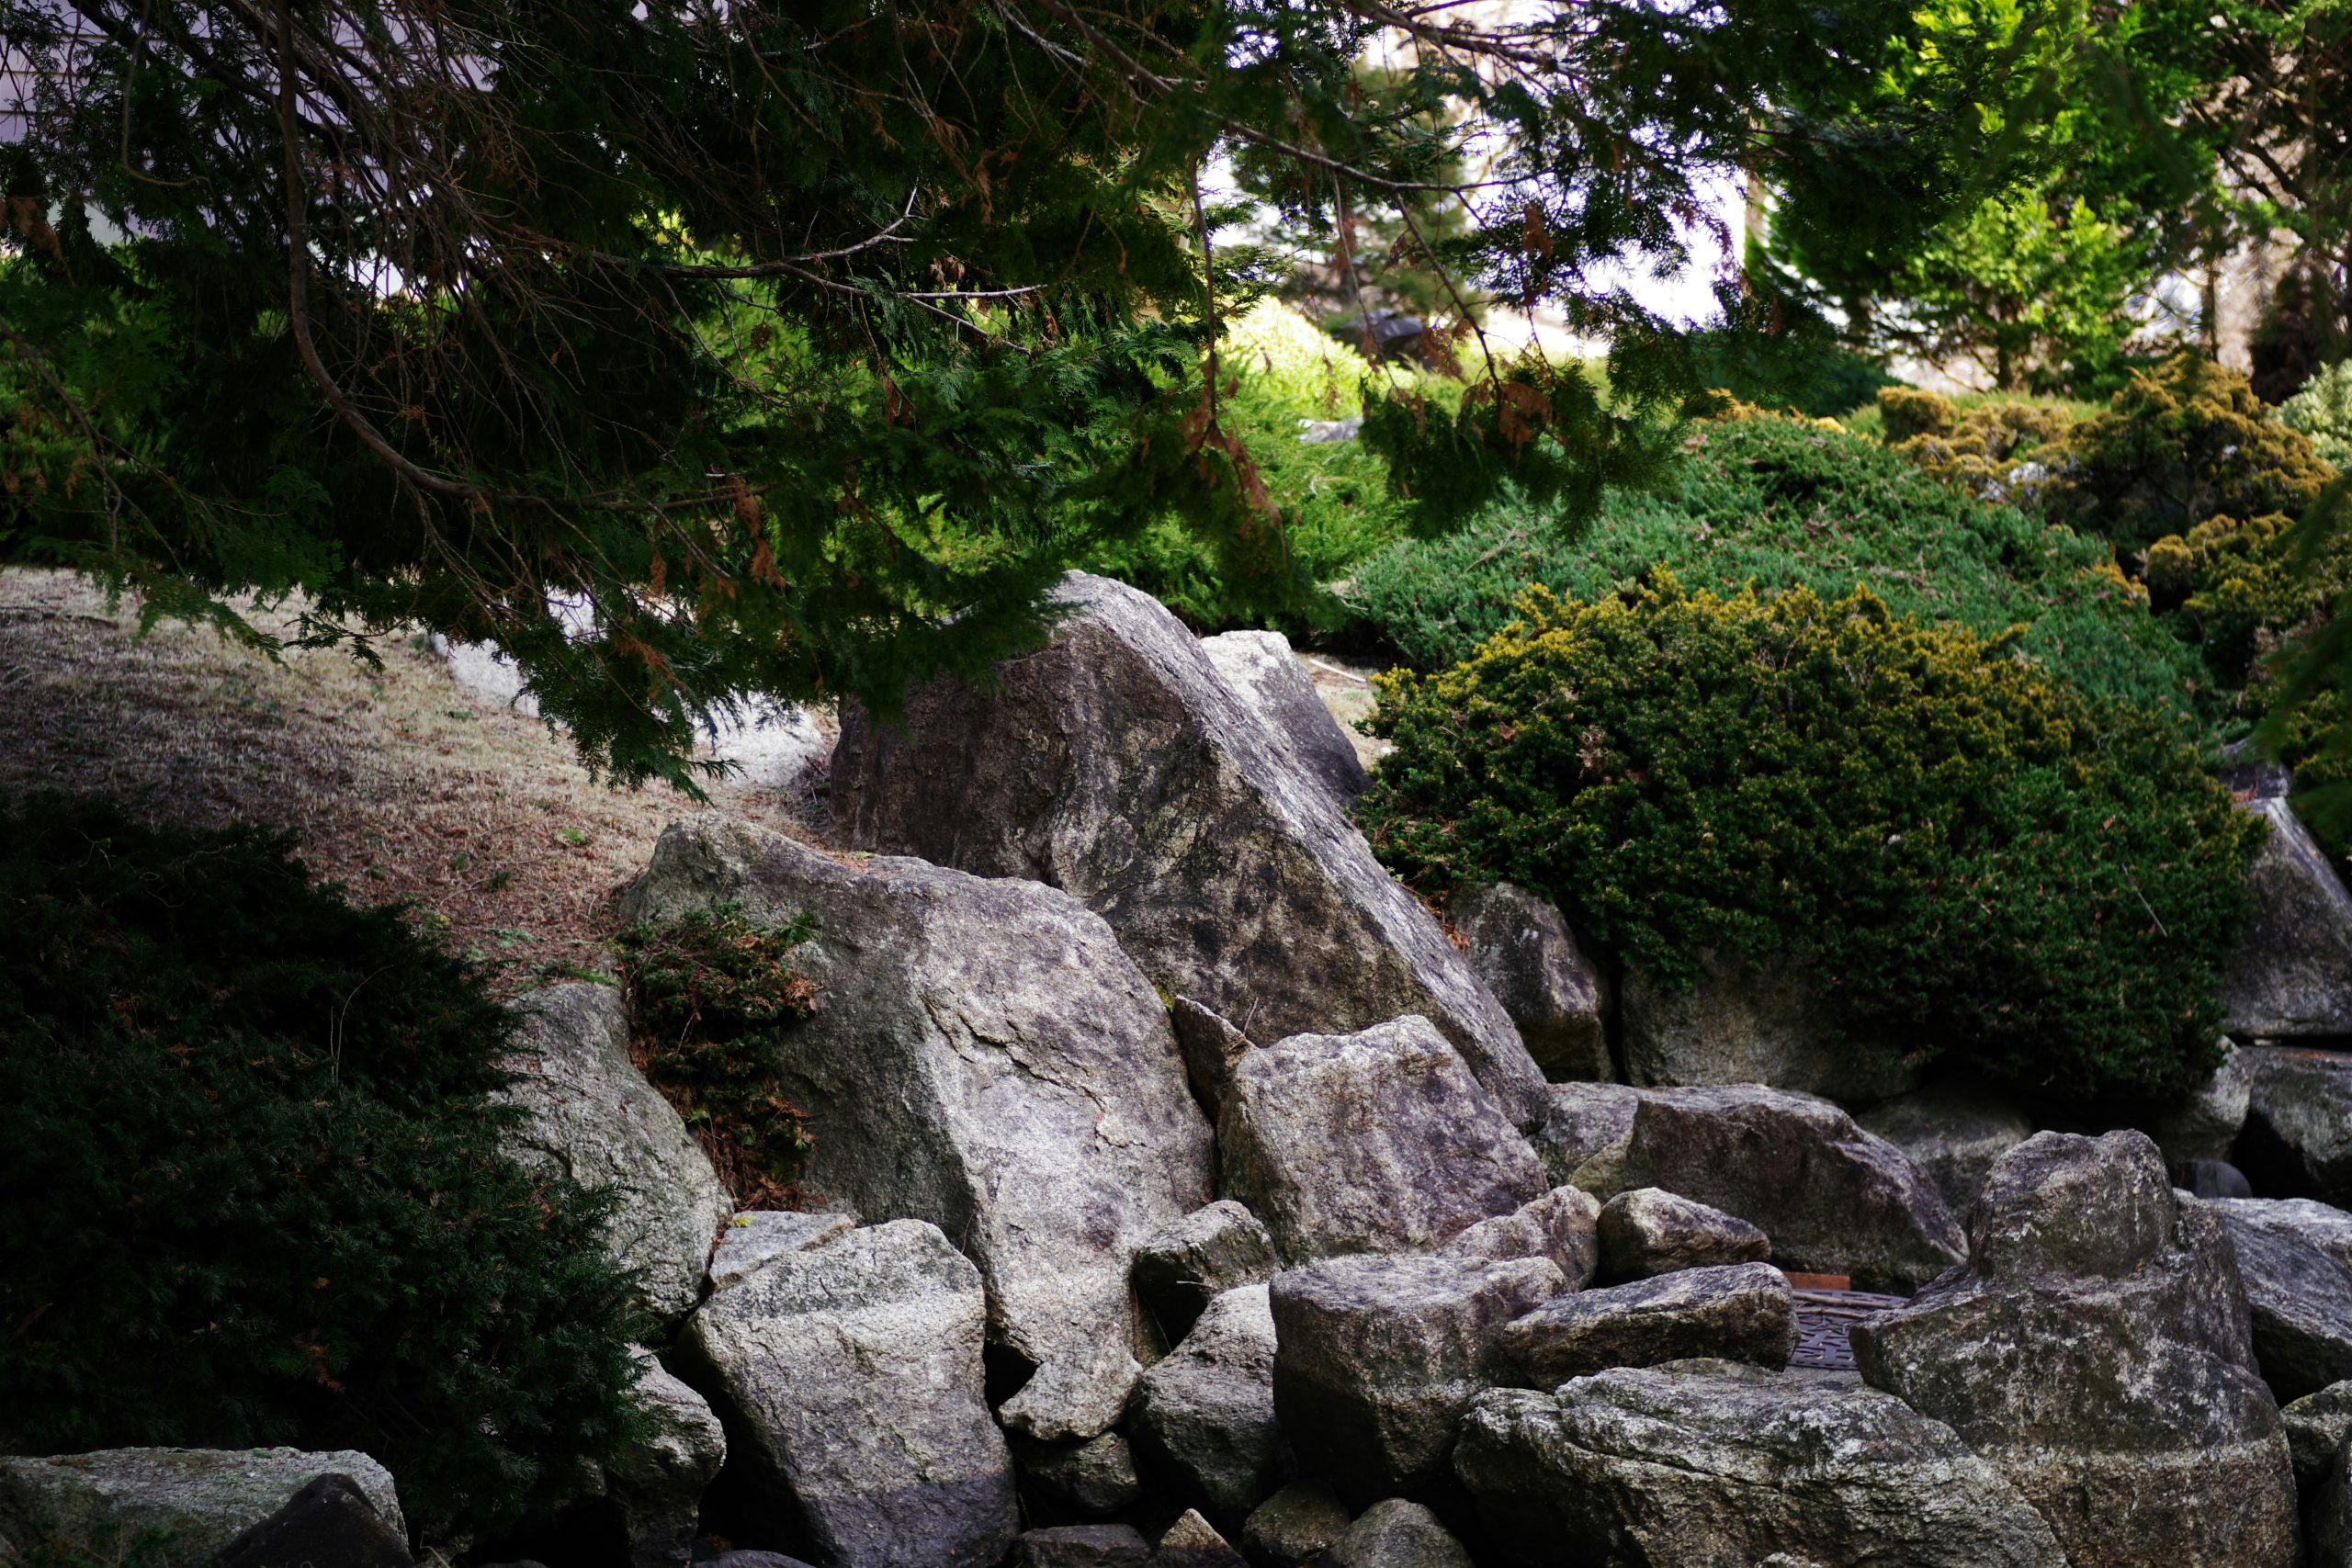
This idea is best suited for larger, more expansive properties, especially those with a wooded backdrop. To avoid looking like a random pile of rocks, you need a generous footprint—think a minimum of 20×15 feet. It works particularly well for camouflaging a steep, unusable slope, turning it into a dramatic and beautiful feature. In a small, flat suburban yard, this look could feel overwhelming and out of place, like a mountain that got lost. If you love this but have less space, consider the more contained version in Idea #7.
13. Layer Evergreen Shrubs Among Natural Boulders
This design succeeds by playing with a limited palette of colors and a rich variety of textures. By sticking almost exclusively to greens and grays, the focus shifts to the contrast between the smooth, hard surfaces of the rocks and the soft, feathery foliage of the evergreen shrubs. The layering of different shades of green—from dark forest green to bright lime—creates visual depth and interest without needing a single flower. It’s a sophisticated, year-round look that feels calm and cohesive.
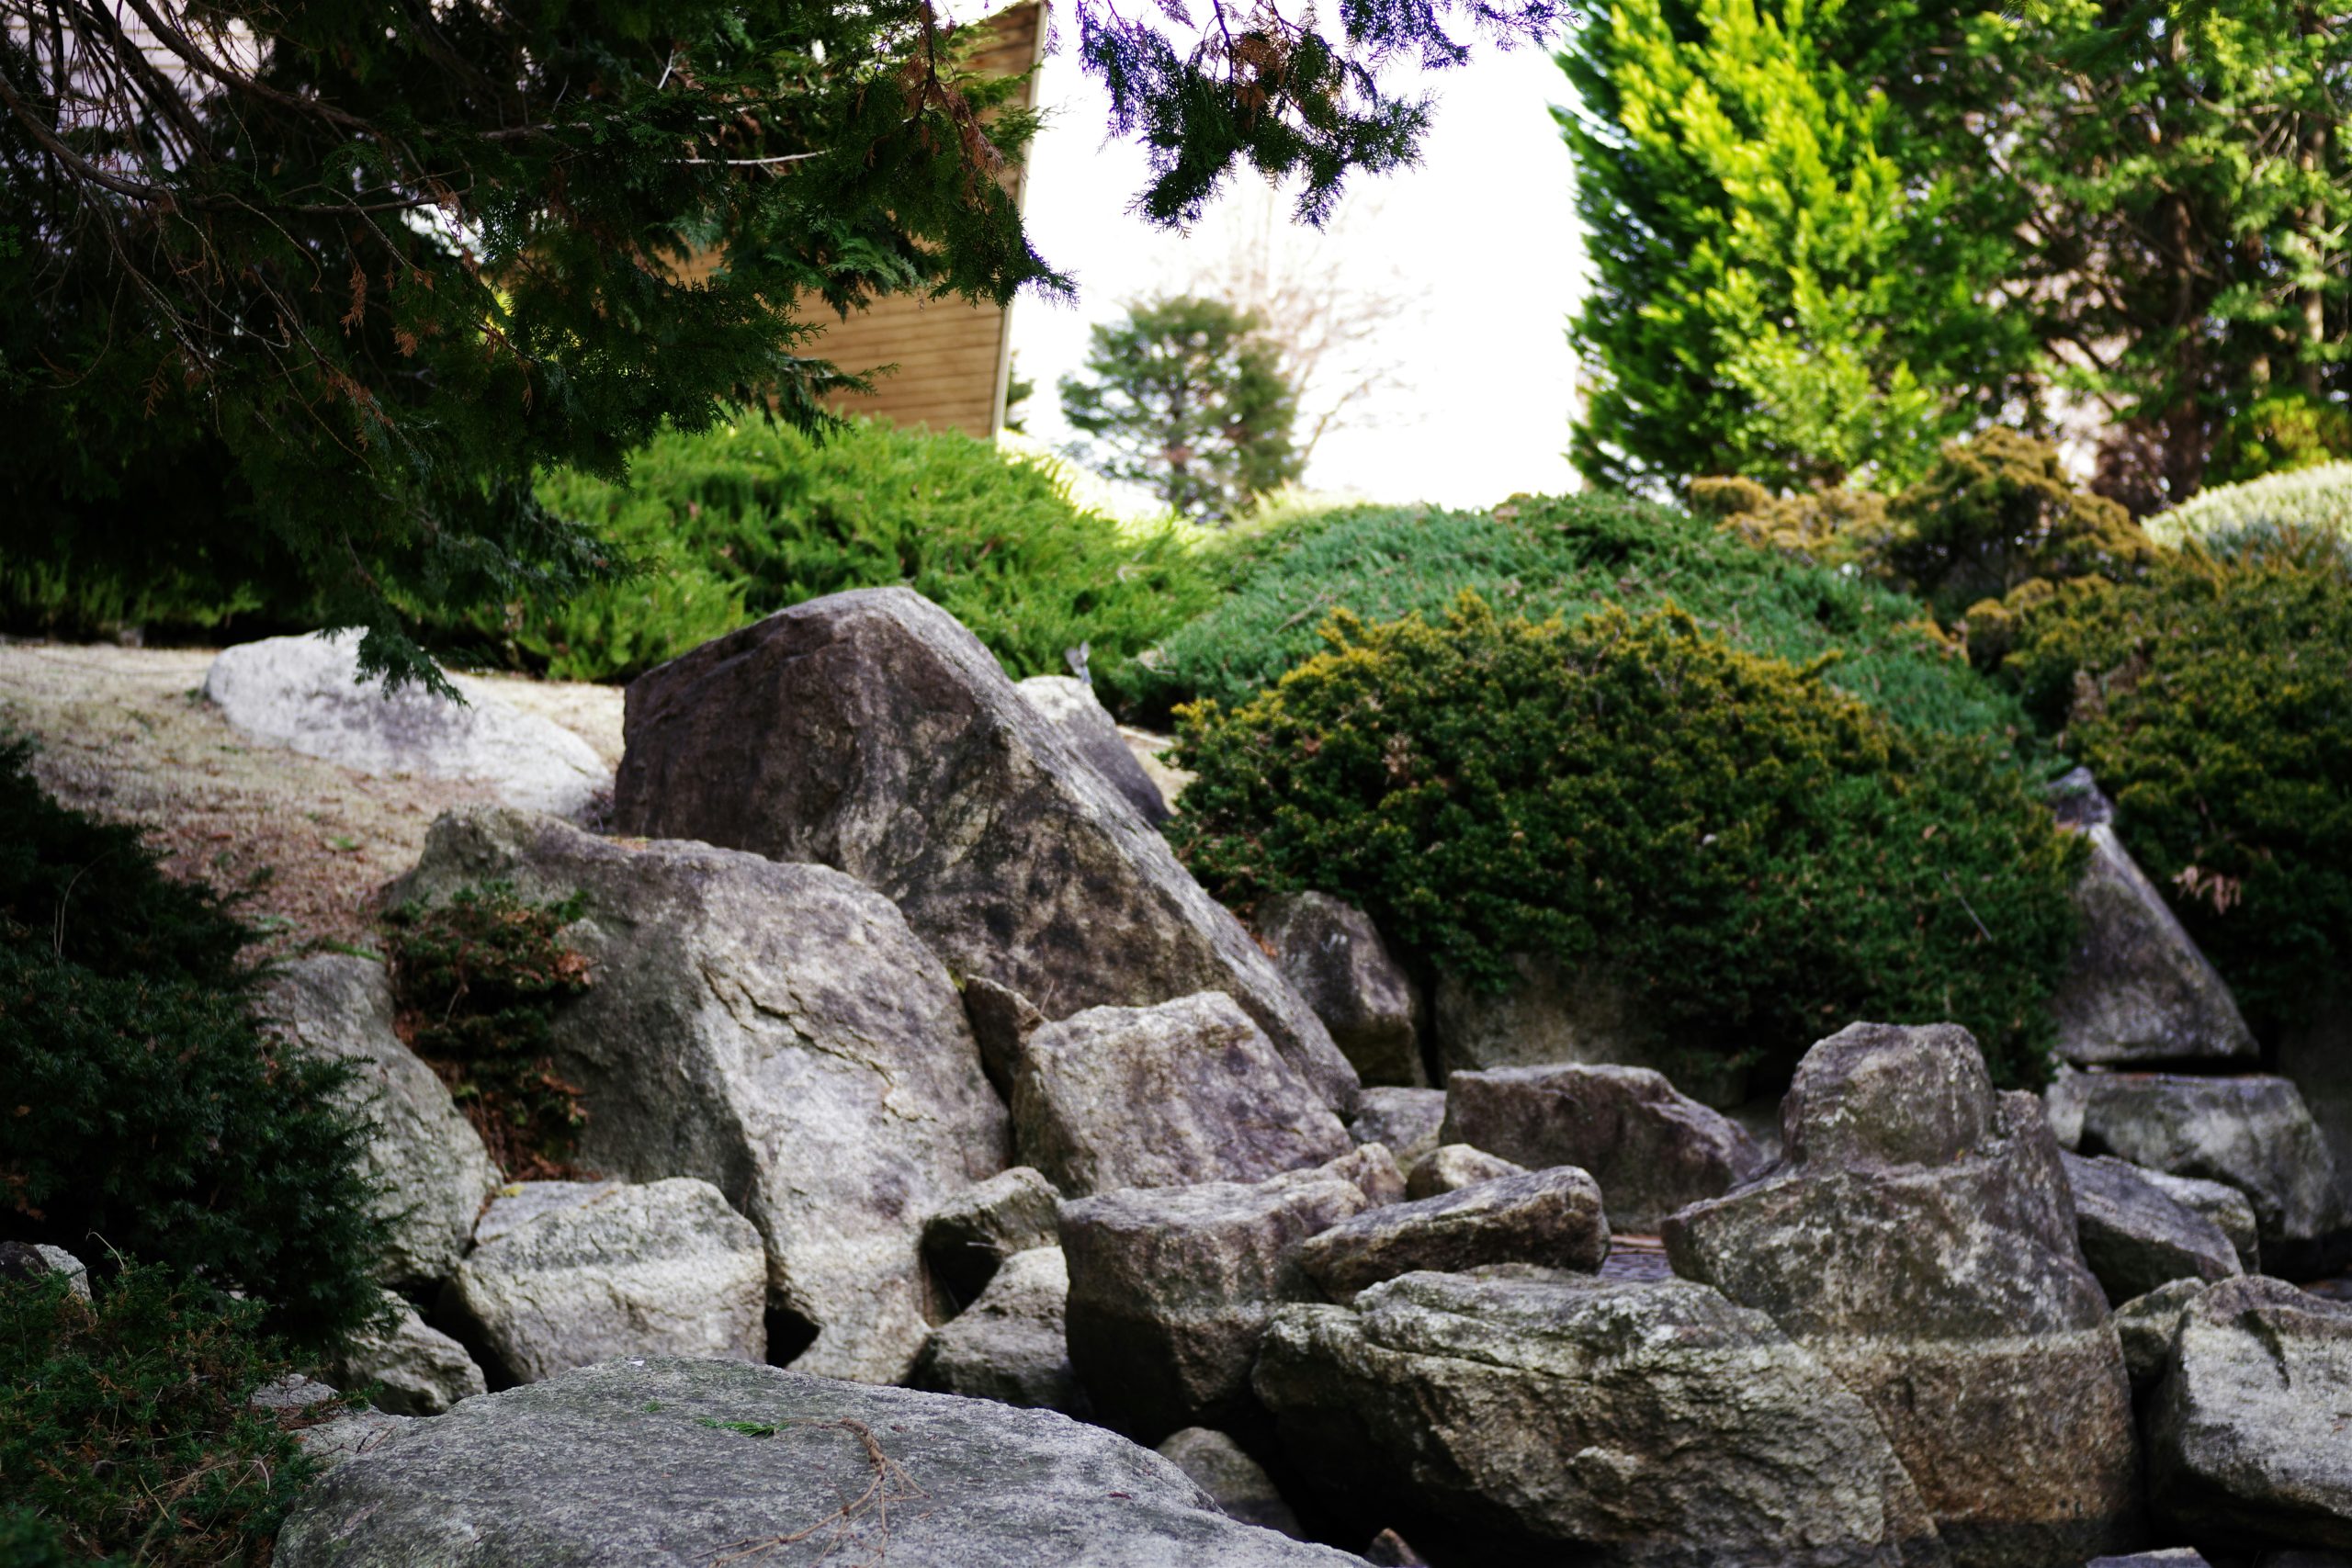
To get this lush, multi-tonal green look, choose at least three different types of evergreen shrubs with varying foliage. For example, combine the feathery, bright green needles of a `Chamaecyparis pisifera ‘Sungold’` with the deep green, classic texture of a boxwood, and the bluish-green tones of a dwarf blue spruce. Planting them in staggered groups of three or five around your boulders will create a more natural, less soldier-like appearance. And don’t forget to consider their mature size to avoid overcrowding down the line.
14. Construct a Low Retaining Wall with Multi-Colored Rocks
A low, rustic retaining wall like this is a fantastic and relatively affordable DIY project.
- Main Furniture (Rocks): $300 – $800 (for 1-2 tons of fieldstone)
- Lighting: $0 (not necessary for this look)
- Textiles (Plants): $100 – $300 (for perennials and bulbs like daffodils)
- Decor/Accessories (Mulch): $50 – $100
- TOTAL: $450 – $1,200
Budget alternative: Look for free rocks on Craigslist or Facebook Marketplace. Many people clearing land are happy to have you haul them away. With free stone, this entire project could be done for under $200. This is a great budget alternative to the more formal stacked wall in Idea #2.
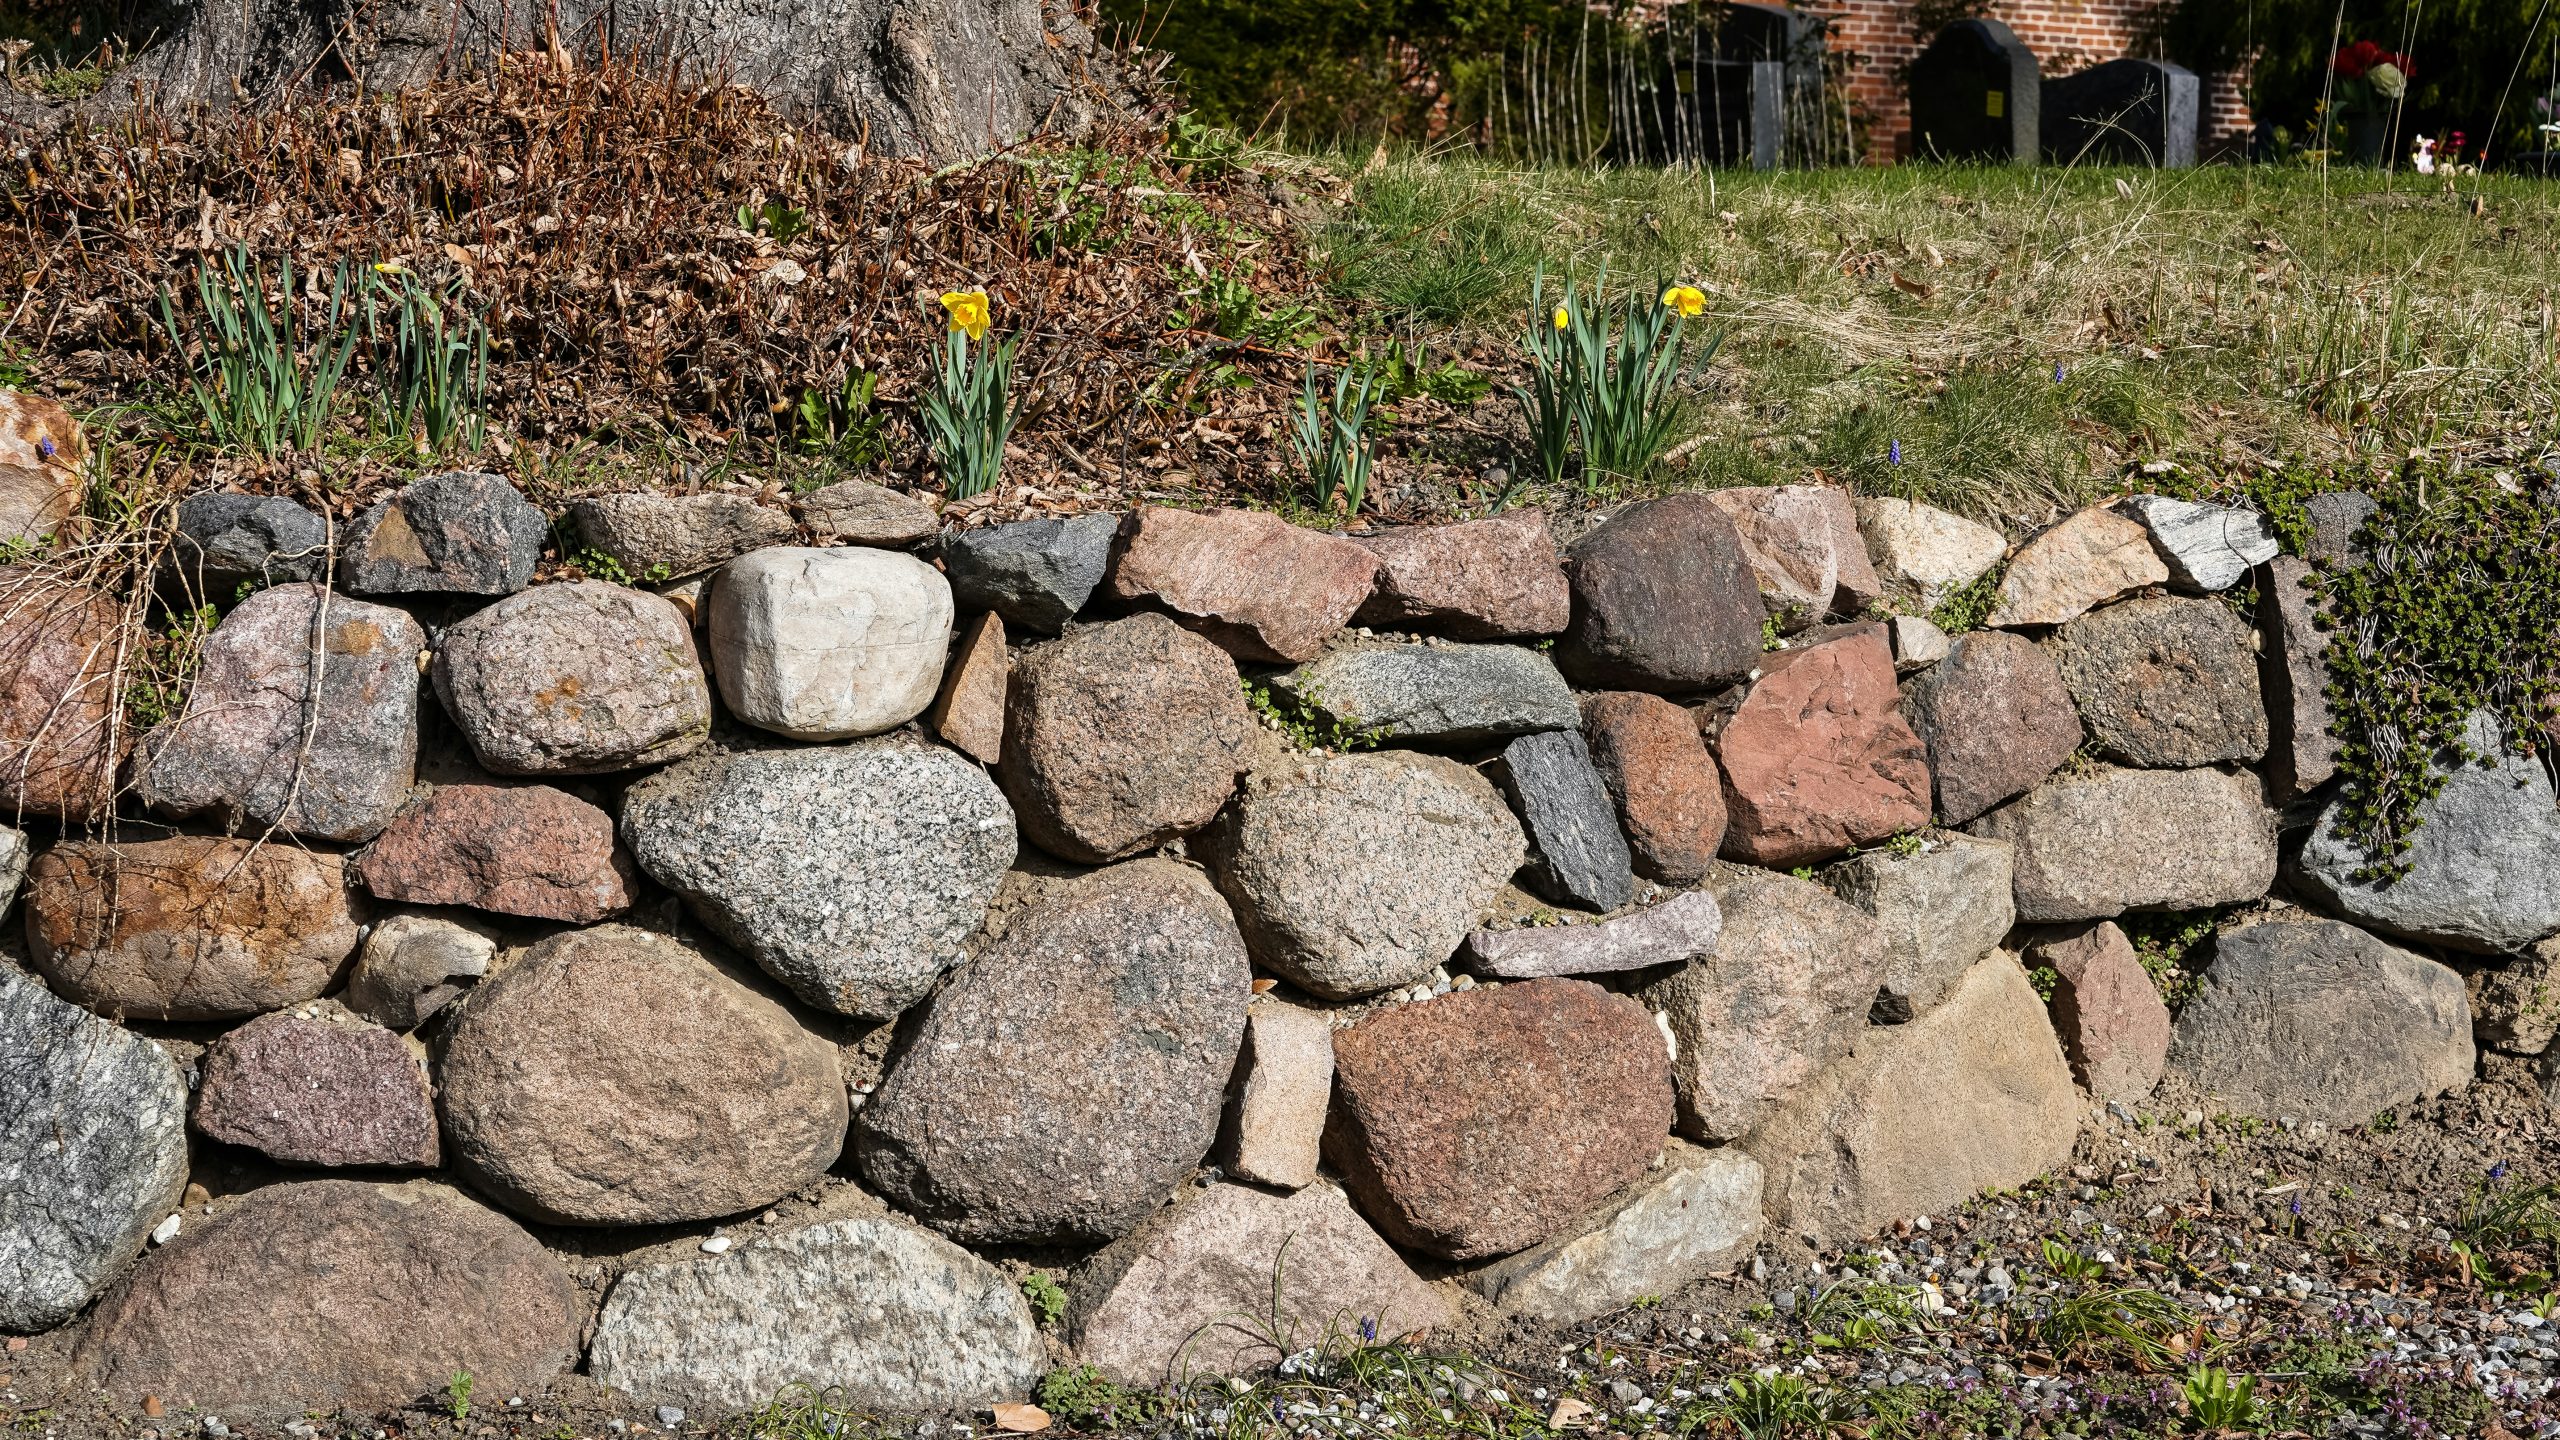
Building a sturdy, low rock wall is easier than it looks. It’s all about a solid base and overlapping your joints.
- Dig a Trench (1-2 hours): Excavate a trench about 6 inches deep and 18 inches wide. Tamp the soil down firmly.
- Lay the Base Course (1 hour): Place your largest, flattest rocks in the bottom of the trench. This is your foundation.
- Stack and Stagger (2-4 hours): Begin your second course, making sure to stagger the joints like you would with bricks. No two vertical seams should line up.
- Backfill As You Go (Ongoing): As you build each course, shovel dirt in the space behind the wall. This adds stability.
- Lean It Back (Ongoing): Make sure each course is set back slightly (about a half-inch) from the one below it. This “batter” gives the wall immense strength against the pressure of the soil.
15. Lay a Casual Stepping Stone Path Through a Lawn
While this looks effortlessly charming, be honest with yourself about lawn maintenance. Mowing around irregular stepping stones can be a real pain. You’ll either need to carefully maneuver your mower wheel onto each stone (risking blade damage) or spend extra time every week with a string trimmer to cut the grass along the edges of each one. The grass growing between the stones also needs to be kept neat, or the path will quickly look messy and disappear. It’s a higher-maintenance choice than a solid gravel or mulch path.
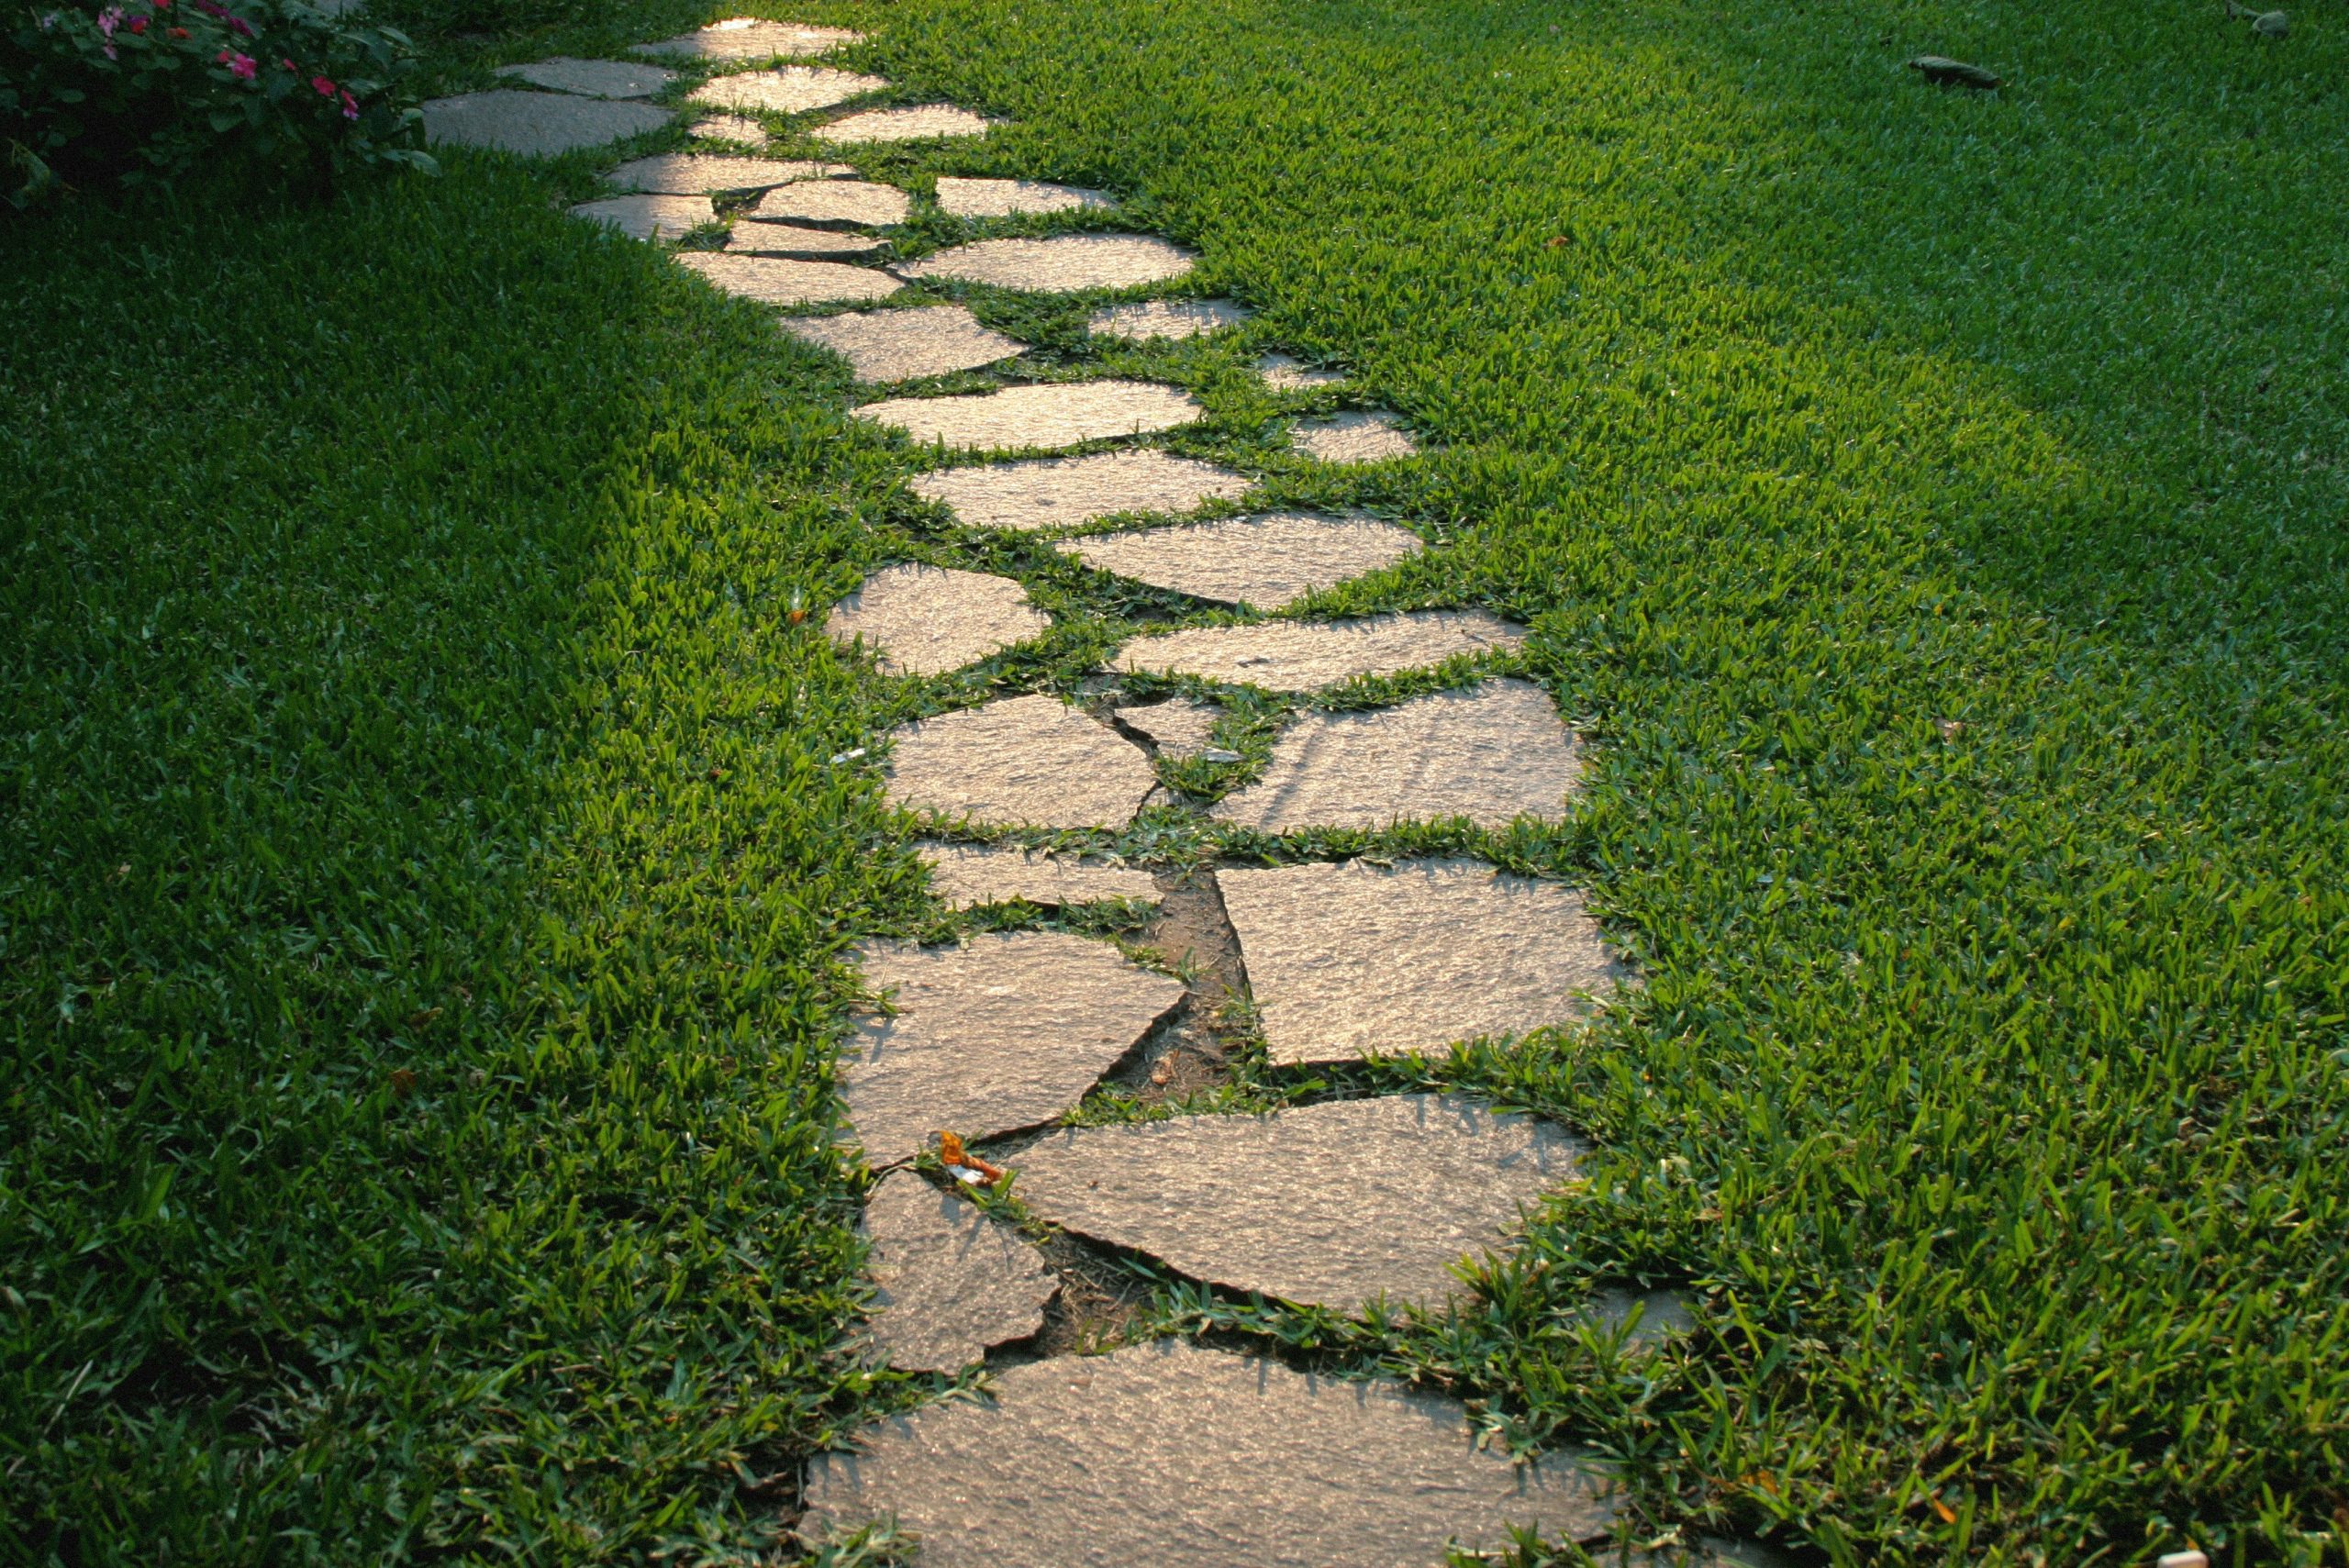
digging, lay out your path and live with it for a week. Here’s what to check:
- Test the Walkway: Lay the stones on top of the grass and walk the path several times. Is the stride length comfortable? Do you have to take unnaturally large or small steps? Adjust the spacing until it feels natural.
- Check the Mower Path: Run your lawnmower over the area. Will the stones interfere with your mowing pattern? Is there enough clearance? It’s much easier to adjust the path now than after you’ve cut into the sod.
- Observe the Sunlight: Notice how the dappled sunlight falls. Will the path be pleasantly lit, or will it be in deep shade most of the day, encouraging slippery moss growth?
16. Design a Mossy Stone Path to a Water Feature
The reason this scene feels so serene and ancient is the dominance of a single color: green. From the moss on the stones to the lush ferns and broad-leafed plants, the entire landscape is a study in green textures. The path itself is made of irregular, moss-covered rocks that feel like they have been there for centuries. This monochromatic focus, combined with the dark, reflective water at the end of the path, creates a deeply calming and immersive experience. It’s a perfect example of how limiting your color palette can actually have a more powerful impact.
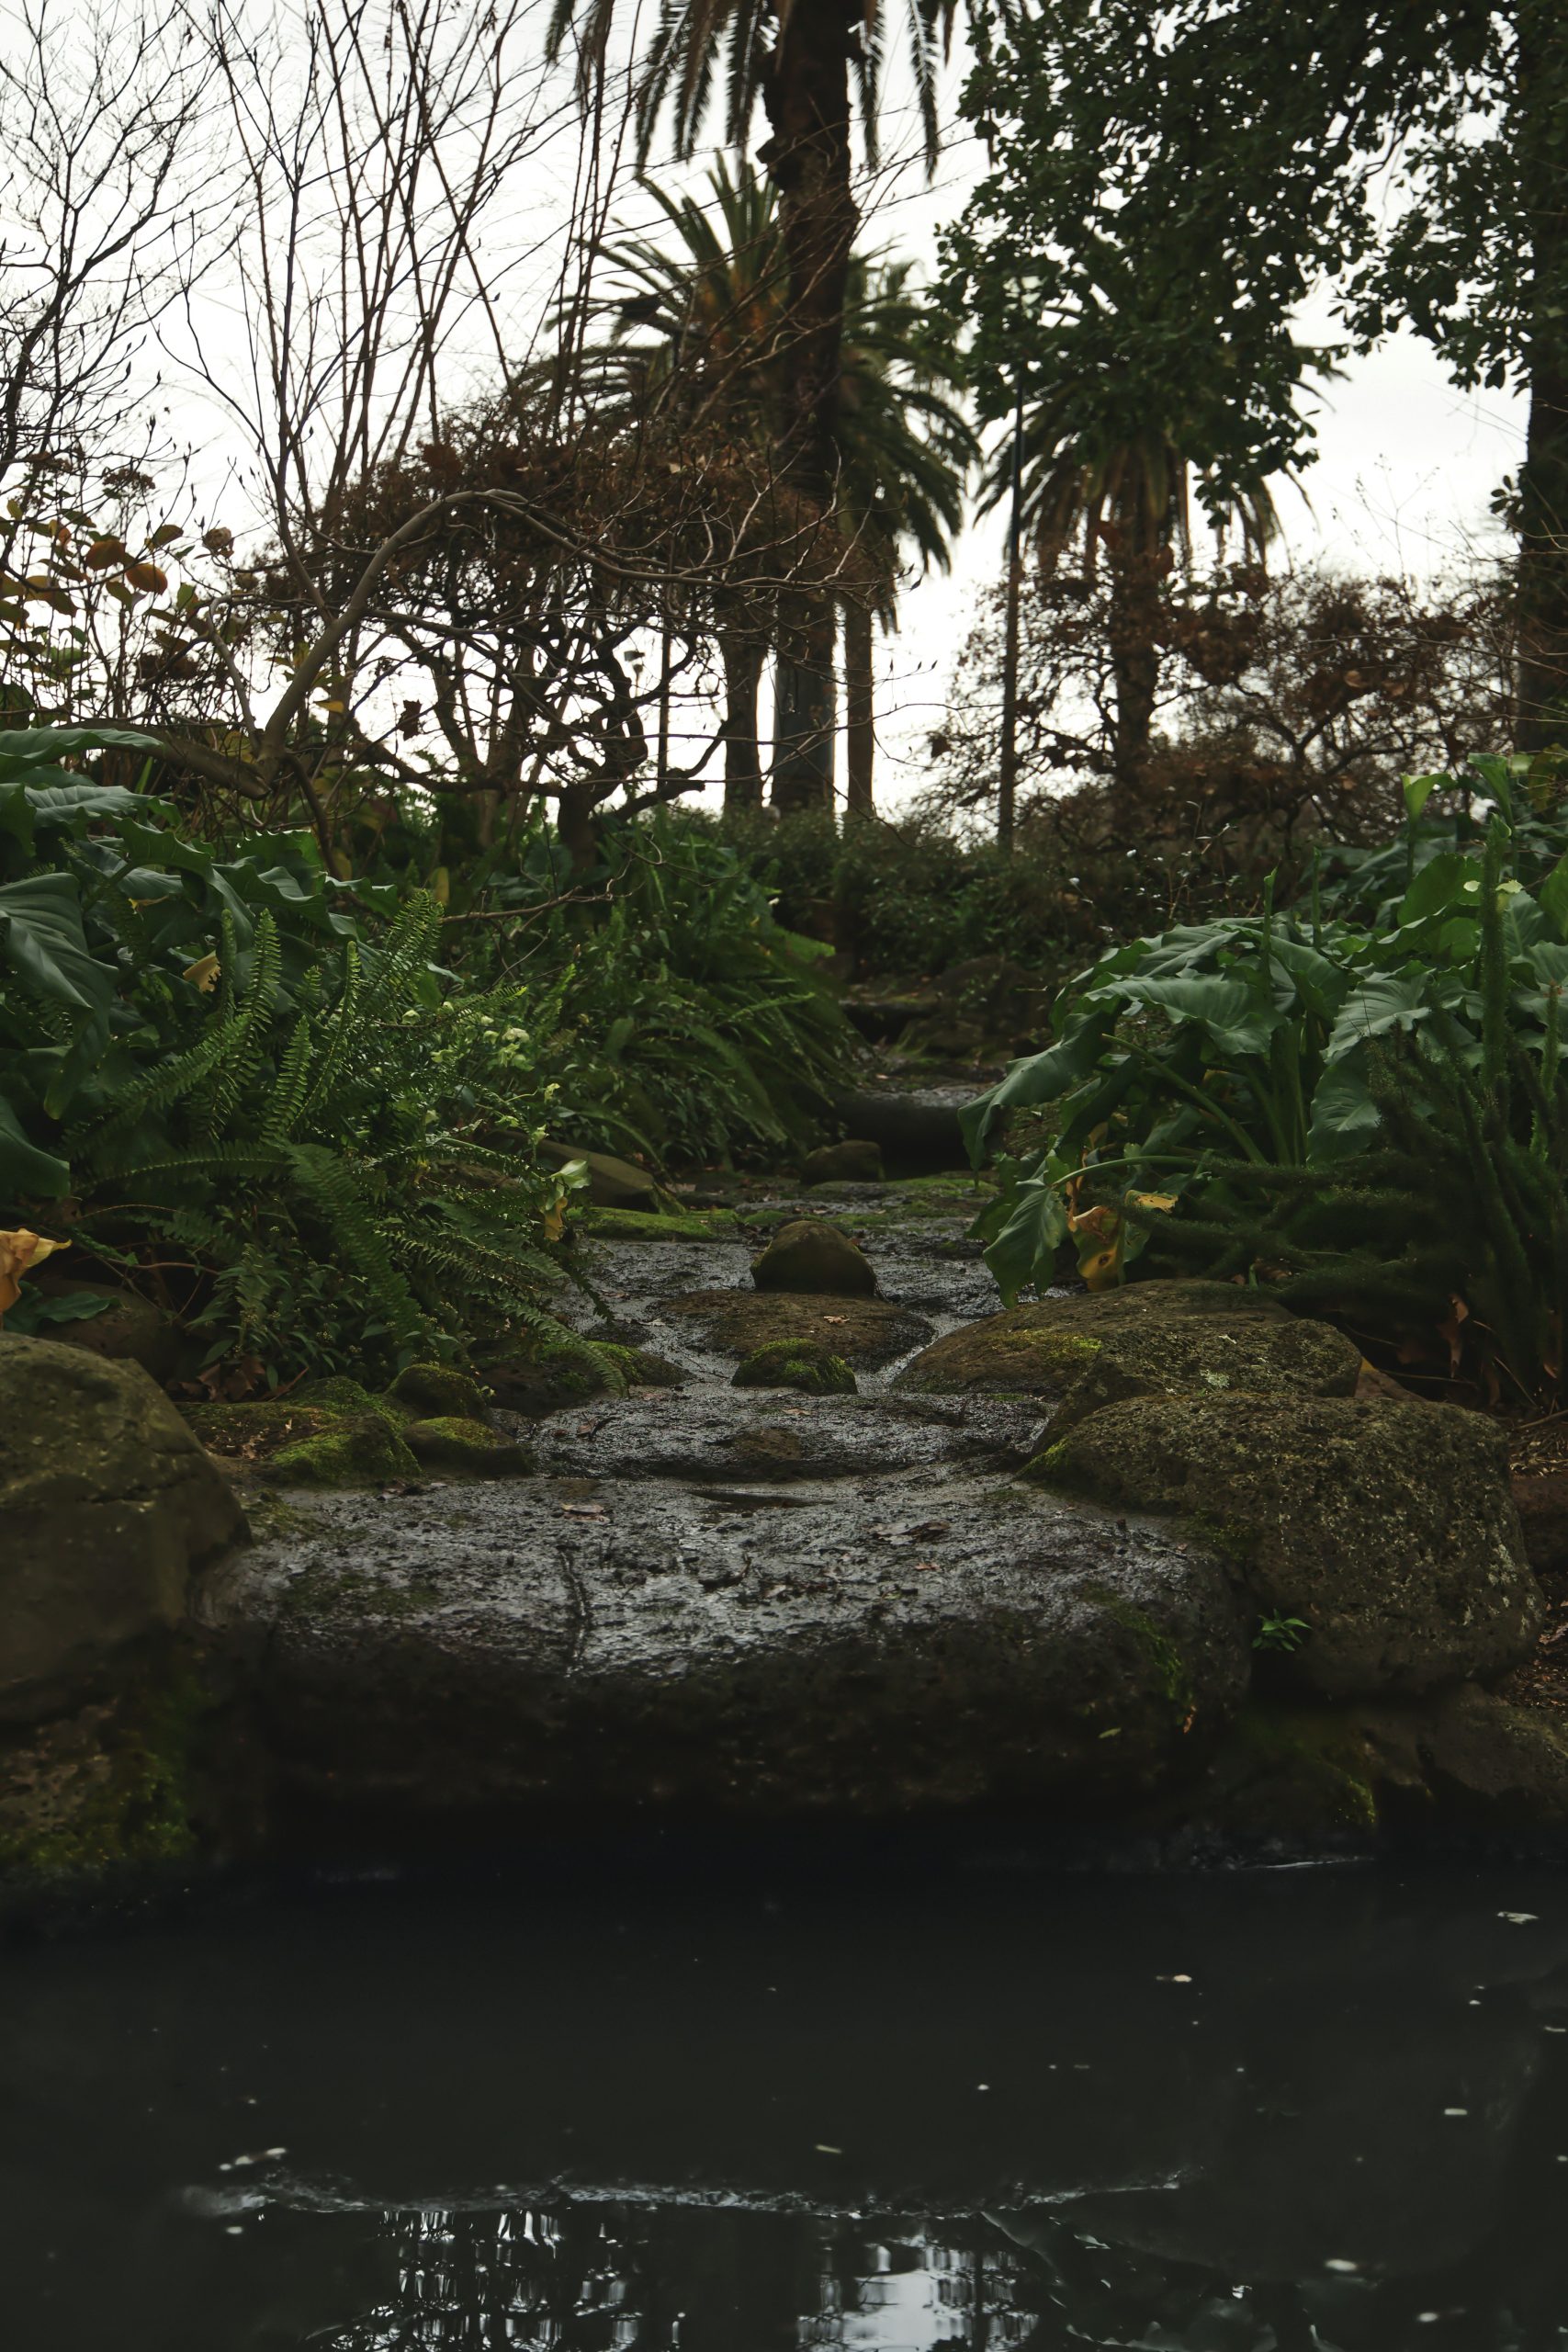
You can get this “ancient path” vibe for a fraction of the cost. Instead of buying expensive, large flagstones, consider using concrete “seconds” or broken pieces of a concrete slab, which are often available for free or very cheap from demolition sites. Arrange them in an irregular pattern and encourage moss growth by “painting” them with a slurry of buttermilk and moss. For the plantings, skip the pricey nursery ferns and look for native species that thrive in shade. Hostas are another great, affordable option that give that lush, broad-leaf look.
17. Embrace Minimalism with White Gravel and a Central Tree
This look is a direct reflection of the “Japandi” trend, which blends the sleek minimalism of modern Japanese design with the cozy, natural elements of Scandinavian style. The clean white lines of the marble-patterned walls and the stark white gravel are pure minimalism. But the organic shape of the central planting bed, the rugged grey rocks, and the delicate tree bring in that warm, nature-inspired element. It’s a style that speaks to our desire for calm, uncluttered spaces that still feel connected to the outdoors. It’s a garden treated as a piece of architectural art.
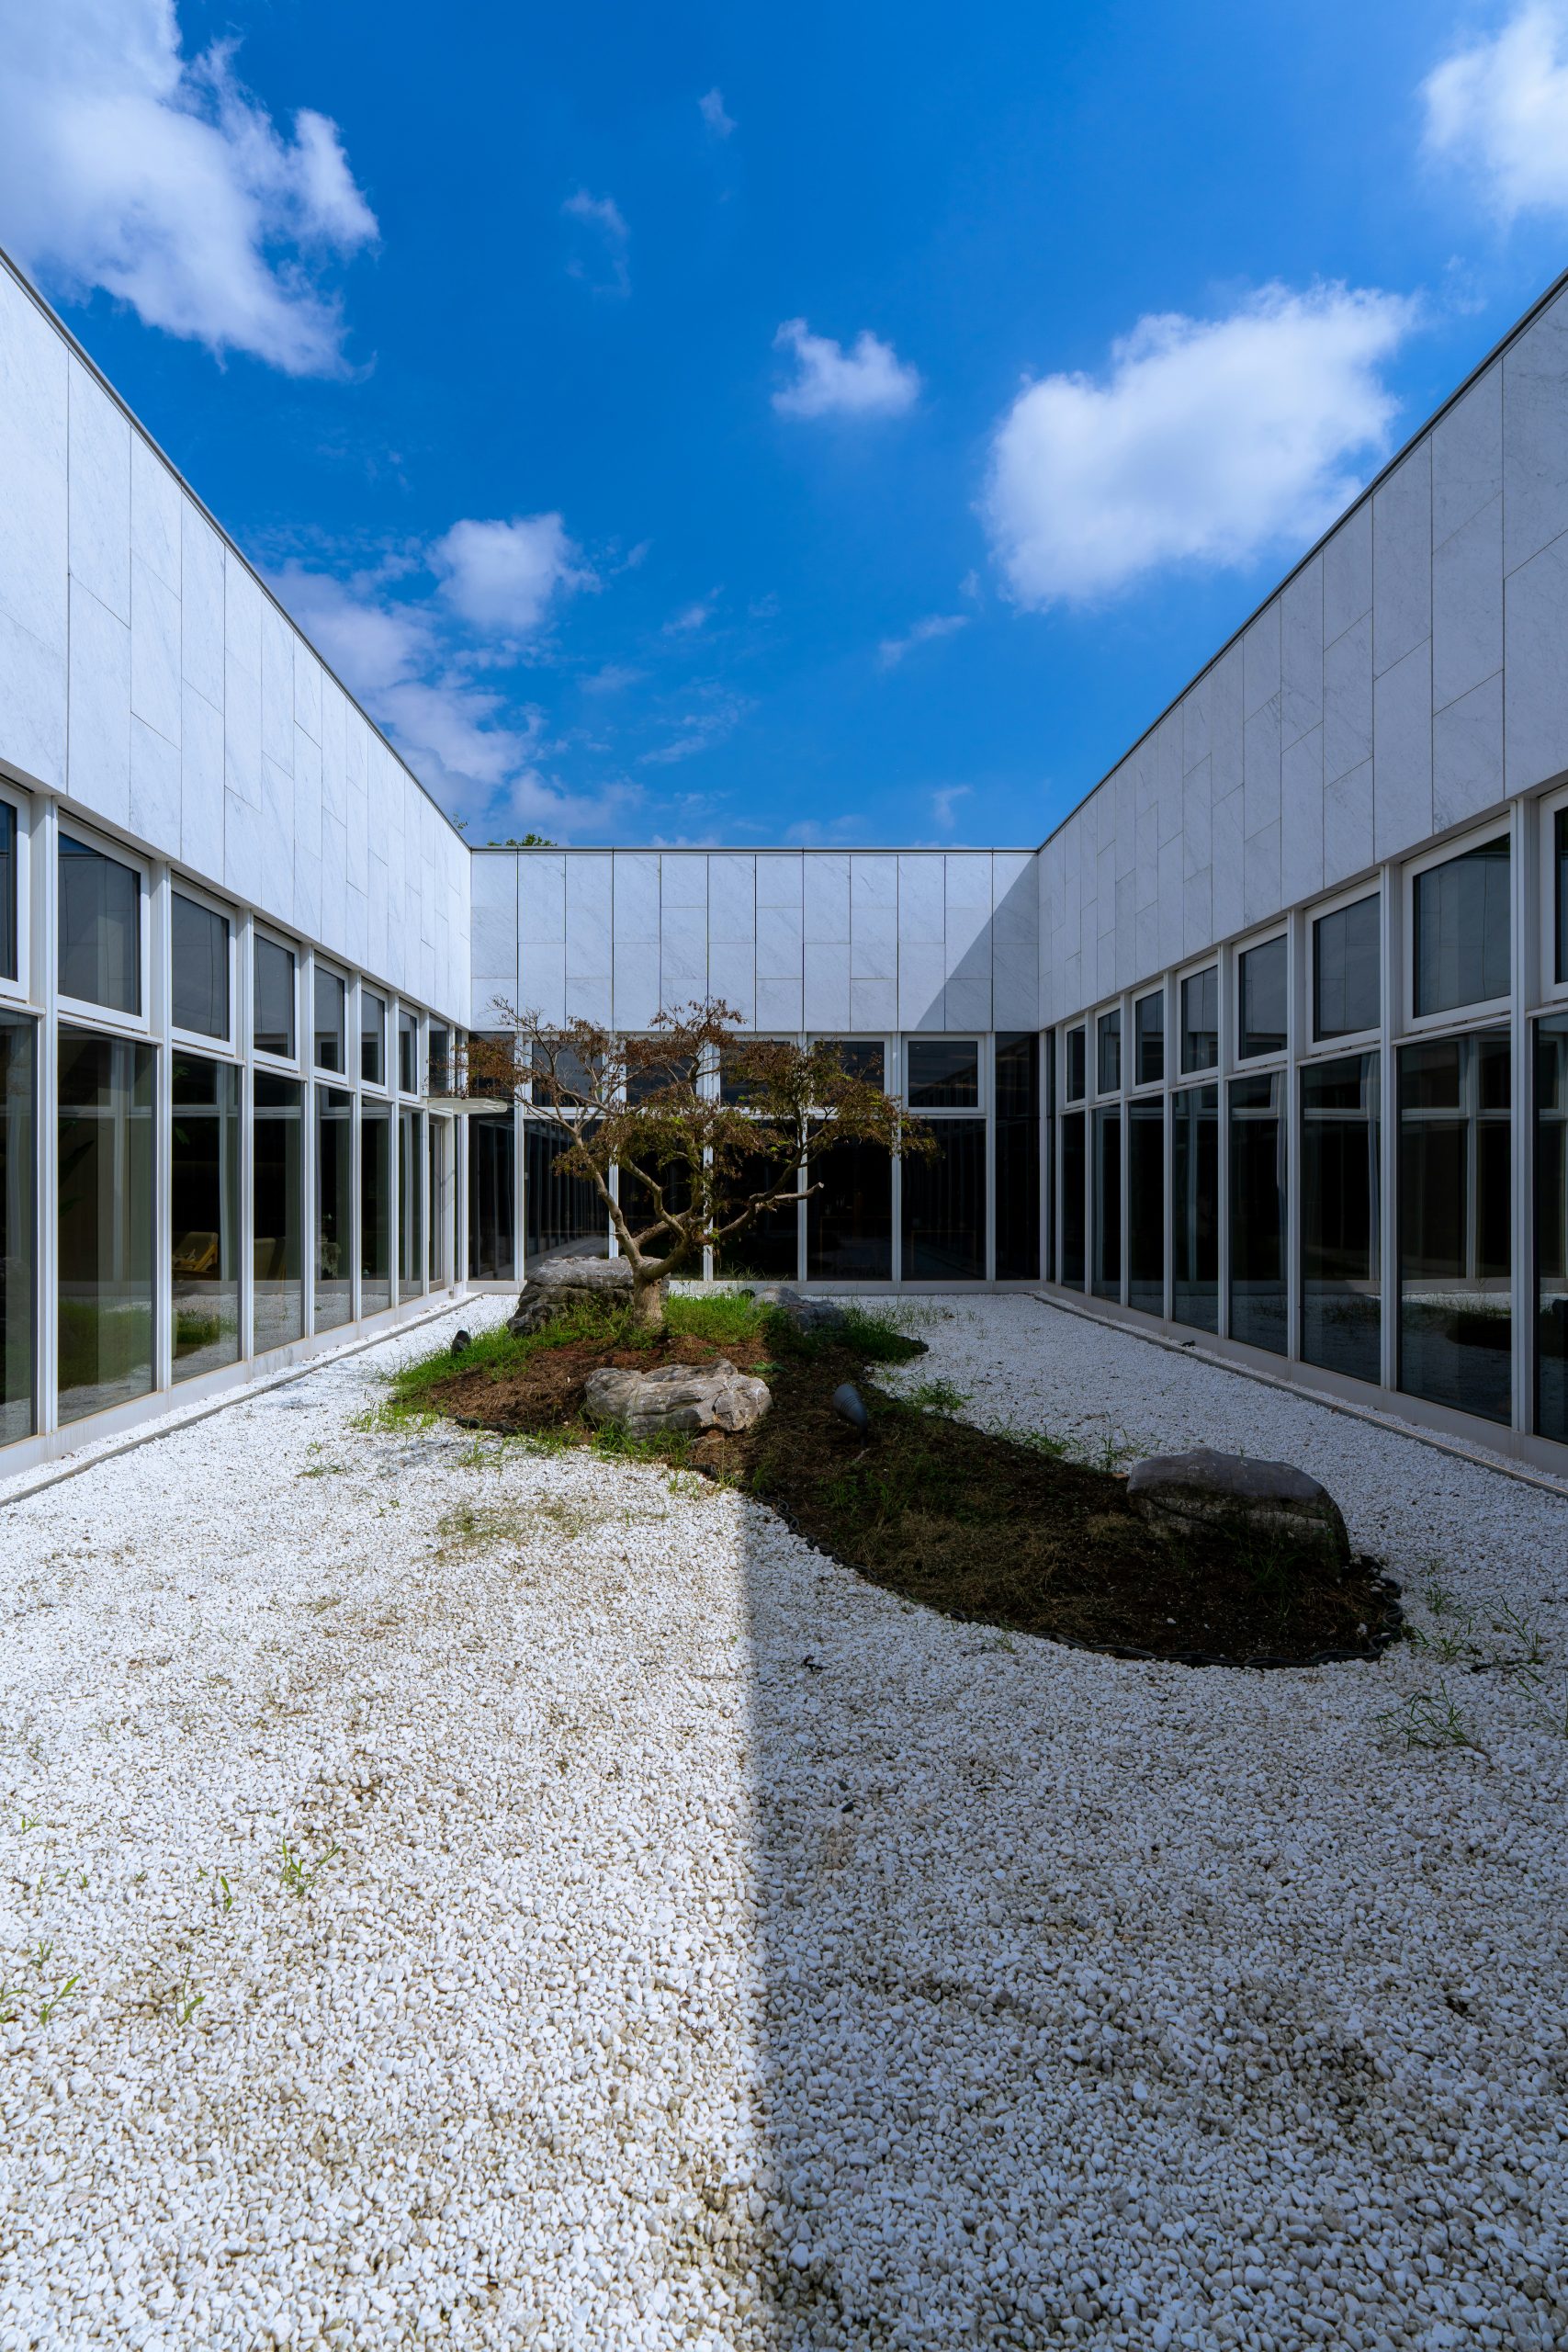
The formula for this ultra-modern look is about stark contrast and controlled nature: 80% minimalist hardscape + 20% organic feature. The vast majority of the space is defined by the clean, bright materials—white gravel and white walls. This creates a gallery-like setting. The “art” is the small, carefully curated island of nature in the center, with its dark soil, textured rocks, and sculptural tree. The key is to keep the organic element contained; if the grass and rocks were to spread, the minimalist tension would be lost.
18. Nestle Purple Blooms Among Natural Brown-Grey Rocks
that makes this idea pop is the brilliant use of complementary colors. The vibrant purple-pink of the flowers sits directly opposite the yellow-brown undertones of the rocks on a color wheel. This natural color opposition creates a visual energy that is instantly captivating. Your eye is drawn to the flowers, and the rocks become the perfect neutral, textured backdrop that makes their color appear even more saturated. Without the purple spikes, it would be a pleasant but unremarkable rock arrangement. With them, it becomes a dynamic piece of living art.
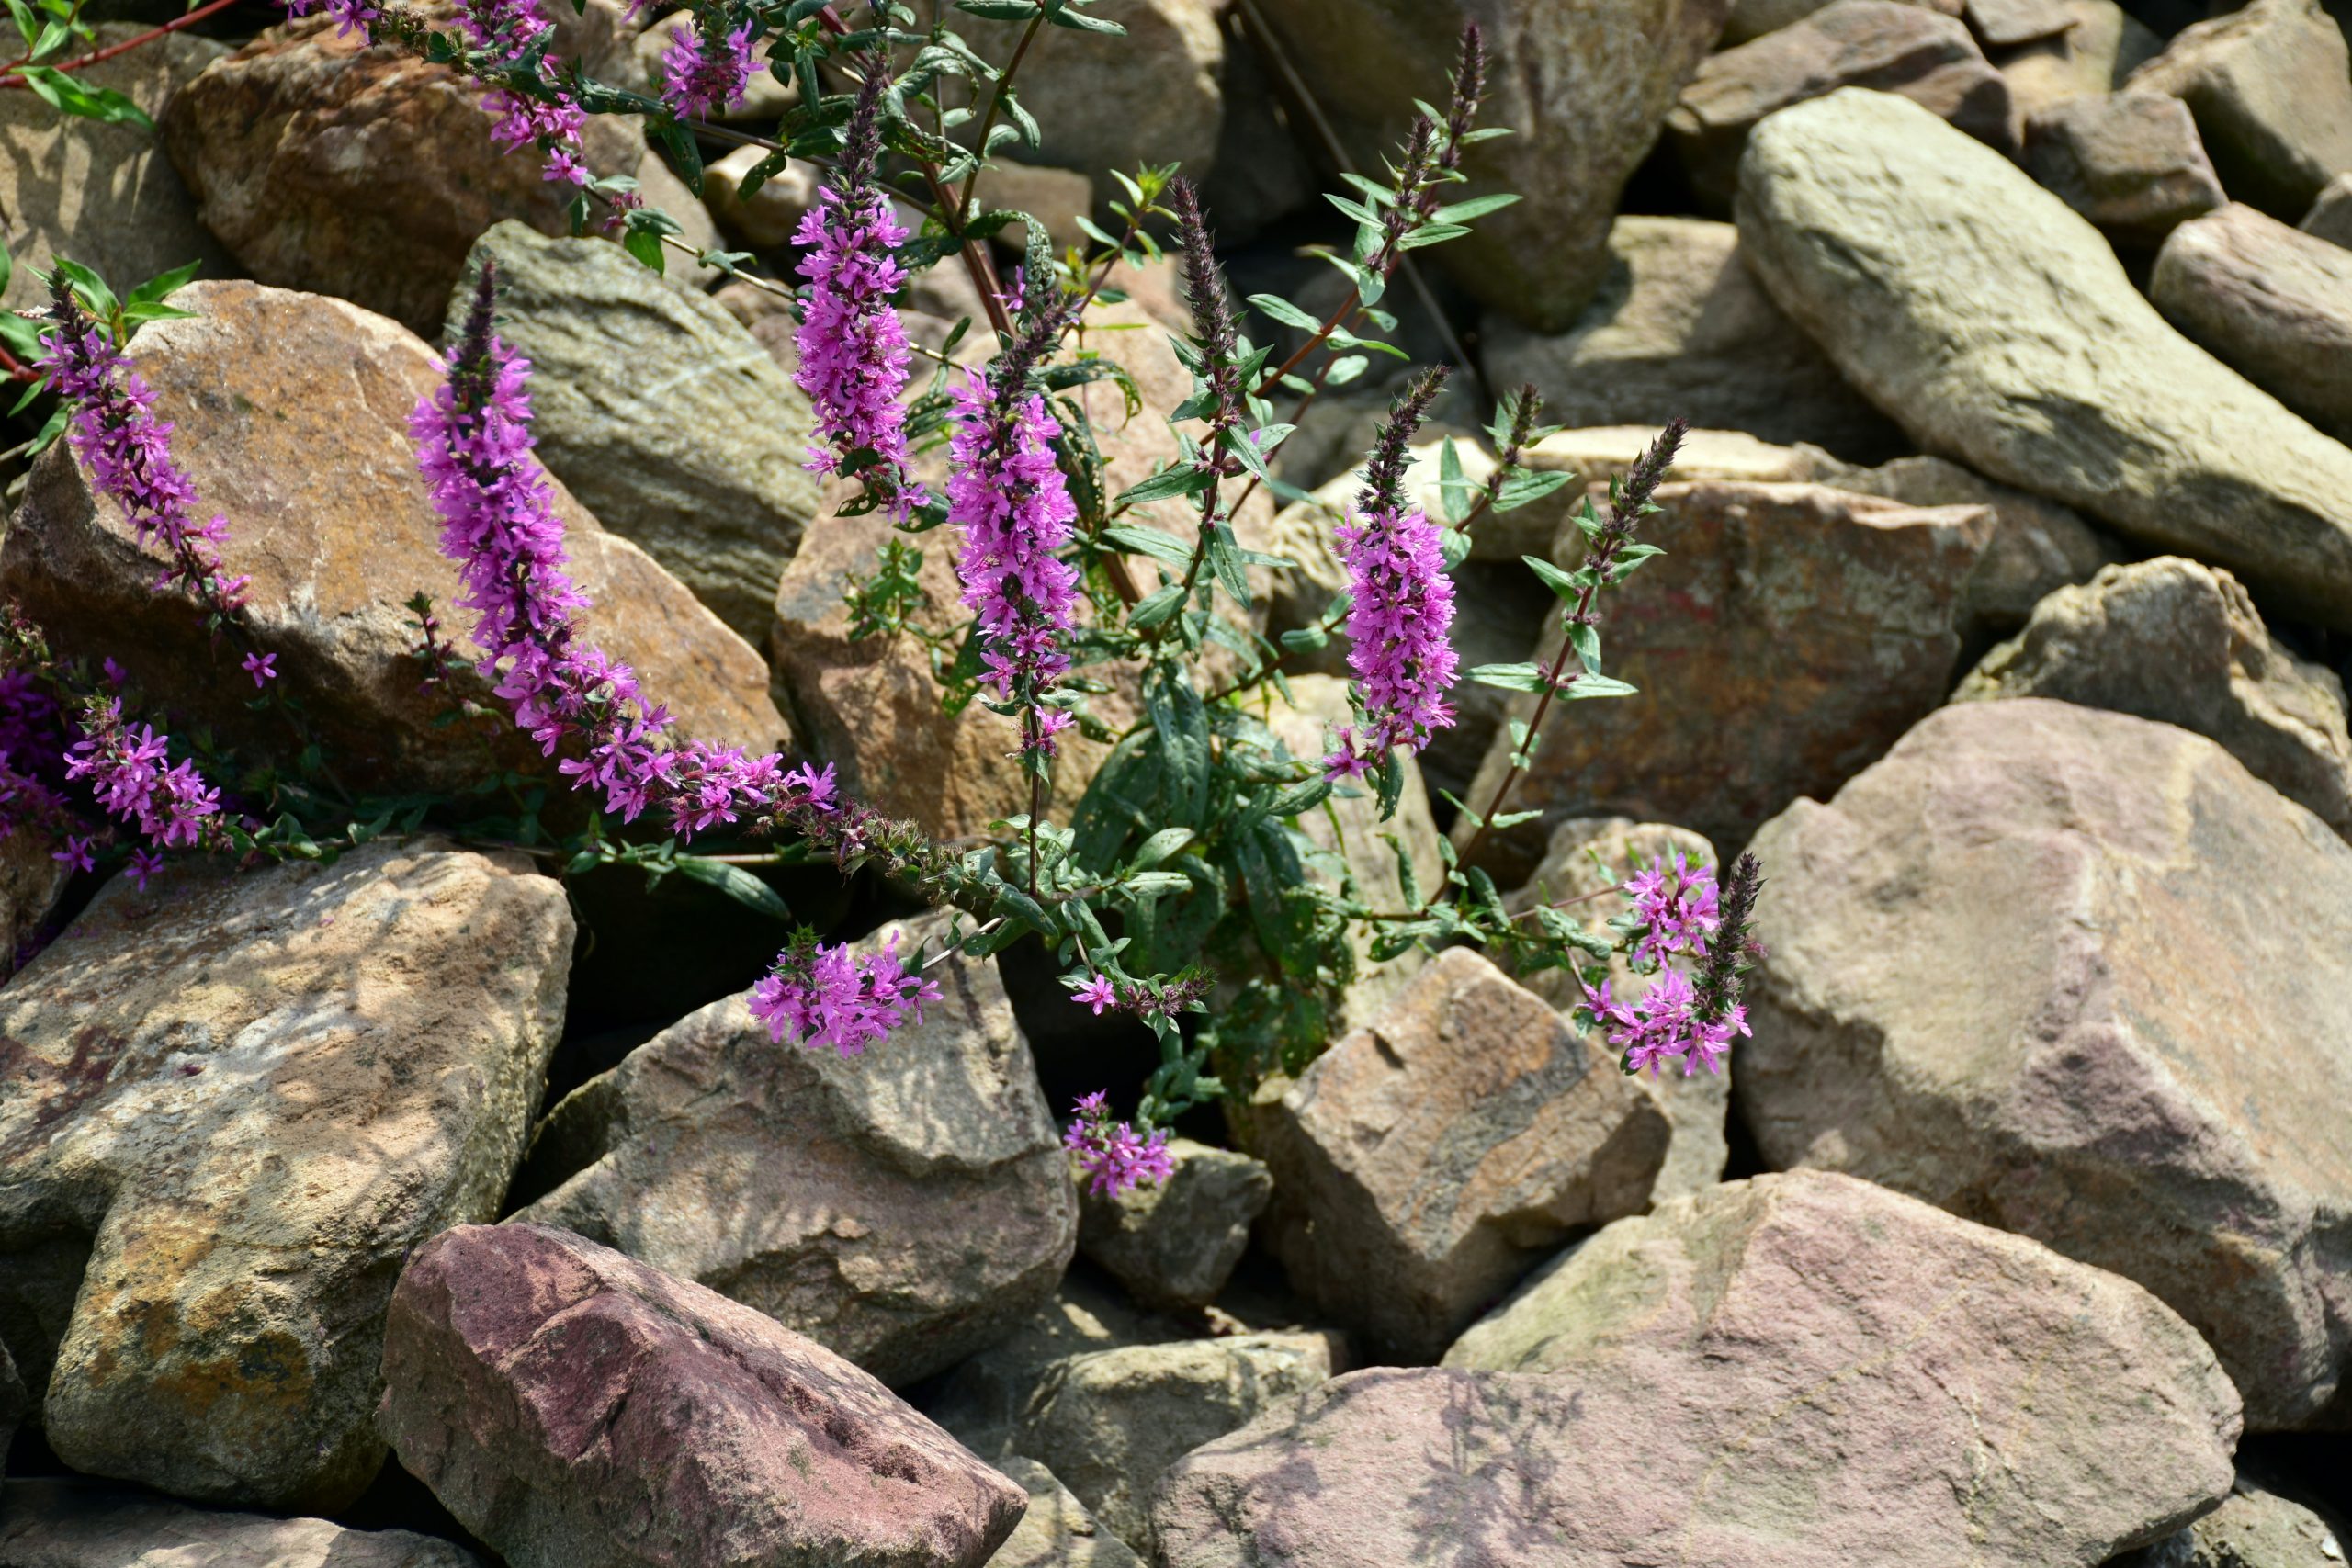
To achieve this “spilling out of the rocks” look, you need to think about planting *before* you place your final rocks. Set your largest anchor stones first, then place the perennial plants (like the Liatris or Salvia shown here) in the gaps. Once the plants are in the ground, carefully arrange the smaller and medium-sized rocks around them. This method allows you to tuck soil right up to the plant’s base and makes the foliage look like it is genuinely growing out of the crevices, rather than being plopped in a hole in front of a rock wall.
19. Create a Cozy Fire Pit with Large Boulder Seating
This works because it taps into a primal sense of gathering and warmth. The design uses elemental materials—stone, fire, and gravel—to create a space that feels both rustic and intentional. The large, rectangular boulders are a genius move; they function as seating, but their massive scale also makes them feel like ancient, protective monoliths. Arranging everything in a circle naturally encourages conversation and community. The fire pit itself, built from rough, irregular rocks, reinforces the natural, unpretentious vibe. This is less of a “patio” and more of a “campsite.”
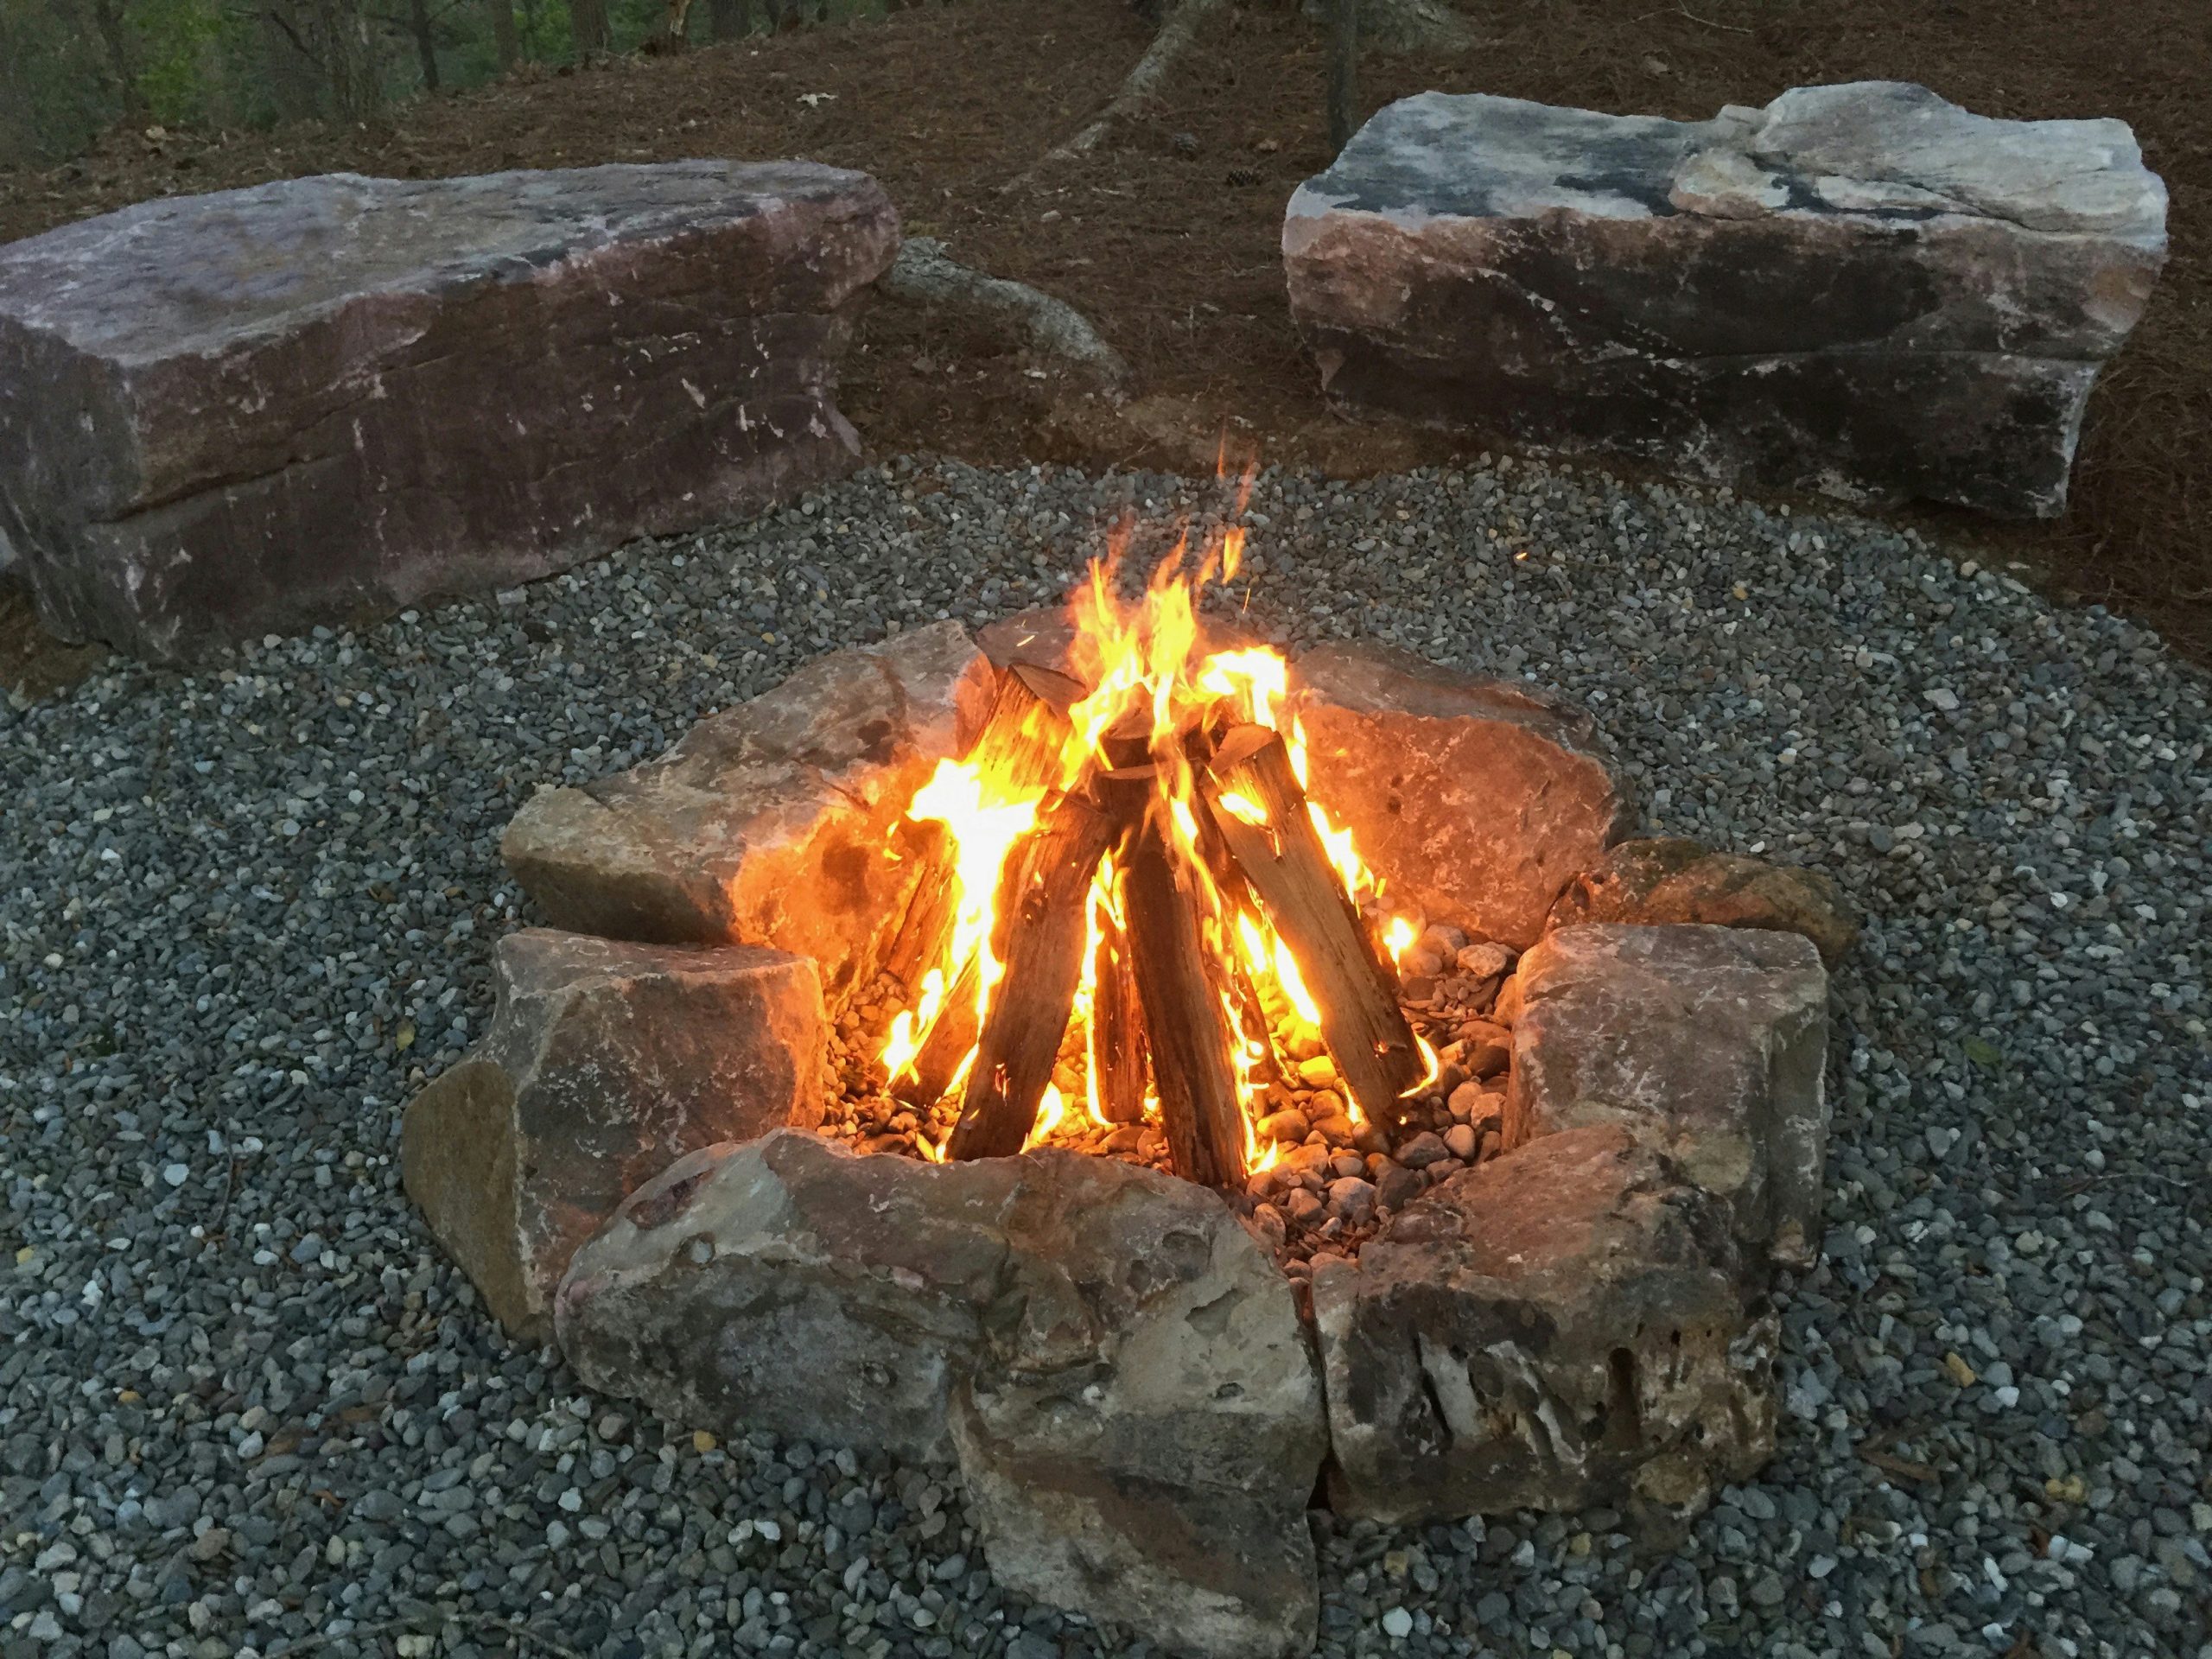
Those big boulder seats look amazing, but let’s be honest: they are not comfortable for long periods. Their surfaces are hard, uneven, and cold. If you plan to host gatherings that last more than 30 minutes, you absolutely need to have a stash of thick outdoor cushions and blankets nearby. Also, consider the surface temperature—a dark-colored boulder that has been sitting in the hot sun all day can be scorching hot, while on a cool evening, it can suck the warmth right out of you. They are a fantastic aesthetic choice, but not a practical replacement for proper chairs.
20. Evoke a Rugged Moorland with Weathered Boulders
The single element that defines this landscape is the texture of the ground itself. It’s not a pristine lawn or a neat gravel bed; it’s a rugged, living tapestry of muddy paths, clumps of grass, and patches of reddish-brown vegetation. This imperfect, “messy” groundcover is what makes the scene feel authentic and wild, like a genuine piece of moorland. The massive, weathered boulders feel right at home because the ground they sit on is just as untamed. If you were to replace the ground with perfect green grass, the boulders would suddenly look like out-of-place decorations.
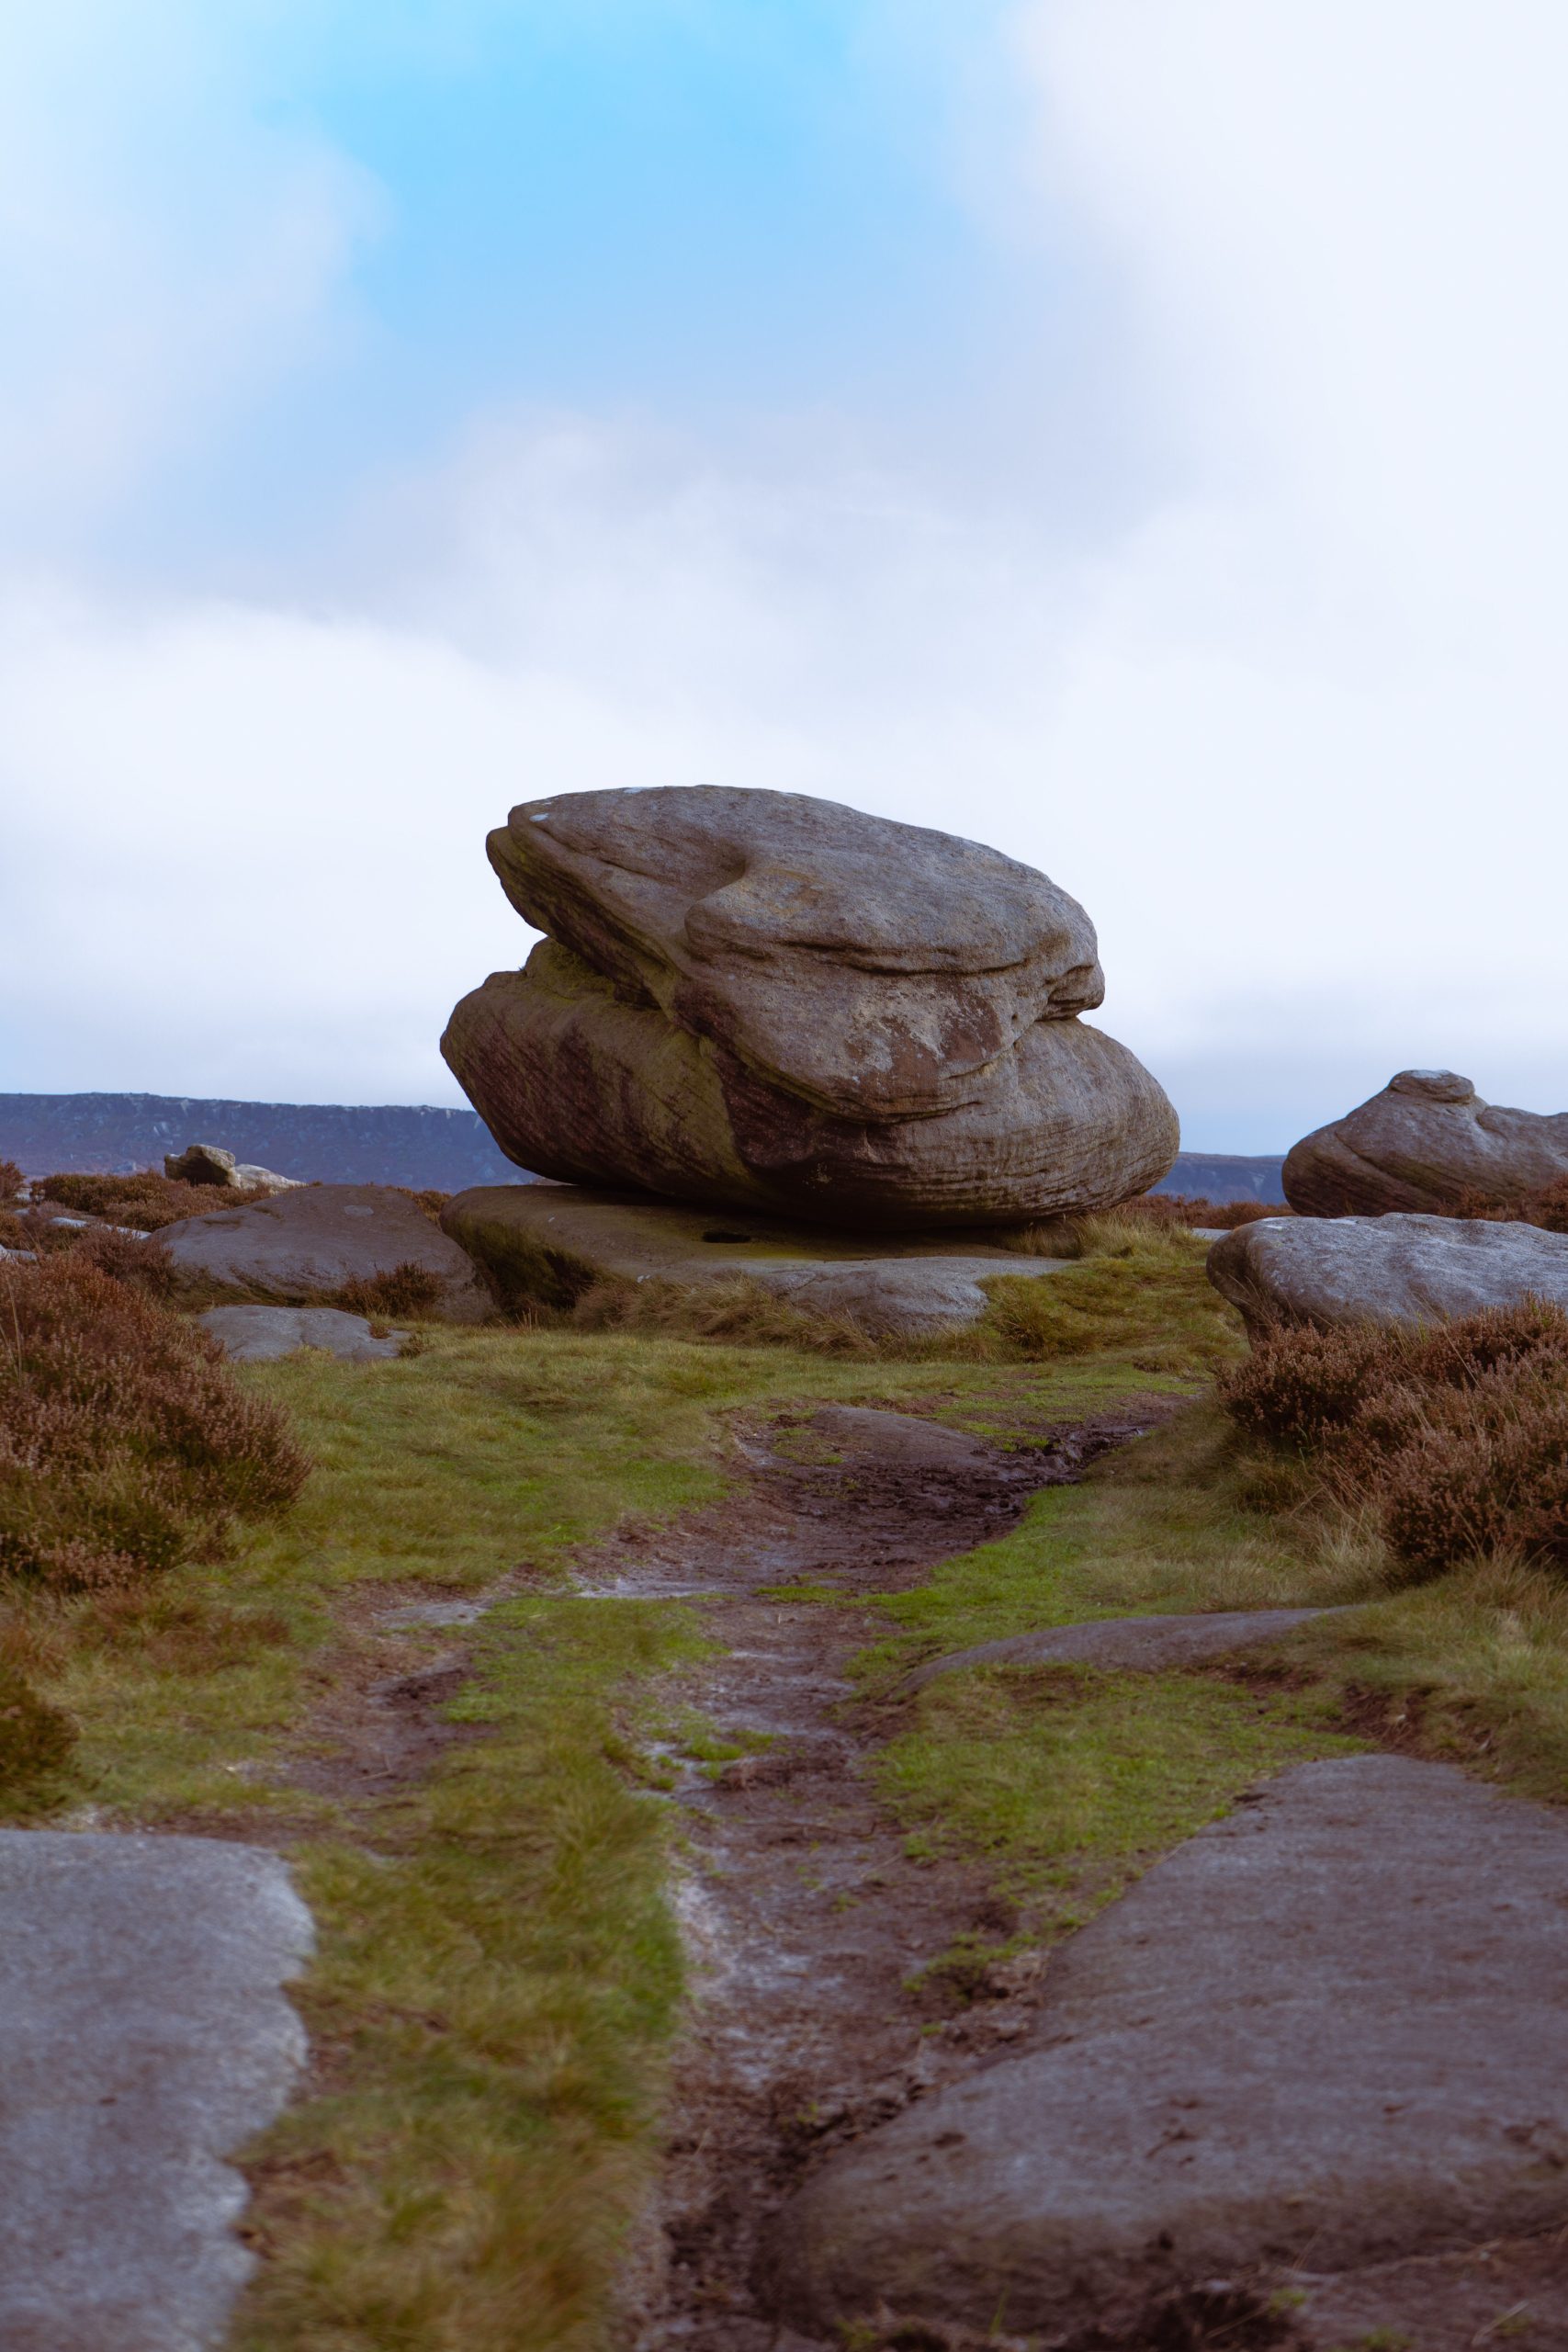
This look is part of a larger movement in landscape design called “rewilding.” It’s a shift away from perfectly manicured lawns and towards creating habitats that support local ecosystems and reflect the natural beauty of the region. Homeowners are getting tired of the constant mowing, watering, and fertilizing required for a perfect lawn. A rugged, naturalistic landscape like this, with native grasses and weathered stones, is lower maintenance, better for the environment, and has a unique, soulful beauty that a pristine lawn can never match.
21. Combine Grey Concrete Blocks with Colorful Rocks and Plants
The formula here is a playful mix of textures and levels: 40% structured block wall + 30% feature rocks + 30% diverse plantings. The grey concrete blocks provide a neutral, modern grid, which acts as a great base. Then, large, colorful rocks—like the veined tan one here—are introduced to break up the pattern and add an organic focal point. Finally, a dense mix of small, varied plants with different foliage and flower colors fills in all the gaps, adding softness and life. The red brick wall in the background adds another layer of warm, urban texture.
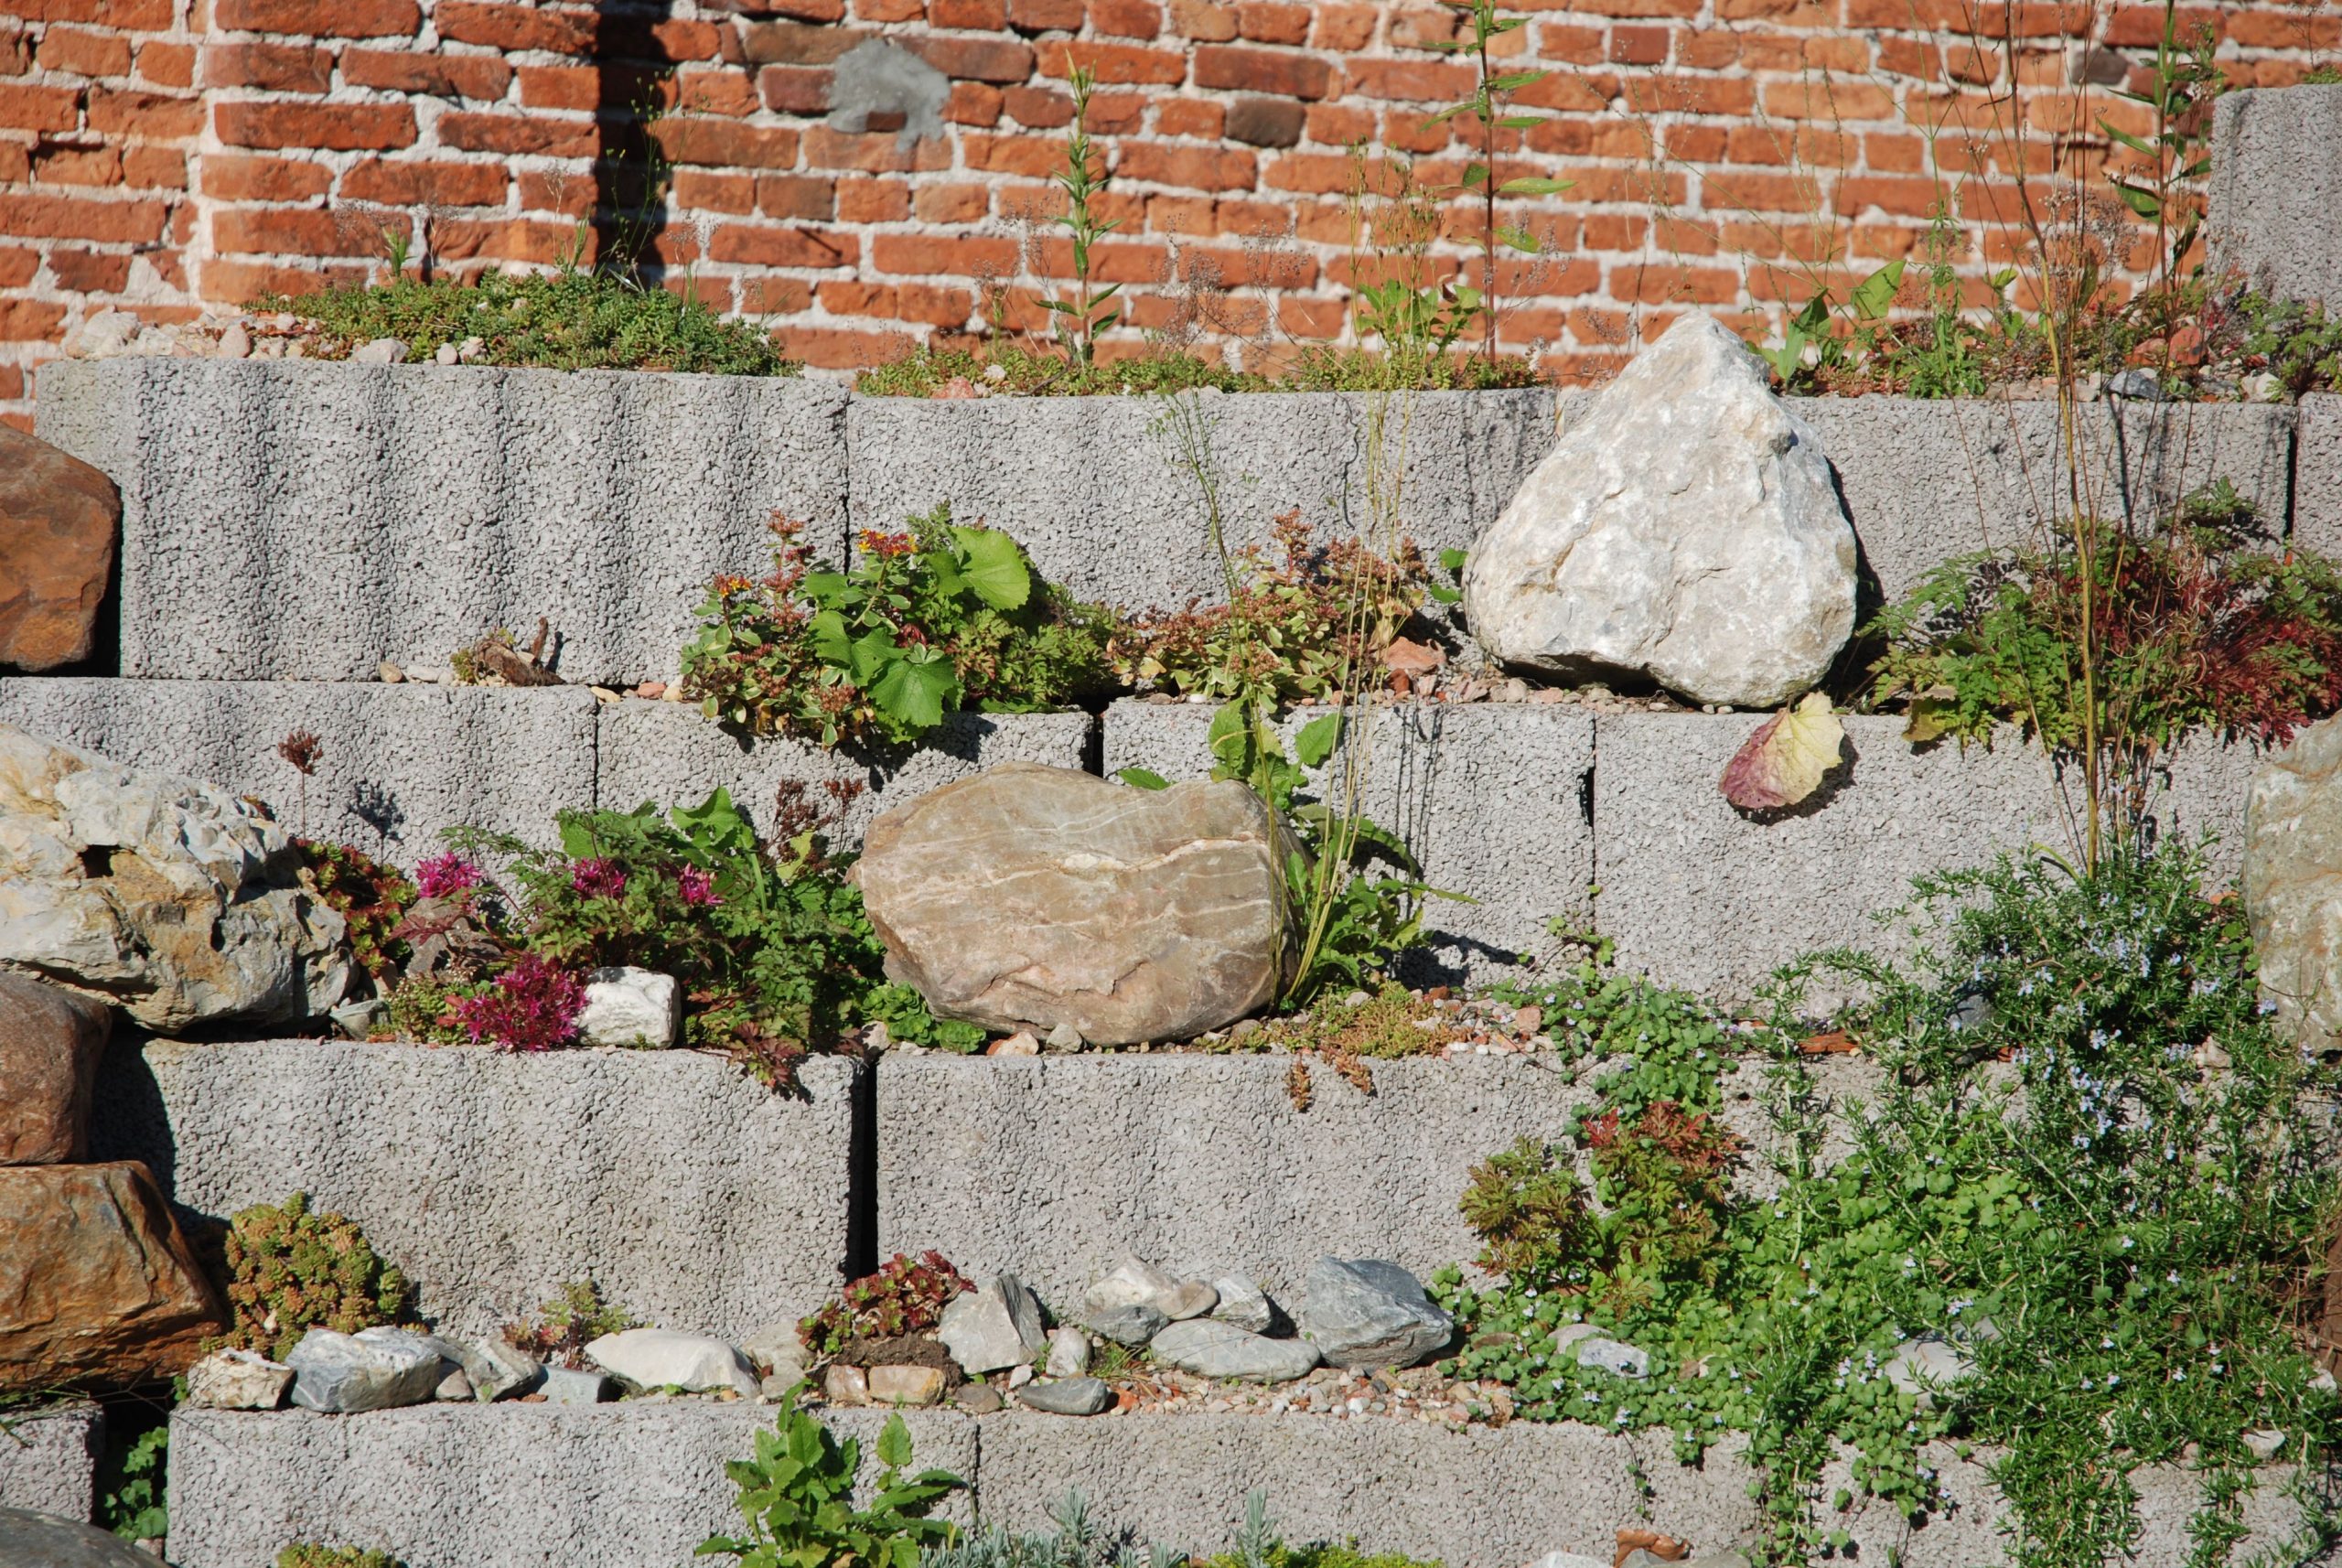
This is a fantastic way to get a high-impact, custom-looking garden on a reasonable budget, since concrete blocks are very affordable.
- Wall Material (Concrete Blocks): $200 – $500
- Feature Rocks: $100 – $300 (for a few interesting character rocks)
- Textiles (Plants): $150 – $400 (for a variety of small perennials)
- Decor/Accessories (Soil & Compost): $50 – $100
- TOTAL: $500 – $1,300
Budget alternative: Scour construction sites (with permission!) for leftover blocks or broken pieces of concrete (“urbanite”). It can be a free source of material. This whole look could be achieved for under $300 with some resourceful scavenging.
22. Craft a Minimalist Zen Garden with Dark Rocks and Raked Gravel
This design is a masterclass in the principle of “Notan,” a Japanese concept involving the play and placement of light and dark elements. The dark, heavy rocks create strong, defined shadows on the light gravel. The raked lines in the gravel, in turn, catch the light in different ways, creating subtle highlights and lowlights. This dynamic interplay between light and shadow is what gives the garden its depth and sense of calm energy. It’s not just about the objects themselves, but the shapes they create in both form and shadow.
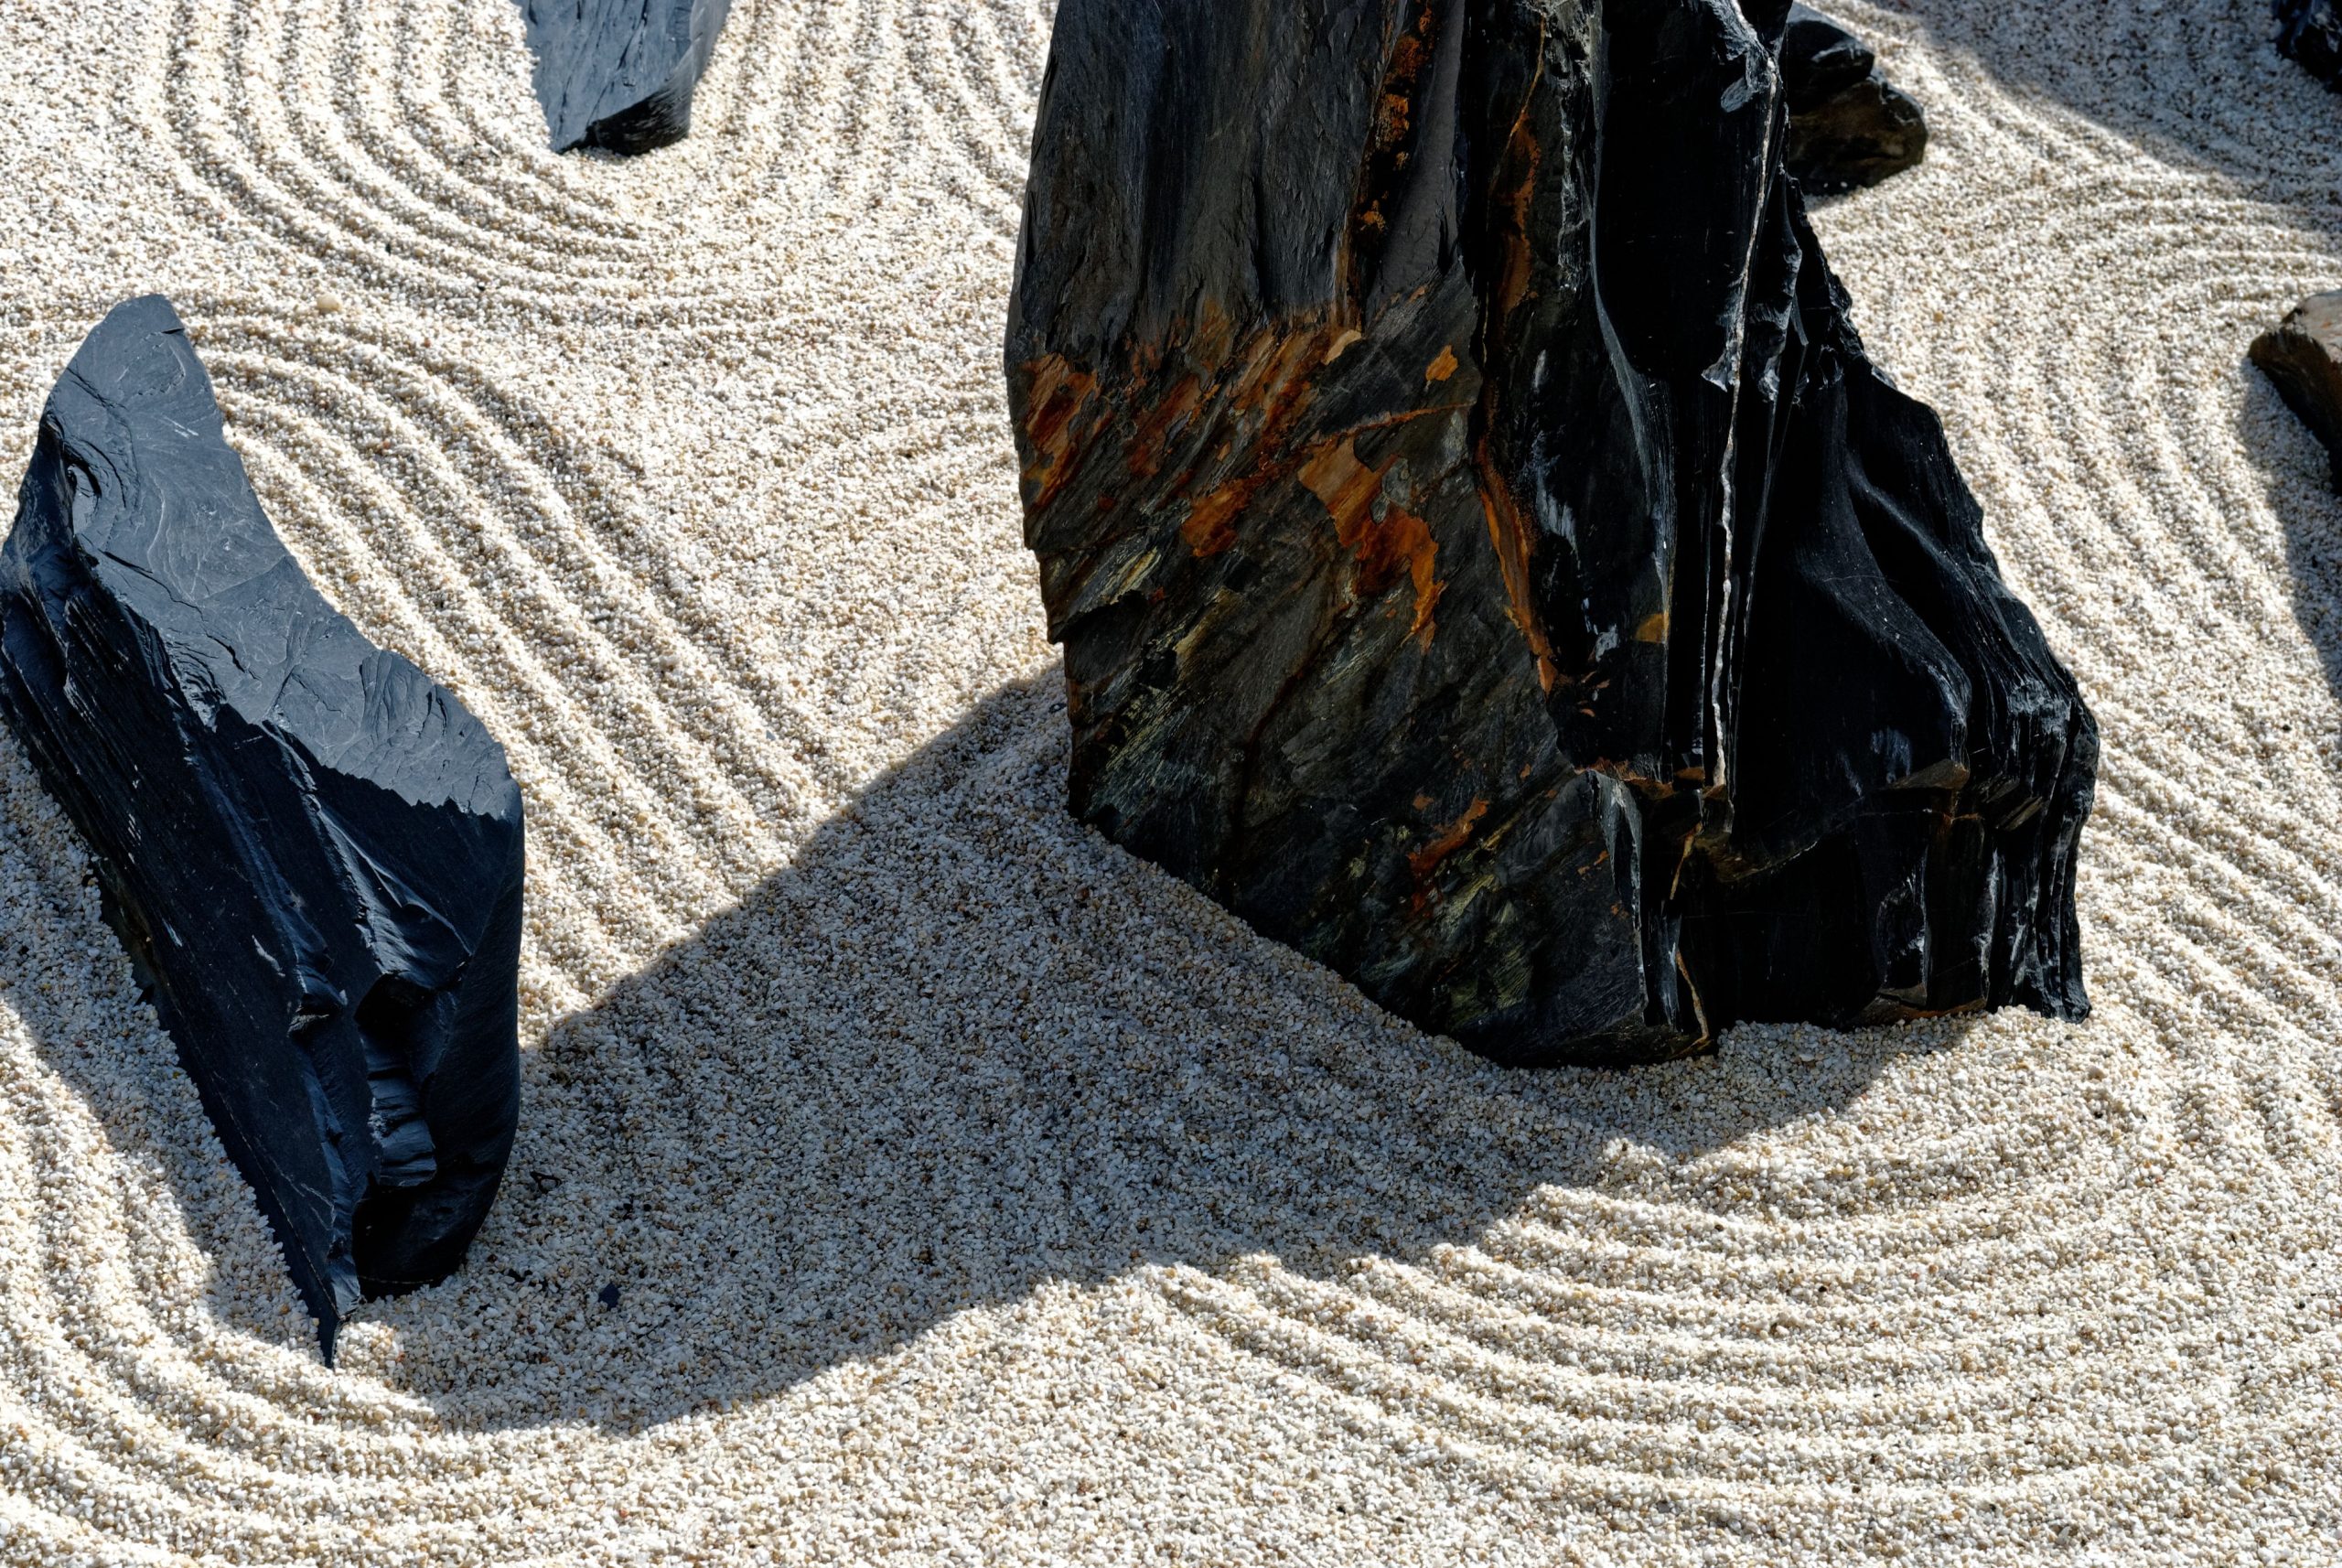
A true Zen garden is a commitment. The light-colored gravel that makes this look so striking is also a magnet for debris. Every falling leaf, every stray twig, every bit of dirt will show up like a stain on a white canvas. If you have large deciduous trees overhead, you will be fighting a constant battle every autumn. This isn’t a “set it and forget it” landscape. It requires regular, almost meditative, tending to maintain its pristine, minimalist appearance. Compare this to the more forgiving look of Idea #20, which embraces a more natural, untamed aesthetic.
23. Soften a Waterfront with a Layered Stone Wall
When building a stone wall near water, use a technique called “riprap.” This means using a mix of stone sizes, from large anchor boulders to smaller, fist-sized rocks. As you build, intentionally leave small gaps and crevices in the wall. These spaces do two important things: they absorb the energy of waves or lapping water, preventing erosion behind the wall, and they create tiny habitats for aquatic insects, small fish, and beneficial bacteria, which helps improve the health of your water feature. A solid, mortar-jointed wall would fight the water; a riprap wall works with it.
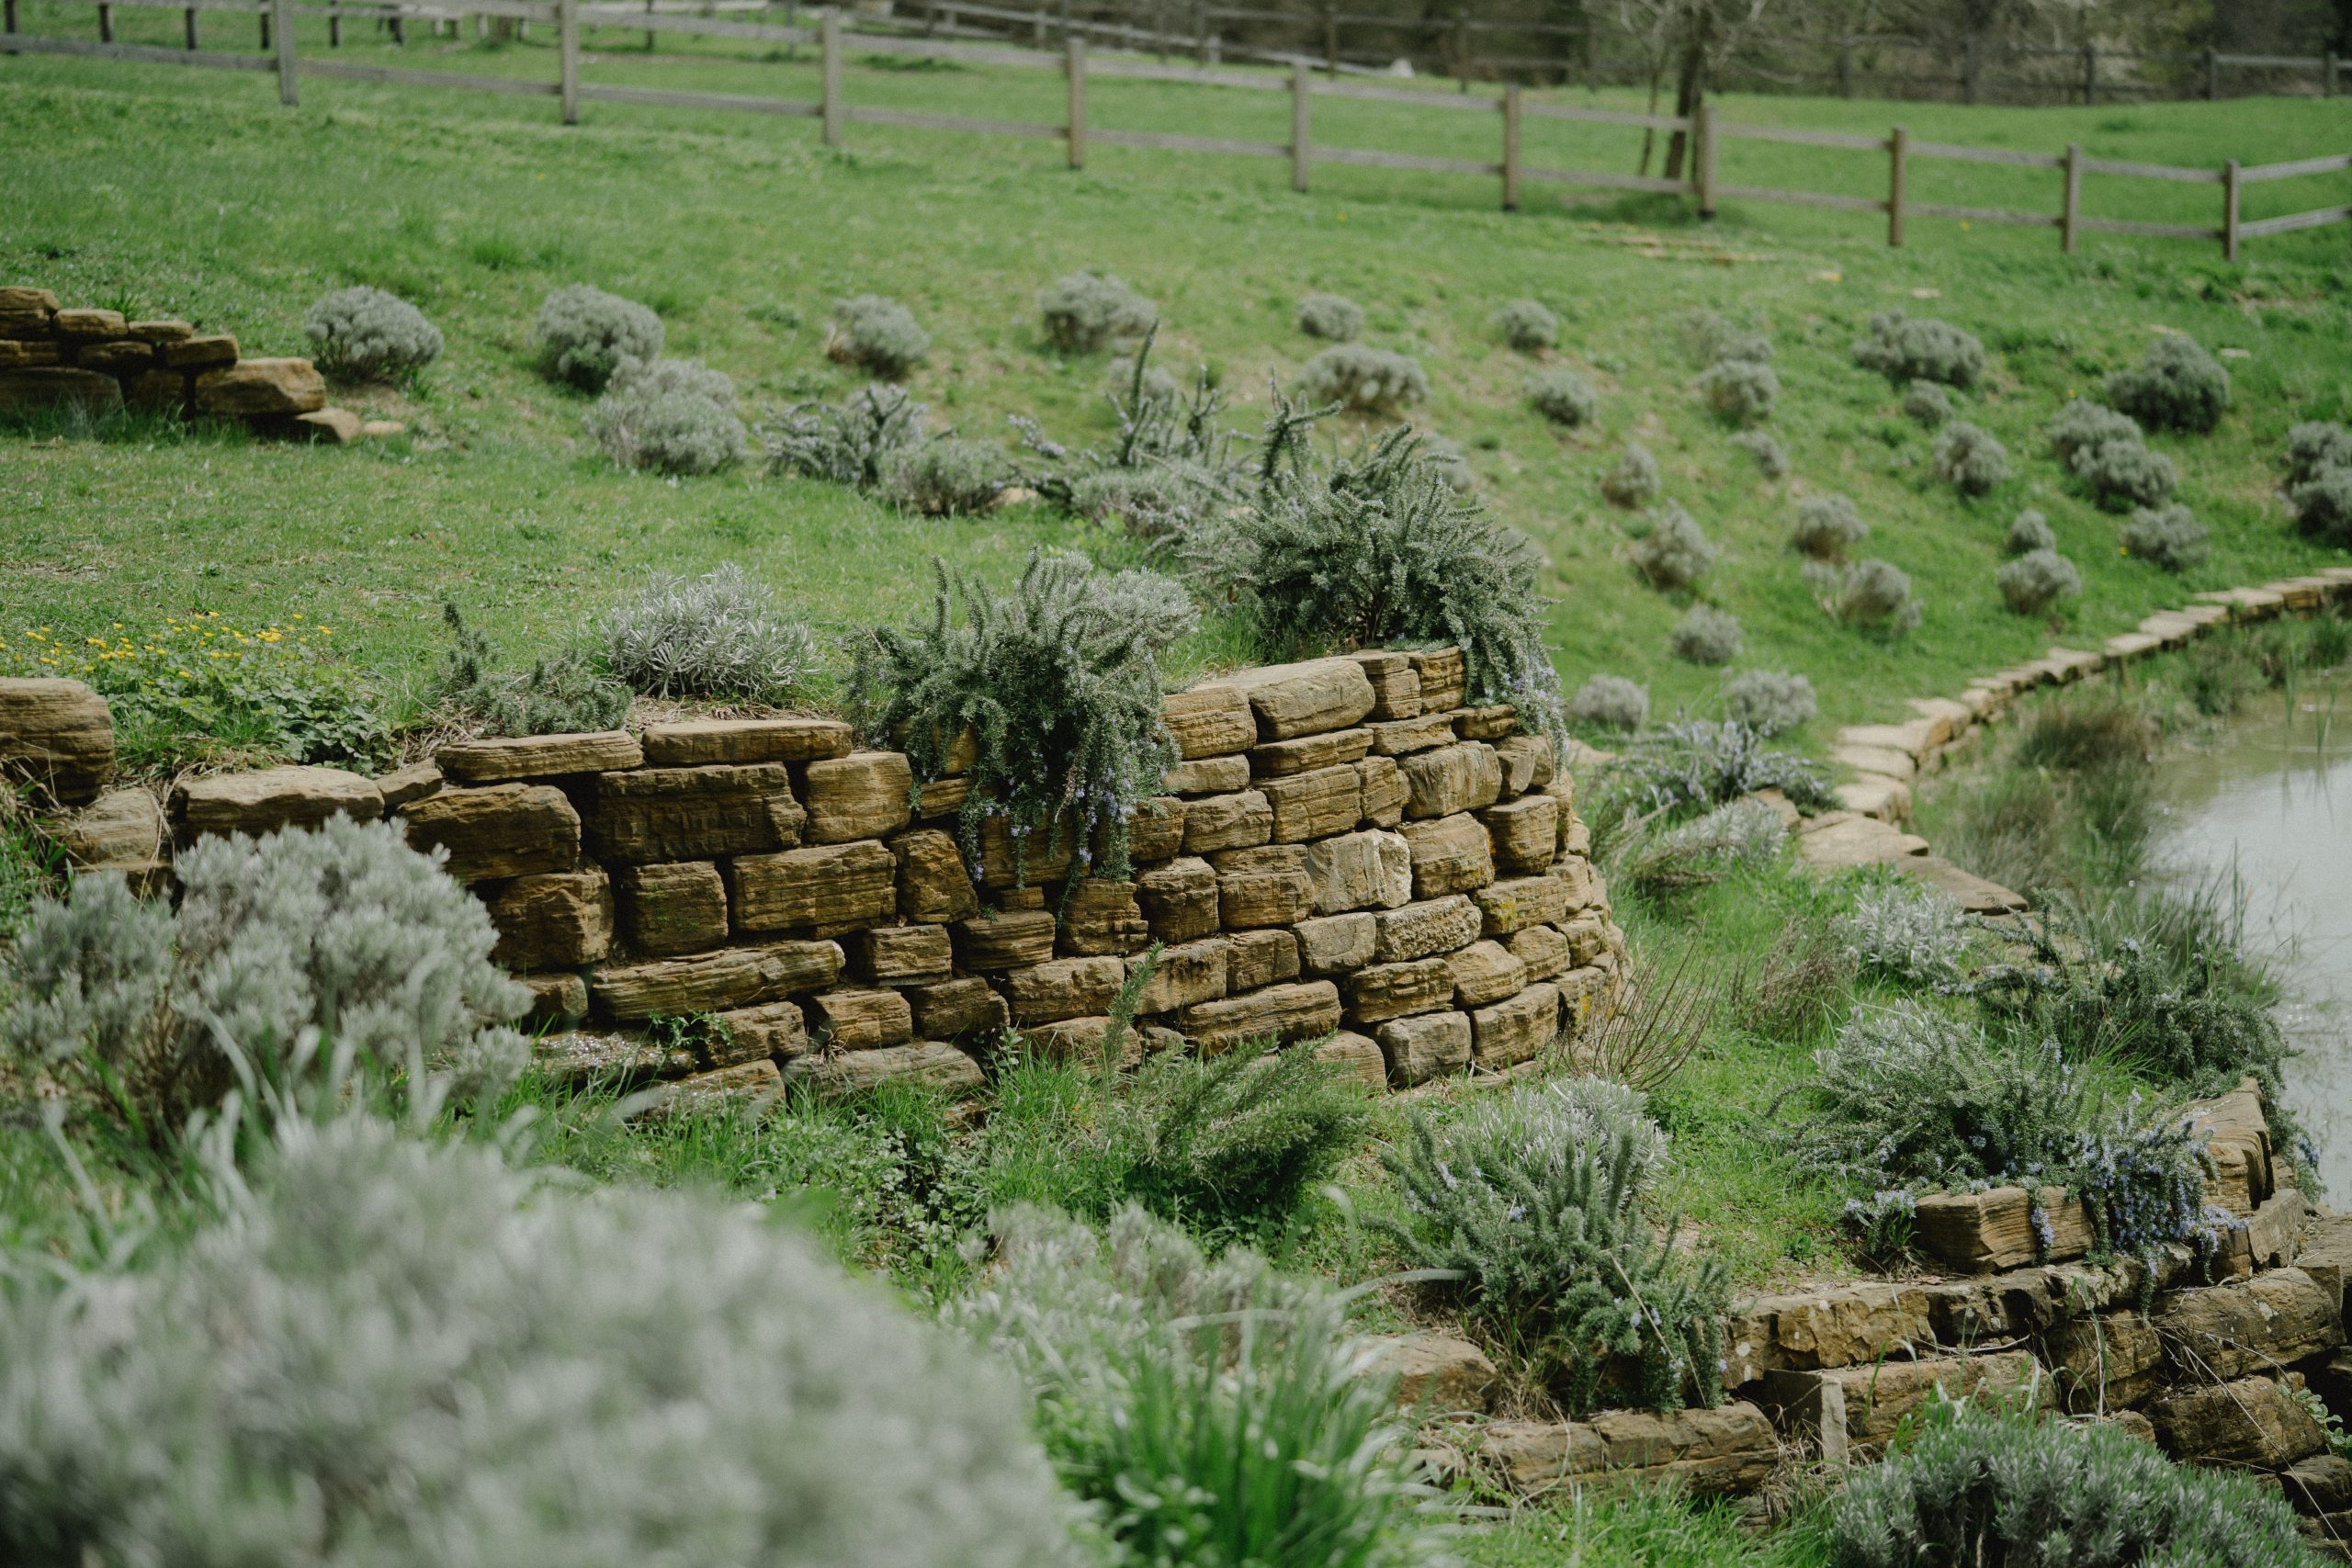
A wall this close to water will inevitably encourage unwanted growth. You’ll need to be vigilant about pulling out invasive weeds and tree seedlings that take root in the crevices of the wall. If left unchecked, their roots can push the stones apart over time, compromising the wall’s stability. You may also need to pressure wash the stones every few years to remove algae buildup, especially on the lower courses that are frequently damp. It’s a beautiful, natural look, but it requires a bit more gardening than a wall in a dry location.
24. Embrace the Wild with Mossy Rocks and a Dark Stream
that makes this look feel so authentically wild is the moss and staining on the rocks. Those patches of green and dark streaks are signs of age and moisture, telling a story of a landscape that has been sitting here, undisturbed, for a long time. It’s a detail that can’t be replicated with brand new, clean stones from a quarry. This patina is what separates a truly naturalistic design from a more sterile, newly installed rock garden. It embraces imperfection and the slow processes of nature. It has a moody, serene feeling that is hard to capture any other way.
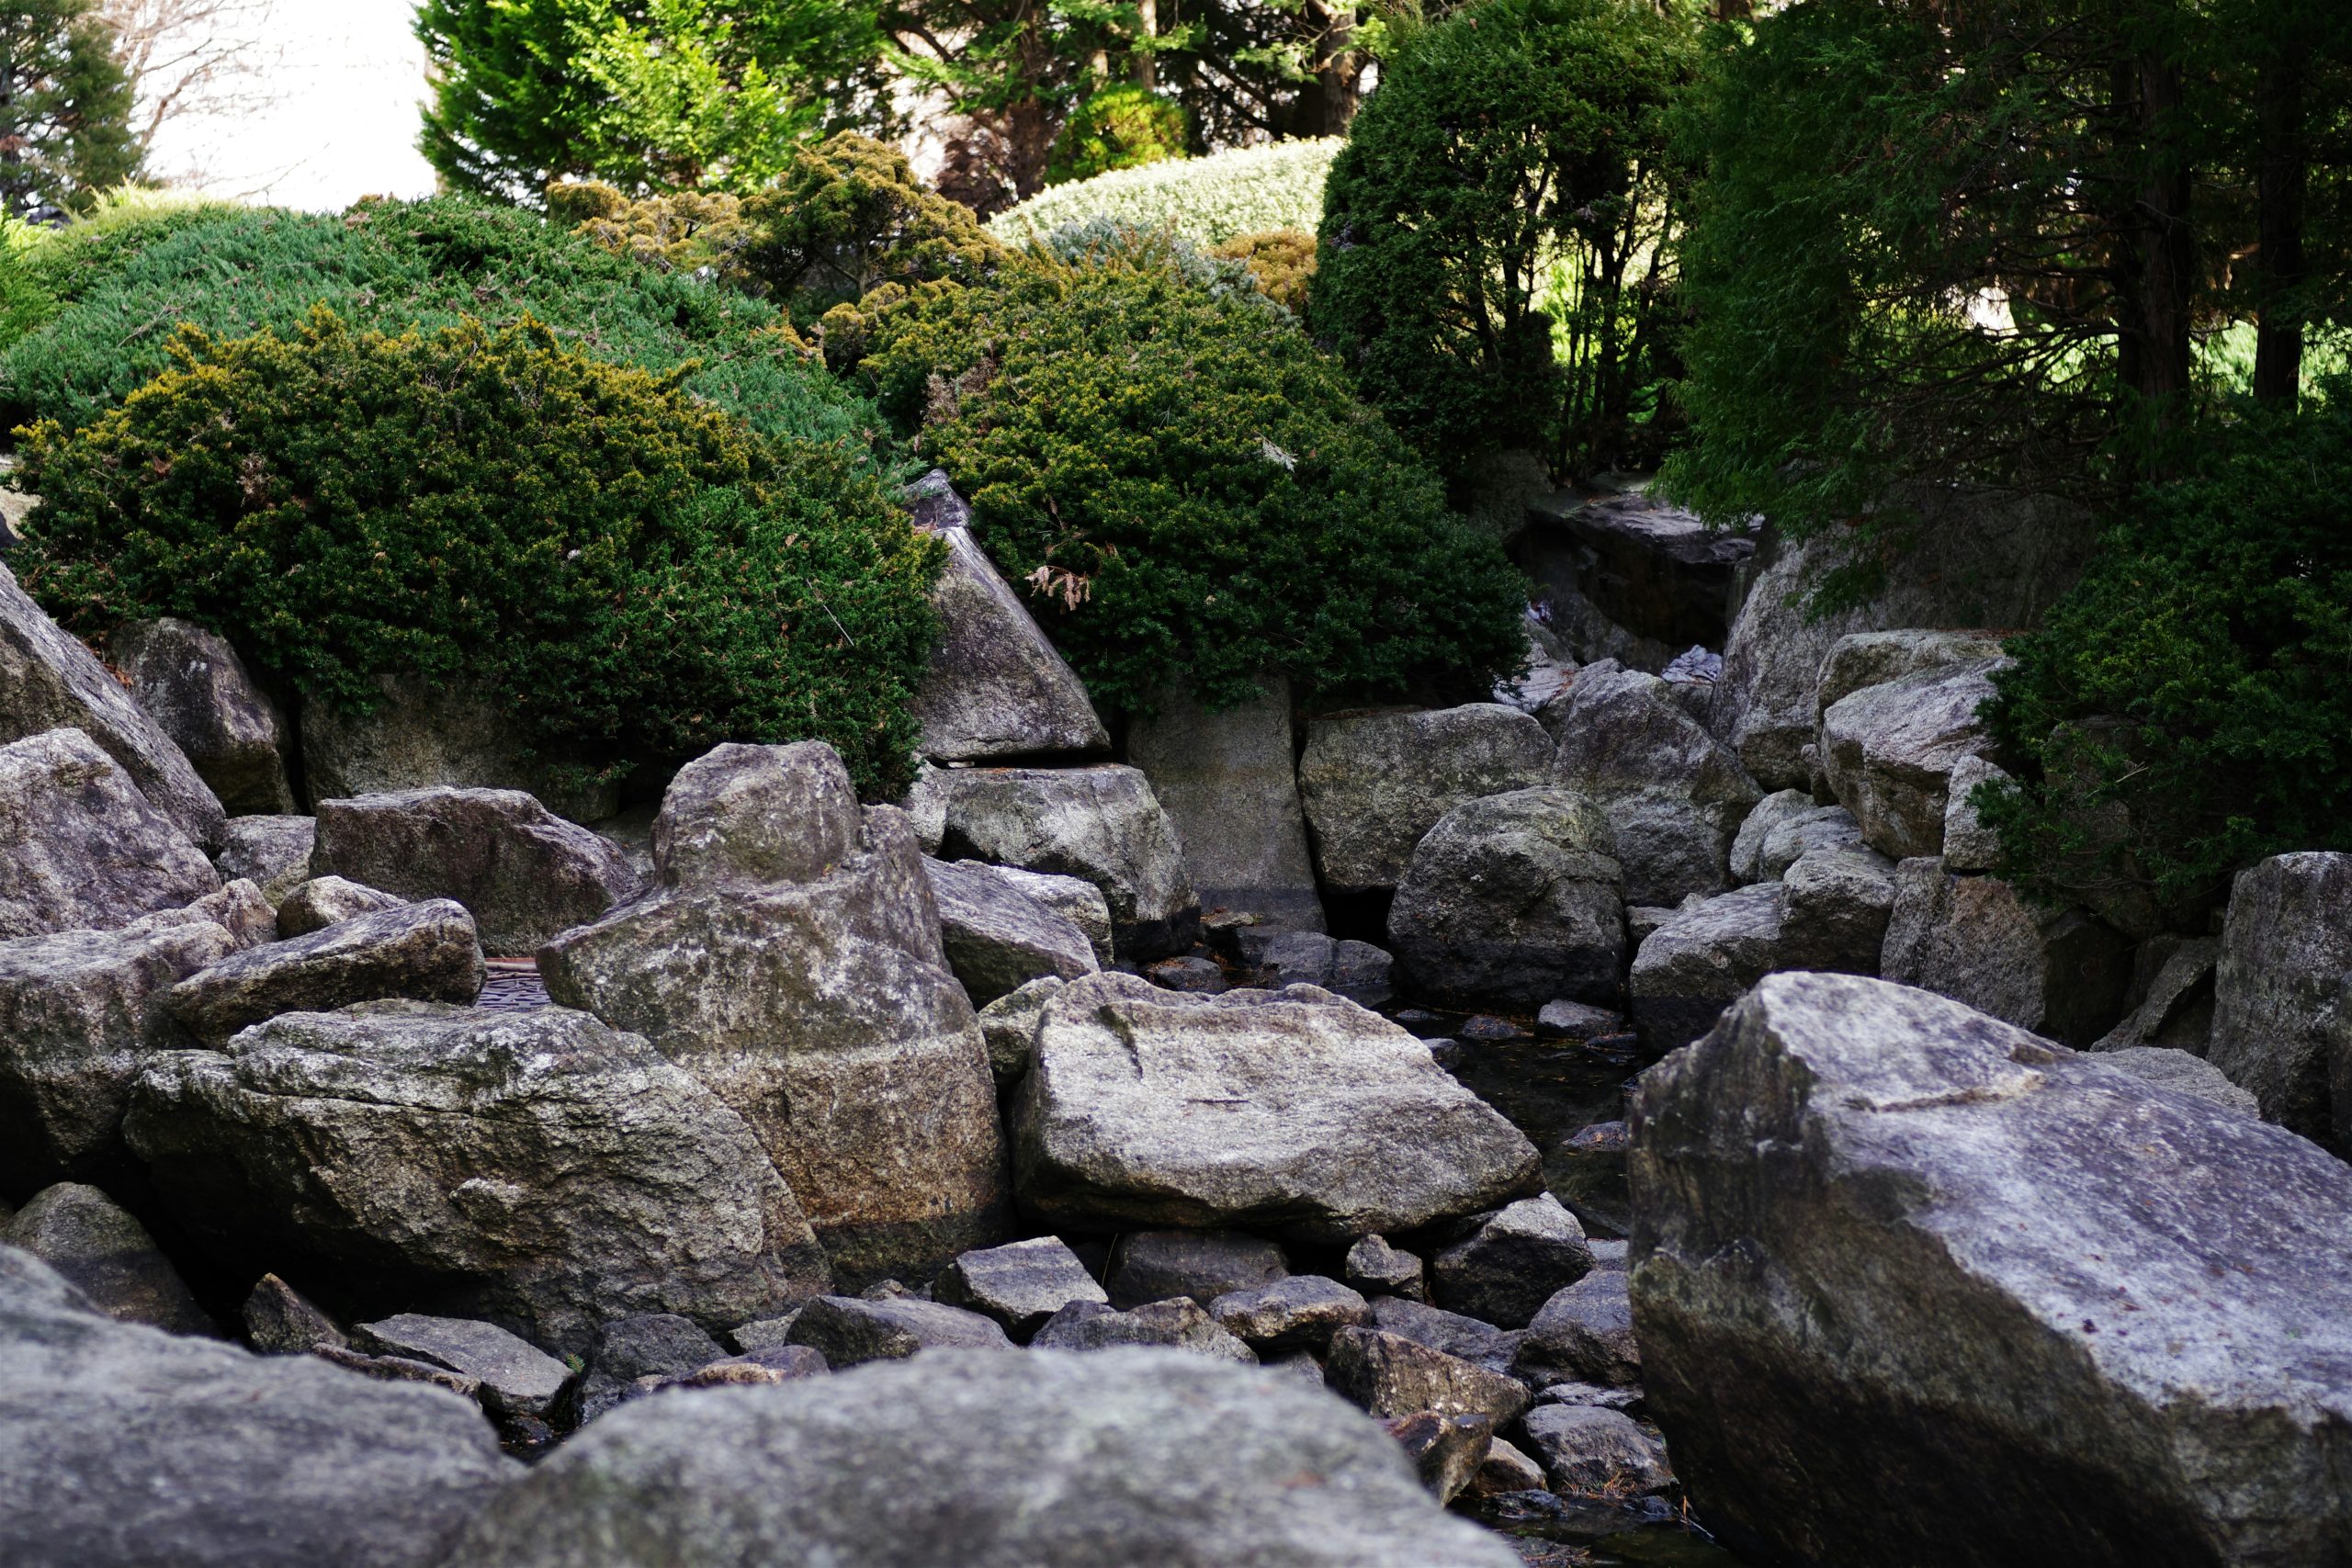
You don’t have to wait a decade for your rocks to get that beautiful, mossy patina. You can speed up the process significantly. Find a shady, damp spot in your yard to place your rocks. Then, mix a handful of live moss (you can often find it growing on pavement or other rocks) with a cup of buttermilk or yogurt and a splash of beer in a blender. “Paint” this soupy mixture onto your rocks. Keep them moist for a few weeks by misting them, and you’ll have a healthy growth of moss in a single season. It’s a classic gardener’s trick that works wonders for aging a landscape.
25. Build a Rustic Outdoor Pavilion with a Grand Stone Fireplace
This structure feels so inviting because it perfectly balances grand scale with natural materials. The fireplace is massive, creating a powerful focal point that draws you in. However, because it’s built from natural, rustic stone, it feels earthy and approachable, not formal or intimidating. The same goes for the heavy wooden beams and flagstone floor. The open-air design frames the views of the surrounding pine trees and sky, making the structure feel like a part of the landscape rather than an imposition on it. It’s a clever mix of “cozy shelter” and “open nature”.
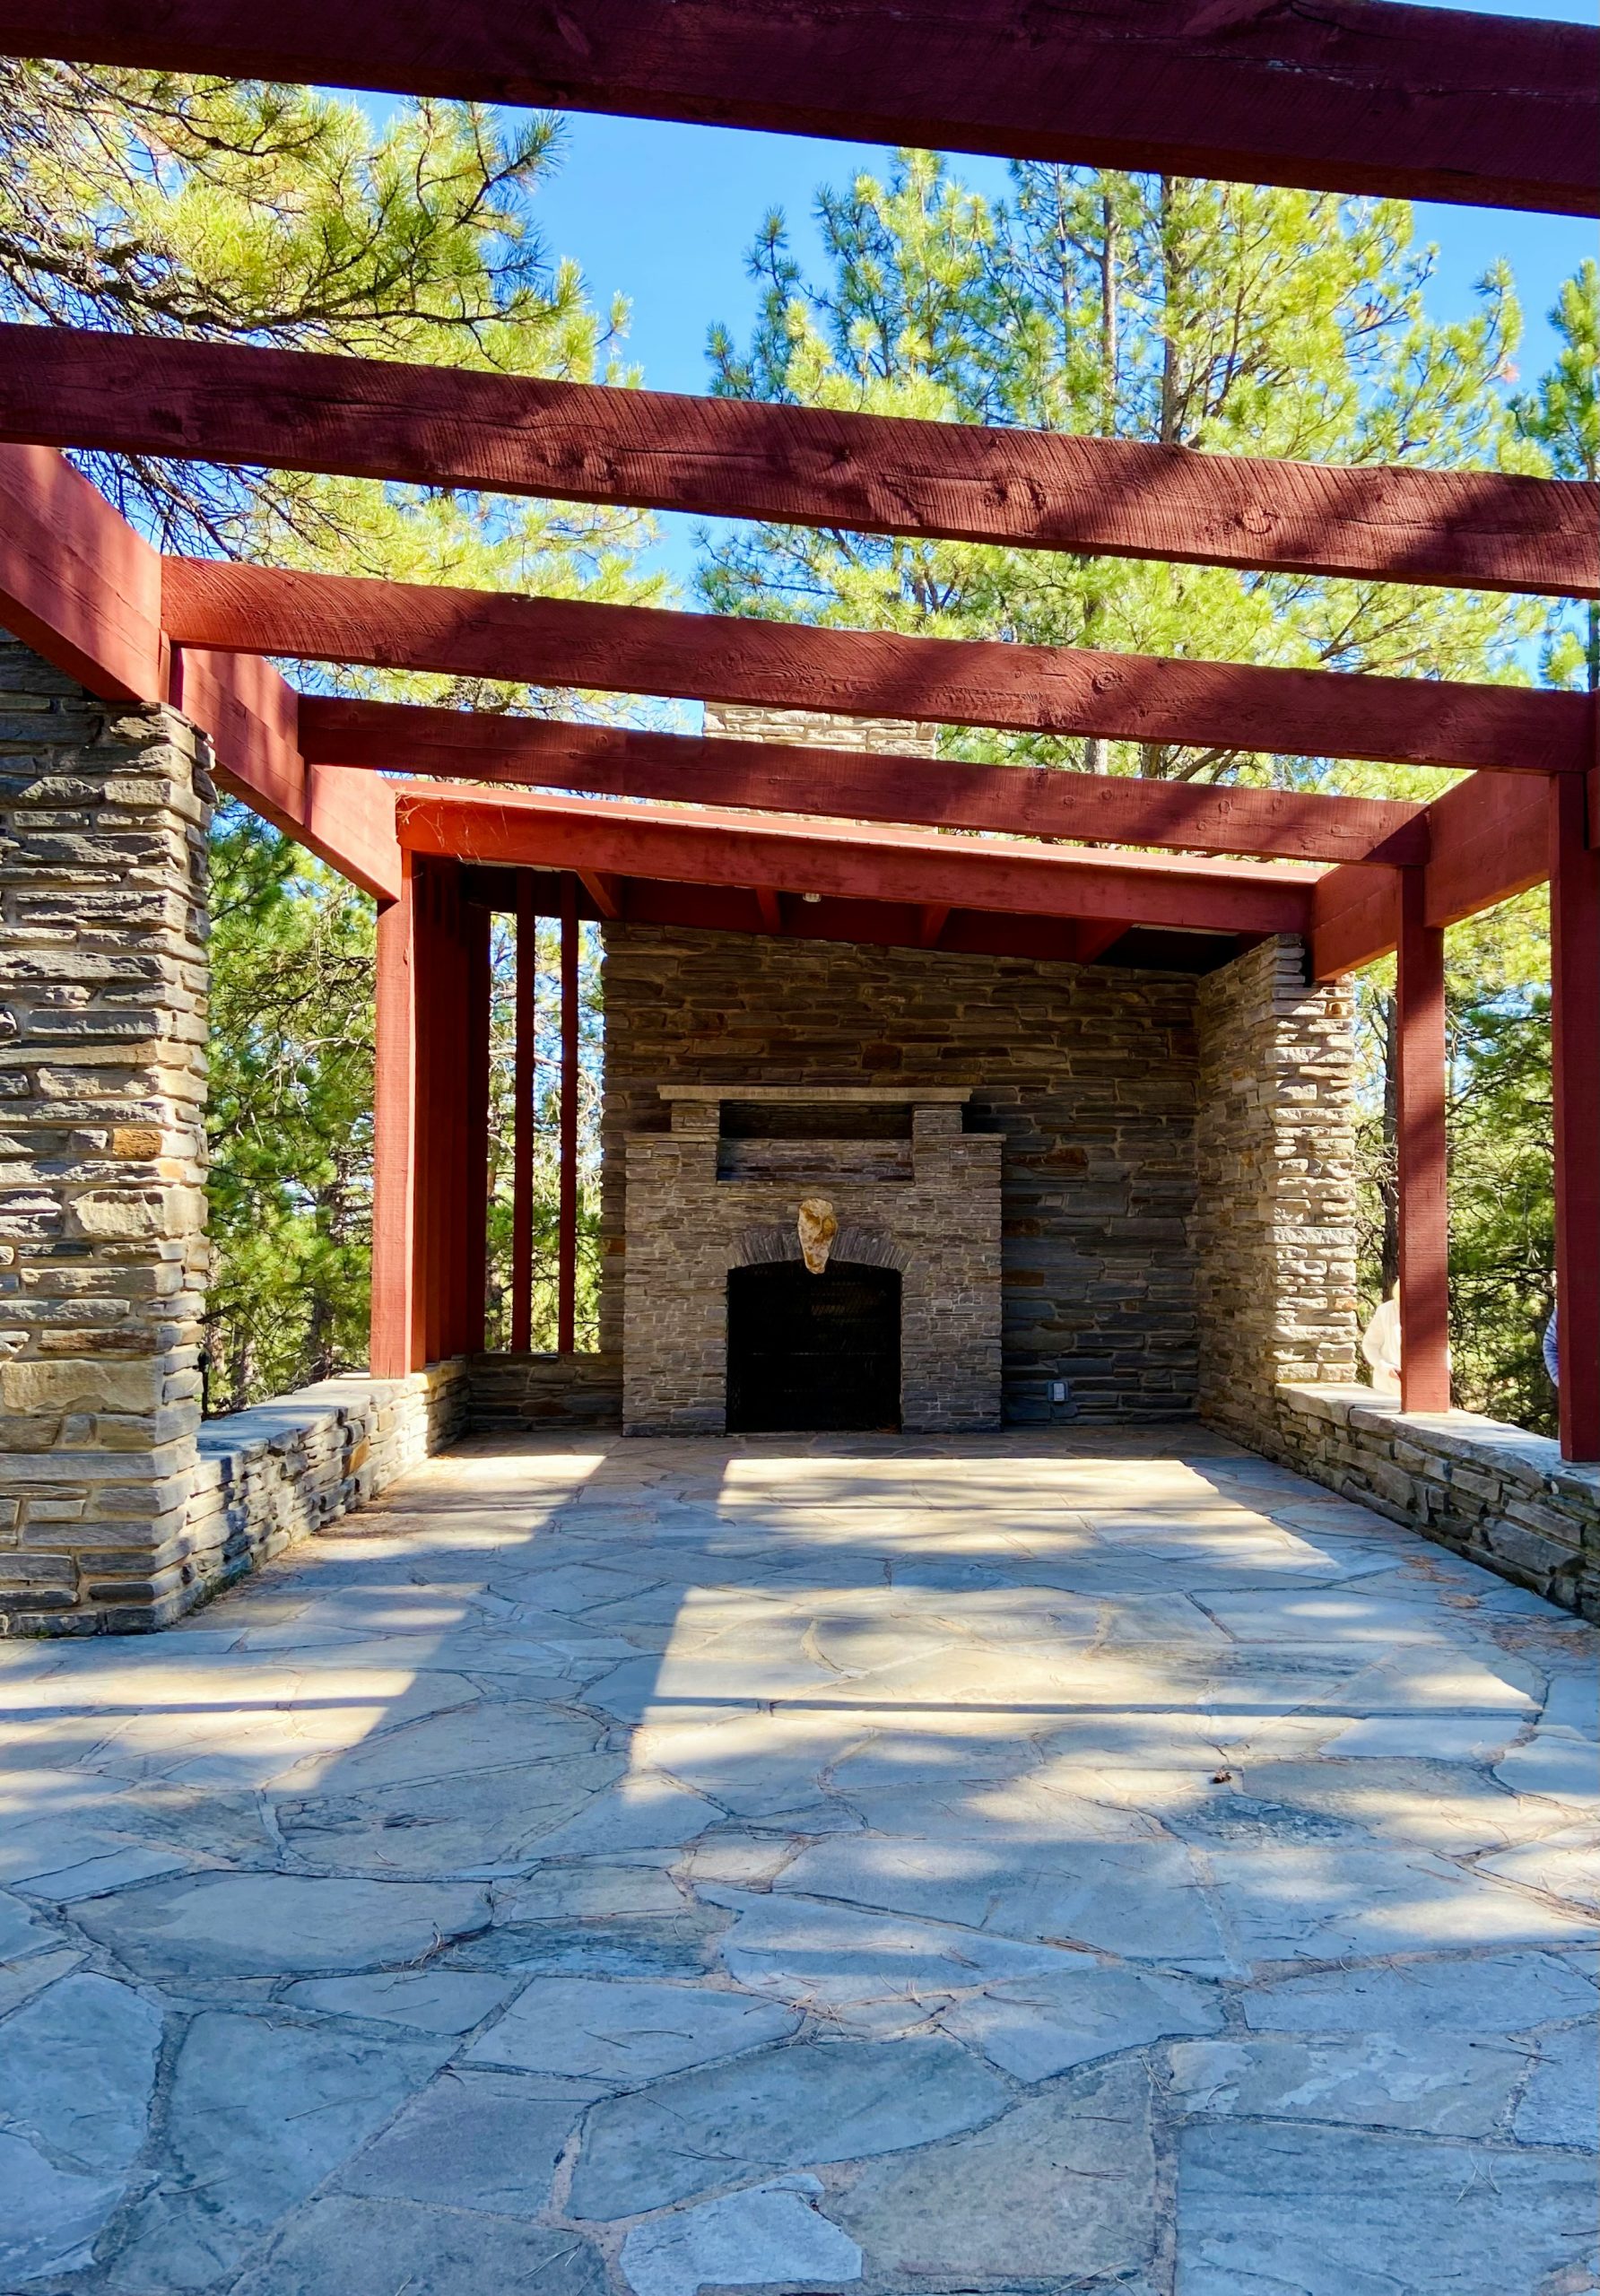
Creating a permanent outdoor structure of this quality is a major construction project with a corresponding price tag. This isn’t just landscaping; it’s architecture.
- Structure & Foundation: $15,000 – $30,000 (for footers, beams, and roofing)
- Stone Fireplace & Chimney: $10,000 – $25,000 (this is a job for a master mason)
- Flooring (Flagstone Patio): $3,000 – $7,000
- Electrical & Lighting: $1,000 – $3,000
- TOTAL: $29,000 – $65,000+
Budget alternative: You can get a similar feeling with a high-quality wood pergola kit ($2,000 – $5,000) and a large, freestanding metal or stone fire pit ($500 – $1,500). Total cost: $2,500 – $6,500.
26. Define a Parkland Path with Boulders and Embedded Stones
When creating a pathway that combines large boulders with a loose-ground surface like decomposed granite or gravel, the key to longevity is burying your anchor stones. At least one-third of each large boulder should be buried below the path’s surface. This prevents them from shifting or “floating” over time as the ground freezes, thaws, and settles. It makes them look like they are an integral part of the landscape, emerging from the earth, which is the entire point. The visible plaque on the boulder here reinforces that feeling of permanence and dedication.
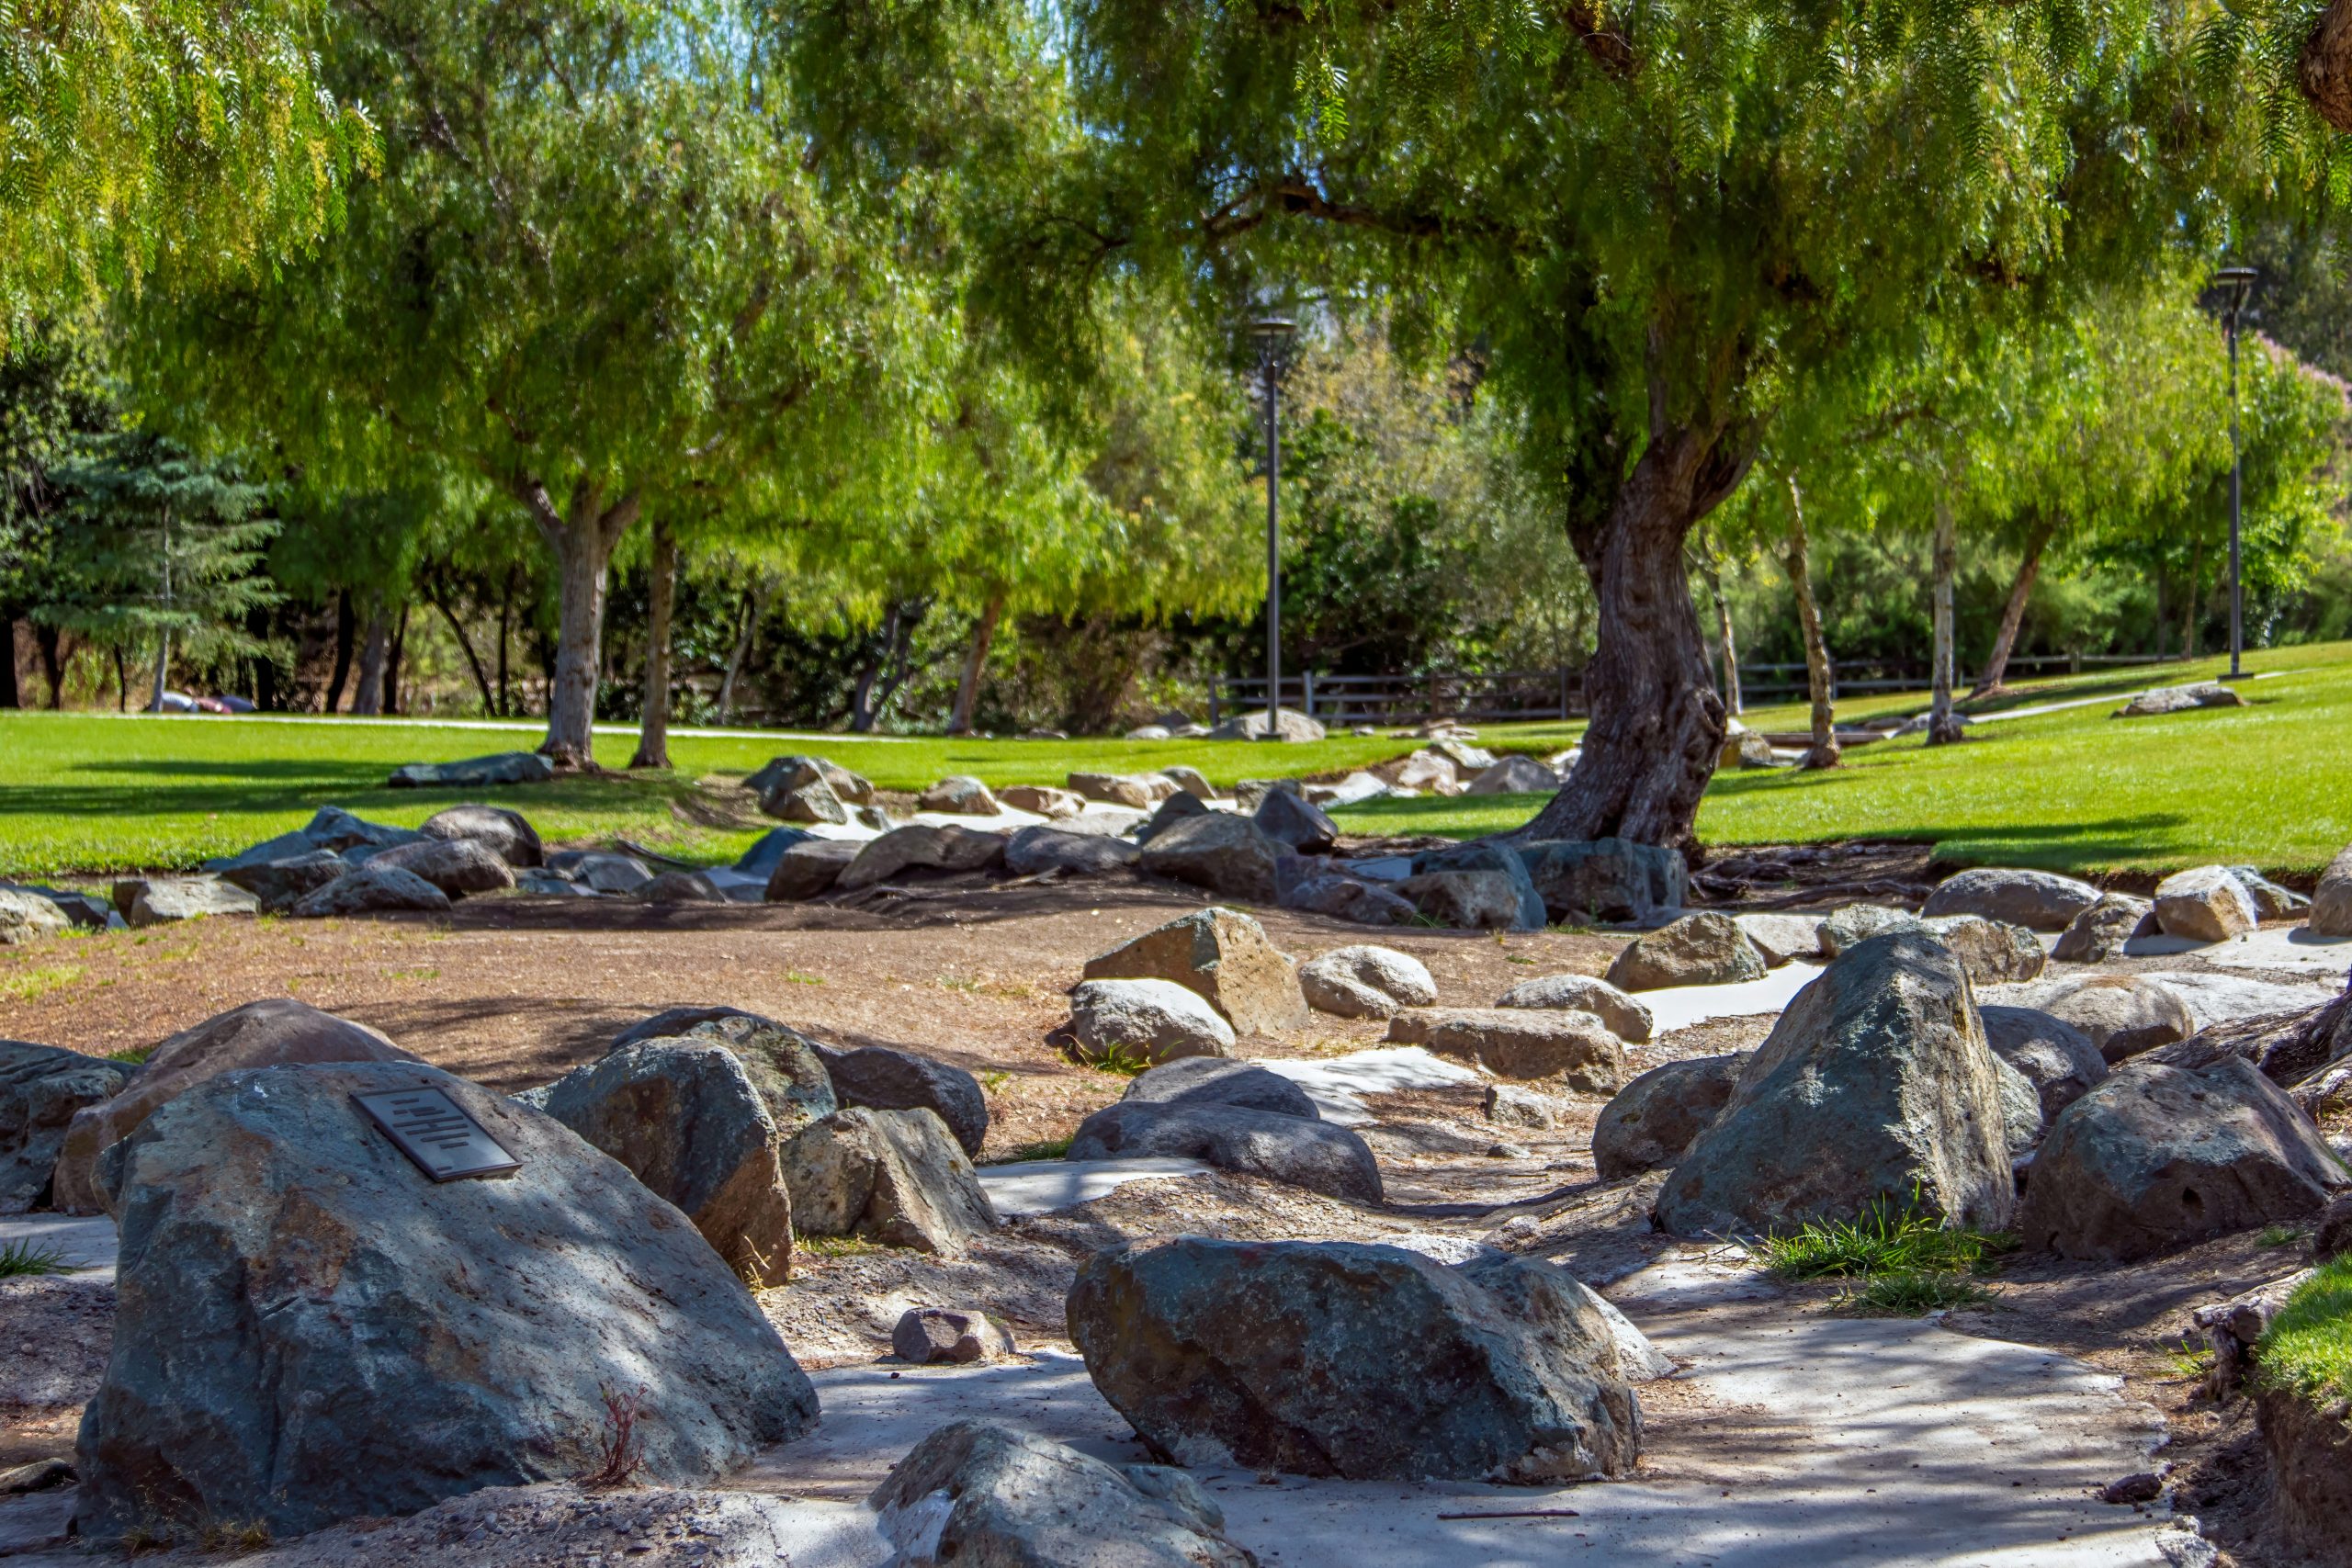
that makes this path feel so special is that it doesn’t have hard edges. The boundary between the light-colored pathway and the green grass is soft, irregular, and rambling. There’s no steel edging or brick border. This deliberate lack of a hard line is what makes the path feel like it belongs to the park. It invites you to meander and feels completely integrated with the surrounding nature. If it had been framed with a rigid border, it would have felt more like a sidewalk and lost all its rustic charm. The softness of the edge is everything.
27. Create a Lush Greenhouse Walkway with Mixed Rocks
This greenhouse interior works because it cleverly combines multiple types of rock application in one small space. You have the industrial look of the gabion wall filled with uniform stones, the organic feel of the loose rocks and pebbles serving as mulch, and the smooth, functional surface of the concrete path. This mix of textures creates a rich, layered look that feels curated and complex. The dense, varied foliage softens all the hardscape, and the transparent roof keeps the space feeling bright and open while still being enclosed.
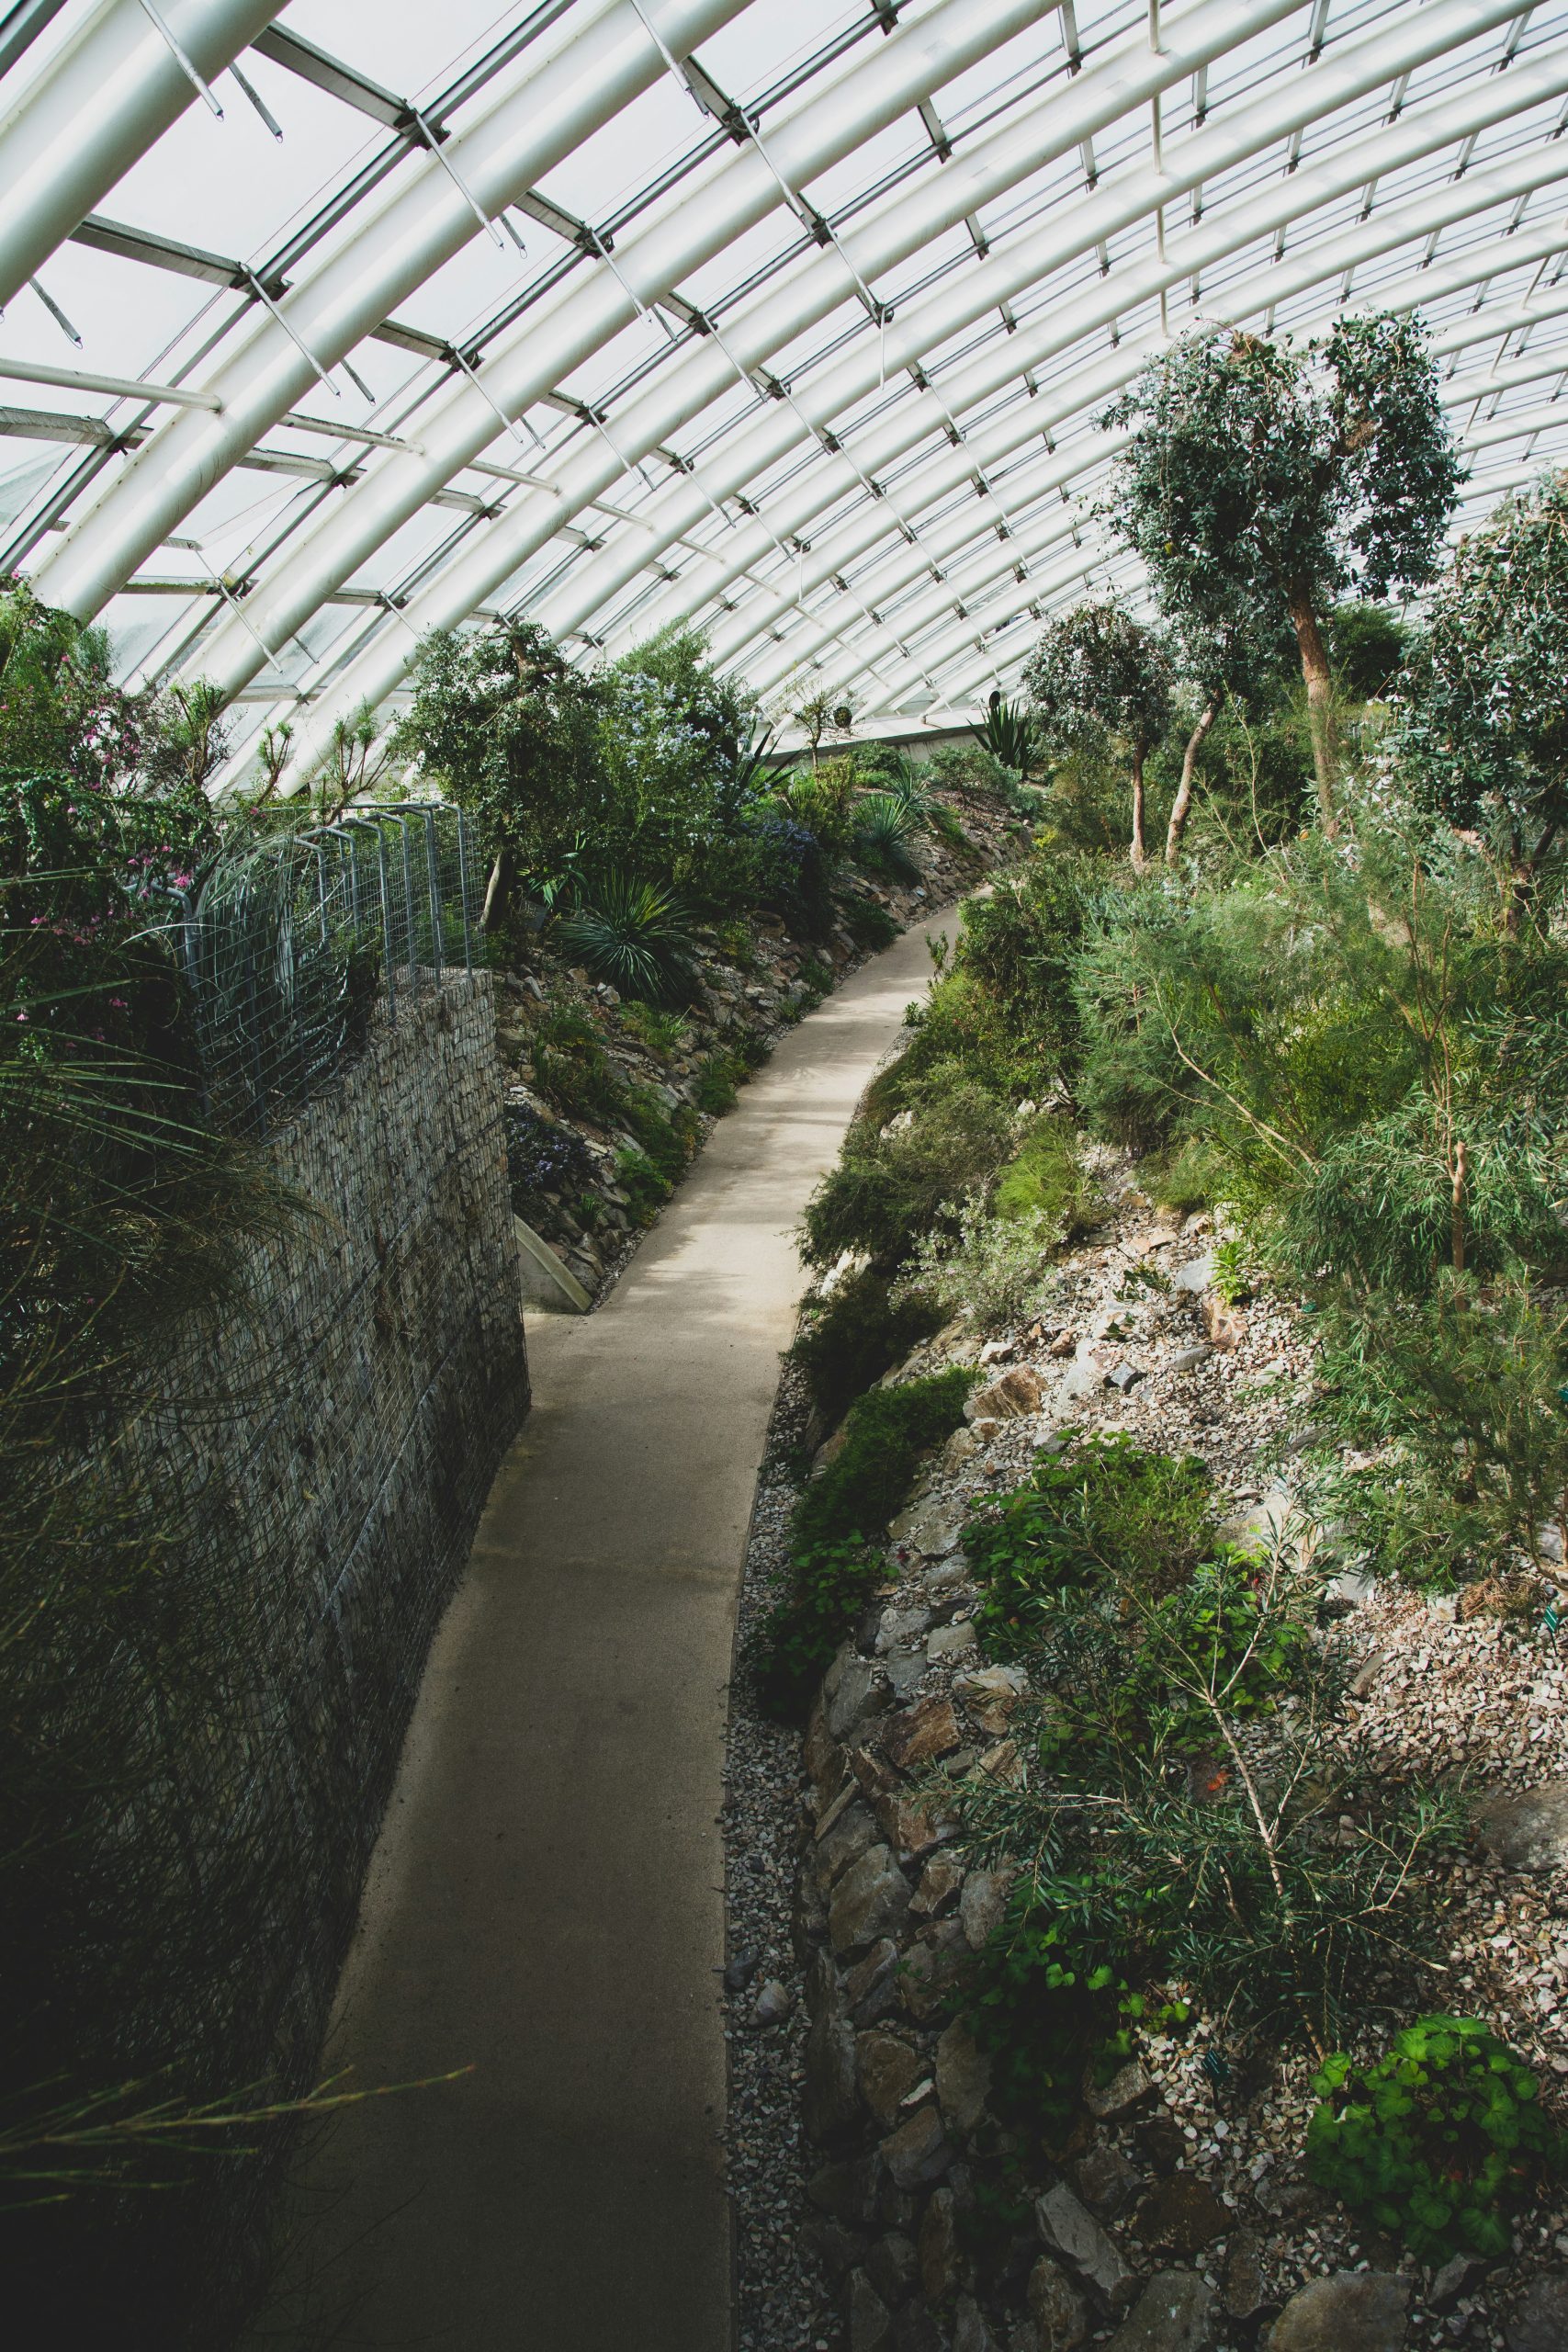
A greenhouse is a self-contained ecosystem, and you need to plan for it before you even think about rocks and plants.
- Ventilation is Key: How will you manage heat? A structure like this can get incredibly hot. You will need roof vents, side vents, or fans to ensure air circulation and prevent your plants from cooking.
- Managing Water: Where will water runoff go? The concrete path is great, but the surrounding beds need excellent drainage so water doesn’t pool. A built-in drainage system is a must.
- Pest Control: A warm, humid greenhouse is paradise for pests like spider mites and aphids. Plan for an integrated pest management strategy from day one, like introducing beneficial insects.
Your Garden’s Next Chapter Is Written in Stone
Now that you’re full of ideas, the next step is making a plan. Pick one element you loved—a color combination, a type of stone, a planting style—and start there. Your dream yard is closer than you think, and it starts with a single, well-placed rock.
Don’t forget to save your favorites to your Pinterest board to keep the inspiration flowing!