
There’s a special kind of magic in having a space dedicated to making, creating, and tinkering. But how do you go from a cluttered corner of the garage to a workshop that truly inspires? We’ve seen the Pinterest boards, the saved Instagram posts, and we get it. After wading through hundreds of photos, we’ve curated the 27 most inspiring and genuinely practical workshop design ideas for 2026. These aren’t just pretty pictures; they are real, functional spaces for everything from pottery and woodworking to car maintenance and art. And stay until the end — we break down the most common mistakes that can ruin these looks. 📌 Save this to Pinterest for later — you’ll want to revisit these ideas.
1. Fusing Glass Workshop with Individual Workstations
The success of this shared space lies in a simple principle: personal zones within a communal area. By giving each artist their own white work mat, you define their territory. This keeps tools from migrating and projects from getting mixed up. The shared elements — the large wooden table and the containers of colorful glass — encourage interaction and a collaborative spirit without sacrificing individual focus. It’s the perfect balance for a creative group setting.
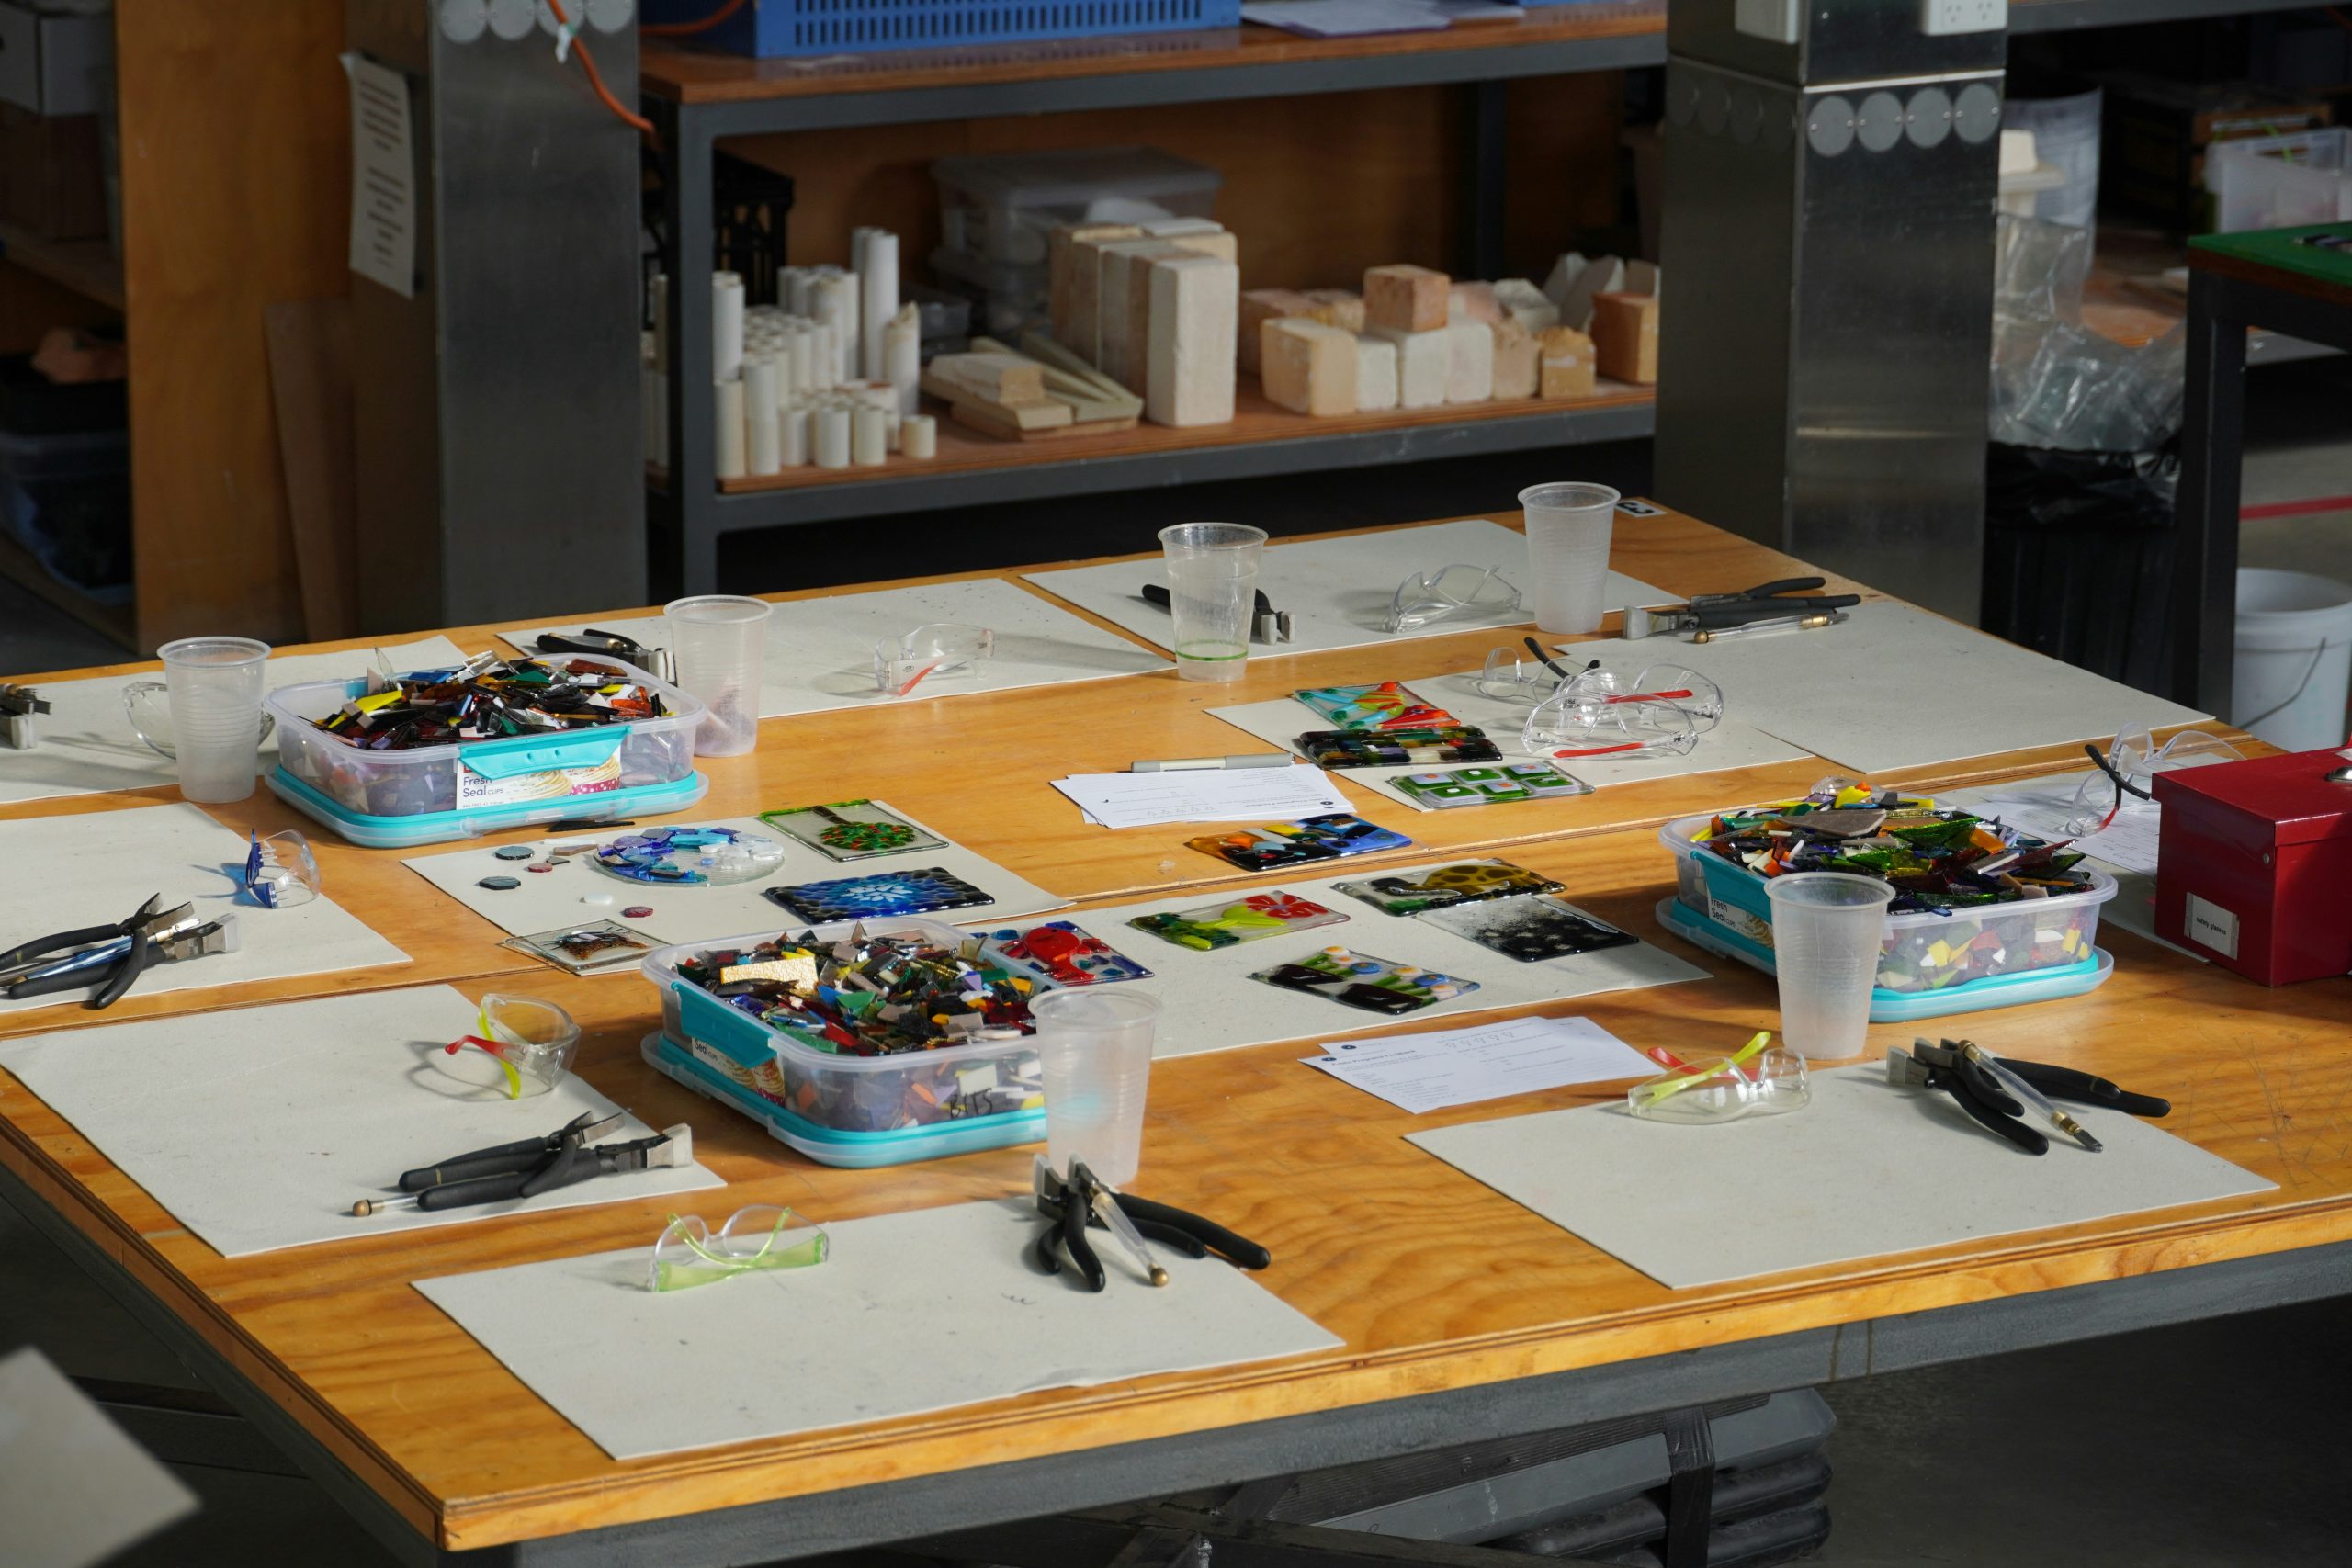
Here’s a rough estimate for setting up a four-person glass fusing station. This assumes you already have a kiln, which is the biggest expense. This breakdown covers the workspace itself.
- Main Furniture (Large wooden table): $400 – $900
- Tools (4 sets of pliers, cutters): $150 – $300
- Materials (Assorted sheet glass, frit): $200 – $500
- Decor/Accessories (Work mats, containers): $100 – $250
- Storage (Metal shelving unit): $150 – $400
- TOTAL: $1,000 – $2,350
- Budget alternative: Use repurposed dining tables and source tools secondhand to bring the cost down by 40-50%.
2. Cozy Natural Wood Craft Workshop with String Lights
The single element that elevates this room from a simple craft space to a truly magical workshop is the overhead string lighting. Imagine the room without them; you’d have functional tables in a plain room. But the warm glow of the exposed bulbs crisscrossing the ceiling instantly injects a sense of warmth, coziness, and creativity. It’s a relatively low-cost addition that completely transforms the atmosphere, making the space feel less like a factory and more like a retreat.
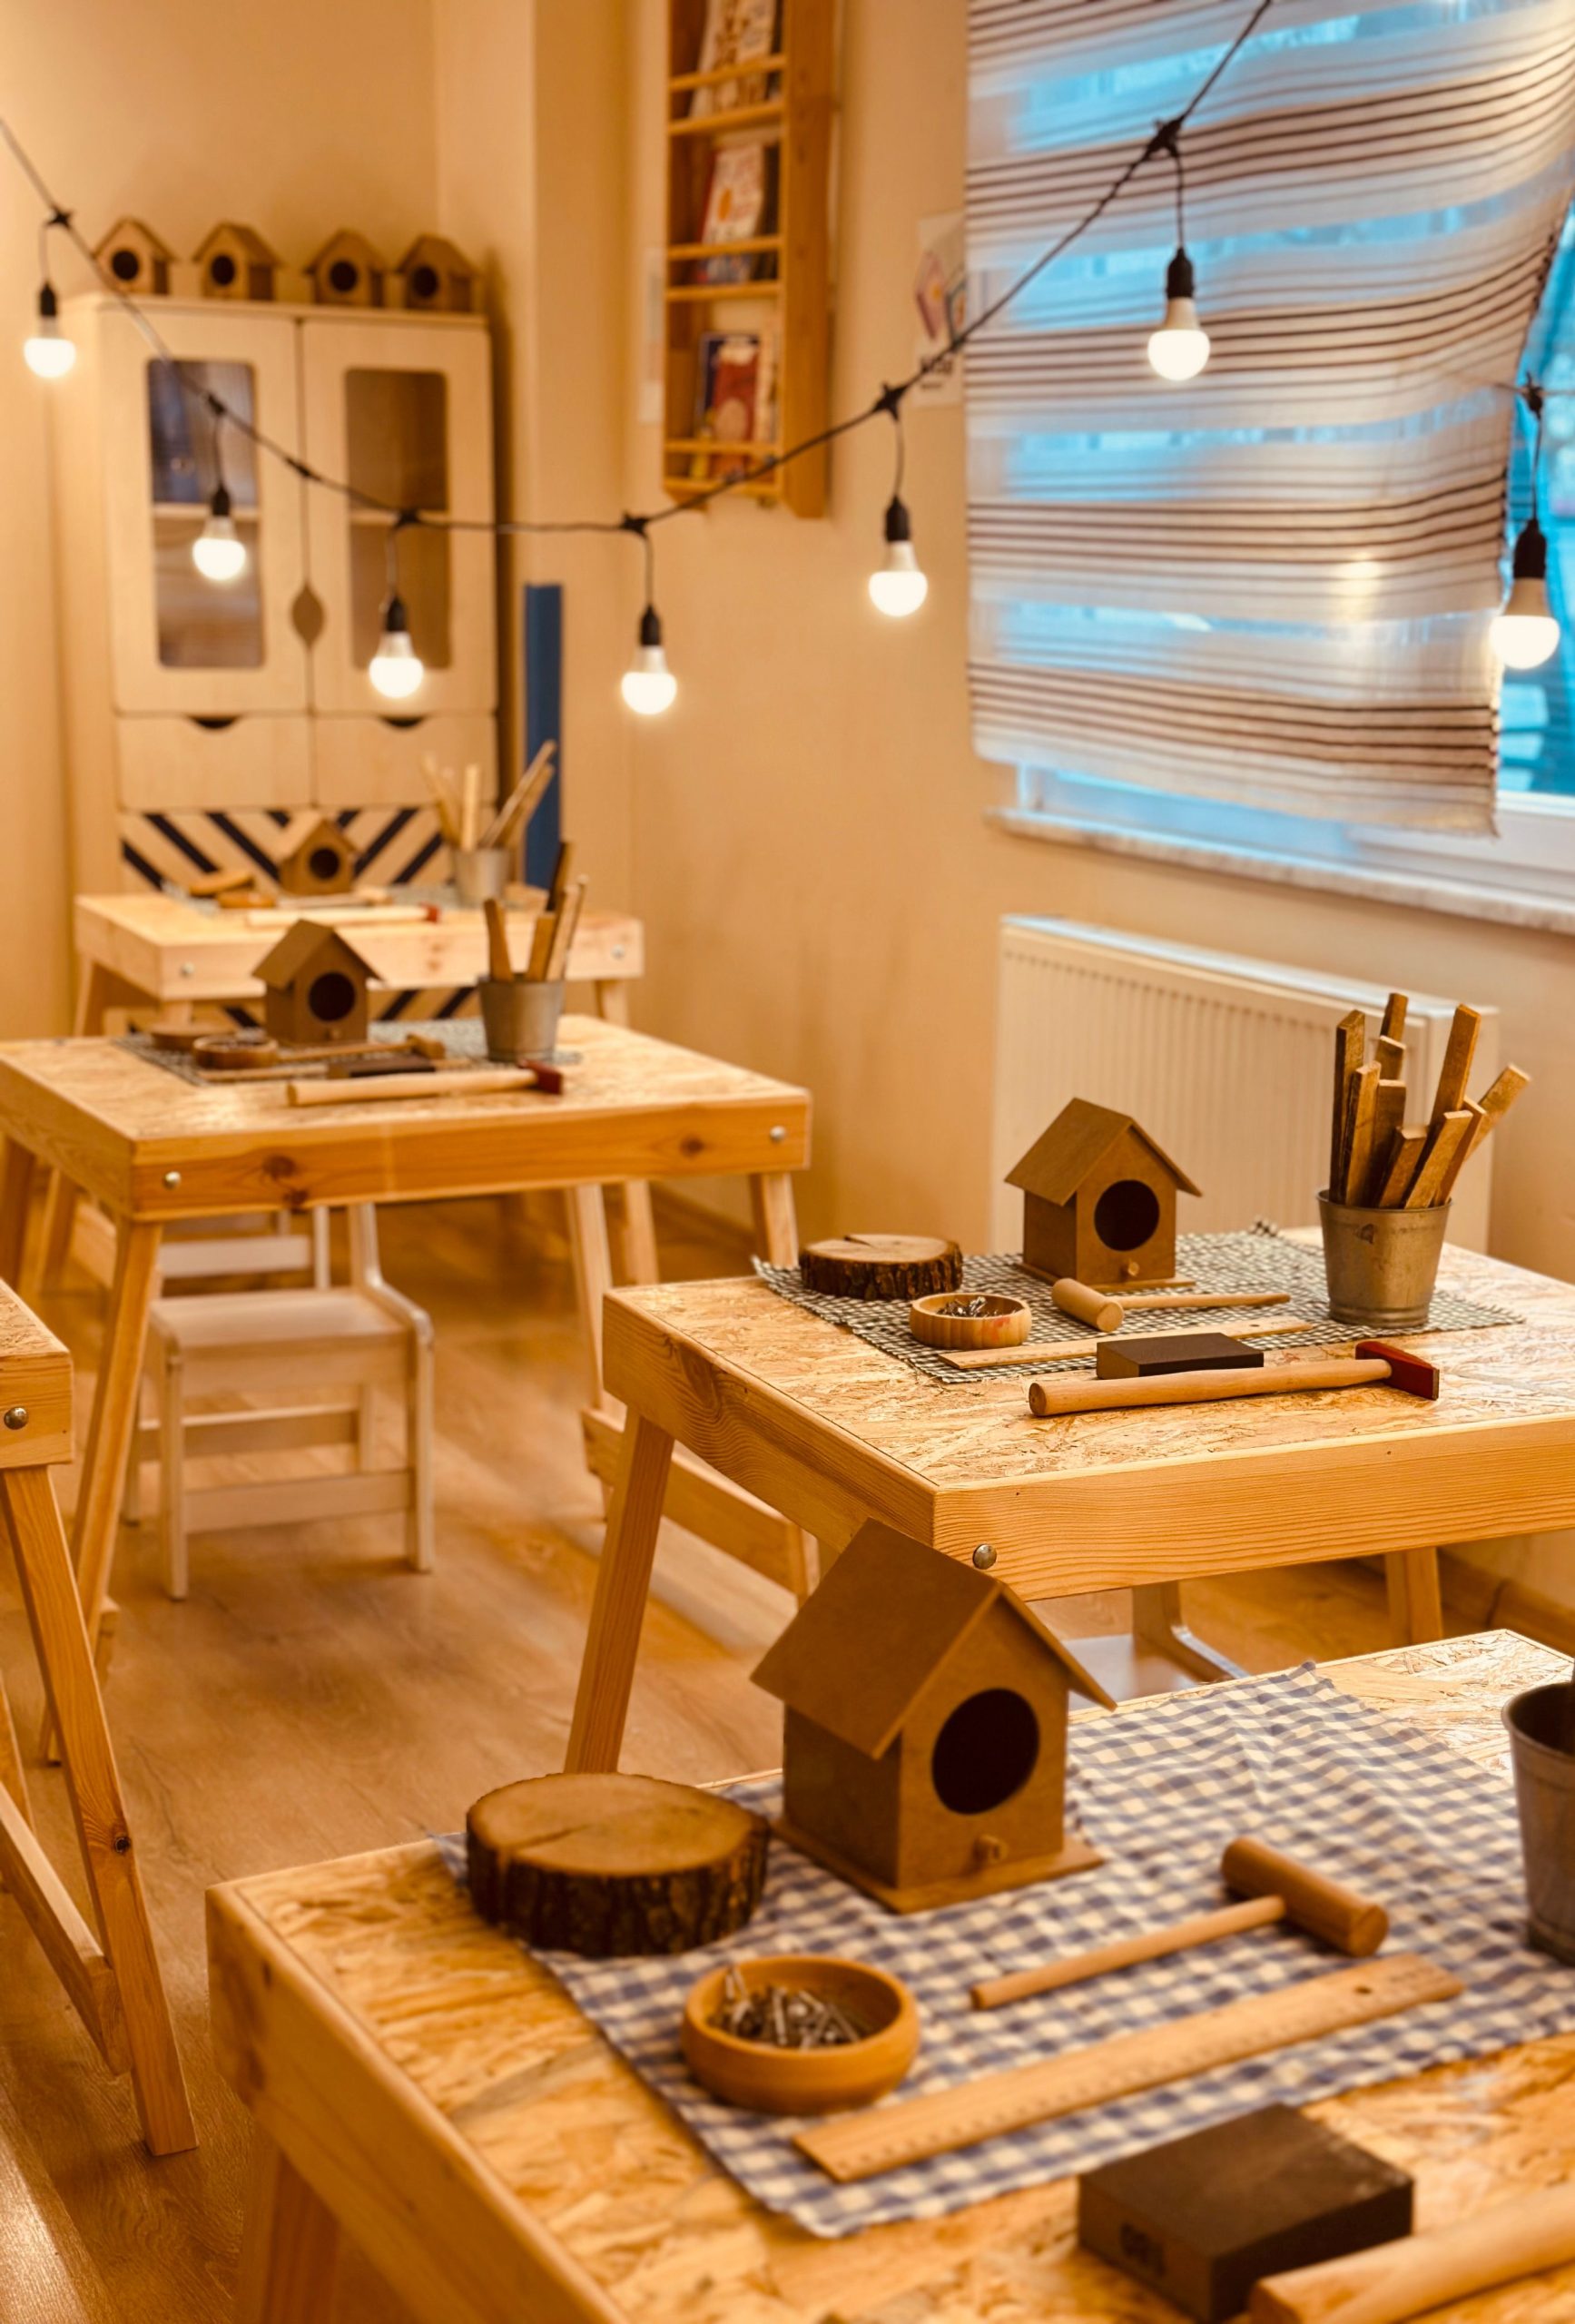
To get that perfect ambient glow without creating harsh shadows, you need to be intentional with your string lights. Choose bulbs labeled as “warm white” (typically 2700K) and ensure they are dimmable. For an 8-foot ceiling, hang the strands so they drape about 12-18 inches from the ceiling at their lowest point. This provides general, diffused light that complements, rather than replaces, task lighting you might have at each workstation.
3. An Artist’s Workshop Blending Traditional Decor and Natural Light
This room’s inviting feel comes from a clever design recipe: 50% functional artist’s space + 30% traditional home comfort + 20% eclectic personality. The functional core is the large white workshop table and simple chair. The comfort comes from the plush yellow armchair and patterned rug. The personality shines through with the gallery wall and the bold red banner. You can swap the elements—try a modern armchair or a different color wall—as long as you keep this core ratio of work, comfort, and personal flair.
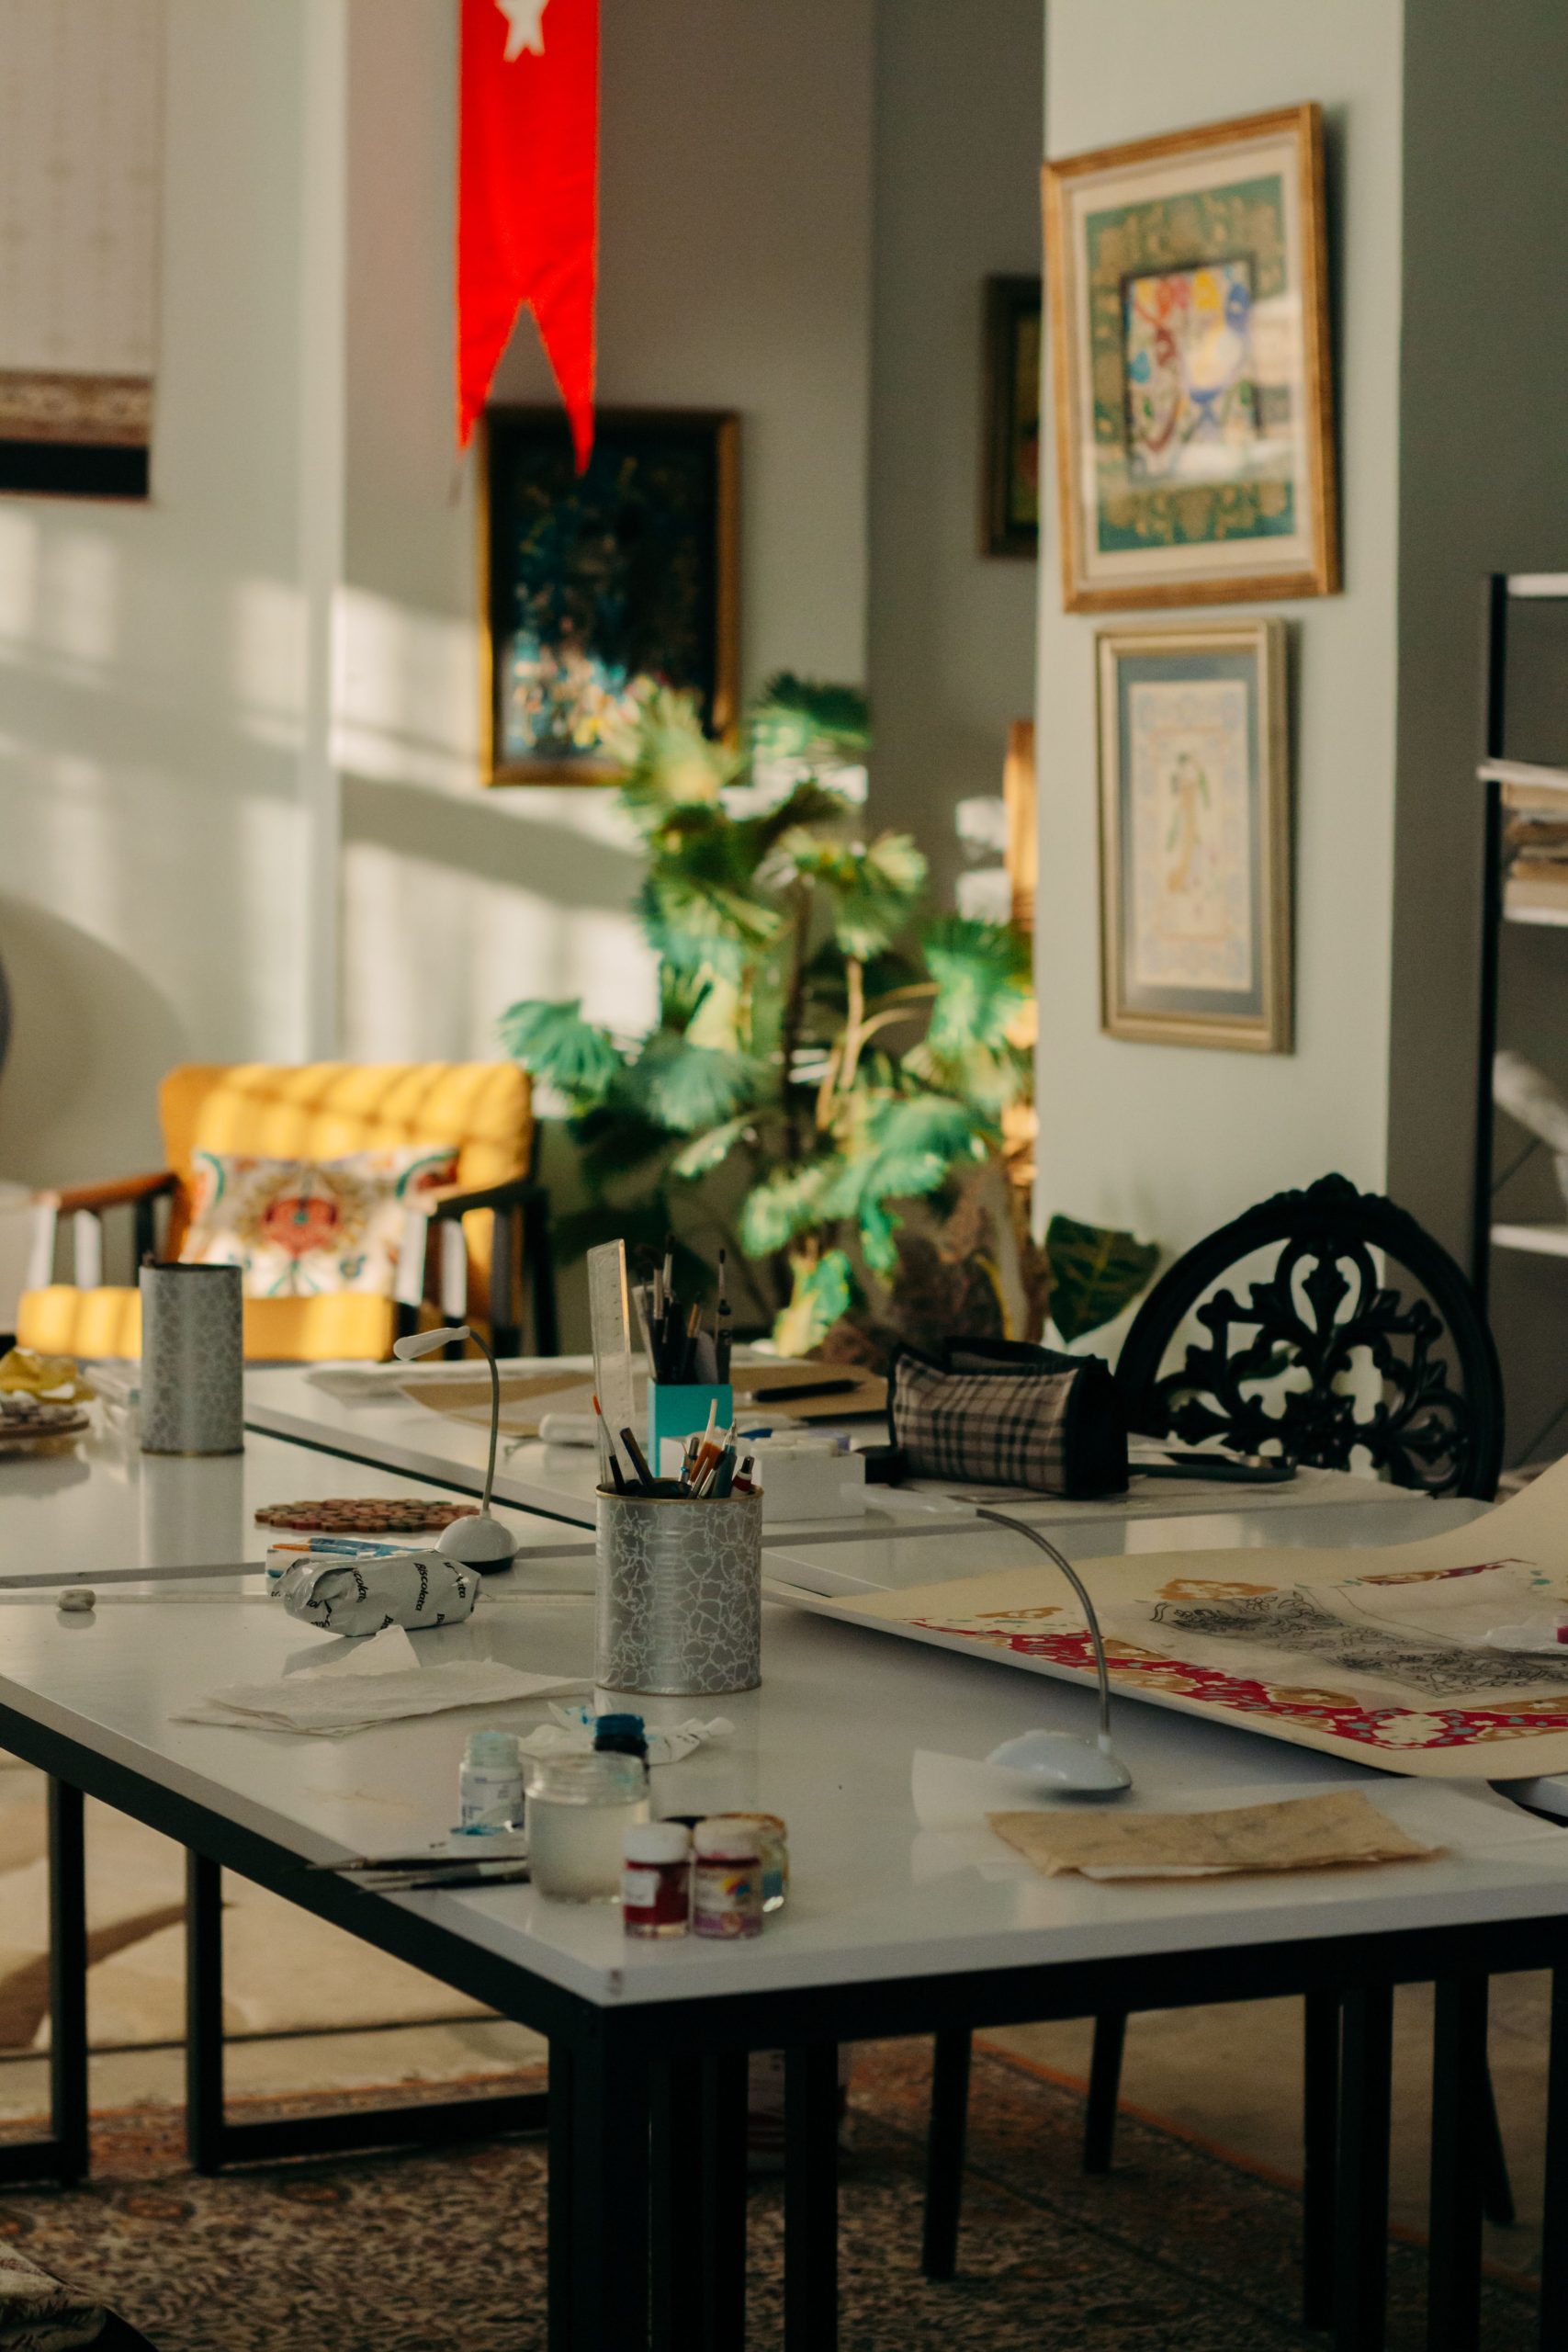
Let’s be honest about that gorgeous yellow armchair: it’s a magnet for disaster in a working art studio. If you’re using messy mediums like paint or charcoal, a fabric armchair is high-risk. A single stray splatter or dusty handprint could become a permanent feature. Consider its placement carefully—keep it well away from the main “splash zone” or opt for a chair in a more forgiving material like leather or a washable slipcover if your creative process is on the messier side.
4. Bright and Simple Kids’ Carpentry Workshop
This setup works because it’s built for its users: kids. The furniture is scaled down, with light wood tables and small white chairs that are approachable and easy to use. The materials for each station are neatly contained, which minimizes overwhelming clutter and helps kids focus on the task at hand. The combination of the OSB tabletops and gingham fabric adds a touch of playful, rustic charm that feels creative and fun, not sterile. For a more advanced woodworking environment, check out the industrial setup in Idea #12.
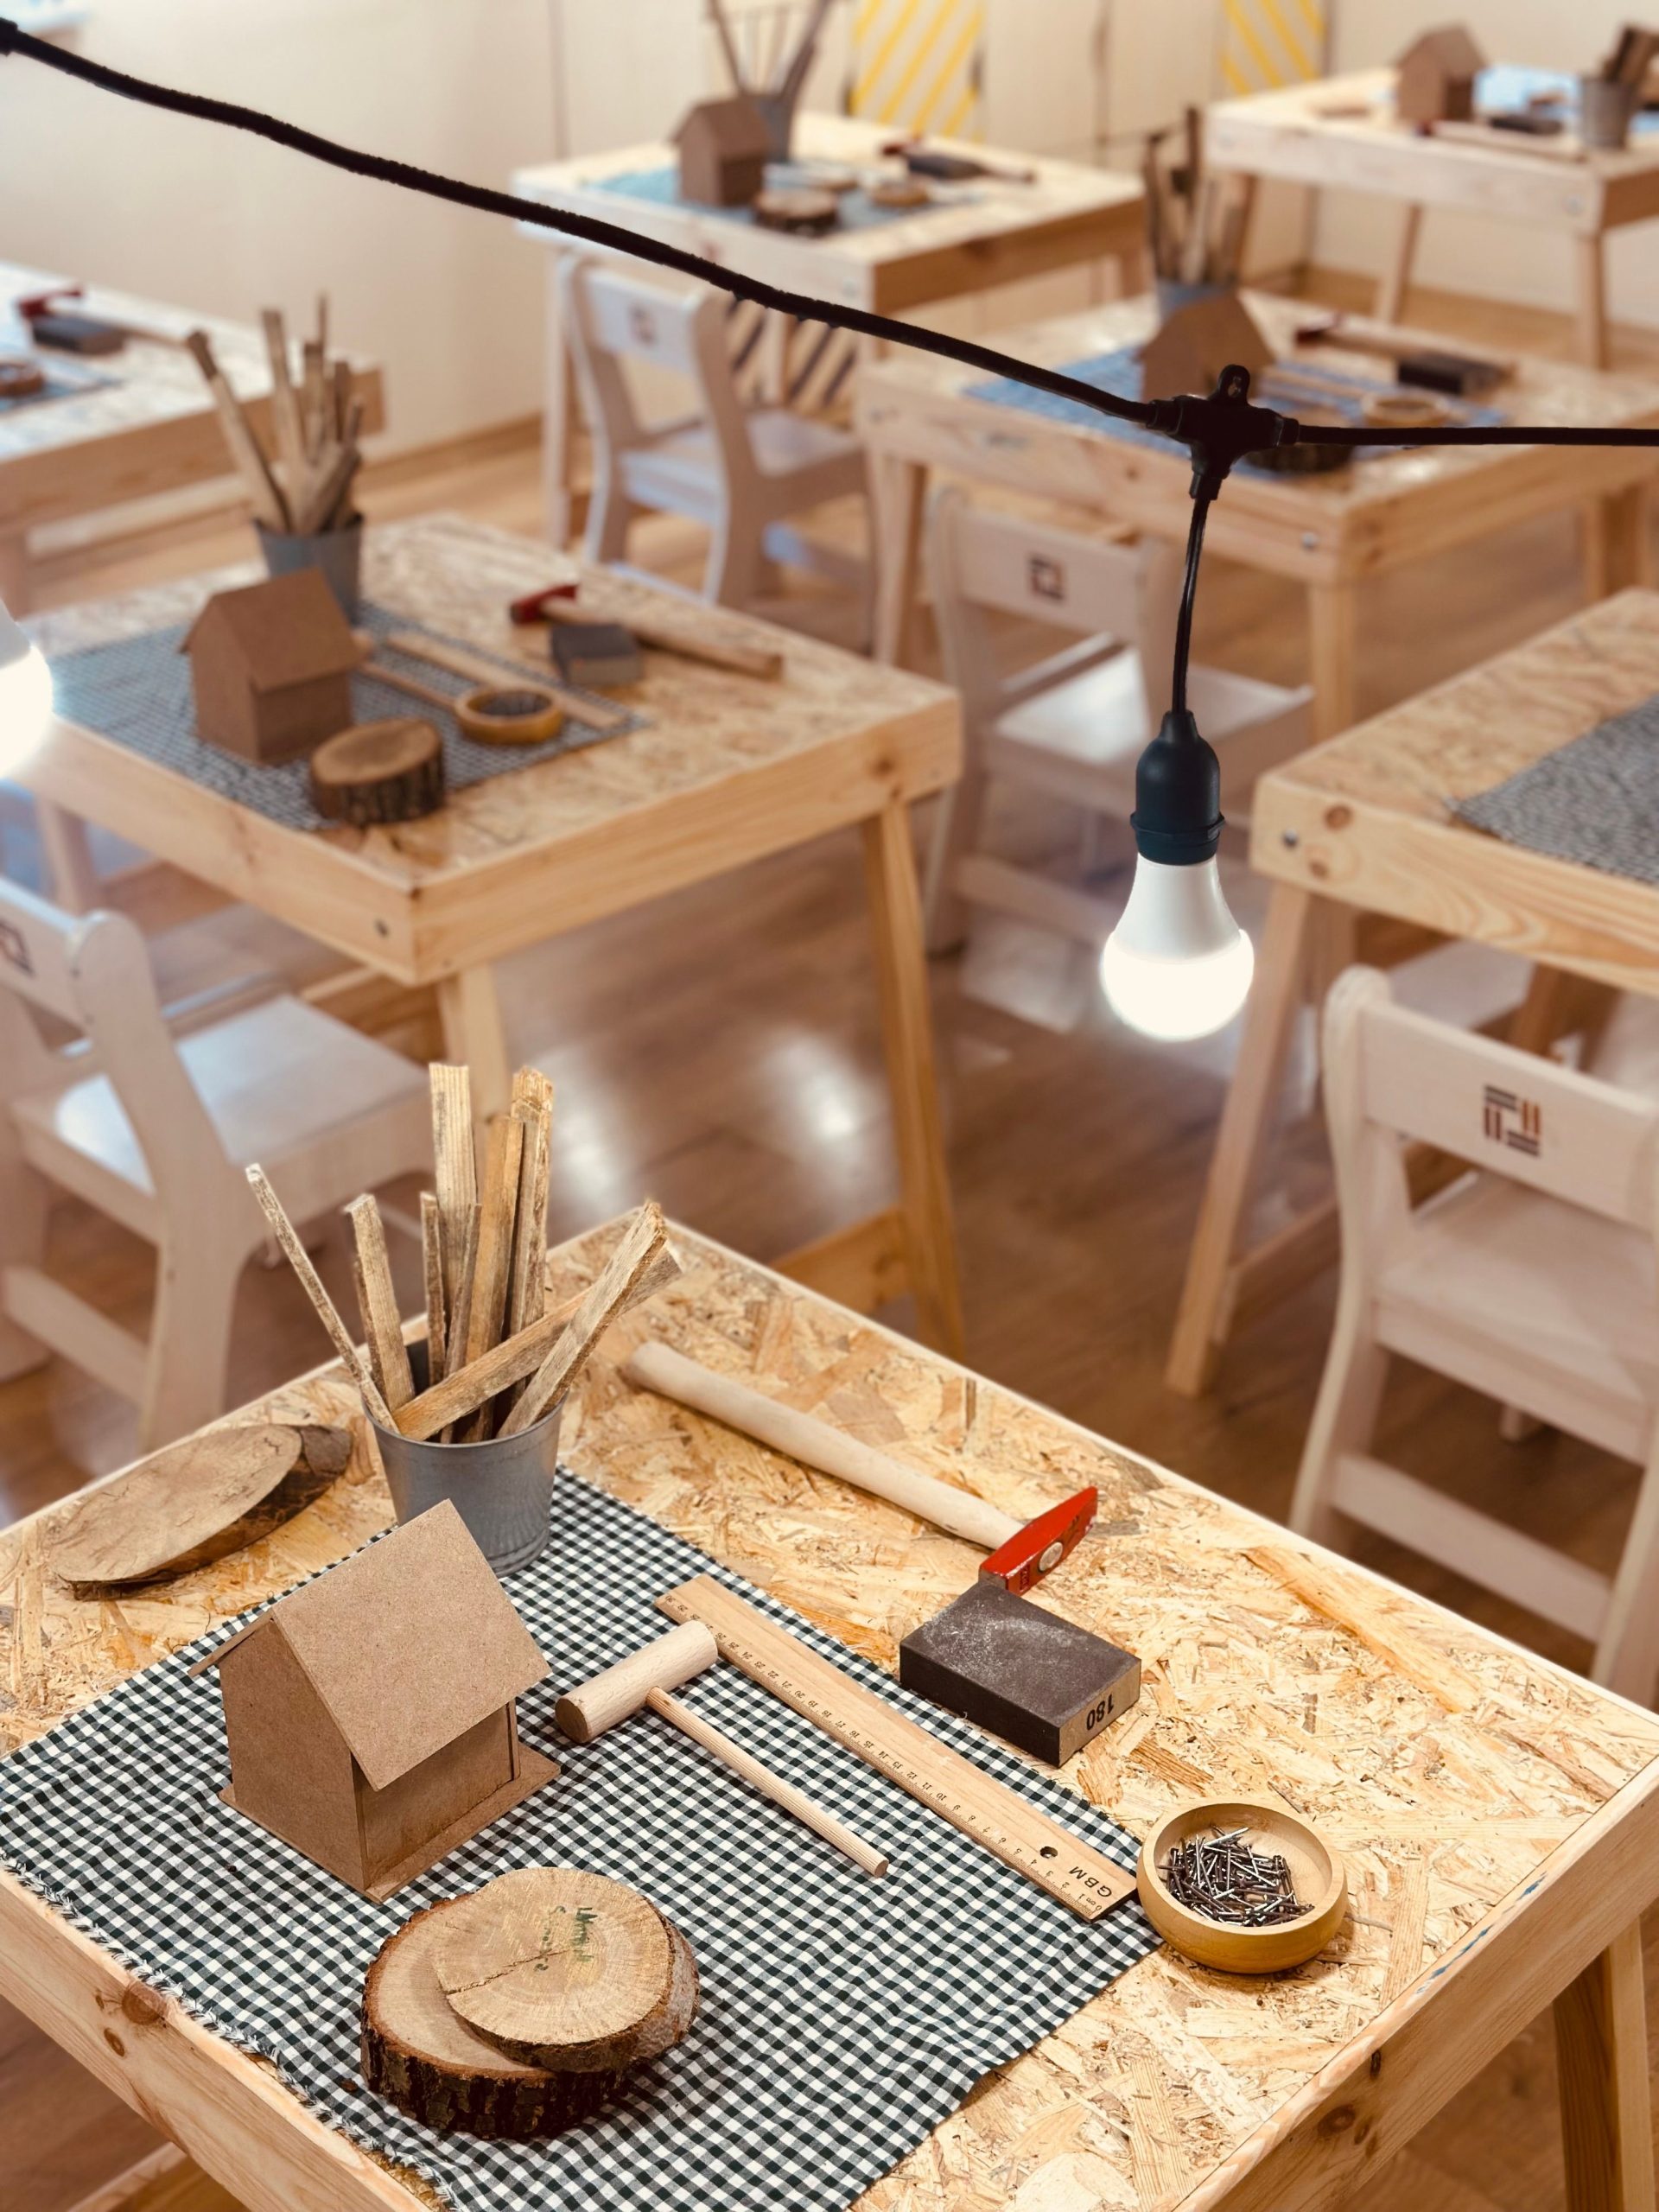
You can create this entire look for a fraction of the cost of dedicated ‘craft furniture.’ Head to IKEA for their basic LÄTT children’s table and chairs set—you can get a table and two chairs for under $50. A large sheet of OSB from a hardware store can be cut down to top several of these tables for that workshop feel, and it’s durable enough to handle some enthusiastic hammering. Facebook Marketplace is another goldmine for small kids’ tables and chairs that you can easily paint or modify.
5. Dynamic Close-Up of Hands Shaping Clay on a Pottery Wheel
that makes this image so compelling is the sense of motion. You can almost feel the hum of the spinning pottery wheel and the slick, yielding texture of the clay. It’s not just a static photo of a pot; it’s a snapshot of the creative process frozen in time. The reflection of light on the wet slip and the blurred streaks on the wheel’s surface convey energy and action. This focus on the hands-on process is what makes the workshop feel alive, even in a still image.

There’s a reason ceramics and pottery have exploded on platforms like Pinterest and TikTok in recent years. In our overwhelmingly digital lives, there’s a collective yearning for tactile, analog hobbies. Getting your hands dirty and creating a physical object from a lump of earth is incredibly grounding. This image perfectly captures that trend—it’s less about the finished product and more about the mindful, messy, and deeply satisfying process of making.
6. A Potter’s Hands-On Moment with a Shaping Tool
The power of this scene is its tight focus. By cropping in on the potter’s hands, the wet clay vessel, and the small shaping tool, the image emphasizes skill and concentration. The use of a simple, dark background eliminates distractions, drawing the viewer’s eye directly to the act of creation. The contrast between the rough, clay-covered hands and the delicate work being performed tells a story of practiced craft. This is much more intimate than the wider view in Idea #8.

A home pottery setup doesn’t require a massive studio. For a single wheel and a small work table for wedging clay, you need a minimum of 40 square feet (e.g., a 5×8 foot area). The most important consideration is the floor; it must be a surface that can handle water and clay dust, like sealed concrete, vinyl, or tile. Avoid setting up on carpet at all costs. You also need access to a dedicated water source and a GFCI outlet for safety.
7. Earthy Focus: Shaping a Terracotta Pot on the Wheel
The visual recipe here is all about earthy texture and focus. It’s about 70% tactile materials (the wet terracotta clay, the denim apron, the muddy water) and 30% focused action (the hands actively shaping the pot). The color palette is secondary to the feeling of different textures interacting. You could swap the terracotta clay for a white porcelain and the denim for a canvas apron, and the formula would still work because the core of the idea is the hands-on, material-focused process.

Working with clay is messy—and that’s an understatement. The fine dust, when dry, can get everywhere and is unhealthy to breathe in over long periods. The wet slurry can splash several feet from the wheel. A dedicated workshop space needs a non-porous floor that can be easily mopped, not swept. A robust ventilation system or at least a good quality air purifier is a non-negotiable for anyone taking up pottery seriously at home to manage airborne silica dust.
8. Playful Pottery Studio with a Full-Wall Blackboard
The giant blackboard wall is, without a doubt, the element that gives this pottery studio its unique personality. Take it away, and you have a perfectly functional but generic workshop. The chalkboard transforms the wall into a dynamic canvas for ideas, inspiration, or just playful doodles. Paired with the bright yellow stools and decorative paper flowers, it signals that this is a space where creativity is meant to be fun and unrestrained, not just serious and productive.
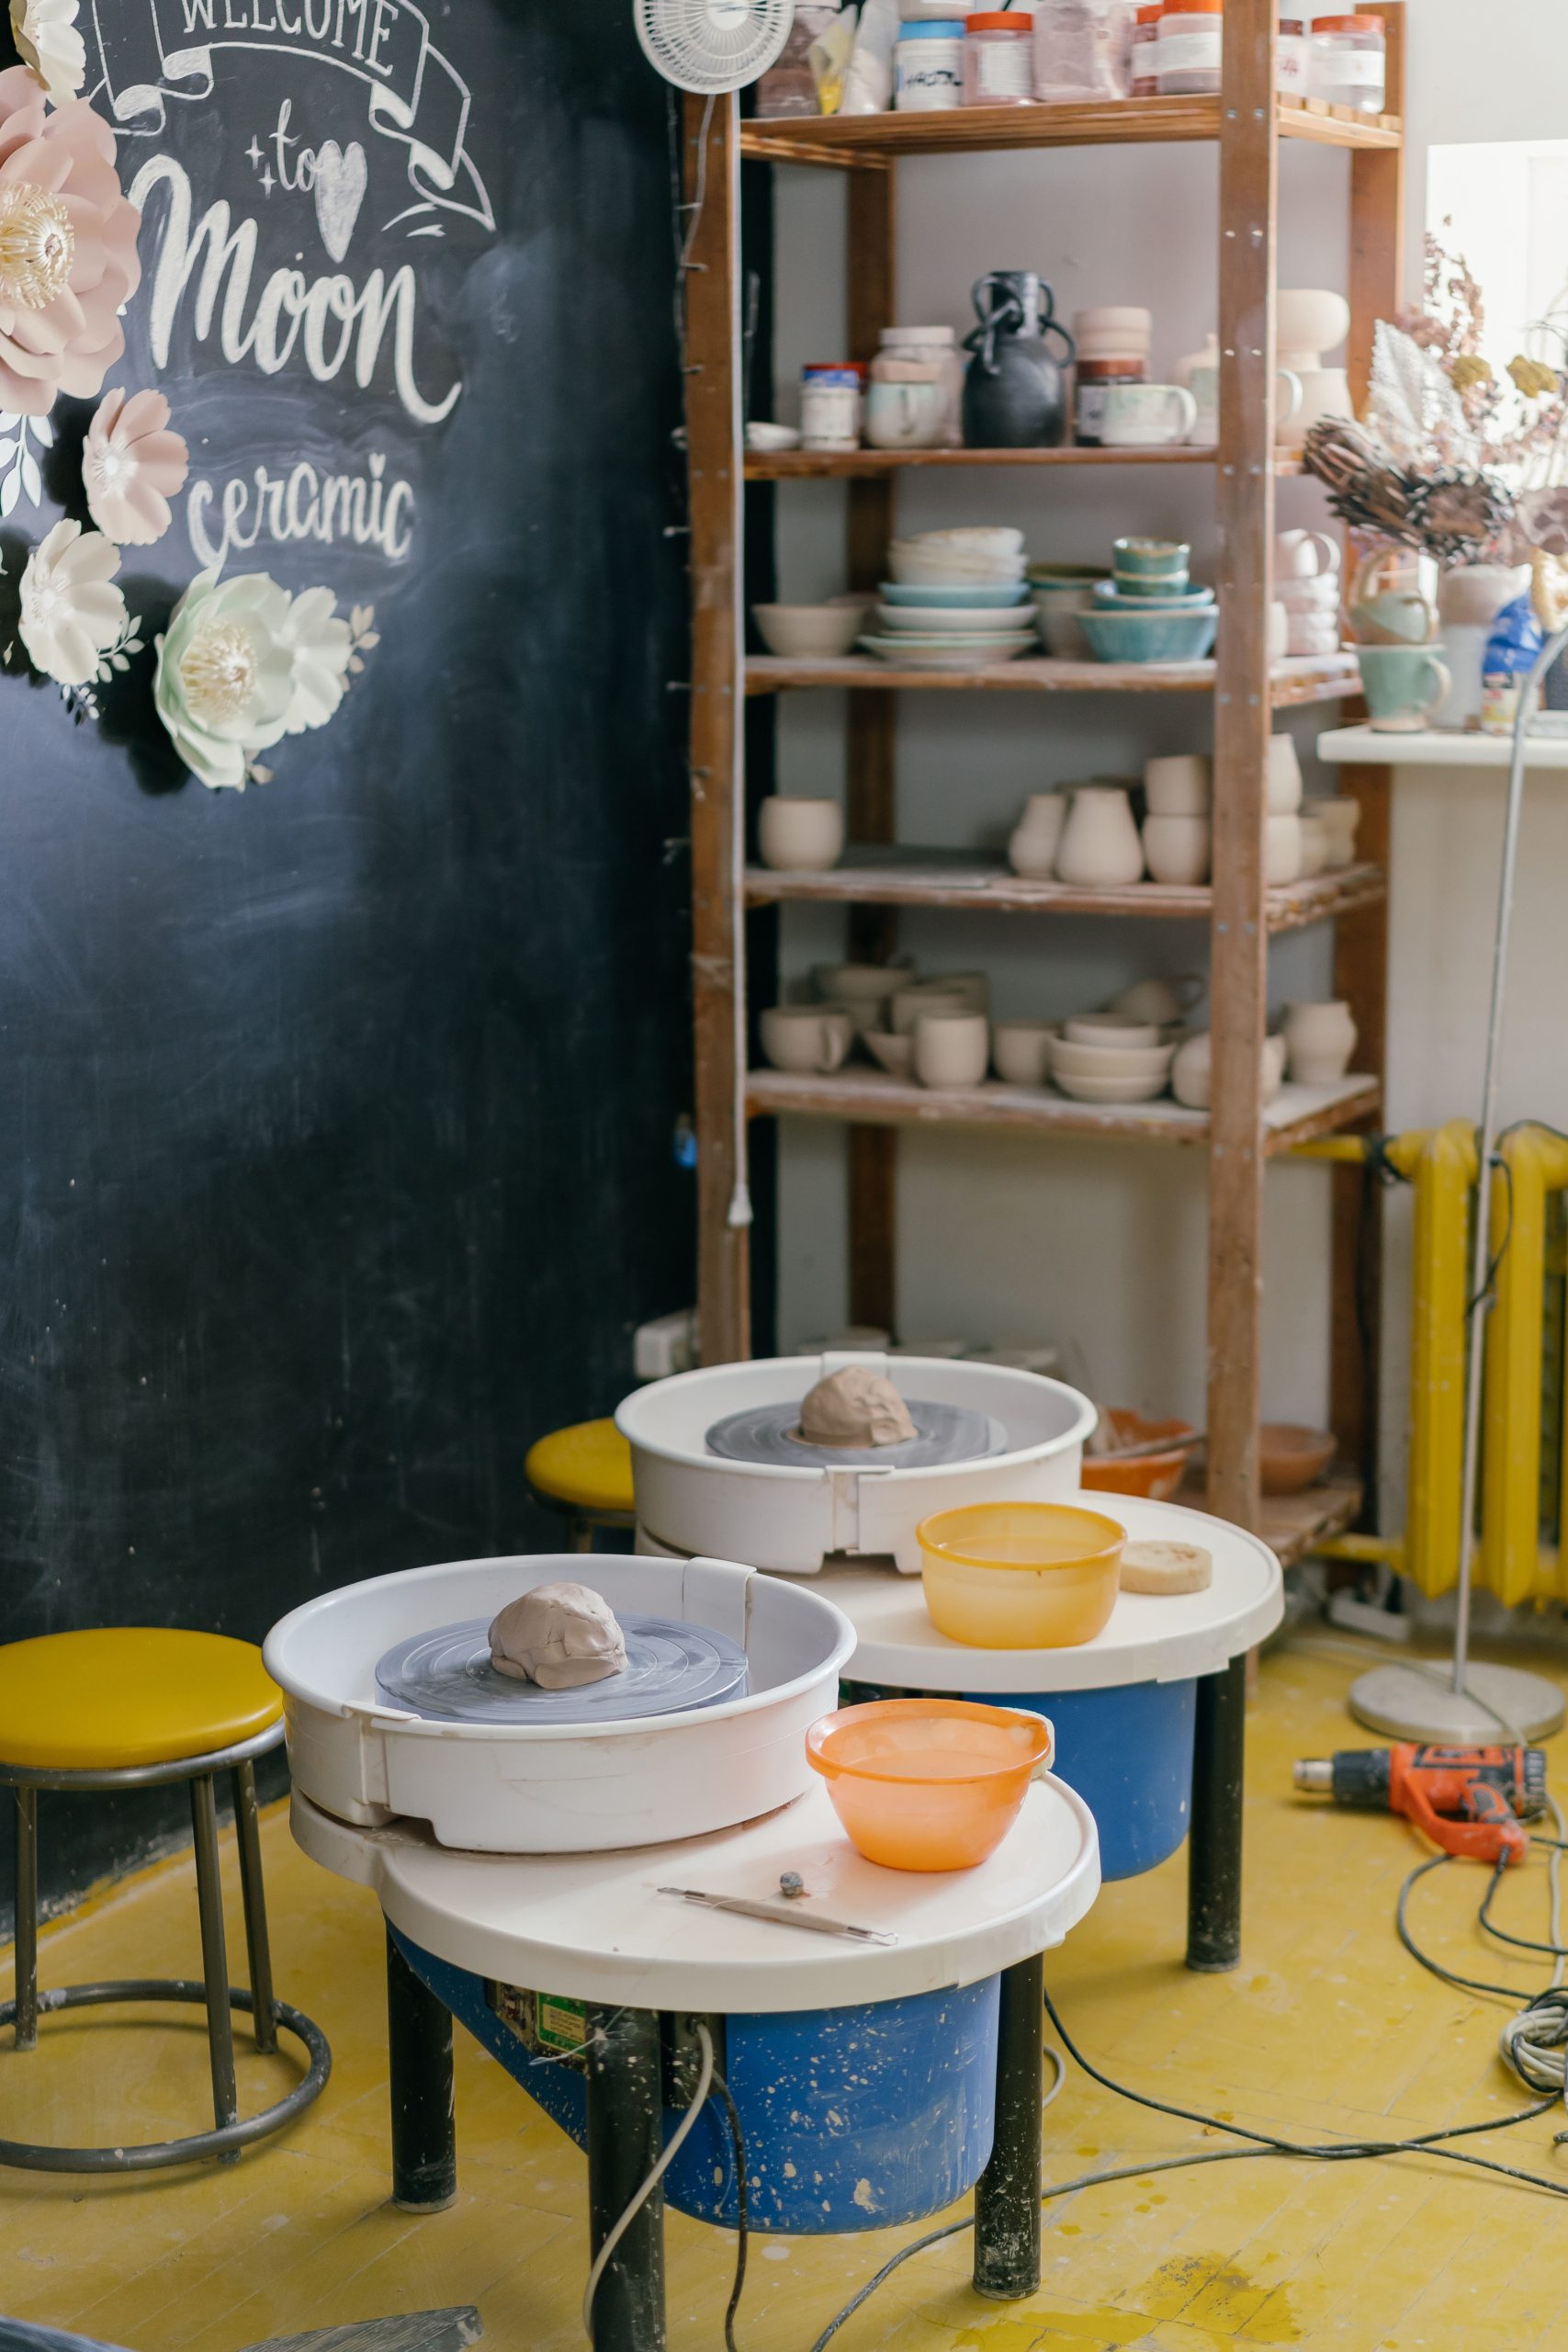
You can create a chalkboard wall like this in a weekend. Here’s a mini guide:
- Prep the wall: Clean the wall thoroughly and let it dry. Patch any holes and sand them smooth. Tape off the edges of your desired chalkboard area with painter’s tape. (Time: 1 hour)
- Prime: Apply one coat of a good quality primer. This is crucial for adhesion and a smooth final finish. Let it dry completely. (Time: 30 mins + 2-4 hours dry time)
- First Coat: Stir the chalkboard paint thoroughly. Apply the first coat with a foam roller for a texture-free finish, using long, even strokes. (Time: 45 mins)
- Second Coat: After the first coat is dry (check can for times), apply a second coat in the opposite direction (e.g., horizontal if you did vertical first) to ensure full coverage. (Time: 45 mins + dry time)
- Cure and Condition: Let the paint cure for at least 3 days. Before you write on it, condition the surface by rubbing the side of a piece of chalk over the entire board and then erasing it. This prevents your first drawings from ‘burning’ into the paint. (Time: 15 mins)
Estimated Material Cost: $50 – $100
9. Pottery Workshop Featuring Warm Wood and a Stone Accent Wall
This space feels so authentic and grounded thanks to a masterful mix of natural textures. The key principle at play is contrast. The rough, cool texture of the light grey stone block wall is balanced by the warmth and smoothness of the wooden paneled ceiling. The organic, earthy forms of the terracotta pottery provide a third layer of texture. This repetition of natural materials in different forms (stone, wood, clay) creates a cohesive and deeply calming environment.
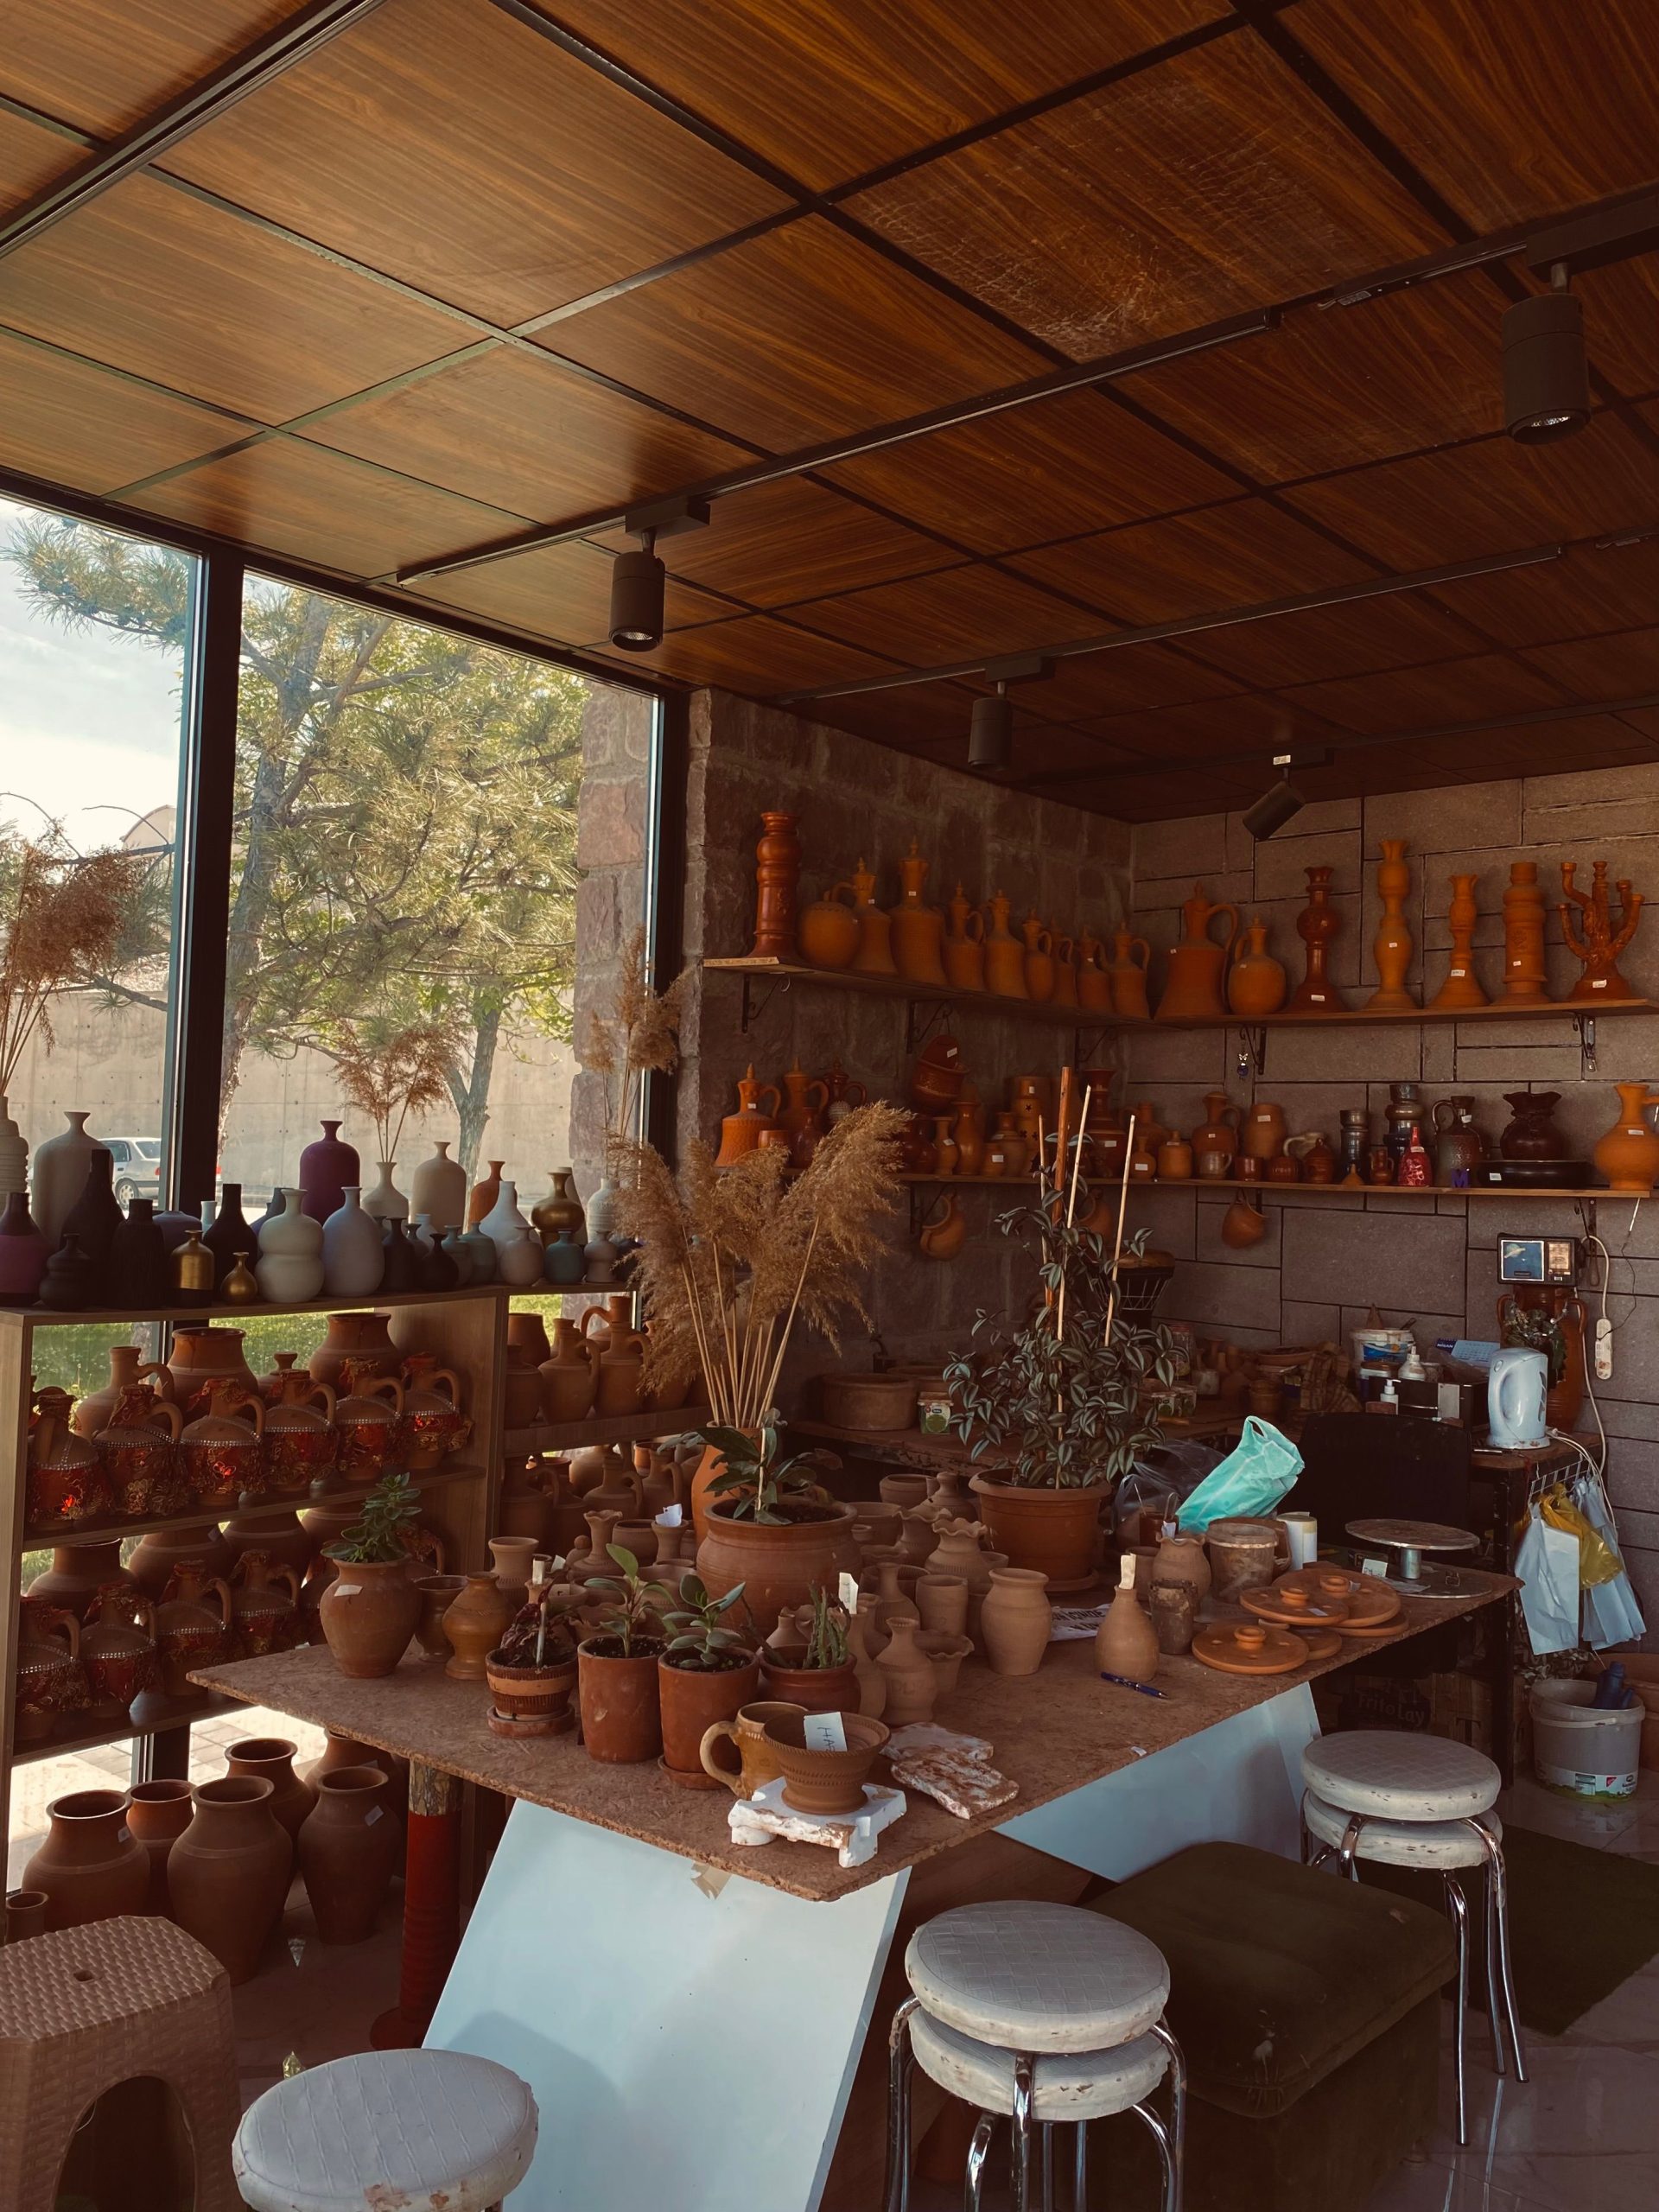
While a wooden ceiling adds incredible warmth, it requires some thought in a workshop. Dust, especially fine clay or wood dust, will eventually settle on the panels and in any grooves. Regular dusting with a high-reach extension duster (at least once a month) is necessary to keep it looking clean. Be mindful of humidity; in a pottery studio with lots of water use, ensure the wood is properly sealed and the space is well-ventilated to prevent any chance of mold or warping over time.
10. Organized Woodworking Haven with a Tool Pegboard
When creating a tool wall, think like a chef arranging their knives. You want your most frequently used tools within easy reach, in what’s called the ‘primary zone’—the area between your shoulder and waist height. Less-used or specialty tools can go higher up or lower down. Also, don’t just hang things randomly. Group tools by function (e.g., all chisels together, all pliers together) to make finding what you need instant and intuitive. The wooden racks here are perfect for this.

Before you commit to a full pegboard wall, run through this quick checklist:
- Measure your tools: Do you have long saws or short screwdrivers? Lay out your most-used tools on the floor to understand the total area you’ll need.
- Check your wall studs: A pegboard loaded with heavy tools needs to be securely anchored into wall studs, not just drywall. Use a stud finder to map them out first.
- Plan for power: Notice the power outlet is integrated into the design. Will you need to work around existing outlets, or do you want to add power as part of the project?
- Consider depth: The tools will stick out from the wall. Make sure the pegboard is in an area where you won’t constantly be bumping into it.
11. Woodworker Amidst Sawdust and Dark Machinery
Sawdust is the glitter of the workshop, but it’s also a serious consideration. The amount of dust shown here is an indicator of heavy work, but it’s also a safety hazard. Fine wood dust is combustible and harmful to breathe. This image is a good reminder that a robust dust collection system—not just a shop vac, but a dedicated system with a cyclone separator and proper ducting to your main machines—is one of the most important investments you can make in a serious woodworking shop.
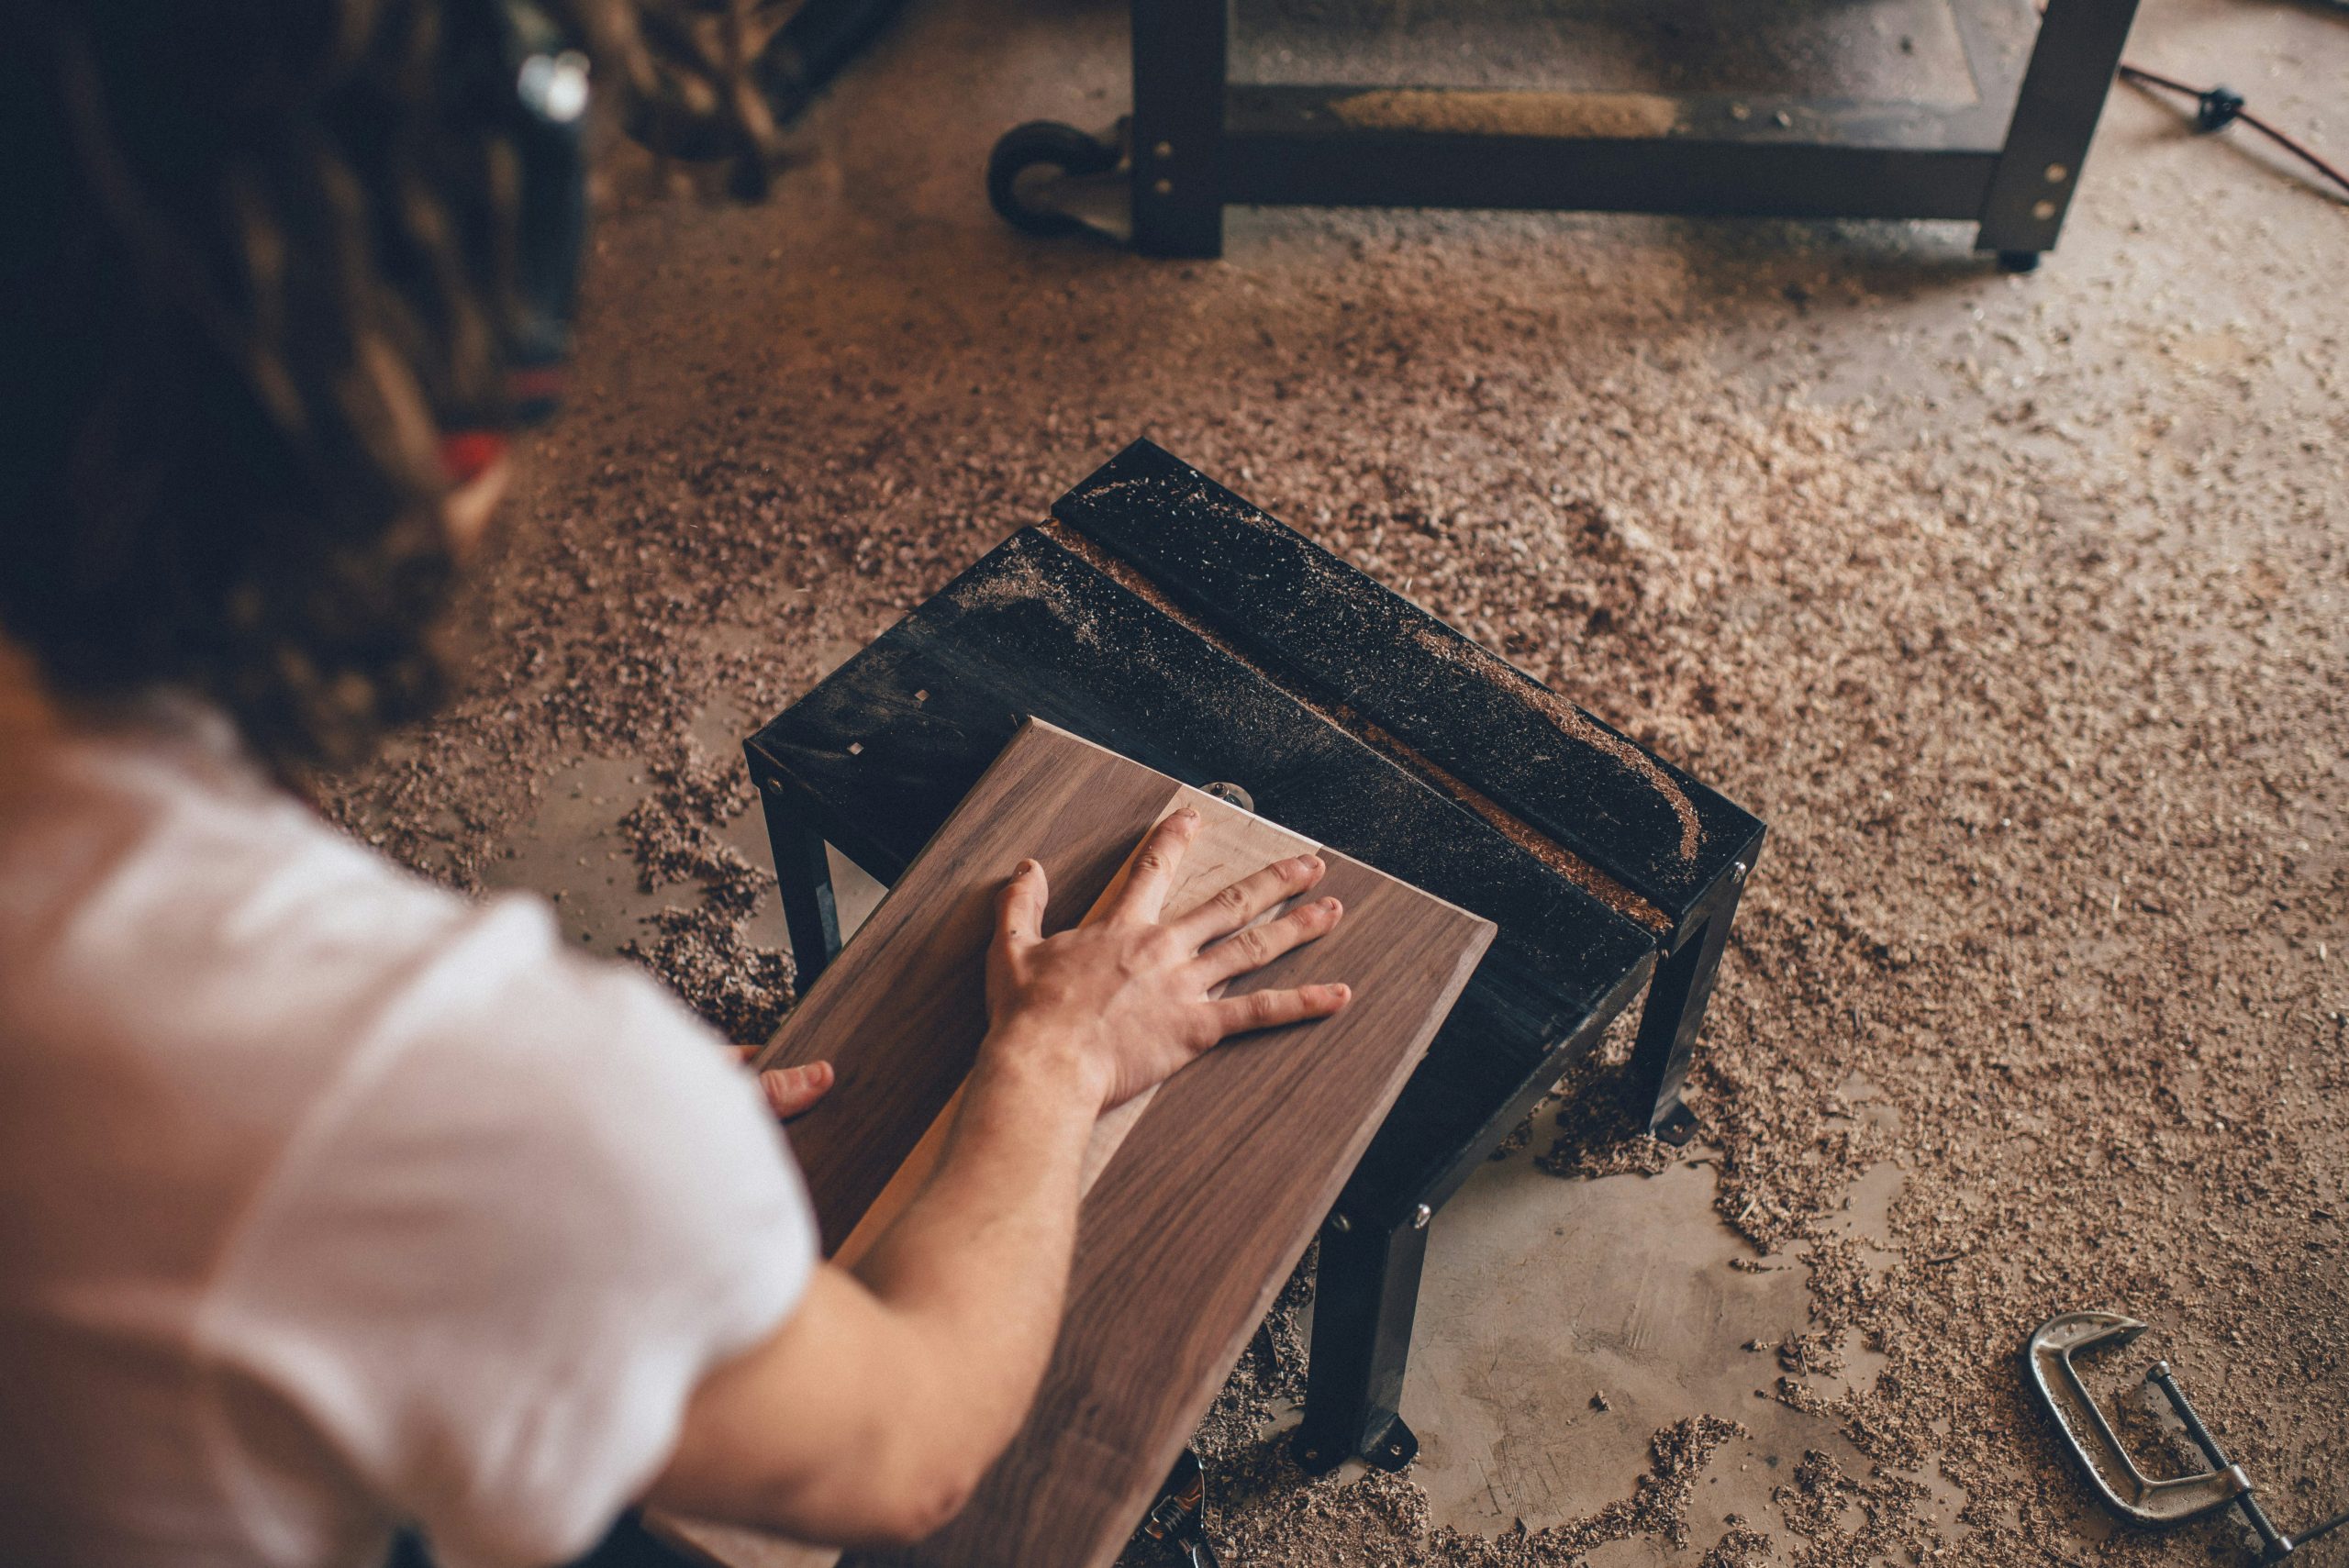
The most important element in this scene isn’t the wood or the machinery, but the sawdust itself. It’s the evidence of work. It adds texture, story, and a sense of dynamic action to an otherwise static shot of a person at a workbench. Without the generous coating of light brown sawdust on the floor, on the black machinery, and in the air, you wouldn’t have the same immediate understanding that this is a space for serious, hands-on creation.
12. Dusty Woodworking Shop with Concrete Walls and Natural Light
This design works because it embraces its raw, industrial nature instead of trying to hide it. The unpainted concrete walls and floor aren’t seen as unfinished; they’re the rugged backdrop for the warm, natural wood being worked. The beauty comes from the contrast between the cold, hard concrete and the warm, soft wood. The visible electrical conduit isn’t hidden but becomes part of the industrial aesthetic. It’s an honest and functional space that prioritizes making over decorating.
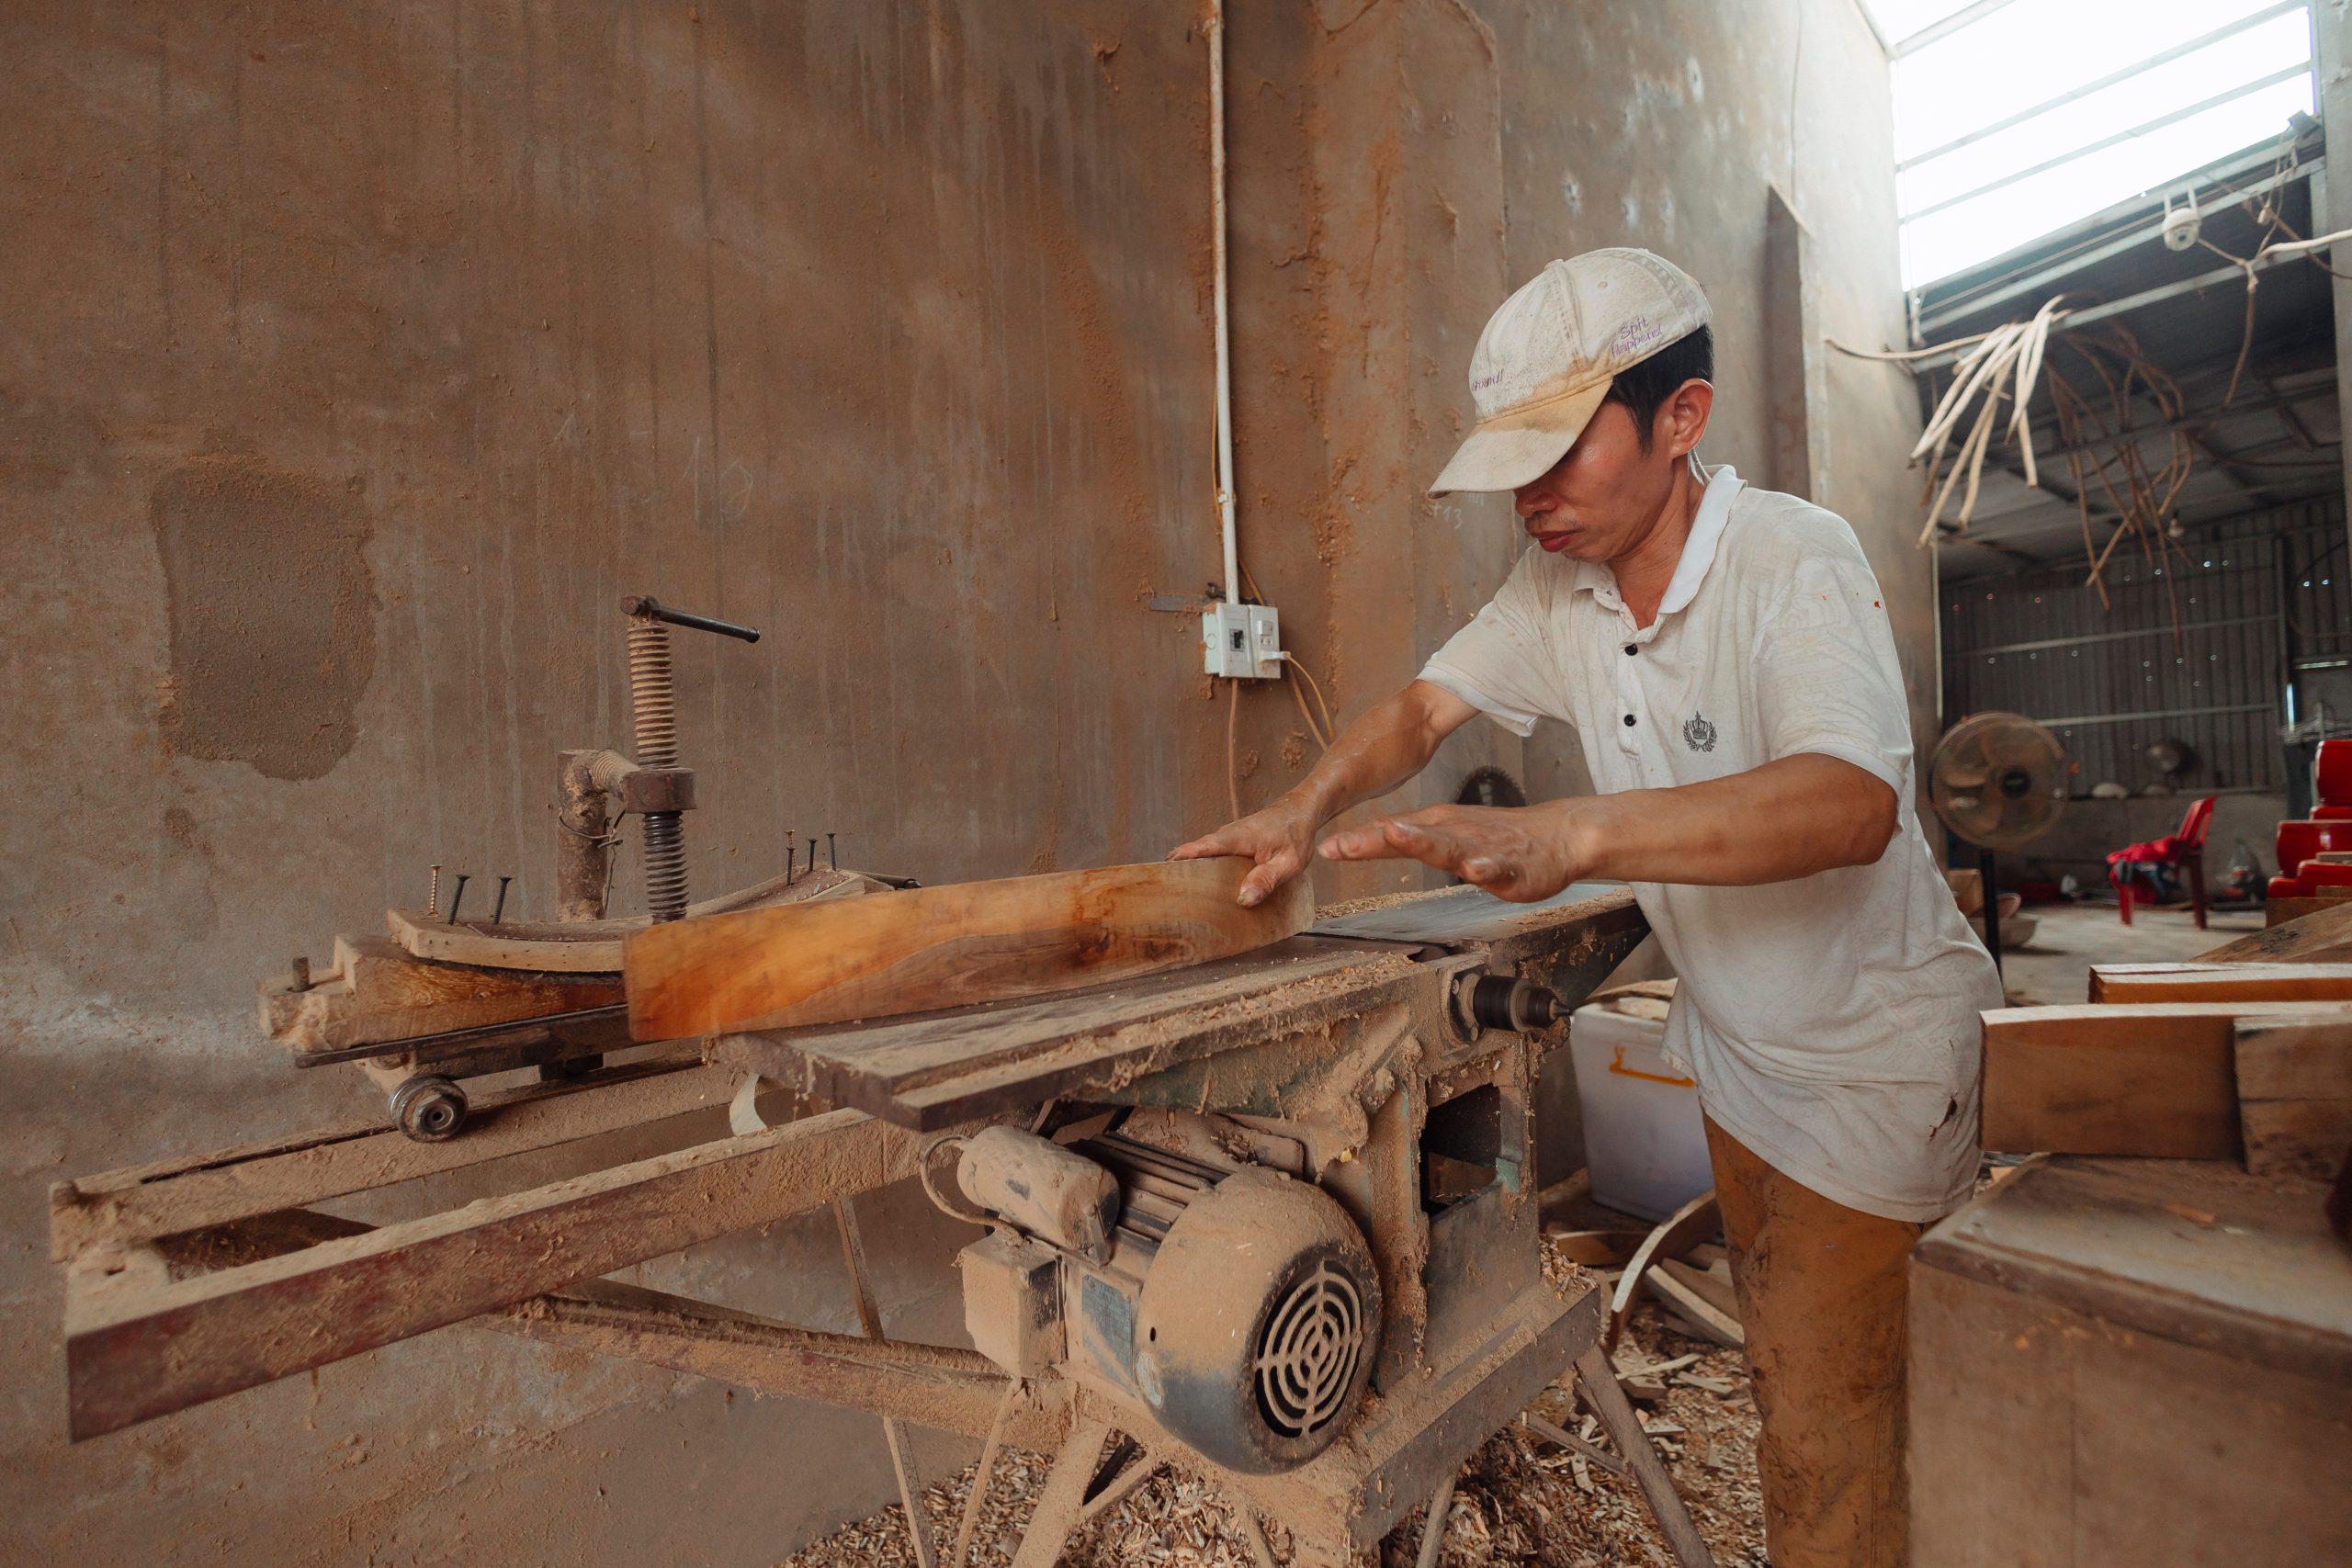
You don’t need a fancy space to get this vibe; in fact, the opposite is true. Unfinished basements or garages are the perfect starting point. Instead of spending money on drywall and paint, invest in what matters: good lighting and dust collection. You can find older, heavy-duty woodworking machines like the one pictured on Facebook Marketplace or at estate sales for a fraction of the price of new equipment. This look is about celebrating the grit, not spending a fortune to conceal it.
13. Industrial Workshop with Exposed Ductwork and Grid Windows
An industrial aesthetic like this thrives on volume. To pull off the look with exposed overhead ductwork, you need significant ceiling height. A minimum of 10 feet is recommended, but 12-15 feet is ideal to ensure the ducting doesn’t feel oppressive or low. The large grid windows are also key; they require a substantial wall area. This look is best suited for larger spaces like a converted garage, a commercial bay, or a basement with unusually high ceilings, at least 400 square feet or more.
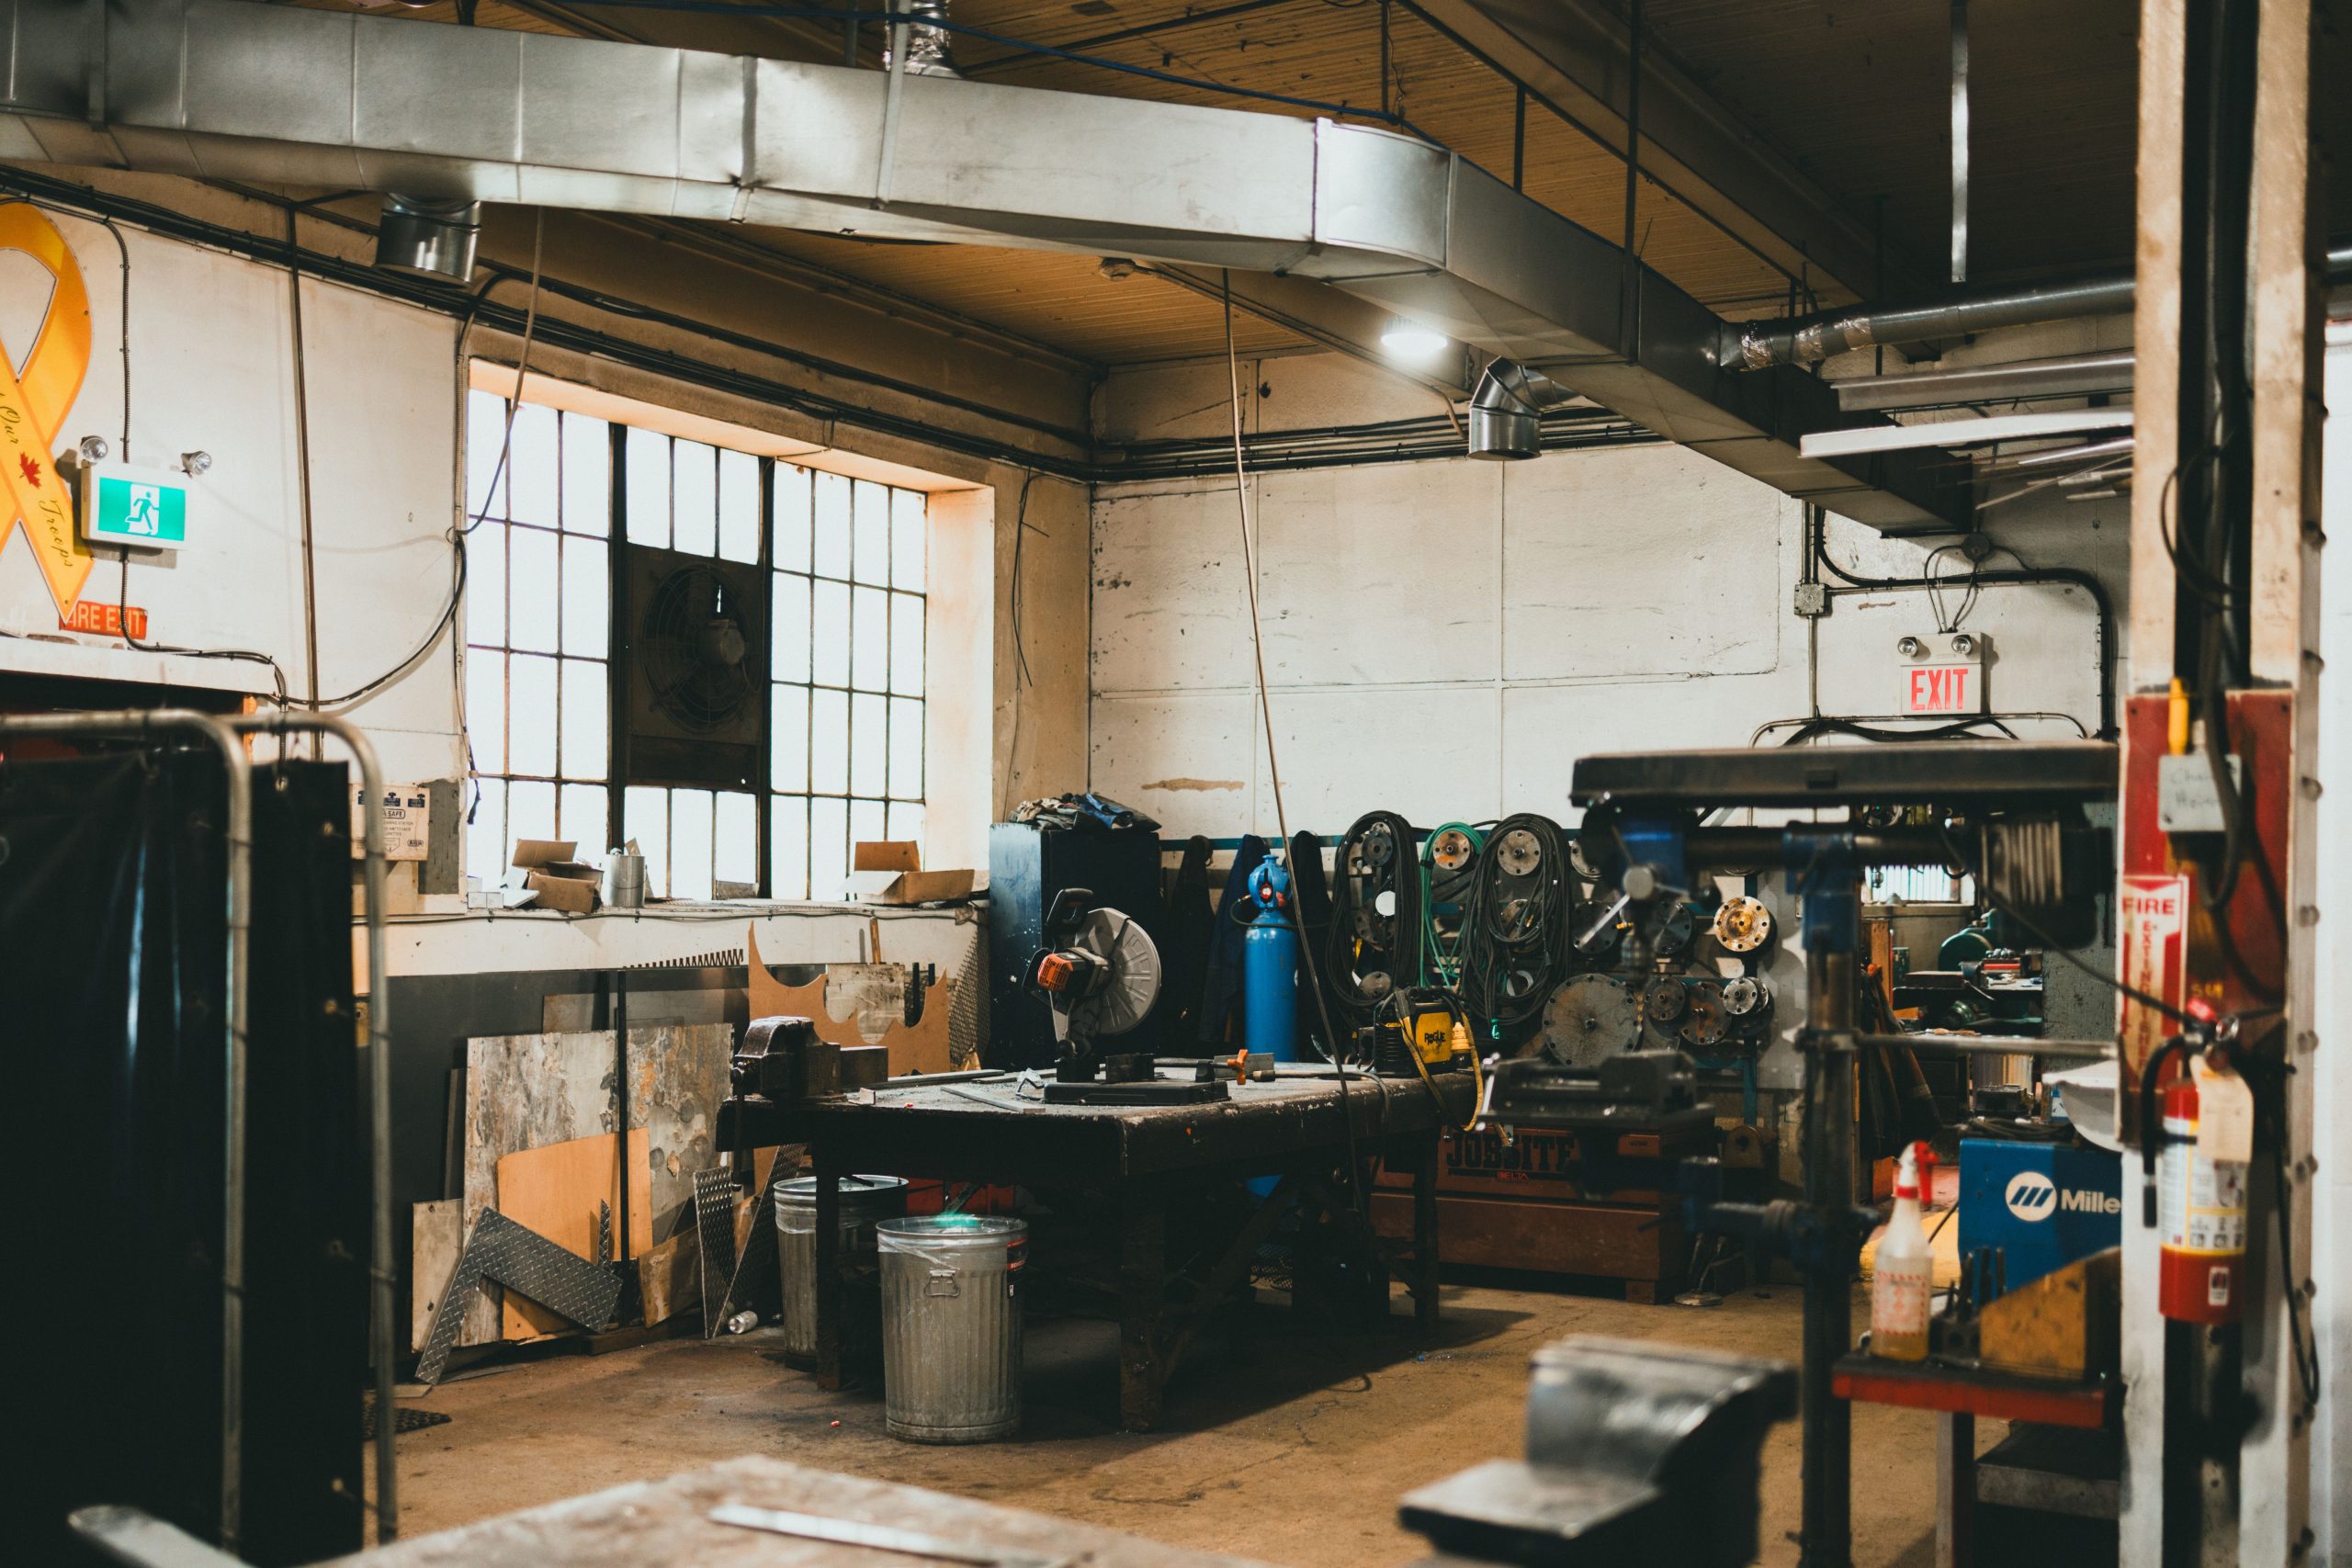
This room’s formula is straightforward industrial purism: 60% raw structural elements (exposed ductwork, concrete floor, wood plank ceiling) + 30% utilitarian function (metal tools, equipment, trash cans) + 10% unfinished texture (rough off-white walls). The key is that nothing is trying to be pretty. The function *is* the form. You could paint the walls a different color, but the core identity would remain as long as the structural honesty is preserved.
14. Classic Car Workshop with Exposed Brick and Arched Windows
The design here is a masterclass in creating atmosphere. The workshop doesn’t just store cars; it honors them. The exposed red-brown brick and grand arched windows provide a sense of history and permanence, acting as a beautiful frame for the classic vehicles. The high ceilings with visible metal beams and industrial pendants add to the sense of scale and importance. It feels less like a garage and more like a museum or gallery dedicated to automotive history. Compare this to the modern, clean look of Idea #16.

This style, often called ‘industrial heritage,’ is trending because it taps into a desire for authenticity and story. In a world full of mass-produced items, spaces that celebrate history and craftsmanship feel special. The classic cars aren’t just vehicles; they are artifacts. The workshop itself, with its preserved architectural details like the brick walls and beams, becomes part of that narrative of quality and endurance. It’s about creating a space that has as much character as the projects within it.
15. Enthusiast’s Car Workshop with Red Tiled Walls and Arched Windows
The single detail that defines this space is the two-tone wall treatment. The combination of the practical, brick-like red tile on the lower half and the clean white paneling above is a deliberate and stylish choice. It’s both functional (the tiles are durable and easy to clean) and aesthetic, breaking up the vertical space and adding a huge dose of visual interest. It immediately communicates a level of care and design intent far beyond a standard garage painted a single color.

If you want to replicate a tiled wall look, consider using tile-effect wall panels instead of actual tiles. They are much faster and easier to install, require no grout, and are often more impact-resistant, which is a huge plus in a workshop environment. For the upper section, using pre-primed beadboard or V-groove panels is a great way to get that clean, paneled look without the labor of building a custom frame and panel wall.
16. Brightly Lit Industrial Vehicle Repair Workshop with Spray Booth
This workshop’s effectiveness comes down to one word: illumination. The extensive grid of overhead fluorescent lighting is the hero here. It banishes shadows and provides bright, even light across the entire space. This is critical for tasks like auto repair and painting, where seeing detail clearly is a matter of safety and quality. The choice of light gray floor tiles and white walls cleverly amplifies the lighting, reflecting it around the room to make the space feel even brighter and cleaner.
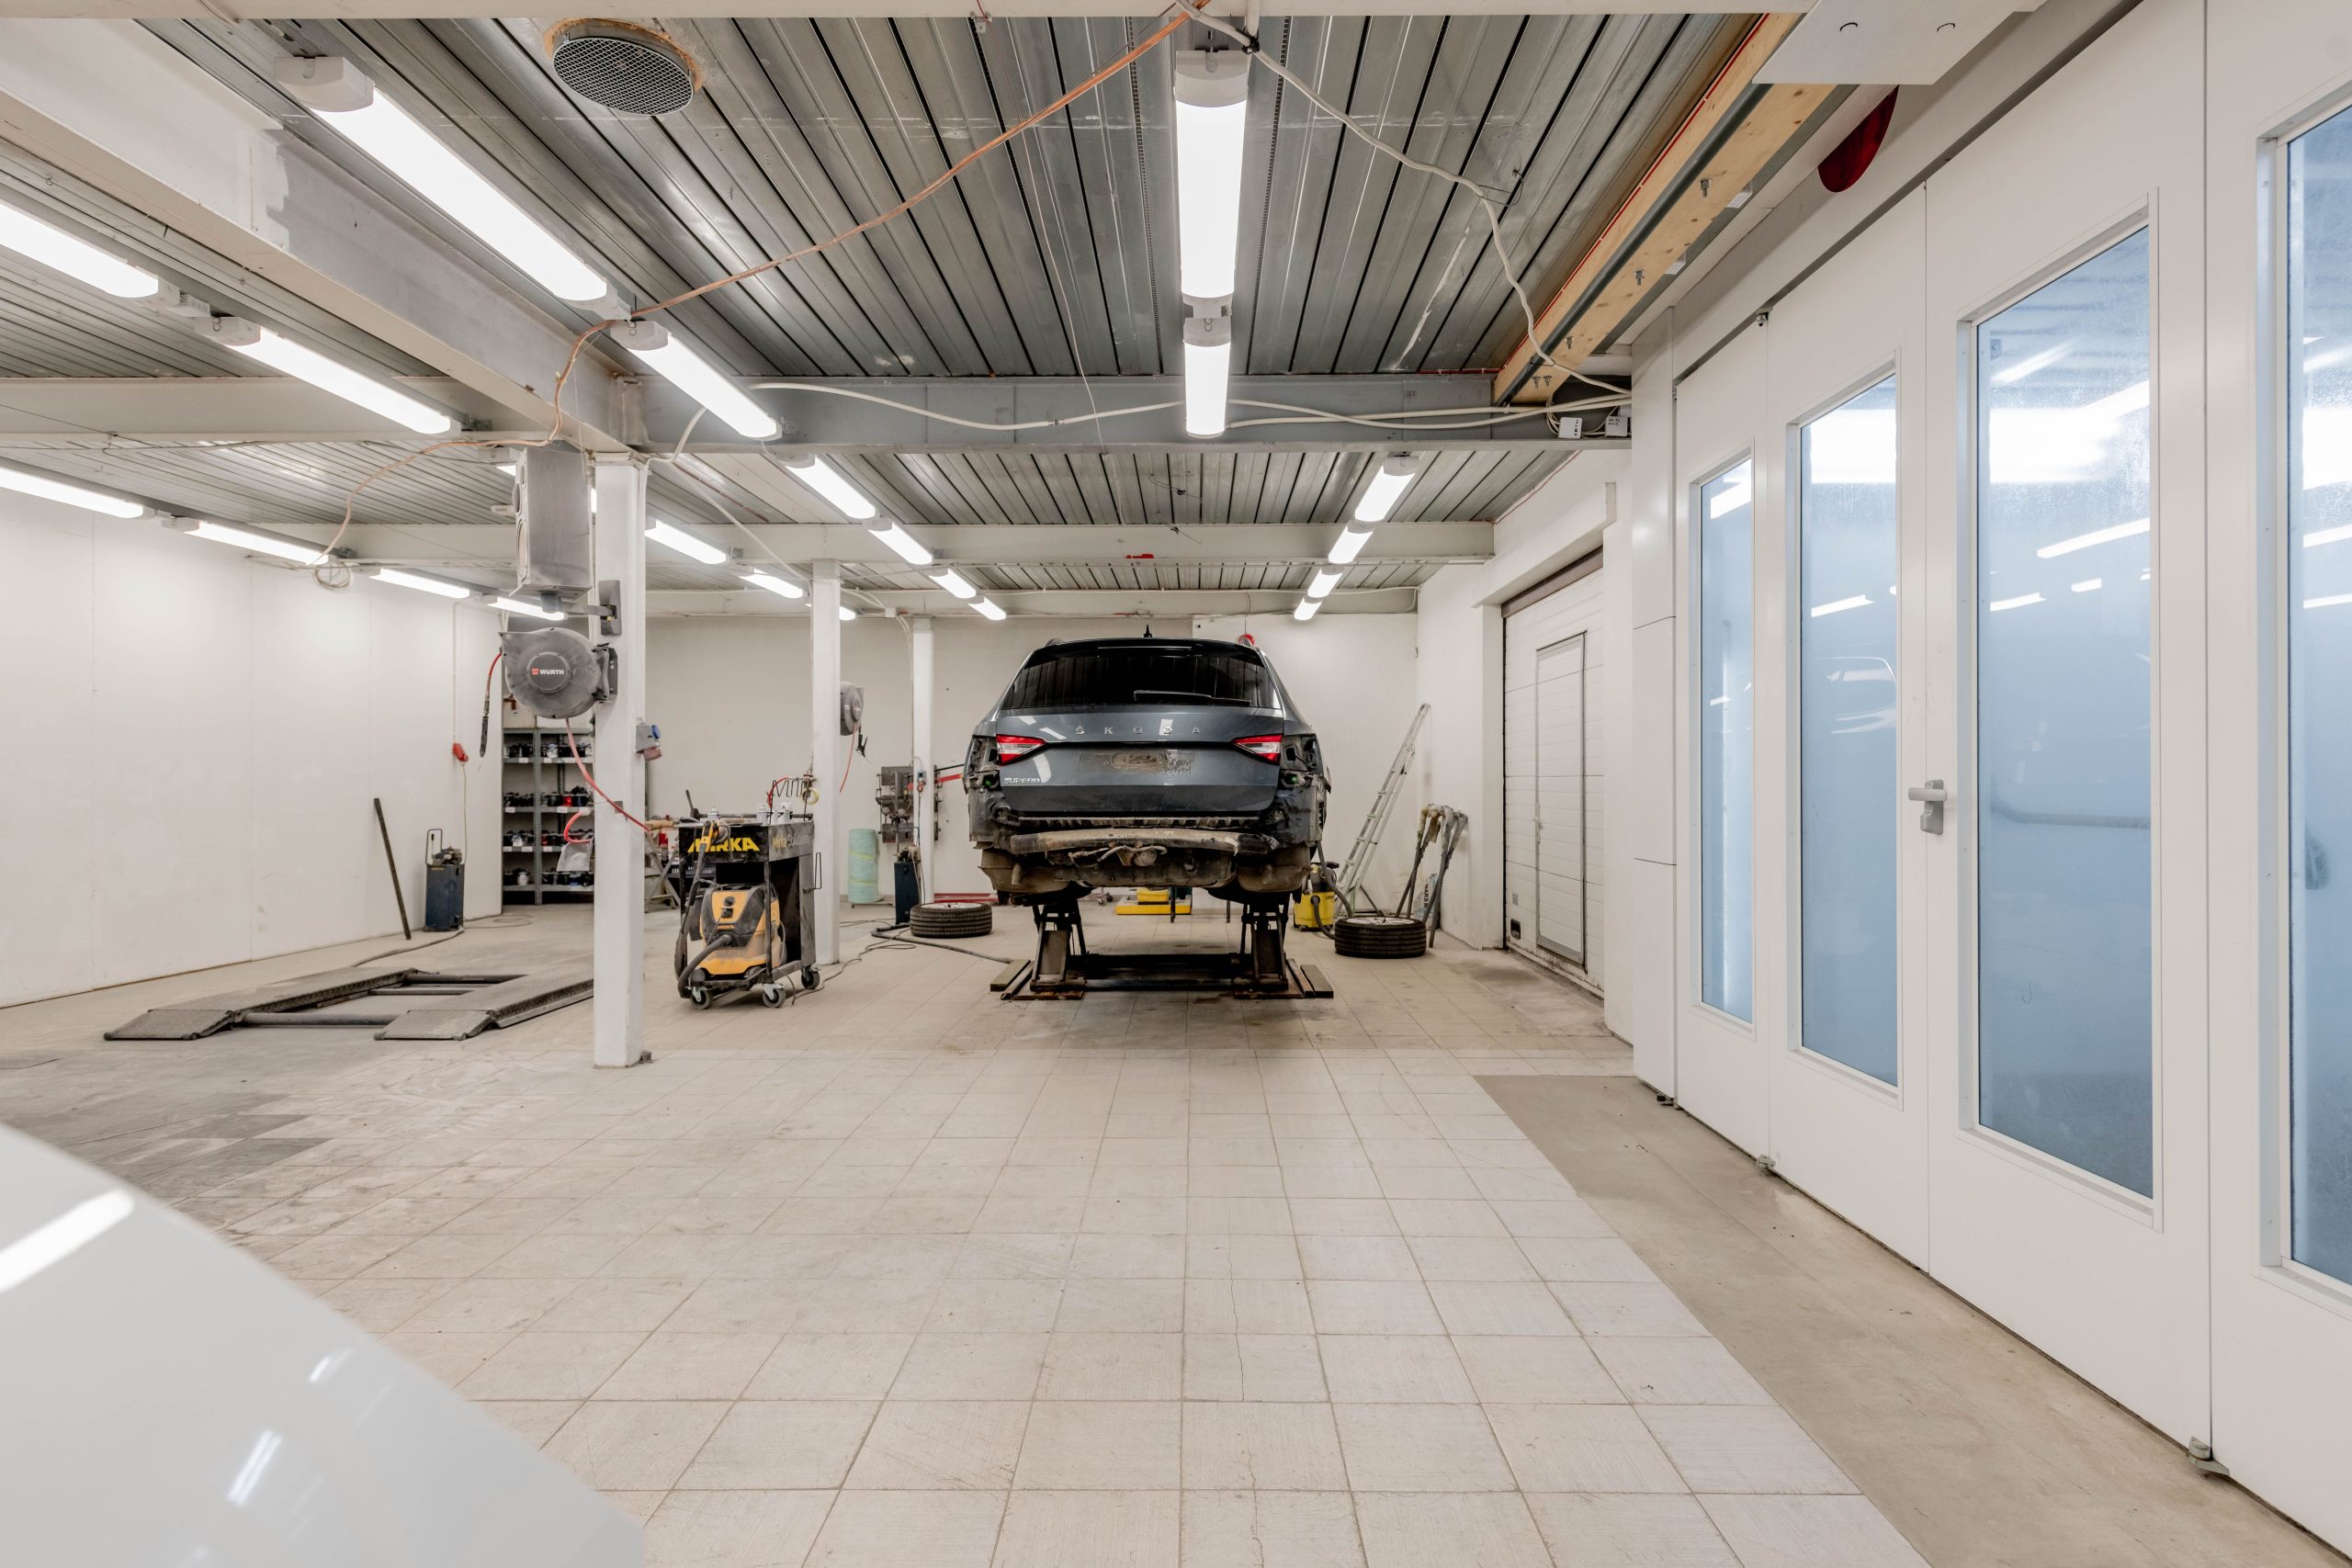
While a bright, clean space like this is amazing for detailed work, achieving it in a typical home garage can be a challenge. The sheer number of fluorescent fixtures required can be costly to install and run. Furthermore, light-colored, smooth-tiled floors show every drop of oil and speck of dirt, requiring constant cleaning to maintain this pristine look. It’s a high-performance environment, but it’s also high-maintenance compared to a standard concrete floor.
17. Functional Automotive Repair Bay with Overhead Strip Lighting
This is the quintessential formula for a no-nonsense, functional garage: 80% utilitarian hardware + 20% durable surfaces. The hardware consists of the overhead strip lights, metal workbenches, tool chests, and exposed conduits. The durable surfaces are the gray square floor tiles and plain walls. There’s zero fluff. The ‘style’ is born from pure function. To personalize it, you could change the 20% – for instance, swapping plain walls for a pegboard or adding posters, as seen here – but the utilitarian core remains.
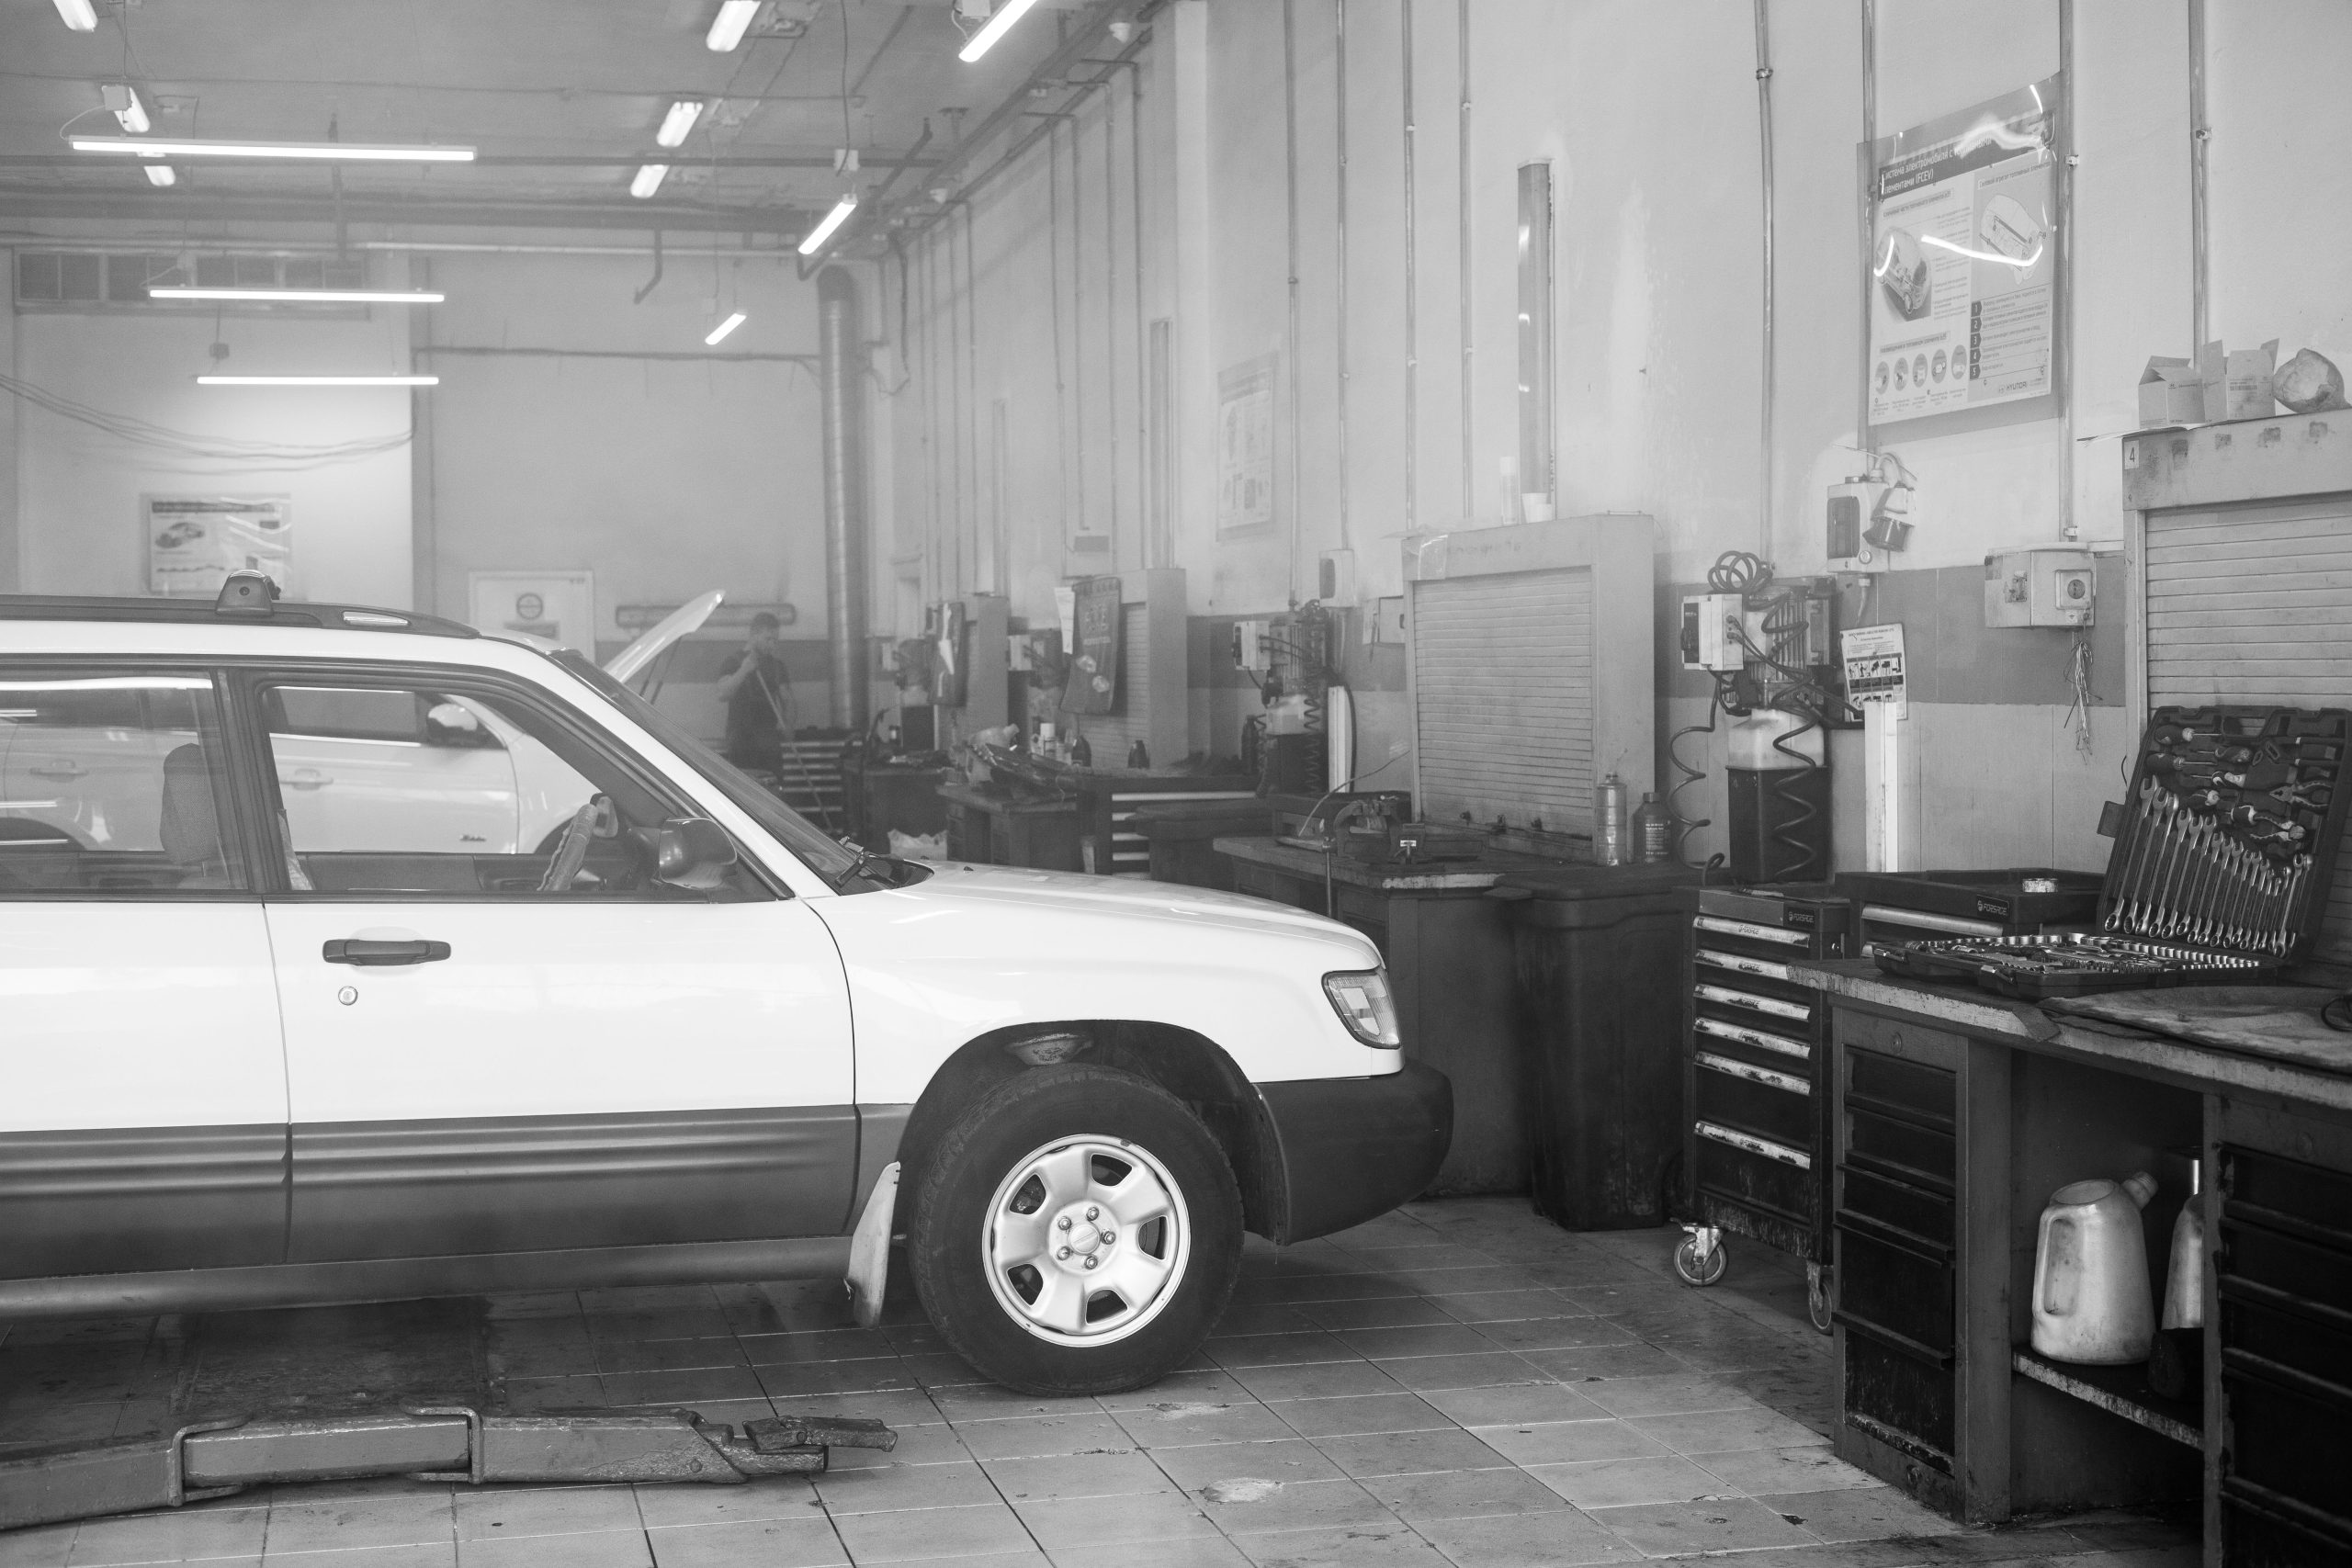
Here’s a budget reality check for outfitting a basic one-car bay like this. This is for the equipment, not the car or the building itself!
- Lighting (4-6 fluorescent strip lights): $300 – $600
- Main Furniture (2 metal workbenches/tool chests): $800 – $2,500
- Flooring (Industrial tiles for a 1-car garage): $500 – $1,500
- Miscellaneous (Wall posters, extension cords): $100 – $200
- TOTAL: $1,700 – $4,800
- Budget alternative: Look for used tool chests on Facebook Marketplace, opt for cheaper peel-and-stick vinyl floor tiles, and use simple shelving instead of full workbenches to cut costs by up to 60%.
18. Artist’s Desk with Patterned Fabric Swatches
This little corner works because it’s a perfect example of an ‘active inspiration’ board. The patterned fabric swatches aren’t just decoration; they are part of the creative process, pinned to the wall right in the artist’s line of sight. This direct link between inspiration (the fabric) and creation (the paint supplies on the desk) makes the space feel dynamic and productive. The strictly monochromatic palette of white, red-pink, and gray-blue keeps the visual clutter to a minimum, allowing the patterns to stand out.
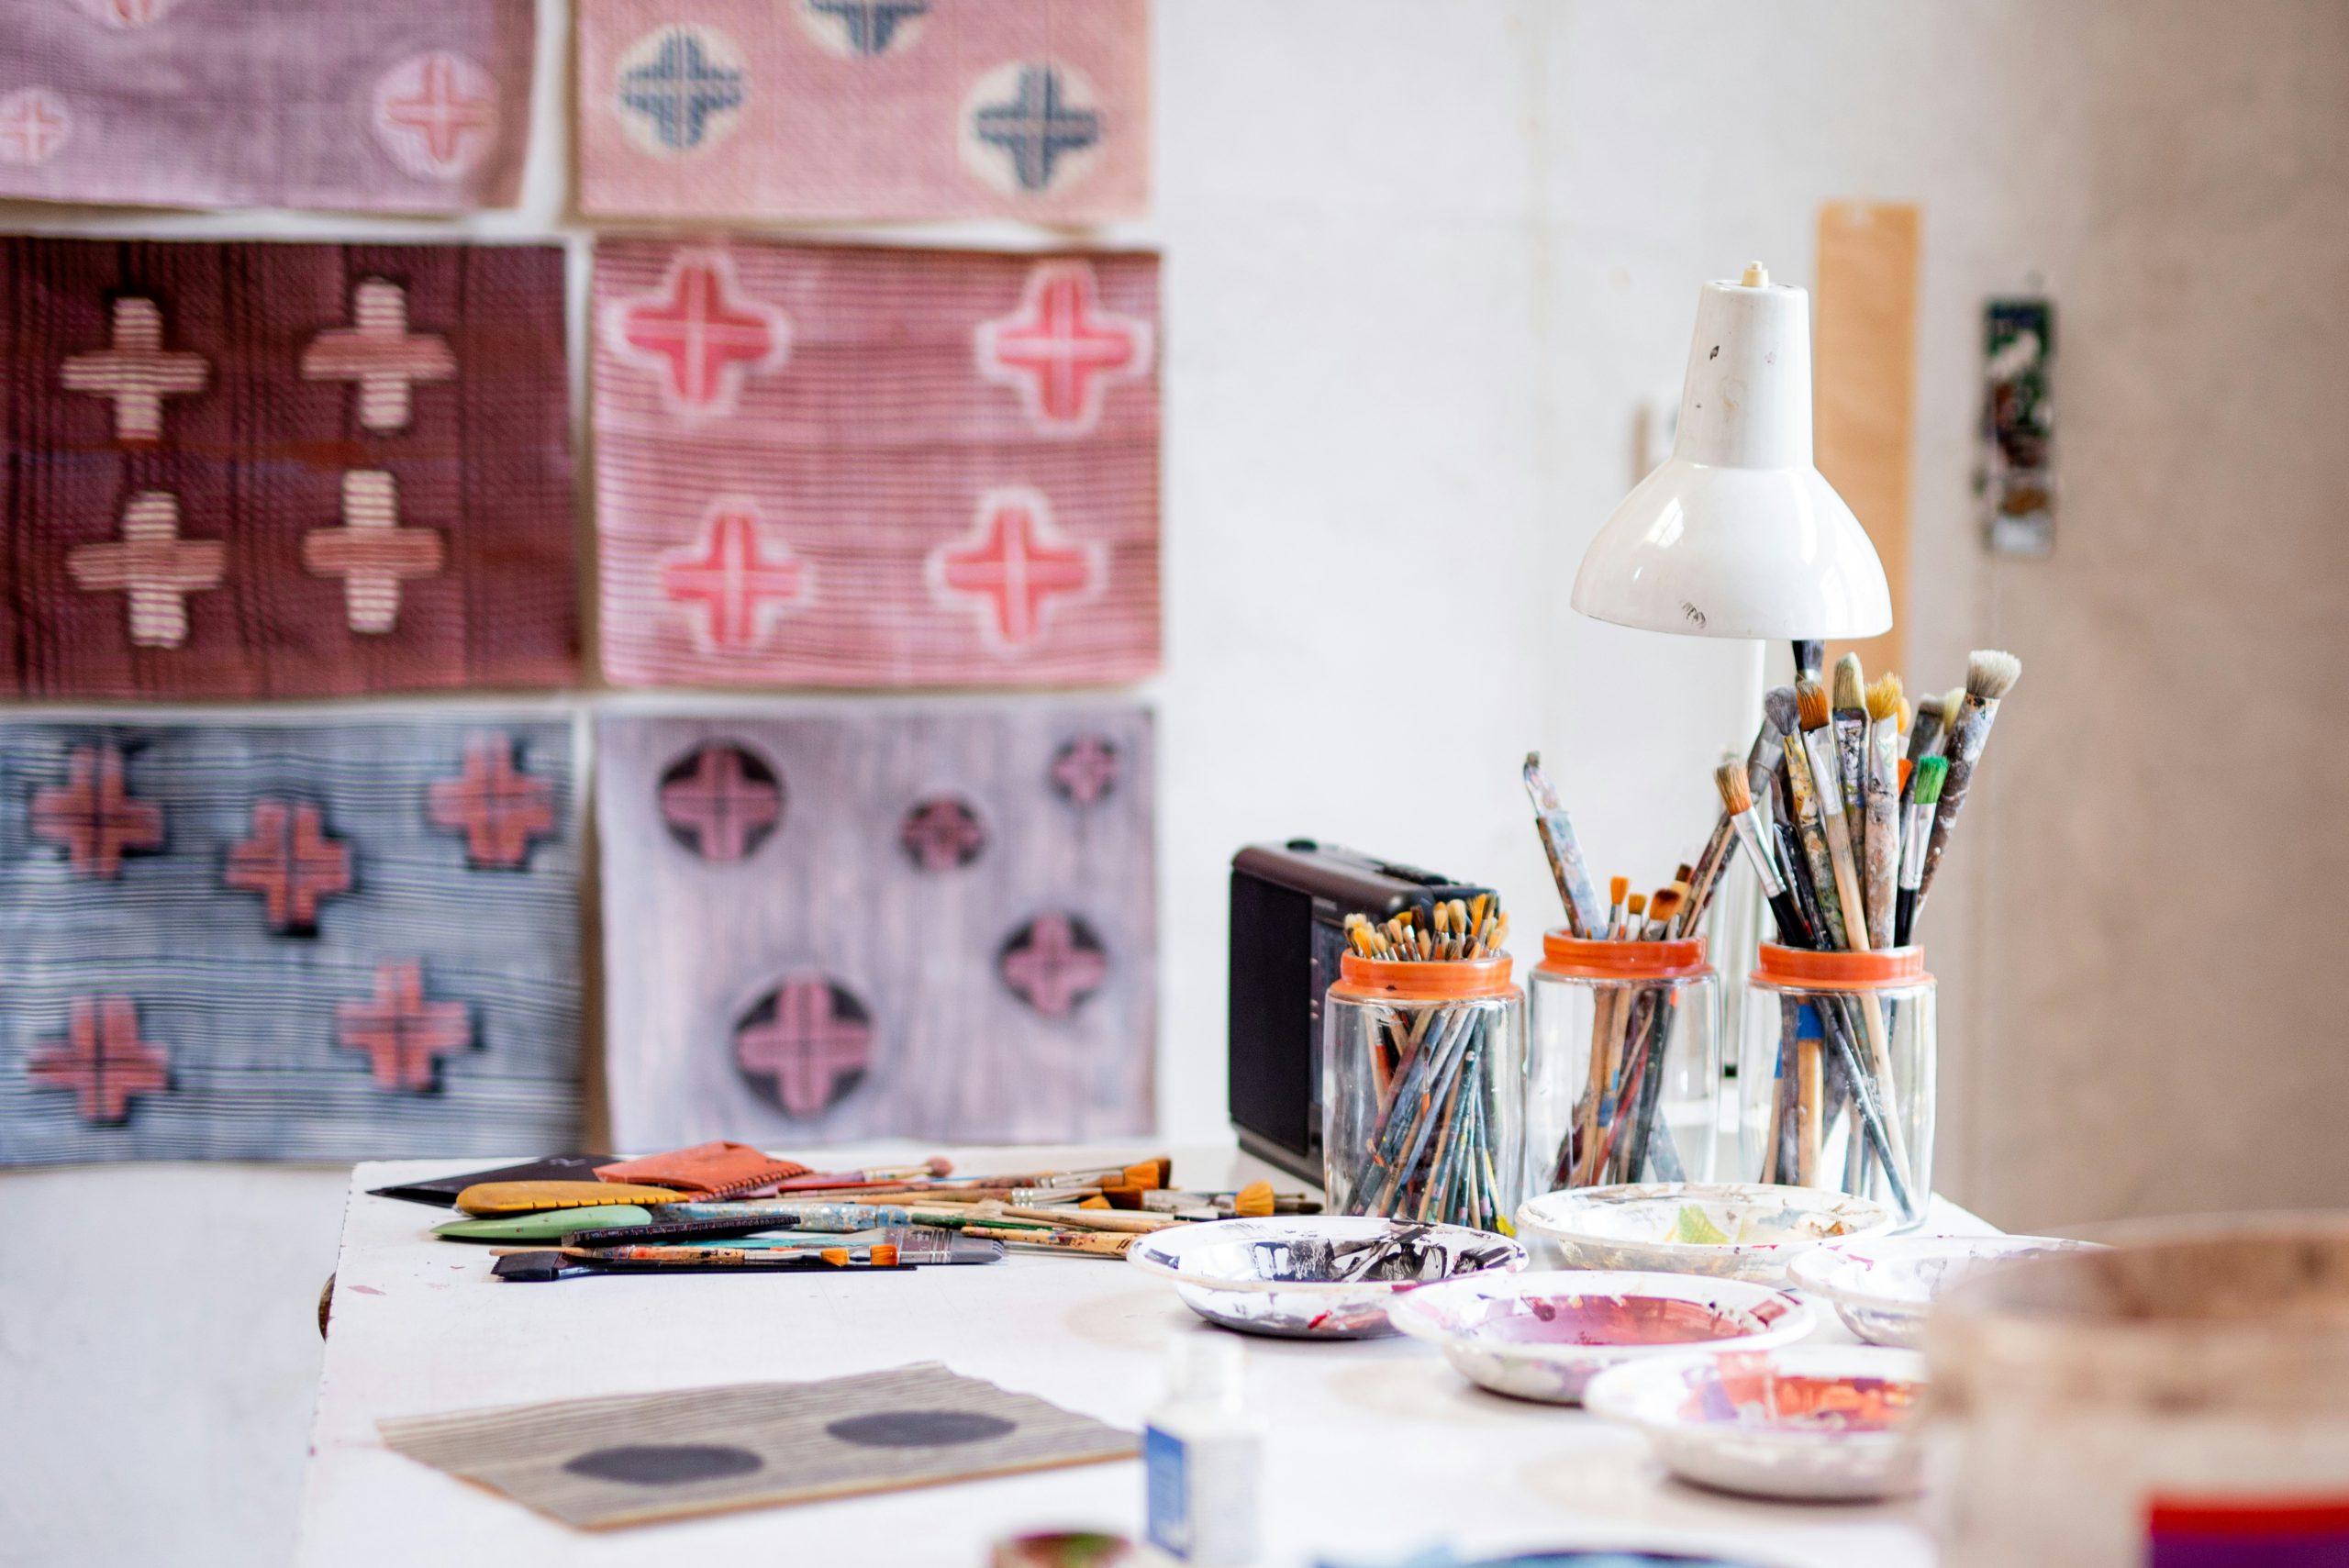
Creating your own reusable fabric swatch display is simple and won’t damage your walls. Here’s how:
- Get a cork board: Purchase a plain cork board from an office supply store. You can leave the frame as is or paint it to match your wall.
- Wrap your swatches: Cut small squares of cardboard (e.g., 4×4 inches). Wrap your fabric swatches around them and secure the fabric on the back with tape or a dab of hot glue. This gives them a neat edge and some rigidity.
- Mount the board: Securely hang the cork board on the wall above your workspace.
- Arrange and pin: Use simple push pins to attach your wrapped fabric swatches to the cork board. This allows you to easily swap them out as your projects and inspiration change.
Time estimate: 1 hour. Material cost: $20-$40.
19. Modern Art Workshop with White Stools and Dark Aprons
When setting up a group workshop, providing a complete, identical kit for each person creates a professional and equitable feel. Notice how each station has the same wooden easel, white stool, side table, and even a dark grey apron. This isn’t just about looking organized; it removes any potential friction about who has the ‘better’ spot or equipment. It allows participants to focus entirely on their own creative process from the moment they arrive.
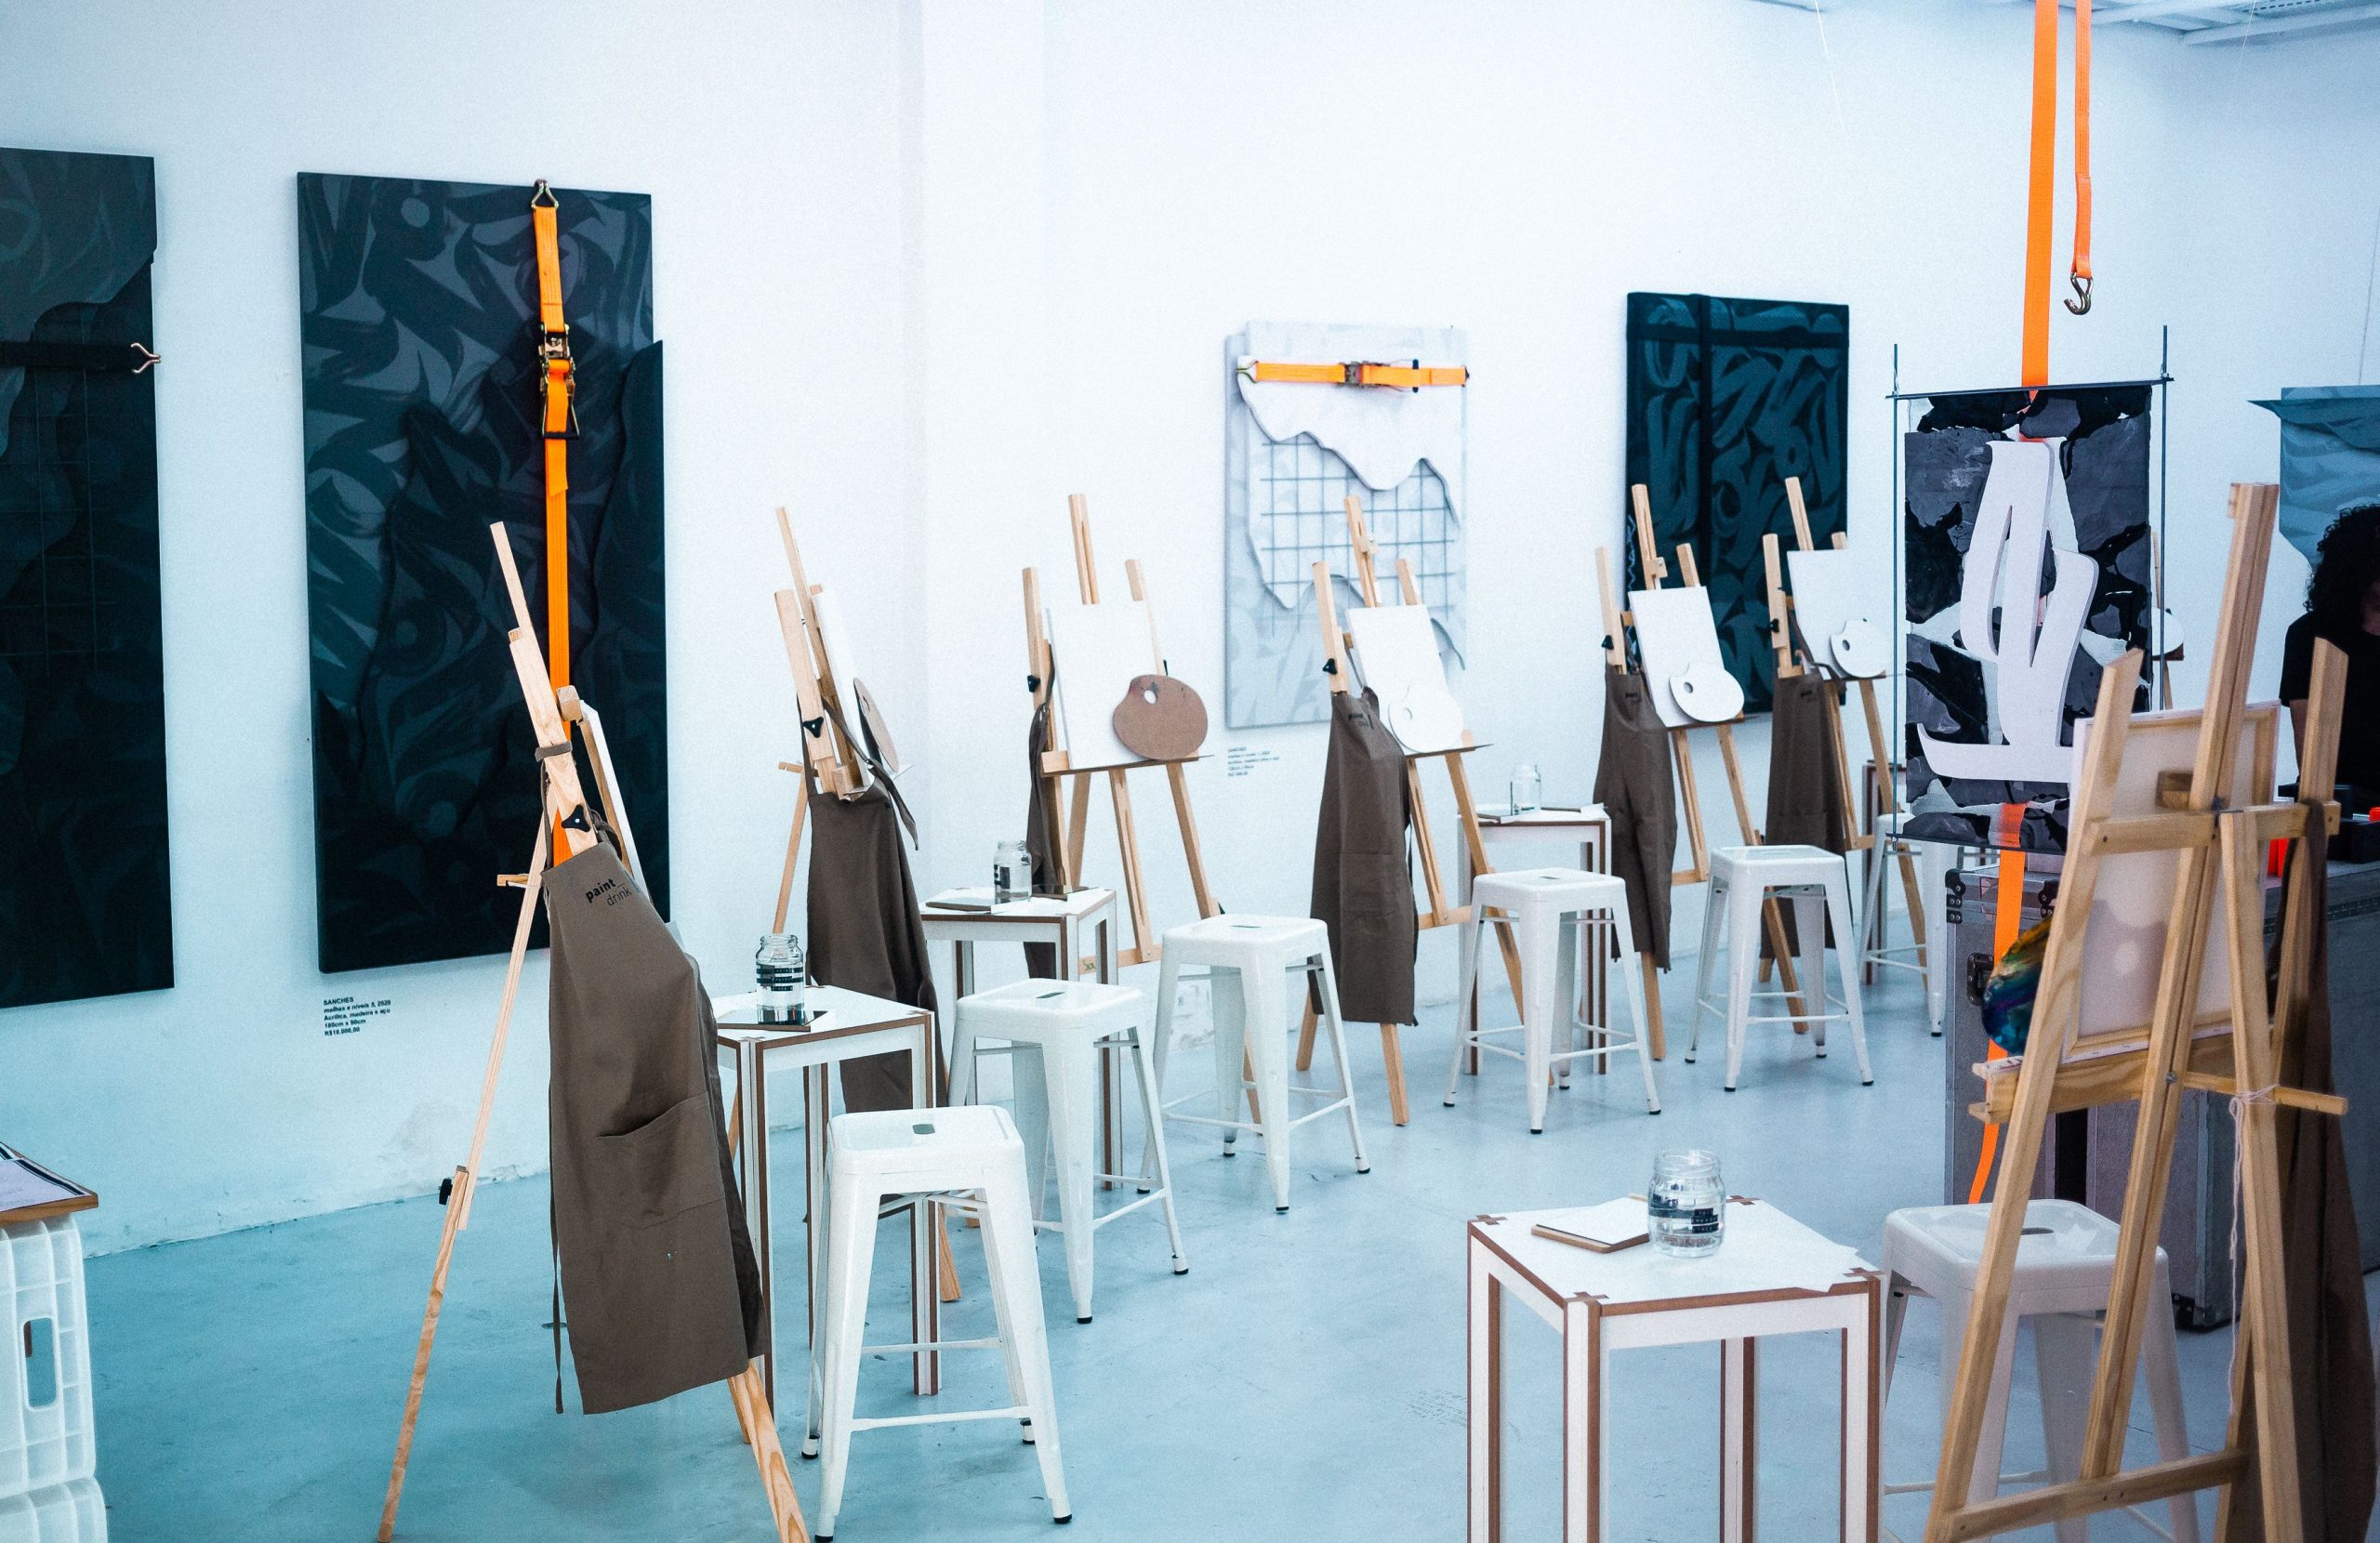
For a comfortable group art class setup like this, space is everything. You need to calculate at least 5-6 feet of width per person. This allows for the easel, the stool, the side table, and enough room for the person to step back from their work to get perspective without bumping into their neighbor. For a class of 4, you’d want a room that is at least 20-24 feet long, with a depth of at least 10 feet to allow for an instructor to walk around.
20. An Urban Loft Workshop with a Botanical Gallery Wall
This space nails the ‘organized chaos’ vibe through a clever use of repetition and a strict color palette. While the gallery wall features a wide variety of art, the consistent use of simple black or light wood frames ties it all together. The repetition of matte black in the pendant lamps, window frames, and chalkboard easel creates a strong visual anchor. The greens of the numerous plants provide a consistent, calming secondary color. This underlying structure is what makes the eclecticism feel intentional and chic, not just messy. It’s a more eclectic version of the artist’s space in Idea #3.
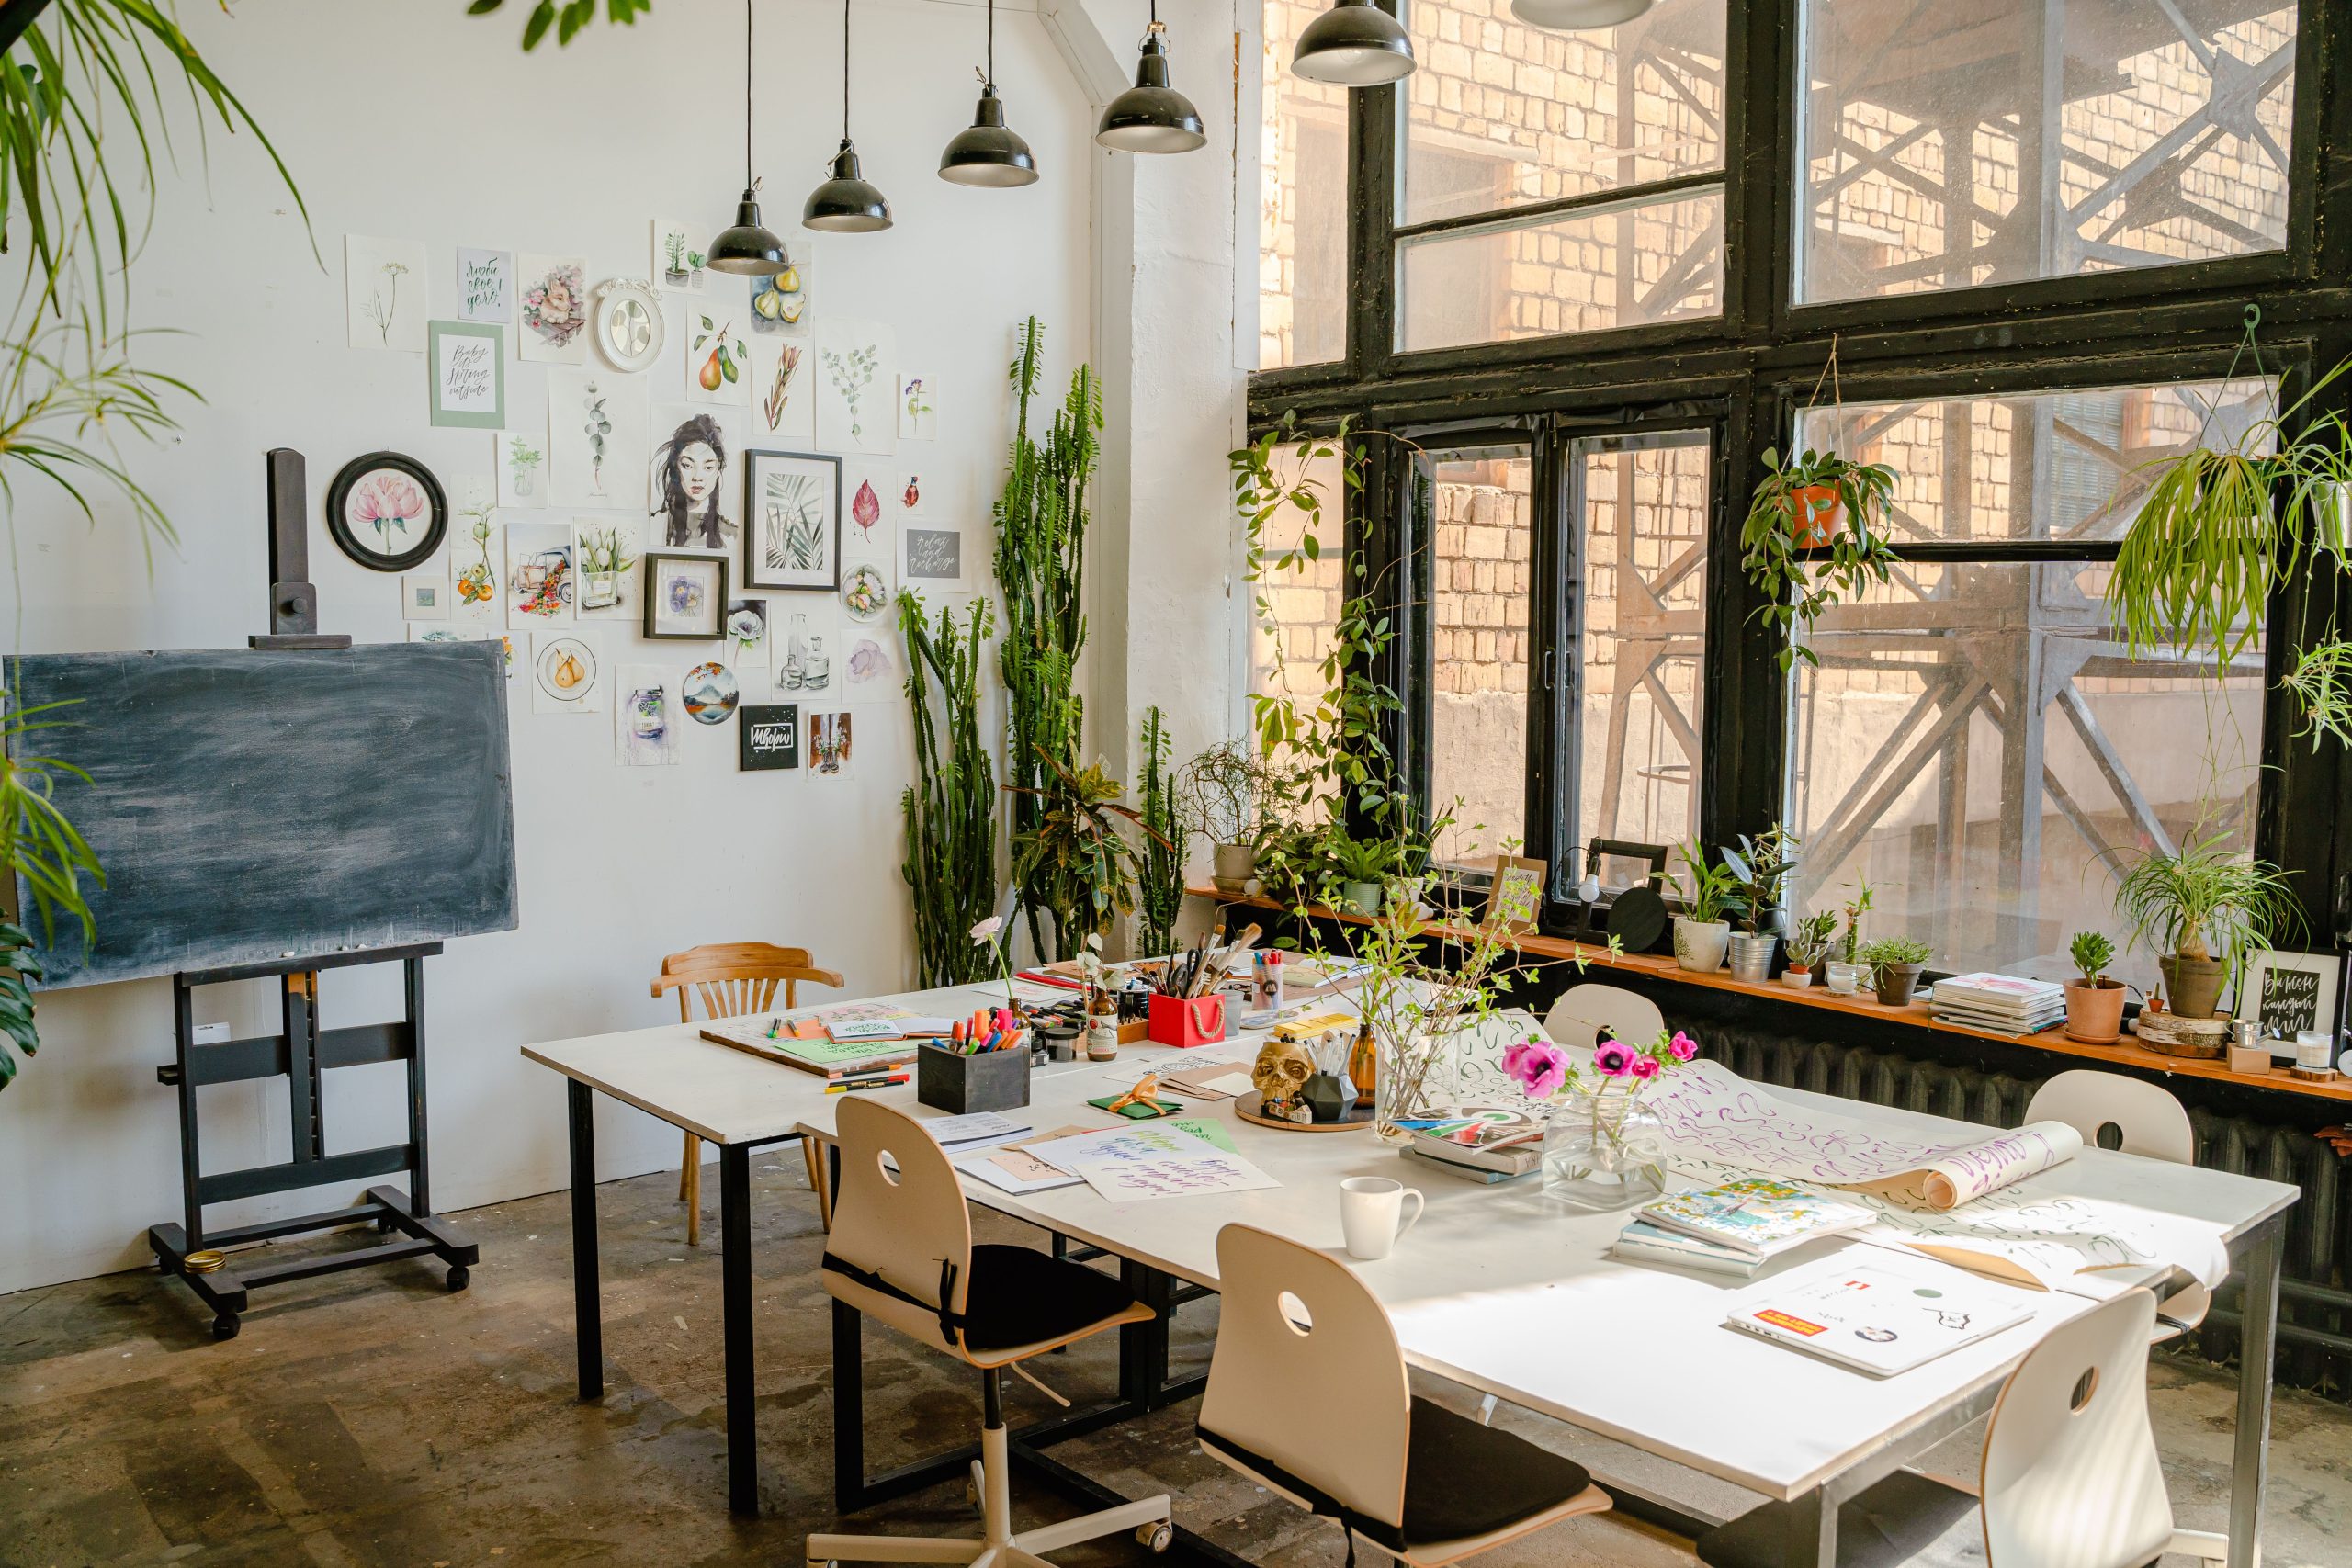
The single element holding this entire room together isn’t the art or the furniture—it’s the plants. Take away the tall cacti, the hanging vines, and the various potted greens, and the space would instantly feel colder and more sterile. The plants BREATHE life into the industrial-loft aesthetic. They soften the hard lines of the concrete floor and metal-framed windows, bridge the gap between the artwork and the furniture, and make the whole workshop feel like a vibrant, living ecosystem of creativity.
21. Corrugated Metal Workshop with Wooden Workbenches
This look is the definition of budget-friendly construction. A pole barn or simple metal building kit is one of the most cost-effective ways to get a large, covered workshop space per square foot. Forget expensive drywall and paint; lean into the industrial aesthetic. Use reclaimed wood or basic plywood for workbenches and find used storage cabinets from office liquidations or sites like Craigslist. The goal here is maximum functionality and square footage for minimum cost.
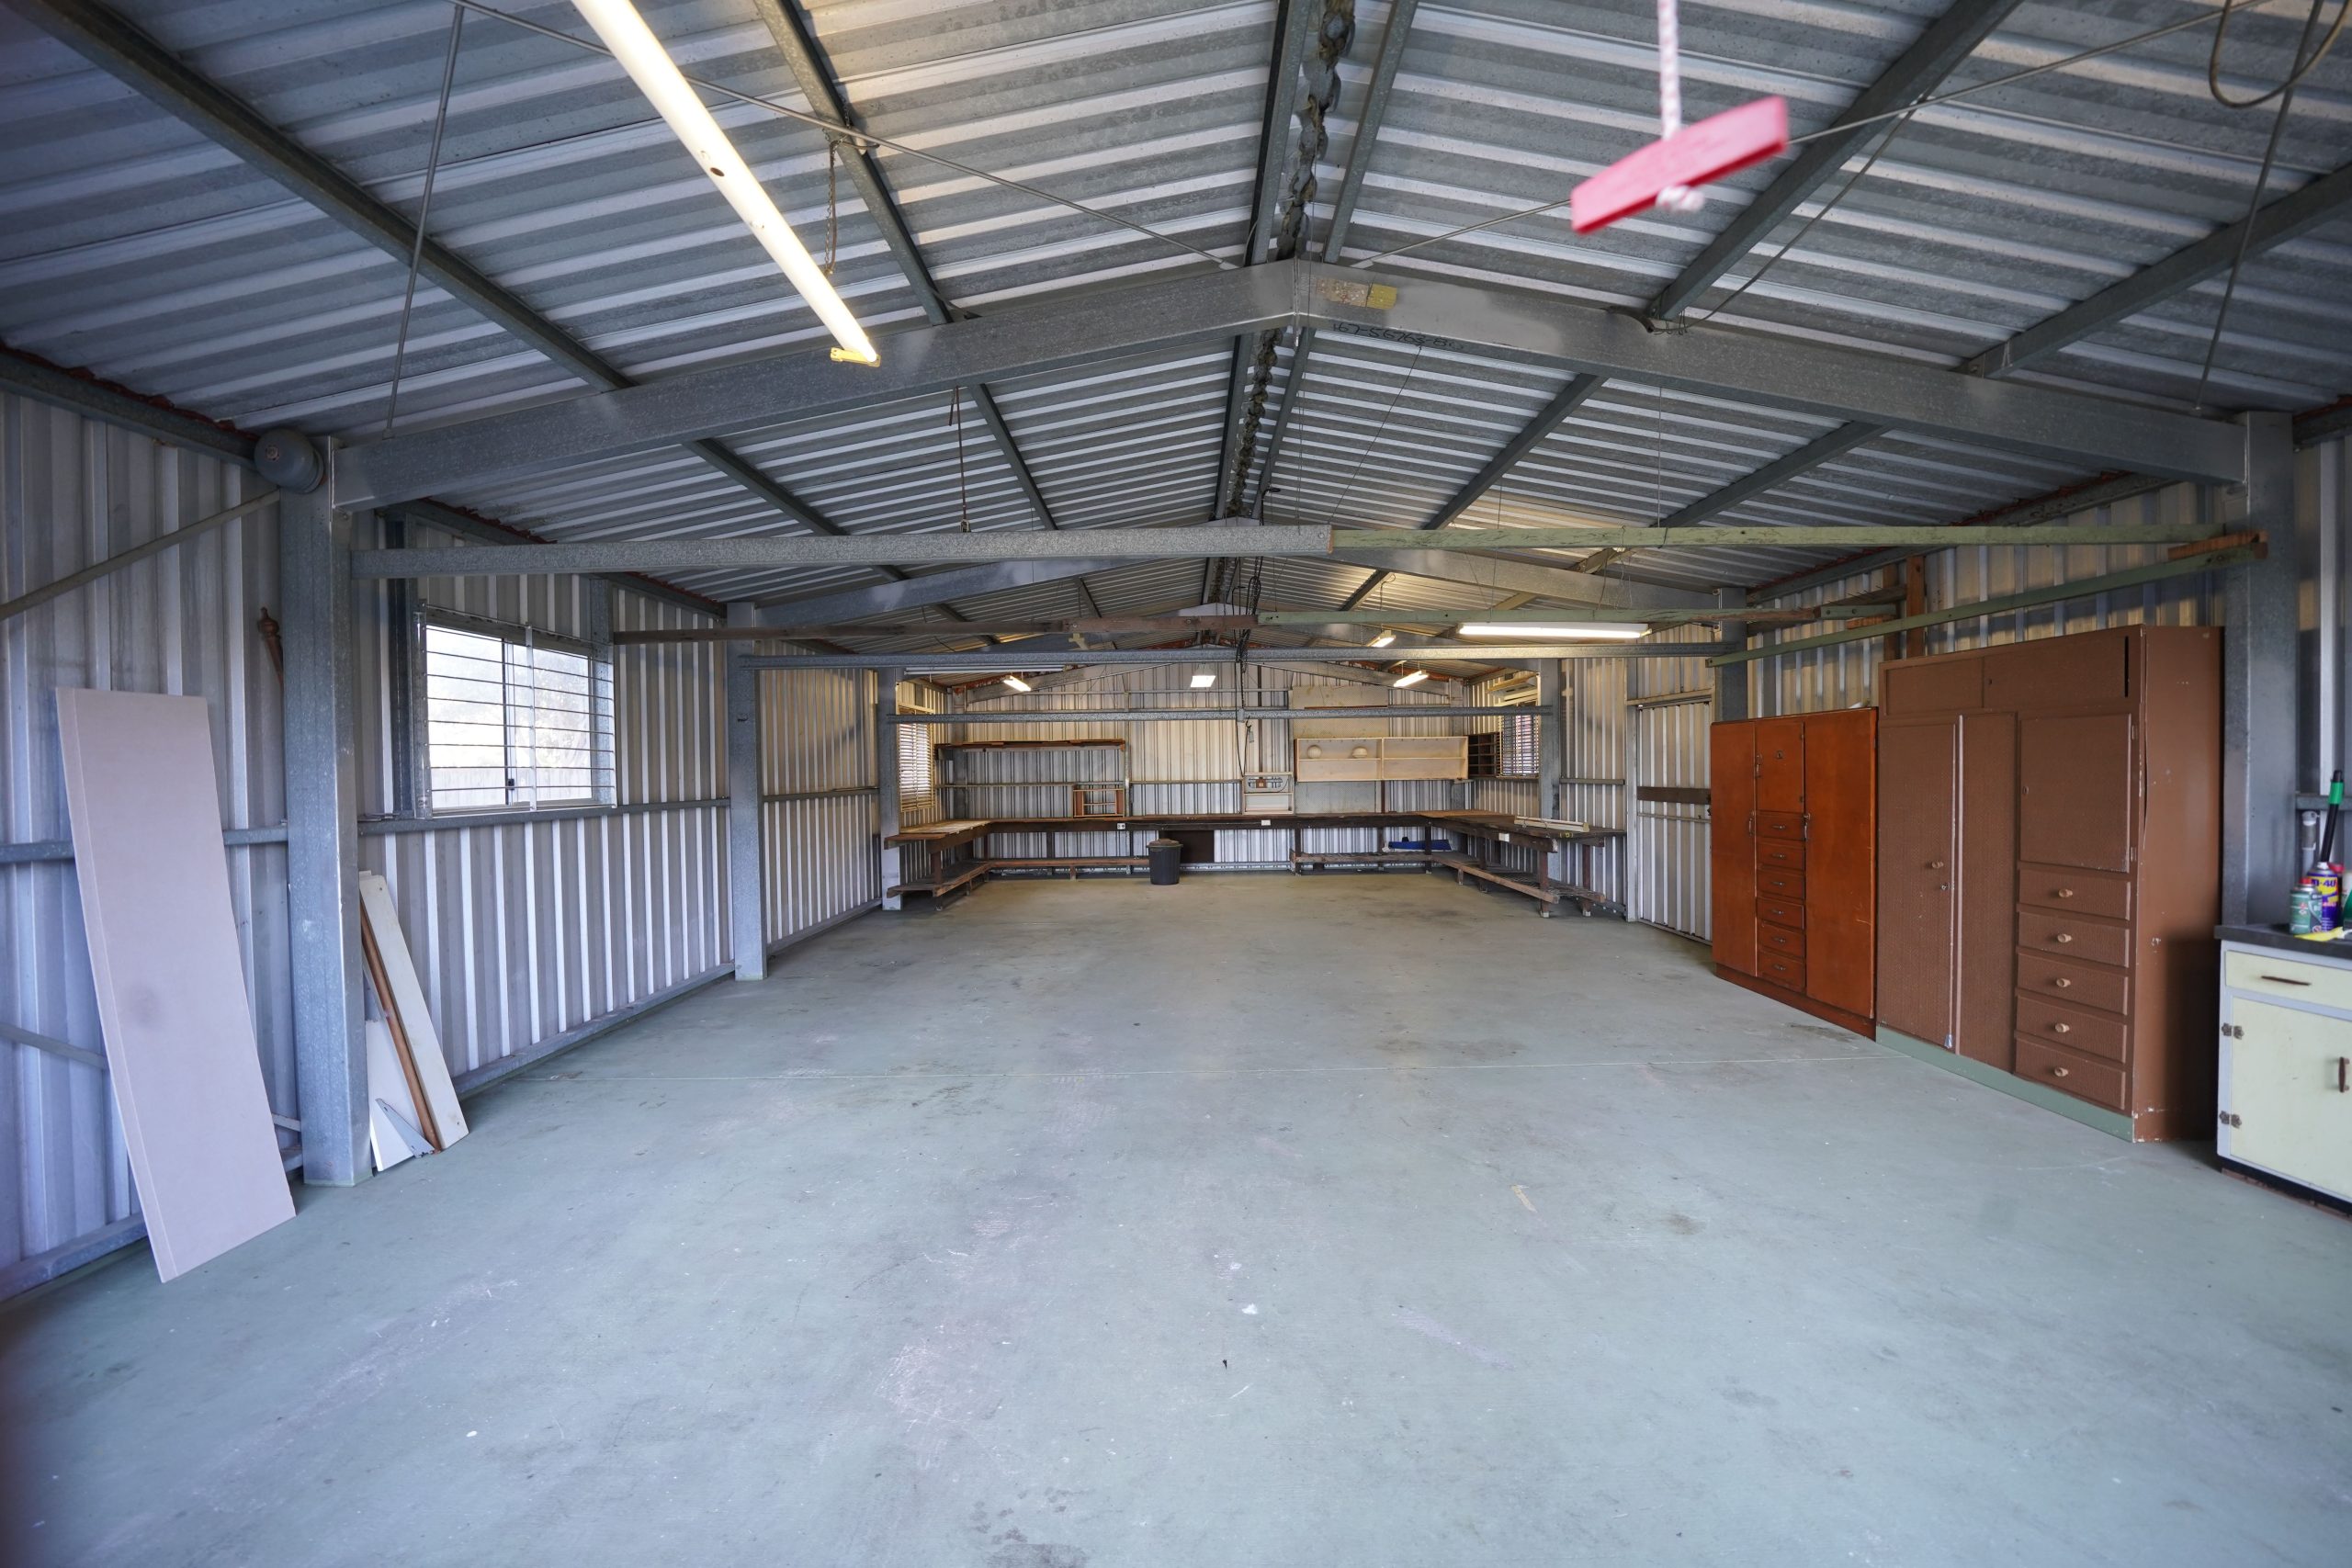
Uninsulated corrugated metal walls and ceilings, while cheap and durable, create a challenging indoor environment. The space will be scorching hot in the summer and frigid in the winter, and condensation can be a major issue, leading to rust on tools and equipment. To make it a year-round functional workspace, you’ll need to invest in spray foam insulation. It’s not a cheap add-on, but it’s the most effective way to control temperature and moisture in a metal building.
22. Workshop Gallery Display with Wooden Easels and Exposed Beams
This space successfully merges the feeling of a working studio with a polished gallery through a powerful use of contrast. There’s a strong material contrast between the rustic, dark grey brick and the intricate network of dark exposed wooden beams overhead. There is also a color contrast between the dark flooring, walls, and ceiling, and the light, natural wood of the display easels. This makes the easels and the artwork they hold pop, clearly defining them as the focal point of the room.
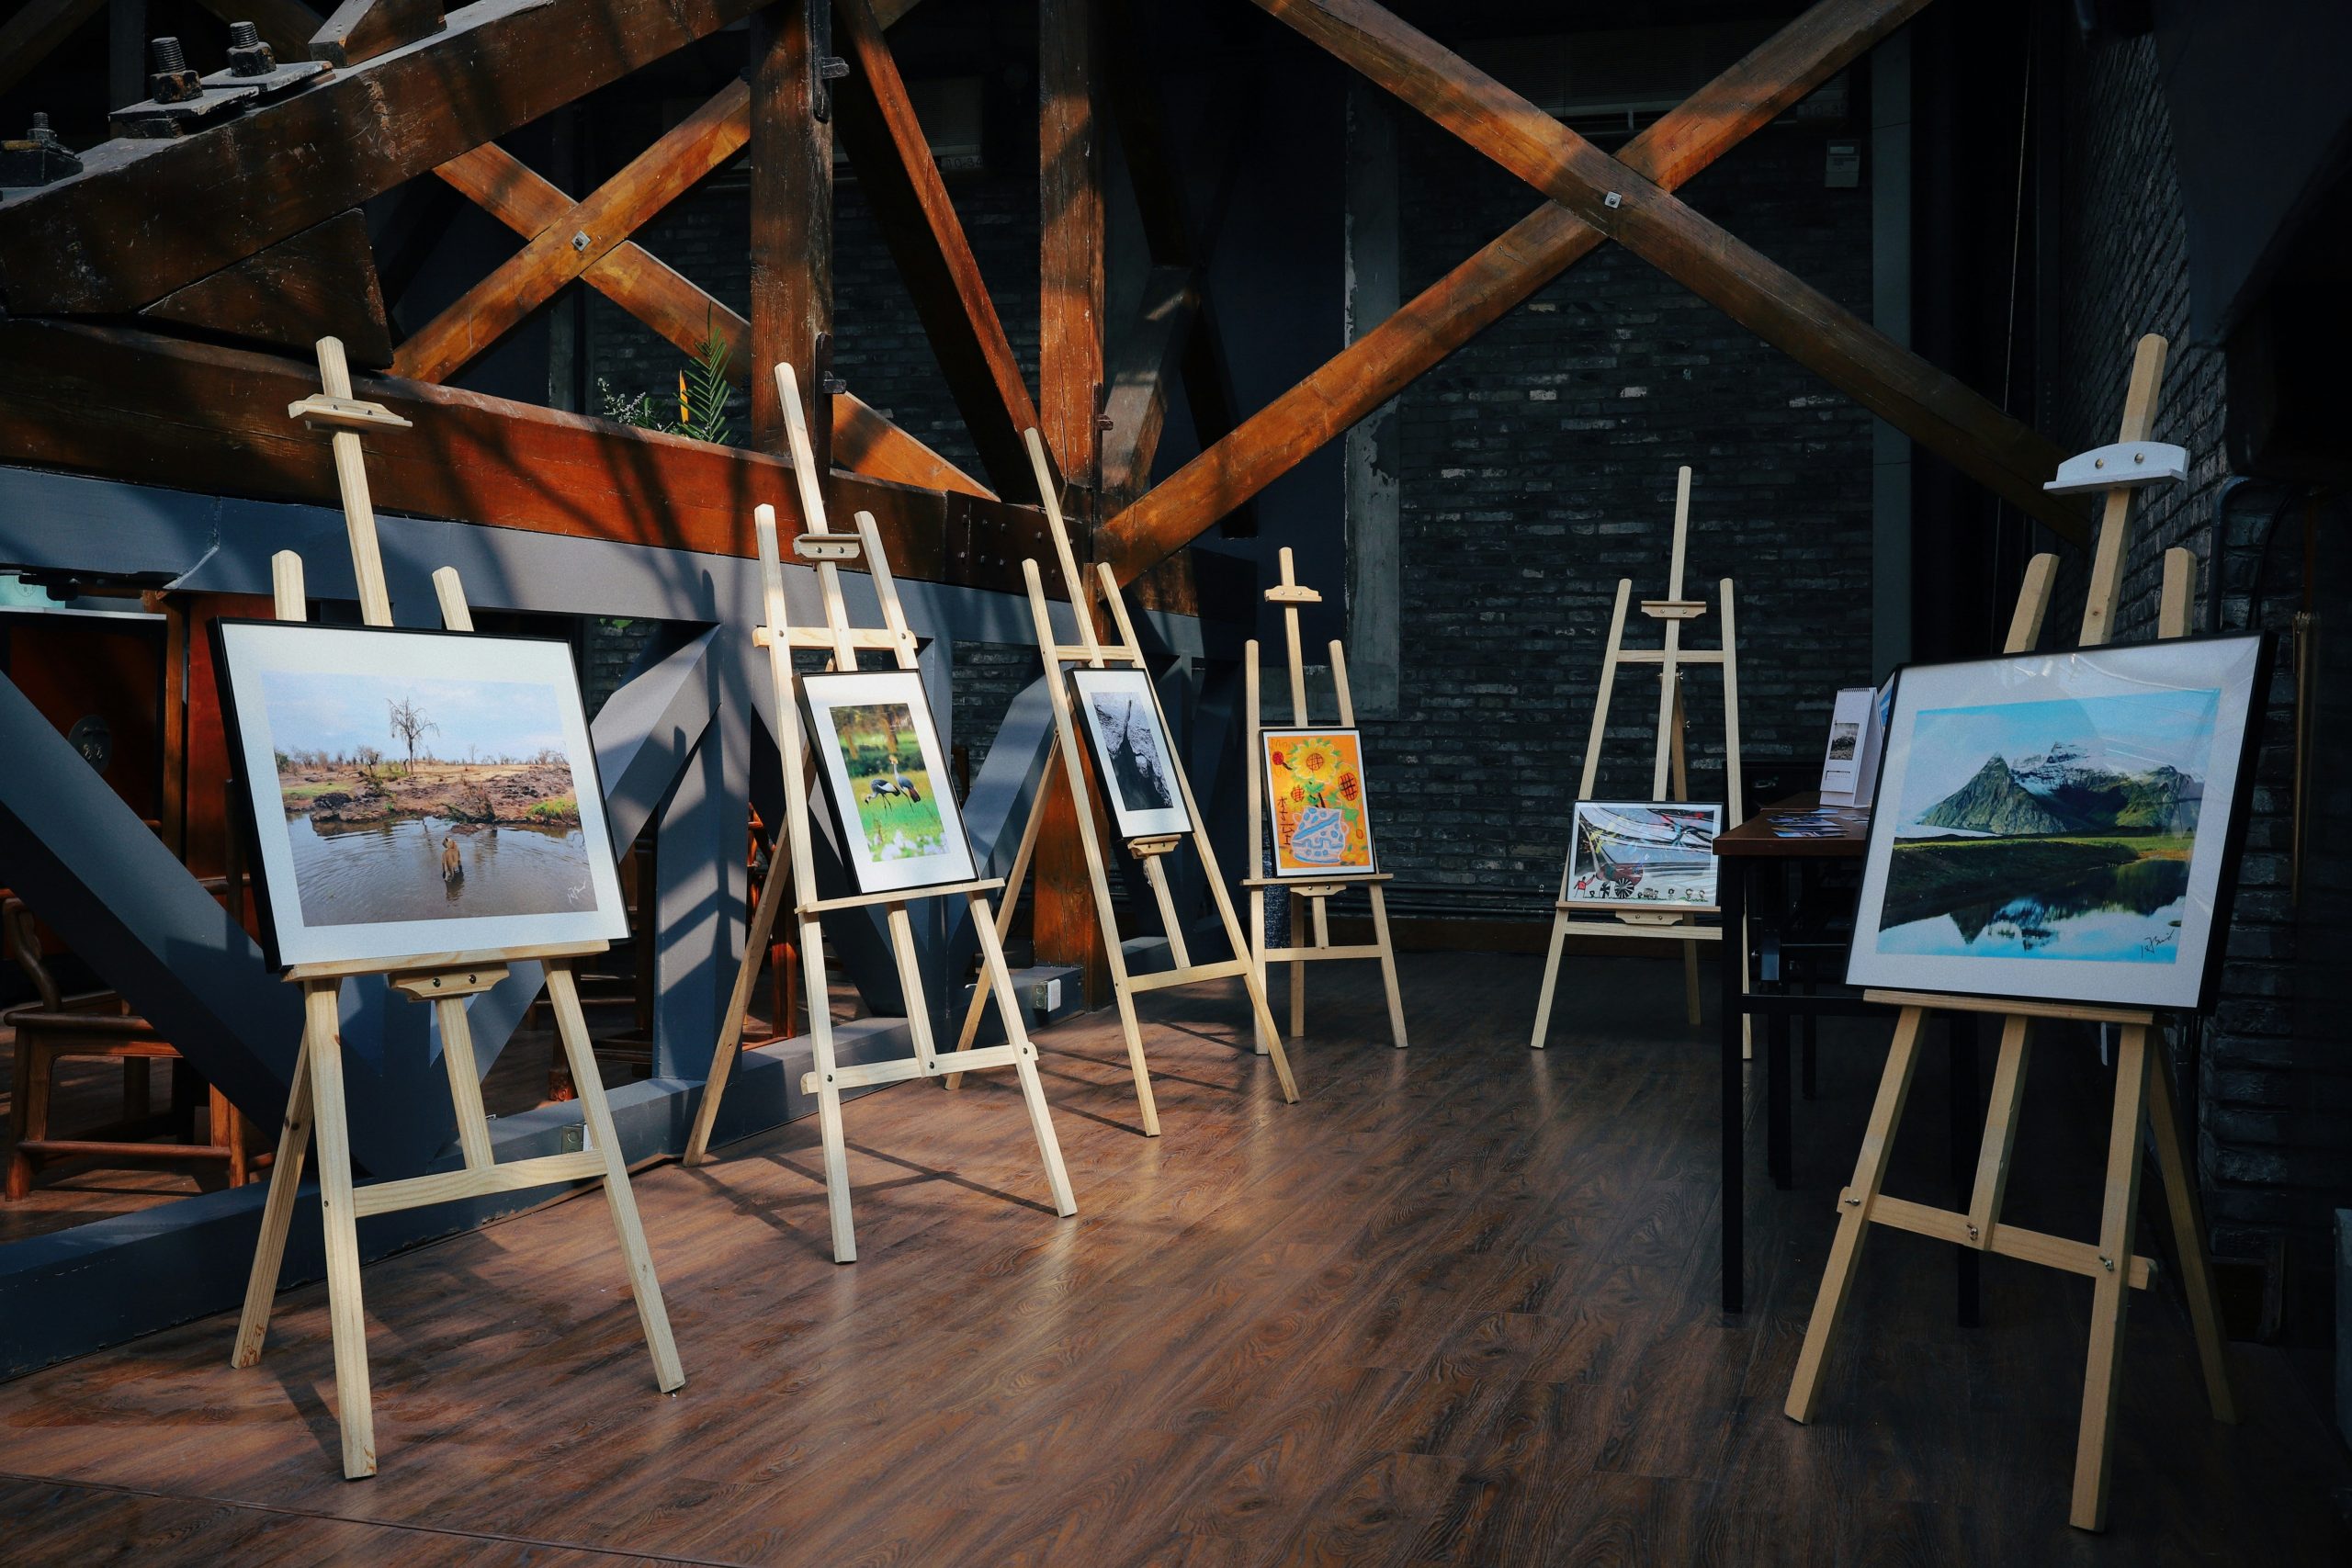
When using easels to display finished work, treat them like furniture, not just functional objects. Arrange them in thoughtful groupings rather than just lining them up against a wall. Create conversational clusters, just as you would with chairs. Here, the arrangement guides the eye through the space. Also, ensure the lighting is focused on the artwork, not the easel. Track lighting, as suggested by the highlights in the photo, is perfect for this, allowing you to aim each light precisely.
23. Wood Carving Tools on a Light Wood Surface
The secret to this image’s calm, focused mood is the storyboard happening on the workbench itself. The faint pencil markings and shallow carved indentations are the most important elements. They transform the scene from a simple photo of tools into a narrative. They tell us a project is underway, that a plan is being executed. They hint at the skill and precision required for the craft, making the viewer lean in to try and decipher the artist’s intention. It’s a snapshot of the moment between planning and doing.
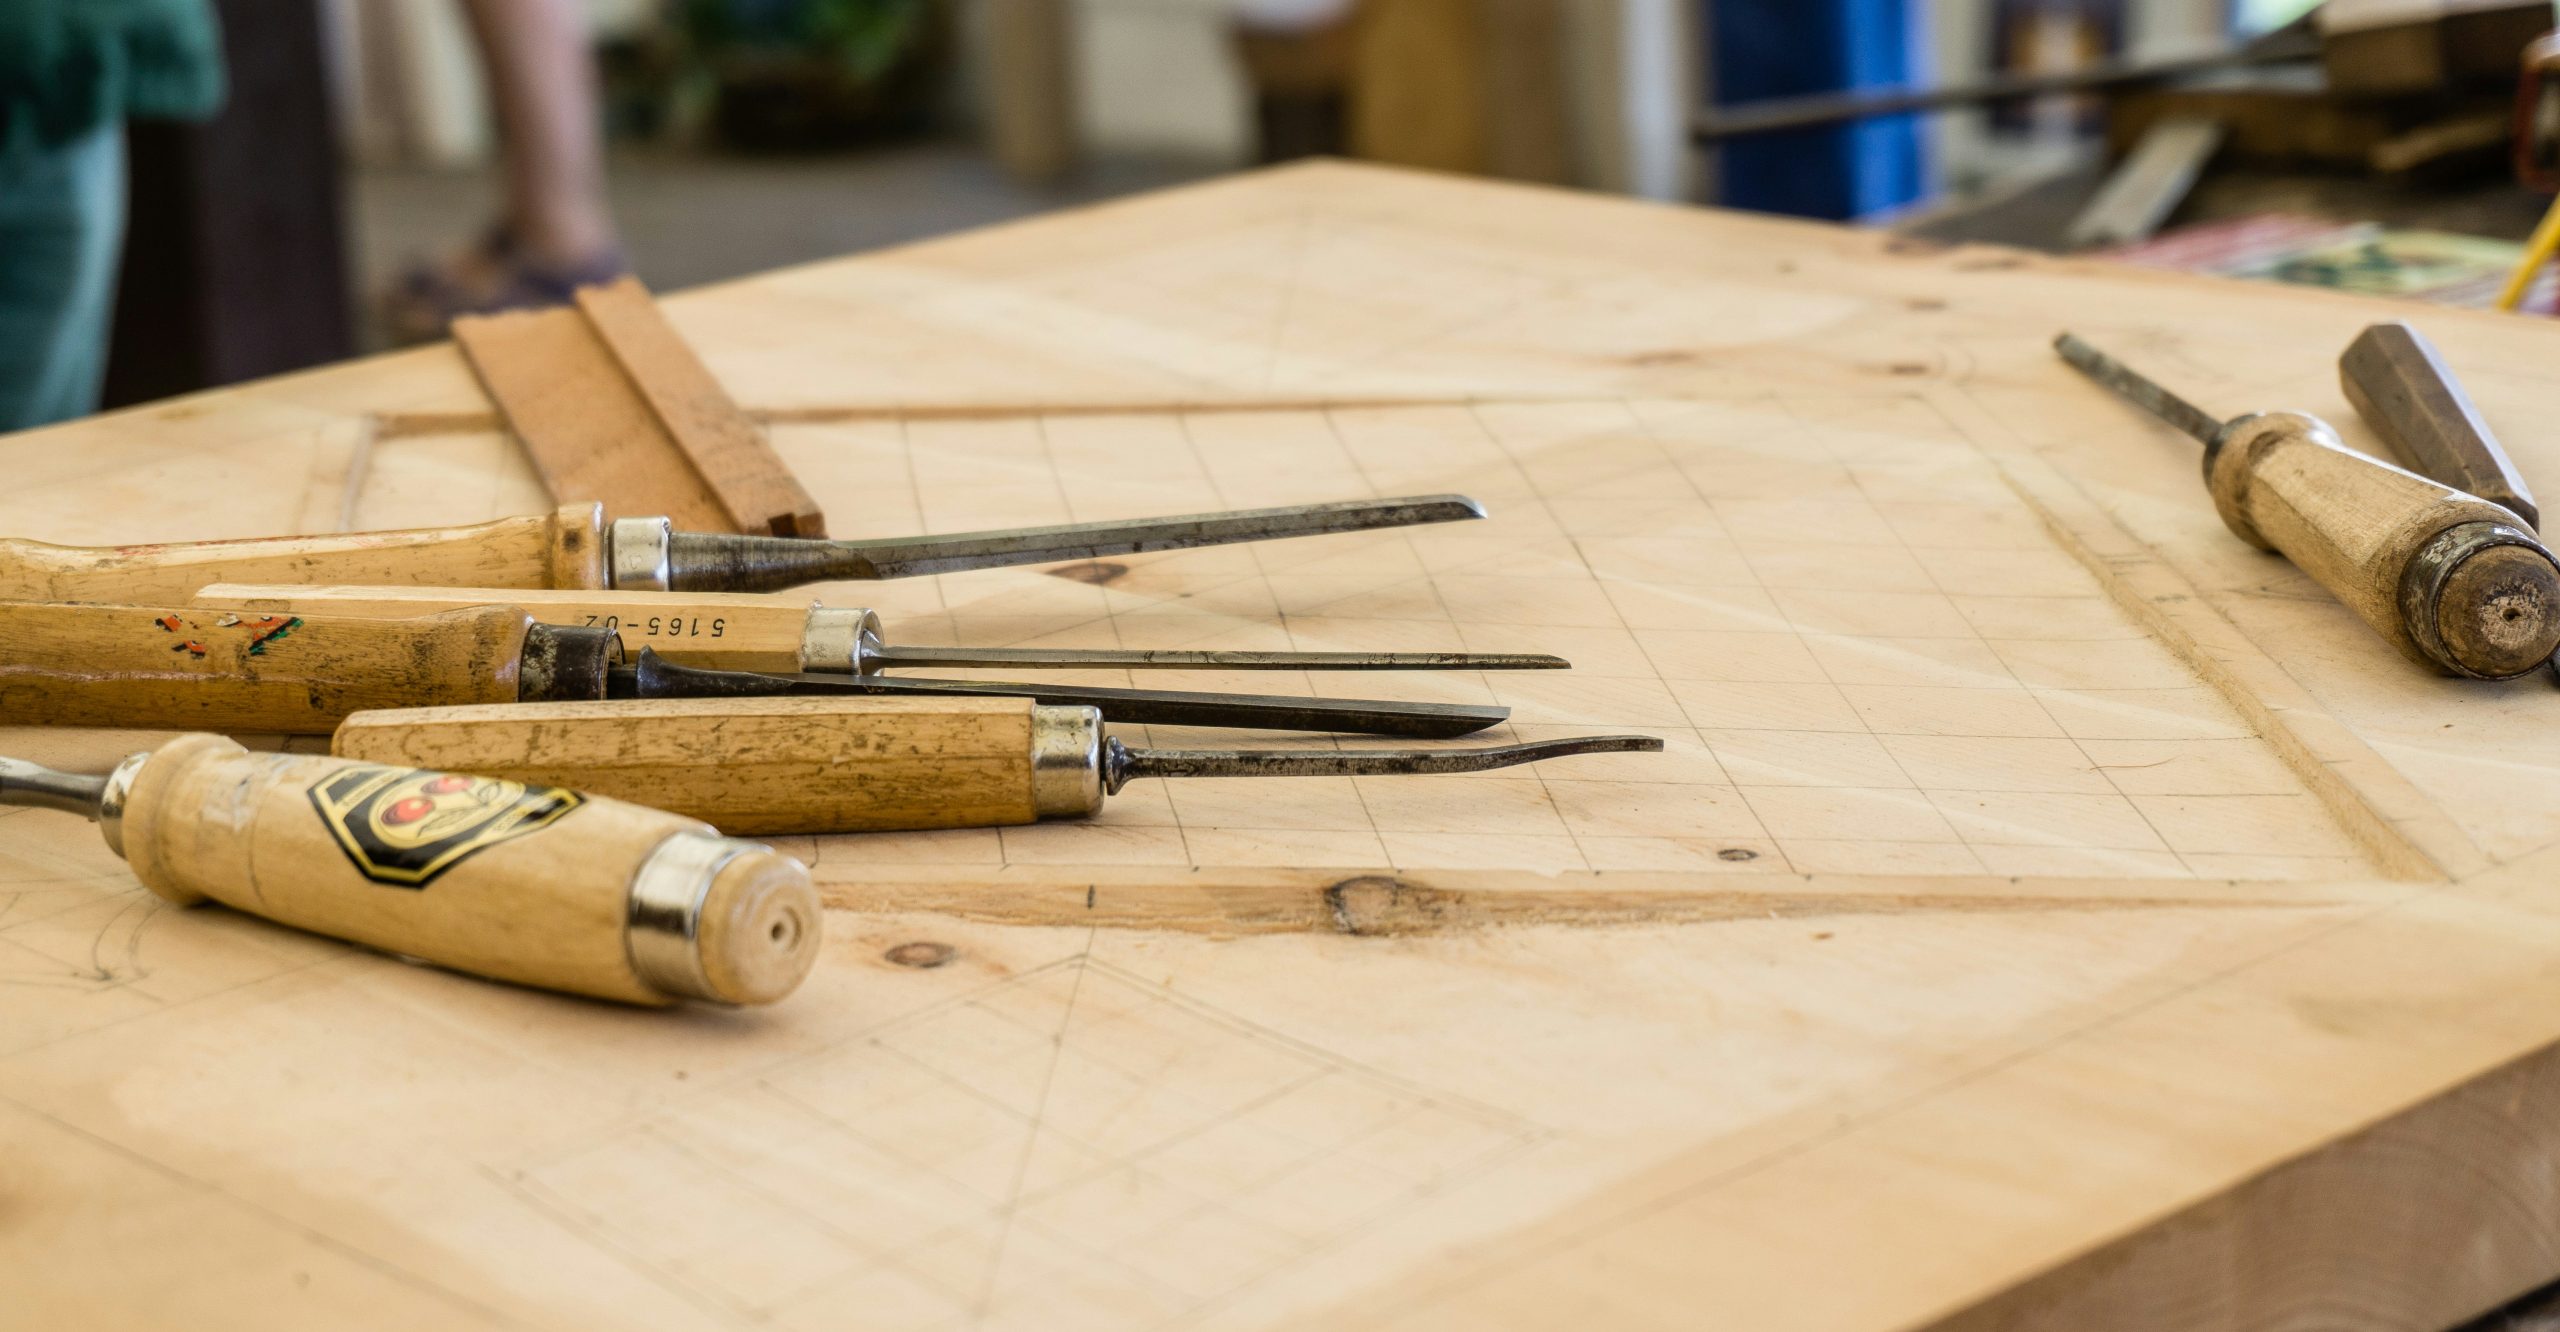
Let’s be real about carving: those tools need to be razor-sharp to work properly and safely (a dull tool is more likely to slip and cause injury). Maintaining that sharp edge is a skill in itself and a significant time commitment. You’ll need a good set of sharpening stones, a honing guide, and the patience to learn how to use them correctly. A beautiful set of carving tools is useless without the accompanying discipline of keeping them perfectly sharp.
24. Historic Wood Workshop with Shiplap Walls and Natural Light
The magic of this workshop is its complete commitment to a single material: wood. The shiplap walls, the planked floor, the multiple workbenches, and even many of the tools are all made of wood. This immersive, monochromatic use of natural and weathered wood tones creates an incredibly warm, cohesive, and timeless atmosphere. The large multi-pane window is the only major break, and its purpose is to flood the wood with natural light, highlighting the different textures and grains. This feels less like a built room and more like an organic environment.
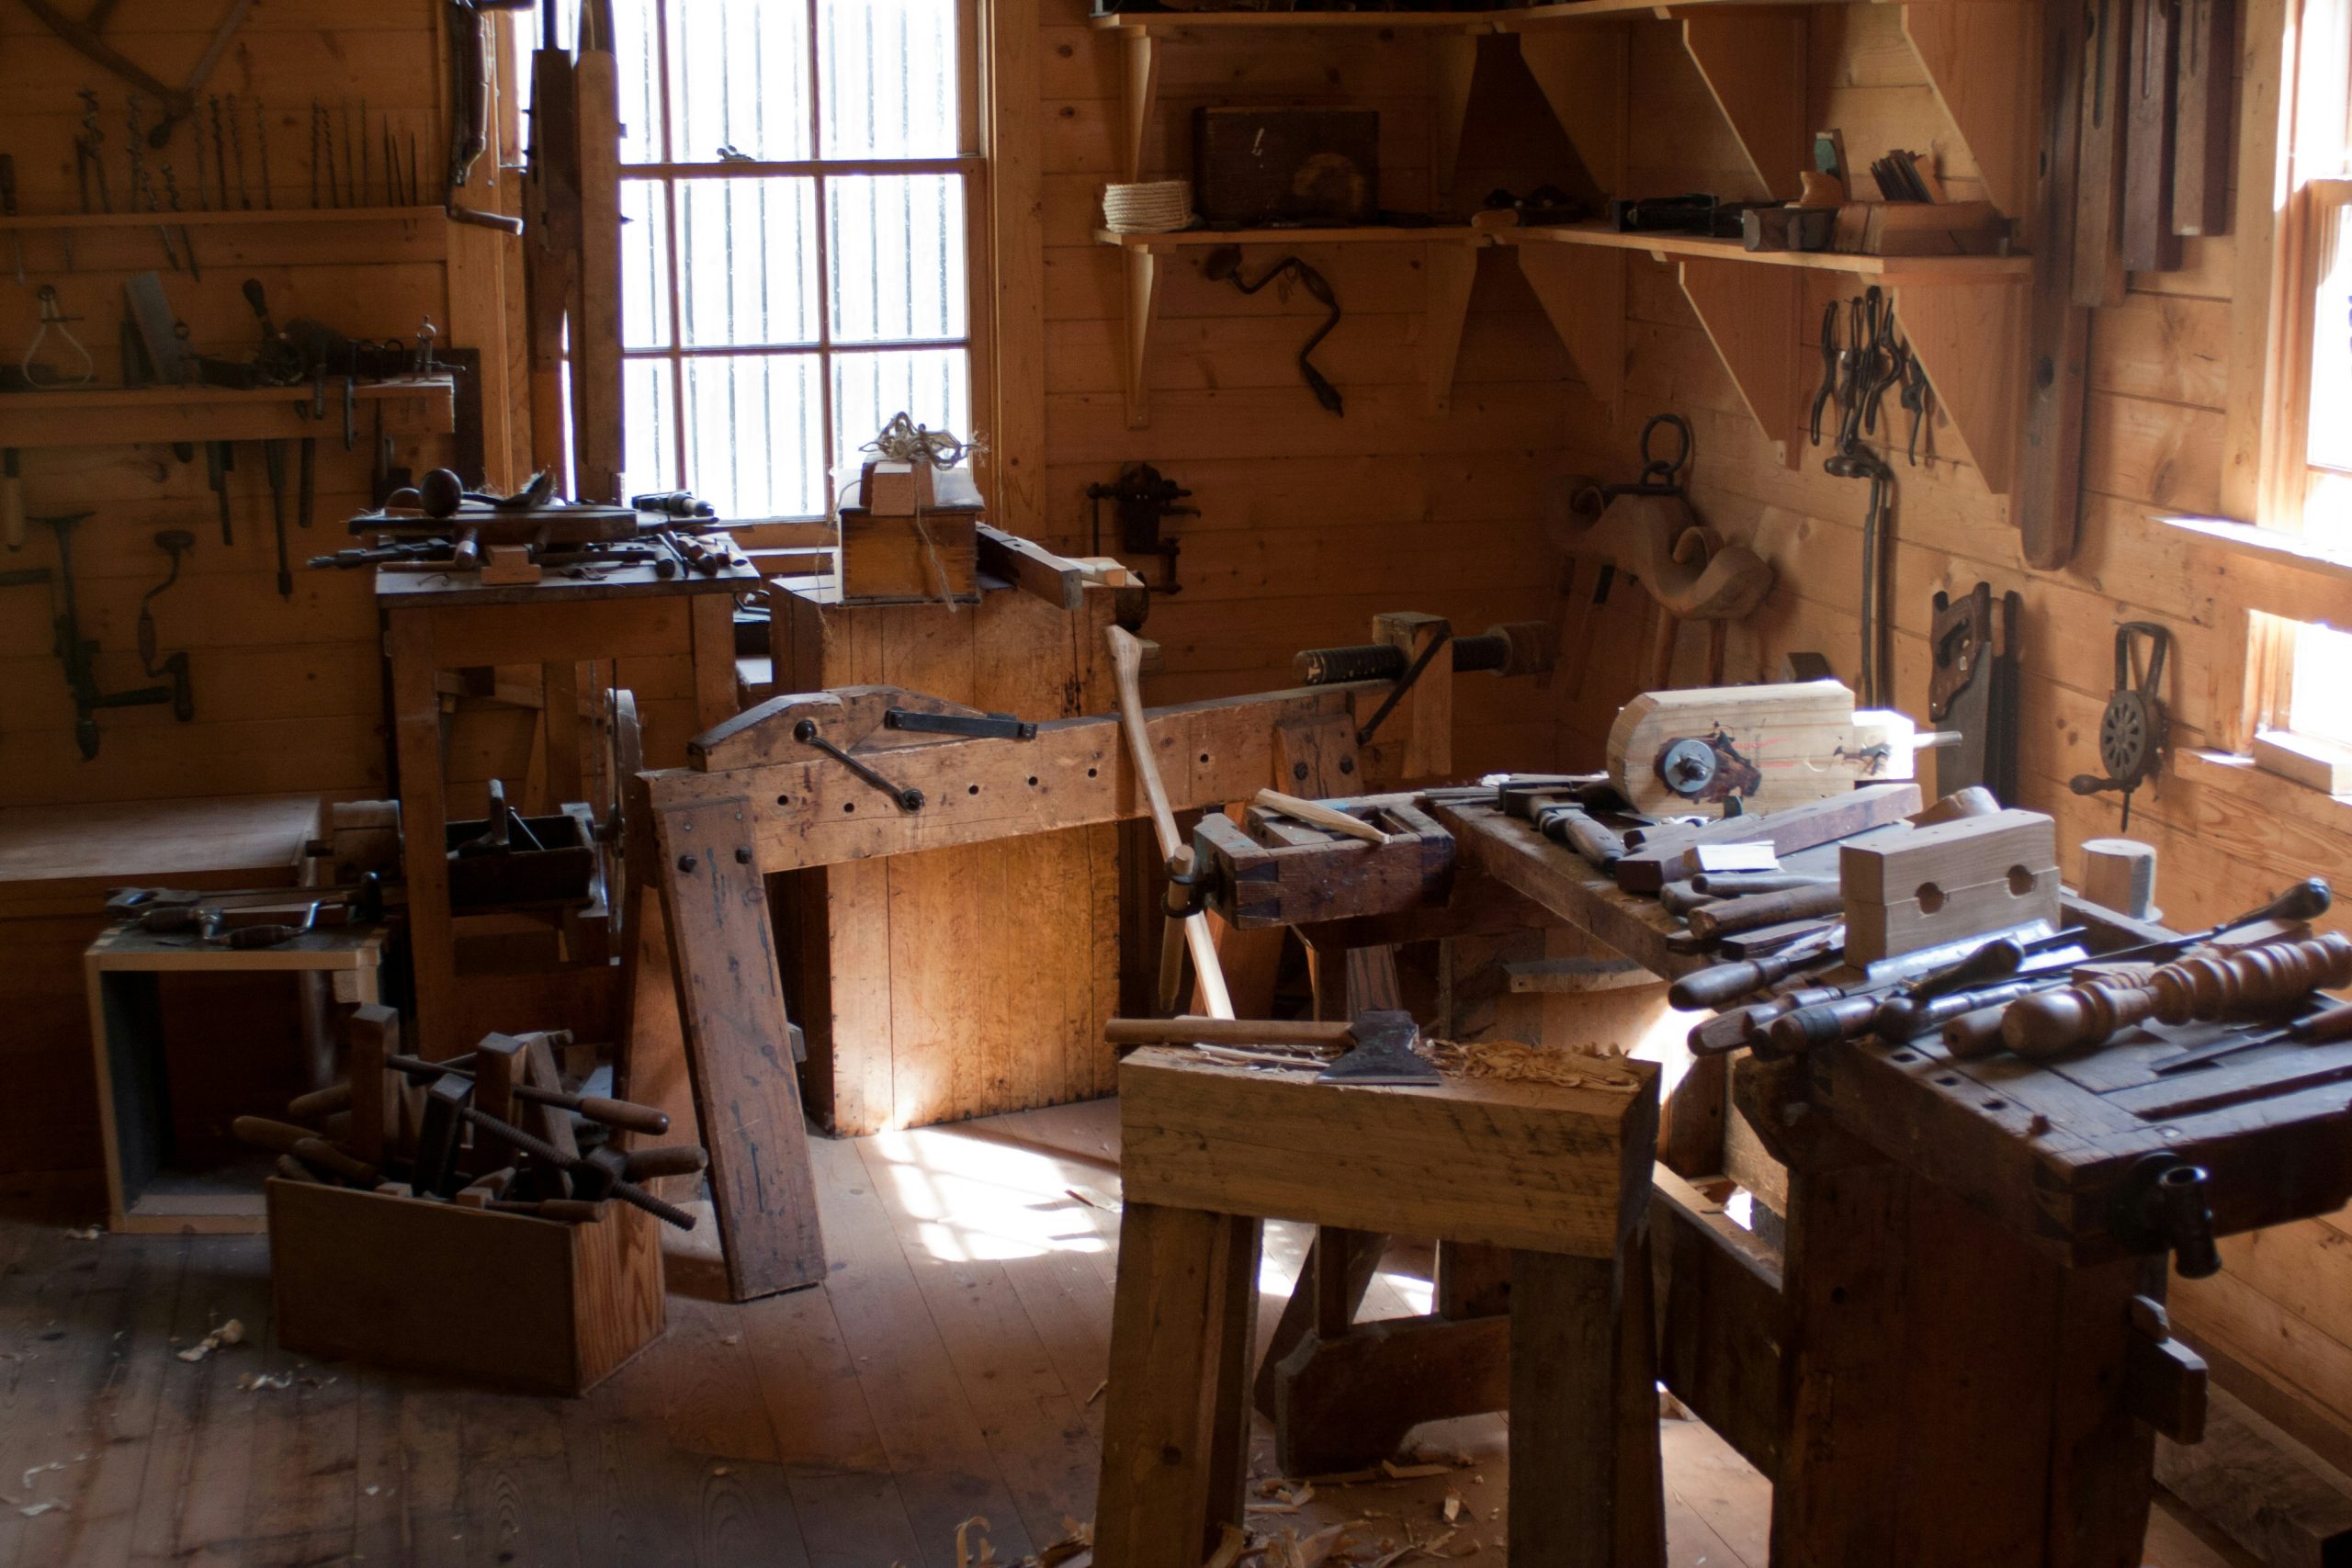
This look, often called ‘heritage workshop’ or ‘artisanal traditional,’ is gaining traction as a response to our hyper-digital, disposable culture. It represents a longing for permanence, craftsmanship, and a connection to history. People are drawn to the idea of a space that feels like it has existed for a hundred years and will exist for a hundred more. The presence of hand tools and the absence of loud, modern machinery speaks to a quieter, more mindful approach to making.
25. Industrial Workshop with Pegboard Tool Organization
This workshop’s gritty character comes from a clear formula: 50% organized chaos + 30% industrial grunge + 20% bold color accents. The organized chaos is the dark wooden pegboard, packed with tools. The grunge is the textured, dirty white walls and assorted cables. The bold color pops are the bright red rolling tool chest and the yellow-and-black machine. You could change the accent colors to orange or blue, but the formula would hold as long as you keep the balance of a packed tool wall and a grungy backdrop.
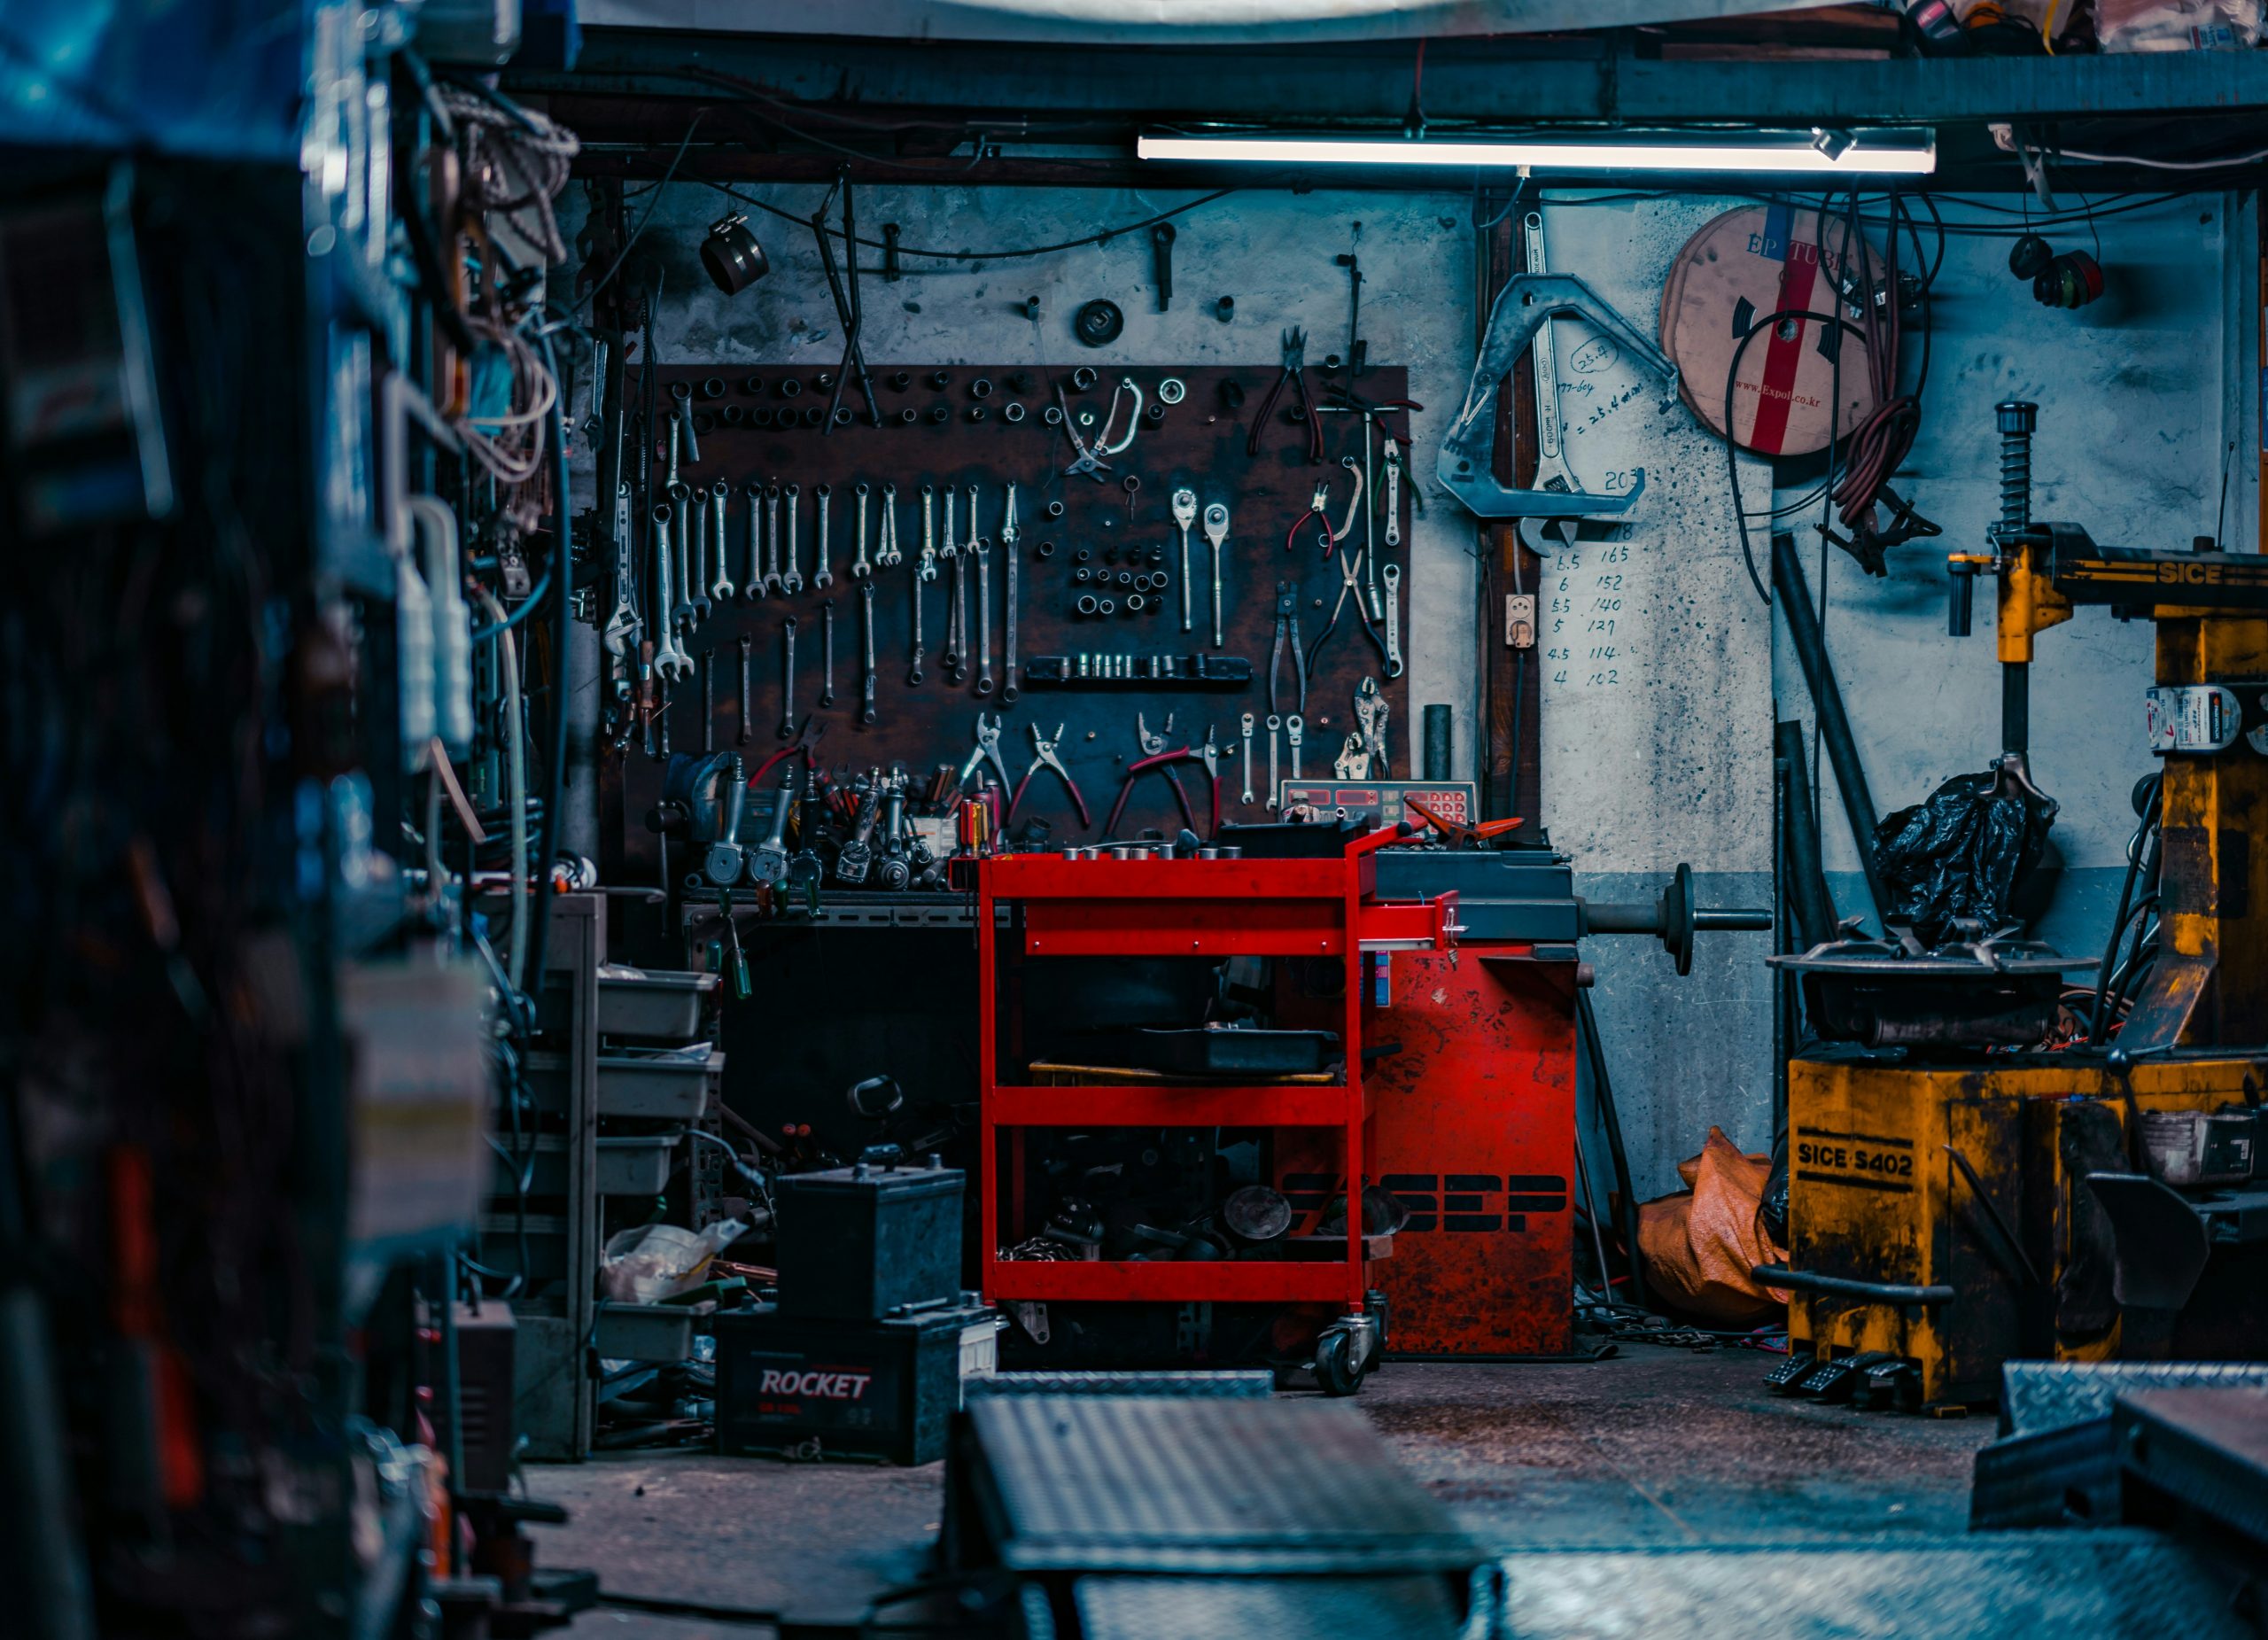
That cool, bluish light from the overhead fluorescent bulbs might look moody, but it’s terrible for color-sensitive work. If you’re painting, finishing wood, or doing anything where color accuracy matters, you need better lighting. The color rendering index (CRI) of typical shop lights is often very low, which can make colors appear distorted. For any creative workshop, investing in high-CRI LED lighting (90+ CRI) is essential for seeing your work accurately.
26. Rustic Wooden Workshop with Warm Incandescent Lighting
This image is a masterclass in texture and warmth. It works because it leans into its age and history. The rough-hewn wooden walls and the deeply patinated workbench aren’t flaws; they are the main characters. The single, bare incandescent bulb is a crucial choice. Its warm, orange-yellow light is perfect for enhancing the rich brown and red tones of the aged wood and rusted metal tools. A modern, cool LED light would completely kill the mood and make the space feel sterile and cold. A much more rustic take on woodworking than Idea #10‘s clean setup.
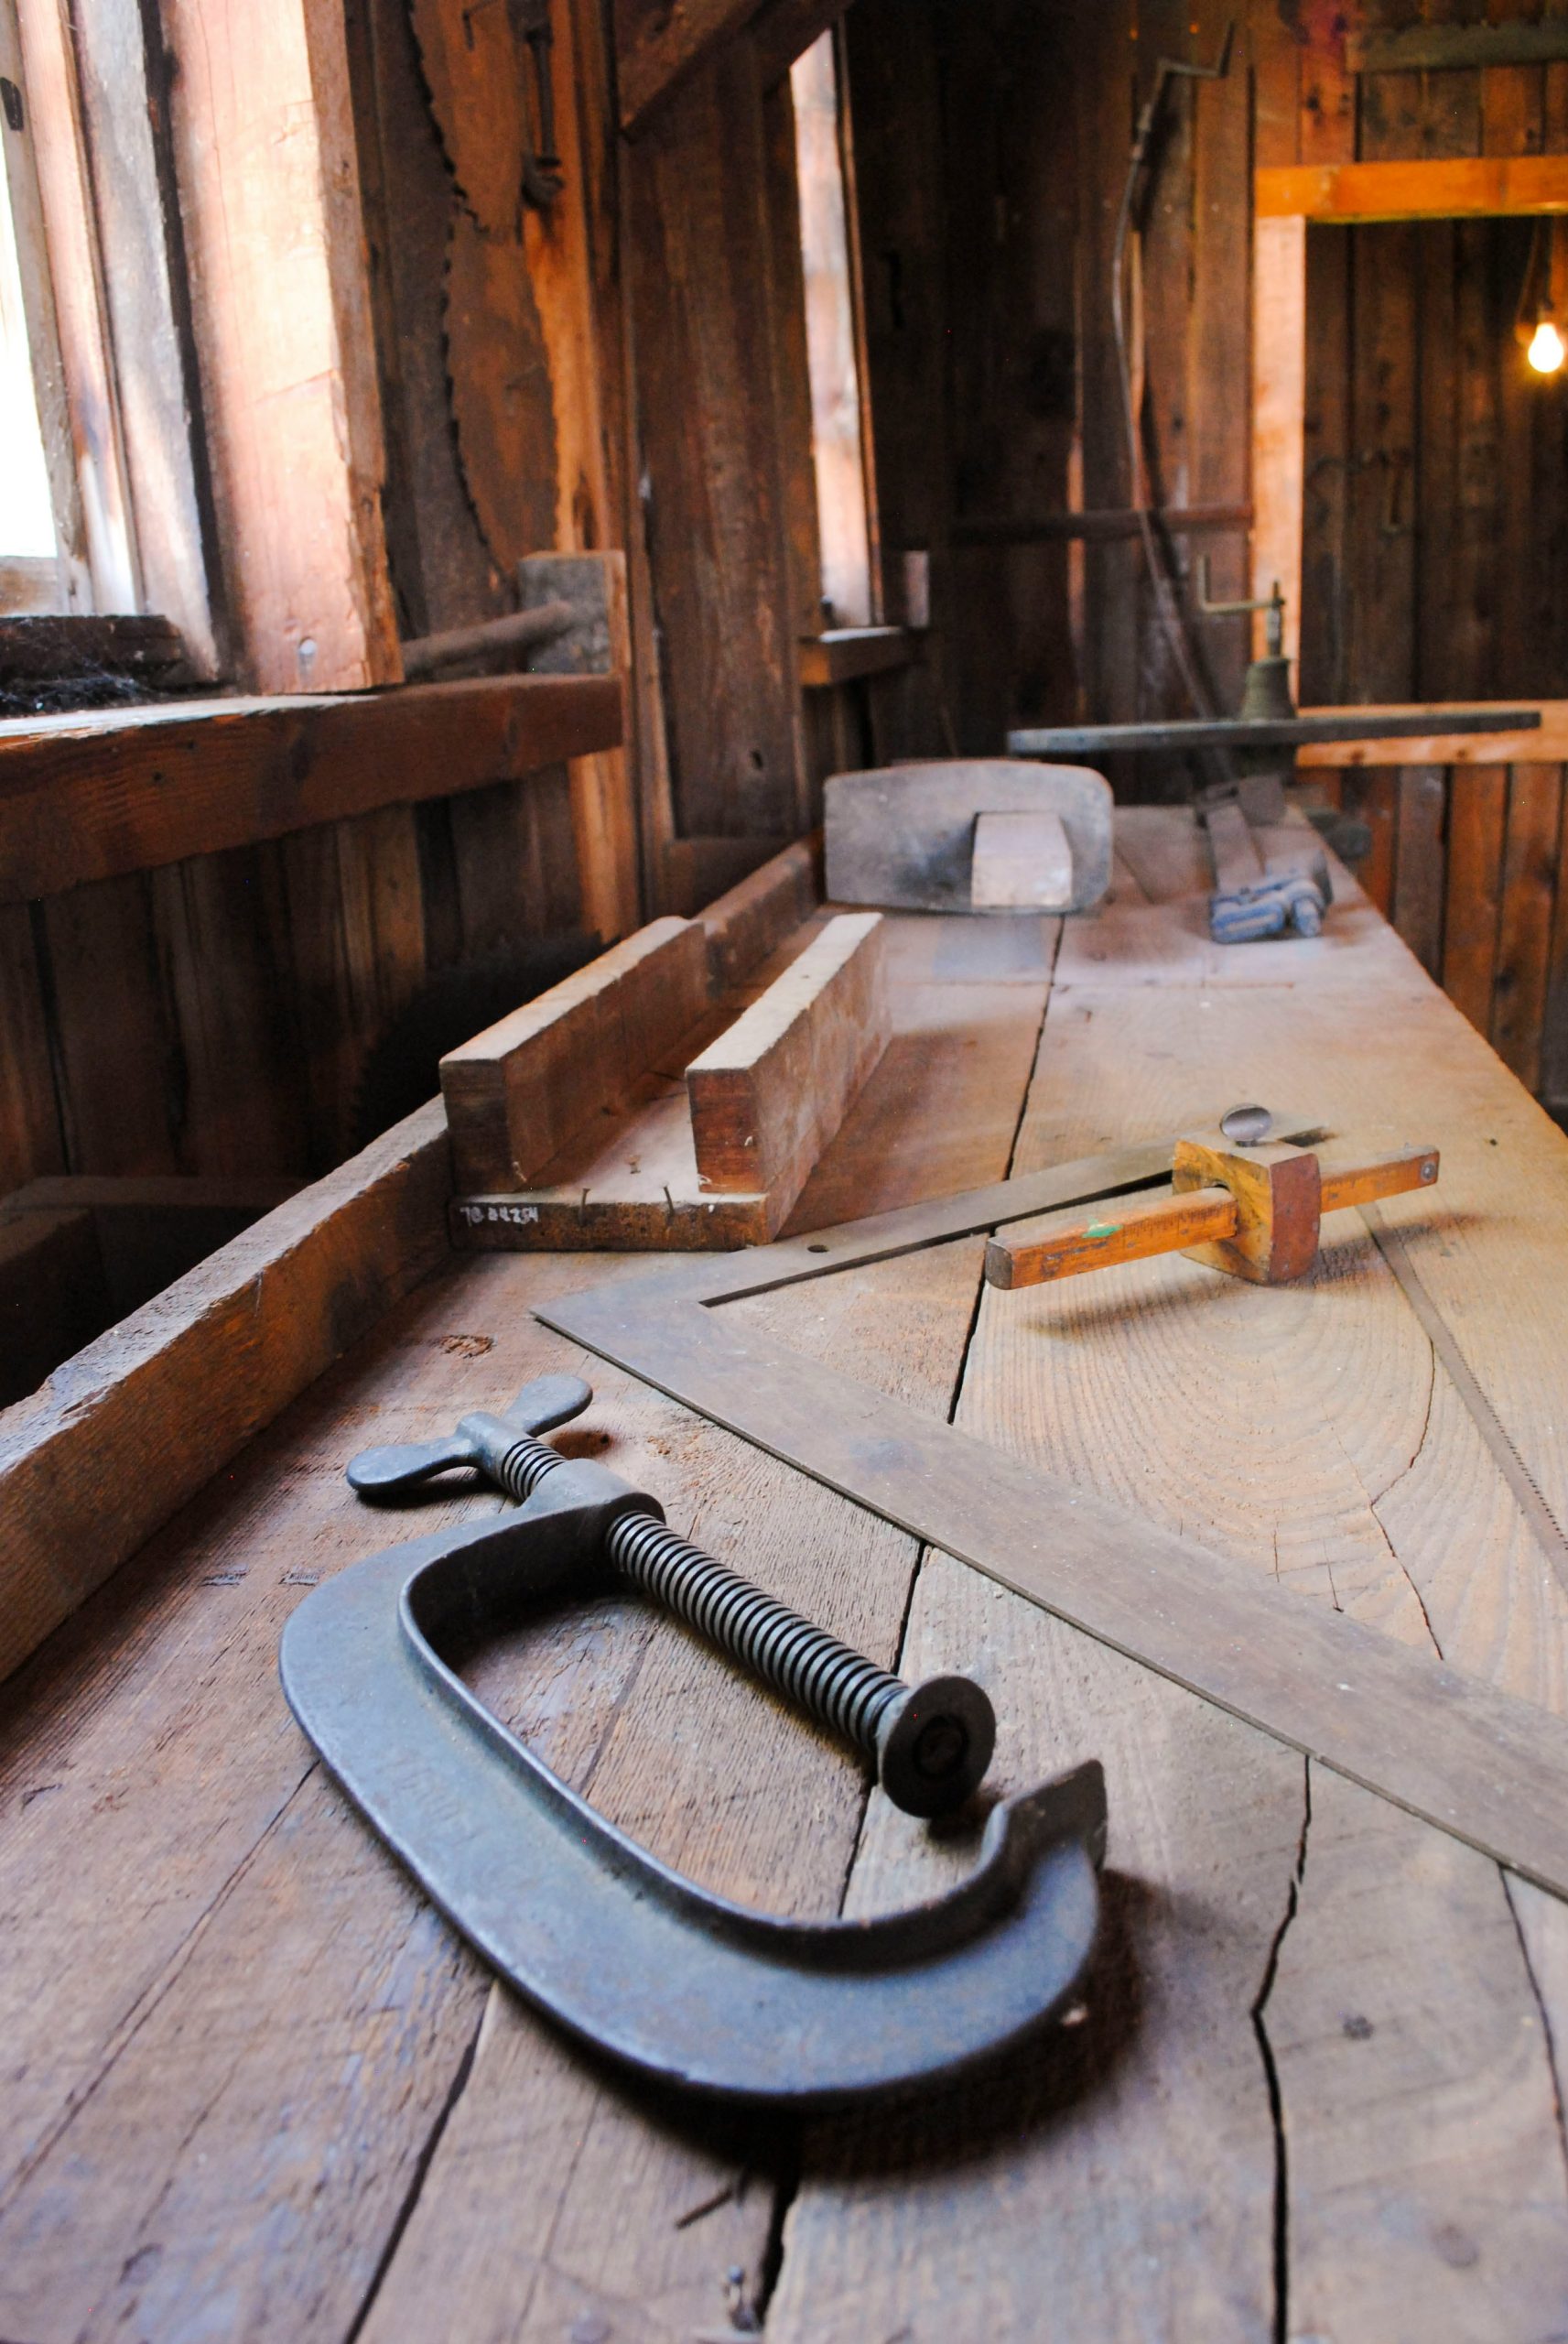
Achieving this historic, found-object aesthetic is all about patience and savvy sourcing, not big spending. Forget the big box stores. Your best friends are barn sales, antique shops, architectural salvage yards, and Facebook Marketplace. Look for old workbenches, wooden crates, and vintage hand tools. The key is to look for items with genuine patina and wear. You can’t fake the history that gives this space its authentic, soulful character.
27. Unfinished Concrete Industrial Shell with Exposed Utilities
Thinking of embracing the raw concrete look? It’s a bold choice. Here’s what to check before you commit:
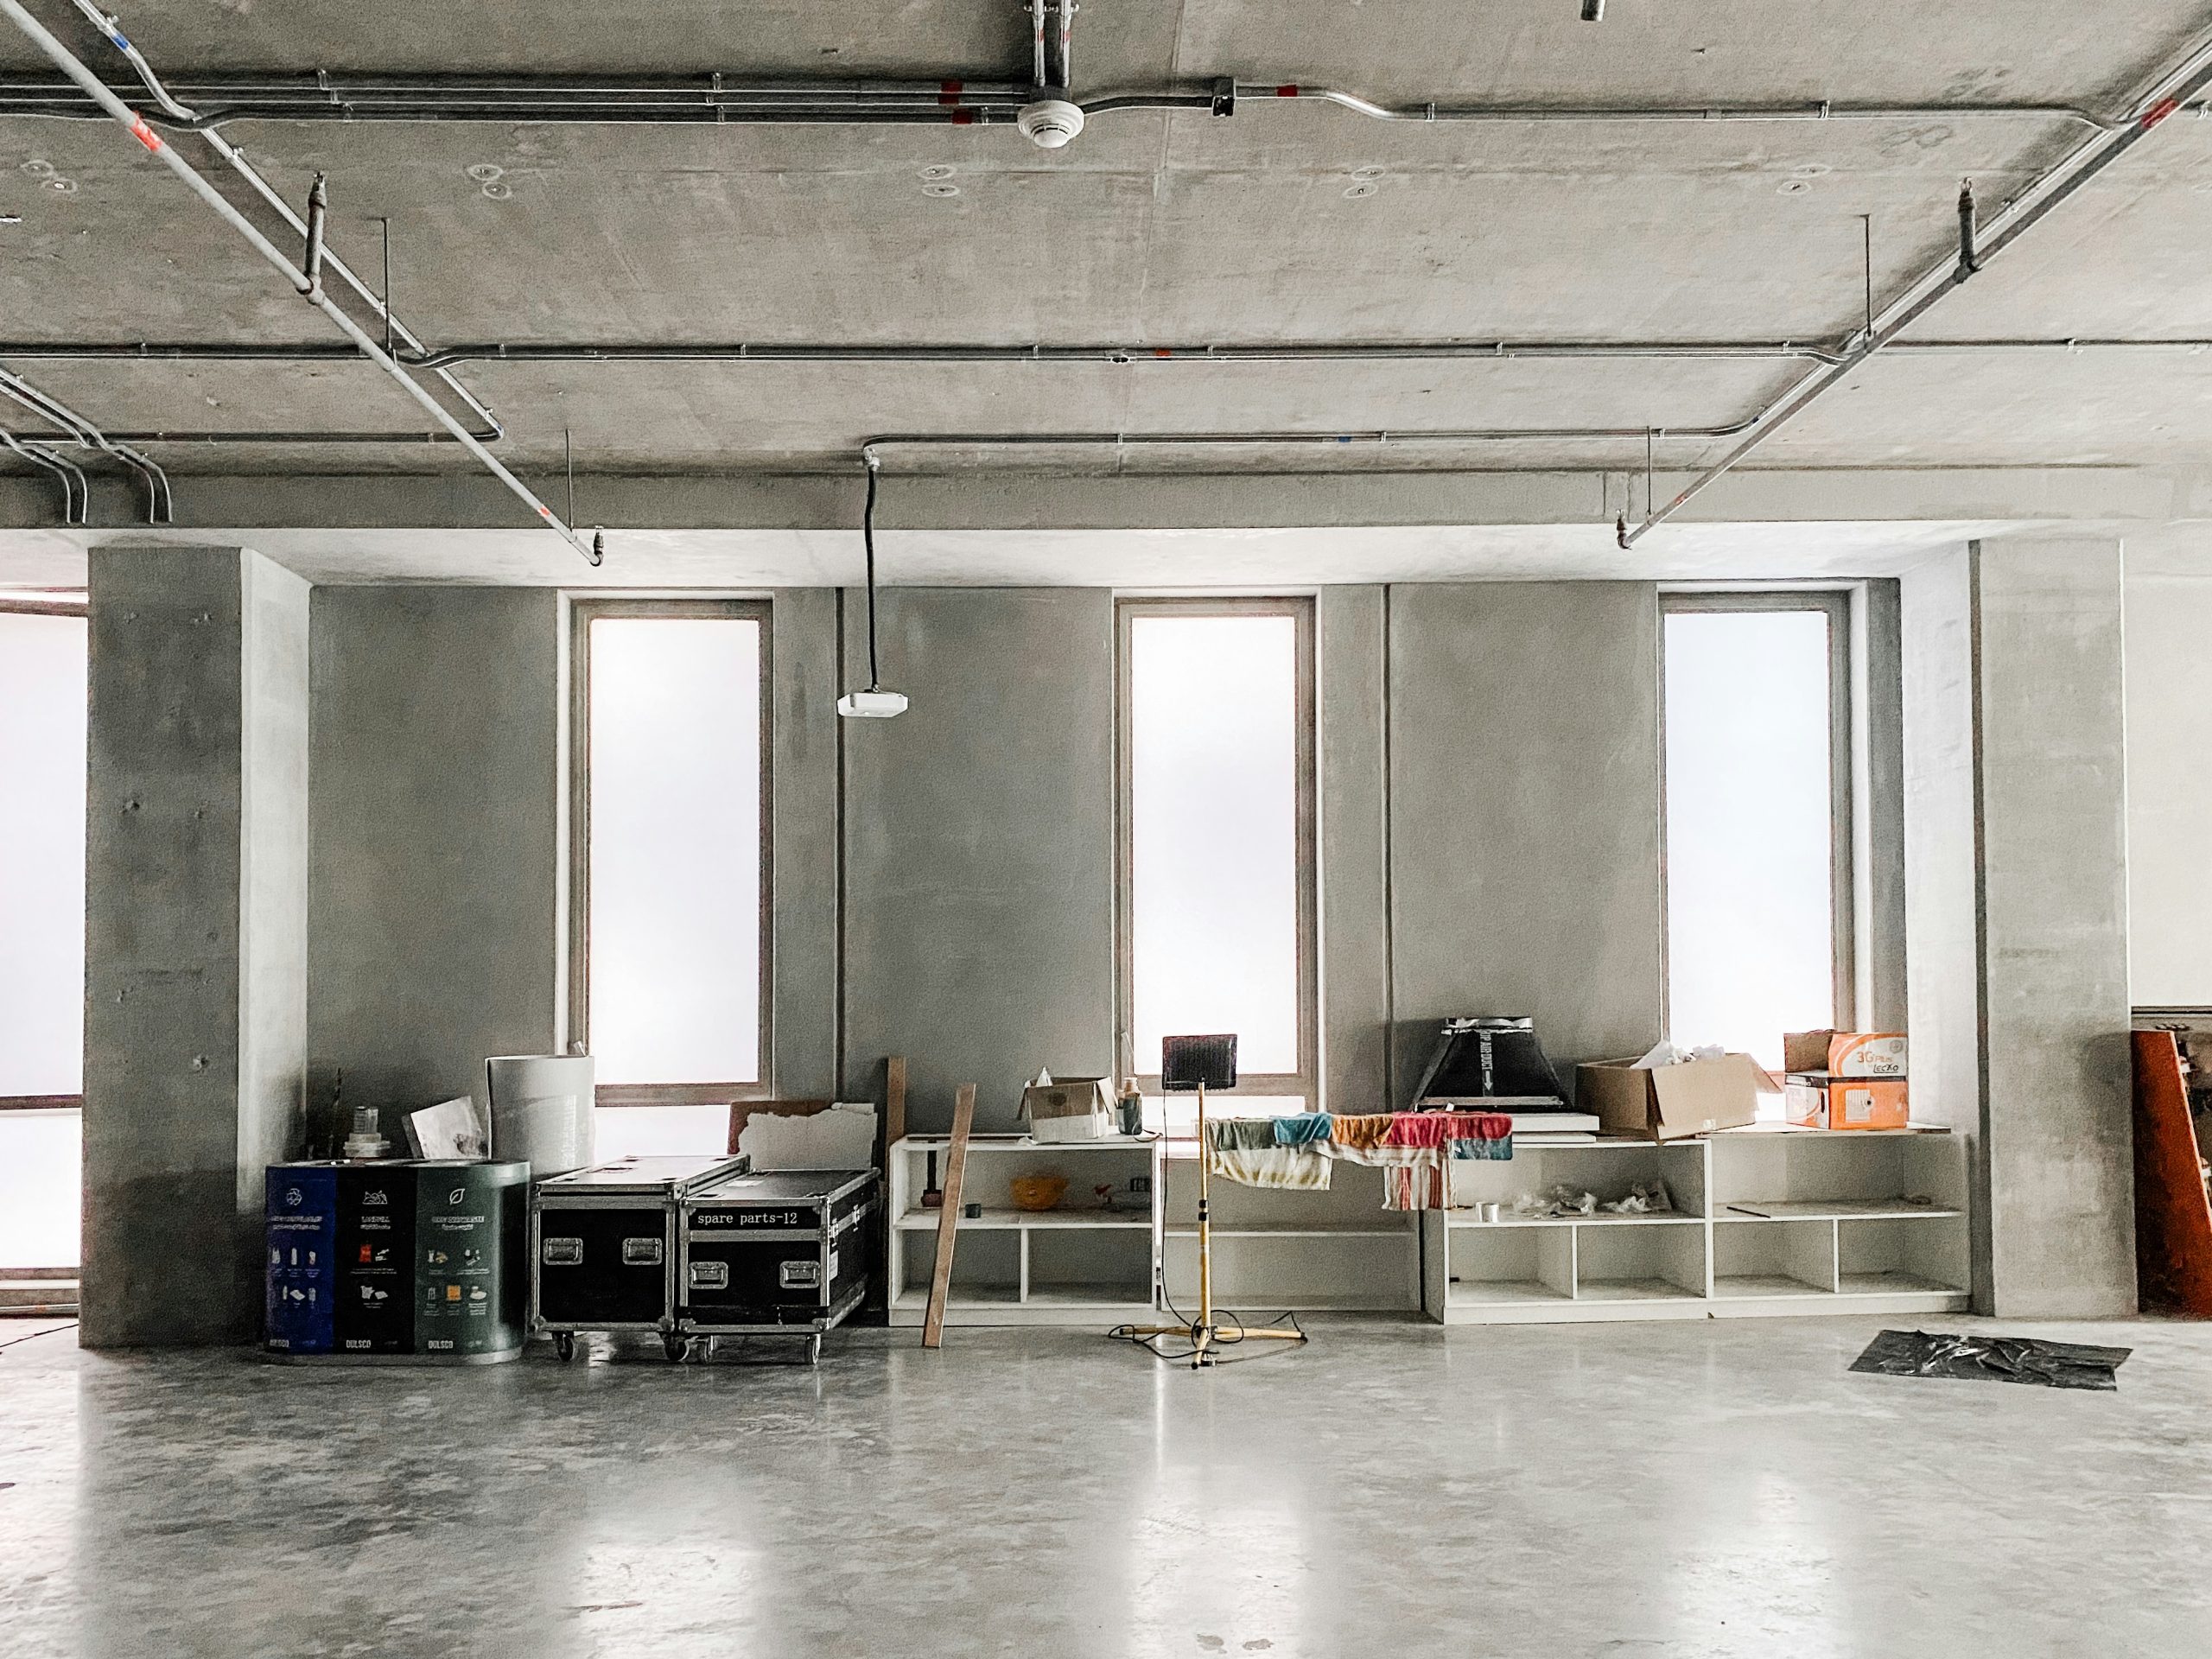
- Seal the deal: Raw concrete is dusty and porous. Has the floor been ground, polished, and sealed? If not, you’ll have perpetual dust issues and any spills will stain permanently.
- Check for moisture: In a basement or ground floor setting, test for moisture wicking up through the concrete. A simple plastic sheet taped to the floor for 24 hours will tell you if you have a problem.
- Plan your utilities: With exposed utilities, every pipe and conduit is a design element. Are they placed in a way that looks intentionally industrial, or just messy? Plan their routes carefully.
This minimalist industrial look requires significant volume to avoid feeling like a prison cell. The tall, narrow windows and high ceilings are doing a lot of work here. To pull this off, you need a ceiling height of at least 10 feet, although 12+ is better. The total footprint should be generous, at least 300-400 square feet. In a smaller room with standard 8-foot ceilings, an all-concrete look can feel incredibly cramped, dark, and oppressive, regardless of how much light you have.
Time to Build Your Creative Haven
Feeling inspired? That’s the first step. The perfect workshop is one that grows with you and your projects. Don’t be afraid to start small and adapt as you go. Now, open up that Pinterest board and start planning the little details that will make your space uniquely yours.